Symmetra is a Specialist Damage hero in Overwatch. She is one of the 21 heroes included in the game's release on 24 May 2016.
Overview
Symmetra utilizes her light-bending Photon Projector to dispatch adversaries, shield her associates, construct teleportation pads and deploy particle-blasting Sentry Turrets.
-
 3D portrait
 -
 2D portrait

Abilities
Passive Abilities


- Reload speed is 1.5x faster after an elimination. This only lasts for 3 seconds, but is refreshed if another elimination is earned.
- An indicator is shown to the right of the crosshair to show when the reload increase is active.
Weapons


1.7 seconds (decay per level)
- Charge level increases after hitting an enemy hero or deployable (e.g. barrier, turret, mine, etc.) for 0.9 seconds.
- When damaging an enemy's barrier or shield health with her beam, Symmetra regenerates 10 ammo per second and 10/20/30 shields per second, depending on her charge level (1/2/3). This does not affect her base health.

2.5 - 50 (aoe at falloff start, min - max charge)
2.5 - 12.5 (aoe at max radius, min - max charge)
0.8 shots/s (max charge)
0.5 - 2.0 meters (max radius, min - max charge)
- Damage per second: 80 while firing at full charge (71.43 w/ reload)
- If the center of the projectile circle does not touch the wall, then the projectile will not explode against the wall. This allows you to shoot at enemies that are located at the edges of shelters.
- The shots can be charged to increase their damage, projectile radius and maximum explosion radius.
- A shot takes 1 second to fully charge, and can be held for an additional 1 second upon reaching maximum charge before automatically firing.
- Charge can be canceled by using any ability, including just entering the targeting mode. Any ammo that went to charging the shot is consumed.
- The damage is scaled off charge time, not ammo consumption. Minimum of 1 ammo will be consumed.
- As long as there is any ammo left, an energy ball can still be fired at full charge.
- The projectile can be destroyed while in air by
 Defense Matrix,
  Kinetic Grasp,
  Javelin Spin,
  Power Matrix and
  Kekkai Sanctuary and reflected by
  Deflect, but the explosion is unaffected.
  Amplification Matrix affects all damage dealt, if the projectile passes through it. Splash damage alone going through is not amplified.
Special Abilities

3 charges
~1 second (deployment)
- If the ability throw is interrupted, the charge will not be spent.
- Turrets are projectiles until they hit a wall, at which point they will deploy.
- The turrets pass through enemy heroes, barriers and other objects.
- While in the air, Sentry Turrets cannot attack but can still be destroyed.
- Sentry Turrets reveal their target to allies while firing at the enemy and for 1 second afterward.
- Sentry Turrets can detect and fire at Sombra if she attempts to use
 Hack from
  Stealth in their range.
 - Sentry Turrets can be placed and lifted by
 Petal Platform if the latter was deployed first. When the platform is destroyed, the turrets will fall on ground.
 - Turrets can attach to fences and other breakables.

- Requires the player to use the Interact key to activate, unless it's an entity separate from a player, in which case it will teleport automatically. (Turrets, D.Va's MEKA when self-destructing, etc)
- Teleporter is prioritized over most other actions that require using the Interaction key.
- Cannot be used while in spawn.
- Can be manually destroyed by pressing the ability key again, including while dead.
- If the entrance and exit are more than 40 meters apart, they are automatically destroyed.
- After Teleporting, there is a 1 second cooldown before it can be reused again for that same player.
- You can hold down the interaction button before the teleport appears and teleport as soon as possible.
- Teleporter can be placed on and lifted by Petal Platform regardless of which was deployed first. When the platform is detroyed, the teleporter falls on ground.
- Teleporter destroys fences and other breakables in its way.
Ultimate Ability

Perks
Minor Perks
A Minor Perk can be chosen at level 2.


Major perks
A Major Perk can be chosen at level 3.

- Shares a cooldown with
 Teleporter.
 - This barrier will destroyed when it touch the wall.

Hero-specific options
| Setting name | Options | Description |
|---|---|---|
| Toggle Secondary Fire | Off (default) | Secondary Fire fires when player stops holding the button. |
| On | Secondary Fire fires when player presses the button again. | |
| Hold to deploy Sentry Turret | Off (default) | Redundant setting. Remnant from old Sentry Turret targeting scheme. |
| On | ||
| Teleporter and Photon Barrier confirmation input | Primary Fire (default) | Teleporter and Photon Barrier is activated by pressing the Ability key then Primary Fire. Secondary Fire to cancel. Ability key to rotate Photon Barrier. |
| Secondary Fire | Teleporter and Photon Barrier is activated by pressing the Ability key then Secondary Fire. Primary Fire to cancel. Ability key to rotate Photon Barrier. | |
| Ability press | Teleporter and Photon Barrier is activated by pressing the Ability key twice. Secondary Fire to cancel. Primary Fire to rotate Photon Barrier. | |
| Ability release | Teleporter and Photon Barrier is activated by pressing and releasing the Ability key. Secondary Fire to cancel. Primary Fire to rotate Photon Barrier. | |
| Default Photon Barrier rotation | Horizontal | Photon Barrier is deployed perpendicular to the direction the player is facing by default. |
| Vertical | Photon Barrier is deployed along the direction the player is facing by default. | |
| Hide Photon Barrier timer | Off (default) | Timer UI element is displayed to the left of the crosshair. |
| On | Timer UI element is hidden. |
Strategy
Symmetra's abilities provide both defensive and positional advantages to her team. She can cover chokepoints with her Sentry Turrents, deploy a Teleporter to provide teammates higher ground or ambush the enemy team, and split the map in half with her Ultimate. Her low health and mobility means that she must coordinate with her team in order to survive.
Weapons & Abilities
![]() Photon Projector (weapon): Symmetra's main weapon. The projector has two modes of fire: a short range beam, and a chargeable, explosive energy ball.
Photon Projector (weapon): Symmetra's main weapon. The projector has two modes of fire: a short range beam, and a chargeable, explosive energy ball.
- Primary fire's range is rather lacking (at 12 meters), so it is best used in combination with Teleporter.
- Primary fire also has a high tickrate, meaning it doesn't fare very well against armor, and it is a bit difficult to consistently maintain the beam on the target. However, given that attacking barriers recharges the weapon's ammo as well as helping ramp up its damage levels, it is a good idea to target nearby enemy barriers first, then firing at enemies, taking advantage of the fully charged and reloaded beam.
- Secondary fire requires quite a bit of leading at longer ranges, but it makes up for primary fire's low range. A fully charged orb deals considerable damage (120), requiring only one full charge and one semi charged orb to secure a kill. Rapid firing orbs is only recommended if you need to hit very low health targets, since it has low damage per second.
![]() Sentry Turret: Symmetra launches a small turret that fires slow beams at enemies.
Sentry Turret: Symmetra launches a small turret that fires slow beams at enemies.
- Another very good ranged tool in her arsenal, her turrets can help cover different parts of the map at once, such as chokepoints.
- Throwing turrets at a full enemy team is not very effective, as they can be shot out of the air.
![]() Teleporter: Symmetra builds a teleporter between two locations.
Teleporter: Symmetra builds a teleporter between two locations.
- This ability can give you free reign over high ground, or otherwise inaccesable parts of the map, for both you and your team.
- It is a decent ambush tool, given you can teleport an unlimited amount of allies and things over its duration. A common tactic is to set up 3 turrets on the ground, and then placing a teleporter into the enemy team, giving them a sudden burst of damage that they have to deal with. However, it has drawbacks. The enemy can see (and hear) the ambush coming, since it has a lengthy deploy time. During this time, they can prepare for the attack, or plainly destroy the teleporter.
- Synergises well with immobile compositions that consist of heroes like Ana, Bastion, Orisa, among others.
![]() Photon Barrier (Ultimate): Symmetra sets up a barrier that cuts the map in half.
Photon Barrier (Ultimate): Symmetra sets up a barrier that cuts the map in half.
- Useful for blocking enemy snipers' line of sight, used reactively against enemy Ultimates, or to protect choke points from "poke" damage.
- Given its infinite range and ability to change orientation, Symmetra can cast this ability from spawn, or anywhere else on the map and still be effective. A good tip for such usage is to point at the objective marker, and checking your teammates chevrons.
- Not many heroes can break the barrier on their own before time runs out, but if the whole enemy team is dealing a large amount of damage, it will not stop them for long.
General Strategy
Match-Ups and Team Synergy
Tank
| Hero | Match-Up | Team Synergy |
|---|---|---|
 D.Va |
Due to her high health, excellent close-range damage output, and supreme mobility, D.Va is one of your worst enemies. If she leads her team into battle, she can allow herself to be targeted by your Sentry Turrets and quickly take them out without any difficulty. Her Boosters let her engage and disengage at will; even if you're targeting her with your Photon Projector and have her near death, she can escape at a moment's notice to regroup and heal, leaving you few ways to pursue. That being said, her Defense Matrix can't protect her from your primary fire, and as she is a stationary, slow-moving enemy, you can very rapidly build up your power. If the D.Va isn't able to quickly take you out or if she chooses not to flee, your Photon Projector will eventually rip through her Mech. When D.Va's out of her Mech, her low health and complete lack of mobility makes her a prime target; whether you see a Pilot D.Va roaming around or take out her Mech yourself, make it your mission to finish her off before she gets her Mech back. This is especially easy if you take out her Mech with your Photon Projector; your increased damage will carry over, so you can target D.Va right after she jumps out of her Mech to finish her off in an instant. Photon Barrier can protect your team from an incoming Self-Destruct; just be sure to position the barrier so your team is safely behind it. | If a friendly D.Va wants to be tricky with you, you can deploy a Teleporter behind enemy lines and she can send her Mech through it during Self-Destruct. If timed right, you can catch the opposing team off guard and wipe them out. |
 Orisa |
(To be added) | (To be added) |
 Reinhardt |
Your Photon Projector actually gains ammunition rather than using it when attacking an enemy barrier. With this in mind, if you keep your weapon trained on an enemy Reinhardt, you will rip through his barrier in seconds while charging yourself to maximum power; should he drop the barrier or have it be destroyed, you can follow up by running him down with your charged up Photon Projector. This makes Symmetra an effective counter to Reinhardt, drastically reducing the ability of his barrier to protect himself and his team. Just don't get too arrogant and up in his face, as a quick Charge or a few hammer blows can easily kill you. If he's caught by your Sentry Turrets, he can gradually take them down in a few hammer swings if they're close enough. Your turrets won't affect him much; he's already slow and bulky, so slowing him down further and dealing slight damage won't matter much in the long run. If you anticipate an oncoming Earthshatter, quick deployment of Photon Barrier can protect yourself and your team; if you attempt to do it in reaction to him using it, though, you'll most likely be a second too late. | (To be added) |
 Roadhog |
Like most low health heroes, all it takes is a single Hook from Roadhog and you're down for the count. You can counter this by keeping your distance, but this won't help take him out any quicker. Like other Tanks, your Sentry Turrets won't effect him that greatly, and if left to his own devices he can take them out without much difficulty and follow up with Take a Breather. If you're forced into a close range fight with him and he doesn't hit you with his Chain Hook his large hitbox can allow you to rapidly charge up your Photon Projector; even if he heals himself with Take a Breather, you should be able to quickly run through his health, so long he doesn't hit you with his Chain Hook once its cooldown has worn off. In general, outside of close quarters team fights, keep your distance and let your team deal with him. | (To be added) |
 Sigma |
(To be added) | (To be added) |
 Wrecking Ball |
(To be added) | (To be added) |
 Winston |
It's debatable whether D.Va or Winston is Symmetra's worst nightmare. Whichever is the case, Winston will spell instant doom for you and your efforts. His Tesla Cannon can track multiple weak enemies at a time, letting him instantly annihilate a clustered Sentry nest in seconds. Your Photon Projector may be able to quickly ramp up, but his Tesla Cannon will be able to track you even if you try to avoid it. A direct one on one fight comes down to who has higher health walking in, and considering Winston has 400 Health and 100 Armor compared to your 100 health and 100 Shields, a direct encounter will rarely end well in your favor. If you have a healer supporting you, your ramped up damage will prevail in a prolonged battle. Winston has his Projected Barrier to reduce incoming damage, and while attacking it can charge up your Photon Projector and refill its ammunition, in that amount of time he can either attack you from the safety of the barrier or use his Jump Jet to easily escape from an encounter that isn't going in his favor. Even if you bring him down to low health, don't assume the battle is over; he can trigger Primal Rage at a moment's notice, instantly restoring his health and letting him knock you away with ease. Try to stay with your team and never stray alone, otherwise you'll be easy pickings for Winston. | (To be added) |
 Zarya |
Due to the tendency of your Sentry Turrets to continue attacking the first target they see, an enemy Zarya can easily activate a Barrier to soak up damage and power up her Particle Cannon prior to destroying the Turret. This also provides a quandary on whether or not you should pressure her with your Photon Projector, increasing both your and her offensive output, or if you should wait until the barrier is down, entering a fight with a weaker Photon Projector. As a rule of thumb, whichever of you has a more charged-up weapon at the start of the fight will most likely win it. If you and your team are grabbed by Graviton Surge, you can quickly throw donw a Teleporter for you and your team to escape through. However, this not only requires instant reaction time from you, but also communication with your teammates so they realize what you're doing and to use your Teleporter. | (To be added) |
Damage
| Hero | Match-Up | Team Synergy |
|---|---|---|
 Ashe |
(To be added) | (To be added) |
 Bastion |
You can't do much against a planted Bastion. You can heckle him with secondary fire from your Photon Projector, but if he doesn't gun you down while you peek your head around corners, he can heal himself in the period between your shots. Your Sentry Turrets won't effect him quite as much since he most likely won't be roaming the battlefield. If your Sentry Turrets catch him by surprise, he can Self-Repair to withstand long enough to focus fire on them. You can deploy a Teleporter behind him to catch him off guard, but if he notices and snaps around, he can gun down both the Teleporter and any teammates who have traveled through it. Your best bet is wait for your team to take him on together. | (To be added) |
 Cassidy |
When fighting Cassidy at close range, it is crucial to avoid his Flashbang, as this will spell instant death. While you can use your secondary fire to launch energy balls his way, it's generally best not to engage him at long range where he has the advantage unless you're protected behind a barrier. Instead, try to lure him into one of your Sentry traps; his slow but powerful fire won't matter if he's being targeted by multiple Turrets, making him easy to take out. In the time between when you hear Cassidy announce his Deadeye and when he shoots, you can quickly deploy your Photon Barrier to completely block his attack. | (To be added) |
 Doomfist |
(To be added) | (To be added) |
 Echo |
(To be added) | (To be added) |
 Genji |
Genji's Deflect ability does nothing to counteract your Photon Projector's primary fire, leaving him with only Swift Strike and his Shuriken. However, as Genji can use his agility to constantly jump around, it may be difficult to keep your laser trained on him. Your Sentry Turrets will lock on to Genji and slow him to a crawl, so if possible try to draw him into an enclosed area where you have turrets set up. His Shuriken can't easily deal with your Turrets, meaning a well-placed trap can cause instant death for him, especially if your team can pressure him before he can escape. | (To be added) |
 Hanzo |
At range, Hanzo easily has you beat. One lucky shot can instantly take you out. If you manage to sneak up on him and bring the fight to close quarters, you still have Storm Arrows to worry about. Should you avoid them, you may stand a chance if you can efficiently avoid his shots. He will have difficulty with turrets, needing to charge his bow to take them out one at a time; if you catch him trapped in a turret nest, you can take this opportunity to ambush him and take him out. | (To be added) |
 Junkrat |
With access to a large number of area of effect abilities, Junkrat can quickly destroy Sentry Turret nests as well as your Teleporter. Even if kill him at close range, his death will trigger Total Mayhem, which can be difficult for you to escape from alive. Be extra cautious around Junkrat. | (To be added) |
 Mei |
You and Mei both have abilities that are more effective the longer you're in combat. Mei's Endothermic Blaster will freeze you if she hits you with it long enough, and your Photon Projector will get more and more powerful the longer you're targeting her with it. However, if Mei is close to death, she can enter Cryo-Freeze to restore health. During this time, your Shields will regenerate, albeit not at the same rate of her self-healing. Mei can't do much against your Sentry Turrets, so rather than following her into a fight, try to goad her your way so you can lure her into a trap. | (To be added) |
 Pharah |
The splash damage from Pharah's rockets makes it easy for her to destroy Sentry nests as well as your Teleporter without putting herself at risk. In addition, Pharah can easily avoid both the primary and secondary fire from Photon Projector while she is in the air, making her extremely difficult to attack. However, if Pharah uses Barrage against your team while Photon Barrier is ready, you can quickly break it down to negate all of the damage and/or cause Pharah to take recoil damage and kill herself. If you catch Pharah at a low altitude, especially if she's being hit by one of your Turrets, you may be able to quickly finish her off before she takes to the skies; otherwise, be extremely cautious around her and stay out of sight. | (To be added) |
 Reaper |
You may be lethal at close range with a charged Photon Projector, but Reaper can hit even harder without the need to charge his weapon up. Even if you get him near death or catch him in a Sentry trap, he can simply enter Wraith Form to regain his lost speed and make a hasty retreat, whereas you have no means of escape if you're close to death unless you happen to be near your Teleporter. If he flees with Wraith Form, do not attempt to follow him unless none of his allies are around to protect him, and even then you should only chase him if he's on the brink of death. You can attempt to heckle him with secondary fire from your Photon Projector at a distance, but he may be able to avoid your attacks. Only engage if he's at low health, if you're in a group fight protected by your team, or if he's caught in a trap and hasn't activated Wraith Form yet. A quick Photon Barrier can protect your team from being hit by Reaper's Death Blossom. | (To be added) |
 Soldier: 76 |
Soldier: 76's Helix Rockets can make quick work of a Sentry Turret or a cluster grouped close together, though their long recharge means he'll have to rely on his Heavy Pulse Rifle to deal with any remaining turrets. Due to the thin effective range of your Photon Projector, a jumpy Soldier: 76 may be able to avoid your attacks while hitting you with his own, making a one on one fight dangerous. If he attempts to Sprint away, only try to follow him and finish him off if he's near death; if he gains too great of a distance or still has substantial health, let him go and deal with him later. Be certain not to leave your Turrets or Teleporter out in the open, or else he can pelt them with his Helix Rockets without breaking a sweat. If possible, try to trick Soldier: 76 into fleeing to an area where you have turrets set up; in the time it takes him to react to him, you should be able to catch up and finish him off. Photon Barrier can help protect your team when Soldier: 76 activates his Tactical Visor. | (To be added) |
 Sombra |
Sombra's Hack barely affects you; you lose the ability to deploy Turrets, your Teleporter and your Photon Barrier for a time, but if you're caught in a firefight with her, that means very little. Your Sentry Turrets will strip her of her exceptional mobility, making her an easy target. If she wishes to escape, she can fling her Translocator away and warp to safety. If this happens, it's usually not worth chasing after her; with Thermoptic Camo, she can easily outrun you and regroup with her team. Be cautious of where your Sentry Turrets and Teleporter are located, as she can sneak behind enemy lines to hit them from a distance. Her EMP can be devastating to you; not only will it disable any Sentry Turrets and your Teleporter within line of sight, it will remove Shields on both you and your allies, reducing you to a measly 100 health, and it will destroy your Photon Barrier Ultimate in an instant. If you're hit by EMP, try to take cover until it wears off; at 100 health and no turrets to assist you, you'll be an easy target for any opponent. | (To be added) |
 Symmetra |
Symmetra mirror matches are rare, but they always come down to who lures who into whom's trap. Unless the enemy Symmetra is on the verge of death, do not follow her past a choke point, or else you'll be playing right into her hand and stepping into a probable Sentry Turret nest. When an enemy Symmetra uses Photon Barrier, it may be tempting to just fire away at it with your Photon Projector to power it up to maximum strength. However, you'll never run through its massive health in time, so instead you should briefly use the Photon Barrier to charge up your Photon Projector before turning your weapon on any foes who are on your side of the enemy barrier. If they are all staying on the opposite side of the barrier, don't pass through it without your team nearby, because even with your maximum-power gun you'll still be torn apart. Keep the inverse of these tips in mind regarding the opposing Symmetra; try to lure her into your own Sentry nest if possible, and be wary of her having a fully-charged Photon Projector if you've activated your Photon Barrier. | (To be added) |
 Torbjörn |
You can heckle Torbjörn's Turret from a distance with your secondary fire; this will deal a decent amount of damage, but not so great that the Torbjörn can't repair it. This also requires you to peek in and out of corners, and unless you're being protected by a shield, the Turret can chip away at your health at a distance. If you manage to close the gap on Torbjörn, you'll have a better shot at fighting him up close than at a distance. Just try not to fight him and his Turret at the same time; wait until his Turret is down, or wait until you have teammates to help you take him down. | A Turret deployed by Torbjörn through your Teleporter will come out on the other end; this can be handy if you wish to deploy his Turret at a far away location, or even at a higher altitude where he normally wouldn't be able to reach. |
 Tracer |
Tracer's high mobility allows her to avoid your Photon Projector. She can also Blink through Sentry Turret nests and can quickly find and destroy your Teleporter. Your best bet to combat Tracer is to have Turrets nearby, which will slow her to a crawl and make her easier to pin down. Tracer will have difficulty destroying your turrets unless she attacks them at extremely close range, which will leave her weak enough to kill of if you reach her before she can Blink or Recall away. | (To be added) |
 Widowmaker |
A fully-charged headshot from Widowmaker is enough to take you out; if you stand in the open, your lack of mobility makes it incredibly easy for Widowmaker to kill you in a shot or two. You can handle yourself much better at close range, but Widowmaker's Grappling Hook can make it difficult to keep her pinned down. She will also most likely be keeping away from close corridors, making your Sentry Turrets less viable against her (not to mention if you leave them out in the open, she can easily take them out from a distance). If you leave your Teleporter unprotected, Widowmaker can destroy it from a distance as well. If an enemy Widowmaker uses Infra-Sight, you can use Photon Barrier to keep your team safe from enemy fire if the situation calls for it. | (To be added) |
Support
| Hero | Match-Up | Team Synergy |
|---|---|---|
 Ana |
If you leave your Turrets in the open, Ana can take them out from a distance. However, should you close the gap on her, or lure her into a Sentry nest, you should have the upper hand. Biotic Grenade can cause trouble, though, so be cautious. | (To be added) |
 Baptiste |
(To be added) | (To be added) |
 Brigitte |
(To be added) | (To be added) |
 Lúcio |
One of Lúcio's greatest strengths is his ability to glide around an objective consistently out of reach to confuse his opponent. Your Turrets will be a great boon in lowering his speed and unpredictability, helping you keep a consistent aim to take him down. When fighting a Lúcio, it's best to keep your turrets spread out so they can't be destroyed in succession; even one turret's slowdown will be enough for your team to take the shot and take him out. | (To be added) |
 Mercy |
Mercy's Guardian Angel will allow her to flee from a fight with you, but often not so far that you can't chase after her. If she's being protected by her team, don't go charging in after her. If possible, try to lure her into a position where you have turrets set up, which will slow her down enough for you to get an easy kill. | (To be added) |
 Moira |
(To be added) | (To be added) |
 Zenyatta |
Zenyatta is easy enough to take down at close range, but at mid to long range, he has you beat. He can hit you with an Orb of Discord and swiftly take you out with a couple of shots. Use your Teleporter to close the gap or take him by surprise, and you should have little difficulty eliminating him. Otherwise, try to lure him into a Sentry Turret nest where he'll be brought to a crawl and can be easily disposed of. | (To be added) |
Map Strategies
Control
| Map | Strategy & Stage Tips |
|---|---|
 Overall Strategy |
TBA RATING | TBA FEATURE
Map strategy details for Overall Strategy are currently missing. You can help the Overwatch Wiki by adding them!
|
 Antarctic Peninsula |
TBA RATING | TBA FEATURE
Map strategy details for Antarctic Peninsula are currently missing. You can help the Overwatch Wiki by adding them! Labs
Strategy details missing.
Sublevel
Strategy details missing.
Icebreaker
Strategy details missing.
|

|
TBA RATING | TBA FEATURE
Map strategy details for Busan are currently missing. You can help the Overwatch Wiki by adding them! Downtown
Strategy details missing.
Sanctuary
Strategy details missing.
MEKA Base
Strategy details missing.
|

|
TBA RATING | TBA FEATURE
Map strategy details for Ilios are currently missing. You can help the Overwatch Wiki by adding them! Lighthouse
Strategy details missing.
Well
Strategy details missing.
Ruins
Strategy details missing.
|

|
TBA RATING | TBA FEATURE
Map strategy details for Lijiang Tower are currently missing. You can help the Overwatch Wiki by adding them! Control Center
Strategy details missing.
Garden
Strategy details missing.
Night Market
Strategy details missing.
|

|
TBA RATING | TBA FEATURE
Map strategy details for Nepal are currently missing. You can help the Overwatch Wiki by adding them! Village
Strategy details missing.
Shrine
Strategy details missing.
Sanctum
Strategy details missing.
|

|
TBA RATING | TBA FEATURE
Map strategy details for Oasis are currently missing. You can help the Overwatch Wiki by adding them! City Center
Strategy details missing.
Gardens
Strategy details missing.
University
Strategy details missing.
|

|
TBA RATING | TBA FEATURE
Map strategy details for Samoa are currently missing. You can help the Overwatch Wiki by adding them! Beach
Strategy details missing.
Downtown
Strategy details missing.
Volcano
Strategy details missing.
|
Escort
| Map | Strategy & Stage Tips |
|---|---|
 Overall Strategy |
TBA RATING | TBA FEATURE
Map strategy details for Overall Strategy are currently missing. You can help the Overwatch Wiki by adding them!
|

|
TBA RATING | TBA FEATURE
Map strategy details for Circuit Royal are currently missing. You can help the Overwatch Wiki by adding them! Attack
Strategy details missing.
Defense
Strategy details missing.
|

|
TBA RATING | TBA FEATURE
Map strategy details for Dorado are currently missing. You can help the Overwatch Wiki by adding them! Attack
Strategy details missing.
Defense
Strategy details missing.
|

|
TBA RATING | TBA FEATURE
Map strategy details for Havana are currently missing. You can help the Overwatch Wiki by adding them! Attack
Strategy details missing.
Defense
Strategy details missing.
|

|
TBA RATING | TBA FEATURE
Map strategy details for Junkertown are currently missing. You can help the Overwatch Wiki by adding them! Attack
Strategy details missing.
Defense
Strategy details missing.
|

|
TBA RATING | TBA FEATURE
Map strategy details for Rialto are currently missing. You can help the Overwatch Wiki by adding them! Attack
Strategy details missing.
Defense
Strategy details missing.
|

|
TBA RATING | TBA FEATURE
Map strategy details for Route 66 are currently missing. You can help the Overwatch Wiki by adding them! Attack
Strategy details missing.
Defense
Strategy details missing.
|

|
TBA RATING | TBA FEATURE
Map strategy details for Shambali Monastery are currently missing. You can help the Overwatch Wiki by adding them! Attack
Strategy details missing.
Defense
Strategy details missing.
|

|
TBA RATING | TBA FEATURE
Map strategy details for Watchpoint: Gibraltar are currently missing. You can help the Overwatch Wiki by adding them! Attack
Strategy details missing.
Defense
Strategy details missing.
|
Hybrid
| Map | Strategy & Stage Tips |
|---|---|
 Overall Strategy |
TBA RATING | TBA FEATURE
Map strategy details for Overall Strategy are currently missing. You can help the Overwatch Wiki by adding them!
|
 Blizzard World |
TBA RATING | TBA FEATURE
Map strategy details for Blizzard World are currently missing. You can help the Overwatch Wiki by adding them! Attack
Strategy details missing.
Defense
Strategy details missing.
|

|
TBA RATING | TBA FEATURE
Map strategy details for Eichenwalde are currently missing. You can help the Overwatch Wiki by adding them! Attack
Strategy details missing.
Defense
Strategy details missing.
|

|
TBA RATING | TBA FEATURE
Map strategy details for Hollywood are currently missing. You can help the Overwatch Wiki by adding them! Attack
Strategy details missing.
Defense
Strategy details missing.
|

|
TBA RATING | TBA FEATURE
Map strategy details for King's Row are currently missing. You can help the Overwatch Wiki by adding them! Attack
Strategy details missing.
Defense
Strategy details missing.
|

|
TBA RATING | TBA FEATURE
Map strategy details for Midtown are currently missing. You can help the Overwatch Wiki by adding them! Attack
Strategy details missing.
Defense
Strategy details missing.
|
 Numbani |
TBA RATING | TBA FEATURE
Map strategy details for Numbani are currently missing. You can help the Overwatch Wiki by adding them! Attack
Strategy details missing.
Defense
Strategy details missing.
|

|
TBA RATING | TBA FEATURE
Map strategy details for Paraíso are currently missing. You can help the Overwatch Wiki by adding them! Attack
Strategy details missing.
Defense
Strategy details missing.
|
Push
| Map | Strategy & Stage Tips |
|---|---|
 Overall Strategy |
TBA RATING | TBA FEATURE
Map strategy details for Overall Strategy are currently missing. You can help the Overwatch Wiki by adding them!
|

|
TBA RATING | TBA FEATURE
Map strategy details for Colosseo are currently missing. You can help the Overwatch Wiki by adding them! Pushing
Strategy details missing.
Defending
Strategy details missing.
|

|
TBA RATING | TBA FEATURE
Map strategy details for Esperança are currently missing. You can help the Overwatch Wiki by adding them! Pushing
Strategy details missing.
Defending
Strategy details missing.
|

|
TBA RATING | TBA FEATURE
Map strategy details for New Queen Street are currently missing. You can help the Overwatch Wiki by adding them! Pushing
Strategy details missing.
Defending
Strategy details missing.
|

|
TBA RATING | TBA FEATURE
Map strategy details for Runasapi are currently missing. You can help the Overwatch Wiki by adding them! Pushing
Strategy details missing.
Defending
Strategy details missing.
|
Flashpoint
| Map | Strategy & Stage Tips |
|---|---|
 Overall Strategy |
TBA RATING | TBA FEATURE
Map strategy details for Overall Strategy are currently missing. You can help the Overwatch Wiki by adding them!
|

|
TBA RATING | TBA FEATURE
Map strategy details for Aatlis are currently missing. You can help the Overwatch Wiki by adding them! Station
Strategy details missing.
Garden
Strategy details missing.
Town Center
Strategy details missing.
Bazaar
Strategy details missing.
Resort
Strategy details missing.
|

|
TBA RATING | TBA FEATURE
Map strategy details for New Junk City are currently missing. You can help the Overwatch Wiki by adding them! Arena
Strategy details missing.
The Ducts
Strategy details missing.
Refinery
Strategy details missing.
Junkyard
Strategy details missing.
Bomb Flats
Strategy details missing.
|

|
TBA RATING | TBA FEATURE
Map strategy details for Suravasa are currently missing. You can help the Overwatch Wiki by adding them! Market
Strategy details missing.
Garden
Strategy details missing.
Palace
Strategy details missing.
Temple
Strategy details missing.
Ruins
Strategy details missing.
|
Achievements
| Name | Icon | Description | Reward |
|---|---|---|---|

|
Hit an enemy with 3 beams simultaneously as Symmetra in Quick or Competitive play. |  | |
|
|
Teleport 15 players in a single Quick or Competitive play game as Symmetra. |  |
Trivia
Vampire Symmetra figure
- Chris Metzen has hinted at Symmetra possessing ulterior motivations.[1] According to Michael Chu, Symmetra is not an "evil" character in the same vein as Reaper or Widowmaker, though her actions could lead individuals within the setting to view her as a villain.[2]
- A magazine image of Symmetra could be found in an outhouse on Route 66. The image was removed in a later patch.[3]
- Symmetra is an amputee, missing her left arm. It is unknown how or when she lost it, and whether or not her glove is a permanent prosthetic replacement or simply a glove.[4]
- As of September 2016, Symmetra was the least played hero in Overwatch.[5]
- Prior to her June 2018 rework in Patch 1.25, Symmetra was the only hero to have a choice between two Ultimates: Teleporter and Shield Generator.
- As of June 2018, Symmetra is currently the only hero to receive more than one total rework. The Developers have hinted that Symmetra may be reworked a third time in the future.
- Symmetra can place sentry turrets on a basketball in spawn rooms, and then carry said ball out onto the field using her Photon Projector. However, the turrets will be destroyed if they make contact with any walls, floors, and objects in the environment.
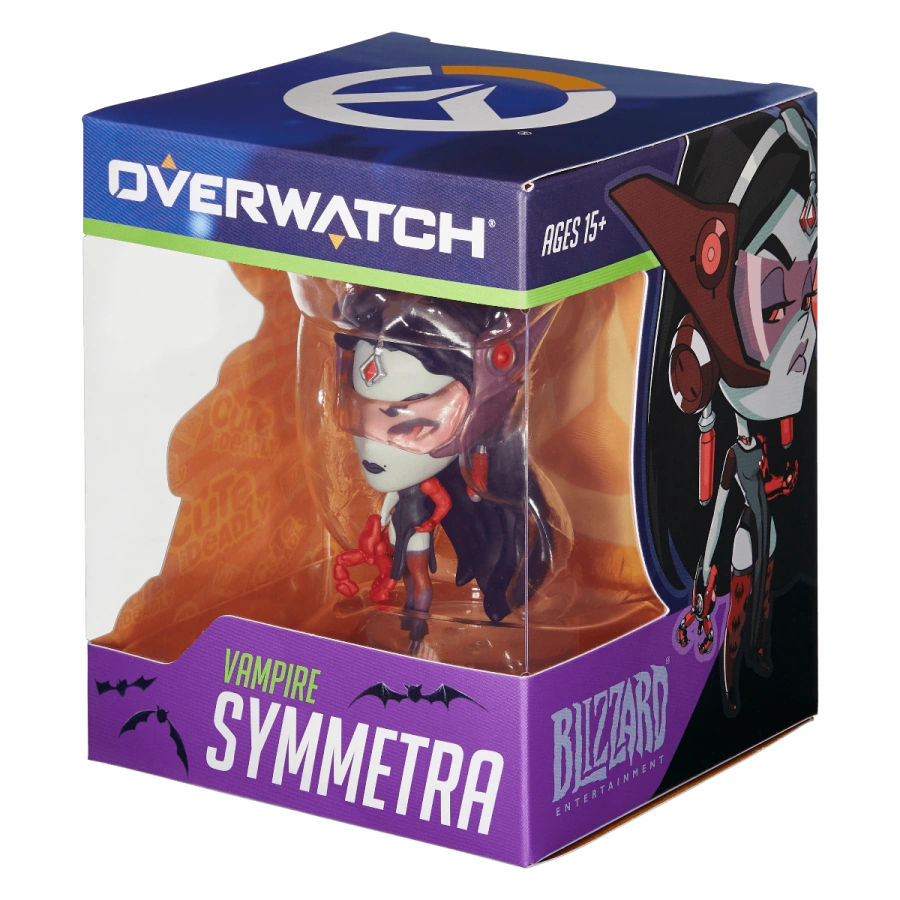
- A "Vampire Symmetra" Cute but Deadly figure was made available during the Halloween Terror 2018 Event.[6]
Misc. Character Information
- Symmetra wears her hair up during business meetings.[7]
- Symmetra dislikes wearing her Vishkar uniform, and prefers custom dresses made by a tailor from her old neighborhood. The dresses allow her to do her best work, whether she be dancing, light-weaving, or fighting. The uniform makes it easier to focus on the job at hand however.[7]
- Symmetra's secondary fire from her Photon Projector, is called an icosahedron, which is a 20 sided three dimensional polygon.
Development
The Architect class
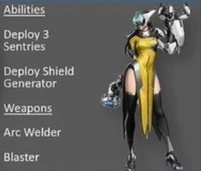
Symmetra's design originated as a playable class called the Architect in the cancelled Project Titan. In the original pitch for the game that would become Overwatch, she was envisioned as wielding an arc welder and blaster, and could deploy sentry turrets and shield generators. In a later pitch she was given "orb buffs," which were ultimately given to Zenyatta. Her arc welder and blaster were later changed when the idea of hard light constructs were incorporated into her design. Her teleporter was taken from the Engineer class, which served as the basis for Torbjörn, and she would eventually receive the Architect's shield generator as a second ultimate in Overwatch.[8]
Symmetra's backstory was expanded through the development of Lúcio, as his backstory includes involvement with Vishkar as well.[9] Symmetra being autistic was initially hinted at in the "A Better World" comic, and later officially confirmed by a letter from Jeff Kaplan to a fan.[10]
Symmetra is the only hero so far to have been recieved two significant ability reworks since the game launched; one in patch 1.6.2 (2017) and another in patch 1.25 (2018).
Overwatch 2
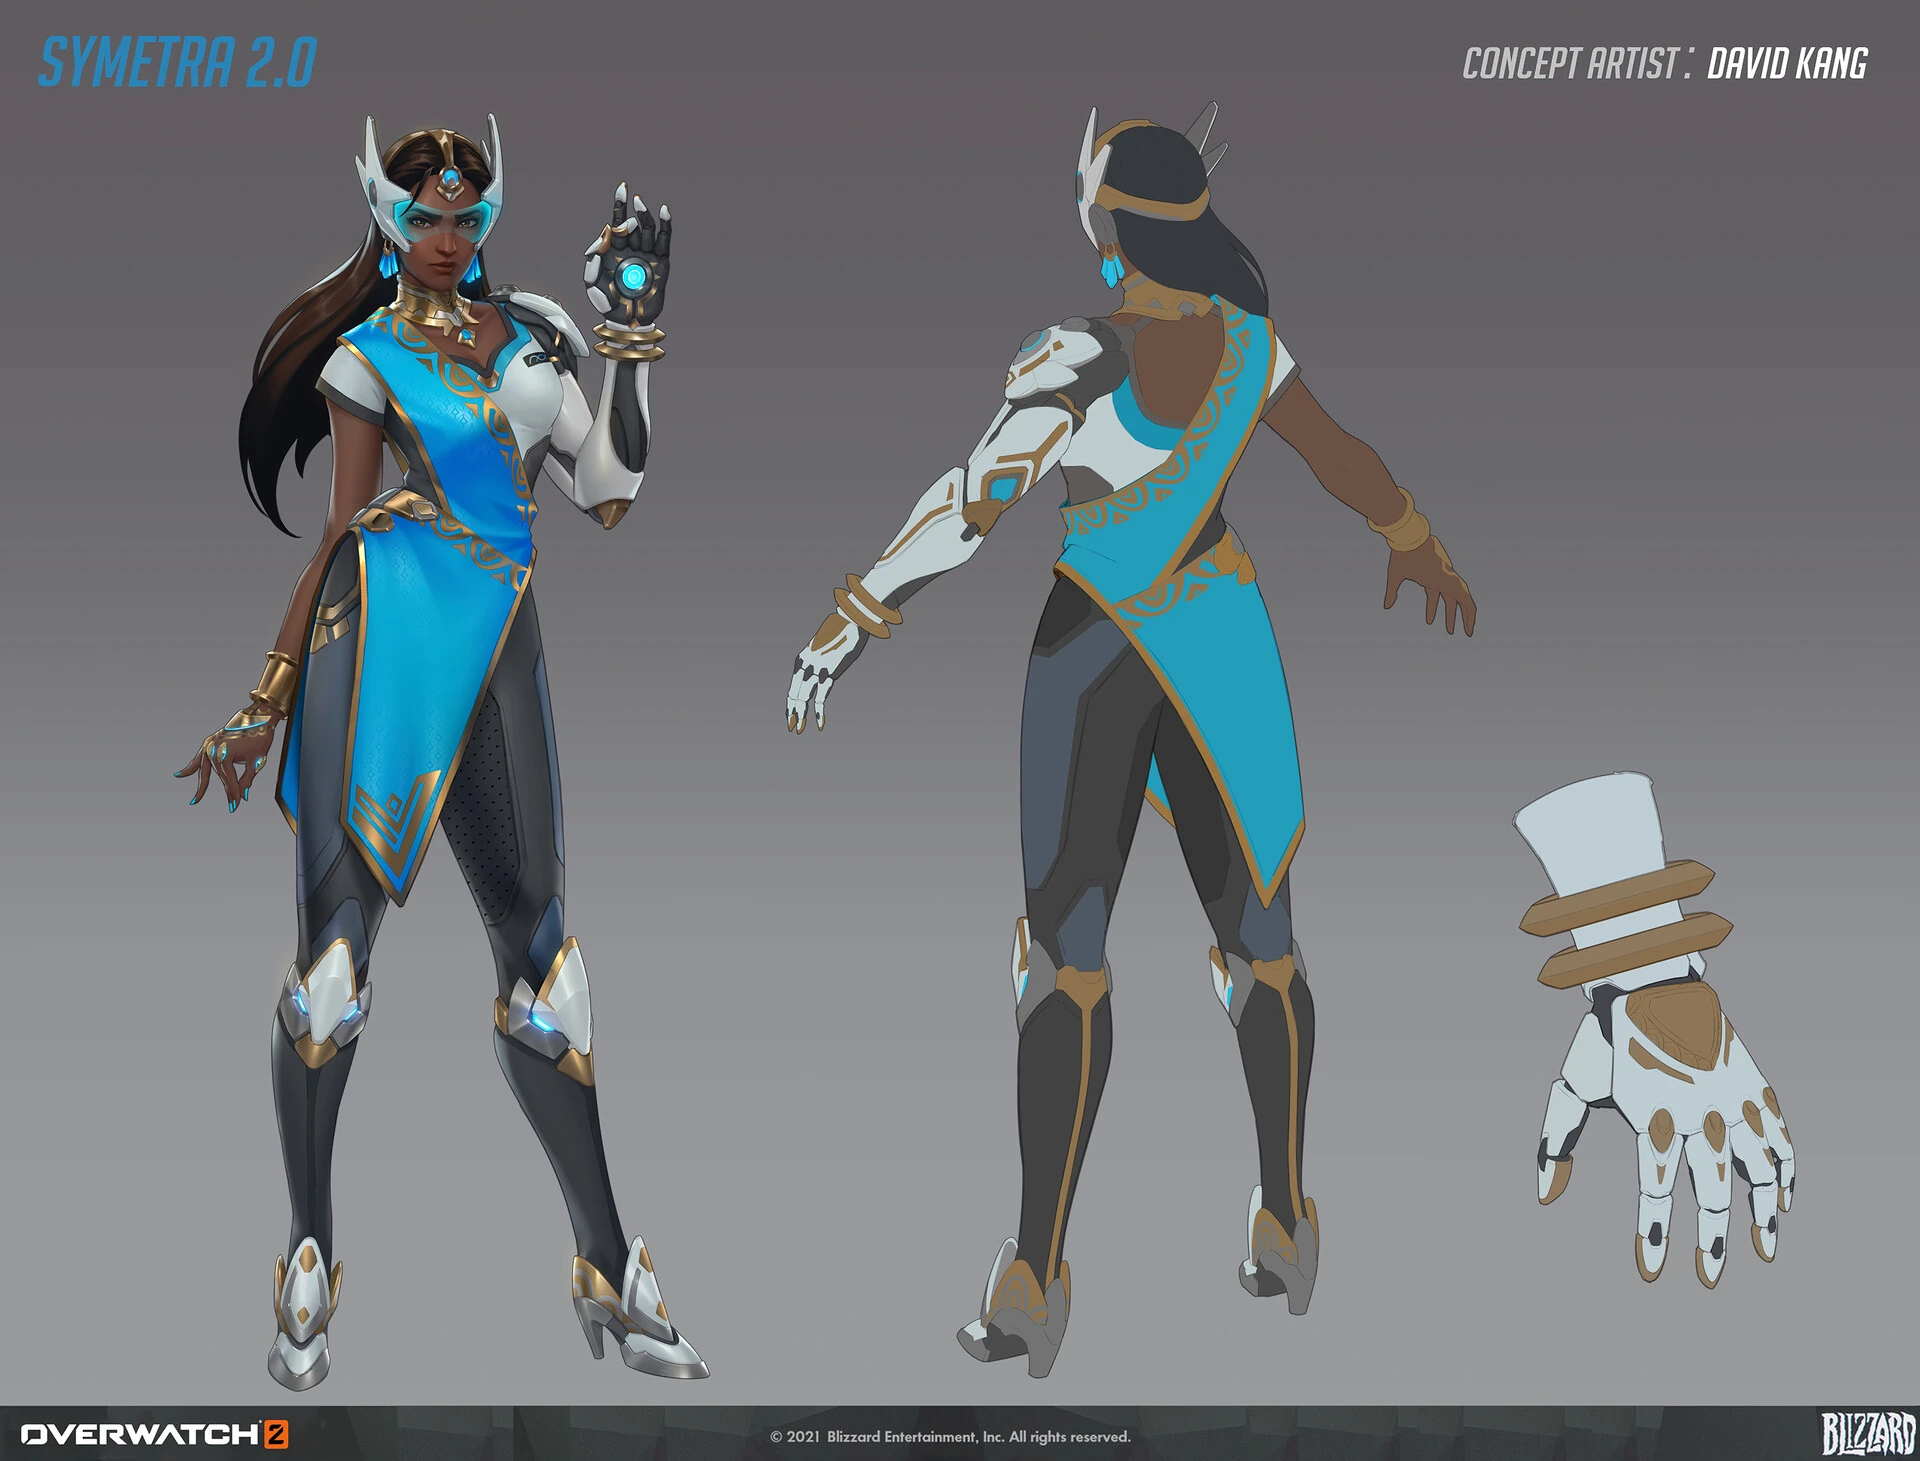
Like almost all Overwatch Heroes, Symmetra was redesigned and given a new look for Overwatch 2. David Kang was the concept artist behind her Overwatch 2 look, but otherwise not much is known about the idea behind her new look. It was stated that the general scheme concept for all new hero looks for Overwatch 2 to be aimed at keeping the "essence" of the hero, while showing some evolution and character growth in the design.[11]
-
 Symmetra's Overwatch 2 Skin Concept Art by David Kang
 -
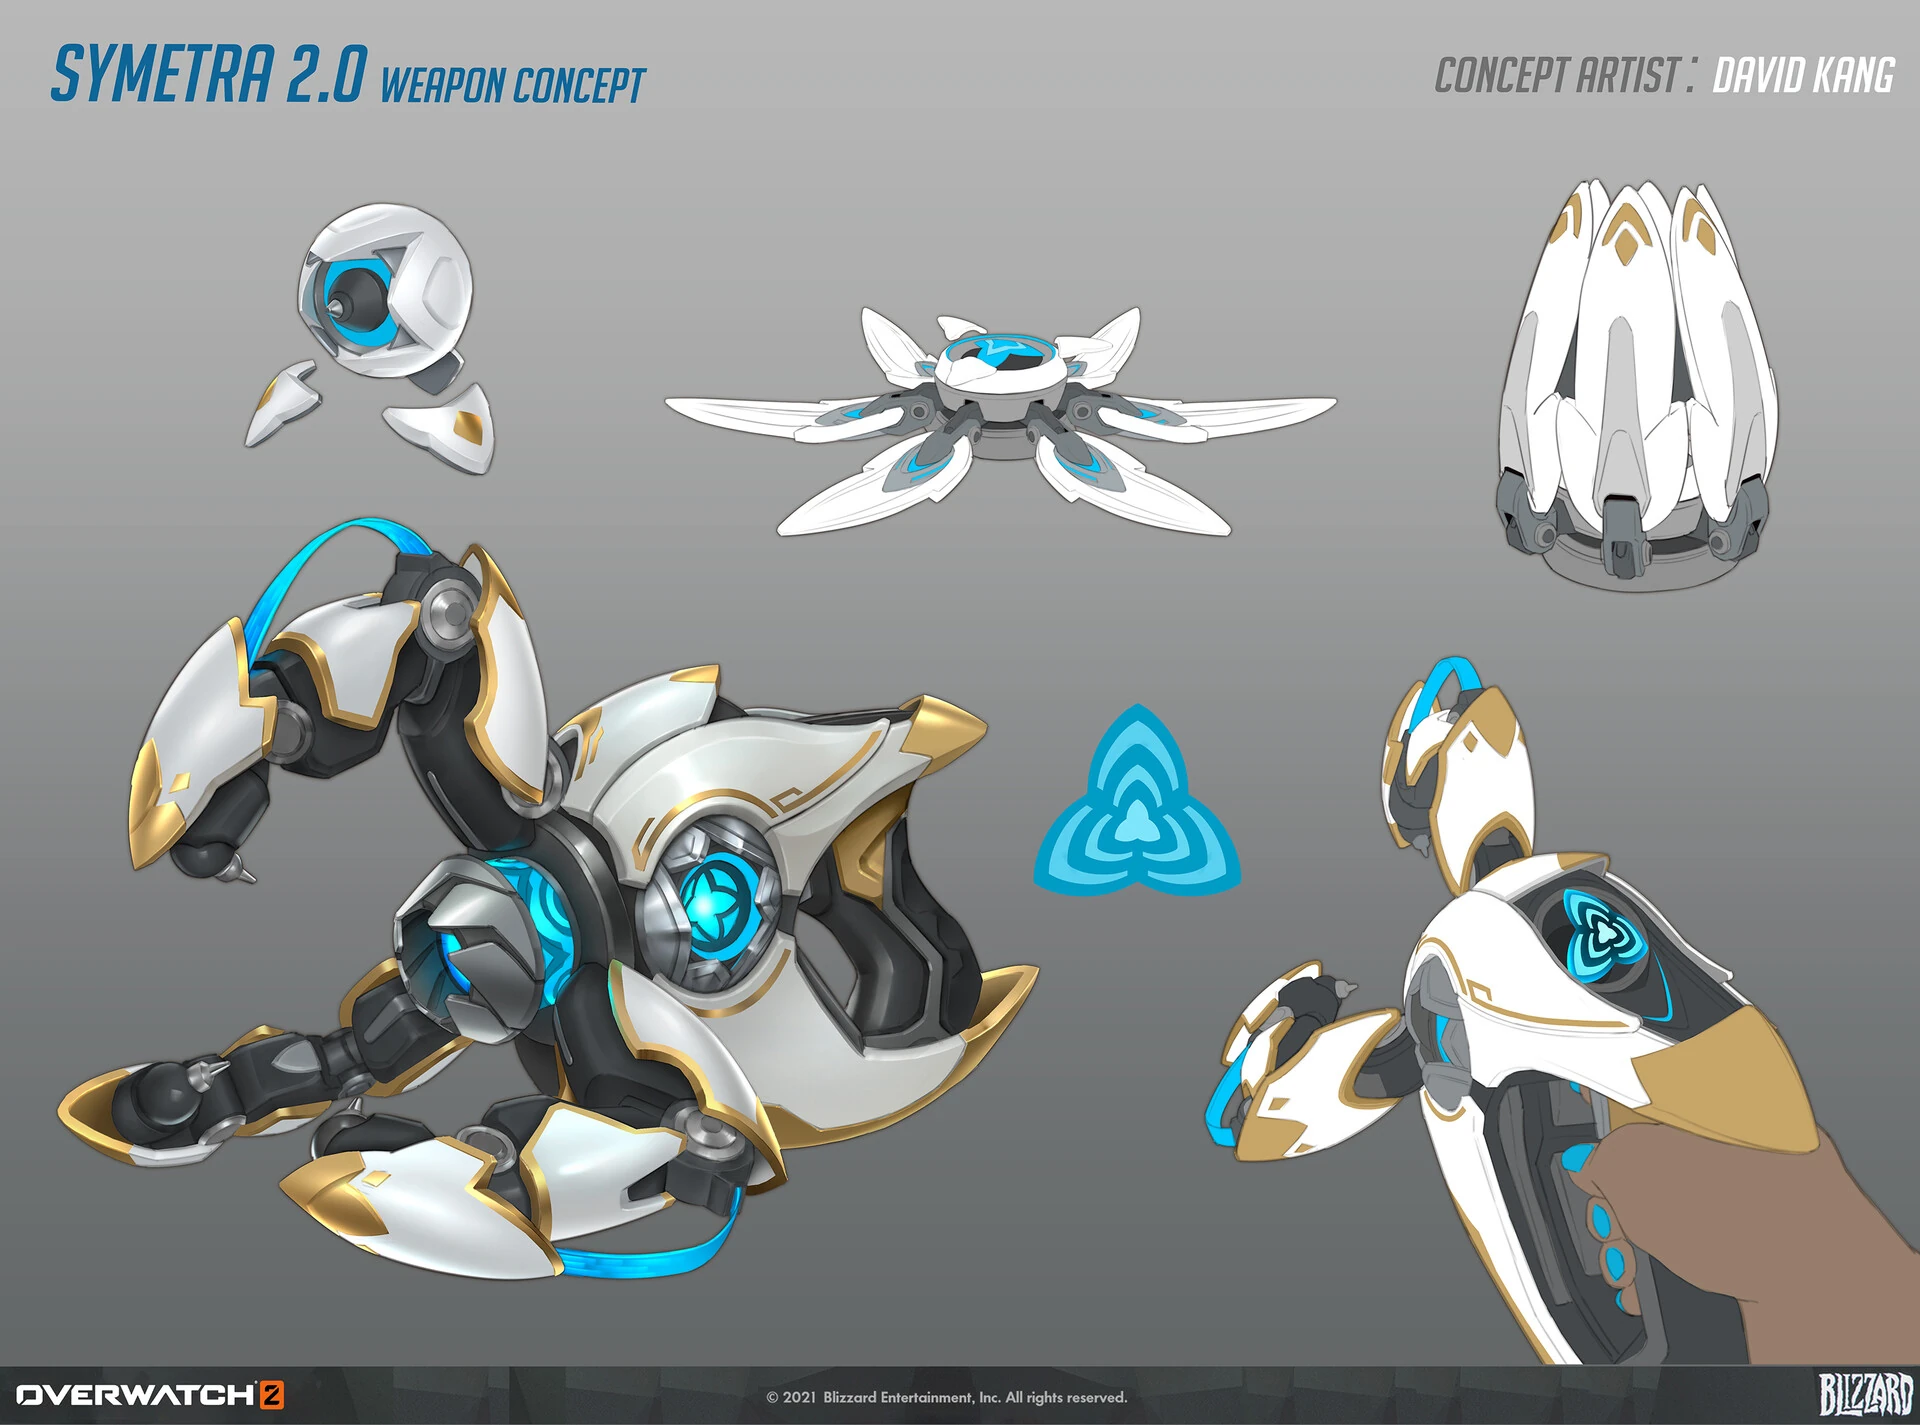
 Symmetra's Overwatch 2 Skin Weapons Concept Art by David Kang
Removed Abilities

- The shields will deactivate if Symmetra is switched to another hero.
- Symmetra does not gain Ultimate charge while the Teleporter is active.
- The teleporter is refunded if there is a change in objective (e.g. point captured/lost).
- It can be interchanged with Shield Generator using the Ultimate key before deployment.

+75 (to allies)
Until destroyed (Generator)
- Symmetra does not gain Ultimate charge while the Shield Generator is active.
- The shield generator ignores line-of-sight, meaning that it can be placed in a concealed position or behind cover while still providing the full shield effect.
- It can be interchanged with Teleporter using the Ultimate key before deployment.
- The generator is refunded if there is a change in objective (e.g. point captured/lost).
- It can be destroyed just like the teleporter
- Strangely, newer heros such as Juno have voice lines for destroying a "Shield Generator" despite it not being in the game since OW1

- Removed in Season 18.
Media
Images
- Former Portrait
-
 Overwatch 1 Hero Portrait

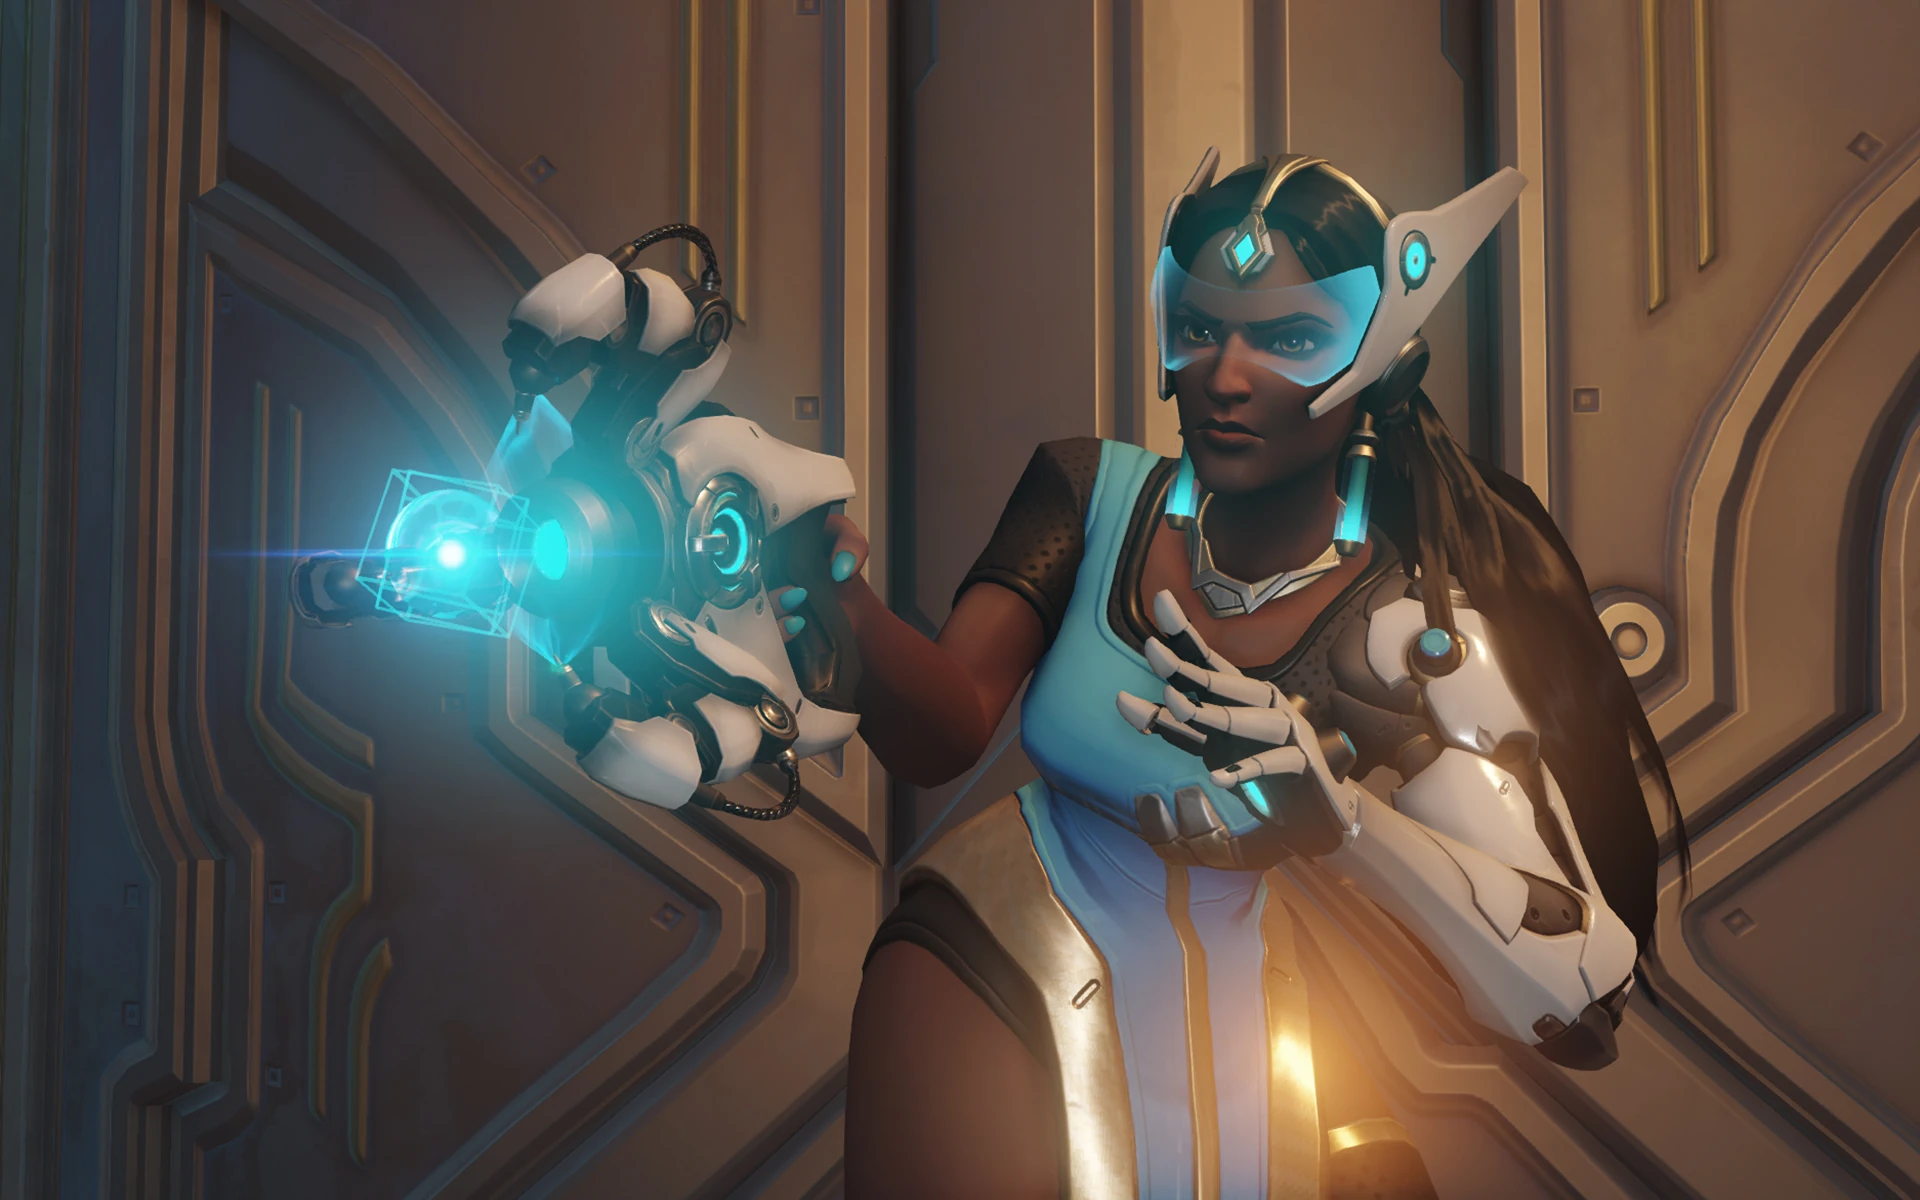
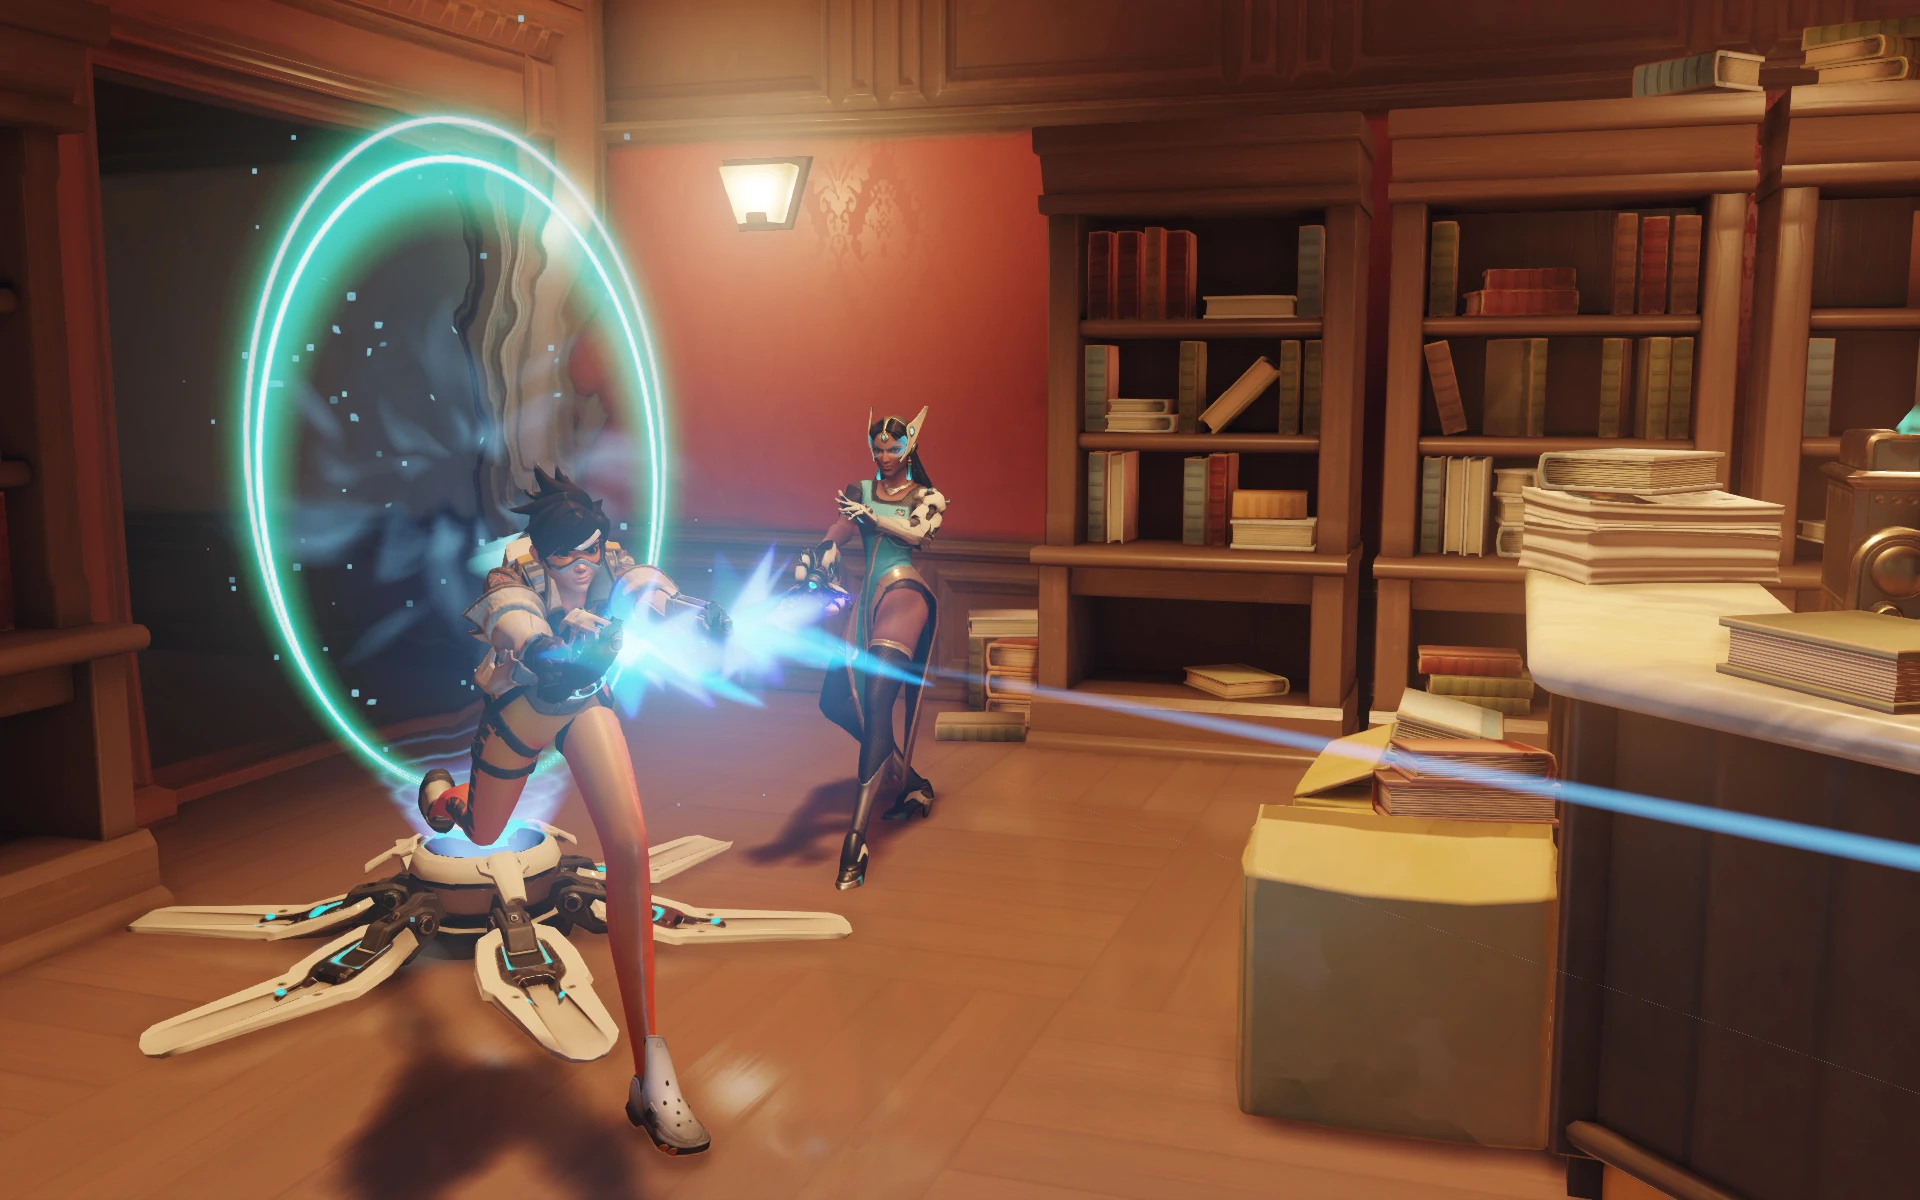
- Gameplay Screenshots

- Concept Art
-
 Overwatch 2 Skin Concept Art by David Kang
 -
 Ditto, with transparent background
 -
 Overwatch 2 Skin Weapons Concept Art by David Kang
 -
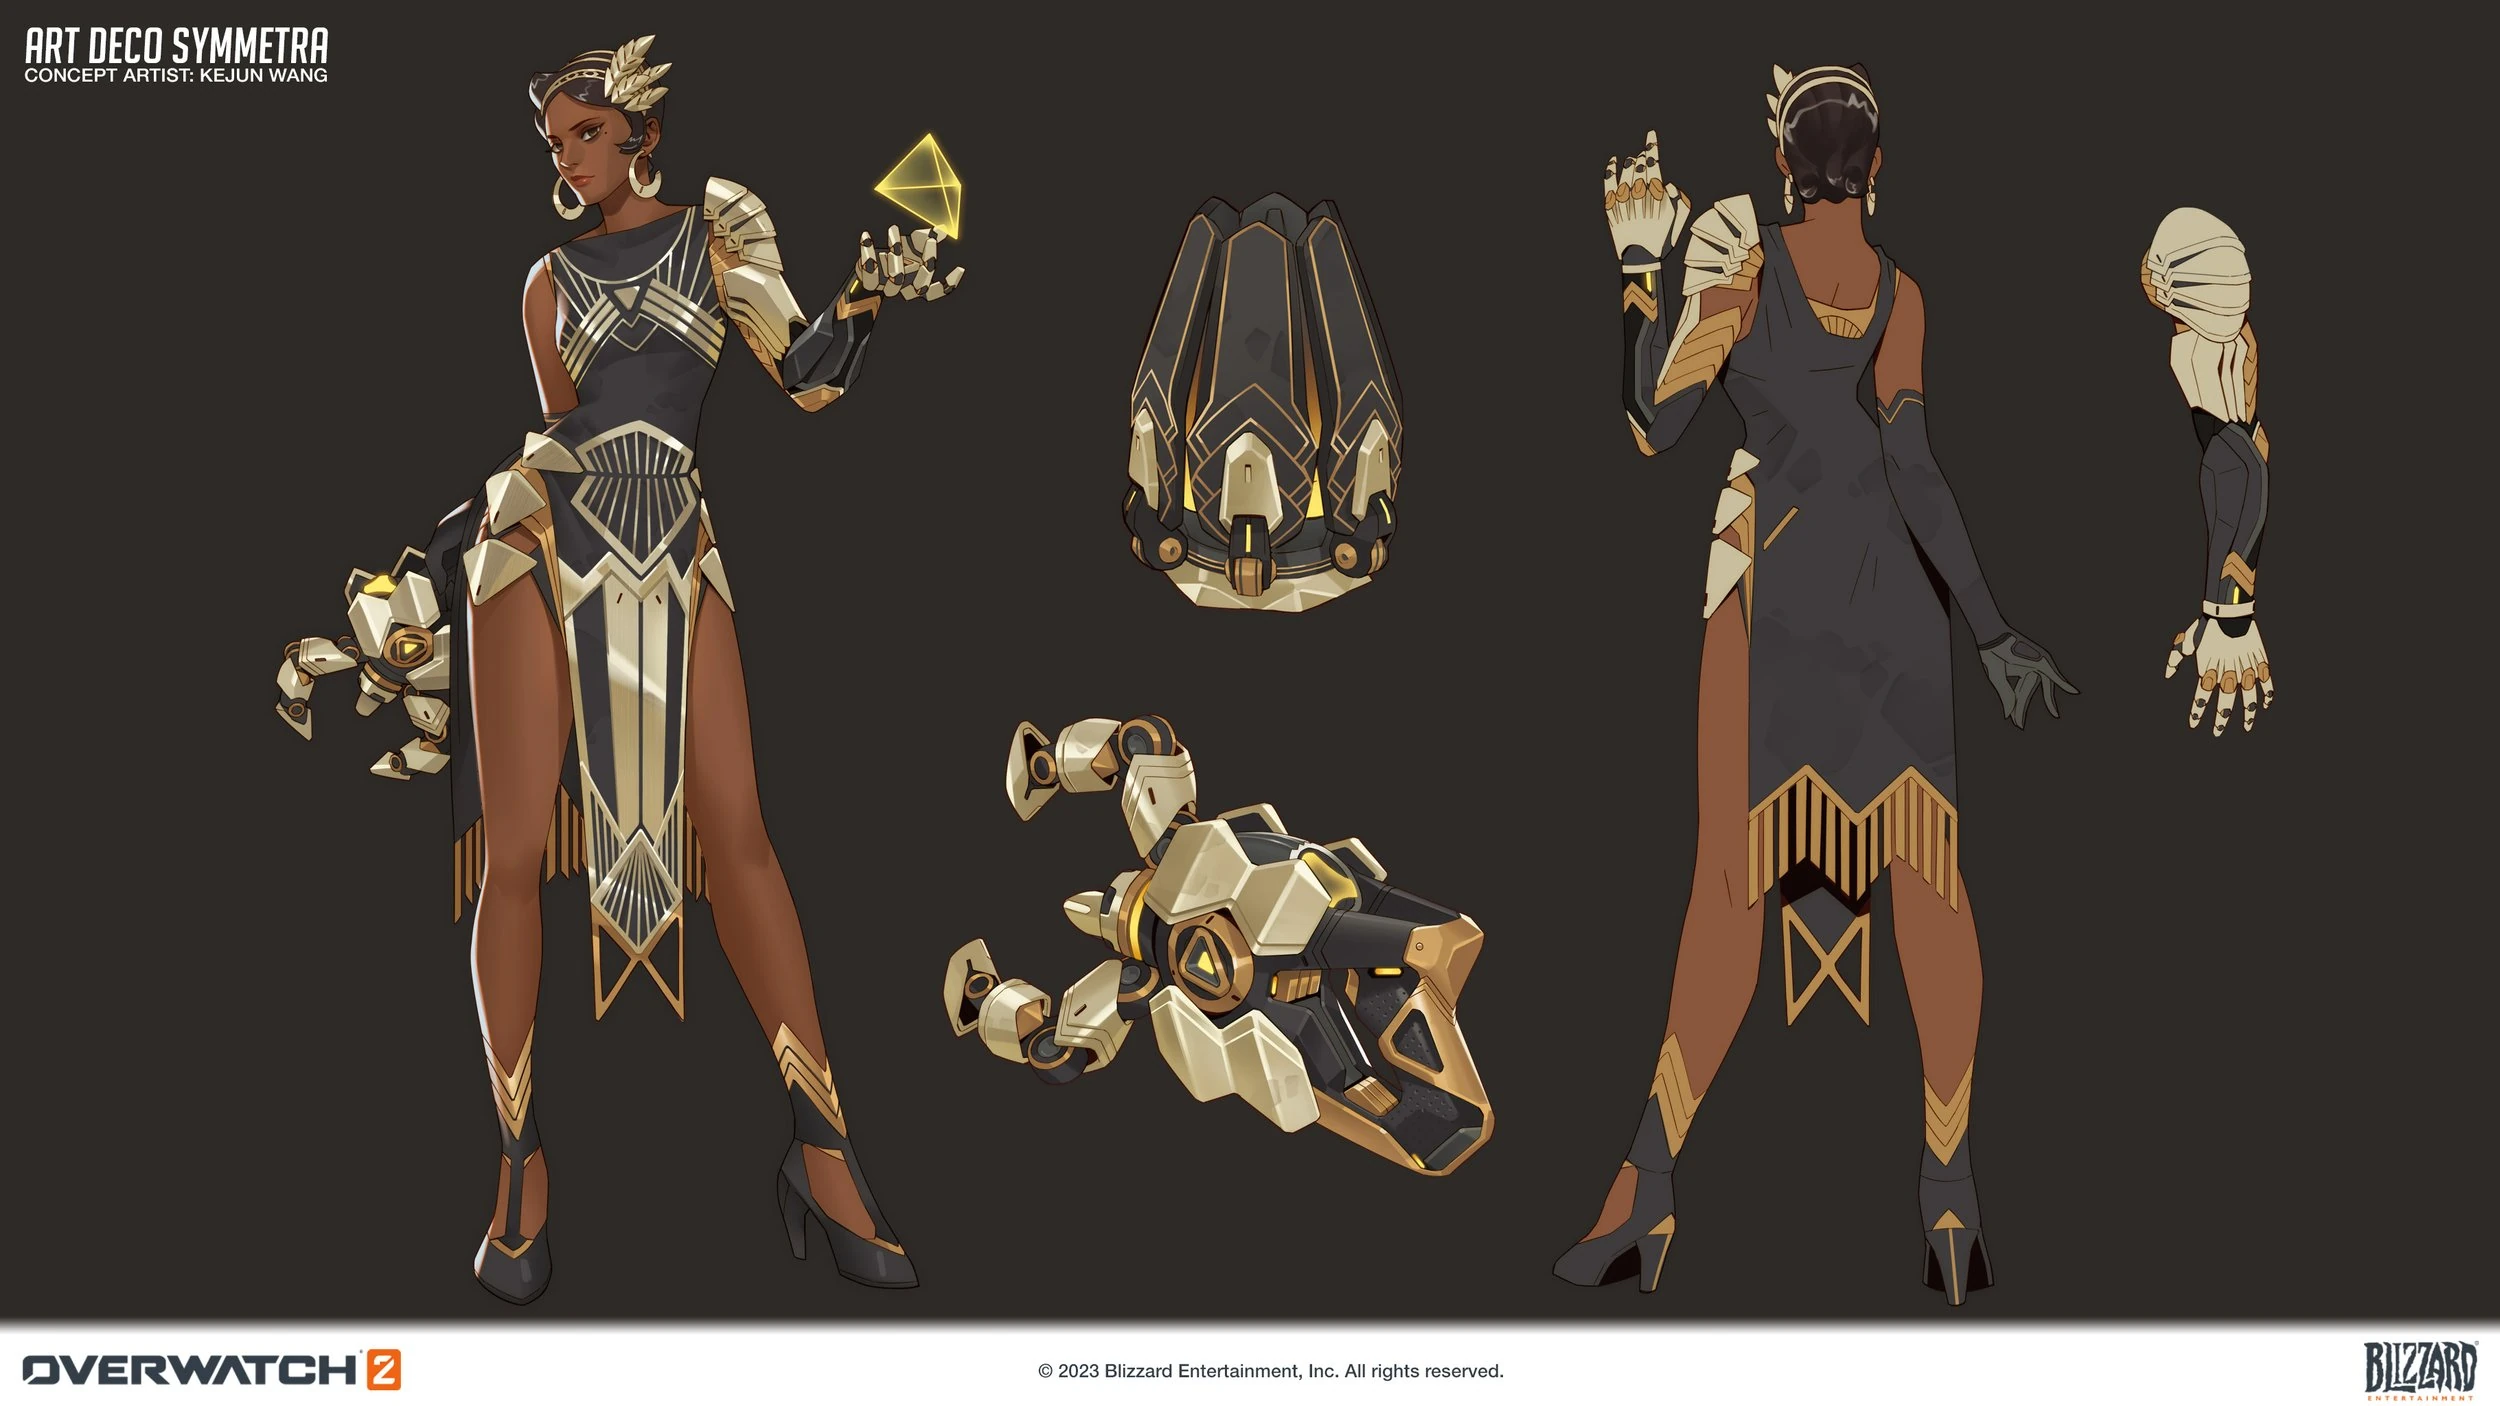
 Art Deco Skin Concept Art by Kejun Wang
 -
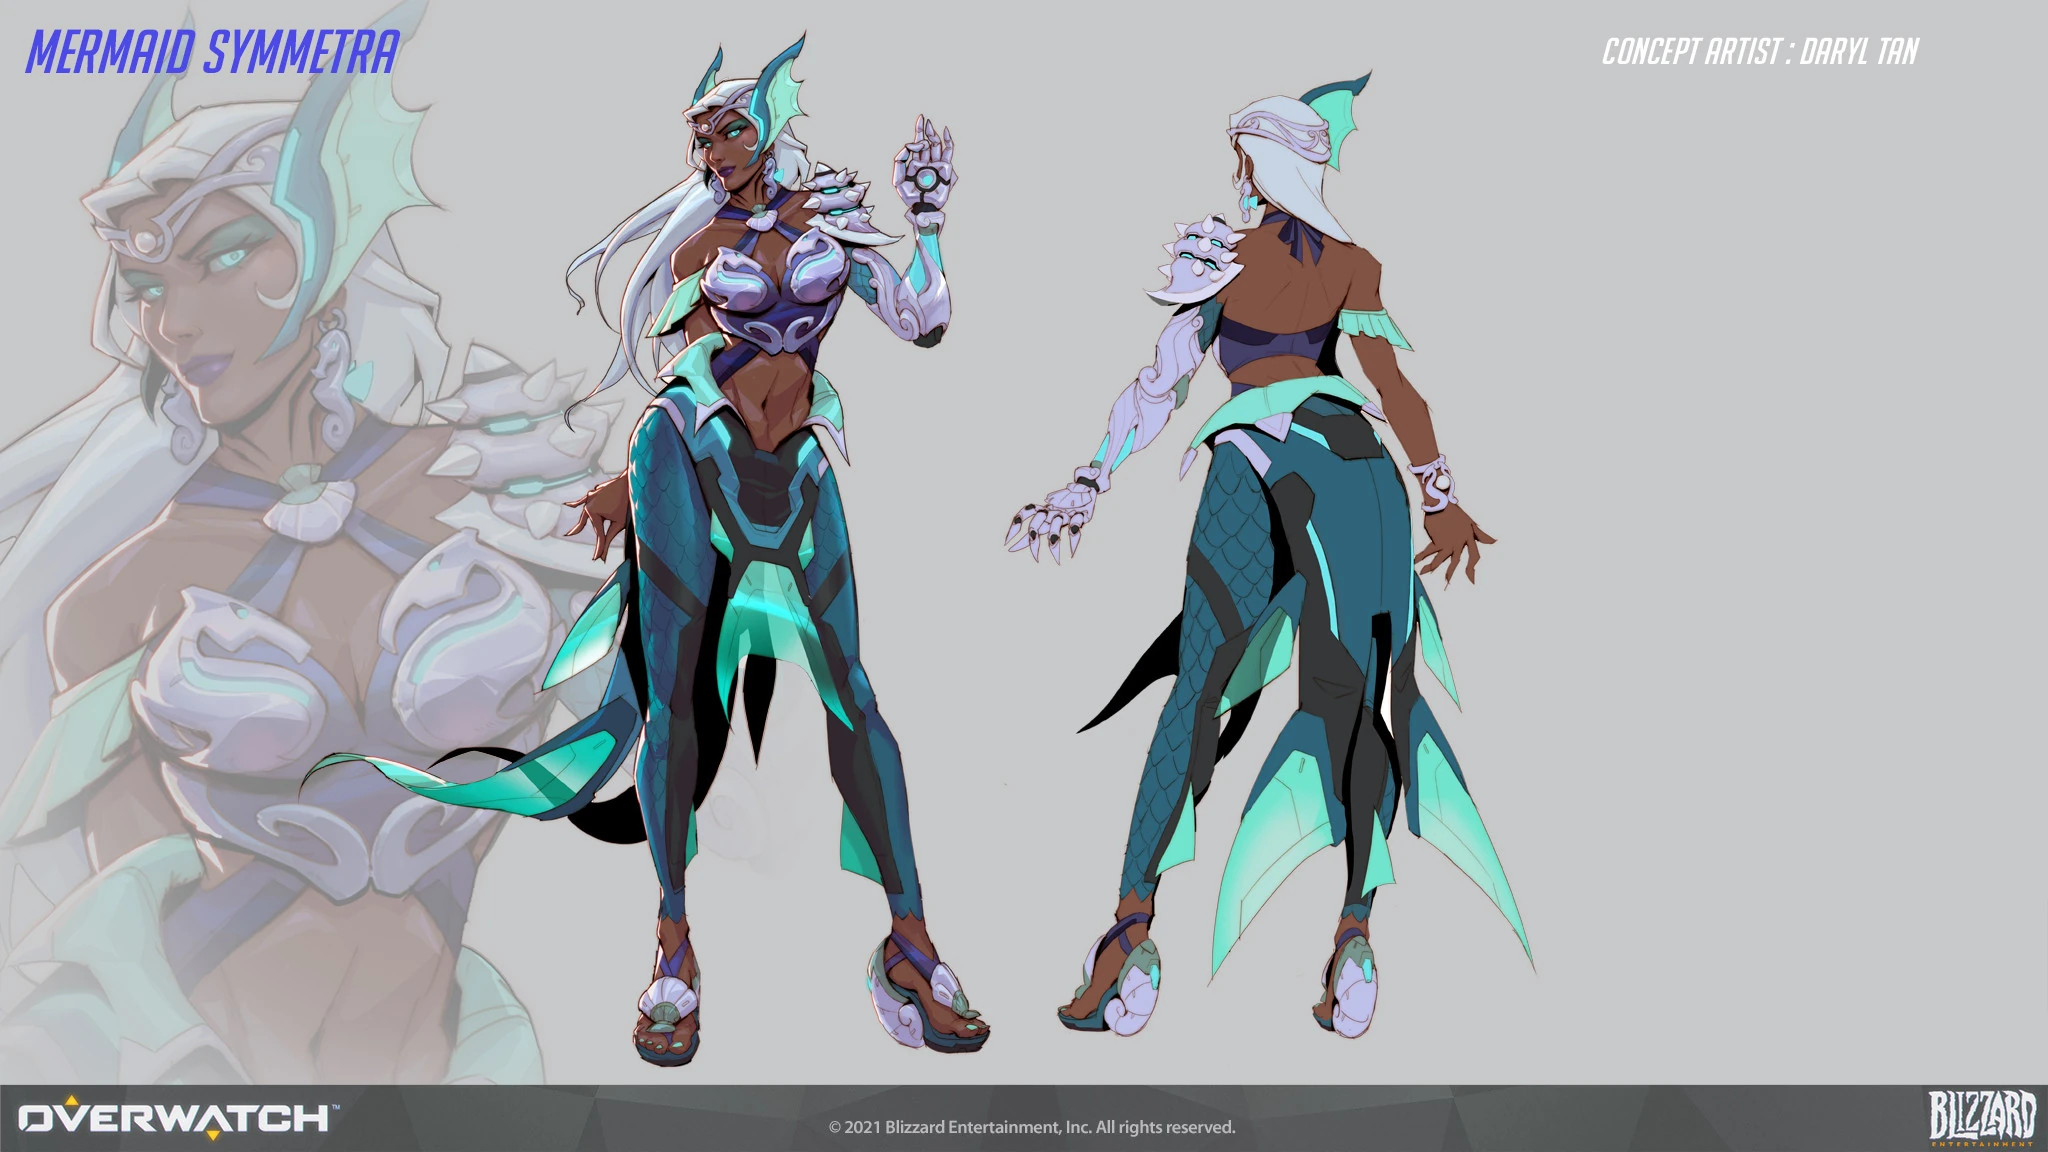
 Mermaid Skin Concept Art by Daryl Tan
 -
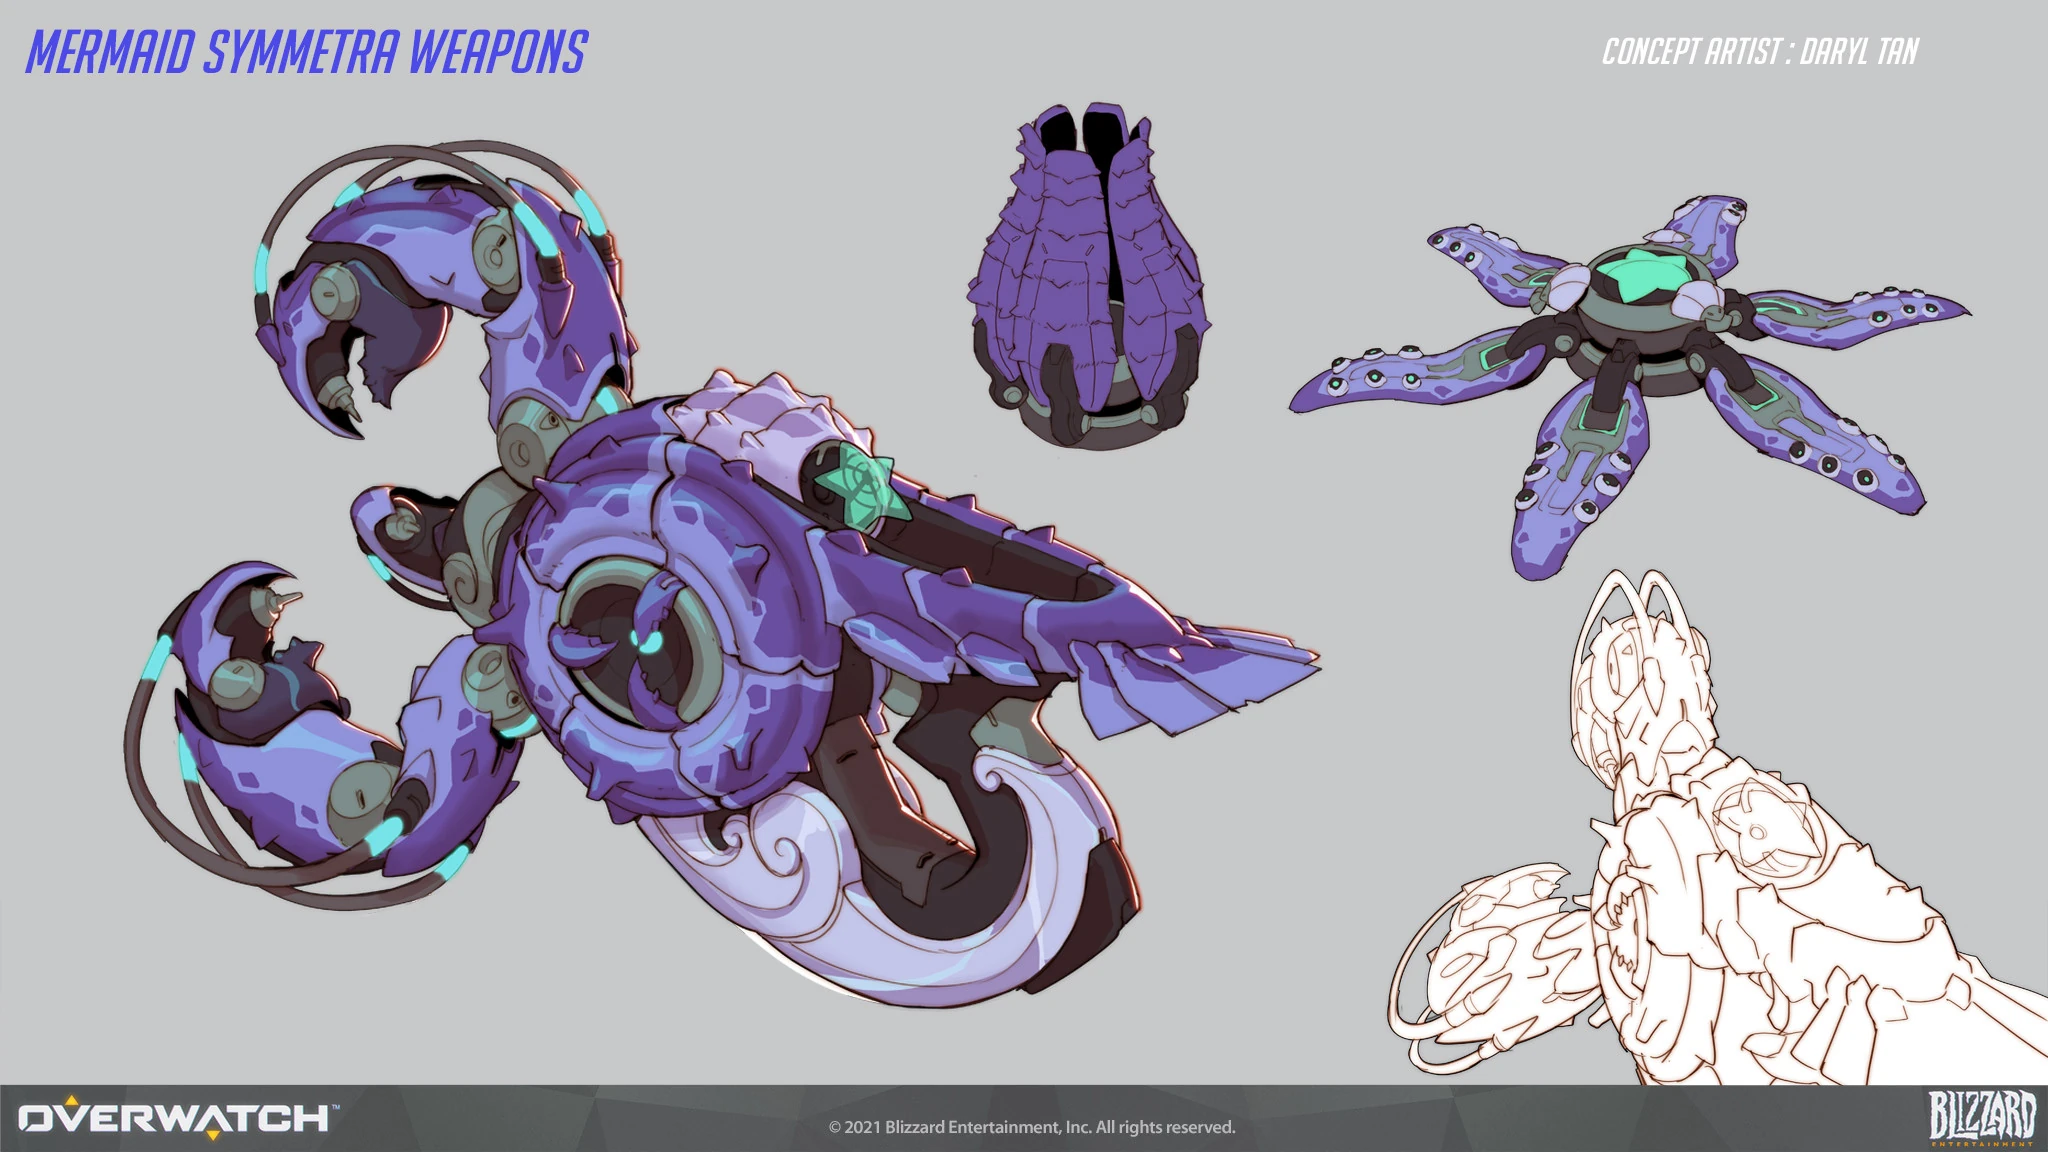
 Mermaid Skin Weapons Concept Art by Daryl Tan
 -
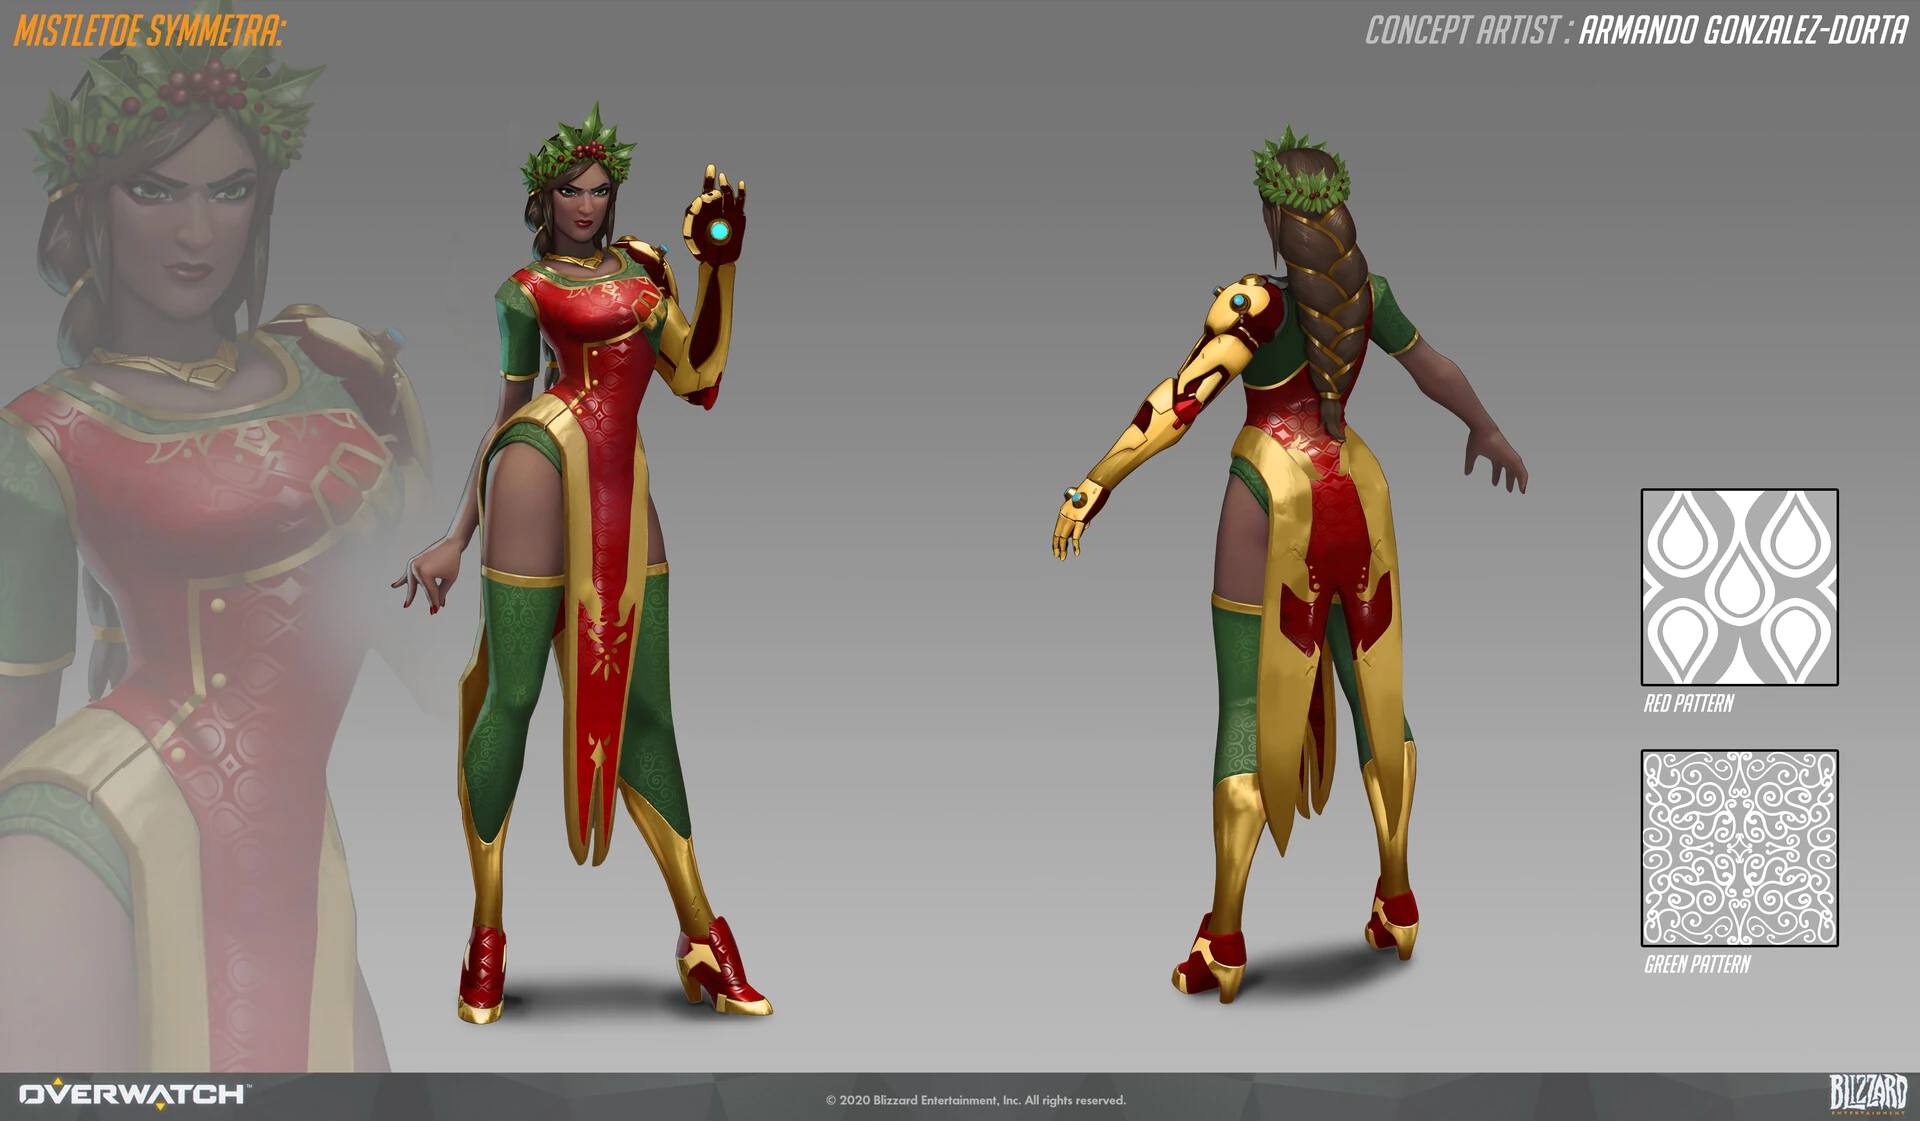
 Mistletoe Skin Concept Art by Armando Gonzalez-Dorta
 -
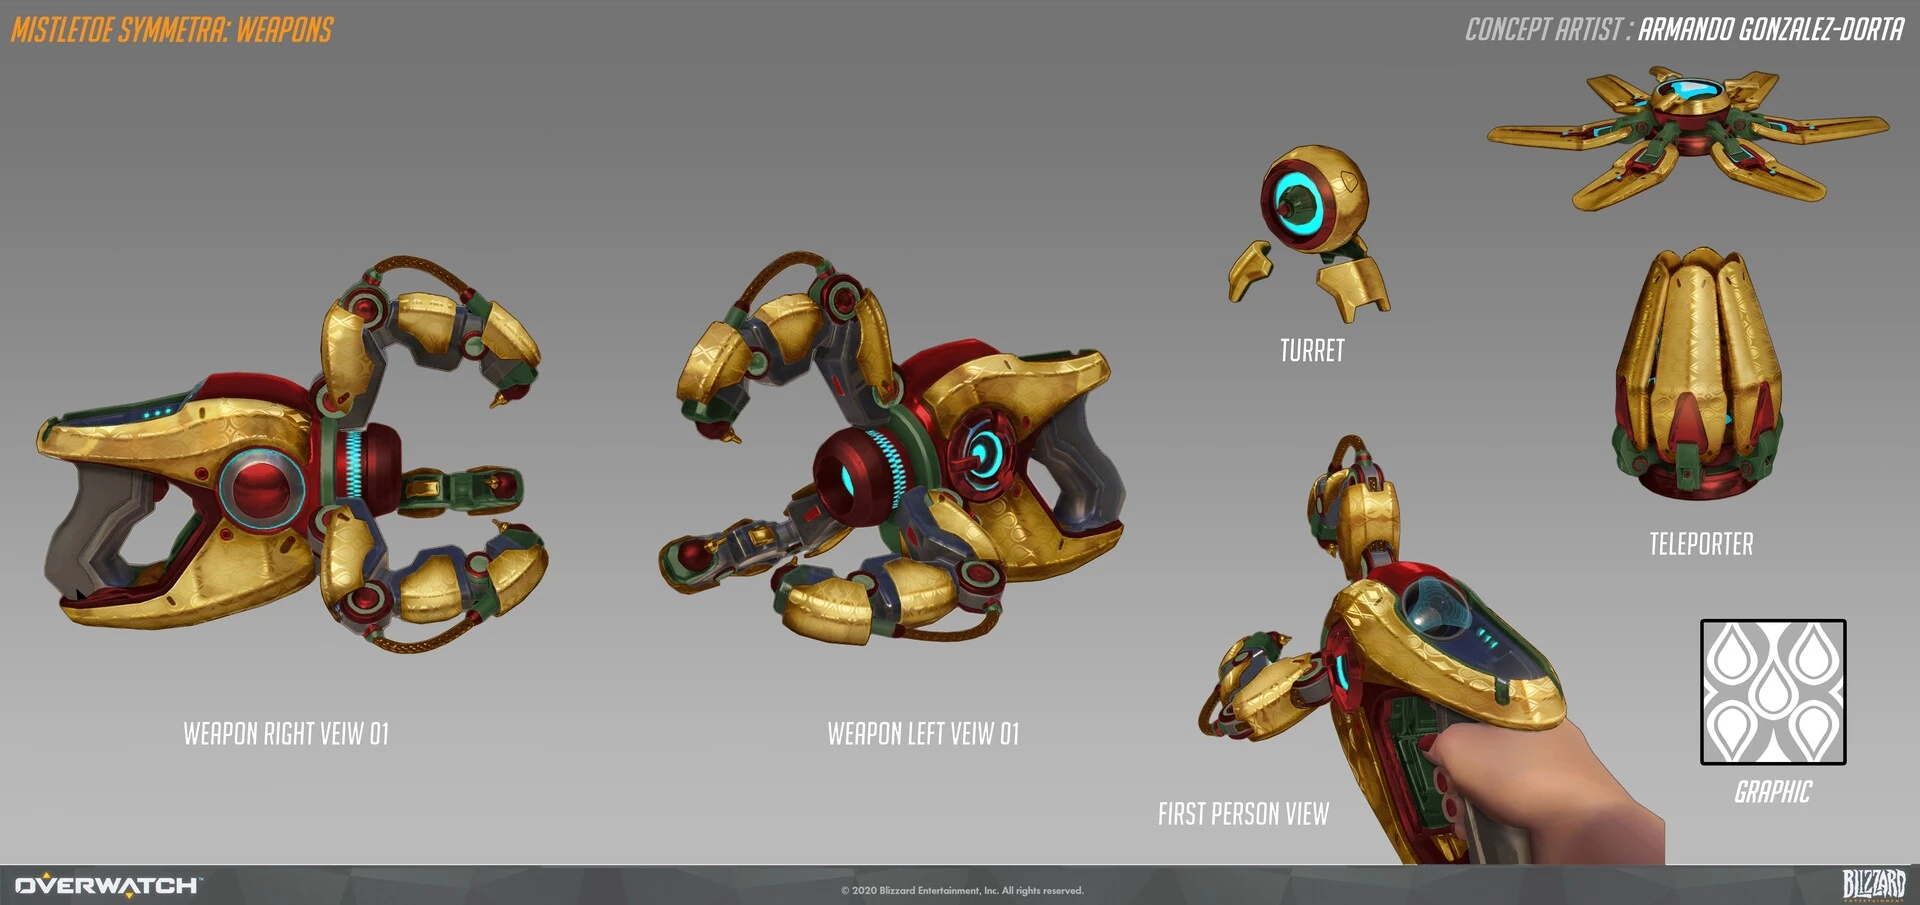
 Mistletoe Skin Weapons Concept Art by Armando Gonzalez-Dorta
 -
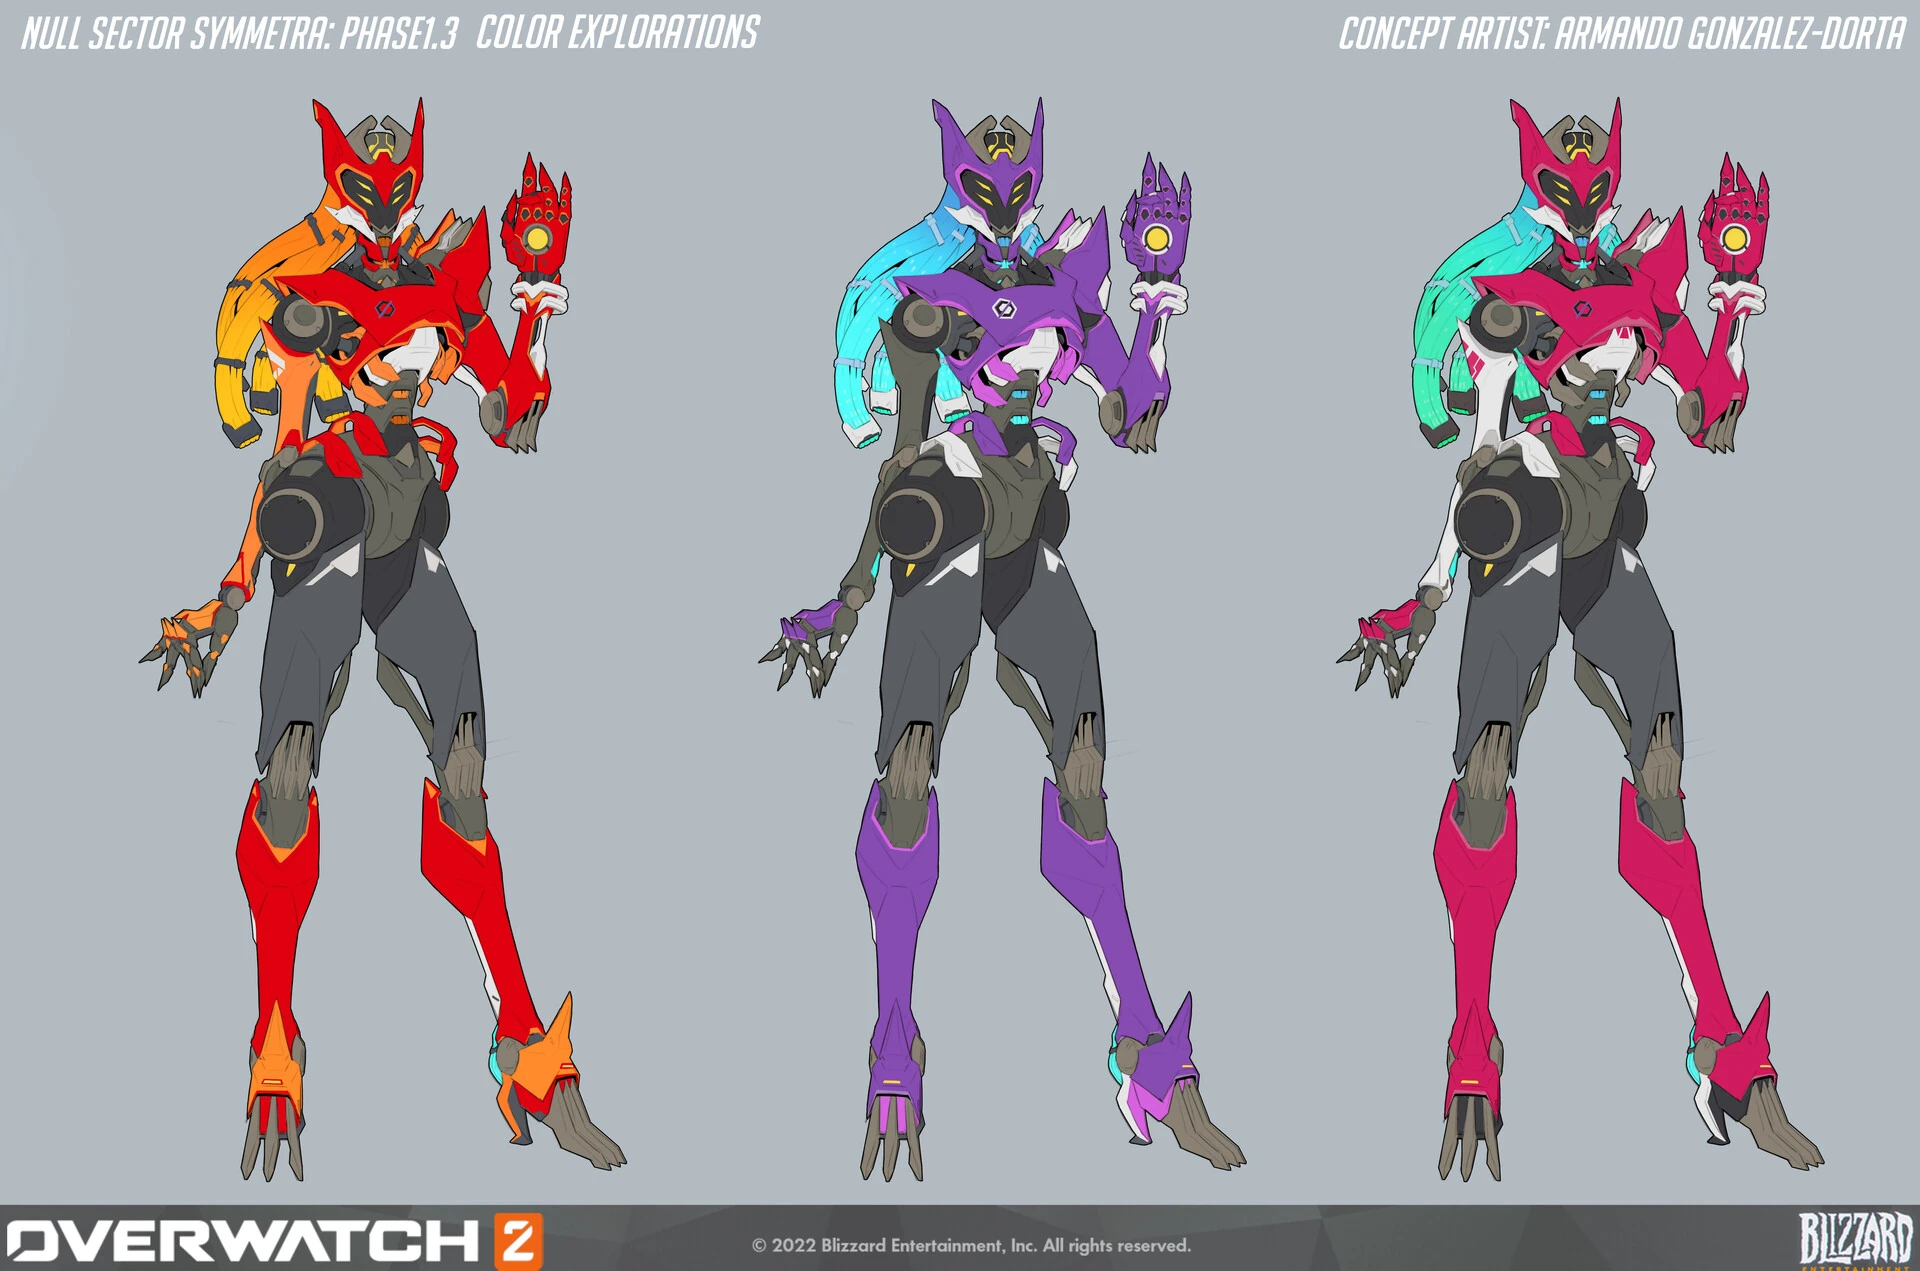
 S-900 Sentry Skin Early Concept Art by Armando Gonzalez-Dorta
 -
 S-900 Sentry Skin Color Exploration Concept Art by Armando Gonzalez-Dorta
 -
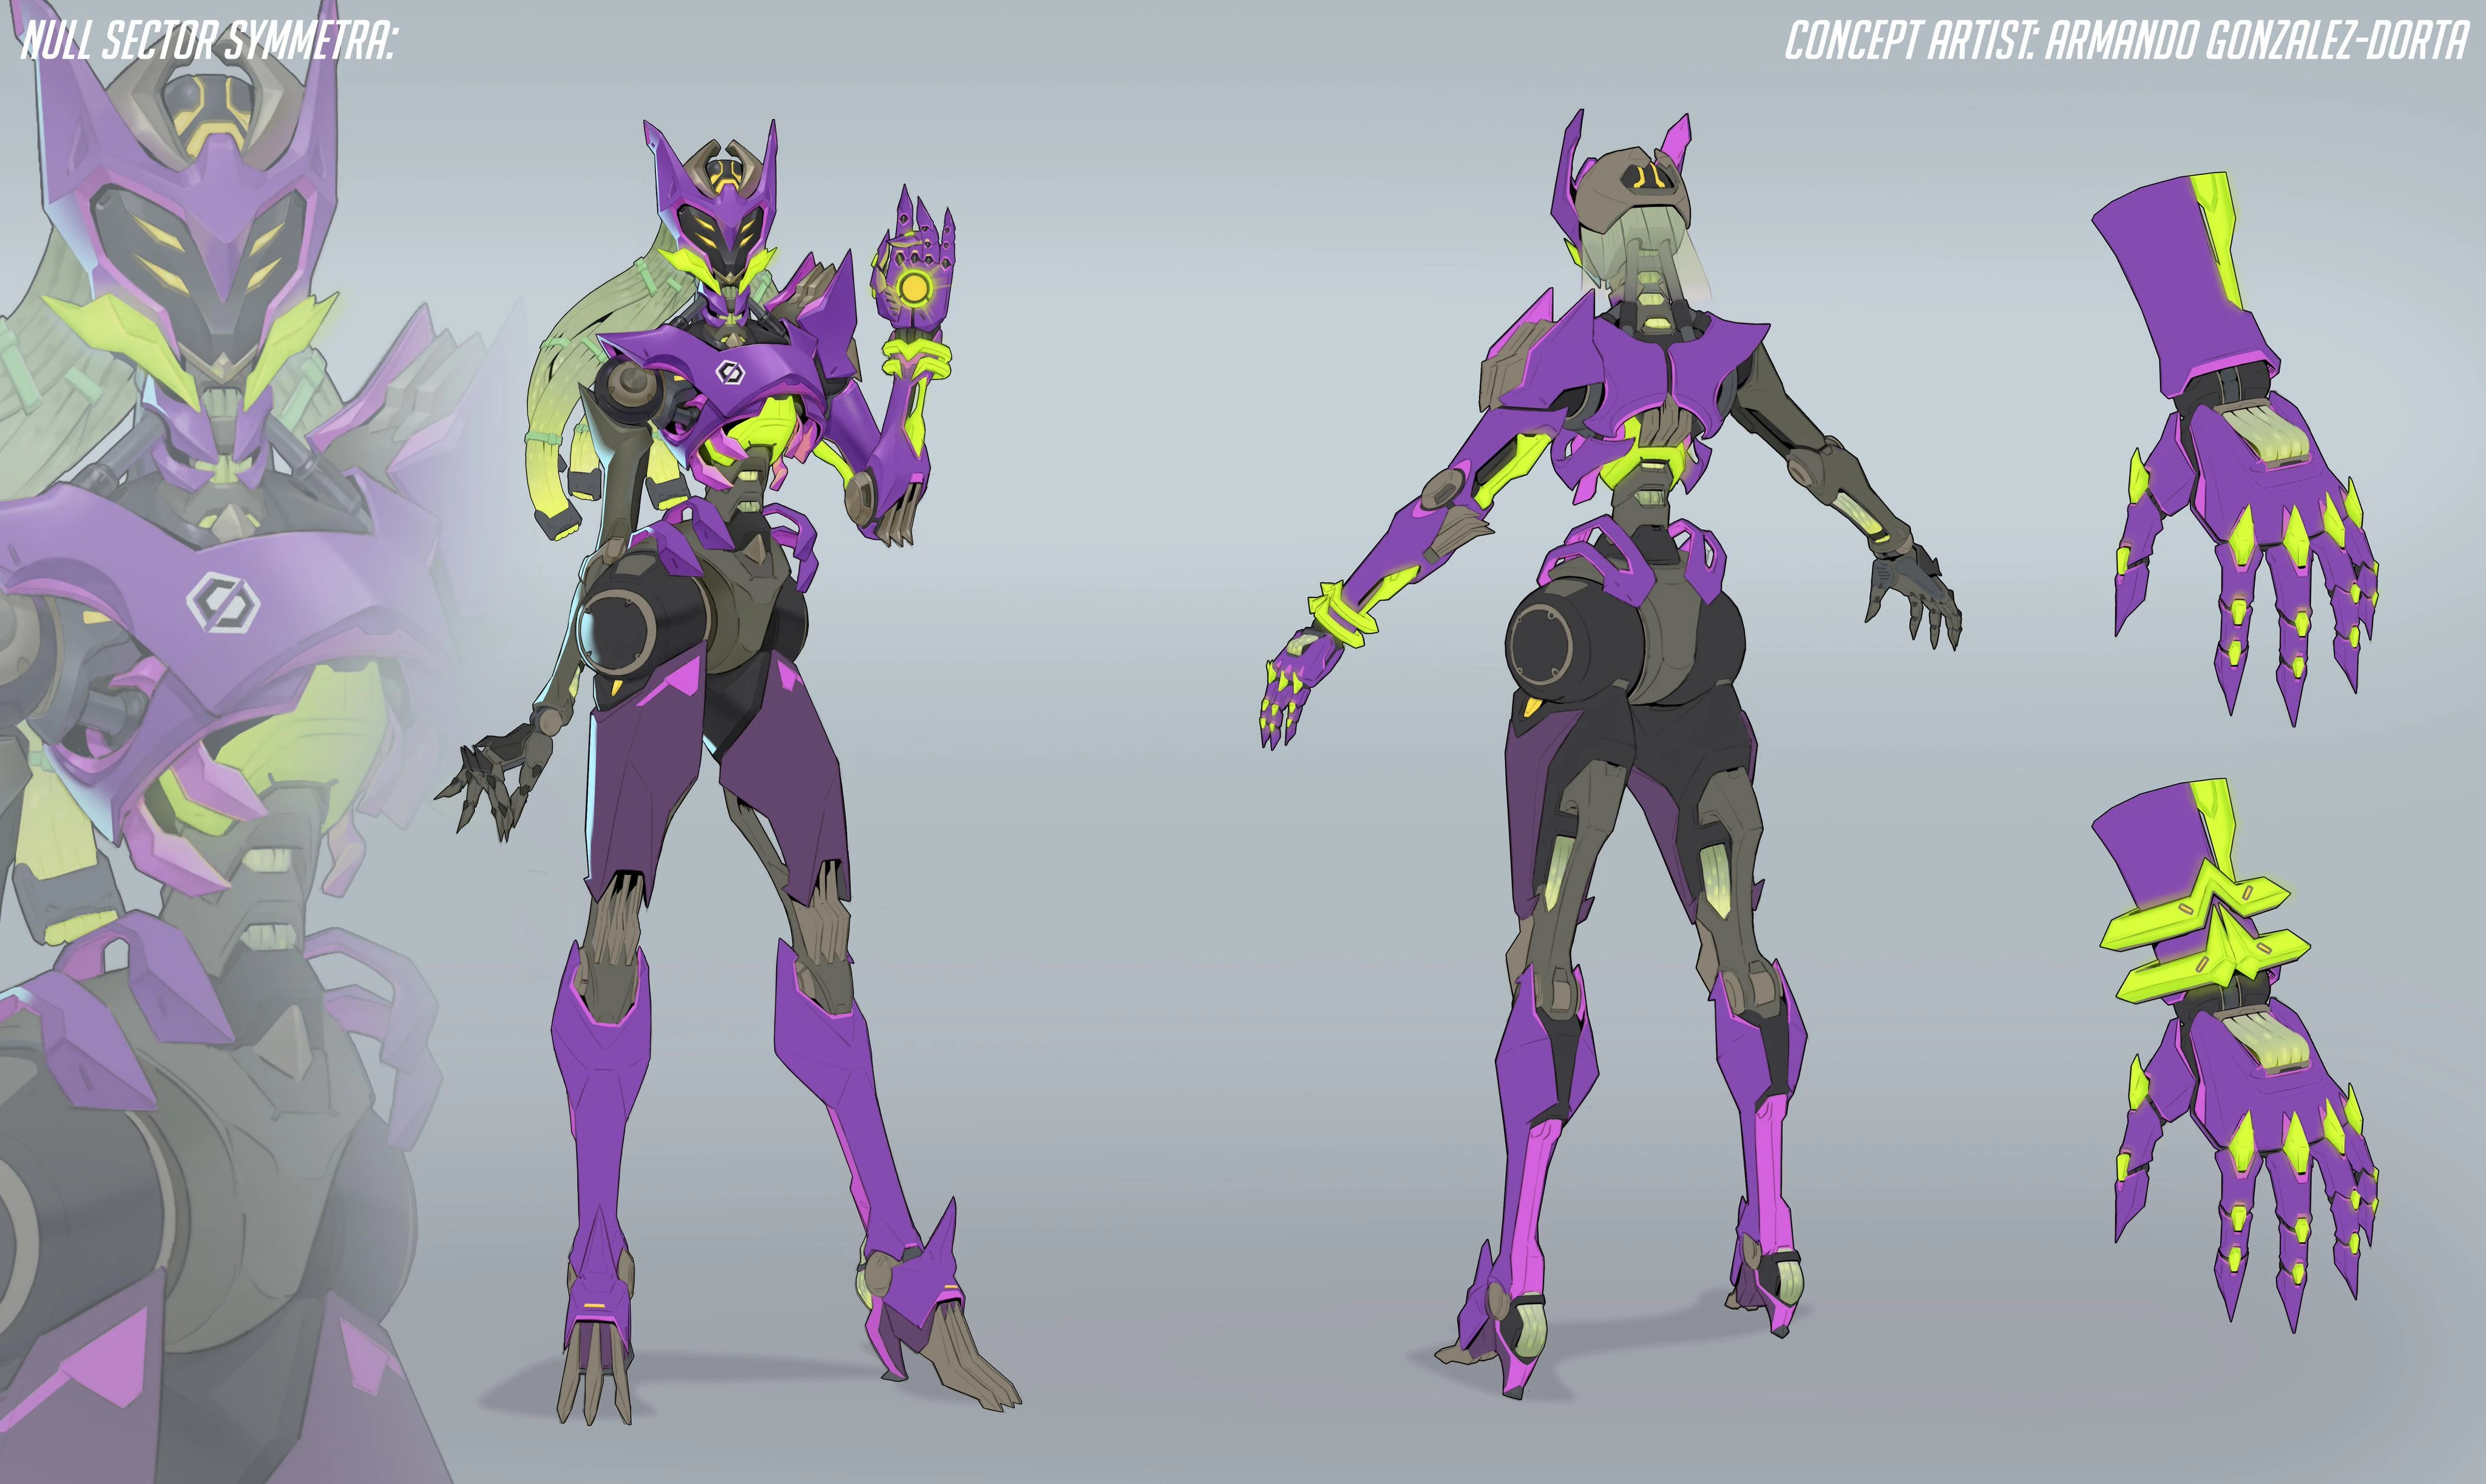
 S-900 Sentry Skin Concept Art by Armando Gonzalez-Dorta
 -
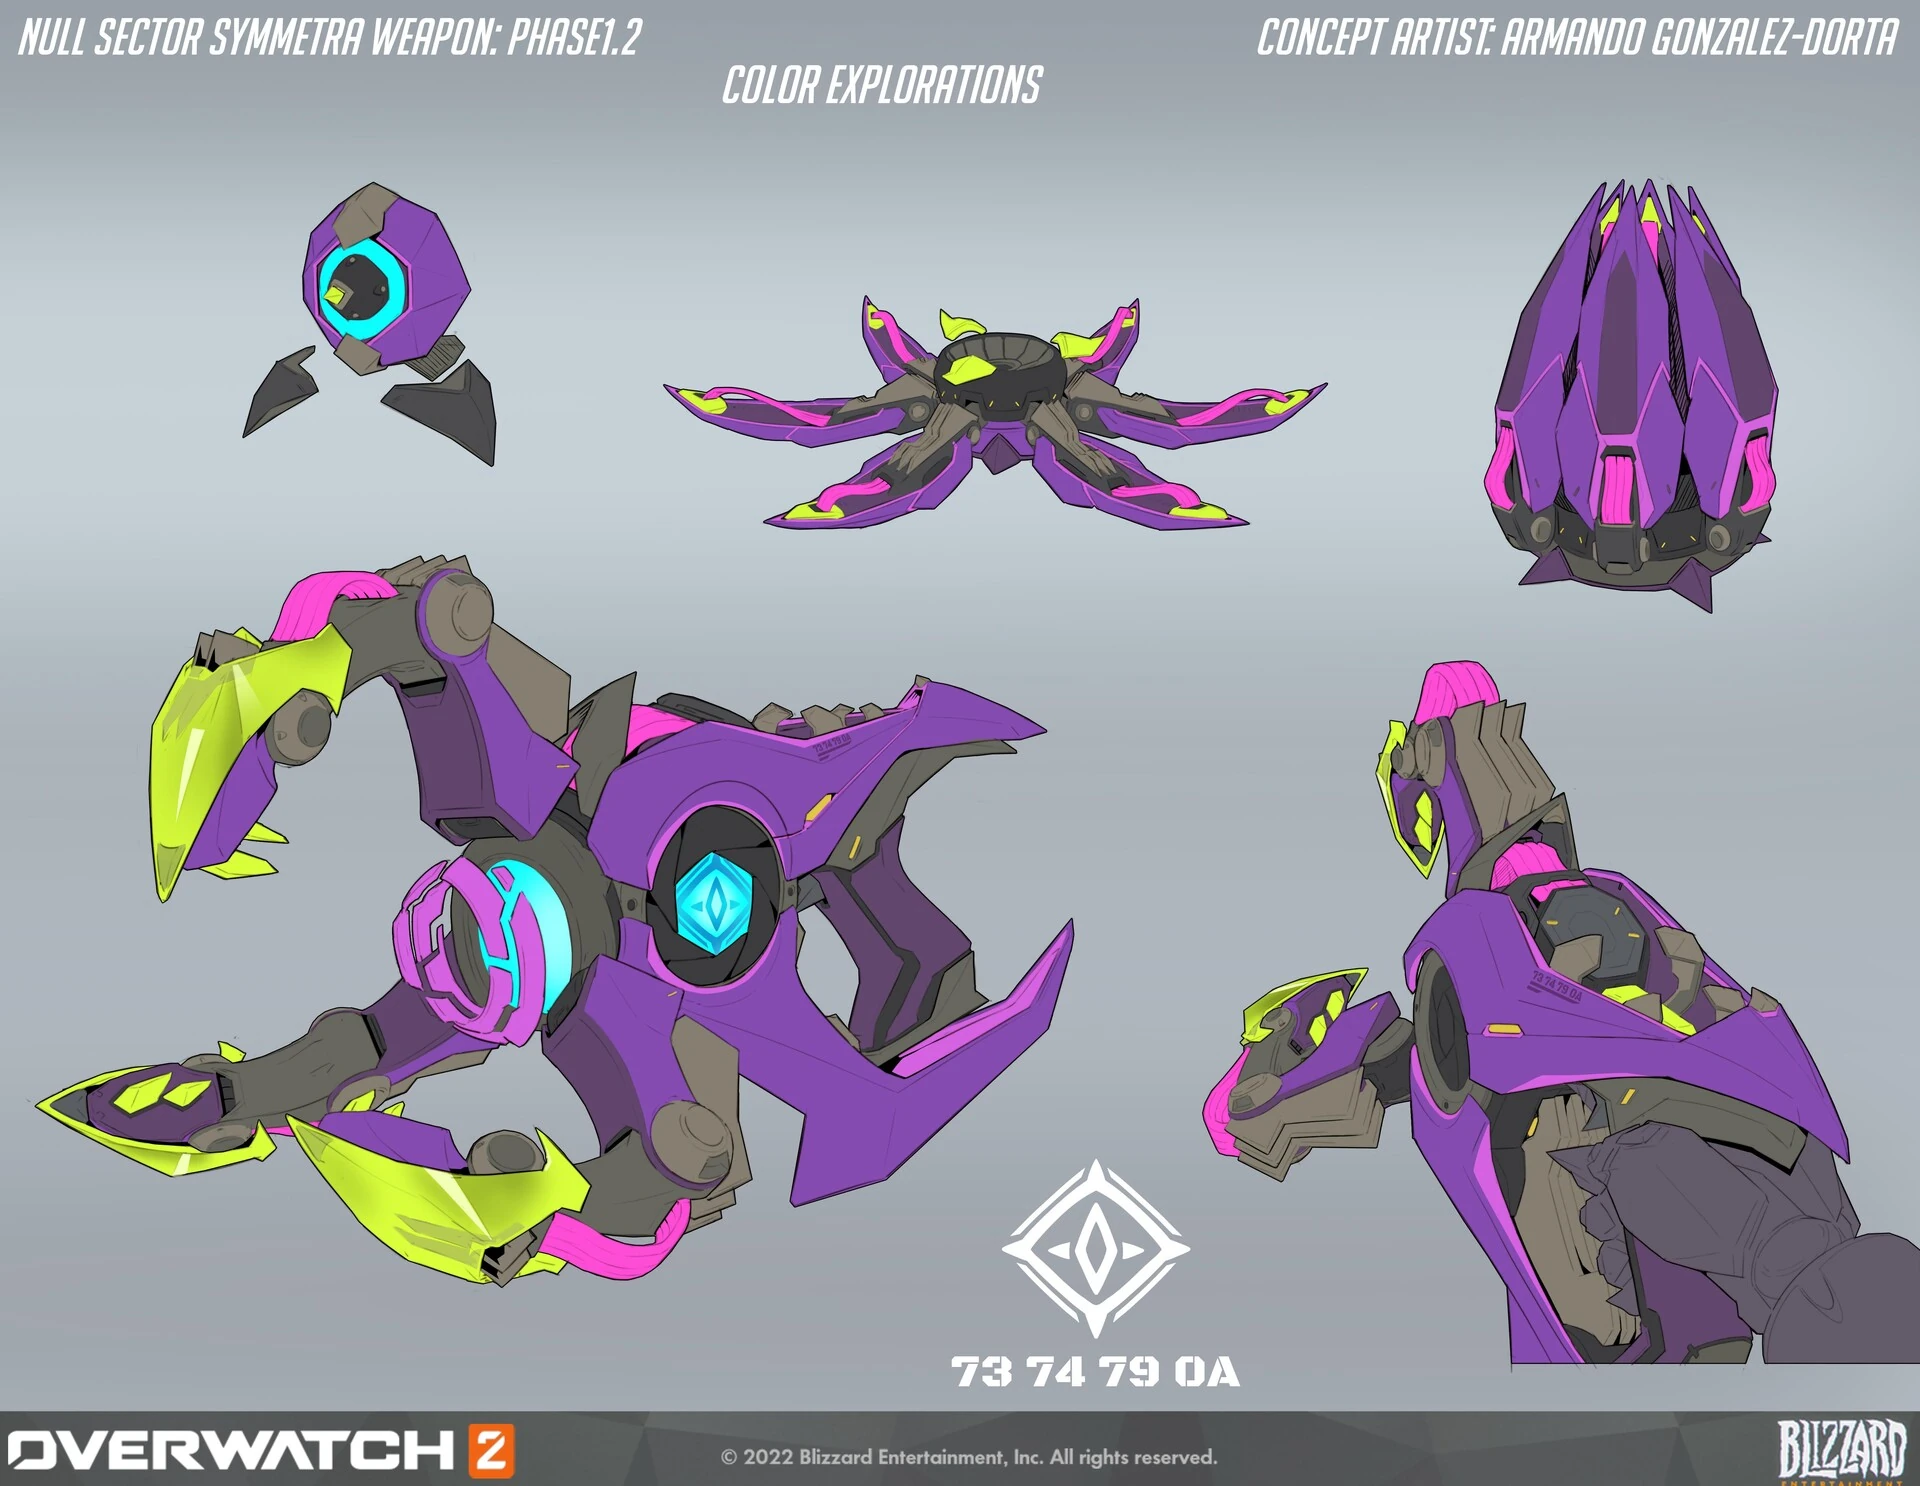
 S-900 Sentry Skin Weapons Concept Art by Armando Gonzalez-Dorta


Videos
- Old Abilities
Balance Change Logs
- For more information, see Patch Notes.
![]() Photon Projector Secondary fire
Photon Projector Secondary fire
- Base projectile size reduced from 0.5 to 0.4 meters.
- Base shield health reduced from 250 to 200.
![]() Advanced Teleportation - Minor Perk
Advanced Teleportation - Minor Perk
- Removed.
![]() Perfect Alignment - Minor Perk
Perfect Alignment - Minor Perk
- Changed to a Minor Perk.
- Now only increases the range of Photon Projector's primary fire by 20% regardless of the charge level of the beam.
![]() Hovering Barrier - Major Perk
Hovering Barrier - Major Perk
- New Major Perk.
- Teleporter gains the option to create a forward moving barrier instead. Pressing E again slows down the barrier's movement.
- Hero Perks
- Sentry Turret gains an additional charge.
- Teleporter's range is increased by 50%.
- Primary Fire's range increases by 15% with each additional charge level.
- Symmetra regenerates 20 shields per second while within 10 meters of her teleporter.
- Base shield health increased from 200 to 250.
- Base health increased from 100 to 125 (Total health increased from 250 to 275).
- Primary fire charge rate increased 25%.
(This change has been silently reverted at an unknown date)
- Primary fire damage per second decreased from 65 to 60, scaling with all levels. Maximum damage per second is 180.
- Health decreased from 50 to 40.
- General updates
- Global projectile size modifier for travel time projectiles with a speed greater than 50 meters per second reduced from 0.1 to 0.075 meters.
- Hero updates
- Primary fire damage per second increased from 60 to 65, scaling with each stage. The new maximum damage per second is 195.
- Health increased from 30 to 50.
- Damage per second increased from 25 to 30.
- Health increased from 50 to 100.
- Shields increased from 150 to 200.
- General updates
Most damage-dealing projectile sizes have been increased by a new global modifier added to their base size.
- +0.05 meters for hitscan projectiles with a high rate of fire or spread (e.g., Tracer's Pulse Pistols or Reaper's Hellfire Shotguns).
- +0.08 meters for hitscan projectiles that are more precise (e.g., Cassidy's Peacekeeper or Soldier:76's Heavy Pulse Rifle).
- +0.05 meters for travel time projectiles that are shotguns or have a very high rate of fire (e.g., Roadhog's Scrap Gun or Ramattra's Void Accelerator).
- +0.10 meters for travel time projectile with a speed greater than 50 meters per second (e.g., Zenyatta's Destruction Orb).
- +0.15 meters for travel time projectile with a speed less than or equal to 50 meters per second (e.g., Pharah's Rocket Launcher).
- Very large projectiles with a base size greater than 0.5 meters have been excluded from these increases (e.g., Orisa's Energy Javelin or Reinhardt's Fire Strike).
Hero combined HP (base health/armor/shields) increased by 15-25%.
- 150-175 HP heroes increased by 25 HP.
- 200-300 HP heroes increased by 50 HP.
- 300+ HP (Tanks) increased by 75-100 HP.
- Each hero's precise health increases are listed in their patch notes below.
Ultimate Charge
- All Ultimate ability costs increased by 10%.
Regenerative Passive for All Heroes
- All heroes now regenerate 20 health per second after 5 seconds of not taking damage.
Support Role Passive
- Now reduces the delay before regeneration begins by half (2.5 seconds).
Damage Role Passive
- Reload speed bonus on elimination has been removed.
- New role passive: Dealing damage reduces enemy healing received by 20% for 2 seconds.
Quick Melee
- Damage increased from 30 to 40.
- Hero updates
- Shields increased from 100 to 150.
- Primary fire beam width increased from 0.2 to 0.25 meters.
- Base shield health reduced from 125 to 100 (total 200 HP).
- Secondary Fire maximum impact damage increased from 45 to 50.
- Secondary Fire maximum explosion damage increased from 45 to 50.
- Regenerate up to 30 shield health per second when primary fire deals damage to barriers or enemies with shield health.
- Damage per second reduced from 40 to 25.
- Turrets now reveal enemy heroes to allies while dealing damage and for 1 additional second afterwards.
- Ultimate cost increased 10%
![]() Photon Projector Primary Fire
Photon Projector Primary Fire
- Beam charge rate and decay rate increased by 20%
- Primary fire ammo consumption rate increased from 7 to 10 per second
- Primary fire gains ammo from damaging barriers again
(beta)
![]() Photon Projector (Secondary Fire)
Photon Projector (Secondary Fire)
- Charge time reduced from 1.2 seconds to 1 second
- Projectile radius increased from 0.4 to 0.5 meters
- Cooldown reduced from 16 to 12 seconds
(beta)
![]() Photon Projector (Primary Fire)
Photon Projector (Primary Fire)
- Maximum ammo increased from 70 to 100
- No longer generates ammo when damaging barriers
![]() Photon Projector (Secondary Fire)
Photon Projector (Secondary Fire)
- Projectile speed increased from 25 to 50
- Max damage reduced from 120 to 90 (45 impact, 45 explosion)
- Max charge projectile size reduced from 0.5 to 0.4
- Ammo cost increased from 7 to 10
- Charge time increased from 1 to 1.2 seconds
- Build time reduced from 2 to 1 second
- Now has a maximum lifetime of 10 seconds
- Cooldown increased from 10 to 16 seconds
- Cooldown starts when Teleporter is placed
- Health reduced from 300 to 200 (50 health, 150 shields)
- Travel speed increased from 15 to 20
- Movement speed reduction on targets reduced from 20% per turret to 15% per turret
- (Parity Adjustment) No longer deals less damage on console platforms
- Can now be manually destroyed while dead
- Base shields increased from 100 to 125
- Cooldown reduced from 12 to 10 seconds
Developer Comment: We're reducing the cooldown of the Teleporter to help lower the friction between needing to use it as both a personal and team-focused mobility tool.
![]() Photon Projector (Secondary Fire)
Photon Projector (Secondary Fire)
- Damage increased from 120 to 140
- [Console-Only Update] Turret DPS reduced from 34 to 30
Developer Comment: Increasing Photon Projectors max damage allows Symmetra to play more effectively at a safer range when necessary.
- Duration reduced from 15 to 12 seconds
- Health reduced from 5000 to 4000
- Damage per second reduced from 50 to 40
- Players impacted by the primary fire beam should now hear a louder impact sound
Developer Comment: The duration of Photon Barrier was too high considering its impact on a battle. Recent changes have seen large increases in Symmetra’s overall damage output, so we’re reducing her turret damage in lieu of making further damage adjustments to her Photon Projector.
General
- Reverted edge-placement change for ground targeted abilities (Reaper's Shadowstep, Mei's Icewall, Symmetra's Teleporter, etc)
General
- Ground targeted abilities (Reaper’s Shadowstep, Mei’s Icewall, Symmetra’s Teleporter, etc) will now more heavily prefer edges over placing as far away as possible.
![]() Photon Projector (Primary Fire)
Photon Projector (Primary Fire)
- Beam width lowered from 0.3 meters to 0.2
- Beam DPS per level lowered from 65/130/195 to 60/120/180
- Now lasts an infinite duration until destroyed
- Players can destroy their Teleporter with the ability 2 input
- Cooldown now starts when Teleporter is destroyed
- Maximum range increased from 25 to 30 meters
- Teleporter is destroyed if the entrance is more than 40 meters from the exit
Developer Comment: Symmetra’s Teleporter is an interesting tool but often felt too restricting to use. Making the Teleporter last indefinitely opens up new opportunities for how Symmetra is used in various maps and group compositions.
- Teleporter interact range increased from 1 meter to 1.5 meters.
Developer Comments: This is primarily a quality of life improvement as it was possible to create a teleporter that Symmetra was unable to interact with unless she moved toward it.
- Railings and other breakable objects no longer block teleporter placement and teleporting
- Primary Fire’s damage ramps up 20% faster
Developer Comments: This will allow Symmetra to more consistently reach peak damage output from her Photon Projector.
- Primary fire beam charges up 20% faster
Developer Comments: It's still difficult to use Symmetra's Photon Projector beam effectively, even after its range was increased. By speeding up the primary fire charge rate, it takes less time to ramp up to its full damage potential and will be a stronger option when she’s presented with targets to charge up on.
General
- Enemies’ health bars will now become visible to players if an entity they create deals damage to an enemy (e.g. Symmetra’s turrets)
- Primary fire range increased from 10 to 12
Developer Comments: Symmetra’s primary fire has huge damage potential but it is too difficult to charge because of its low range and slow charge rate. We’re increasing the range to see how it plays out, giving her more opportunities to use it, especially against enemy barriers.
- Now a damage hero
- No longer locks onto targets
- Range increased to 10 meters
- Damage ramping now takes 2 seconds per damage level instead of 1 second
- Damage ramp increased from 30/60/120 to 60/120/180
- Now generates ammo instead of spending it when hitting a barrier
- Ammo reduced from 100 to 70
![]() Photon Projector (Secondary Fire)
Photon Projector (Secondary Fire)
- No longer pierces targets
- Now explodes on contact
- Projectile speed increased
- Charge up speed increased
- Damage changed to 60 impact / 60 explosive
- Turret is now placed like a projectile instead of being set in place
- Can hold a max of 3, down from 6
- Can now deploy a max 3, down from 6
- Damage increased
- Amount of slowing effect increased
- Can now place the exit up to 25 meters away from Symmetra
- Entrance will automatically be built in front of Symmetra, rather than at her team’s spawn point
- Lasts 10 seconds
- Health lowered to 300
- More things can teleport through it (e.g. Junkrat’s RIP-Tire)
- Entrance can be destroyed
- If either the entrance or exit is destroyed, the other is removed
- Deploys a barrier that is big enough to span and cut through an entire map
- Orientation can be changed by pressing the ultimate button again
- Lasts 15 seconds
- Has 5000 health
Developer Comments: The goal of these changes is to move Symmetra to her new damage role and make her more flexible and viable across more areas of the game than she was previously. Now that Symmetra is no longer a support hero, she is expected to be able to dish out heavy damage, and these changes allow for her to do so. She should be more powerful and interesting in more team compositions and maps, and she should also be stronger on offense and defense.
- Replaces her existing Photon Shield ability
- Generates a large energy barrier in front of Symmetra that blocks enemy fire as it travels forward
![]() Shield Generator (New Ultimate Ability Option)
Shield Generator (New Ultimate Ability Option)
- Symmetra's Ultimate ability now offers a choice between Teleporter and a new option: Shield Generator
- Shield Generator places a device that grants additional shields to allies within its effective radius (regardless of barriers, walls, or obstacles between them and the Shield Generator)
![]() Photon Projector (Primary Fire)
Photon Projector (Primary Fire)
- Range has been increased from 5 meters to 7 meters
- Turrets that can be carried have been increased from 3 turrets to 6 turrets
- Cooldown has been reduced from 12 seconds to 10 seconds
- Replaced with the new Photon Barrier ability
- Health has been decreased from 200 to 50
- Shields have been increased from 0 to 350
Developer Comments: We wanted to address two main issues with Symmetra. First, on the whole, we felt that she didn’t feel active enough. Second, due to the nature of her Teleporter, she felt weak in certain situations on different maps and game modes. To address the first point, we replaced her more passive Photon Shield ability with a much more active ability: Photon Barrier. Now, Symmetra can help lead the charge on offense or help shut down a big push on defense by actively blocking damage for your team. For the second point, we noticed players would often switch off of Symmetra once they found themselves in a situation where her Teleporter wasn’t as useful. For example, when playing her on defense on an Assault map, players often used her to defend the first capture point, then quickly switched to another hero if that point fell. To help her feel more useful in more situations, we've given her an alternative to her Teleporter. The Shield Generator is just as important for the enemy to deal with, but is useful in more situations. The turret changes allow her to rebuild her turret nests faster. Even if all her turrets are wiped out, it's now easier for players to build them all back up before the next push. We’re also increasing the range on her Photon Projector to make it easier for her to build up and keep a powerful charge on her target.
- Dealing damage to things other than players (like Torbjorn's turret or Symmetra's teleporter) no longer charges ultimate abilities
Developer Comment: Game-changing ultimate abilities were coming up a bit too frequently. This change helps keep them in check while still allowing them to be powerful.
- When activating the "Ultimate Status" communication, Symmetra now reports the number of charges left on her teleporter
- Hero Balance Update
- Ultimates that consume the ultimate meter when activated will now drain the meter more quickly (.25 second instead of 1 second)
- Reverted a recent change that reduced the size of heroes' projectiles
- Most hero abilities will no longer interrupt quick melee attacks
- Ultimate abilities will now interrupt quick melee attacks
Developer Comments: Altering the size of projectiles in flight had too many unintended side effects to keep in the game, at least in its current form. We will continue watching this and make additional changes if necessary. We’re also making quick melee more consistent when interacting with enemy abilities.
- Hero Balance Change (PS4 and XB1 exclusively)
- Turrets damage decrease by 30%
References
- ↑ 2014-11-24, BlizzCon 2014 – Overwatch Unveiled Panel Transcript. Blizzplanet, accessed on 2015-03-08
- ↑ 2015-08-16, Reddit Q&A about Solider[sic] 76 | Overwatch. Blizzplanet, accessed on 2015-08-06
- ↑ 2016-03-26, Blizzard Patches Masturbation Gag Out Of Overwatch. Kotaku, accessed on 2016-03-26
- ↑ 2016-12-10, Blizzcon 2016 Overwatch Q&A Panel Transcript. BlizzPlanet, accessed on 2018-11-16
- ↑ Game Informer #81: Designing Overwatch: From Titan to Torbjörn
- ↑ 2018-10-09, OVERWATCH HALLOWEEN TERROR GEAR AVAILABLE NOW. Blizzard Entertainment, accessed on 2018-10-10
- ↑ 7.0 7.1 Cite error: Invalid
<ref>tag; no text was provided for refs namedRebuildingRuins - ↑ Blizzcon 2017, Overwatch: Archives
- ↑ 2015-12-10, How Blizzard is making up Overwatch's story as it goes. PC Gamer, accessed on 2015-12-24
- ↑ 2017-03-09, Overwatch fan theory about Symmetra finally confirmed by Blizzard. Polygon, accessed on 2017-03-10
- ↑ 2021-02-19, BlizzConline 2021 | Behind the Scenes of Overwatch 2 | Overwatch. Youtube @PlayOverwatch, accessed on 2024-04-16
External links
| Heroes in Overwatch
| ||||||||
|---|---|---|---|---|---|---|---|---|
Tank |
 Bruiser |
|||||||
 Initiator |
||||||||
 Stalwart |
||||||||
Damage |
 Flanker |
|||||||
 Recon |
||||||||
 Sharpshooter |
||||||||
Specialist |
 Symmetra |
|||||||
Support |
 Medic |
|||||||
 Survivor |
||||||||
 Tactician |
||||||||


