Vendetta is a Flanker Damage hero in Overwatch. She was released in Season 20 on 9 December 2025, making her the 45th hero to be added to the game. She serves as the central antagonist of the Reign of Talon story arc.
Overview
Vendetta Hero Selection
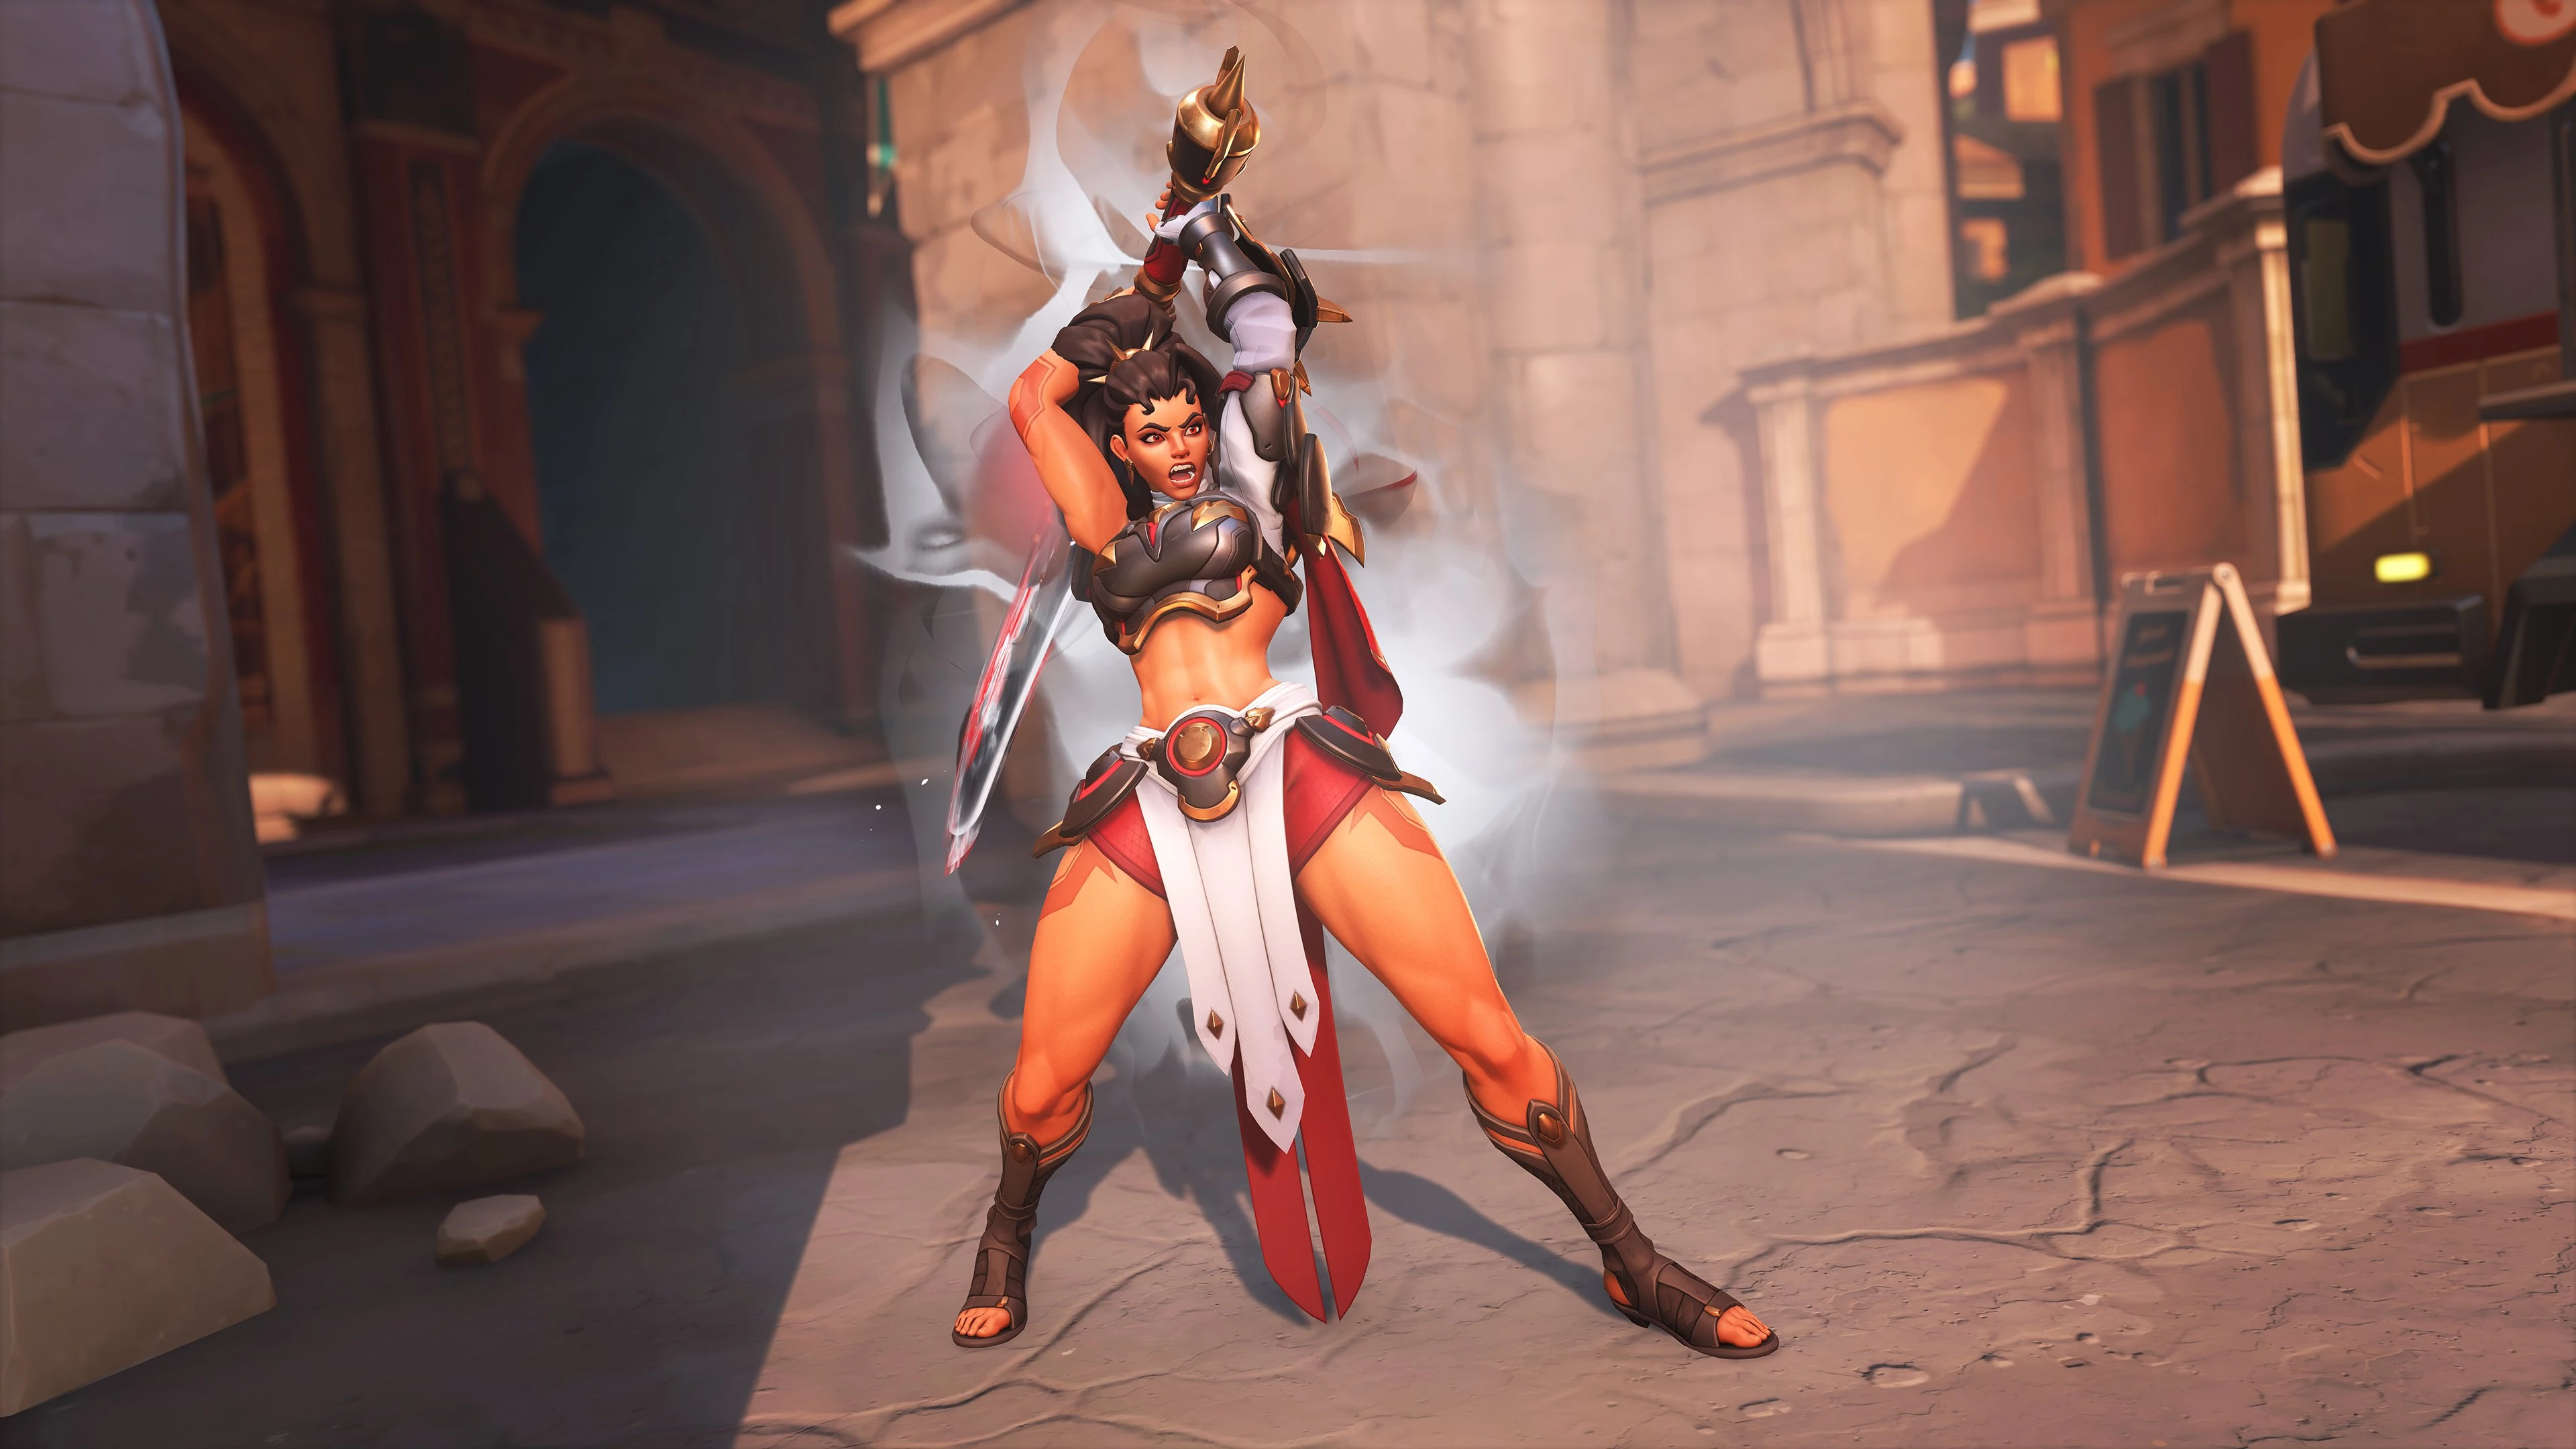
Vendetta is a dive-focused Damage Hero who takes big risks for big rewards. She needs to really commit when she engages, but if you can make the most of her mobility, speed, and unique defensive mechanic, she becomes a terrifying threat to squishy backline heroes.[4][5][6]
Vendetta has a high skill ceiling. Her mobility can also unintentionally be a trap, goading overzealous attackers into jumping directly into the action without an escape plan.[7]
-
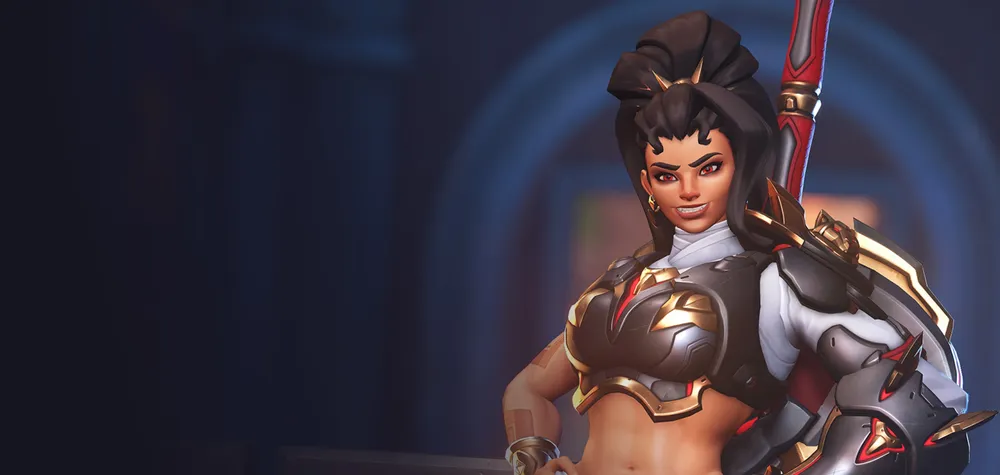
 Key Art
 -
 Menu Screen
-
 3D portrait
 -
 2D portrait

Abilities
Passive Abilities


- Small Health packs restore 150 Hit points, up from 75.
- Large Health packs restore 325 Hit points, up from 250.
- Anran, Genji, and Tracer additionally have a higher base movement speed of 6.0m/s, rather than the normal 5.5m/s.

- Stacks additively, up to 5 times. All stacks are lost at once when the duration expires.
- Activated by Palatine Fang, Projected Edge, Whirlwind Dash, Soaring Slice, Sundering Blade,
 Quick Melee and environmental eliminations.
 - Does not trigger from hitting deployables, including
 B.O.B..
 - Also speeds up the cast time of
 Projected Edge.
 - Unlike
 Energy, Onslaught does not reset to 0 upon death.
  Resurrect restores the number of Onslaught stacks accrued with the remaining time prior to being eliminated. The timer still ticks while not alive.
Weapons


120 (overhead strike)
6.3 meters (overhead critical)
40 m/s (midair overhead plunge)
- Every third swing with the Palatine Fang within the combo threshold will become an Overhead Strike.
- Overhead Strike damage is critical.
- If airborne, including just jumping from the ground, Overhead Strike will cause Vendetta to leap forward about 4.6 meters.
- After the leap, Vendetta will fall with increased gravity.
- If the enemy is airborn when hit with the overhead slash, they will fall with increased gravity.[8]
- Overhead strike can be canceled by using
 Warding Stance.
- Swing timings are as follows:
- 1st swing: 0.4s startup + 0.28s recovery
- 2nd swing: 0.2s startup + 0.3s recovery
- Overhead: 0.64s startup + 0.74s recovery
- All abilities, except Quick Melee, can be used to cancel recovery animation.

9% per second (regen rate)
0.75 seconds (energy regen delay)
- Can block 250 damage maximum, which chunks 62.5hp off your health bar
- Only depletes energy when taking damage, but energy does not regenerate while Warding Stance is up.
- Energy cost is based on the raw damage of the attack, before any damage reductions.
- Must have at least 30% energy remaining to start blocking, however dropping below 30% while already blocking will not end the ability.
- When an instance of damage reduces energy to zero, it will still be reduced in full.
- It takes ~11.1 seconds for Warding Stance to fully recharge.
- The lines in the energy bar correspond to 30% and 60% of max energy.
- Using any abilities, except Quick Melee, will interrupt blocking.
Special Abilities

1.235 meters (outer)
- Causes Vendetta to stop blocking for approximately 1.1 seconds.
 Onslaught speeds up the cast time of Projected Edge.
- The projectile has a 0.2 meter inner radius for collision against barriers and terrain-like deployables, such as
 Tree of Life. If only the outer edge of the projectile hits, it will not be blocked and it damages the deployable.
- Always pierces heroes and other kinds of deployables.
- Recovery time for
 Whirlwind Dash and
  Soaring Slice is lower at 0.25 seconds, instead of the usual 0.35 seconds

4 meters (height)
5.8 m/s (whirlwind)
- The blade spin has a small knockback effect.
- The rush forward has a large narrow knockback effect, similar to being indirectly hit by Reinhardt's
 Charge.
 - The rush always moves horizontally, and Vendetta is not affected by gravity while rushing.
- Stacks additionally with other movement speed buffs. Does not count toward global movement speed cap.
- If Whirlwind Dash collides with
 Rocket Punch,
  Shield Bash, a charging B.O.B., Charge, or another Vendetta using Whirlwind Dash, both participants get knocked down for 1.7 seconds.

12.8 m/s (midair overhead launch)
5 m/s (jump cancel)
- Vendetta respawns with this ability on cooldown.
- The next attack after Soaring Slice and before touching the ground will become an Overhead strike.
- Triggering the Overhead strike allows Vendetta to change directions while midair.
- Cancelling immediately with jump (or aiming at the ground) allows Vendetta to get a free Overhead strike without changing position much, allowing her to combo two Overhead strikes on the same target.
Ultimate Ability

200/100 (direct/indirect stage 2)
400/200 (direct/indirect stage 3)
4 seconds (max)
2.5 meters (direct hit)
- Pierces barriers, ignores damage reduction, destroys overhealth before dealing damage, and deals full damage to Bubbled (
 Particle/Projected Barrier and
  Adaptive Barrier) enemies if the Bubble is destroyed.
 - Deals 50% of deployables' max health as damage, plus the extra damage charged by the ultimate.
- The charge progresses a stage every 1 second, up to stage 3. Each stage increases the damage and area of the slash.
- Once stage 3 has been reached, spending more time charging has no benefit.
- Will automatically fire when 4 seconds have expired.
- Vendetta is not affected by gravity while charging.
- When complete, Vendetta will fall faster than gravity and the cleave will hit the ground.
- Secondary fire provides a small camera angle change.
- Sundering Blade counts as an Overhead Strike for cases like Siphoning Strike that grant lifesteal.
Perks
Minor Perks
A Minor Perk is unlocked at level 2.
- First hit happens after 0.3 second delay and the following two after 0.45 second delay each.
- The spin can be canceled by pressing primary fire.
- Hits from Raging Storm also grant Onslaught stacks.

Major perks
A Major Perk is unlocked at level 3.

- Normal Overhead Strike results in 48 healing without damage modifications.
- Sundering Blade at level 1 results in 20 to 40 healing, at level 2 results in 40 to 80 healing, and at level 3 results in 80 to 160 healing.
- Healing is not reduced by the global healing reduction passive.
Hero-specific options
| Setting name | Options | Description |
|---|---|---|
| Toggle Warding Stance | Off (default) | Warding Stance deactivates when player stops holding the button. |
| On | Warding Stance deactivates when player presses the button again. | |
| Onslaught UI | On (default) | Onslaught stack UI element is displayed below the crosshair. |
| Off | Onslaught stack UI element is hidden. | |
| Sundering Blade Charge Bar UI | On (default) | Sundering Blade UI element is displayed below the crosshair. |
| Off | Sundering Blade UI element is hidden. | |
| Sundering Blade Text | On (default) | Sundering Blade "Fire" and "Swap Shoulder" text are displayed to the left and right of the crosshair respectively. |
| Off | Sundering Blade "Fire" and "Swap Shoulder" text are hidden. |
Strategy
Vendetta is a strong, up-close high-risk high-reward gladiator in battle. Her ![]() Soaring Slice and
Soaring Slice and ![]() Whirlwind Dash provide her with amazing mobility to quickly reposition to close the distance between her and her opponents, while her
Whirlwind Dash provide her with amazing mobility to quickly reposition to close the distance between her and her opponents, while her ![]() Palatine Fang can deal devastating damage once they're in range. Being a melee-based hero makes barriers a trivial obstacle, as they won't block her primary attack, allowing her to cleave opponents hoping to hide behind them. She excels with dive compositions, where her whole team can go in to support her aggressive style to secure eliminations and destroy opponents. Additionally, her
Palatine Fang can deal devastating damage once they're in range. Being a melee-based hero makes barriers a trivial obstacle, as they won't block her primary attack, allowing her to cleave opponents hoping to hide behind them. She excels with dive compositions, where her whole team can go in to support her aggressive style to secure eliminations and destroy opponents. Additionally, her ![]() Warding Stance provides her with immediate survivability to reduce incoming damage and completely negate melee-based attacks from heroes like Reinhardt and Brigitte. Even at a distance, her
Warding Stance provides her with immediate survivability to reduce incoming damage and completely negate melee-based attacks from heroes like Reinhardt and Brigitte. Even at a distance, her ![]() Projected Edge provides her with some source of damage, allowing her to secure eliminations at a distance, build
Projected Edge provides her with some source of damage, allowing her to secure eliminations at a distance, build ![]() Onslaught stacks early in a fight and pierce opponents grouped up.
Onslaught stacks early in a fight and pierce opponents grouped up.
While Vendetta excels at up-close battle, she is especially vulnerable at the middle & long ranged fights. Her only source of long-range damage reduces her block's energy, making her more vulnerable if left in the open. If her opponents can keep a distance from her, they can burst her down before she can eliminate them. And sometimes, even at close-range, she suffers from other close-range burst heroes like Junkrat and Cassidy, who can quickly eliminate her before she has the chance to damage them. Whilst her abilities provide her with excellent mobility to engage and disengage, they make her vulnerable to attacks as they're predictable with the animations. Additionally, her primary attack is a slow animation, requiring her Onslaught passive to have full stacks to be used in somewhat-quick effect.
- General
- Vendetta's primary source of damage will be her primary fire,
 Palatine Fang, but the slow attack speed means if an opponent is low, using a quick melee attack or another ability to finish an opponent may be quicker.
 - Don't feel like you have to engage head-on to opponents. Her amazing mobility means she can flank and dive the opponent's backline, then quickly escape without issue.
- She has 2 great abilities to reposition: to engage or disengage from battle. Her Whirlwind Dash is instant movement, while Soaring Slice has a small animation before moving. As such, using Soaring Slice to engage can deal quick burst damage to opponents, then using Whirlwind Dash to disengage can provide a quick escape.
- Don't forget about Warding Stance. It is your primary source of mitigating damage and can save you from critical damage when up-close to opponents.
- Flying heroes like Pharah may seem like simple counters to Vendetta, but if you can land a Soaring Slice to ground them, their lower health pool can be quickly deleted without much trouble.
- Otherwise, avoid staying in open spaces where they can burst you down from a distance, use natural cover to your advantage.
- Your high damage can quickly burst down Damage and Support heroes, but against Tank's it can take longer. As such, it's suggested you work with another hero to burst down tanks, either to support & heal you as you engage them, or help delete their health more quickly.
- This is also very dependent on the tanks. Roadhog and Junker Queen can quickly eliminate you with their shotguns, but Zarya and Sigma will have to focus on you for longer to finish you off.
- Though, if possible, avoid the tank fights and focus the Support and Damage heroes.
- Onslaught (Passive)
- Vendetta's Onslaught passive triggers from any source of damage she applies, so prior to engaging it may be worth firing a few Projected Edge projectiles or engaging with one of her abilities to start building stacks to more quickly damage opponents.
- Her stacks will last for a few seconds before resetting to 0, so if you secure an elimination it may be worth quickly refocusing on another enemy nearby whilst your stacks are full.
- However, if you're health is at a vulnerable position and you're certain you won't secure the elimination, use the additional movement speed to disengage and escape before they can finish you off.
- You don't gain stacks from attack deployables, so prioritize attacking opponents over barriers or other harmless deployables, as your damage at full stacks will be quick enough to secure the eliminations despite them.
- If there is a Torbjörn or Symmetra Turret damaging you, or Baptiste Immortality Field preventing an opponent from dying, it may be with quickly destroying them before engaging so u can more safely secure eliminations.
- Don't think having full stacks makes you unstoppable. The improved movement speed and attack speed makes you deadly, but does nothing to mitigate incoming damage, so be wary of your situation and escape when necessary.
- The main appeal of her primary attack is her overhead strike that deals devastating damage. This will be the primary source of most of her damage.
- The overhead has decreased range from side-to-side but has further forward range to compensate.
- If airborne during the third strike, even if just jumping, Vendetta will leap forward a little and fall with increased gravity. This can be used to give a little movement boost.
- The first two strikes have a lingering hitbox that can be extended by rotating Vendetta mid-attack, extending the range side-to-side, helping hit multiple opponents in range.
- Prior to fighting an opponent around the corner, you can use both preliminary swings so the first attack against an opponent is the overhead strike for big damage.
- You can cancel the swings at any point by using Warding Stance, which allows you to get the leap from the airborne third strike without performing the strike itself.
- The overhead strike causes mid-air opponents to fall with increased gravity, which has a slight duration that prevents opponents from flying away.
- Warding Stance has no duration so long as you have enough energy, so you can hold it for as long as you want.
- It can be used to cancel most of her animations, helping prevent incoming damage mid-animation.
- Whilst the block's damage reduction is strong, it's energy is limited. It can't block long instances of damage, such as a Pharah's Barrage, but can block instant high damage like D.Va's Self-Destruct or Tracer's Pulse Bomb.
- It reduces Vendetta's movement speed by 30%, so if in a sticky situation it can be better to escape rather than block as it makes you easy to hit.
- This especially applies when fighting heroes with hard Crowd Control abilities like Sleep Dart or Chain Hook, as you can easily be hit by these abilities.
- Projected Edge throws a piercing project that deals decent damage, great to secure eliminations on low opponents running away or even mid-fight while blocking.
- There's a small cast-time animation that causes Vendetta to stop blocking for about a second, which can be deadly in situations.
- It doesn't pierce barriers, and the damage is minor against most barriers, so it's not suggested you use it against opponents hiding behind barriers as it just wastes your Warding Stance energy.
- It's a great way to build Onslaught stacks early on, as it pierces opponents.
- This is Vendetta's longing cooldown, but quickest mobility tool. Once used, it has a near-instant case time, making it great to reposition mid-fight, close the distance easily, or escape without delay.
- It has a straight movement path, making it predictable for opponents to see where you're going.
- The animation stops early if it collides with an opponent or the environment, which can be used to deal guaranteed damage in a fight without making distance between you and your opponent.
- It has the Collide keyword, meaning it can be used to counter-charge other charging opponents like Doomfist and Reinhardt.
- Be wary if using this tactically, as counter-charging near opponents makes you vulnerable, so try wait for when they engage into your team so they can burst the opponent down and keep you safe.
- The movement isn't affected by gravity, making it useful to traverse gaps without falling.
- This is one of Vendetta's greatest engaging tools, as it immediately triggers her overhead strike after travelling to the sword.
- It also allows her to travel diagonally above the opponents to catch them by surpise, and fall directly above them to deal burst damage.
- It can be used on the floor in front of Vendetta to quickly deal the overhead strike.
- After travelling to the blade, before the overhead strike triggers, you can use Whirlwind Dash to reposition further and still have the overhead strike available.
- As it provides vertical mobility, it can be used to dodge ground-based attacks such as Reinhardt's Earthshatter, if timed right.
- It's a great way to reposition mid-air for
 Sundering Blade, as it provides flight once mid-air.
 - The overhead strike from Soaring Slice is only triggered if you use your primary fire. Without pressing it, you'll continue to fall until you hit the ground, which removes the prepared overhead strike.
- If you jump at the right time, you can bunny hop after using Soaring Slice, retaining your overhead strike for a jump or two, especially if you animation cancel with quick melee.
- This is a great, high instant-damage ultimate against any form of block. It deals 'True Damage', ignoring any form of damage mitigation the game provides.
- This is due to the unique Sunder keyword, which renders ultimate's like Lúcio's Sound Barrier and Ana's Nano Boost essentially useless to prevent the damage. It also causes the ultimate to deal
- This ultimate as a fairly thin, but long range, often making it difficult to hit multiple targets spread out.
- Due to the Sunder effect, her ultimate is a great tool to prevent opponents engaging with Sound Barrier or Nano Boost, as it can still eliminate them if they do, assuming they aren't Tank's.
- The ultimate also deals 50% of deployables' max health as damage, making it a great tool to destroy them, such as B.O.B., Tree of Life, or any Barrier.
- Vendetta is extremely vulnerable during the ultimate, with her movement speed drastically reduced, making her an easy target for Sleep Dart or Chain Hook, as well as an easy target to be attacked.
- To avoid this, using Soaring Slice to reposition mid-air for Sundering Blade, as well as using environmental cover, can help protect you while charging the ultimate, then slowly move out of cover once nearly fully charged.
- To avoid this, using
- This ultimate combo's amazingly with other ultimate's that group opponents together, like Zarya's Graviton Surge or Orisa's Terra Surge, as it prevents opponents from escaping.
- Despite the long charging time, it can be worth using the ultimate before it's fully charged if you can secure an elimination at an early charge, as waiting can give opponents opportunities to escape.
- Avoid using her ultimate above environmental gaps, as it causes Vendetta to fall drastically below her, similar to her overhead strike.
Match-Ups and Team Synergy
Tank
| Hero | Match-Up | Team Synergy |
|---|---|---|
 D.Va |
TBA MATCHUP OR PRIORITY | TBA RISK
Matchup details for D.Va are currently missing. You can help the Overwatch Wiki by adding them!
|
TBA SYNERGY
Team synergy details with D.Va are currently missing. You can help the Overwatch Wiki by adding them!
|
 Domina |
TBA MATCHUP OR PRIORITY | TBA RISK
Matchup details for Domina are currently missing. You can help the Overwatch Wiki by adding them!
|
TBA SYNERGY
Team synergy details with Domina are currently missing. You can help the Overwatch Wiki by adding them!
|
 Doomfist |
EVEN MATCHUP | EXTREME RISK
A duel between Vendetta and Doomfist (which is also iconic, being a battle between the former and current leader of Talon) is a highly volatile clash of high-mobility melee attacks. Because both of you excel at fighting up close, engaging him head-on is a massive risk. If your
Do not use |
STRONG SYNERGY
Vendetta and Doomfist form a terrifying, hyper-mobile dive core. Because both of you excel at rapid, high-burst engagements, you can coordinate your
Furthermore, Doomfist's ability to punch enemies into walls or group them up perfectly sets the stage for a devastating |
 Hazard |
TBA MATCHUP OR PRIORITY | TBA RISK
Matchup details for Hazard are currently missing. You can help the Overwatch Wiki by adding them!
|
TBA SYNERGY
Team synergy details with Hazard are currently missing. You can help the Overwatch Wiki by adding them!
|
 Junker Queen |
TBA MATCHUP OR PRIORITY | TBA RISK
Matchup details for Junker Queen are currently missing. You can help the Overwatch Wiki by adding them!
|
TBA SYNERGY
Team synergy details with Junker Queen are currently missing. You can help the Overwatch Wiki by adding them!
|
 Mauga |
TBA MATCHUP OR PRIORITY | TBA RISK
Matchup details for Mauga are currently missing. You can help the Overwatch Wiki by adding them!
|
TBA SYNERGY
Team synergy details with Mauga are currently missing. You can help the Overwatch Wiki by adding them!
|
 Orisa |
TBA MATCHUP OR PRIORITY | TBA RISK
Matchup details for Orisa are currently missing. You can help the Overwatch Wiki by adding them!
|
TBA SYNERGY
Team synergy details with Orisa are currently missing. You can help the Overwatch Wiki by adding them!
|
 Ramattra |
TBA MATCHUP OR PRIORITY | TBA RISK
Matchup details for Ramattra are currently missing. You can help the Overwatch Wiki by adding them!
|
TBA SYNERGY
Team synergy details with Ramattra are currently missing. You can help the Overwatch Wiki by adding them!
|
 Reinhardt |
STRONG MATCHUP | MEDIUM RISK
A frontline brawl against Reinhardt is where Vendetta truly shines. Because
The most important interaction to master is the counter-charge. If Reinhardt attempts to use |
EXCEPTIONAL SYNERGY
Reinhardt and Vendetta are the ultimate brawling duo. With Reinhardt holding the frontline and absorbing the heavy poke damage, Vendetta is free to safely build her
When it's time to engage, you can follow his Charge with your |
 Roadhog |
TBA MATCHUP OR PRIORITY | TBA RISK
Matchup details for Roadhog are currently missing. You can help the Overwatch Wiki by adding them!
|
TBA SYNERGY
Team synergy details with Roadhog are currently missing. You can help the Overwatch Wiki by adding them!
|
 Sigma |
TBA MATCHUP OR PRIORITY | TBA RISK
Matchup details for Sigma are currently missing. You can help the Overwatch Wiki by adding them!
|
TBA SYNERGY
Team synergy details with Sigma are currently missing. You can help the Overwatch Wiki by adding them!
|
 Winston |
TBA MATCHUP OR PRIORITY | TBA RISK
Matchup details for Winston are currently missing. You can help the Overwatch Wiki by adding them!
|
TBA SYNERGY
Team synergy details with Winston are currently missing. You can help the Overwatch Wiki by adding them!
|
 Wrecking Ball |
EVEN MATCHUP | LOW RISK
Wrecking Ball is far too mobile and heavily armored for Vendetta to reliably burst down alone. Chasing him is usually a waste of your cooldowns. However, because you excel at close-quarters combat, you are exceptionally good at peeling him off your vulnerable support line.
If Wrecking Ball uses |
STRONG SYNERGY
Wrecking Ball thrives on causing chaos and displacing the enemy team, which creates the perfect environment for Vendetta to strike. When Wrecking Ball slams the enemy backline, they are momentarily knocked into the air and trapped in predictable arcs—making them incredibly easy targets for your
Because Wrecking Ball does not have a barrier to protect you, this composition requires you to play carefully around natural cover until the exact moment he disrupts the enemy lines. |
 Zarya |
TBA MATCHUP OR PRIORITY | TBA RISK
Matchup details for Zarya are currently missing. You can help the Overwatch Wiki by adding them!
|
TBA SYNERGY
Team synergy details with Zarya are currently missing. You can help the Overwatch Wiki by adding them!
|
Damage
| Hero | Match-Up | Team Synergy |
|---|---|---|
 Anran |
TBA MATCHUP OR PRIORITY | TBA RISK
Matchup details for Anran are currently missing. You can help the Overwatch Wiki by adding them!
|
TBA SYNERGY
Team synergy details with Anran are currently missing. You can help the Overwatch Wiki by adding them!
|
 Ashe |
TBA MATCHUP OR PRIORITY | TBA RISK
Matchup details for Ashe are currently missing. You can help the Overwatch Wiki by adding them!
|
TBA SYNERGY
Team synergy details with Ashe are currently missing. You can help the Overwatch Wiki by adding them!
|
 Bastion |
TBA MATCHUP OR PRIORITY | TBA RISK
Matchup details for Bastion are currently missing. You can help the Overwatch Wiki by adding them!
|
TBA SYNERGY
Team synergy details with Bastion are currently missing. You can help the Overwatch Wiki by adding them!
|
 Cassidy |
MEDIUM PRIORITY TARGET | EXTREME RISK
Cassidy is one of the most dangerous damage heroes for Vendetta to face. His
You must bait out the Flashbang before fully committing. Use |
SITUATIONAL SYNERGY
This synergy is somewhat disjointed. Cassidy prefers to hold angles and protect the backline from flankers, while Vendetta wants to push deep into the enemy territory. However, if Cassidy manages to stick a flanking enemy with his
|
 Echo |
TBA MATCHUP OR PRIORITY | TBA RISK
Matchup details for Echo are currently missing. You can help the Overwatch Wiki by adding them!
|
TBA SYNERGY
Team synergy details with Echo are currently missing. You can help the Overwatch Wiki by adding them!
|
 Emre |
TBA MATCHUP OR PRIORITY | TBA RISK
Matchup details for Emre are currently missing. You can help the Overwatch Wiki by adding them!
|
TBA SYNERGY
Team synergy details with Emre are currently missing. You can help the Overwatch Wiki by adding them!
|
 Freja |
TBA MATCHUP OR PRIORITY | TBA RISK
Matchup details for Freja are currently missing. You can help the Overwatch Wiki by adding them!
|
TBA SYNERGY
Team synergy details with Freja are currently missing. You can help the Overwatch Wiki by adding them!
|
 Genji |
EVEN MATCHUP | MEDIUM -> HIGH RISK
A duel between Genji and Vendetta is a thrilling, high-speed sword fight where Vendetta holds a distinct mechanical advantage: because
Genji's only reliable option is to keep his distance using his superior vertical mobility and poke you with Shurikens, forcing you to drain your |
EXCEPTIONAL SYNERGY
Genji and Vendetta form a hyper-lethal, dual-flanker composition. Because both heroes possess resetting or highly spammable movement abilities, the enemy support line will be completely overwhelmed by the constant, multi-angled pressure.
Coordinating your engagements is key. If Vendetta uses |
 Hanzo |
TBA MATCHUP OR PRIORITY | TBA RISK
Matchup details for Hanzo are currently missing. You can help the Overwatch Wiki by adding them!
|
TBA SYNERGY
Team synergy details with Hanzo are currently missing. You can help the Overwatch Wiki by adding them!
|
 Junkrat |
TBA MATCHUP OR PRIORITY | TBA RISK
Matchup details for Junkrat are currently missing. You can help the Overwatch Wiki by adding them!
|
TBA SYNERGY
Team synergy details with Junkrat are currently missing. You can help the Overwatch Wiki by adding them!
|
 Mei |
TBA MATCHUP OR PRIORITY | TBA RISK
Matchup details for Mei are currently missing. You can help the Overwatch Wiki by adding them!
|
TBA SYNERGY
Team synergy details with Mei are currently missing. You can help the Overwatch Wiki by adding them!
|
 Pharah |
LOW PRIORITY TARGET | HIGH RISK
Pharah is a massive headache for Vendetta. Because you are a melee-focused brawler, Pharah can hover safely out of your reach and constantly bombard you with rockets, forcing you to deplete your
However, if you are skilled enough, you possess one hyper-specific counter to her flight. If you throw your sword into the skybox using |
POOR SYNERGY
Pharah and Vendetta have zero overlapping synergy. Pharah requires a team composition that can play slowly and control sightlines while she pokes from the sky, often requiring a dedicated Mercy pocket. Vendetta requires a team that plays fast, aggressive, and on the ground. Because you operate in completely different spheres of the map, you will rarely be able to assist each other.
|
 Reaper |
TBA MATCHUP OR PRIORITY | TBA RISK
Matchup details for Reaper are currently missing. You can help the Overwatch Wiki by adding them!
|
TBA SYNERGY
Team synergy details with Reaper are currently missing. You can help the Overwatch Wiki by adding them!
|
Shion |
TBA MATCHUP OR PRIORITY | TBA RISK
Matchup details for Shion are currently missing. You can help the Overwatch Wiki by adding them!
|
TBA SYNERGY
Team synergy details with Shion are currently missing. You can help the Overwatch Wiki by adding them!
|
 Sierra |
TBA MATCHUP OR PRIORITY | TBA RISK
Matchup details for Sierra are currently missing. You can help the Overwatch Wiki by adding them!
|
TBA SYNERGY
Team synergy details with Sierra are currently missing. You can help the Overwatch Wiki by adding them!
|
 Sojourn |
TBA MATCHUP OR PRIORITY | TBA RISK
Matchup details for Sojourn are currently missing. You can help the Overwatch Wiki by adding them!
|
TBA SYNERGY
Team synergy details with Sojourn are currently missing. You can help the Overwatch Wiki by adding them!
|
 Soldier: 76 |
TBA MATCHUP OR PRIORITY | TBA RISK
Matchup details for Soldier: 76 are currently missing. You can help the Overwatch Wiki by adding them!
|
TBA SYNERGY
Team synergy details with Soldier: 76 are currently missing. You can help the Overwatch Wiki by adding them!
|
 Sombra |
TBA MATCHUP OR PRIORITY | TBA RISK
Matchup details for Sombra are currently missing. You can help the Overwatch Wiki by adding them!
|
TBA SYNERGY
Team synergy details with Sombra are currently missing. You can help the Overwatch Wiki by adding them!
|
 Symmetra |
TBA MATCHUP OR PRIORITY | TBA RISK
Matchup details for Symmetra are currently missing. You can help the Overwatch Wiki by adding them!
|
TBA SYNERGY
Team synergy details with Symmetra are currently missing. You can help the Overwatch Wiki by adding them!
|
 Torbjörn |
TBA MATCHUP OR PRIORITY | TBA RISK
Matchup details for Torbjörn are currently missing. You can help the Overwatch Wiki by adding them!
|
TBA SYNERGY
Team synergy details with Torbjörn are currently missing. You can help the Overwatch Wiki by adding them!
|
 Tracer |
TBA MATCHUP OR PRIORITY | TBA RISK
Matchup details for Tracer are currently missing. You can help the Overwatch Wiki by adding them!
|
TBA SYNERGY
Team synergy details with Tracer are currently missing. You can help the Overwatch Wiki by adding them!
|
 Vendetta |
MIRROR MATCHUP | EXTREME RISK
A duel between two Vendettas is an explosive, high-speed sword fight where the first player to commit their cooldowns is usually the one who loses. If you initiate with
Because Warding Stance blocks frontal melee damage, circling your opponent and utilizing unpredictable movement is key. Try to hit them with a |
MIRROR SYNERGY
In game modes with no role limits, a double Vendetta composition provides a relentless wave of melee aggression that can easily overwhelm uncoordinated teams. You can constantly chain your
The major flaw of this composition is a complete lack of ranged pressure. If the enemy team runs a heavy poke composition (like Widowmaker, Ashe, or Hanzo) or utilizes flying heroes (Pharah or Echo), both Vendettas will be forced to burn their |
 Venture |
TBA MATCHUP OR PRIORITY | TBA RISK
Matchup details for Venture are currently missing. You can help the Overwatch Wiki by adding them!
|
TBA SYNERGY
Team synergy details with Venture are currently missing. You can help the Overwatch Wiki by adding them!
|
 Widowmaker |
TBA MATCHUP OR PRIORITY | TBA RISK
Matchup details for Widowmaker are currently missing. You can help the Overwatch Wiki by adding them!
|
TBA SYNERGY
Team synergy details with Widowmaker are currently missing. You can help the Overwatch Wiki by adding them!
|
Support
| Hero | Match-Up | Team Synergy |
|---|---|---|
 Ana |
EXTREMELY HIGH PRIORITY TARGET | HIGH RISK
Ana's complete lack of mobility makes her the prime target for your assassinations. A quick
However, Ana possesses the two most dangerous cooldowns in the game for Vendetta: |
EXCEPTIONAL SYNERGY
Ana provides the exact burst healing and utility that Vendetta needs to survive in the enemy backline. Ana can safely heal you from across the map while you dive, and her
The true terror of this composition is the |
 Baptiste |
TBA MATCHUP OR PRIORITY | TBA RISK
Matchup details for Baptiste are currently missing. You can help the Overwatch Wiki by adding them!
|
TBA SYNERGY
Team synergy details with Baptiste are currently missing. You can help the Overwatch Wiki by adding them!
|
 Brigitte |
TBA MATCHUP OR PRIORITY | TBA RISK
Matchup details for Brigitte are currently missing. You can help the Overwatch Wiki by adding them!
|
TBA SYNERGY
Team synergy details with Brigitte are currently missing. You can help the Overwatch Wiki by adding them!
|
 Illari |
TBA MATCHUP OR PRIORITY | TBA RISK
Matchup details for Illari are currently missing. You can help the Overwatch Wiki by adding them!
|
TBA SYNERGY
Team synergy details with Illari are currently missing. You can help the Overwatch Wiki by adding them!
|
 Jetpack Cat |
LOW PRIORITY TARGET | LOW RISK
Jetpack Cat presents a unique problem for Vendetta: she is in permanent flight, completely out of the reach of your grounded
However, if you absolutely must secure a kill on her, you can use |
SITUATIONAL SYNERGY
Jetpack Cat's permanent flight means she cannot easily follow you into tight, enclosed spaces where Vendetta thrives. While her
The one massive benefit of this synergy is |
 Juno |
TBA MATCHUP OR PRIORITY | TBA RISK
Matchup details for Juno are currently missing. You can help the Overwatch Wiki by adding them!
|
TBA SYNERGY
Team synergy details with Juno are currently missing. You can help the Overwatch Wiki by adding them!
|
 Kiriko |
TBA MATCHUP OR PRIORITY | TBA RISK
Matchup details for Kiriko are currently missing. You can help the Overwatch Wiki by adding them!
|
TBA SYNERGY
Team synergy details with Kiriko are currently missing. You can help the Overwatch Wiki by adding them!
|
 Lifeweaver |
TBA MATCHUP OR PRIORITY | TBA RISK
Matchup details for Lifeweaver are currently missing. You can help the Overwatch Wiki by adding them!
|
TBA SYNERGY
Team synergy details with Lifeweaver are currently missing. You can help the Overwatch Wiki by adding them!
|
 Lúcio |
TBA MATCHUP OR PRIORITY | TBA RISK
Matchup details for Lúcio are currently missing. You can help the Overwatch Wiki by adding them!
|
TBA SYNERGY
Team synergy details with Lúcio are currently missing. You can help the Overwatch Wiki by adding them!
|
 Mercy |
TBA MATCHUP OR PRIORITY | TBA RISK
Matchup details for Mercy are currently missing. You can help the Overwatch Wiki by adding them!
|
TBA SYNERGY
Team synergy details with Mercy are currently missing. You can help the Overwatch Wiki by adding them!
|
 Mizuki |
MEDIUM PRIORITY TARGET | HIGH RISK
Mizuki's
If Mizuki uses |
GOOD SYNERGY
Vendetta and Mizuki synergize very well in a highly aggressive brawl or dive composition. Mizuki's
Furthermore, Mizuki's |
 Moira |
TBA MATCHUP OR PRIORITY | TBA RISK
Matchup details for Moira are currently missing. You can help the Overwatch Wiki by adding them!
|
TBA SYNERGY
Team synergy details with Moira are currently missing. You can help the Overwatch Wiki by adding them!
|
 Wuyang |
HIGH PRIORITY TARGET | MEDIUM RISK
Wuyang is highly vulnerable to your aggression if you can bait out his
Wuyang's ultimate, |
GOOD SYNERGY
Wuyang's
Wuyang's |
 Zenyatta |
TBA MATCHUP OR PRIORITY | TBA RISK
Matchup details for Zenyatta are currently missing. You can help the Overwatch Wiki by adding them!
|
TBA SYNERGY
Team synergy details with Zenyatta are currently missing. You can help the Overwatch Wiki by adding them!
|
Map Strategies
Control
| Map | Strategy & Stage Tips |
|---|---|
 Overall Strategy |
TBA RATING | TBA FEATURE
Map strategy details for Overall Strategy are currently missing. You can help the Overwatch Wiki by adding them!
|
 Antarctic Peninsula |
TBA RATING | TBA FEATURE
Map strategy details for Antarctic Peninsula are currently missing. You can help the Overwatch Wiki by adding them! Labs
Strategy details missing.
Sublevel
Strategy details missing.
Icebreaker
Strategy details missing.
|

|
TBA RATING | TBA FEATURE
Map strategy details for Busan are currently missing. You can help the Overwatch Wiki by adding them! Downtown
Strategy details missing.
Sanctuary
Strategy details missing.
MEKA Base
Strategy details missing.
|

|
TBA RATING | TBA FEATURE
Map strategy details for Ilios are currently missing. You can help the Overwatch Wiki by adding them! Lighthouse
Strategy details missing.
Well
Strategy details missing.
Ruins
Strategy details missing.
|

|
TBA RATING | TBA FEATURE
Map strategy details for Lijiang Tower are currently missing. You can help the Overwatch Wiki by adding them! Control Center
Strategy details missing.
Garden
Strategy details missing.
Night Market
Strategy details missing.
|

|
TBA RATING | TBA FEATURE
Map strategy details for Nepal are currently missing. You can help the Overwatch Wiki by adding them! Village
Strategy details missing.
Shrine
Strategy details missing.
Sanctum
Strategy details missing.
|

|
TBA RATING | TBA FEATURE
Map strategy details for Oasis are currently missing. You can help the Overwatch Wiki by adding them! City Center
Strategy details missing.
Gardens
Strategy details missing.
University
Strategy details missing.
|

|
TBA RATING | TBA FEATURE
Map strategy details for Samoa are currently missing. You can help the Overwatch Wiki by adding them! Beach
Strategy details missing.
Downtown
Strategy details missing.
Volcano
Strategy details missing.
|
Escort
| Map | Strategy & Stage Tips |
|---|---|
 Overall Strategy |
TBA RATING | TBA FEATURE
Map strategy details for Overall Strategy are currently missing. You can help the Overwatch Wiki by adding them!
|

|
TBA RATING | TBA FEATURE
Map strategy details for Circuit Royal are currently missing. You can help the Overwatch Wiki by adding them! Attack
Strategy details missing.
Defense
Strategy details missing.
|

|
TBA RATING | TBA FEATURE
Map strategy details for Dorado are currently missing. You can help the Overwatch Wiki by adding them! Attack
Strategy details missing.
Defense
Strategy details missing.
|

|
TBA RATING | TBA FEATURE
Map strategy details for Havana are currently missing. You can help the Overwatch Wiki by adding them! Attack
Strategy details missing.
Defense
Strategy details missing.
|

|
TBA RATING | TBA FEATURE
Map strategy details for Junkertown are currently missing. You can help the Overwatch Wiki by adding them! Attack
Strategy details missing.
Defense
Strategy details missing.
|

|
TBA RATING | TBA FEATURE
Map strategy details for Rialto are currently missing. You can help the Overwatch Wiki by adding them! Attack
Strategy details missing.
Defense
Strategy details missing.
|

|
TBA RATING | TBA FEATURE
Map strategy details for Route 66 are currently missing. You can help the Overwatch Wiki by adding them! Attack
Strategy details missing.
Defense
Strategy details missing.
|

|
TBA RATING | TBA FEATURE
Map strategy details for Shambali Monastery are currently missing. You can help the Overwatch Wiki by adding them! Attack
Strategy details missing.
Defense
Strategy details missing.
|

|
TBA RATING | TBA FEATURE
Map strategy details for Watchpoint: Gibraltar are currently missing. You can help the Overwatch Wiki by adding them! Attack
Strategy details missing.
Defense
Strategy details missing.
|
Hybrid
| Map | Strategy & Stage Tips |
|---|---|
 Overall Strategy |
TBA RATING | TBA FEATURE
Map strategy details for Overall Strategy are currently missing. You can help the Overwatch Wiki by adding them!
|
 Blizzard World |
TBA RATING | TBA FEATURE
Map strategy details for Blizzard World are currently missing. You can help the Overwatch Wiki by adding them! Attack
Strategy details missing.
Defense
Strategy details missing.
|

|
TBA RATING | TBA FEATURE
Map strategy details for Eichenwalde are currently missing. You can help the Overwatch Wiki by adding them! Attack
Strategy details missing.
Defense
Strategy details missing.
|

|
TBA RATING | TBA FEATURE
Map strategy details for Hollywood are currently missing. You can help the Overwatch Wiki by adding them! Attack
Strategy details missing.
Defense
Strategy details missing.
|

|
TBA RATING | TBA FEATURE
Map strategy details for King's Row are currently missing. You can help the Overwatch Wiki by adding them! Attack
Strategy details missing.
Defense
Strategy details missing.
|

|
TBA RATING | TBA FEATURE
Map strategy details for Midtown are currently missing. You can help the Overwatch Wiki by adding them! Attack
Strategy details missing.
Defense
Strategy details missing.
|
 Numbani |
TBA RATING | TBA FEATURE
Map strategy details for Numbani are currently missing. You can help the Overwatch Wiki by adding them! Attack
Strategy details missing.
Defense
Strategy details missing.
|

|
TBA RATING | TBA FEATURE
Map strategy details for Paraíso are currently missing. You can help the Overwatch Wiki by adding them! Attack
Strategy details missing.
Defense
Strategy details missing.
|
Push
| Map | Strategy & Stage Tips |
|---|---|
 Overall Strategy |
TBA RATING | TBA FEATURE
Map strategy details for Overall Strategy are currently missing. You can help the Overwatch Wiki by adding them!
|

|
TBA RATING | TBA FEATURE
Map strategy details for Colosseo are currently missing. You can help the Overwatch Wiki by adding them! Pushing
Strategy details missing.
Defending
Strategy details missing.
|

|
TBA RATING | TBA FEATURE
Map strategy details for Esperança are currently missing. You can help the Overwatch Wiki by adding them! Pushing
Strategy details missing.
Defending
Strategy details missing.
|

|
TBA RATING | TBA FEATURE
Map strategy details for New Queen Street are currently missing. You can help the Overwatch Wiki by adding them! Pushing
Strategy details missing.
Defending
Strategy details missing.
|

|
TBA RATING | TBA FEATURE
Map strategy details for Runasapi are currently missing. You can help the Overwatch Wiki by adding them! Pushing
Strategy details missing.
Defending
Strategy details missing.
|
Flashpoint
| Map | Strategy & Stage Tips |
|---|---|
 Overall Strategy |
TBA RATING | TBA FEATURE
Map strategy details for Overall Strategy are currently missing. You can help the Overwatch Wiki by adding them!
|

|
TBA RATING | TBA FEATURE
Map strategy details for Aatlis are currently missing. You can help the Overwatch Wiki by adding them! Station
Strategy details missing.
Garden
Strategy details missing.
Town Center
Strategy details missing.
Bazaar
Strategy details missing.
Resort
Strategy details missing.
|

|
TBA RATING | TBA FEATURE
Map strategy details for New Junk City are currently missing. You can help the Overwatch Wiki by adding them! Arena
Strategy details missing.
The Ducts
Strategy details missing.
Refinery
Strategy details missing.
Junkyard
Strategy details missing.
Bomb Flats
Strategy details missing.
|

|
TBA RATING | TBA FEATURE
Map strategy details for Suravasa are currently missing. You can help the Overwatch Wiki by adding them! Market
Strategy details missing.
Garden
Strategy details missing.
Palace
Strategy details missing.
Temple
Strategy details missing.
Ruins
Strategy details missing.
|
Achievements
| Name | Icon | Description | Reward |
|---|---|---|---|
|
|
Kill 3 enemies with a single use of Sundering Blade in Quick or Competitive Play. |  | |
|
|
Have 5 stacks of Onslaught for 30 seconds in a row. |  |
Trivia
- A recurring motif for Vendetta is being underestimated.[3]
- According to Jude Stacey, Vendetta is explicitly a villain within the context of the Overwatch storyline.[3]
- Vendetta's voice actor Chiara Preziosi also voices her in the Italian dubbing.
- In addition to her English lines, Vendetta speaks both Latin and Italian. Some of the Latin phrases are taken verbatim from the Roman Empire.[9]
- In a promotional email for Vendetta, she was stated to have been thrown into the fighting pits of Colosseo.[10]
- La Lupa is her favorite animal.[11]
- She is the fourth trilingual hero in Overwatch (after Baptiste, Kiriko and Illari and before Domina and Emre), speaking English, Italian and Latin.
Cultural References
- Vendetta's title of "She-Wolf" is a reference to the wolf that raised the mythological founders of Rome, Romulus and Remus.[3]
- She Wolf is a 2009 song by Shakira. Vendetta's title was seen by some as a reference to the song.[12]
- Vendetta's sandals feature paw prints, harkening back to the wolf that raised Romulus and Remus.[9]
- When using her ultimate, Vendetta's eyes glow red. This is another wolf reference.[9]
- Vendetta's skin recolors are named after Roman building materials.[9]
- Vendetta's name, Marzia, is possibly derived from Mars, the Roman god of war.
Development
Vendetta's name, look, voice, and some story elements were revealed on November 17, 2025.[13] Many Roman Empire references were incorporated into her appearance and abilities.[9]
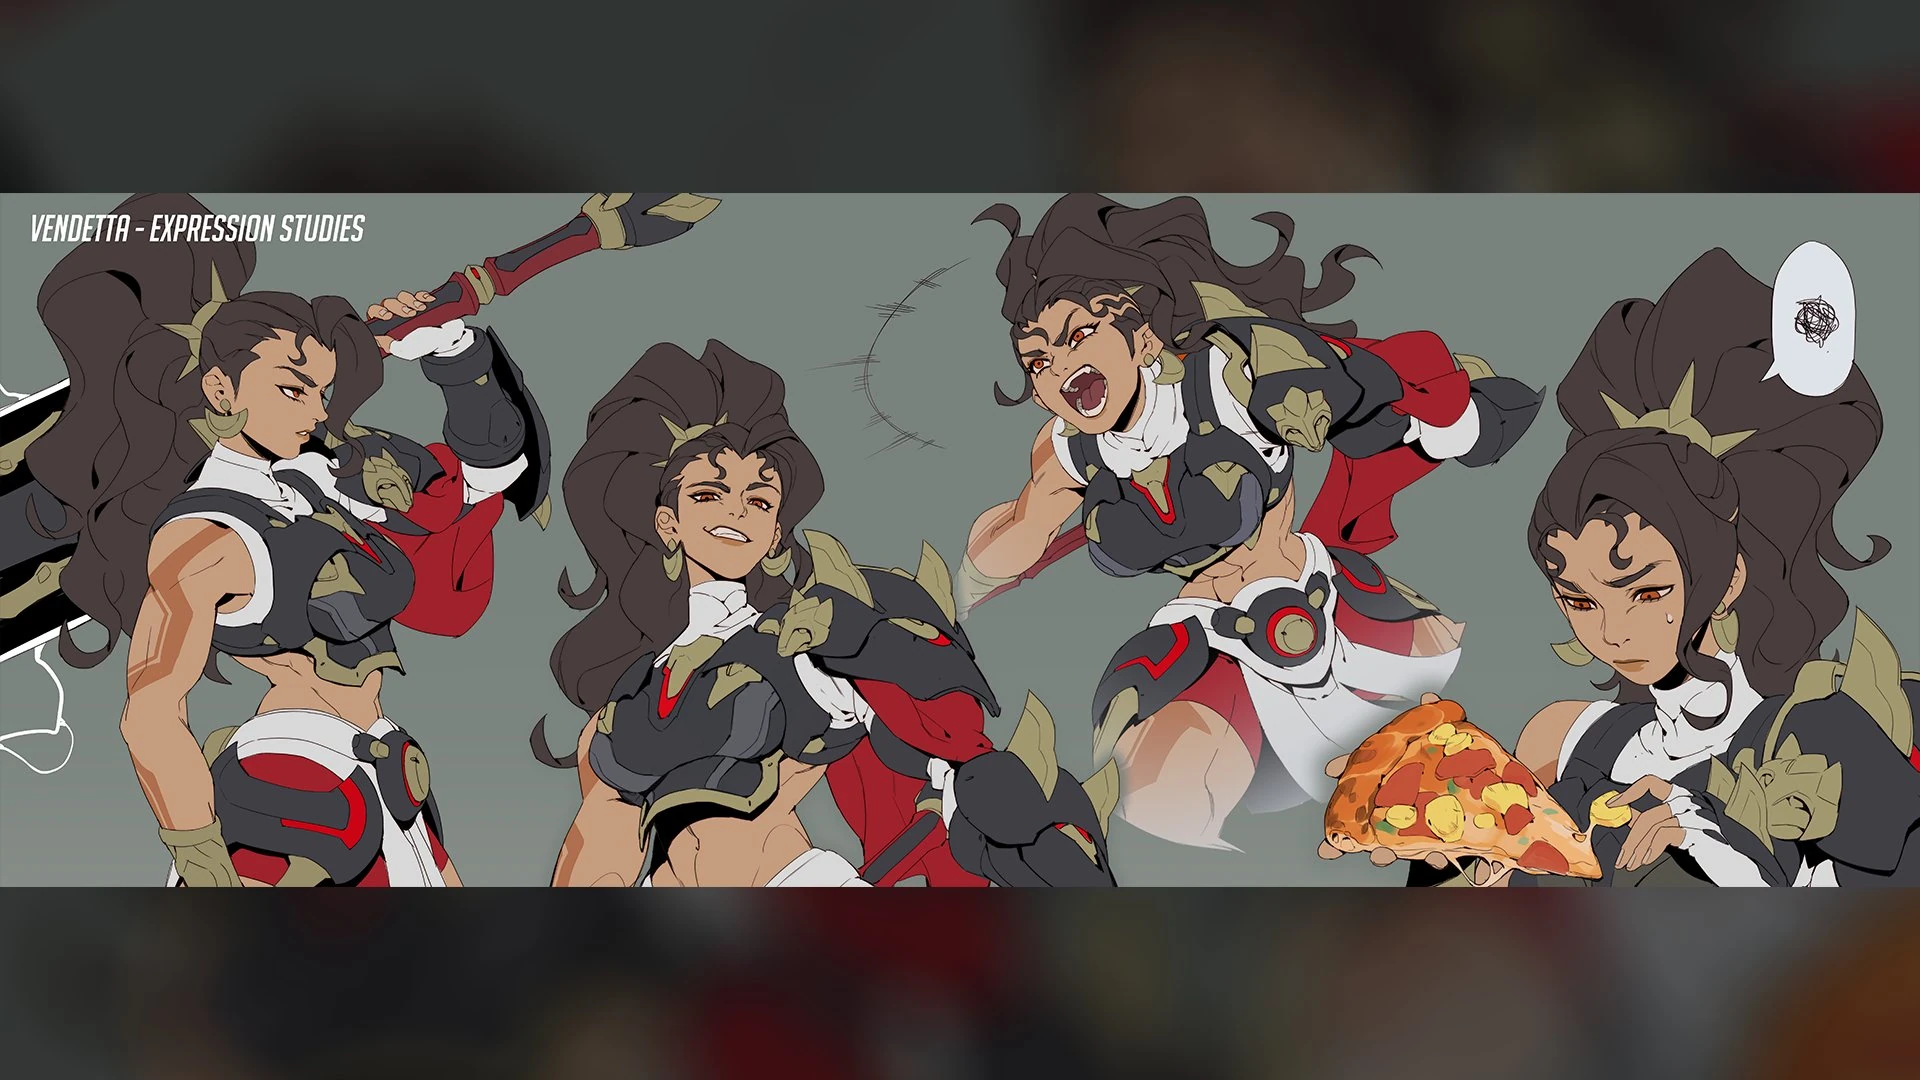
Character Development
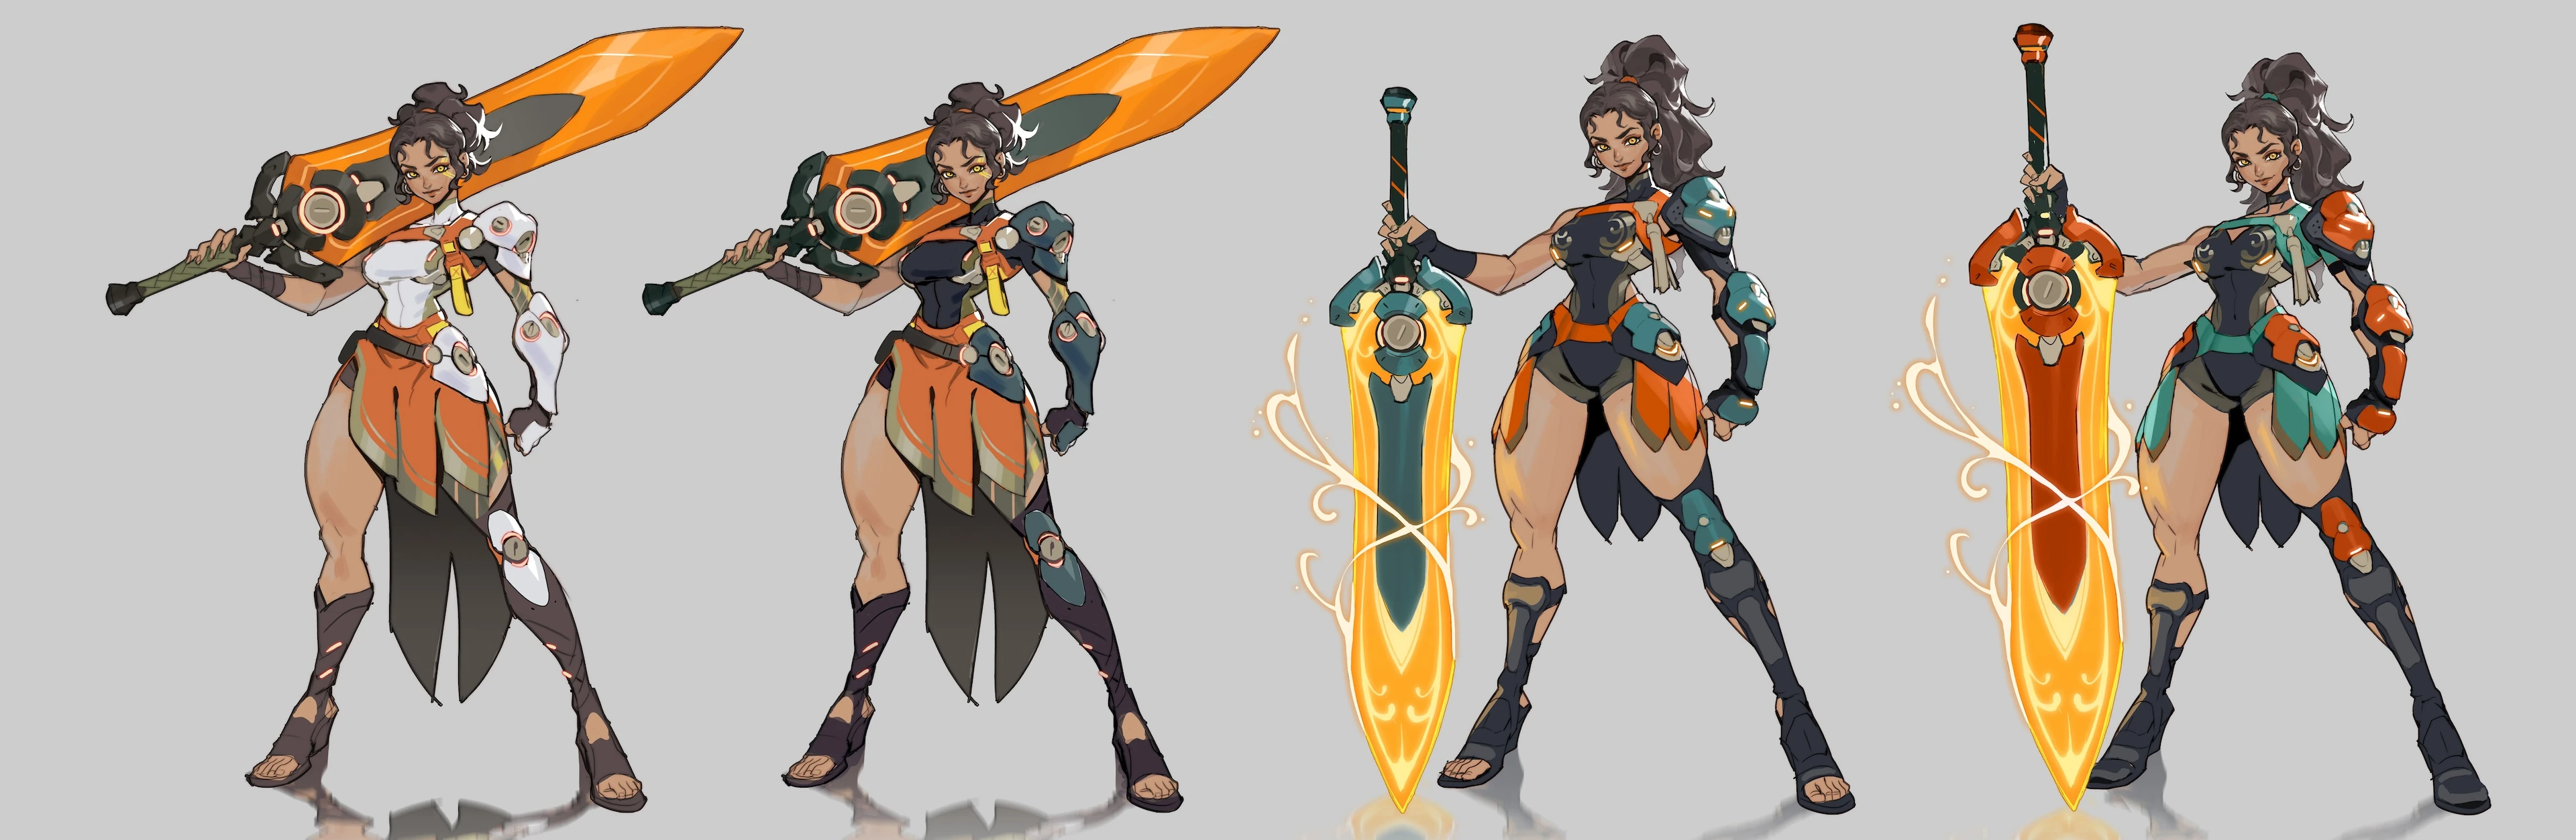
Early concept art
When designing Vendetta, Team 4 had a choice of making her a protagonist or antagonist. One iteration of Vendetta painted her as a gladiator who defended Italian citizens during Null Sector's attacks. However, it was chosen to make her a villain. Jude Stacey took point in developing Vendetta's story after this choice, as in her words, "it's [making her a villain] way cooler."[3] She pitched Vendetta as being "a true villain."[1] Part of the rationale was that it had been awhile since a villain hero had been introduced. Stacey developed Vendetta's personality, and in her words, "There was no waffling or trying to convince people she’s evil. It just flowed." Although Vendetta was written to be explicitly a villain, she was written to be able to have players see themselves in her actions and narrative.[3]
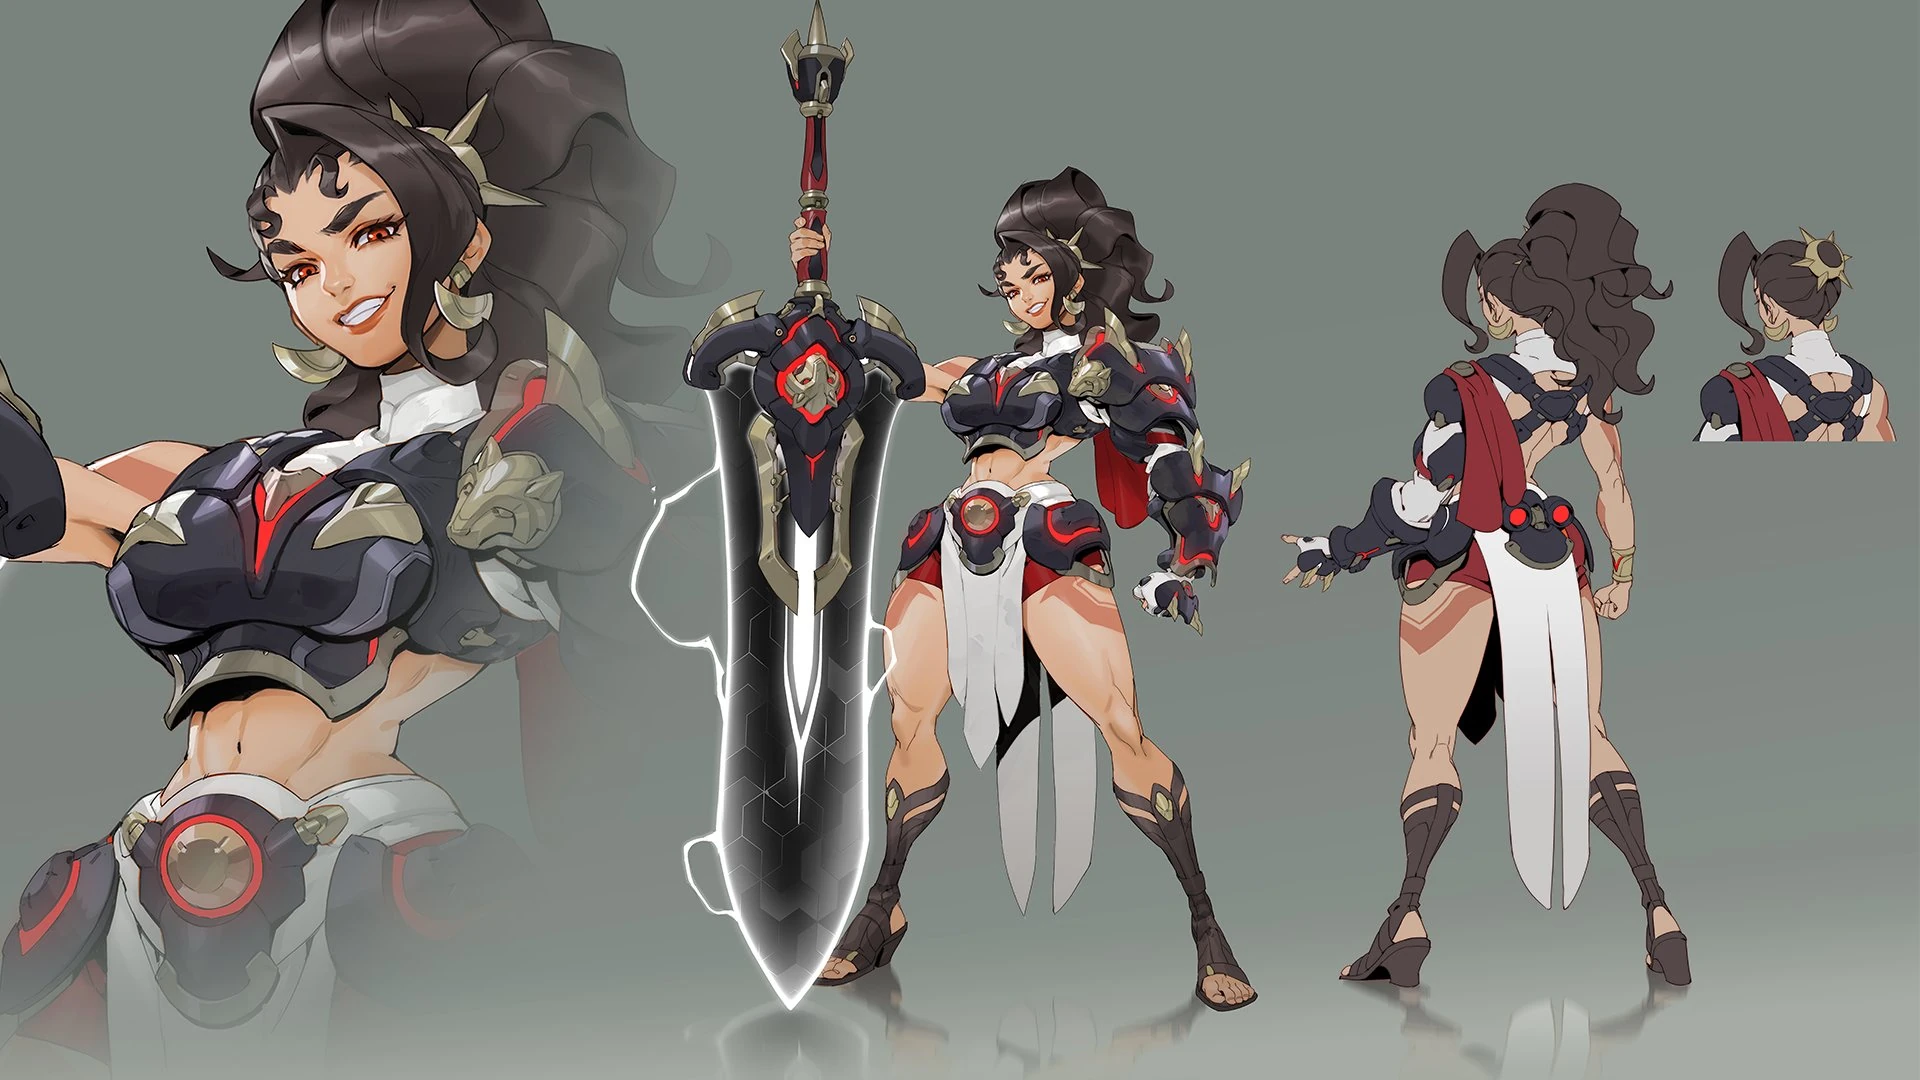
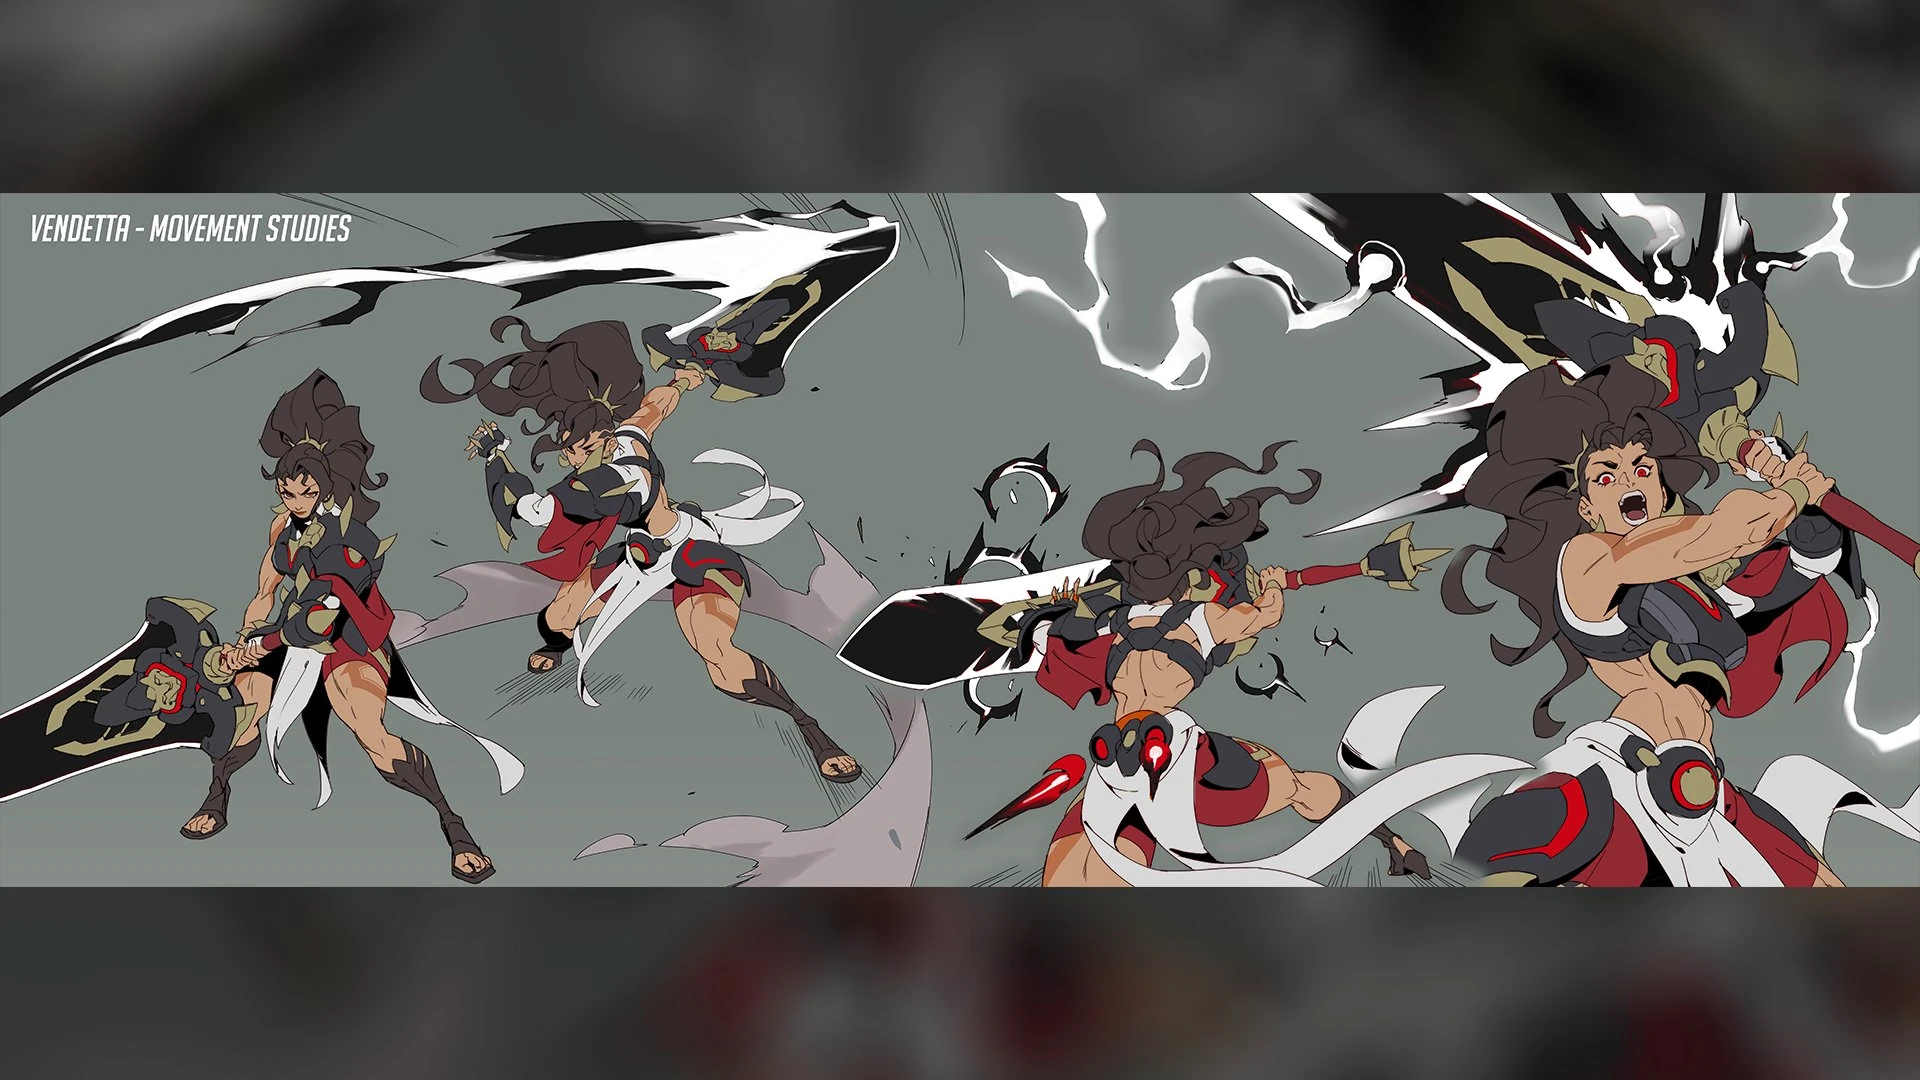
Concept art
Stacey was given free reign to shape Vendetta's character and backstory.[14] She wanted Vendetta to have rage, ambition, absolute belief in the strength and value of herself above all others. While these are common villain traits, Stacey felt they were under-represented in female antagonists, for whom such emotions were treated as weaknesses. She designed Vendetta to be a character for whom hatred and pain is empowering, and to be a villain who people would "love to hate." She set out guidelines for writers to use when writing for the character. These rules were as follows:[1]
- Vendetta does not ask questions, but demands answers
- She does not allow interruptions, and rarely cuts herself short
- All of her dialogue is spoken as if addressing an audience[1]
Concept art
When developing Vendetta's backstory, Stacey was instructed to harken back to earlier Overwatch lore; good vs. evil, heroes vs. villains, etc. She took inspiration from the events of Retribution, and the development of her backstory followed. As her backstory was developed further, she became a greater threat over time, going from gladiator, to someone who had what it took to challenge Talon.[1]
The developers knew they wanted to create a sturdy hero, and looked at art of crusaders, gladiators, and other heavy-hitter concepts to guide them. Three entirely different prototypes were made for the hero that would later become Vendetta. One was a long-range hitscan, another was a midrange assassin, and the last was a close-range melee DPS hero. The melee version was deemed the most compelling, and it offered the clearest potential for Team 4 to do something they'd been craving for a long time; to make a hero that swung a really big sword. In this context, the developers derived inspiration from various pieces of fiction, from old-school video game franchises to anime classics starring heroes who wield massive weapons.[3]
Concept art
For years prior to the development of Vendetta, Team 4's narrative team had been asked to create a hero with Italian roots. Vendetta offered the chance to capitalize on that request while fleshing out what the world looks like in the late 21st century. While the Italy of this period had been glimpsed at through maps such as Colosseo and Arena Victoriae, Vendetta's story will delve into "the nitty gritty" of the country. When designing her, the narrative team took inspiration from the opulence, glory, and dominance of the Roman Empire (with help from the Italian localization team) to flesh out everything from her weaponry to her voice lines. Various voice lines were created in sync with the Italian localization team for authenticity.[3]
When auditioning for Vendetta, the following casting monologue was used:
Earning the title of champion might be enough for a man, but a wolf cannot fill its body with accolades. Know that our battle tonight is the first of many, and that my victory foreshadows a greater conquest. There will be war in our lifetime, and I will not rest until I have seen it through.[1]
Gameplay Development
While Vendetta's early design was akin to a crusader in heavy armor, her design was shifted to a more recognizable silhouette. This change motivated Team 4 to design a hero that would combine agility with heavy-hitting melee damage. While other melee heroes already existed in the game such as Reinhardt and Brigitte, Vendetta was designed to have more aggression in her combat style.[3]
Prior to official confirmation, Vendetta was known as "XLV" from a poster in Colosseo. Various hints pointed to XLV being "Hero 45":
- XLV is "45" in Roman numerals. This was very likely a hint towards the individual the poster was referring to being Hero 45, as at the time of the poster's reveal on the Arena Victoriae map, up to 44 heroes had either been released or revealed in Overwatch 2.
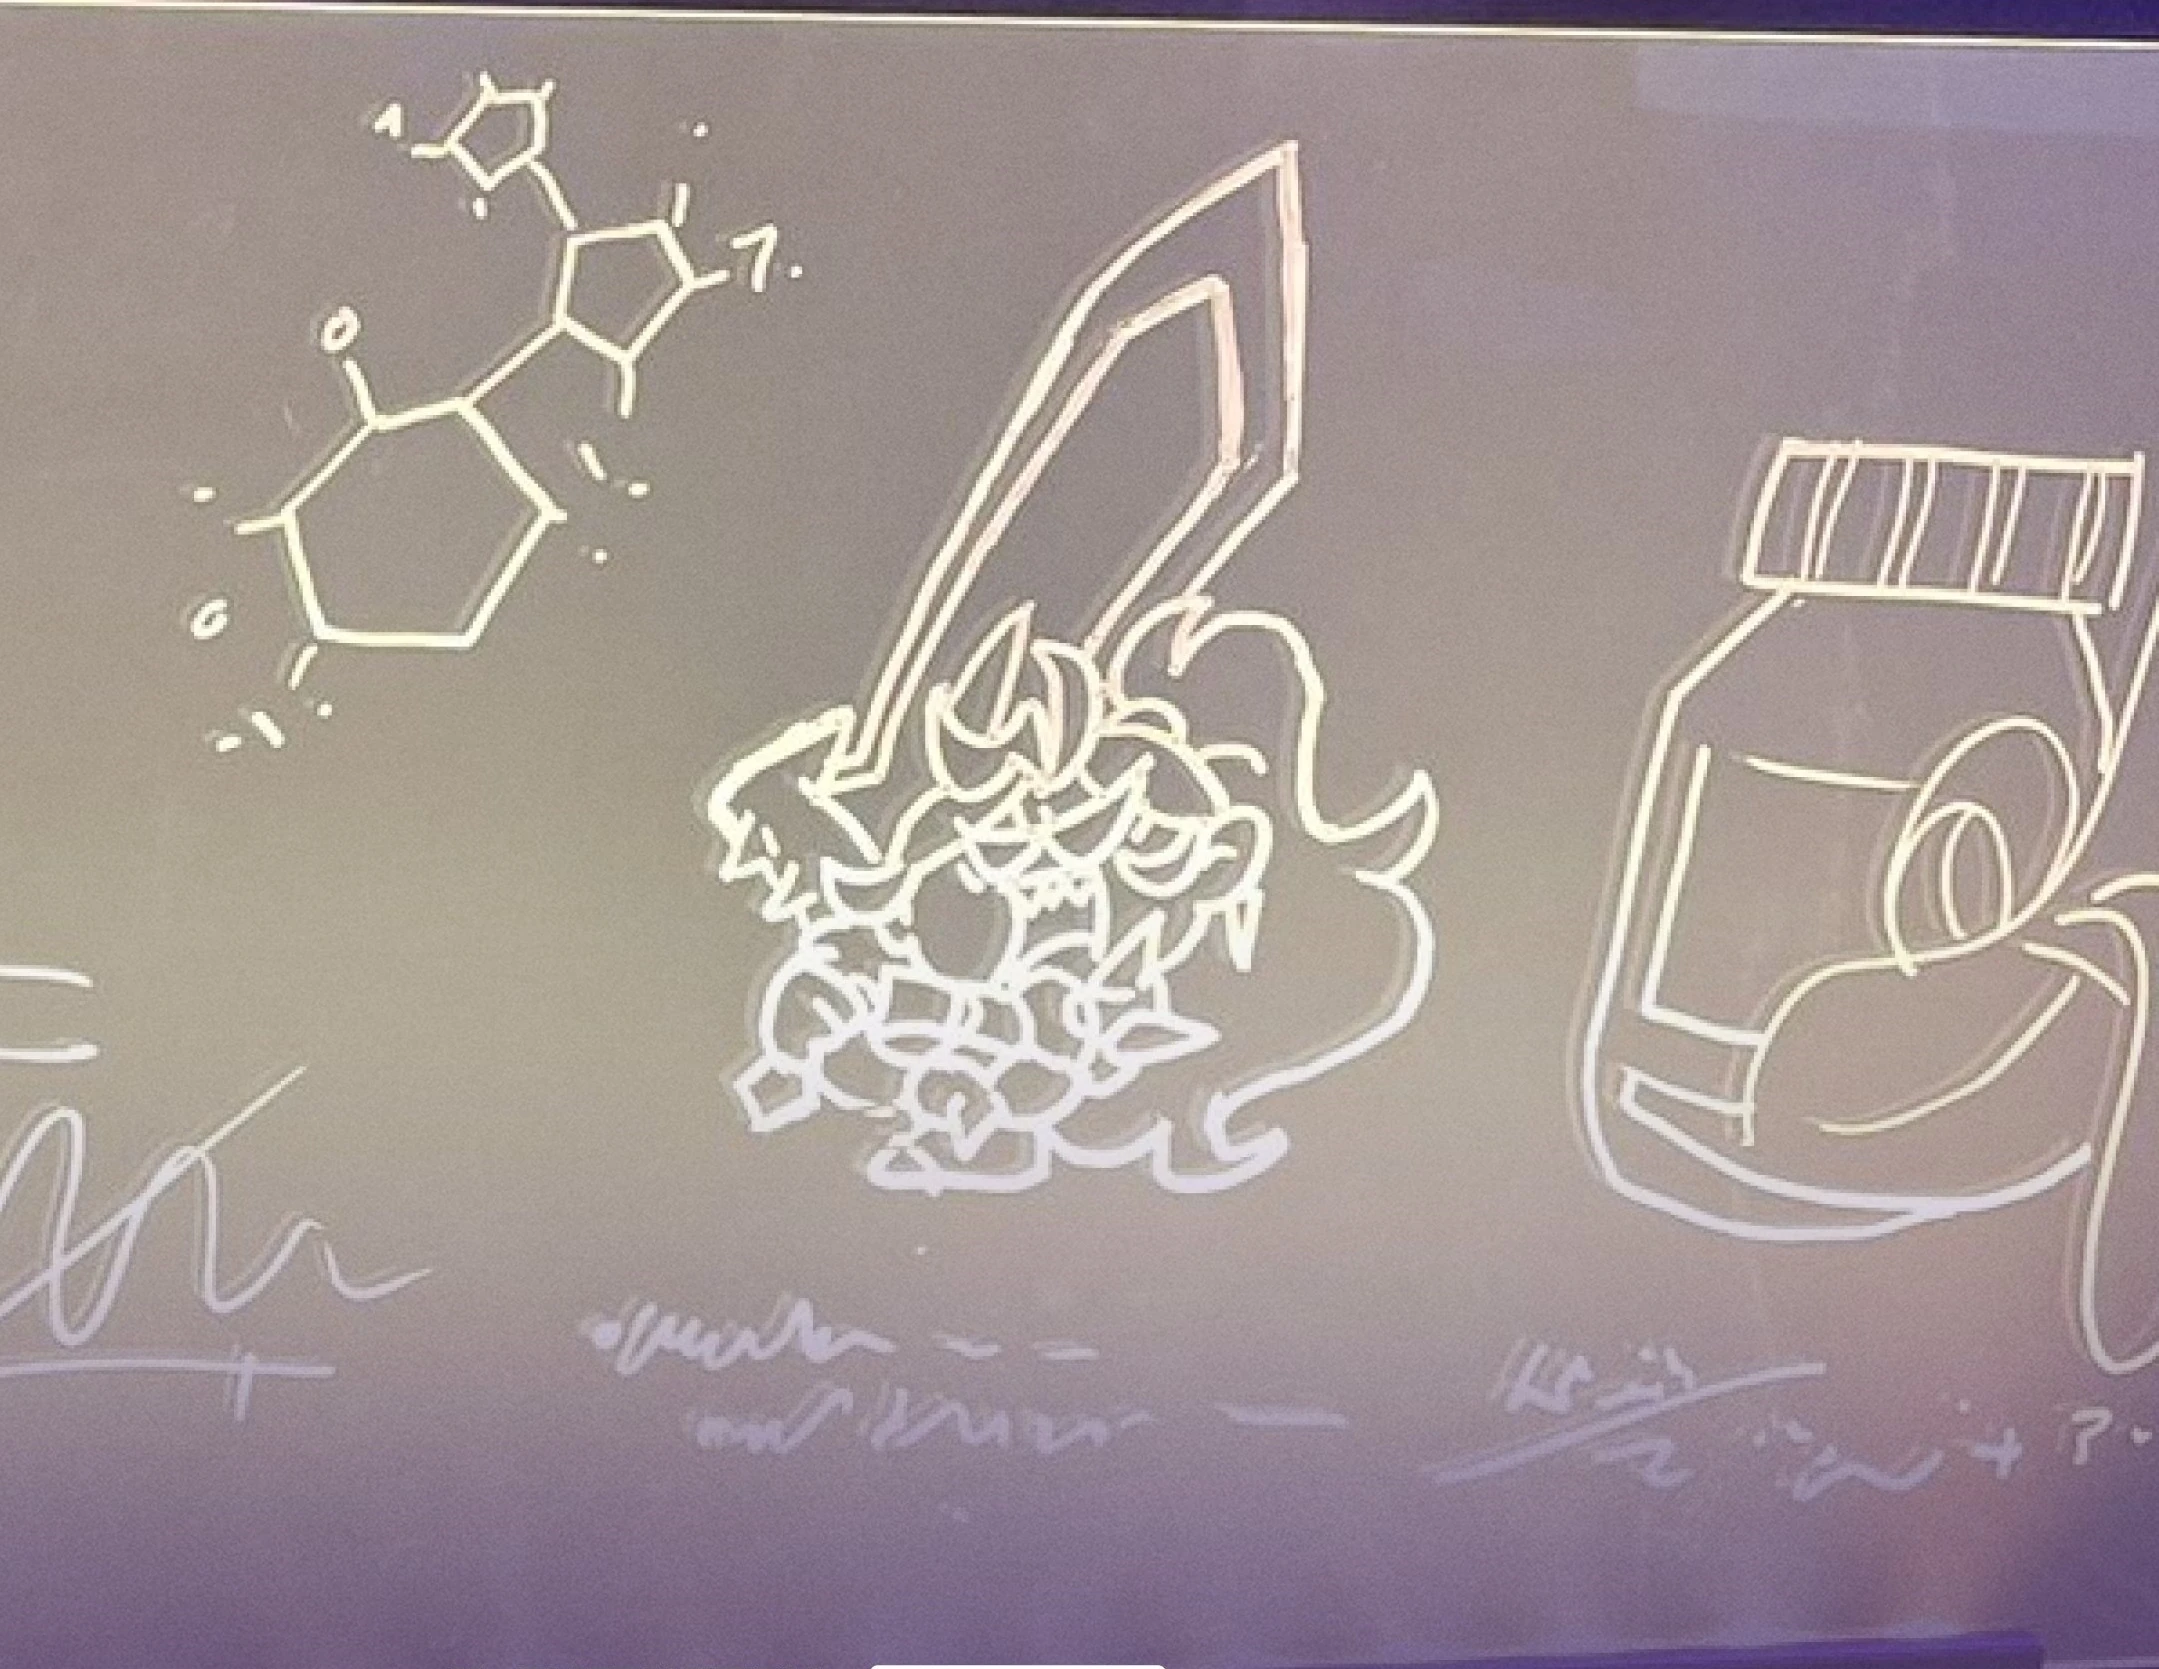
- When Freja and Wuyang were teased, fans noticed a doodle of an angry female knight holding a massive sword, which perked the entire community up.[12] While Vendetta hasn't been depicted with a shield, her sword can be found on display in the Arena Victoriae map.[15]
- Aaron Keller has hinted that Hero 45 was teased in the aforementioned teaser. During a stream, Keller confirmed that Team 4 was considering a "giant sword hero."[16]
- For April Fools 2025, a line of Brigitte's bio was changed to "gladiators gonna gladiate." This was seen by some as a possible hint of a gladiator-themed hero.[12]

The silhouette
- In Reconciliation, a silhouette appears in the comic that appears to be Vendetta. The comic indicates she has a history with Talon, with the quote "Talon's problems will become the world's problems."
- Two Streamer Mode names, VIVALALUPA and xXLaCaMpIoNeSsAXx are likely references to Vendetta, as she seems to be based on the Roman myth La Lupa and is a female champion (campionessa in Italian).
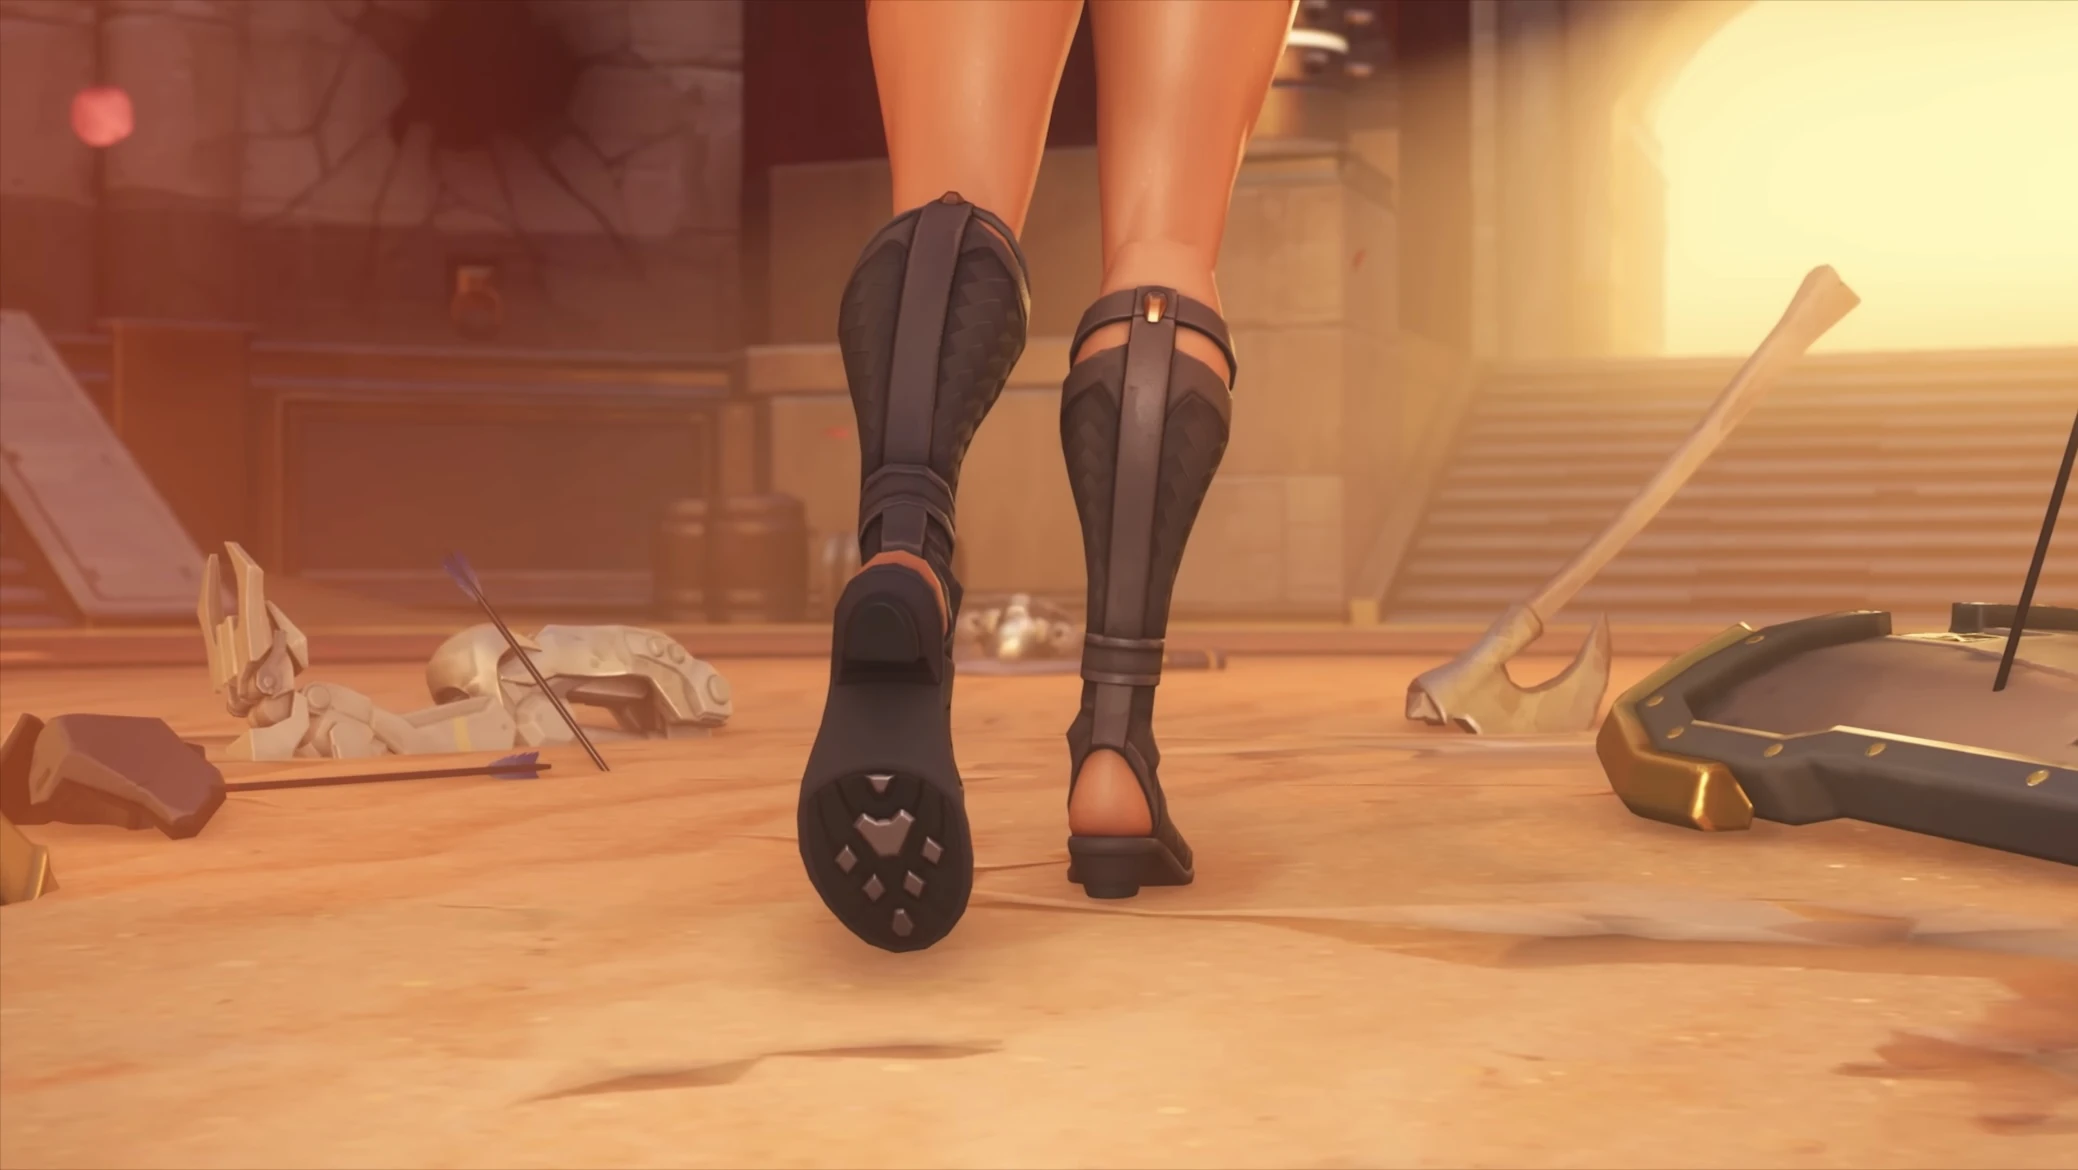
Vendetta walking in Arena Victoriae, where the statue of Magnus, “the eternal champion” once was
- The season 19 launch trailer included a teaser at the end. The teaser showed a woman (now confirmed to be Vendetta) walking in Arena Victoriae who then said "Ready yourselves for war!".[17]
- The developer update released shortly after the launch trailer had a section where the developers talked about the next hero. Not much was revealed, but there was the text "Redatta" (Italian for redacted) on the center of the screen.[18]
- A hidden Lupa mask appeared in the Haunted Masquerade game mode.
Removed abilities
- Overhealth decays over 6 seconds at the end of the duration.
- Removed in Season 1: Conquest
Media
Images
- Hero Teasers
-
 The 'knight doodle'
 -
 Her emblem
 -
 Vendetta’s Lupa mask in the Haunted Masquerade game mode


- Gameplay Screenshots
- Concept Art
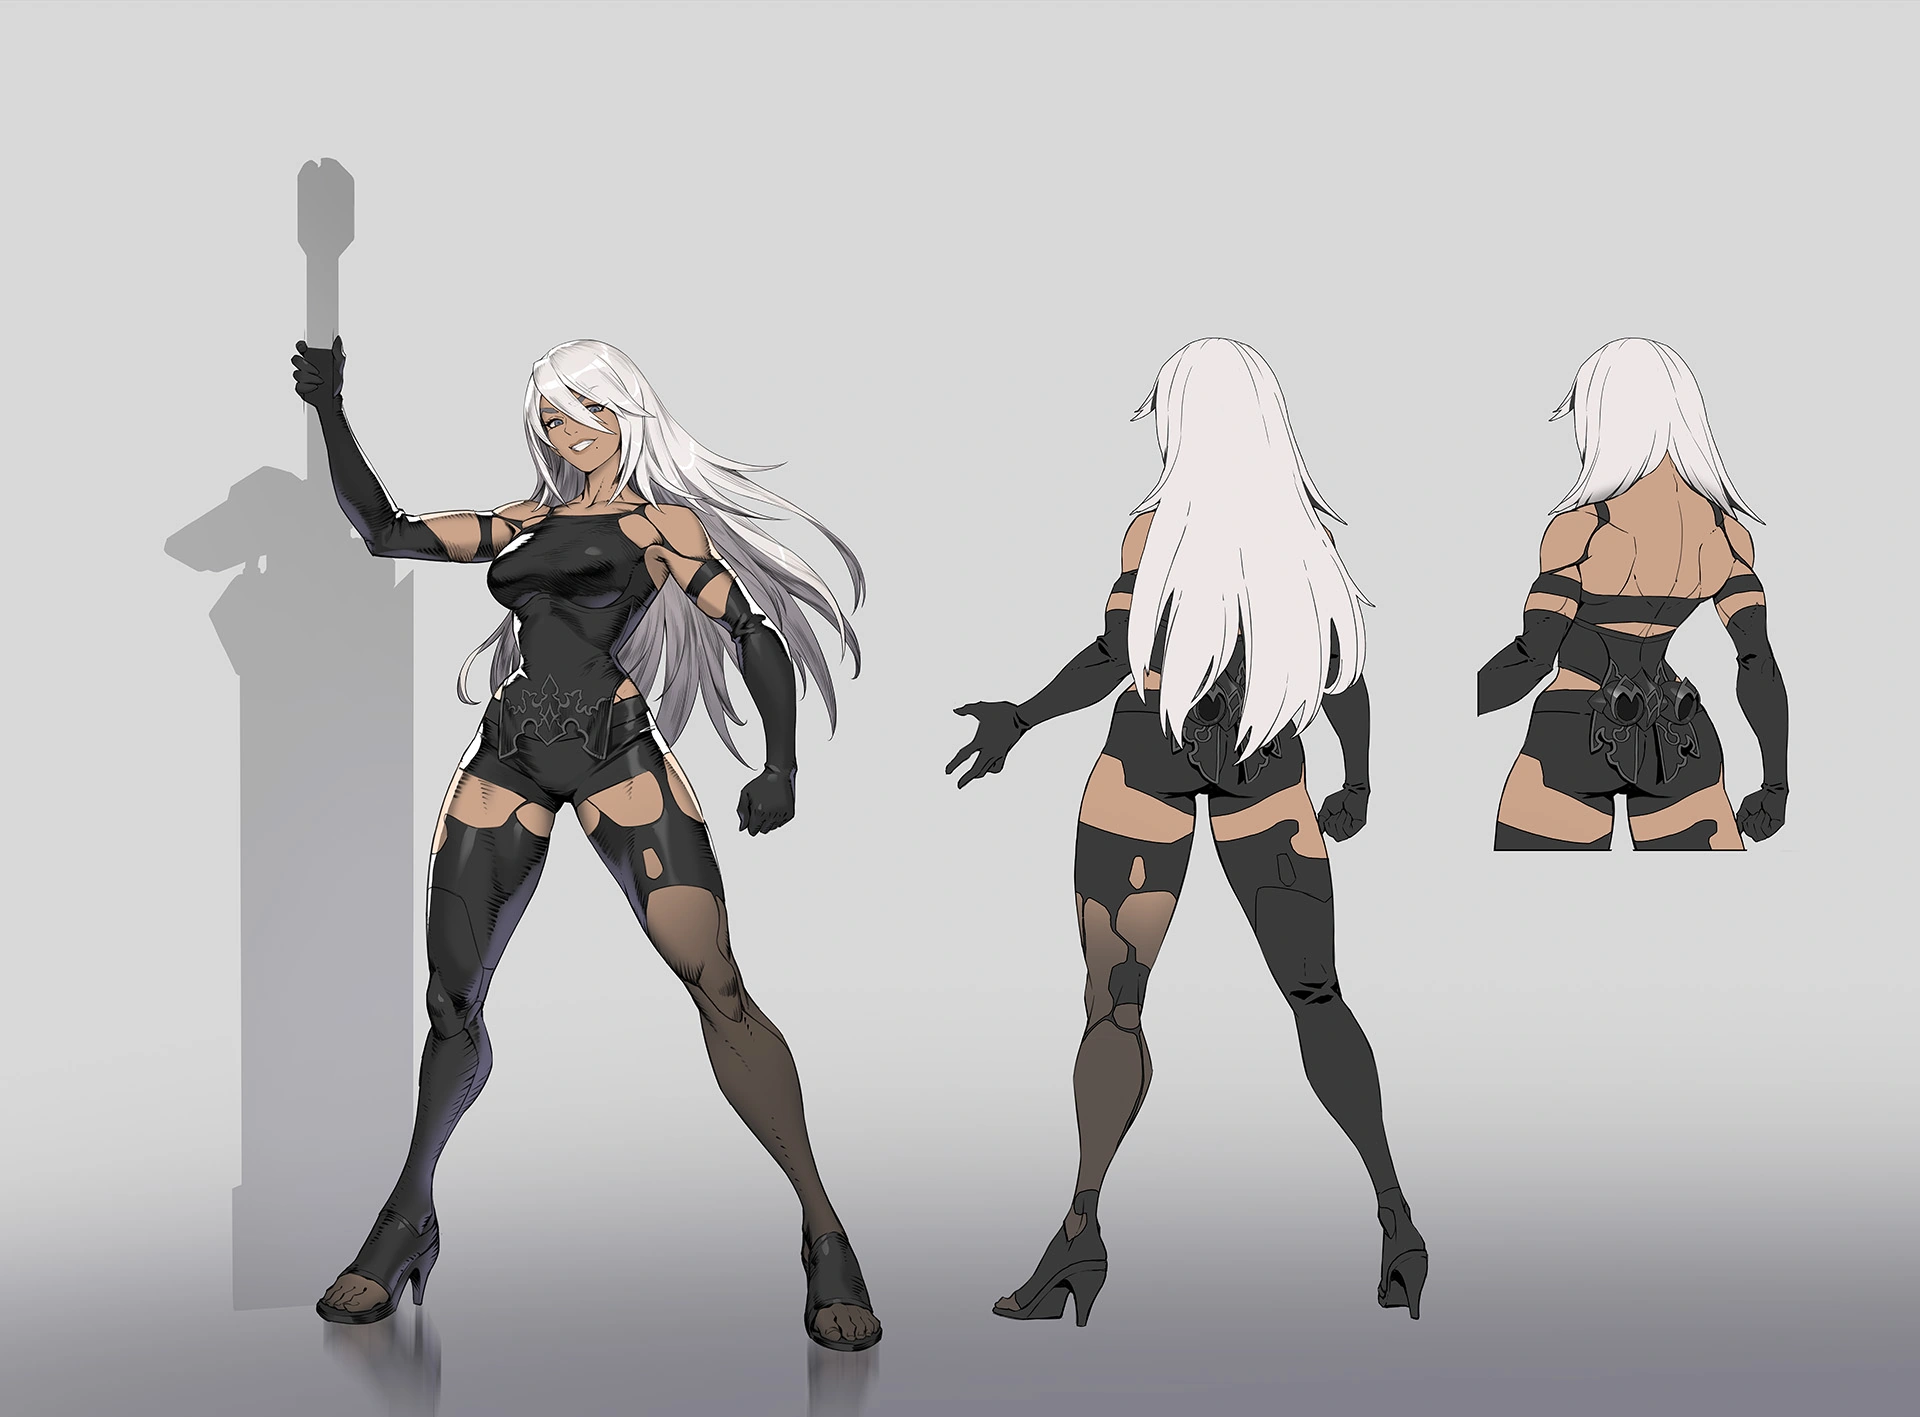
-
 Vendetta A2 Skin Concept Art
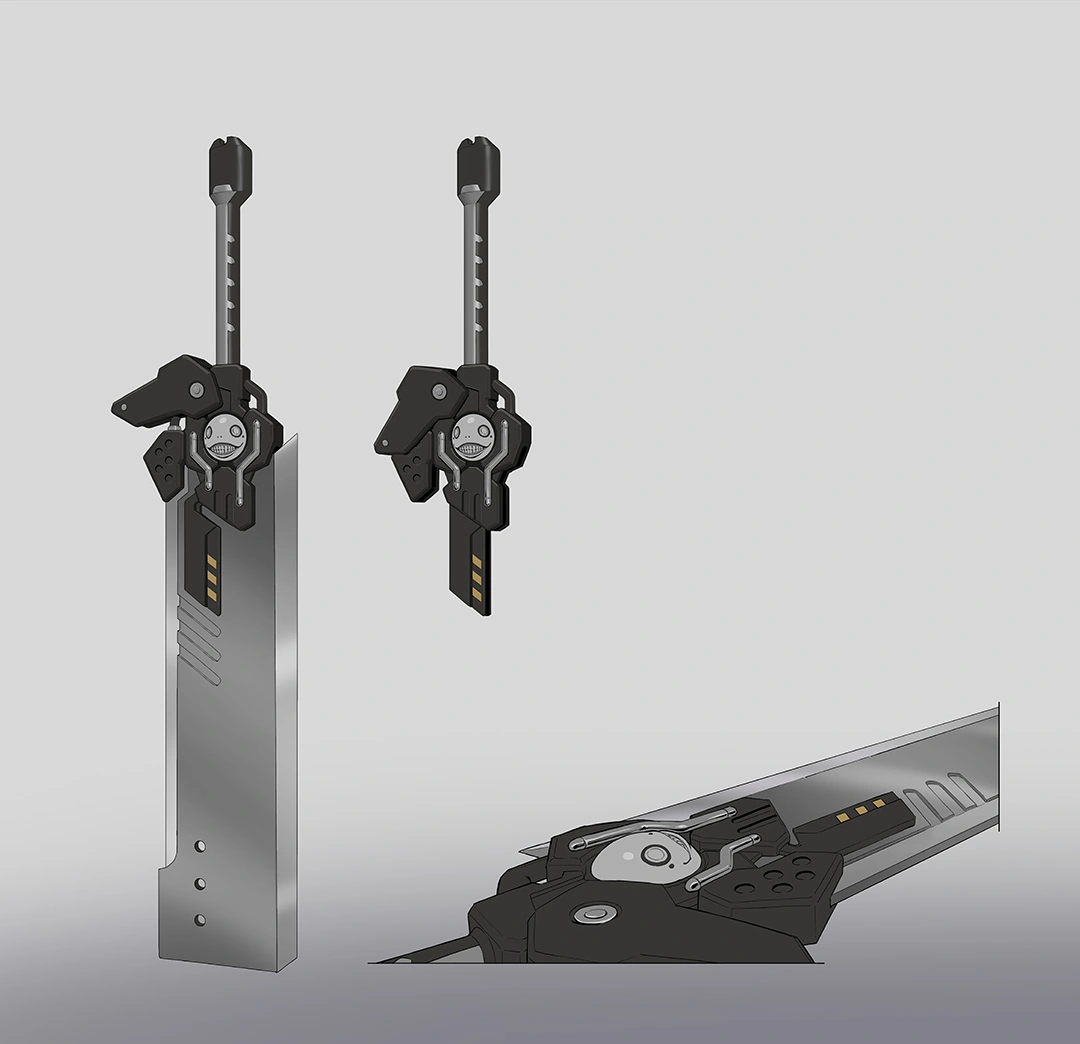
 -
 Vendetta A2 Skin Weapon Concept Art
Videos
- Story Times
Balance Change Log
- For more information, see Patch Notes.
- Health increased from 175 to 200. (Total health increased from 250 to 275.)
- Armor reduced from 100 to 75.
Perk Costs
- Minor Perk cost reduced by 6%.
- Major Perk cost reduced by 5%.
- Movement speed per stack reduced from 4% to 2%.
- Overhead swing bonus range reduced from 2.5 to 2.0 meters.
![]() Raging Storm - Minor Perk
Raging Storm - Minor Perk
- Moved from Major to Minor.
- Damage per spin reduced from 35 to 30.
![]() Siphoning Strike - Major Perk
Siphoning Strike - Major Perk
- Moved from Minor to Major.
- Overhead lifesteal increased from 30% to 40%.
- Overhead swing damage reduced from 130 to 120.
- Bug fix - Overhead swing can now be affected by horizontal knockback while launching downward.
![]() Siphoning Strike – Minor Perk
Siphoning Strike – Minor Perk
- Lifesteal reduced from 40% to 30%.
General
- Health increased from 150 to 175
- Armor reduced from 125 to 100.
- Cooldown increased from 6 to 7 seconds.
![]() Extra Edge - Minor Perk
Extra Edge - Minor Perk
- Projected Edge costs 25% less energy.
![]() Relentless - Major Perk
Relentless - Major Perk
- Moved from Minor to Major.
![]() Swift Vengeance - Major Perk
Swift Vengeance - Major Perk
- Removed.
- Damage reduced from 80 to 70.
- Soaring Slice now starts on cooldown when respawning (does not apply when Resurrected or in Death Match)
- Damage reduced from 80 to 70.
![]() Raging Storm perk
Raging Storm perk
- Damage reduced from 40 to 35 per spin.
- Horizontal swing damage reduced from 50 to 45.
- Overhead swing recovery can now be interrupted by Warding Stance
- Fixed a bug with launching enemies downward with the overhead not working consistently against flying targets
- Raging Storm perk recovery time reduced from 0.4 to 0.25 seconds
- Recovery time for Whirlwind Dash and Soaring Slice reduced from 0.35 to 0.2 seconds
- Recovery time reduced from 0.25 to 0.1 seconds
- Weapon throw range increased from 14 to 15 meters
General
- Reduced recovery times of Palatine Fang overhead, Whirlwind Dash, and Projected Edge by about 15%
- Projectile speed increased from 33 to 37 meters per second
- Max throw distance reduced from 16 to 14 meters
![]() Siphoning Strike - Perk
Siphoning Strike - Perk
- Lifesteal increased from 30% to 40%
![]() Swift Vengeance - Perk
Swift Vengeance - Perk
- Overhealth increased from 125 to 150
- Currency from damage and healing increased by 5%.
![]() Cyclone Charge - Power
Cyclone Charge - Power
- Whirlwind Dash Damage during additional duration increased to 75% (Up from 50%).
![]() Double Dash - Power
Double Dash - Power
- Whirlwind Dash reactivation damage increased to 75% (Up from 50%).
![]() Skycut - Power
Skycut - Power
- Free Projected Edge damage increased to 75% (Up from 50%).
![]() Overloaded Strike - Power
Overloaded Strike - Power
- Mini Sundering Blade damage increased to 50% increased damage (Up from 25%).
![]() Cataclisma - Power
Cataclisma - Power
- Explosion Damage increased to 30 (Up from 20).
![]() Continuum - Power
Continuum - Power
- Before dying, temporarily come back to life with 15% Max Life per each [Onslaught] stack and become hindered. (90s Cooldown)
![]() Rising Rampage - Power
Rising Rampage - Power
- [Onslaught]'s maximum stack increases by 1 after earning 2 Eliminations, up to 3.
![]() Overloaded Strike - Power
Overloaded Strike - Power
- After using [Soaring Slice], holding Overhead swing in air can channel level 1 [Sundering Blade] with 25% increased damage.
![]() Skycut - Power
Skycut - Power
- After blocking ranged damage, Overhead swing shoots a [Projected Edge] with 50% damage.
![]() Defiance Core - Power
Defiance Core - Power
- [Warding Stance] energy regenerates energy regenerates now even while blocking at 75% rate. For every [Projected Edge] fired, reduce [Whirlwind Dash] and [Soaring Slice] cooldown by 0.7s.
![]() Furious Friction - Power
Furious Friction - Power
- [Warding Stance] has 50% increased energy regeneration rate.
![]() Riposte - Power
Riposte - Power
- After blocking ranged damage, remove [Warding Stance] move speed penalty. Vendetta's next swing becomes an overhead swing.
![]() Cyclone Charge - Power
Cyclone Charge - Power
- [Whirlwind Dash] to continue spinning up to 3s for 50% damage after the initial spin.
![]() Double Dash - Power
Double Dash - Power
- After [Whirlwind Dash] is finished, it can be reactivated within 3s for 50% damage.
![]() Exalted Empress - Power
Exalted Empress - Power
- After using [Soaring Strike], overhead strike and [Sundering Blade] gives 30% of damage as temporary Overhealth, up to 100.
![]() Up And Over - Power
Up And Over - Power
- Using [Soaring Slice] gives 35% of missing life as Overhealth for 10s.
![]() Cataclisma - Power
Cataclisma - Power
- [Projected Edge] explodes on enemy hit, dealing 20 (AP) damage to enemies within 4m.
![]() Crater Creator - Rare Weapon Hero Item
Crater Creator - Rare Weapon Hero Item
- 10 Health
- +10% Weapon Power
- Performing an Overhead swing mid-air drags the hit enemy down to the ground along with Vendetta, dealing 30 (WP) damage on land.
- 4000 Cost
![]() Scaled Steel - Epic Weapon Hero Item
Scaled Steel - Epic Weapon Hero Item
- 10% Attack Speed
- +25% [Palatine Fang] Swing Range
- 10000 Cost
![]() Chimera Cross - Rare Ability Hero Item
Chimera Cross - Rare Ability Hero Item
- 10% Ability Power
- After blocking damage, gain 15% Ability Power for 5s.
- 5000 Cost
![]() Warrior's Shout - Rare Ability Hero Item
Warrior's Shout - Rare Ability Hero Item
- 25 Health
- +10% Ability Power
- Using [Whirlwind Dash] gives 10% of max life as Overhealth to all allies within 9m.
- 6000 Cost
![]() Talon Trinket - Rare Ability Hero Item
Talon Trinket - Rare Ability Hero Item
- 10 Health
- +5% Cooldown Reduction
- For each enemy hit by [Sundering Blade], reduce [Whirlwind Dash]'s Cooldown by 1s.
- 4500 Cost
![]() Onslaught Amplifier - Epic Ability Hero Item
Onslaught Amplifier - Epic Ability Hero Item
- 25 Health
- Gain 5% Ability Power for every [Onslaught] stack. 12000 Cost
![]() Marzia's Mastery - Epic Ability Hero Item
Marzia's Mastery - Epic Ability Hero Item
- +10% Weapon Lifesteal
- +15% Ability Lifesteal
- [Soaring Slice] heals all allies within line of sight for 150% of the damage dealt over 2s.
- 9500 Cost
![]() Ricochet Razor - Epic Ability Hero Item
Ricochet Razor - Epic Ability Hero Item
- +10% Ability Power
- +10% Ability Lifesteal
- [Projected Edge] bounce off surfaces 1 time.
- 10000 Cost
![]() Colosseo Coin - Rare Survival Hero Item
Colosseo Coin - Rare Survival Hero Item
- +25 Health
- The last player to land a killing blow on you becomes a target. Eliminate the target to gain 200 extra Stadium Cash and reset cooldowns.
- 4000 Cost
![]() Braced Blade - Rare Survival Hero Item
Braced Blade - Rare Survival Hero Item
- +25 Health
- Gain 1 [Onslaught] stack for every 50 damage absorbed with [Warding Stance].
- 4000 Cost
![]() Chargeguard - Rare Survival Hero Item
Chargeguard - Rare Survival Hero Item
- +25 Health
- After deflecting a melee attack, gain 2% Ultimate Charge.
- 4000 Cost
![]() Duelist's Draught - Epic Survival Hero Item
Duelist's Draught - Epic Survival Hero Item
- +25 Health
- +5% Move Speed
- Gain 15% damage reduction if there is only 1 enemy within 6m.
- 9000 Cost
![]() Antonio's Lesson - Epic Survival Hero Item
Antonio's Lesson - Epic Survival Hero Item
- +50 Health
- Gain 50% damage reduction during dashing using [Whirlwind Dash] or [Soaring Slice].
- 9000 Cost
![]() Vicious Vow - Epic Survival Hero Item
Vicious Vow - Epic Survival Hero Item
- +50 Health
- While channeling [Sundering Blade], gain 25 (AP) Overhealth every second, up to 50 (AP).
- 9000 Cost
References
- ↑ 1.0 1.1 1.2 1.3 1.4 1.5 1.6 1.7 1.8 A New Empire
- ↑ 2.0 2.1 Cite error: Invalid
<ref>tag; no text was provided for refs namedVendettaHeroTrailer - ↑ 3.0 3.1 3.2 3.3 3.4 3.5 3.6 3.7 3.8 Cite error: Invalid
<ref>tag; no text was provided for refs namedStrengthGlory - ↑ 2025-11-18, Overwatch 2’s next hero is Vendetta, an Italian gladiatrix, launching in Season 20. Massively Overpowered, accessed on 2025-11-19
- ↑ 2025-11-17, Overwatch 2's new damage hero is melee-focused hard (light) hitter Vendetta. Polygon, accessed on 2025-11-19
- ↑ 2025-11-18, Overwatch 2's newest hero has roots in one of the best PvE missions I played 7 years ago. PC Gamer, accessed on 2025-11-19
- ↑ https://overwatch.blizzard.com/en-us/news/24242737/weekly-recall-strength-glory-vendetta/
- ↑ https://www.reddit.com/r/Overwatch/comments/1pb9sos/quickest_way_to_kill_a_genji/
- ↑ 9.0 9.1 9.2 9.3 9.4 Cite error: Invalid
<ref>tag; no text was provided for refs namedVendettaInterviewStacey - ↑ Cite error: Invalid
<ref>tag; no text was provided for refs namedClaimYourVengeance - ↑ Cite error: Invalid
<ref>tag; no text was provided for refs namedVendettaQuotes - ↑ 12.0 12.1 12.2 2025-04-15, Overwatch 2’s Hero 45 Tease Is So Vague, Even Shakira Might Qualify. Fandom, accessed on 2025-04-17
- ↑ 2025-11-13, Overwatch 2 Hero 45 set to premiere on November 17th. Esports Insider, accessed on 2025-11-14
- ↑ Cite error: Invalid
<ref>tag; no text was provided for refs namedInsideVendettaStacey - ↑ 2025-04-15, Best look yet at Overwatch 2 Hero 45 spotted in Stadium. MSN, accessed on 2025-04-17
- ↑ 2025-02-14, Overwatch 2 boss has good news for fans requesting “giant sword” hero. Dexerto, accessed on 2025-04-17
- ↑ 2025-10-09, Season 19: Haunted Masquerade Official Trailer | Overwatch 2. Blizzard Entertainment, accessed on 2025-10-10
- ↑ 2025-10-09, Developer Update | Season 19: Haunted Masquerade, Stadium, Mythics, & More. Blizzard Entertainment, accessed on 2025-10-10
External Links
| Heroes in Overwatch
| ||||||||
|---|---|---|---|---|---|---|---|---|
Tank |
 Bruiser |
|||||||
 Initiator |
||||||||
 Stalwart |
||||||||
Damage |
Flanker |
 Vendetta |
||||||
 Recon |
||||||||
 Sharpshooter |
||||||||
 Specialist |
||||||||
Support |
 Medic |
|||||||
 Survivor |
||||||||
 Tactician |
||||||||


