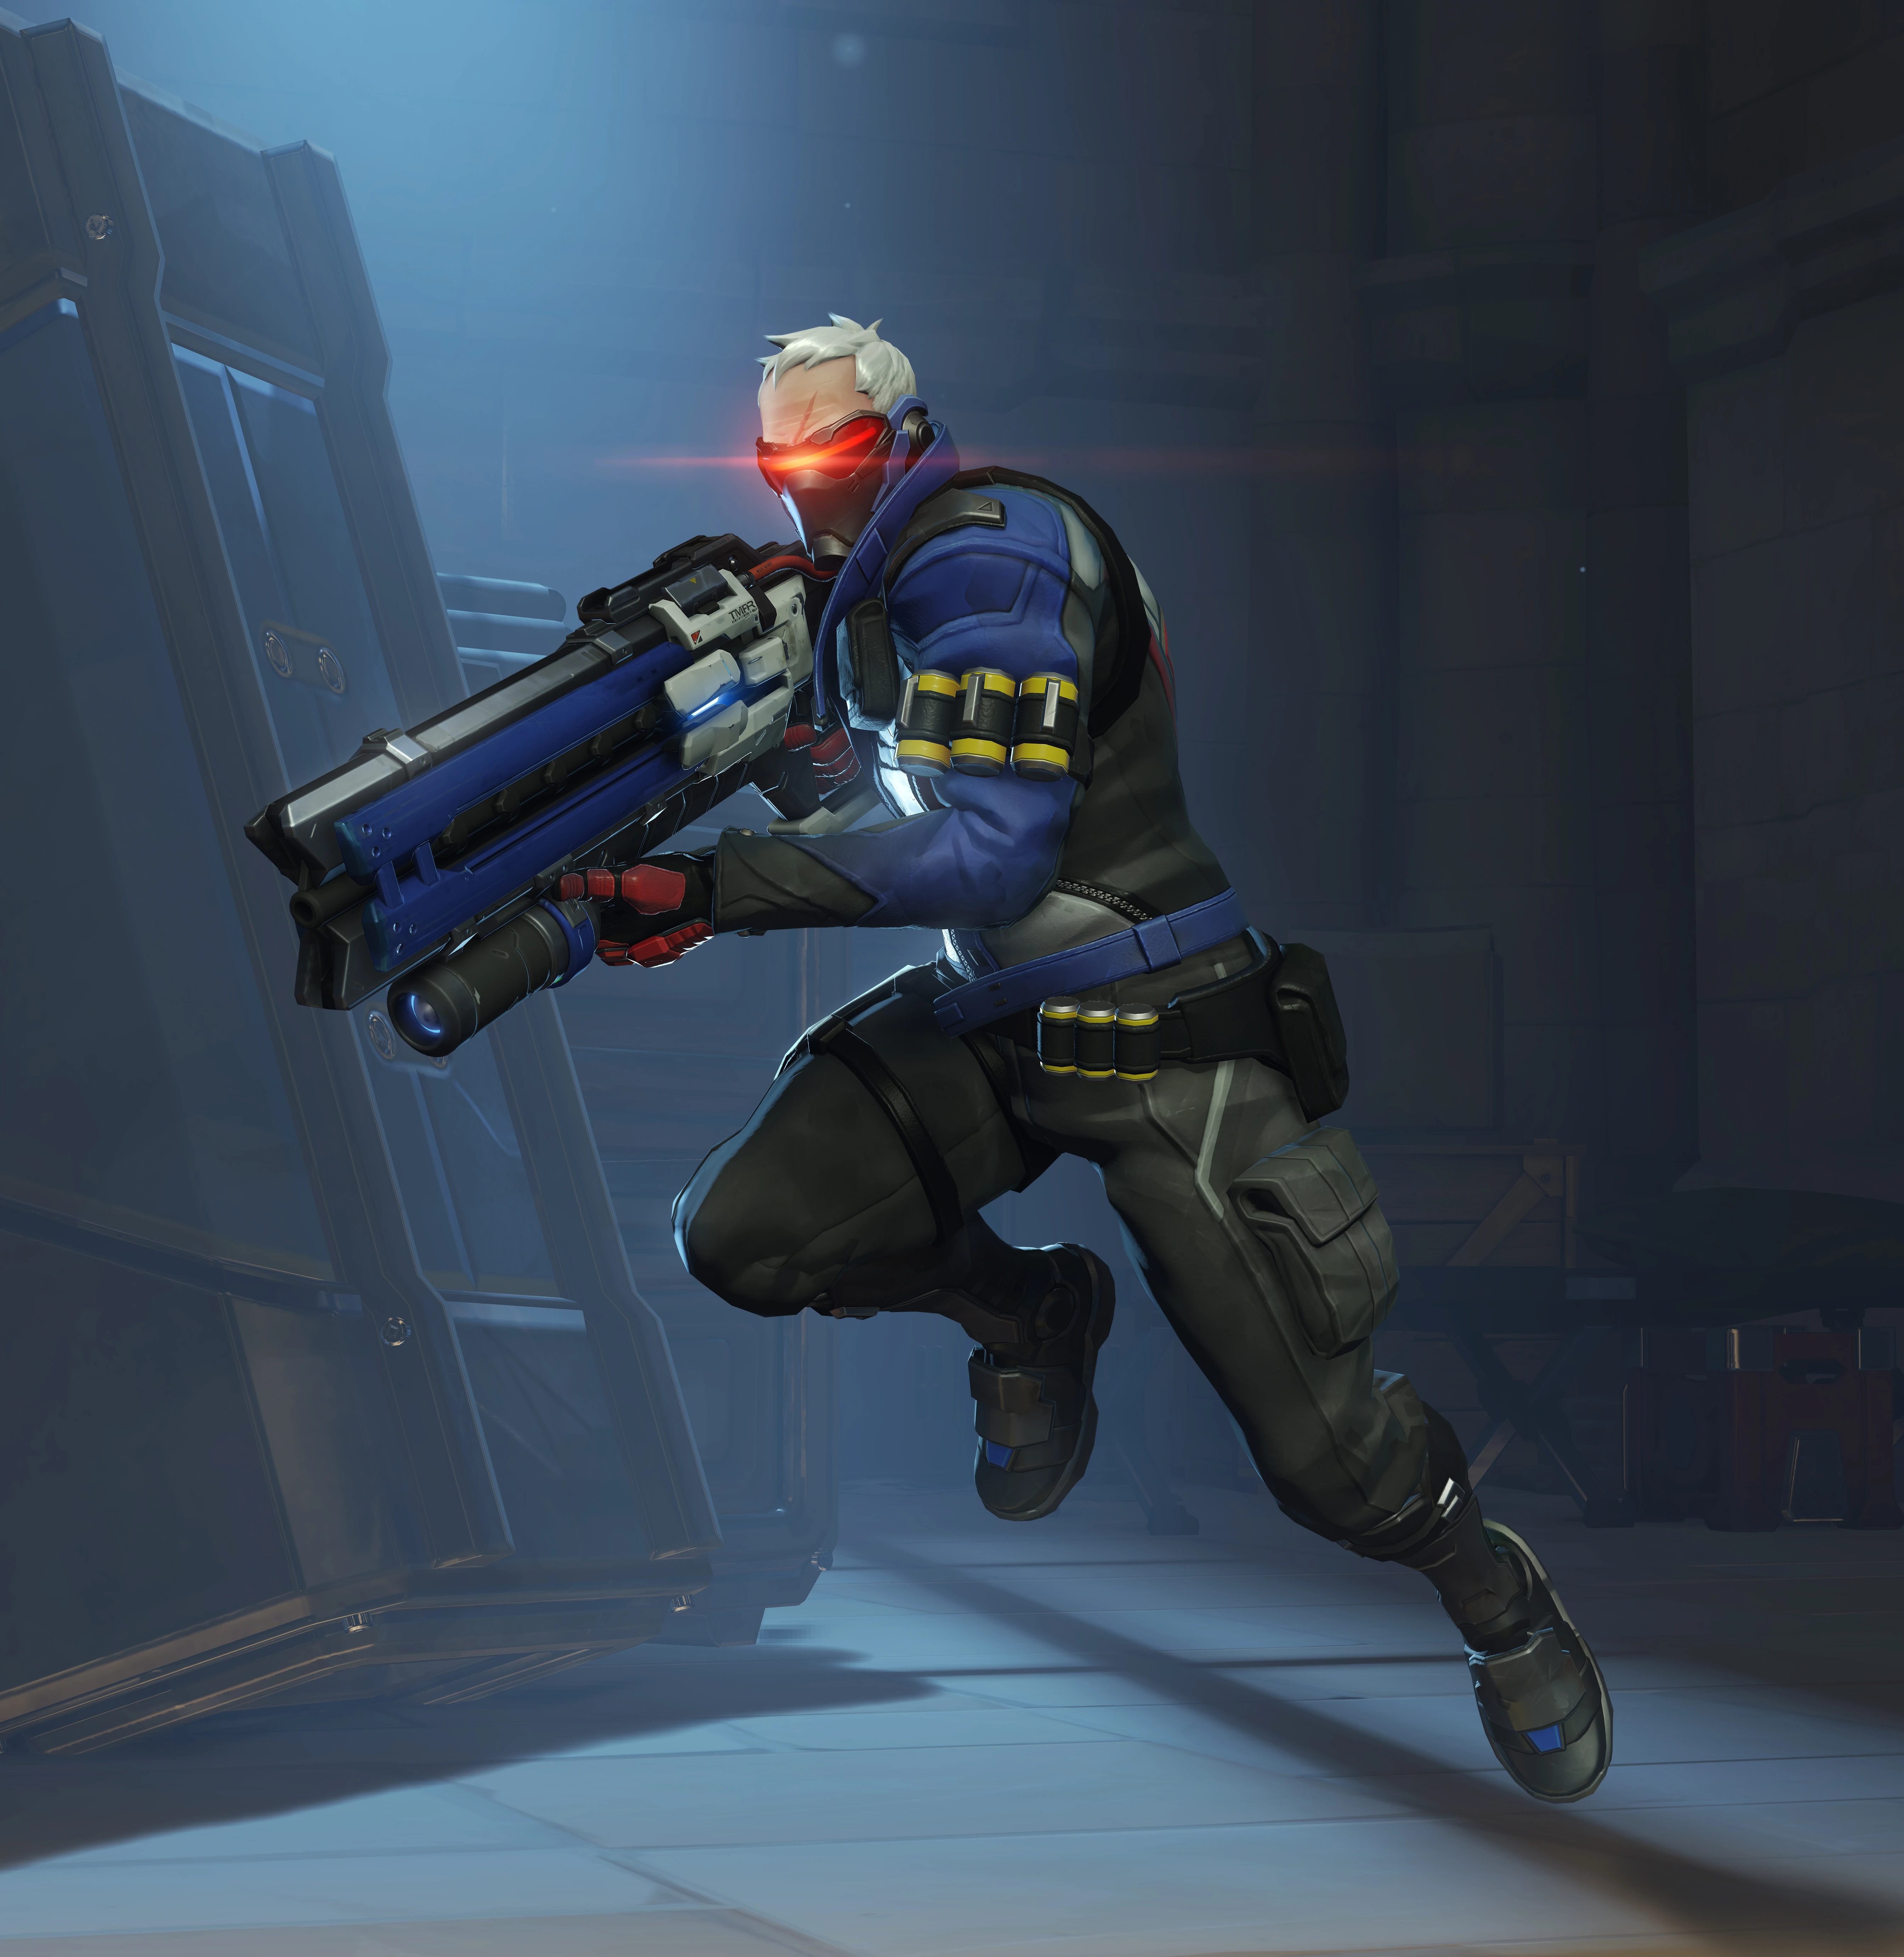
Soldier: 76 is a Specialist Damage hero in Overwatch. He is one of the 21 heroes included in the game's release on 24 May 2016.
Overview
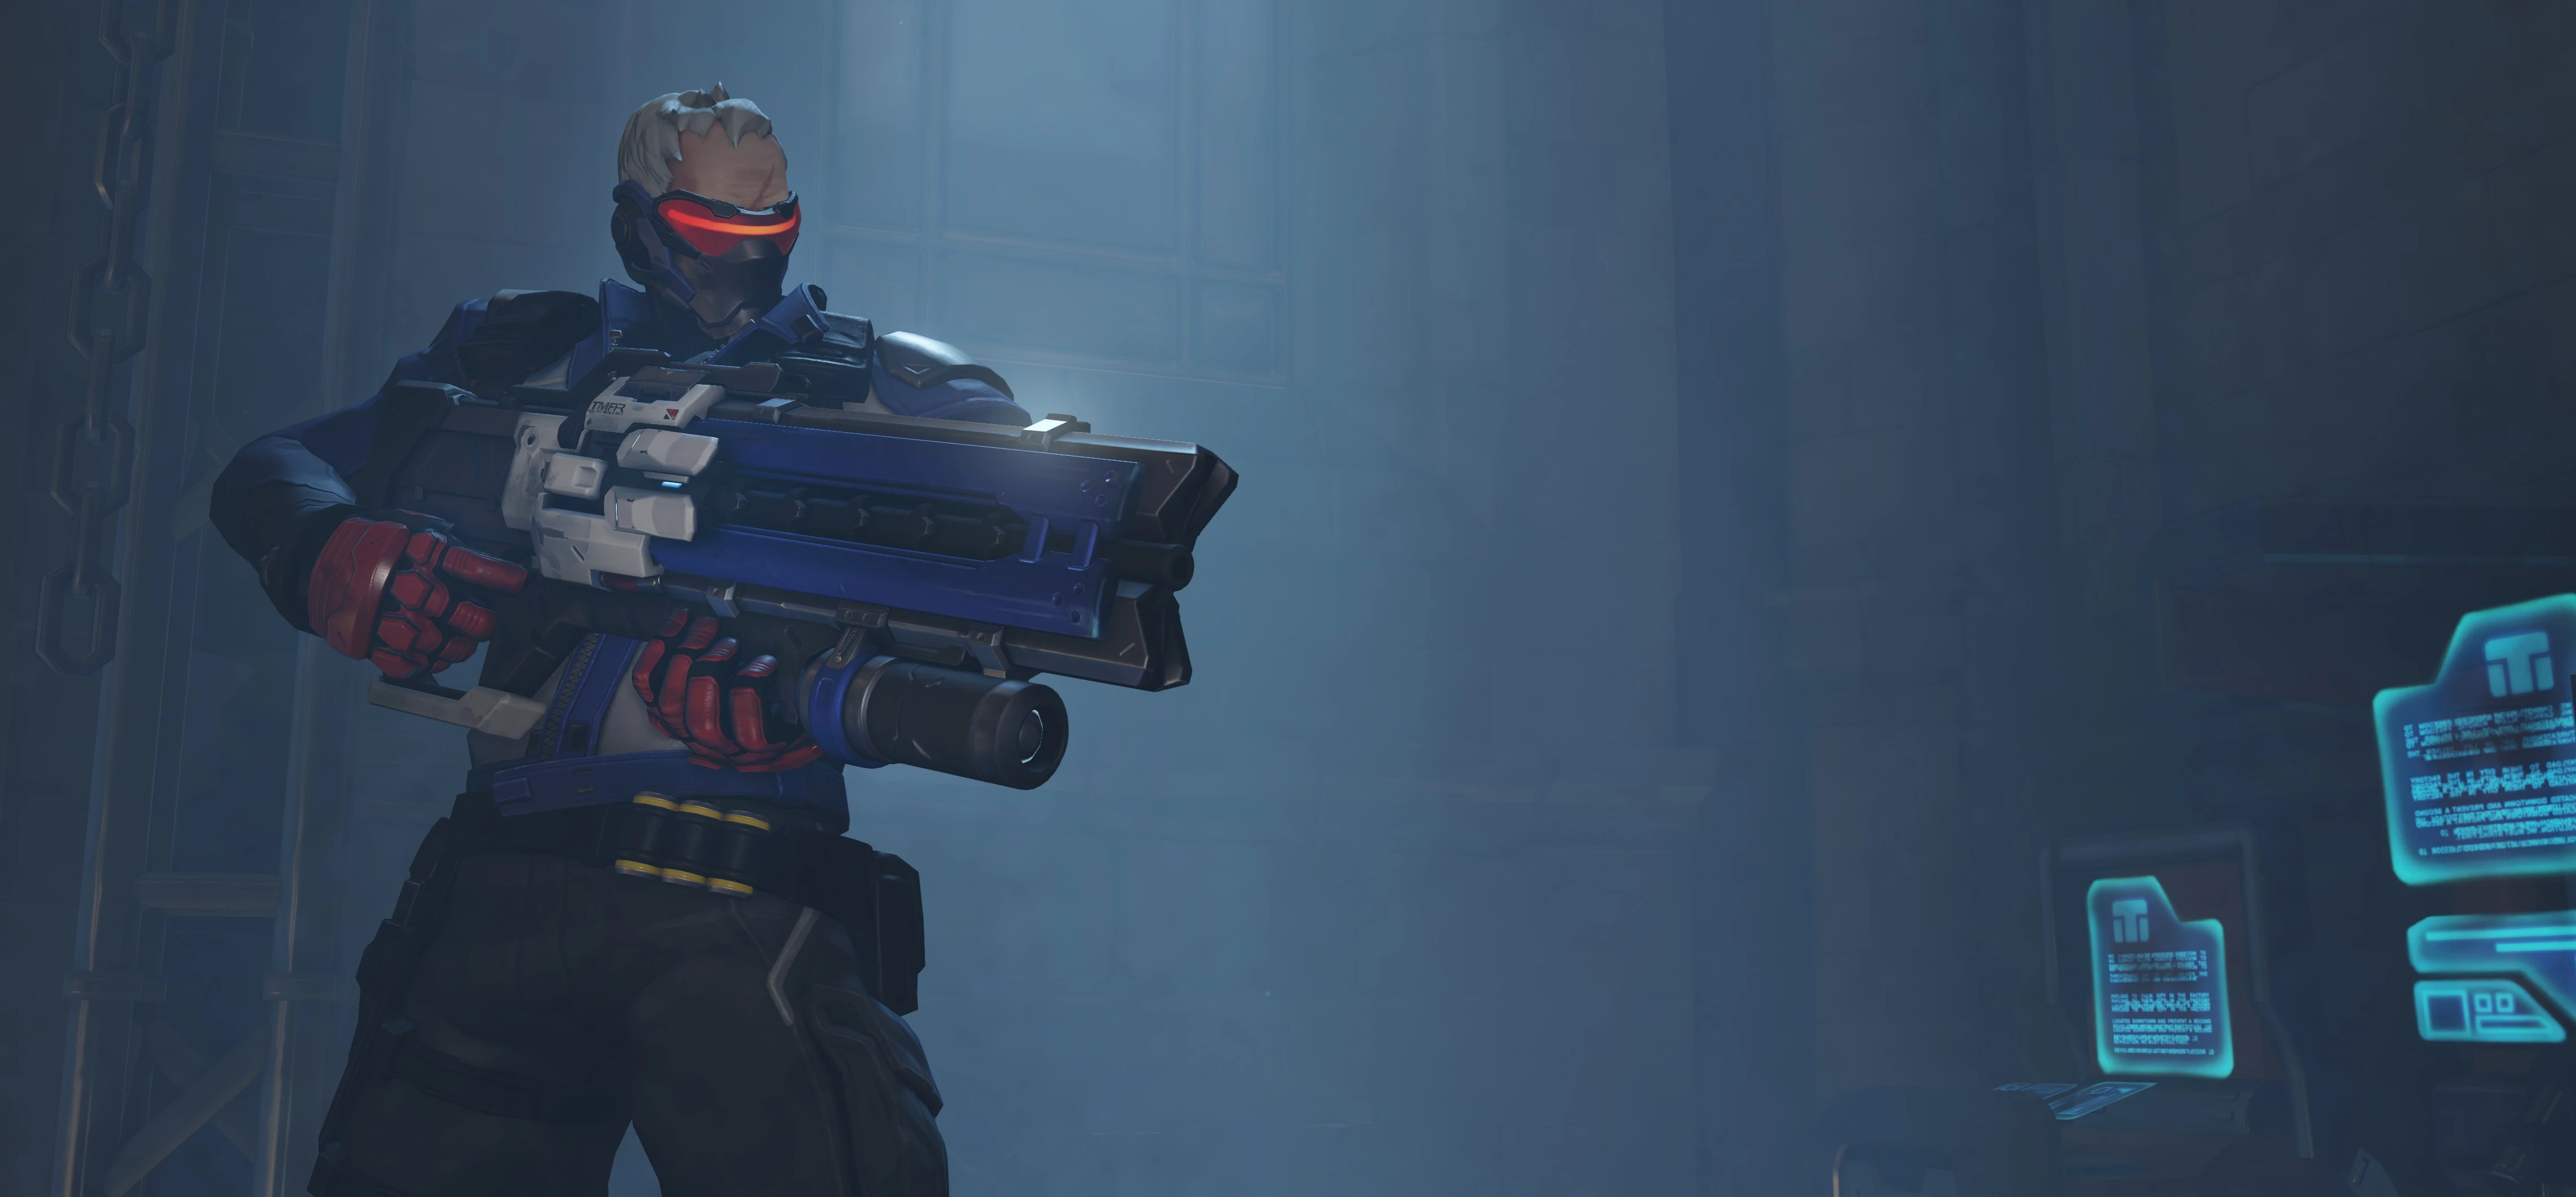
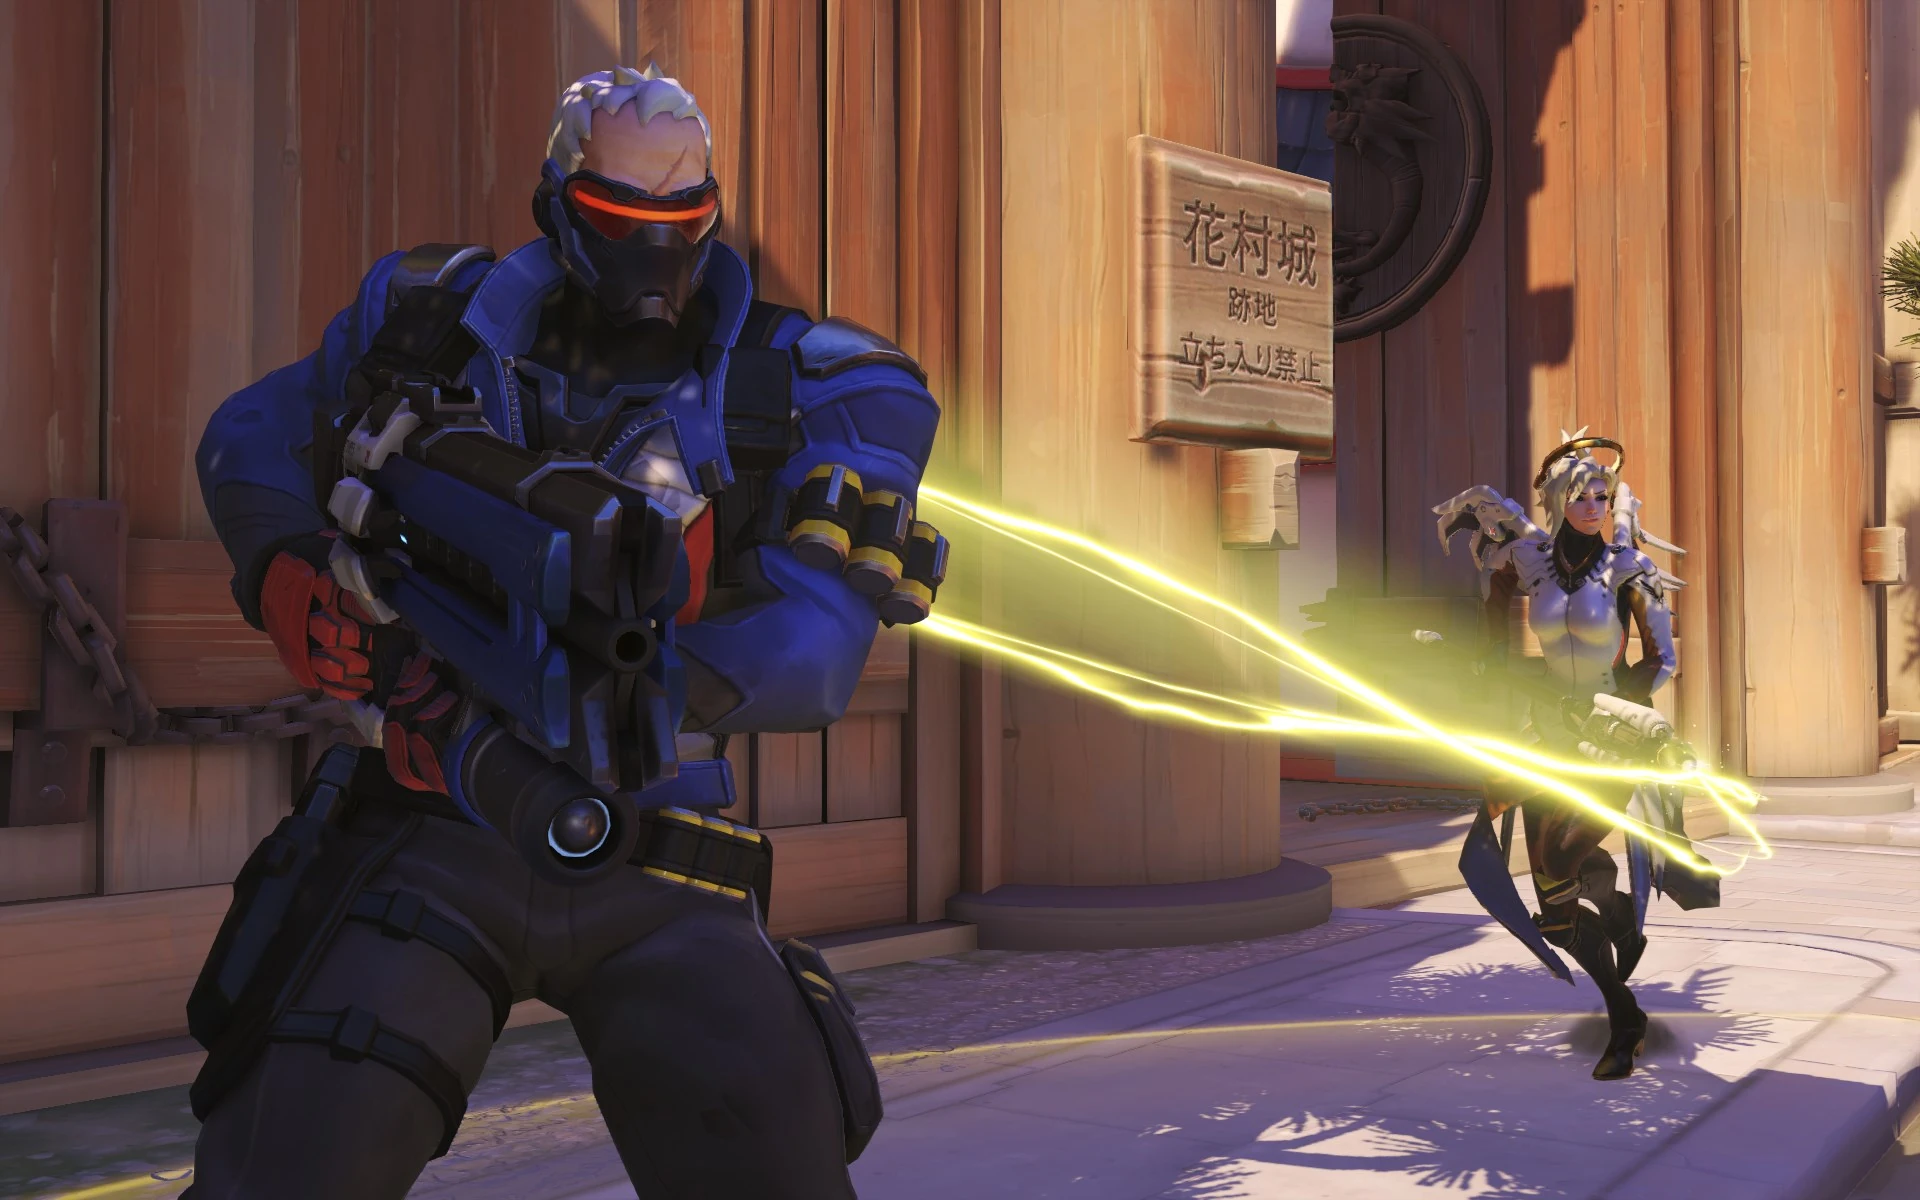
Armed with cutting-edge weaponry, including an experimental pulse rifle that’s capable of firing spirals of high-powered Helix Rockets, Soldier: 76 has the speed and support know-how of a highly trained warrior.
-
 3D portrait
 -
 2D portrait

Abilities
Passive Abilities


- Reload speed is 1.5x faster after an elimination. This only lasts for 3 seconds, but is refreshed if another elimination is earned.
- An indicator is shown to the right of the crosshair to show when the reload increase is active.
Weapons


- Damage per second: 171 while firing (117.9 overall w/ reload)
- Each shot changes facing angle +0.098.
Special Abilities

80 – 40 (splash, enemy)
40 – 20 (splash, self)
- The explosion also applies a knockback.
- Soldier: 76 takes 50% of the splash damage and will be affected by the knockback, if caught in the explosion.
- The projectile can be destroyed while in air by
 Defense Matrix,
  Kinetic Grasp,
  Javelin Spin,
  Power Matrix and
  Kekkai Sanctuary and reflected by
  Deflect, but the explosion is unaffected.
  Amplification Matrix affects all damage dealt, if the projectile passes through it. Splash damage alone going through is not amplified.

- After Sprint is cancelled, there is a 0.3 second recovery period where Soldier: 76 cannot use primary or secondary fire.
- The activation of the ability can be customized between holding the button and toggling with a single press.
- Sprint's movement speed buff does not count towards global movement speed buff cap.

- Cannot be destroyed.
- Only one field can be active at a time.
- Healing is only applied to targets within line of sight of the biotic emitter, ignoring enemy barriers.
- Can be placed on and lifted by
 Petal Platform if the latter was deployed first. If the platform is destroyed, it will fall on the ground.
Ultimate Ability

- Activation of Tactical Visor instantly replenishes
 Heavy Pulse Rifle's ammo and cancels the recovery animation of
  Quick Melee,
  Helix Rockets,
  Biotic Field and
  Stim Pack.
 - Heavy Pulse Rifle's reload time is greatly reduced while Tactical Visor is active.
- Damage falloff still applies.
- Tactical Visor auto-aims Heavy Pulse Rifle at the enemy closest to the reticle within the targeting area.
- Can target enemy heroes,
 B.O.B.,
  RIP-Tire, and
  Immortality Field. Other deployables can only be (manually) shot if there are no valid targets for auto-aim.
 - Soldier: 76 will only lock on to a target if their center of mass is visible and not behind an enemy barrier.
- Can target enemy heroes,
- Soldier: 76 can headshot during Tactical Visor only if the shot would have been a headshot without it. Additionally, it is possible to land headshots without aiming at the target's head during some posture changing actions, such as Zenyatta's animation when he fires an orb volley.
- Auto-aim does not apply to Helix Rockets.
Perks
Minor Perks
A Minor Perk can be chosen at level 2.


- Instantly applies to Helix Rocket if it is on cooldown when Tactical Visor is activated.
- Cooldown reduction applies in full as long as it is fired before Tactical Visor ends.
Major perks
A Major Perk can be chosen at level 3.


- Cooldown starts when the effect ends.
- Area of effect benefits from Biotic Field are lost; Both healing and attack speed from Stim Pack only affect Soldier: 76.
Hero-specific options
| Setting name | Options | Description |
|---|---|---|
| Hold to use Sprint | Off (default) | Sprint deactivates when player presses the button again. |
| On | Sprint deactivates when player stops holding the button. | |
| Relative aim sensitivity during Tactical Visor | 0% ... 500% (default: 100%) | Multiplier to base aim sensitivity during Tactical Visor. |
Strategy
Soldier: 76 is a well-rounded Damage hero. He's able to deal both sustained and burst damage at any range, move quickly across the battlefield, and support both himself and his team through the use of ![]() Biotic Field. His downsides are a lack of any real specialization with his weapons or abilities, no vertical movement, and a less impactful Ultimate when compared to other Assault heroes. He's a simple hero to learn to play, but a difficult one to master, making him a great pick for new players and veterans alike.
Biotic Field. His downsides are a lack of any real specialization with his weapons or abilities, no vertical movement, and a less impactful Ultimate when compared to other Assault heroes. He's a simple hero to learn to play, but a difficult one to master, making him a great pick for new players and veterans alike.
It is highly recommended to read the information in Abilities if you are not familiar with Soldier: 76's loadout.
Weapons & Abilities
- Adjust your rate you fire depending on the range you're fighting at. Use fully automatic fire when fighting up close and at medium range, and fire in three-round bursts at long range, exploiting the Heavy Pulse Rifle's perfect accuracy for its first 3 shots in a burst. (Spread has been replaced with vertical recoil, so the accuracy remains pin-point no matter how many shots you take.)
- Helix Rockets can be used to deal burst damage, killing an enemy before they can escape or use an ability.
- If you're unsure of your aim, or are against an evasive opponent, fire Helix Rockets at your enemy's feet instead of directly at them. This will ensure that the explosion damages them, even if you can't directly hit them with the rockets.
- Helix Rockets self damage can kill you if your health is too low.
- Sprint is an incredibly versatile ability. Use it to move between cover, chase after fleeing opponents, race to get to a Health Pack, or to get back to the fight after respawning.
- Biotic Field has a small animation when activated. This animation will interrupt 76's reload animation. Try to use it either before or after reloading.
- Biotic Field will attach to and travel with the Payload and moving platforms.
- Tactical Visor is a deceptively powerful ability, allowing 76 to hit highly evasive targets like Tracer or Genji with perfect accuracy. Use Tactical Visor when facing them to net yourself a quick kill.
- Because Tactical Visor gives you perfect accuracy, you can spend more time focusing on dodging enemy attacks while it's active.
- While Tactical Visor can be a powerful Ultimate, keep in mind that it doesn't make your shots any more damaging than normal. Barriers will still block your bullets, and enemies will still take the same amount of damage to kill as before. It's best to use it on enemies who are distracted by another member of your team like Reinhardt or Winston, allowing you to fire with impunity. Take advantage of the perfect accuracy it provides by keeping your distance from the enemy team, making it harder for them to hit you.
- Tactical Visor will always aim towards the body of whoever is targeted, only able to headshot when your crosshair is on their head. It's best to use Tactical Visor on smaller, more agile opponents like Tracer or Pharah, rather than on Tanks like Winston or D.Va, since you can deal more damage by aiming at their large heads manually without wasting your ultimate.
- Tactical Visor fully reloads Soldier's gun, so if you run out of ammo, you can use it to keep pressing your attack. It can be a good idea to lay down a hail of fire to weaken your foes before using Tactical Visor's free reload to continue your assault, but first ensure it hasn't scared them all into cover, where Tactical Visor will be of no help. Additionally, note that Tactical Visor immediately presents yourself as a prominent target, so using the element of surprise and engaging enemies at longer ranges is generally superior to rushing into close quarters and firing indiscriminately.
General Strategies
- A reliable source of steady damage, a dependable AoE heal, and a powerful burst make Soldier: 76 the very definition of frontline presence and assault. Alongside a Reinhardt or any other frontline hero, 76 can push or protect objectives with relative ease by mowing down anyone in his path, all while pressuring snipers and Pharahs.
- Soldier: 76 is a great addition to any team. His lack of guaranteed escape tools makes him less effective at flanking than heroes like Genji, Tracer, or Reaper. He therefore tends to serve his team best by staying with them and helping them out with suppressive fire from his Heavy Pulse Rifle, and healing with his Biotic Field.
- Soldier: 76 does his best work when he assails from a defensible position on high ground, ensuring that powerful close-range heroes can't easily reach him, giving him cover from return fire, and allowing him to more easily aim his Helix Rockets.
- Soldier can occasionally branch off from his team and attack from a separate position, using his Biotic Field to sustain him, if it means finding a good vantage point from high ground. Be ready to
 Sprint back to the safety of your team if someone comes to deal with you, however, as Soldier does poorly in close-range engagements, and the distraction alone can sometimes be enough for his team to make gains — but not if Soldier dies, where the loss of his damage will be sorely felt.
- Get into the habit of using Sprint whenever you're not in combat, as it gives you a big mobility advantage over many of the heroes in the game. You can Sprint indefinitely, so don't worry about overusing it.
- Drop Biotic Field at the start of a fight to give yourself constant healing. This can give you a big Health advantage, especially when facing multiple opponents.
- Helix Rockets can deal heavy damage if it directly hits an enemy. Try to bait your opponent around a corner and then fire the Rocket when they turn it.
Match-Ups and Team Synergy
Tank
| Hero | Match-Up | Team Synergy |
|---|---|---|
 D.Va |
D.Va can use her Defense Matrix to shut down all of your offensive abilities, specifically your Heavy Pulse Rifle, your Helix Rockets, and even your Tactical Visor. Her Boosters ensure that she can reach you no matter where you are, even if you have the high ground, and her heavy armor and high damage at close range makes her a daunting foe if she gets in your face. Biotic Field can help you withstand her attacks, but if you activate it too late into a fight, she can use her Boosters to push you out of the Field, then gun you down before you can run back in and heal yourself. While it doesn't take too many shots at her cockpit point blank to force D.Va out of her Mech, D.Va can use her Boosters to flee from a fight that isn't going her way. Fighting D.Va comes entirely down to fight or flight; you need to accurate judge the situation and dedicate yourself to running away and escaping D.Va's ambush or standing your ground and waiting out her Defense Matrix before shooting her down. Being indecisive can easily lead to your death. Should you get D.Va out of her Mech, quickly use Helix Rockets to finish her off before she can get her bearings; she may have low health, but if she gains some distance and cover, she'll be able to land Light Gun attacks until her Mech recharges. | (To be added) |
 Orisa |
(To be added) | (To be added) |
 Reinhardt |
If you choose to stand your ground against Reinhardt, your high damage output can put significant pressure on Reinhardts's Barrier Field, forcing him to drop it or have it shattered. Conversely, if you're feeling brave, you can Sprint behind Reinhardt's barrier to shoot him or the allies he's protecting; just know that he can drop his shield and strike you with his hammer to kill you in one or two shots, or he can Charge into you to instantly kill you. You should only barrel into Reinhardt if he's at low health or if you need to force him to drop his shield so the rest of your team can make a play. Be careful about using Tactical Visor against Reinhardt; while you can heavily damage, if not destroy, his barrier with it, you'll essentially be wasting your Ultimate. | (To be added) |
 Roadhog |
If you're snagged by Roadhog's Chain Hook, there's almost no chance you're getting out alive. Stay far away from his Hook's range and fire away with your Heavy Pulse Rifle. Both you and Roadhog have self-healing in the form of your Biotic Field and his Take a Breather; however, while your Biotic Field requires you to stay still, Roadhog can continue to approach you while using Take a Breather so always be ready to flee from him with Sprint if you need to keep your distance. Tactical Visor is a waste against Roadhog, since with Take a Breather he'll almost certainly withstand your assault. | (To be added) |
 Sigma |
(To be added) | (To be added) |
 Wrecking Ball |
(To be added) | (To be added) |
 Winston |
Winston's Jump Pack can let him chase you and force you to retreat from your position. His Projector Barrier can also absorb your attacks. However, when Winston is on the offensive, your Biotic Field can help you absorb Winston's low damage output, meaning you can stand your ground and fight back. His large size also makes him an easy target to land headshots on, especially with your Helix Rockets. If you are at low health and Winston is targeting you, Sprint away and fire from further away; due to his Tesla Cannon's pitiful range, Winston's only choice will be to keep leaping after you, and if you can Sprint towards your team or away from his, you'll be able to stay alive while returning fire. | (To be added) |
 Zarya |
Zarya has lower health than most Tanks, but if you happen to fire at her while her Particle Barrier is active, she can become a pain to deal with. Stay far away from Zarya's limited attack range and try to land headshots on her, always being ready to stop your fire when her Particle Barirer goes up. Be especially cautious of her Barriers when preparing to use Tactical Visor so that you aren't stuck choosing between wasting your Ultimate's time and empowering Zarya. | (To be added) |
Damage
| Hero | Match-Up | Team Synergy |
|---|---|---|
 Ashe |
(To be added) | (To be added) |
 Bastion |
Bastion's huge damage output will run you down within seconds, even if you're in your Biotic Field. It will be difficult for you to flank around him, and shooting him head-on won't deal much damage if he's in Sentry Configuration. If he's not being protected by a barrier, though, you can easily land a direct hit with Helix Rockets, taking out a substantial amount of Bastion's health. Your best bet is to fire around corners or behind cover. | (To be added) |
 Cassidy |
You and Cassidy deal roughly the same damage, however his is more burstier making him slightly more lethal. Up close Cassidy can also use |
(To be added) |
 Doomfist |
Always try to keep a distance between Doomfist, his damage output is pitiful at medium to long ranges and you can quite easily shoot him down, If Doomfist manages to cut the distance though, you'll be in trouble, Doomfist can quite easily beat you with his abilities and knock you out of your biotic field, unless you have quick reflexes, Doomfist will usually win in close quarters combat. | (To be added) |
 Echo |
(To be added) | (To be added) |
 Genji |
When Genji is around, try to stick by your team to protect your weaker teammates from being flanked by him. Genji's Deflect can be deadly if he reflects your Helix Rockets directly back at you. He can use his mobility to keep tossing Shuriken at you while jumping or Fan of Blades in close combat. If you have Biotic Field up, though, you can generally withstand Genji's attacks while attacking back. If Genji fails to kill you with a Swift Strike, you can escape from him with ease with Sprint. You'll handle Genji best if you keep your distance and shoot him from afar. Tactical Visor is best for killing evasive heroes, making Genji a prime target. While Genji can Deflect Tactical Visor's bullets, you can just temporarily stop shooting or target other enemies. | (To be added) |
 Hanzo |
Your ability to accurately fire at distant enemies can help you pressure an enemy Hanzo. Be careful to avoid Hanzo's single, powerful arrows while landing successive gunshots on him. Don't be predictable, especially if you're standing in your Biotic Field, as this will make it easy for Hanzo land his hits. If Hanzo does manage to wound you, you can use Sprint to get behind cover while Hanzo has few means to pursue you. If he does leave his position to chase you down, he'll end up making himself an easier target once you're healed. Be careful when Hanzo has your position revealed with Sonic Arrow, as this will make it easy for him to hide behind cover while landing direct hits on you. | (To be added) |
 Junkrat |
You have an extreme advantage over Junkrat when fighting at a distance, while he has you beat in close quarters. You both have quick escape mechanisms, with your Sprint and his Concussion Mine. You also both have ways of dealing burst damage, with your Helix Rockets and his Steel Trap that can keep you still long enough to land successive Frag Grenades. Always try to make sure you have the high ground over Junkrat, and always try to keep your distance and keep your watch for Steel Traps. If you hear Junkrat activate RIP-Tire, Sprint as far as you can from your team. Once you see the tire, try to fire away at it; your accurate Heavy Pulse Rifle can potentially destroy it before it can kill you or your teammates. | (To be added) |
 Mei |
The accuracy of Mei's Icicles pales in comparison to that of your Heavy Pulse Rifle. While you easily have Mei outmatched at a distance, she can use Ice Walls to block off your attacks and her Endothermic Blaster to stop your Sprint in its tracks. No matter what, never let Mei get close to you; even with your Helix Rockets, it's unlikely you'll be able to finish Mei off before she freezes you, at which point you will be good as dead. If Mei does manage to catch you up close, quickly deploy your Biotic Field, as its healing may barely be able to help you survive Mei's Icicle headshot after you are frozen. Ice Wall will block off your Tactical Visor's line of sight, so try to either kill her first or move to a position where it will be difficult for her to block off your sight before activating your Ultimate. | (To be added) |
 Pharah |
Your hitscan Heavy Pulse Rifle can accurately shoot Pharah out of the sky, making you one of her best counters. That doesn't mean you're perfect against her, though; if she hits you with her rockets, you'll take a large amount of damage. Dropping a Biotic Field will make it easier for Pharah to predict her shots on you since you're unlikely to leave the Field. Just stay mobile and aim well, and you should be able to quickly handle Pharah. While Helix Rocket is unlikely to hit her in the air, Tactical Visor can quickly shoot her down. | (To be added) |
 Reaper |
Reaper's high-damage Hellfire Shotguns and his self-healing ability The Reaping make him a vicious threat in close combat, even if you have Biotic Field active. If Reaper uses Shadow Step or Wraith Form to approach you, don't hesitate to Sprint to a safe distance before opening fire on him. If you spot a Reaper trying to Shadow Step to your location, hitting him with your Helix Rockets as soon as he finishes teleporting can potentially instantly kill him. | (To be added) |
 Soldier: 76 |
When facing an enemy Soldier: 76, be quick to either Sprint to your team or, if you plan to stand your ground, drop a Biotic Field. Assuming you're both firing at each other in the open, Biotic Field's healing will help keep you alive farther into the fight. The other Soldier: 76 will most likely do the thing, so try to land headshots on him to quickly kill him while simultaneously avoiding headshots yourself. Don't attempt to chase Soldier: 76 down if he flees, since your Sprint will never catch up to his once he's already running. | (To be added) |
 Sombra |
Sombra's invisibility will allow her to get close to you and Hack you before you can notice, causing you to lose your Sprint, Biotic Field and Helix Rockets. A one-on-one fight with Sombra is relatively even while you're Hacked, but if you're stranded while her team is approaching, you're going to be in a lot of trouble. Try not to stray too far from your team when an enemy Sombra is about to avoid this situation. If a fight turns sour for Sombra, she can use her Translocator to retreat. If she teleports within your view, you have a strong advantage shooting her from a distance; otherwise, you might want to follow her Translocator's light trail with Sprint and finish her off. Don't worry about being Hacked after you've activated Tactical Visor, as it won't be cancelled out. | (To be added) |
 Symmetra |
If Symmetra can dodge your Helix Rockets, she will win in a sustained fight. However, she's nowhere near as powerful at a distance. Stay as far away from her as you can when attacking her. Be careful when Sprinting, as you may accidentally run into a Sentry Turret nest and brought to a crawl. You can take out one or two with your Helix Rockets, but you'll still be vulnerable to enemies after taking damage from the Sentry Turrets. If Symmetra deploys a Teleporter near you, you can try to quickly gun it down, but if you're not near any teammates, it may be better to quickly Sprint away so you're not ganged up on by the whole enemy team that comes out of the Teleporter. Photon Barrier can completely nullify Tactical Visor; try to kill her before using it, or if you must fight around it, stay on one side of the barrier and shoot at enemies on your side of the barrier. | (To be added) |
 Torbjörn |
Torbjörn's stationary Turret is an easy target to gun down at a distance if it isn't being protected by some form of cover. If it's out in the open, you can quickly hit it with your Helix Rockets and standard fire, destroying it while taking minimal damage in the process. If you absolutely must protect yourself from the Turret's fire, Biotic Field will mitigate its damage. Don't expose yourself to the Turret unless you're ready to destroy it, though; while you have decent health, if you get distracted by other enemies it won't take long for the Turret to shoot you down. When fighting Torbjörn on his own, he's a mild threat, especially when he's using Overload. If you Sprint away from him when he uses Overload, you can wait out its duration before returning to finish him off. If you must fight him up close, use your Biotic Field to stay healthy; at a distance, your Heavy Pulse Rifle will easily kill him before his Rivet Gun can kill you. As soon as Torbjörn uses Molten Core, either quickly gun him down if he's in your sights and you're certain he's close to death, or Sprint out of there to ensure you aren't caught in the magma. | (To be added) |
 Tracer |
Tracer's Pulse Pistols have high damage and exceed your healing capability, meaning whether you win or lose, fights with her will tend to be quick. She will try to use Blink to jump around you and shoot from your blind spots, so try to fight around walls where she can't get around you and be ready to quickly snap around. If you can keep a beat on her, a direct Helix Rocket will drop her to 30 health, making her a simple target to finish off with standard fire. Keep track of her Blinks and Recalls if you want to finish her off. If you need to retreat, be careful since Tracer can use Blink to catch up to you even when you're Sprinting. Tactical Visor is a great counter to Tracer's evasive mobility, so try to keep her in your sights once you've activated it. While you're not defenseless in close quarters, in general you'll want to keep your distance and fire at Tracer from far away. | (To be added) |
 Widowmaker |
If you fire at a Widowmaker attempting to aim from a distance, you can pressure her into messing up her shots and/or fleeing. Sprint can help you quickly close the gap on Widowmaker, potentially reaching one of her blind spots where you can kill her before she uses Grappling Hook to escape. Be careful when running in the open, though; a single headshot will instantly take you out, and a good Widowmaker will be able to land a shot on you even while Sprinting. If you catch her in close combat, open fire; her assault mode on her Widow's Kiss won't deal much damage, meaning she'll be forced to use Grappling Hook to escape. If she does, try to shoot her down from a distance, but if you're worried she'll quickly scope in and kill you, you can Sprint to cover and make your way to her new location. Watch out for Venom Mine; while Biotic Field will stave off its damage, it will allow her to see you through walls, making you an easier target. | (To be added) |
Support
| Hero | Match-Up | Team Synergy
|
|---|---|---|
 Ana |
Ana will tend to hide behind her teammates, making her difficult to focus on. If you catch her out in the open unprotected by teammates or cover, try to make her a priority; otherwise, try to stay out of her field of view and let a teammate more suited to flanking take her out. If Ana hits you or any of your allies with her Biotic Grenade, it will render your Biotic Field useless. Sleep Dart can completely disrupt Tactical Visor, so be aware of her location before activating it. | You're an excellent target for a friendly Ana's Nano-Boost; once boosted, you can use Tactical Visor ("Nano-Visor", as it's sometimes called) so that your locked-on attacks now hit much harder than they normally would. |
 Baptiste |
(To be added) | (To be added) |
 Brigitte |
(To be added) | (To be added) |
 Lúcio |
Lúcio's tendency to slide around in the open makes him an easy target for you to shoot down at a distance. His small hitbox, self-healing and constant mobility can make it hard to put him down for good, but a Helix Rocket can take out a huge chunk of his health. While Lúcio's standard attack deals little damage, his Soundwave can disrupt your positioning so be careful when he approaches you. Watch out for Lúcio's Sound Barrier, as it can ruin your Tactical Visor; try to kill him first, wait until he uses Sound Barrier, or activate it on a group of enemies when Lúcio isn't close enough to protect them. | Lúcio's speed boost can help you to get to advantageous positions even faster. |
 Mercy |
If Mercy is flying about in the air, she'll prove an easy target for you to pin down at a distance. Otherwise, she may be hiding behind teammates or cover, in which case let another teammate try to deal with her unless she emerges from cover, in which case you can try to quickly gun her down. If her team isn't nearby and she's attempting to flee, you can use Sprint to chase her down and finish her off before she can get away. | If your ultimate is ready, communicate with the Mercy on your team, as a boost from her Caduceus Staff can make the perfect aim of Tactical Visor even more potent. |
 Moira |
(To be added) | (To be added) |
 Zenyatta |
Both you and Zenyatta can put out massive damage at a distance, and you both have slow self-healing, with Zenyatta having his shields and you having Biotic Field. However, you have the clear advantage in mobility, meaning that you can close in on Zenyatta's position or run out of his field of view as you please. Try not to stay out in the open, though; if you're hit with Orb of Discord, you're an easy target not just for Zenyatta, but for his entire team. Be careful activating Tactical Visor around Zenyatta; Transcendence can protect both him and his team from your attacks, rendering your Ultimate a waste. | (To be added) |
Map Strategies
Control
| Map | Strategy & Stage Tips |
|---|---|
 Overall Strategy |
TBA RATING | TBA FEATURE
Map strategy details for Overall Strategy are currently missing. You can help the Overwatch Wiki by adding them!
|
 Antarctic Peninsula |
TBA RATING | TBA FEATURE
Map strategy details for Antarctic Peninsula are currently missing. You can help the Overwatch Wiki by adding them! Labs
Strategy details missing.
Sublevel
Strategy details missing.
Icebreaker
Strategy details missing.
|

|
TBA RATING | TBA FEATURE
Map strategy details for Busan are currently missing. You can help the Overwatch Wiki by adding them! Downtown
Strategy details missing.
Sanctuary
Strategy details missing.
MEKA Base
Strategy details missing.
|

|
TBA RATING | TBA FEATURE
Map strategy details for Ilios are currently missing. You can help the Overwatch Wiki by adding them! Lighthouse
Strategy details missing.
Well
Strategy details missing.
Ruins
Strategy details missing.
|

|
TBA RATING | TBA FEATURE
Map strategy details for Lijiang Tower are currently missing. You can help the Overwatch Wiki by adding them! Control Center
Strategy details missing.
Garden
Strategy details missing.
Night Market
Strategy details missing.
|

|
TBA RATING | TBA FEATURE
Map strategy details for Nepal are currently missing. You can help the Overwatch Wiki by adding them! Village
Strategy details missing.
Shrine
Strategy details missing.
Sanctum
Strategy details missing.
|

|
TBA RATING | TBA FEATURE
Map strategy details for Oasis are currently missing. You can help the Overwatch Wiki by adding them! City Center
Strategy details missing.
Gardens
Strategy details missing.
University
Strategy details missing.
|

|
TBA RATING | TBA FEATURE
Map strategy details for Samoa are currently missing. You can help the Overwatch Wiki by adding them! Beach
Strategy details missing.
Downtown
Strategy details missing.
Volcano
Strategy details missing.
|
Escort
| Map | Strategy & Stage Tips |
|---|---|
 Overall Strategy |
TBA RATING | TBA FEATURE
Map strategy details for Overall Strategy are currently missing. You can help the Overwatch Wiki by adding them!
|

|
TBA RATING | TBA FEATURE
Map strategy details for Circuit Royal are currently missing. You can help the Overwatch Wiki by adding them! Attack
Strategy details missing.
Defense
Strategy details missing.
|

|
TBA RATING | TBA FEATURE
Map strategy details for Dorado are currently missing. You can help the Overwatch Wiki by adding them! Attack
Strategy details missing.
Defense
Strategy details missing.
|

|
TBA RATING | TBA FEATURE
Map strategy details for Havana are currently missing. You can help the Overwatch Wiki by adding them! Attack
Strategy details missing.
Defense
Strategy details missing.
|

|
TBA RATING | TBA FEATURE
Map strategy details for Junkertown are currently missing. You can help the Overwatch Wiki by adding them! Attack
Strategy details missing.
Defense
Strategy details missing.
|

|
TBA RATING | TBA FEATURE
Map strategy details for Rialto are currently missing. You can help the Overwatch Wiki by adding them! Attack
Strategy details missing.
Defense
Strategy details missing.
|

|
TBA RATING | TBA FEATURE
Map strategy details for Route 66 are currently missing. You can help the Overwatch Wiki by adding them! Attack
Strategy details missing.
Defense
Strategy details missing.
|

|
TBA RATING | TBA FEATURE
Map strategy details for Shambali Monastery are currently missing. You can help the Overwatch Wiki by adding them! Attack
Strategy details missing.
Defense
Strategy details missing.
|

|
TBA RATING | TBA FEATURE
Map strategy details for Watchpoint: Gibraltar are currently missing. You can help the Overwatch Wiki by adding them! Attack
Strategy details missing.
Defense
Strategy details missing.
|
Hybrid
| Map | Strategy & Stage Tips |
|---|---|
 Overall Strategy |
TBA RATING | TBA FEATURE
Map strategy details for Overall Strategy are currently missing. You can help the Overwatch Wiki by adding them!
|
 Blizzard World |
TBA RATING | TBA FEATURE
Map strategy details for Blizzard World are currently missing. You can help the Overwatch Wiki by adding them! Attack
Strategy details missing.
Defense
Strategy details missing.
|

|
TBA RATING | TBA FEATURE
Map strategy details for Eichenwalde are currently missing. You can help the Overwatch Wiki by adding them! Attack
Strategy details missing.
Defense
Strategy details missing.
|

|
TBA RATING | TBA FEATURE
Map strategy details for Hollywood are currently missing. You can help the Overwatch Wiki by adding them! Attack
Strategy details missing.
Defense
Strategy details missing.
|

|
TBA RATING | TBA FEATURE
Map strategy details for King's Row are currently missing. You can help the Overwatch Wiki by adding them! Attack
Strategy details missing.
Defense
Strategy details missing.
|

|
TBA RATING | TBA FEATURE
Map strategy details for Midtown are currently missing. You can help the Overwatch Wiki by adding them! Attack
Strategy details missing.
Defense
Strategy details missing.
|
 Numbani |
TBA RATING | TBA FEATURE
Map strategy details for Numbani are currently missing. You can help the Overwatch Wiki by adding them! Attack
Strategy details missing.
Defense
Strategy details missing.
|

|
TBA RATING | TBA FEATURE
Map strategy details for Paraíso are currently missing. You can help the Overwatch Wiki by adding them! Attack
Strategy details missing.
Defense
Strategy details missing.
|
Push
| Map | Strategy & Stage Tips |
|---|---|
 Overall Strategy |
TBA RATING | TBA FEATURE
Map strategy details for Overall Strategy are currently missing. You can help the Overwatch Wiki by adding them!
|

|
TBA RATING | TBA FEATURE
Map strategy details for Colosseo are currently missing. You can help the Overwatch Wiki by adding them! Pushing
Strategy details missing.
Defending
Strategy details missing.
|

|
TBA RATING | TBA FEATURE
Map strategy details for Esperança are currently missing. You can help the Overwatch Wiki by adding them! Pushing
Strategy details missing.
Defending
Strategy details missing.
|

|
TBA RATING | TBA FEATURE
Map strategy details for New Queen Street are currently missing. You can help the Overwatch Wiki by adding them! Pushing
Strategy details missing.
Defending
Strategy details missing.
|

|
TBA RATING | TBA FEATURE
Map strategy details for Runasapi are currently missing. You can help the Overwatch Wiki by adding them! Pushing
Strategy details missing.
Defending
Strategy details missing.
|
Flashpoint
| Map | Strategy & Stage Tips |
|---|---|
 Overall Strategy |
TBA RATING | TBA FEATURE
Map strategy details for Overall Strategy are currently missing. You can help the Overwatch Wiki by adding them!
|

|
TBA RATING | TBA FEATURE
Map strategy details for Aatlis are currently missing. You can help the Overwatch Wiki by adding them! Station
Strategy details missing.
Garden
Strategy details missing.
Town Center
Strategy details missing.
Bazaar
Strategy details missing.
Resort
Strategy details missing.
|

|
TBA RATING | TBA FEATURE
Map strategy details for New Junk City are currently missing. You can help the Overwatch Wiki by adding them! Arena
Strategy details missing.
The Ducts
Strategy details missing.
Refinery
Strategy details missing.
Junkyard
Strategy details missing.
Bomb Flats
Strategy details missing.
|

|
TBA RATING | TBA FEATURE
Map strategy details for Suravasa are currently missing. You can help the Overwatch Wiki by adding them! Market
Strategy details missing.
Garden
Strategy details missing.
Palace
Strategy details missing.
Temple
Strategy details missing.
Ruins
Strategy details missing.
|
Achievements
| Name | Icon | Description | Reward |
|---|---|---|---|
|
|
Get 2 killing blows with a single use of Soldier: 76's Helix Rockets in Quick or Competitive play. |  | |
|
|
Kill 4 enemies with a single use of Soldier: 76's Tactical Visor in Quick or Competitive play. |  |
Trivia
- As of September 2016, Soldier: 76 was the most widely played hero in the game.[5] By October 2023, this position had been taken by Ana.[6]
- Soldier: 76 is the player character when introduced in the tutorial.
Cultural References
- Solider: 76's two quotes "Smells like victory" and "I love the smell of pulse munitions in the morning" are both references to the 1979 psychological war drama film Apocalypse Now.
- "Dad Soldier: 76" is a popular fan reinterpretation of the character, depicting him as an individual struggling to control children (younger versions of Overwatch characters). Tatasciore himself is reciprocal to the meme, stating "he's definitely a father figure...I totally get it. I see him as that too, and that's one of the most moving parts of him. Even if you're a soldier on his team, he's going to try and teach you. Even if you're fighting him, he'll say, "You got to learn differently." He is a protector, and he will watch over everyone, and he's trying."[7]
- Soldier: 76 appears as a skin for Raynor in Heroes of the Storm.
- A Soldier: 76 portrait is available in StarCraft II for those who purchase the Origins Edition.[8]
Misc. Character Information
- At some point, Hollywood made a film depicting the founding of Overwatch. Morrison considered the film a "total flop," and regarded the actor who portrayed him as an amateur.[9]
- His Commando: 76 and Night Ops: 76 skins list his religion as Catholic on the dog tags, which is notably the first reference to a real-world religion in Overwatch.
- Soldier: 76 is the second LGBT hero in the game, after Tracer. This was revealed in the short story Bastet, and later confirmed in a Tweet from Michael Chu, the lead writer.[10]
- Morrison has a low opinion of both Viskhar and Helix Security International.[9]
- Morrison's uncle was still alive during the Omnic Crisis.[9]
- Morrison's favorite animal is the Jack Russel Terrier.[9]
- Morrison takes vitamins once a day, after a steak dinner.[9]
- The details of Morrison's personal life are mostly unknown to the public at large.[11]
- Morrison and Opara both thought highly of each other.[9]
Contradictions
- Contradictory information seems to exist as to the nature of Reaper and Morrison's relationship. An Atlas News post in 2015 stated that Morrison becoming head of Overwatch was the source of the rift between them.[12] In 2018, Jeff Kaplan stated that there was no rift, that Reyes was happy for Morrison to have the more political role and be "number two," as there would be less accountability. [13]
- Morrison's views on Ana's supposed death seem to vary between sources. In Old Soldiers, he states that he thought she was dead, however, later in Bastet, he claims she knew he wasn't dead and that everyone else thought he was being irrational.
- The time and reason for Morrison joining the military somewhat varies. In an article discussing Morrison's life, it claims and implies that Morrison joined the military prior to the Omnic Crisis and only planned to serve a brief stint before heading home. However, his work ethic and courage caught the eye of military brass, which earned him a position in the Soldier Enhancement Program; after which, the Omnic Crisis finally broke out.[12] Meanwhile, in the Uprising comic, Morrison instead claims that he only joined the military following the Crisis breaking out to help fight. He also claims to have signed up for the enhancement program himself as well.[14] In Overwatch 2: Sojourn, it states that Morrison enlisted at eighteen, and had reached the rank of first sergeant by the time the Omnic Crisis had occurred, after which he was signed up for the enhancement program.[4]
- Overwatch: Declassified melds the differing accounts, and is the one this article has gone with. In it, it is established that while Morrison originally intended his stint to be brief, he ended up going career. Given the timeframe, Morrison would have been in the US Army for around a decade before the Omnic Crisis broke out, at which point he signed up for the SEP, and later, Overwatch.
Merchandise
The Soldier:76 Nendoroid figure
- A bronze statue of Soldier: 76 is available in the Collector's Edition of Overwatch.[15]
- A "Cute but Deadly" Soldier: 76 figure is available for purchase from the Blizzard Store.[16]
- A Soldier: 76 Nendoroid figure went on sale in Q2 2019.
Development
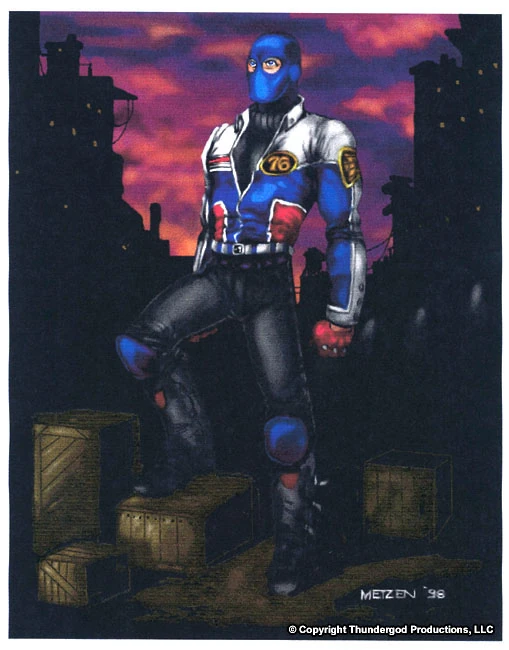
Early concept art for Chris Metzen's unpublished Soldier: 76 comic book series
Soldier: 76 was designed using a top-down approach, where developers started with the flavor/story/art side of the subject and built mechanics around it. The original concept was pitched by Chris Metzen, and the team instantly got onboard. From there, lead concept artist Arnold Tsang, Metzen and art director Bill Petras worked together to finalize a character concept. By this stage, the developers had the idea of making 76 a "normal rifle guy," in regards to his gameplay style. Few problems were encountered during development, and only his heal ability changed.[17] It was intended that he be easy for players from other FPS games to play, allowing them to ease into Overwatch before moving onto more exotic heroes.[5] Metzen leveraged Soldier: 76 as a "fulcrum point" of the story/setting. He is said to represent Overwatch at its greatest.[18]
Soldier: 76 stems in part from the Ranger class from Project Titan. The Ranger had a sniper rifle, an assault rifle, and a rifle that could transform into a turret. Soldier: 76 got the assault rifle, while the sniper rifle and transforming rifle went to Widowmaker and Bastion respectively.[19]
Morrison's visual design differs from his initial appearance during and after the Omnic Crisis, and how he appears in the game itself. This was intentional on the developers' part, as they wanted his visual design to reflect how his state of mind has changed over the years.[17]
Soldier: 76 was a comic book series concept by Chris Metzen. Morrison's design was inspired by the title character—Metzen wanted to see what the development team would do with the character. Morrison shares a lot of broad themes and motivations with the comic character, but the details of the characters' lives differ greatly.[17]
Overwatch 2
Like almost all Overwatch Heroes, Soldier: 76 was redesigned and given a new look for Overwatch 2. Not much is known about the idea behind his new look. It was stated that the general scheme concept for all new hero looks for Overwatch 2 to be aimed at keeping the "essence" of the hero, while showing some evolution and character growth in the design. [20]
-
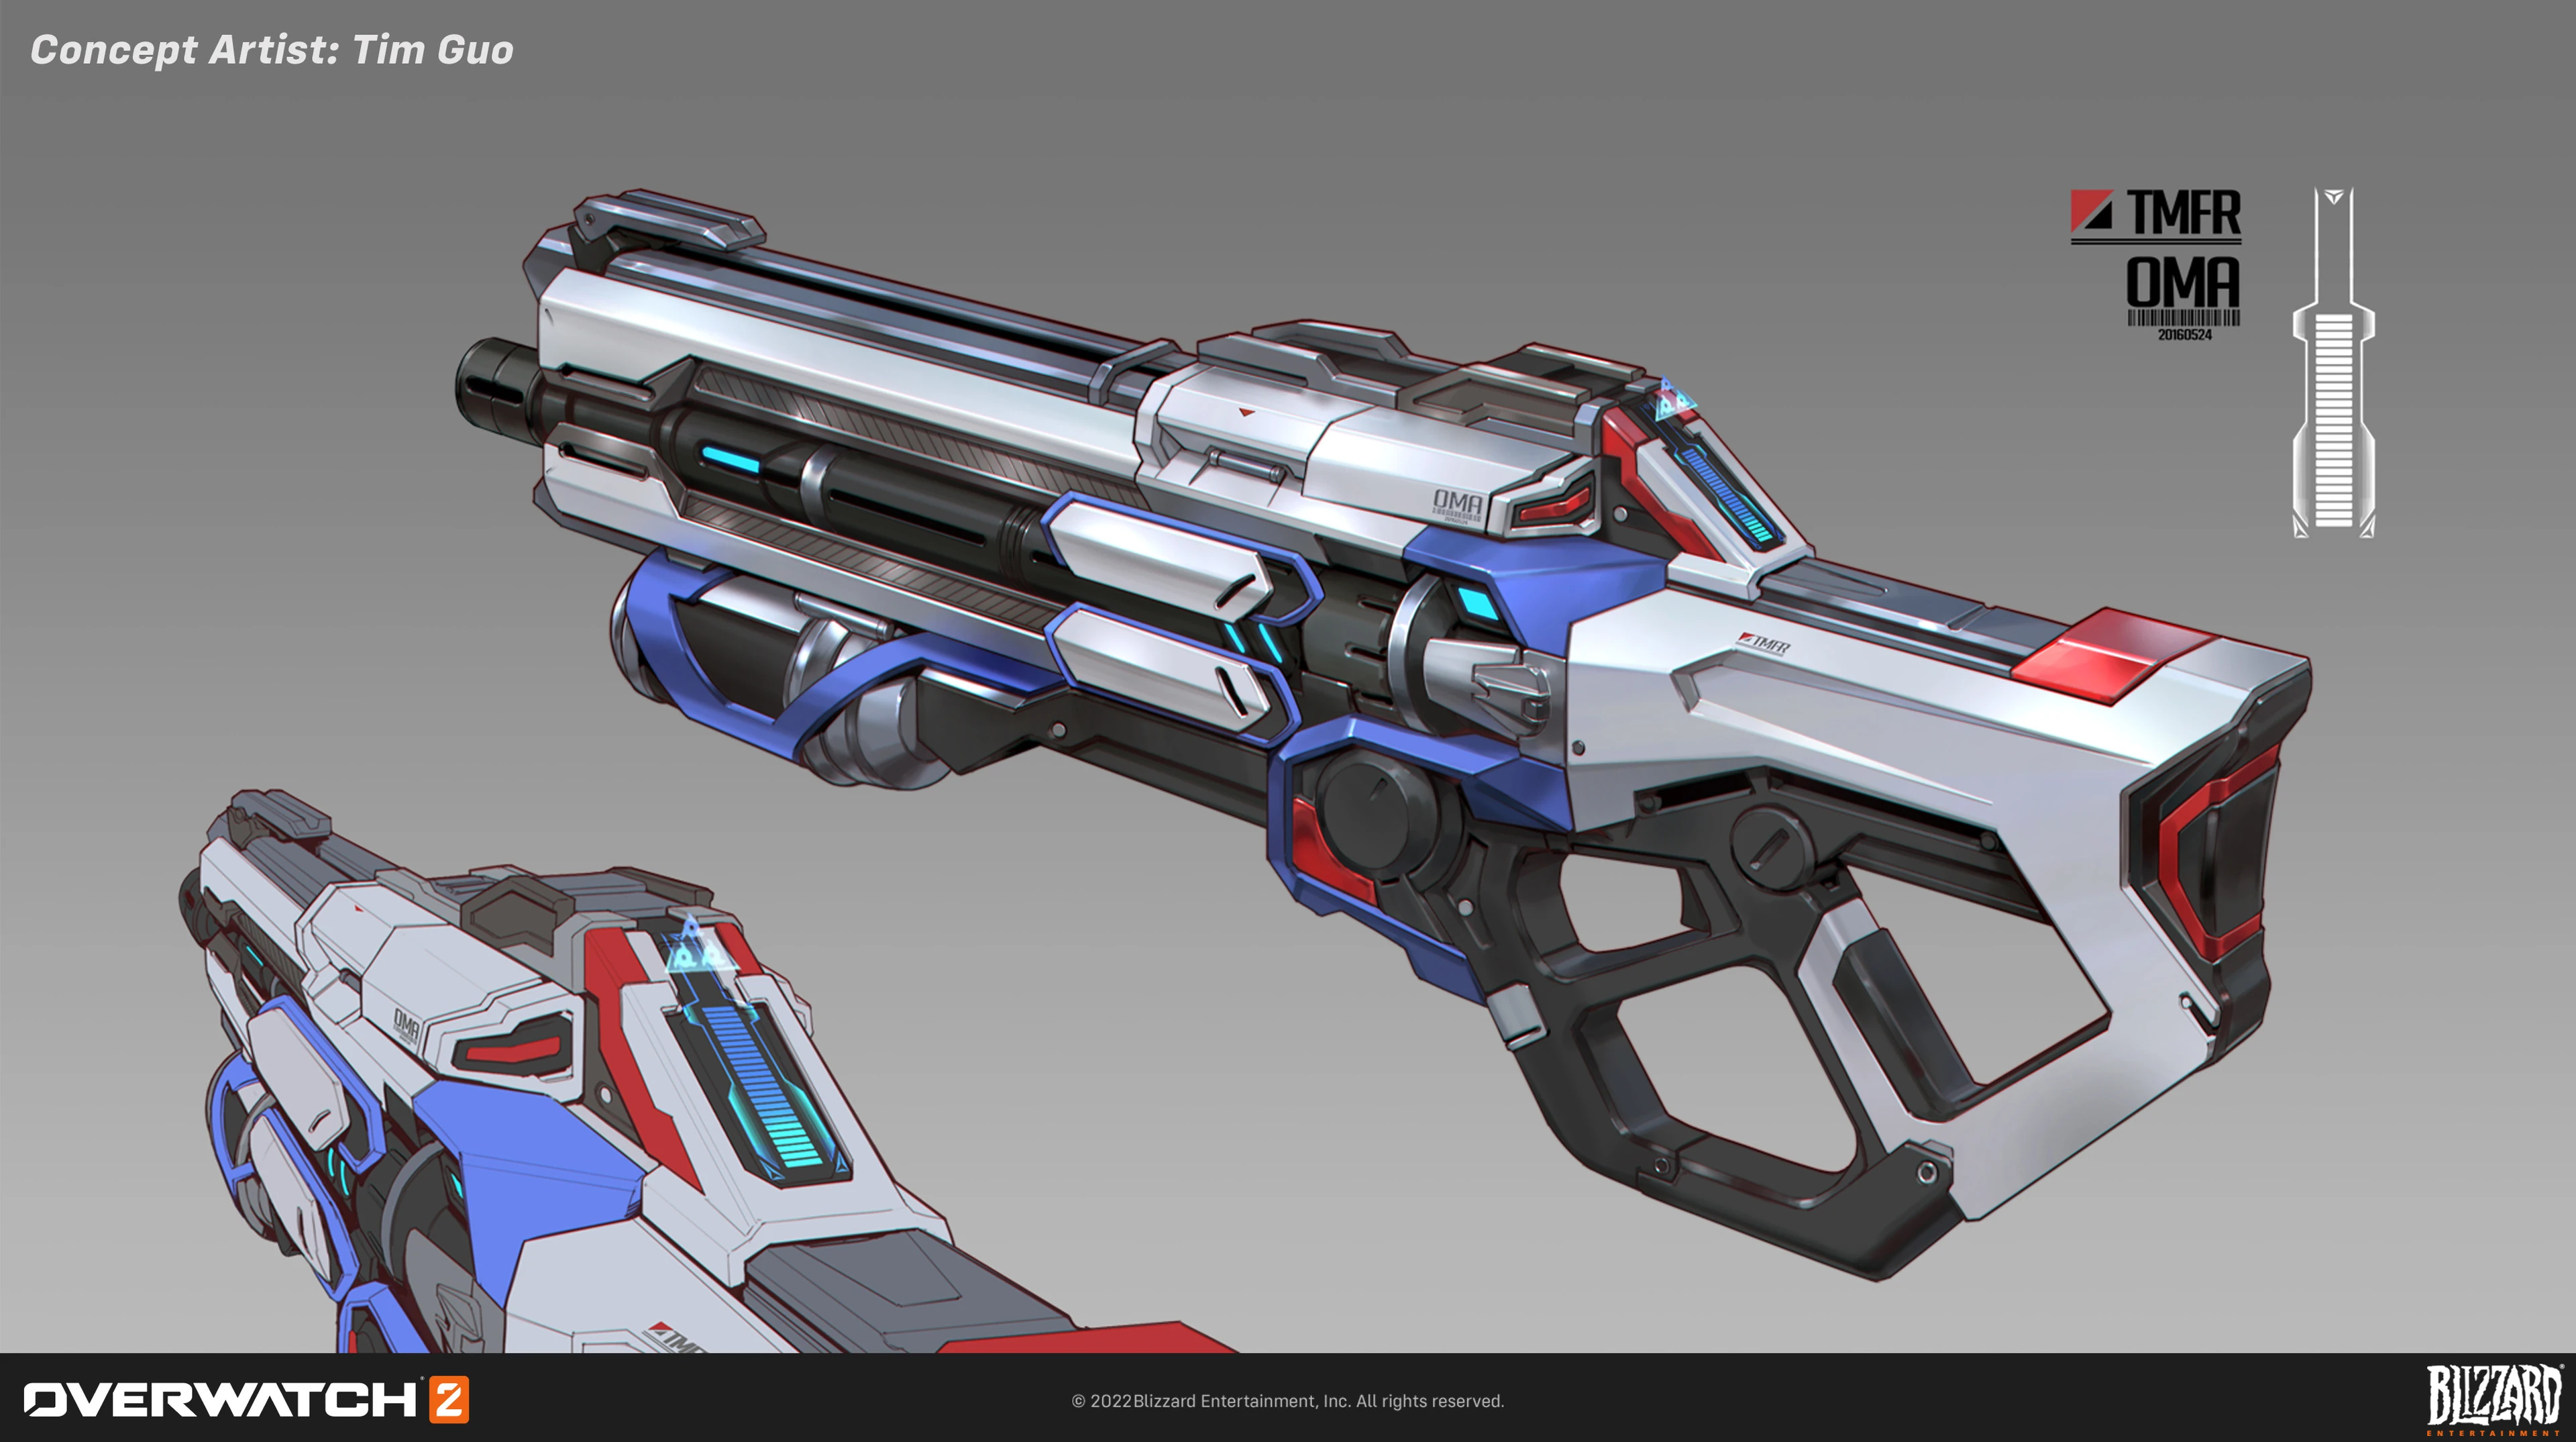
 Overwatch 2 Weapon Concept Art by Tim Guo
 -
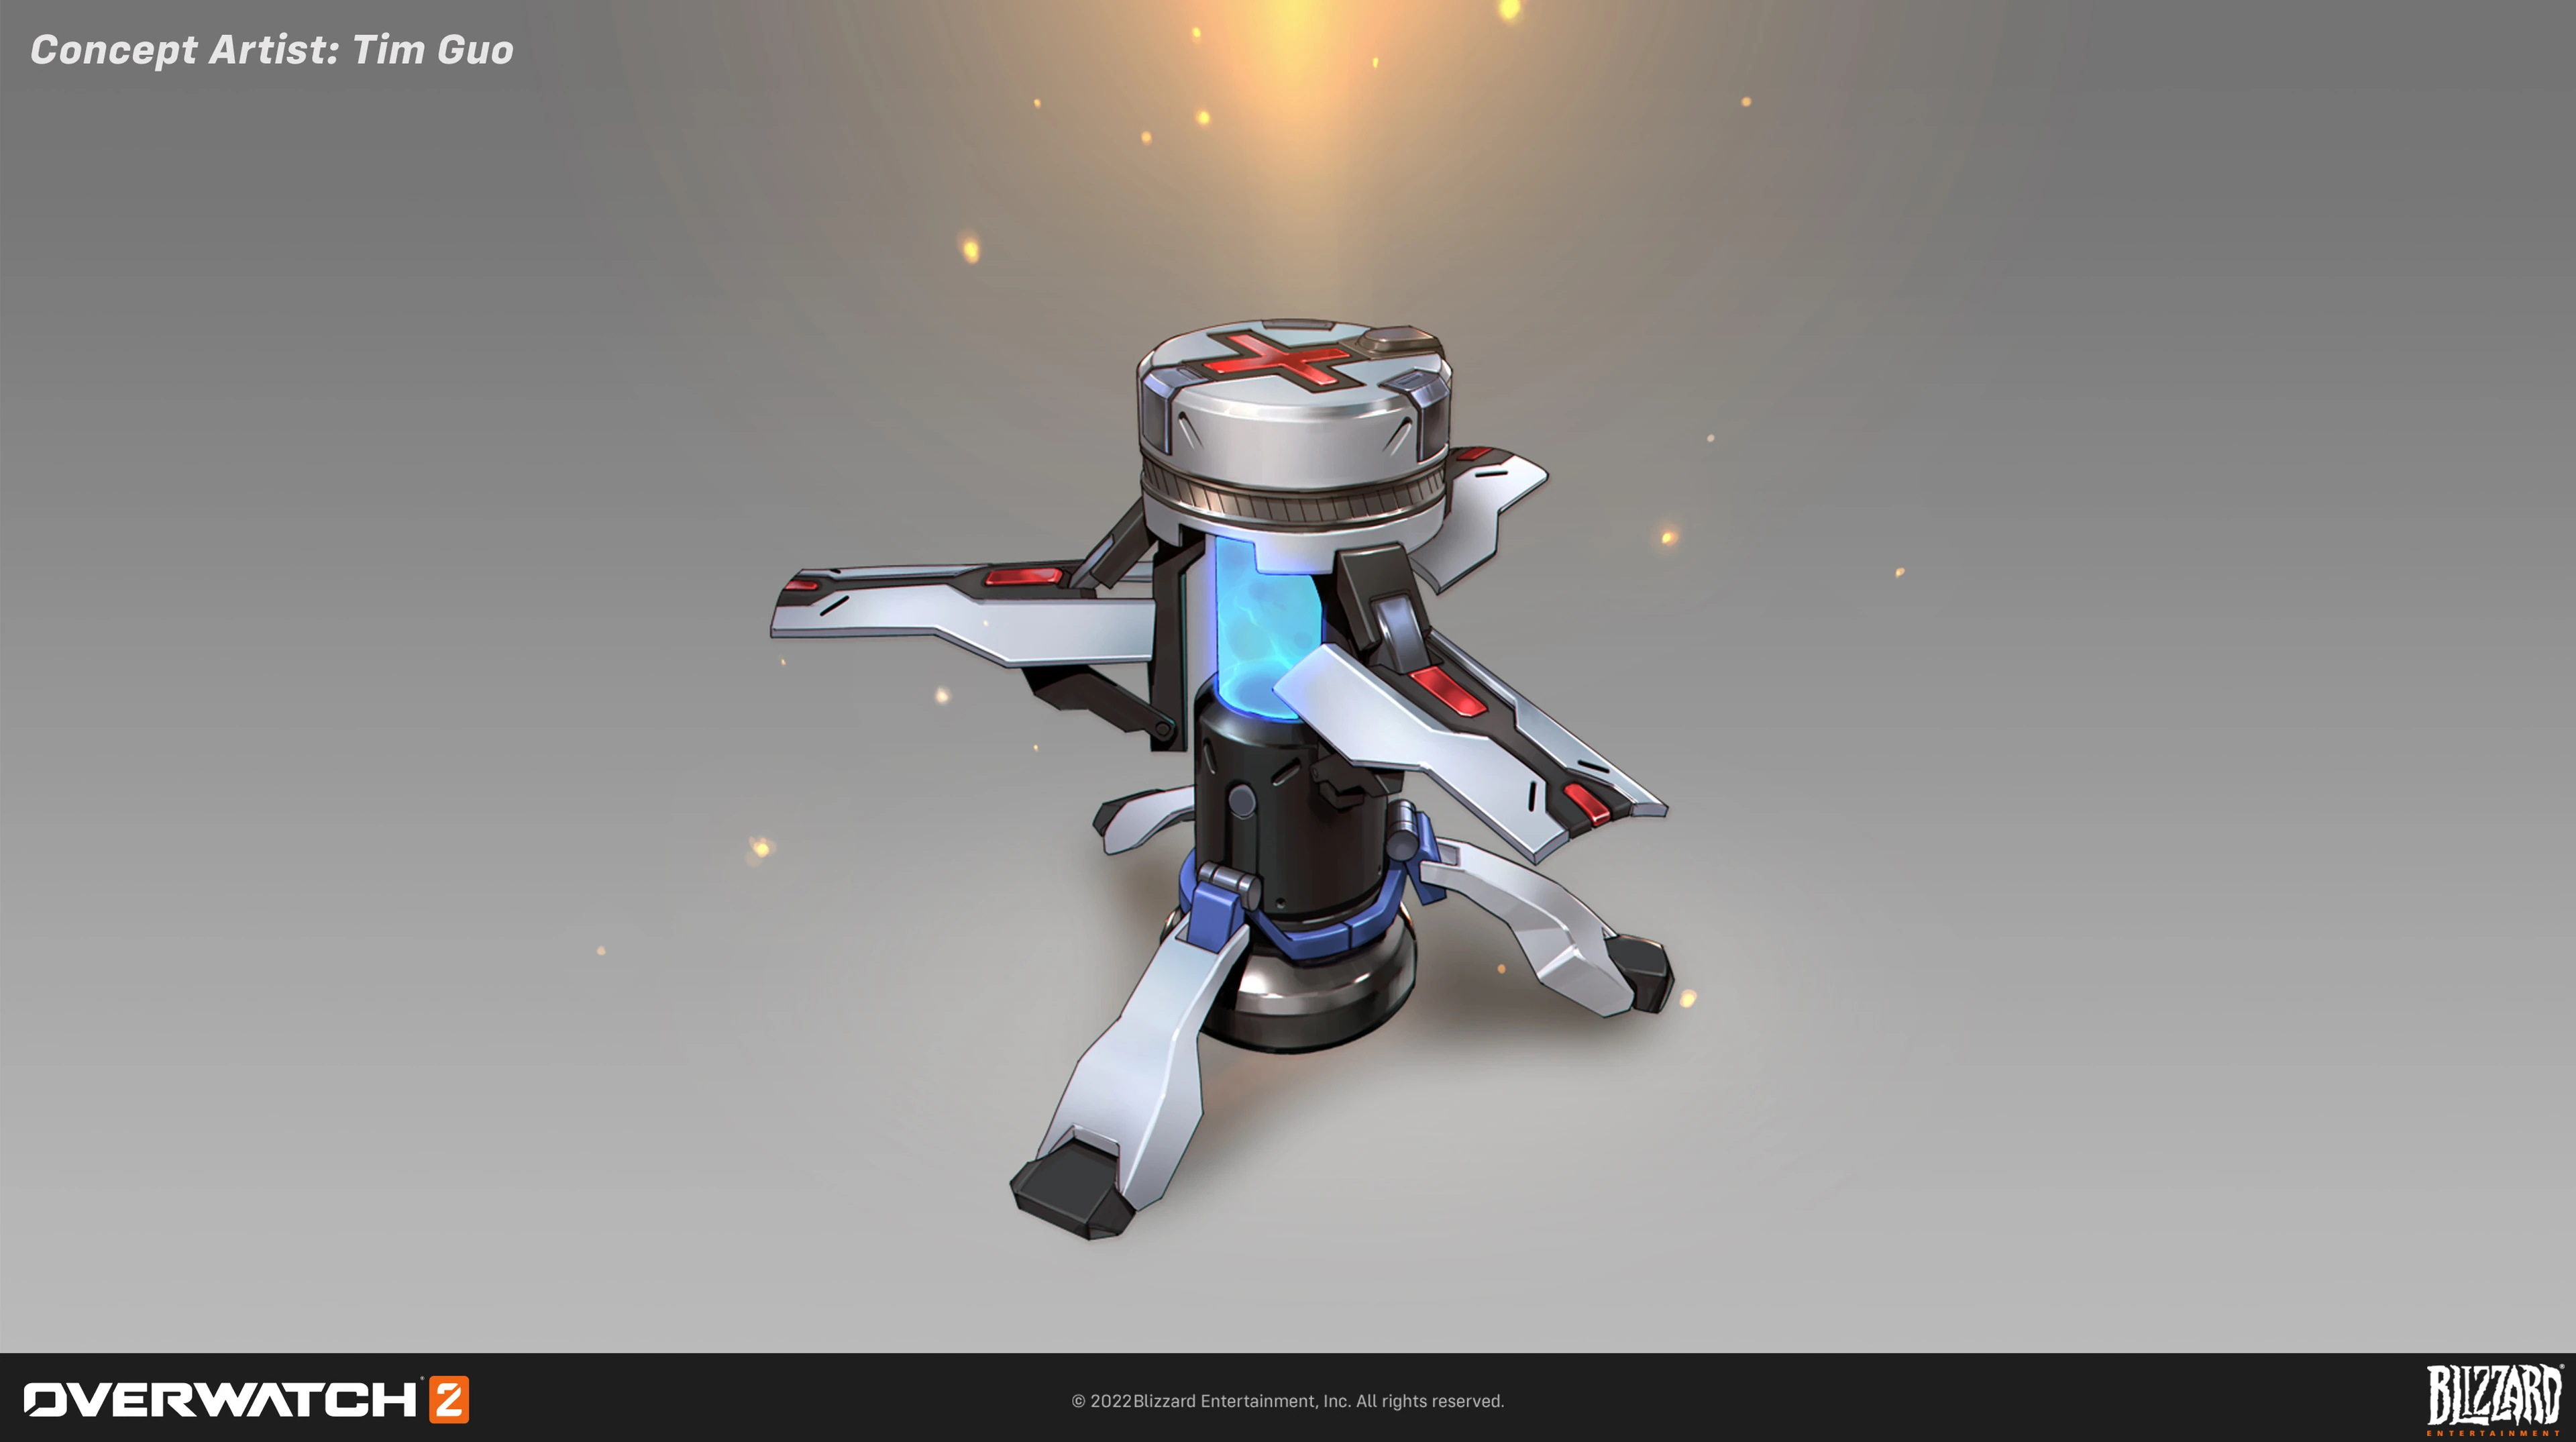
 Overwatch 2 Biotic Field Concept Art by Tim Guo
Soldier: 76 Comic Pitch
- The American dream has become a nightmare.
- A dramatic rise in terrorist attacks executed on US soil erodes national confidence in the Federal Government’s ability to maintain order and security throughout the country. Extremist militant groups, both foreign and domestic, strike at US holdings with seeming impunity. The Federal Government’s inability to directly counter these threats begins to chip away at the cornerstones of national unity.
- The seditious debate over how to respond forcefully to the rising crisis begins to fracture the tentative fraternity between the Federal and State Governments. The increasingly sensationalist media-bloc fans the flames of public paranoia and discontent.
- Violence reaches a boiling point on both coasts as various ethnic and special interest groups are blamed for society’s rapid disintegration. The tenuous public conscience finally snaps as race riots, violent anti-Federal demonstrations and outright urban warfare erupt throughout the nation’s major population centers.
- Local governments, unable to stem the tide of the growing anarchy, turn to the Federal Government for a final solution. Martial Law is instated across the land as Federal armed forces move in and quickly take control of thirteen eastern states. The massive police action quickly spirals out of control as numerous guerilla militias rise up to spread terror and destruction up and down the East Coast.
- Outraged by this unprecedented Federal action, and driven to circumvent similar events in their own territories, a number of central and western states declare their intentions to secede from the union. In a final bid to keep the nation from fracturing any further, the Federal Government sends its troops into the heartland of America to restore order at any cost.
- The Second American Civil War has begun…
Essentially, the character – S:76 – is an old super soldier (there was a whole series of them - though the term ‘super soldier’ will likely NEVER be used). These guys had special micro-chips implanted in their brain stems that regulate their autonomic systems – giving them sporadic boosts of speed, endurance, aggression and strength. Anyway, 76 was left behind on a botched assassination mission over thirty years ago. Wounded and alone he has wandered the seedy back-alleys of South America as an amnesiac ever since. The government has presumed him dead all these years.
While he was away – America devolved into a war-zone. The nation (for a number of reasons – rampant domestic terrorism being a biggie) lost all sense of itself as the Second American Civil War erupted between the Federal controlled east and a loose conflagration of western states. The country is in chaos. Race riots and worse are erupting in every major population center. Things are not good.
As fate would have it, our hero finds his way home to a very different America than he knew. Still suffering from amnesia, he must attempt to come to terms with his shadowed past in order to chose the right side to fight for.
The series is being painted by Brazilian artist, Max Velati, with me writing the script. We’re cranking away, so I hope to start sending this thing out for solicitation pretty soon.
For a sneak peek – you guys can check out the short story Soldier: 76: The Vigil I did with artist Greg Scott in Digital Webbing Presents issue #16 (on sale a few months back). Below, I’ve also included a sketch page Greg did of 76 as we were jamming on the story!
Well, I hope y’all dig the concept! Let me know what ya’ think! Happy Holidays everyone! Let’s tip a few back in honor of the 1st birthday of Sons of the Storm!!! - Metzen[21]
Removed abilities

- Removed in Season 18.

- Removed in Reign of Talon Season 1

Media
Images
- Former Portrait
-
 Overwatch 1 Hero Portrait

- Promotional
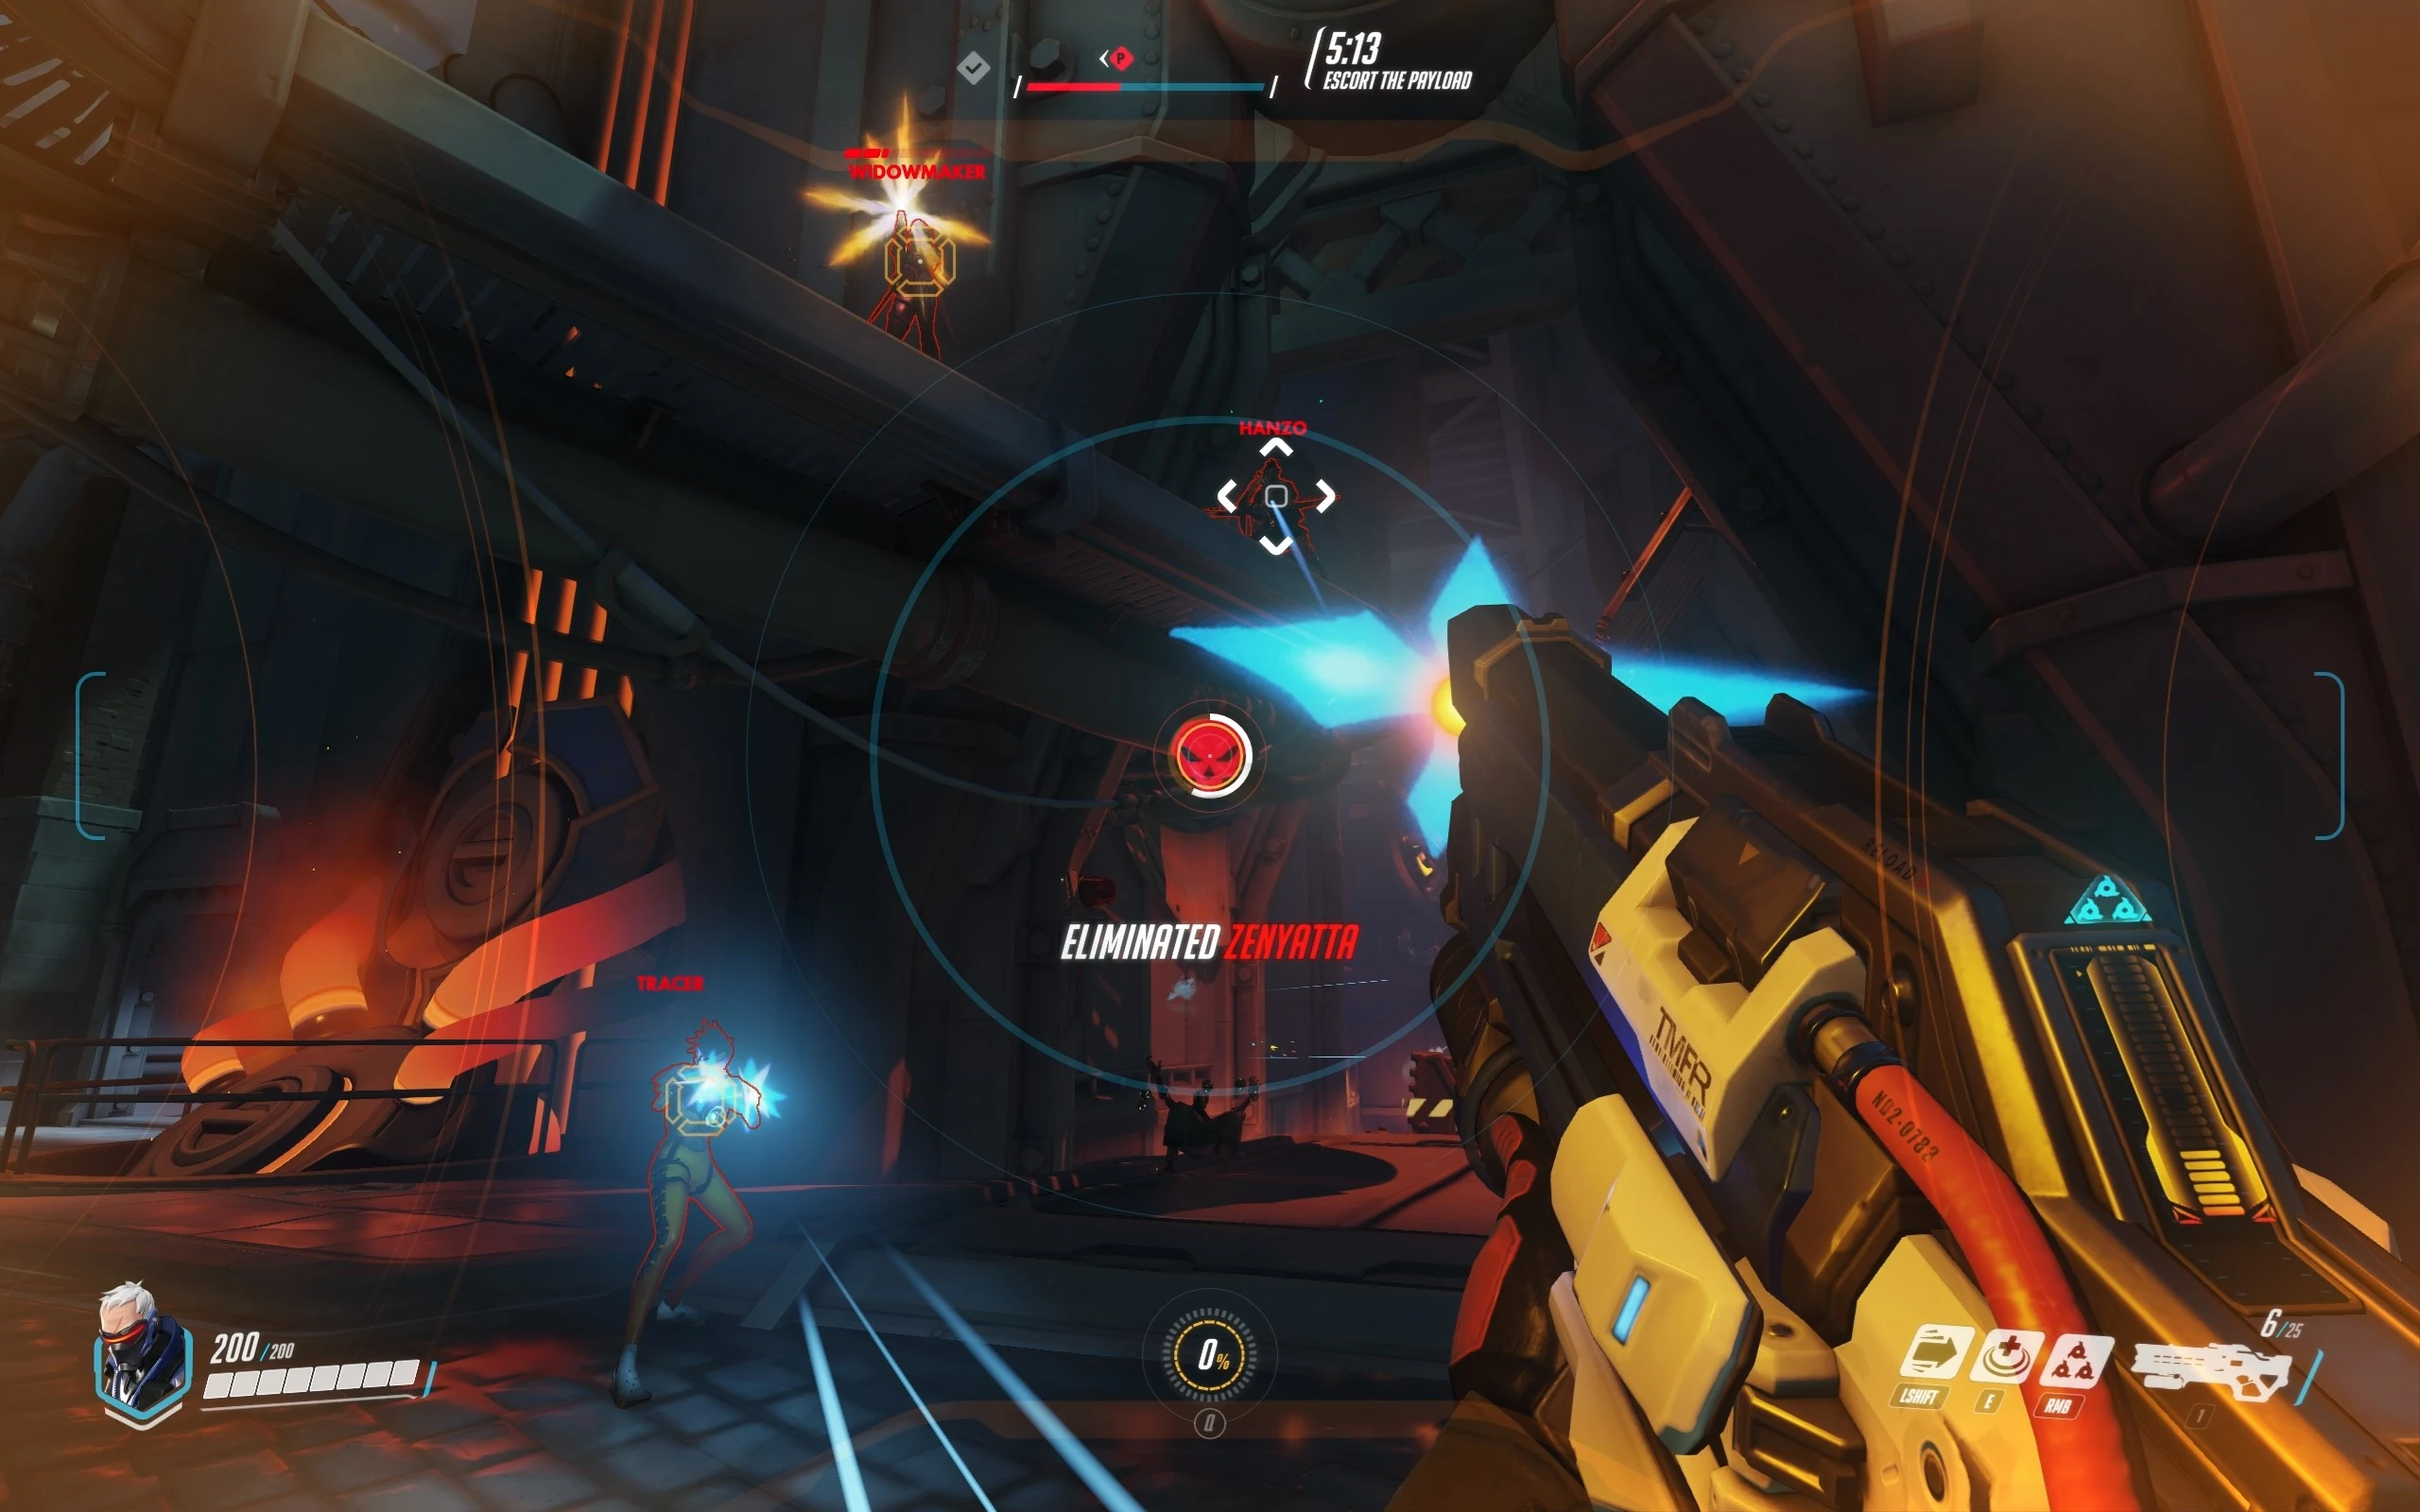
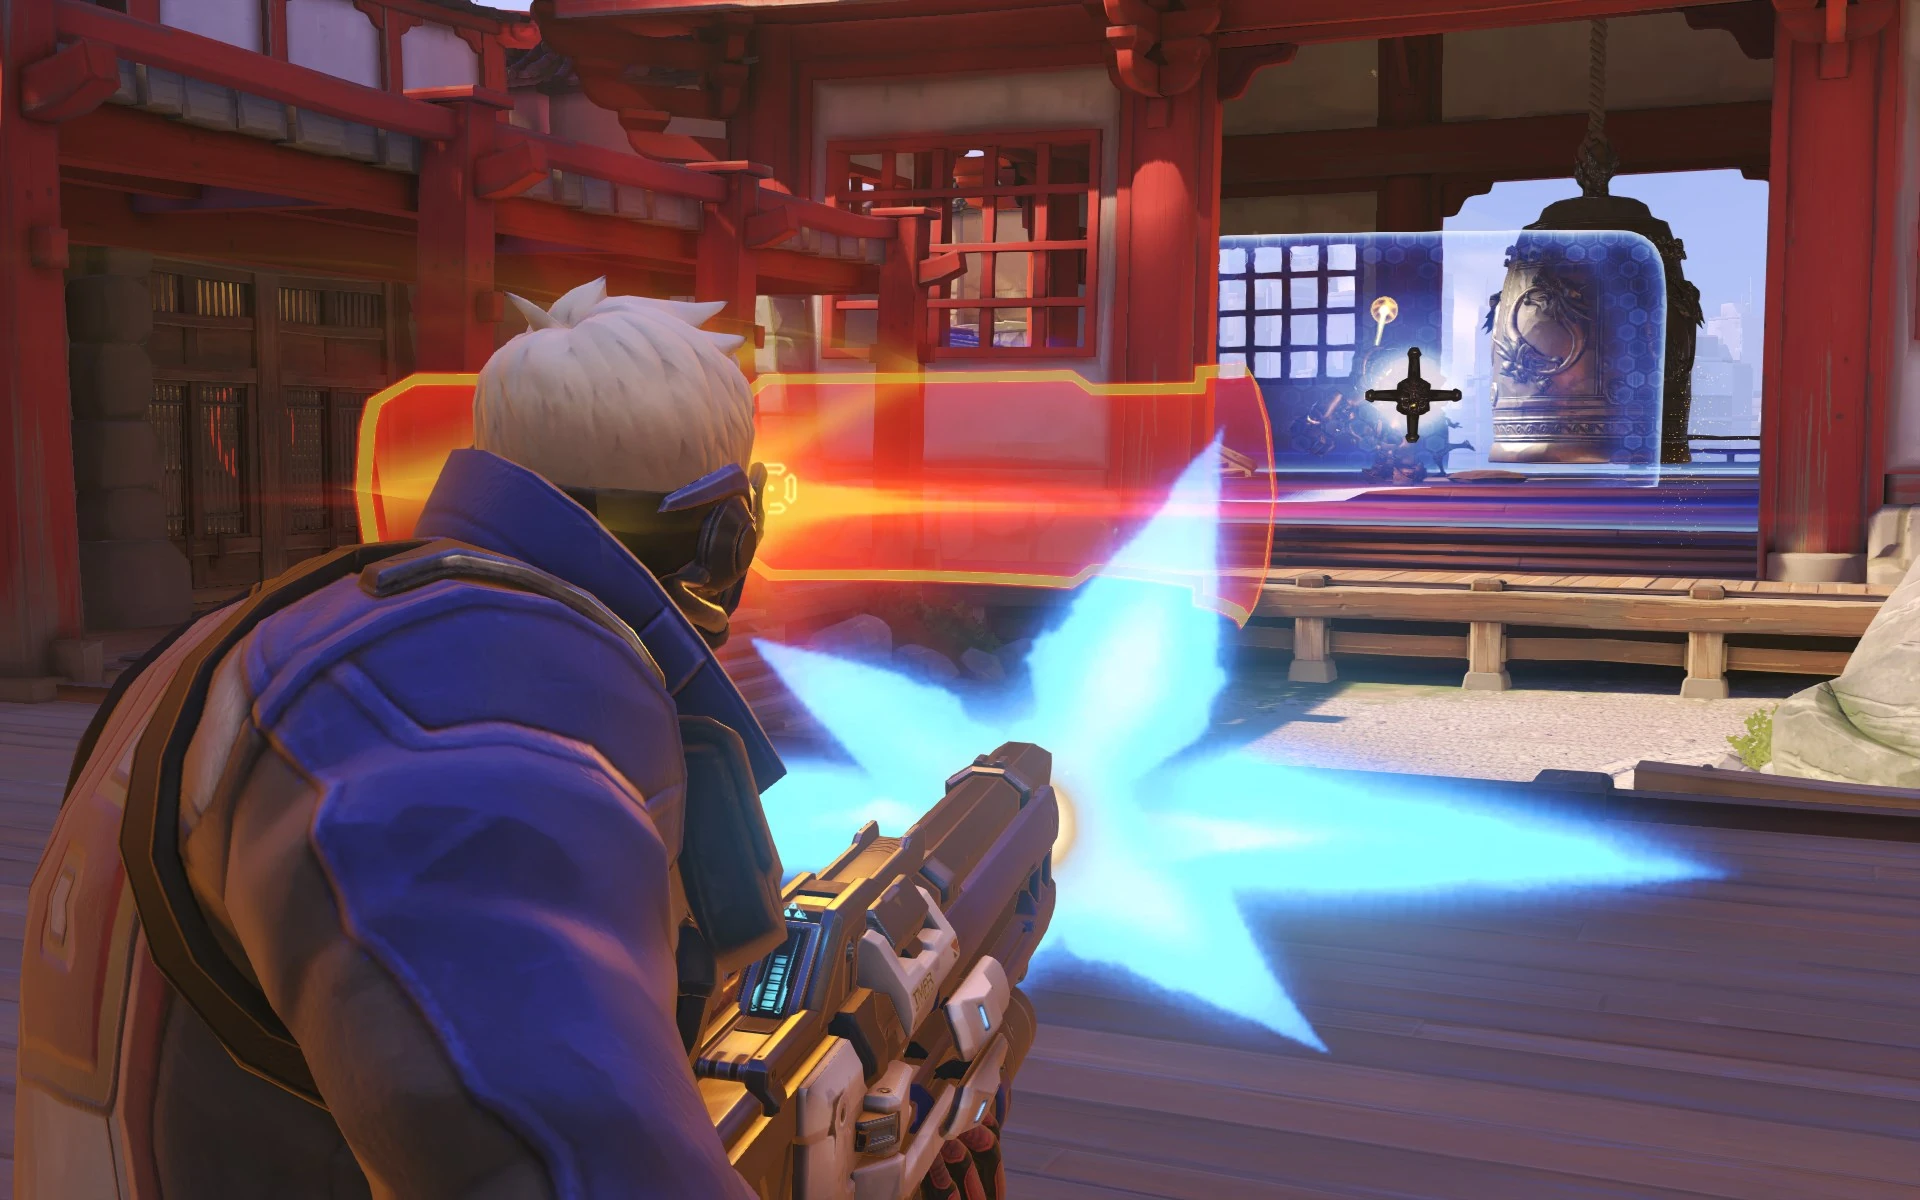
- Gameplay Screenshots
- Concept Art
-
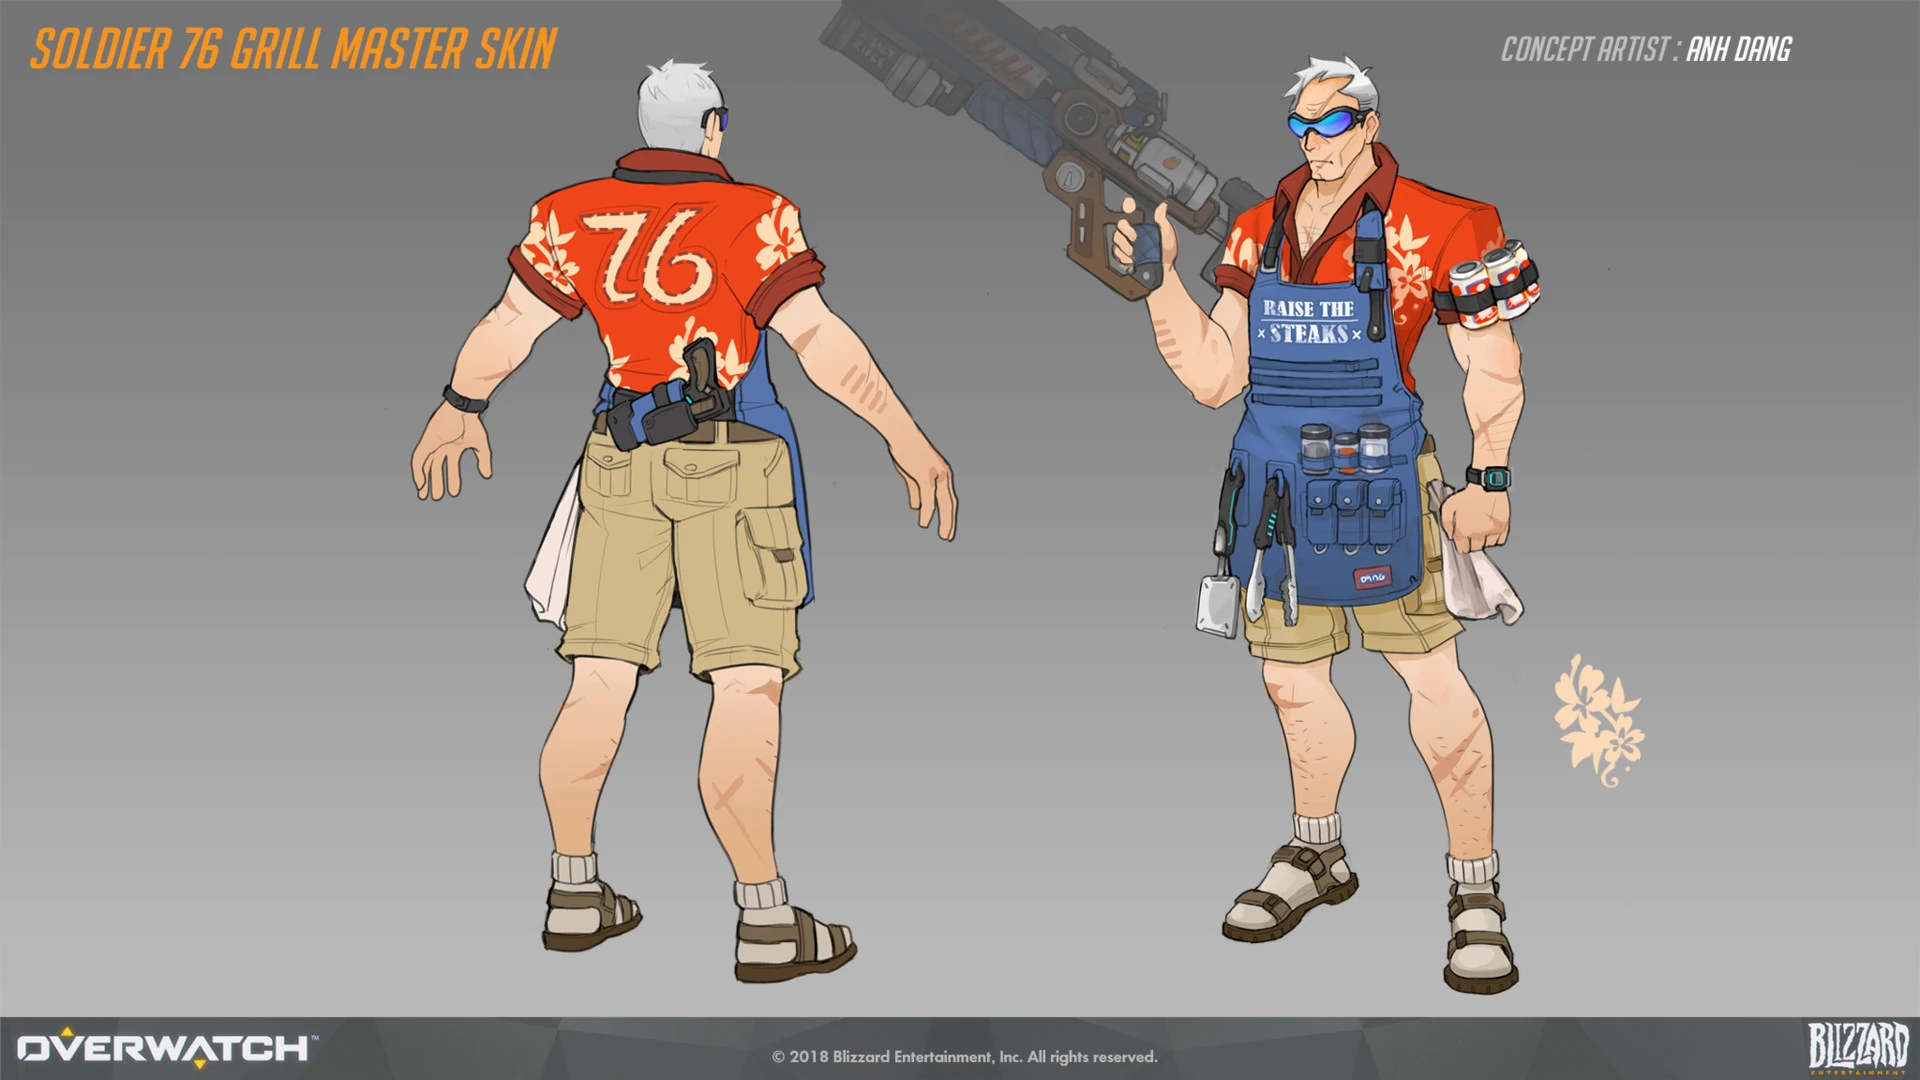
 Grillmaster: 76 Skin Concept Art by Anh Dang
 -
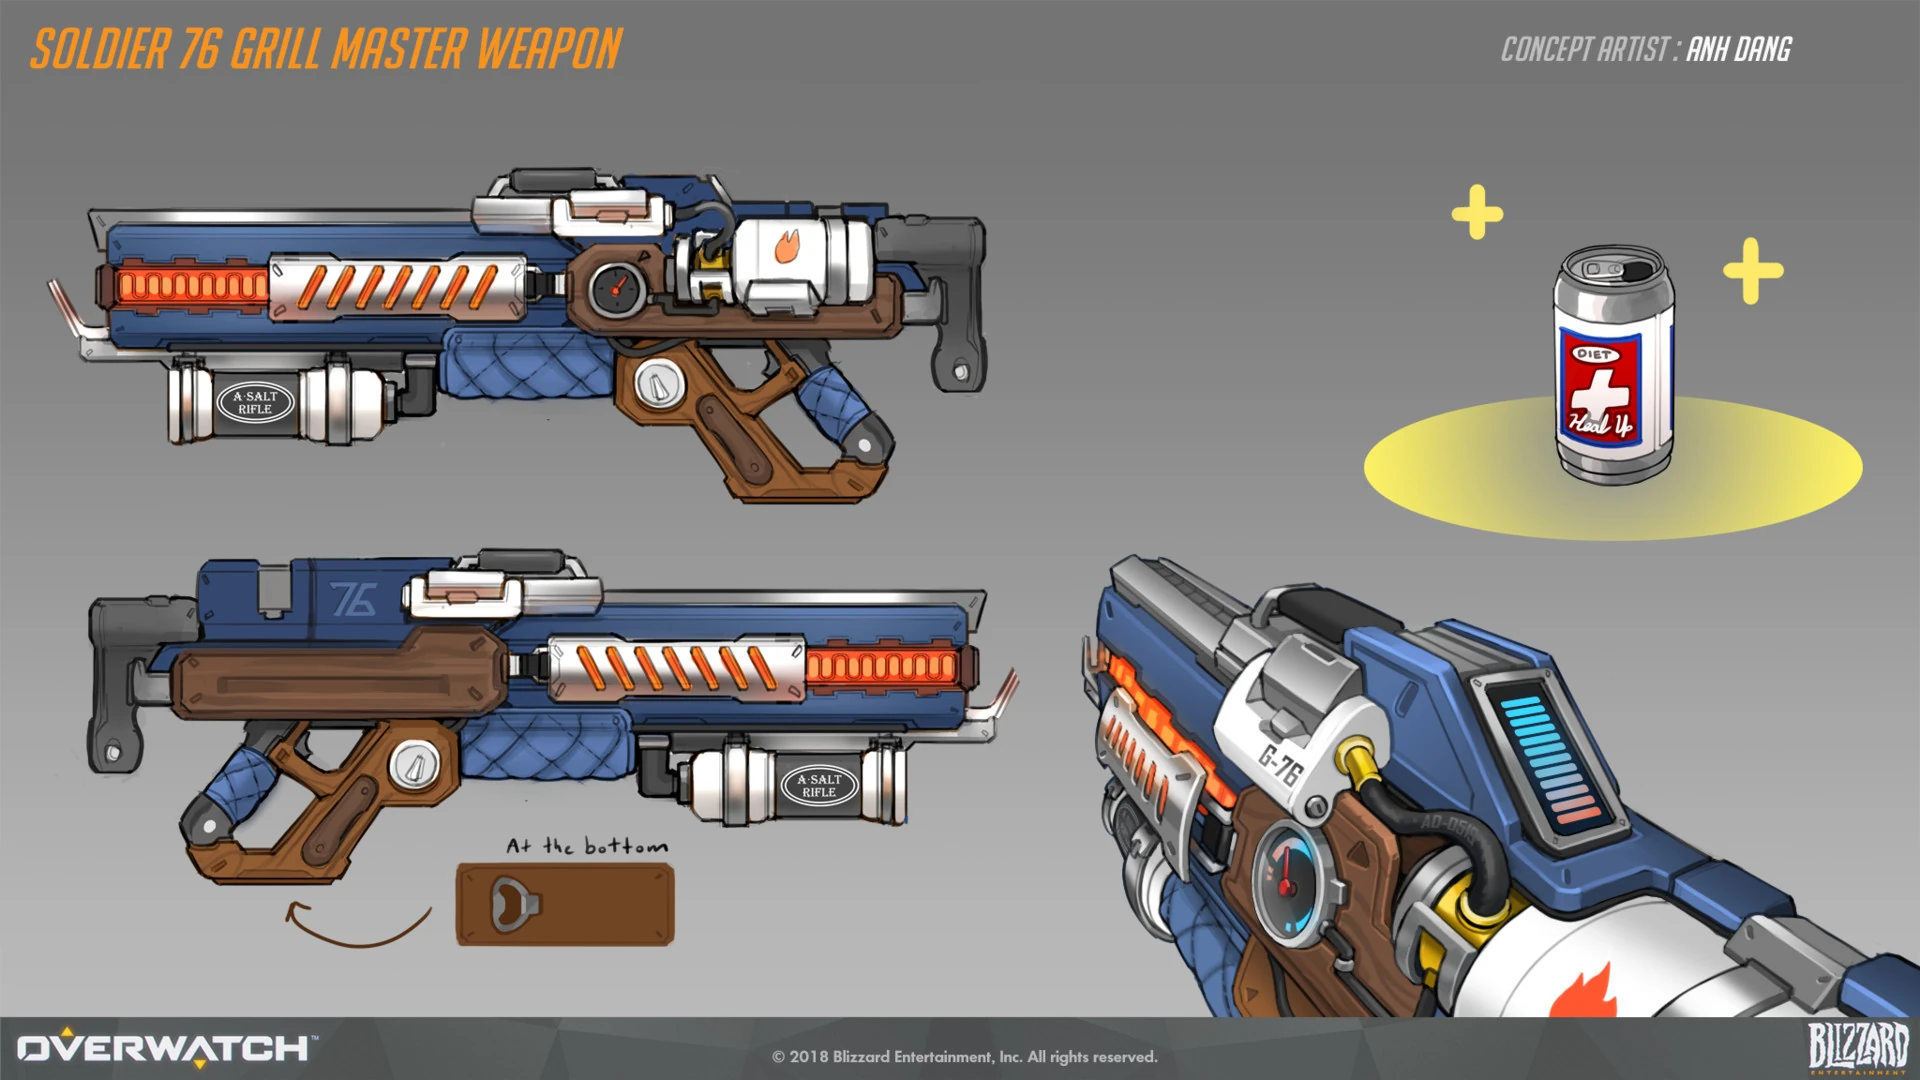
 Grillmaster: 76 Skin Weapon Concept Art by Anh Dang
 -
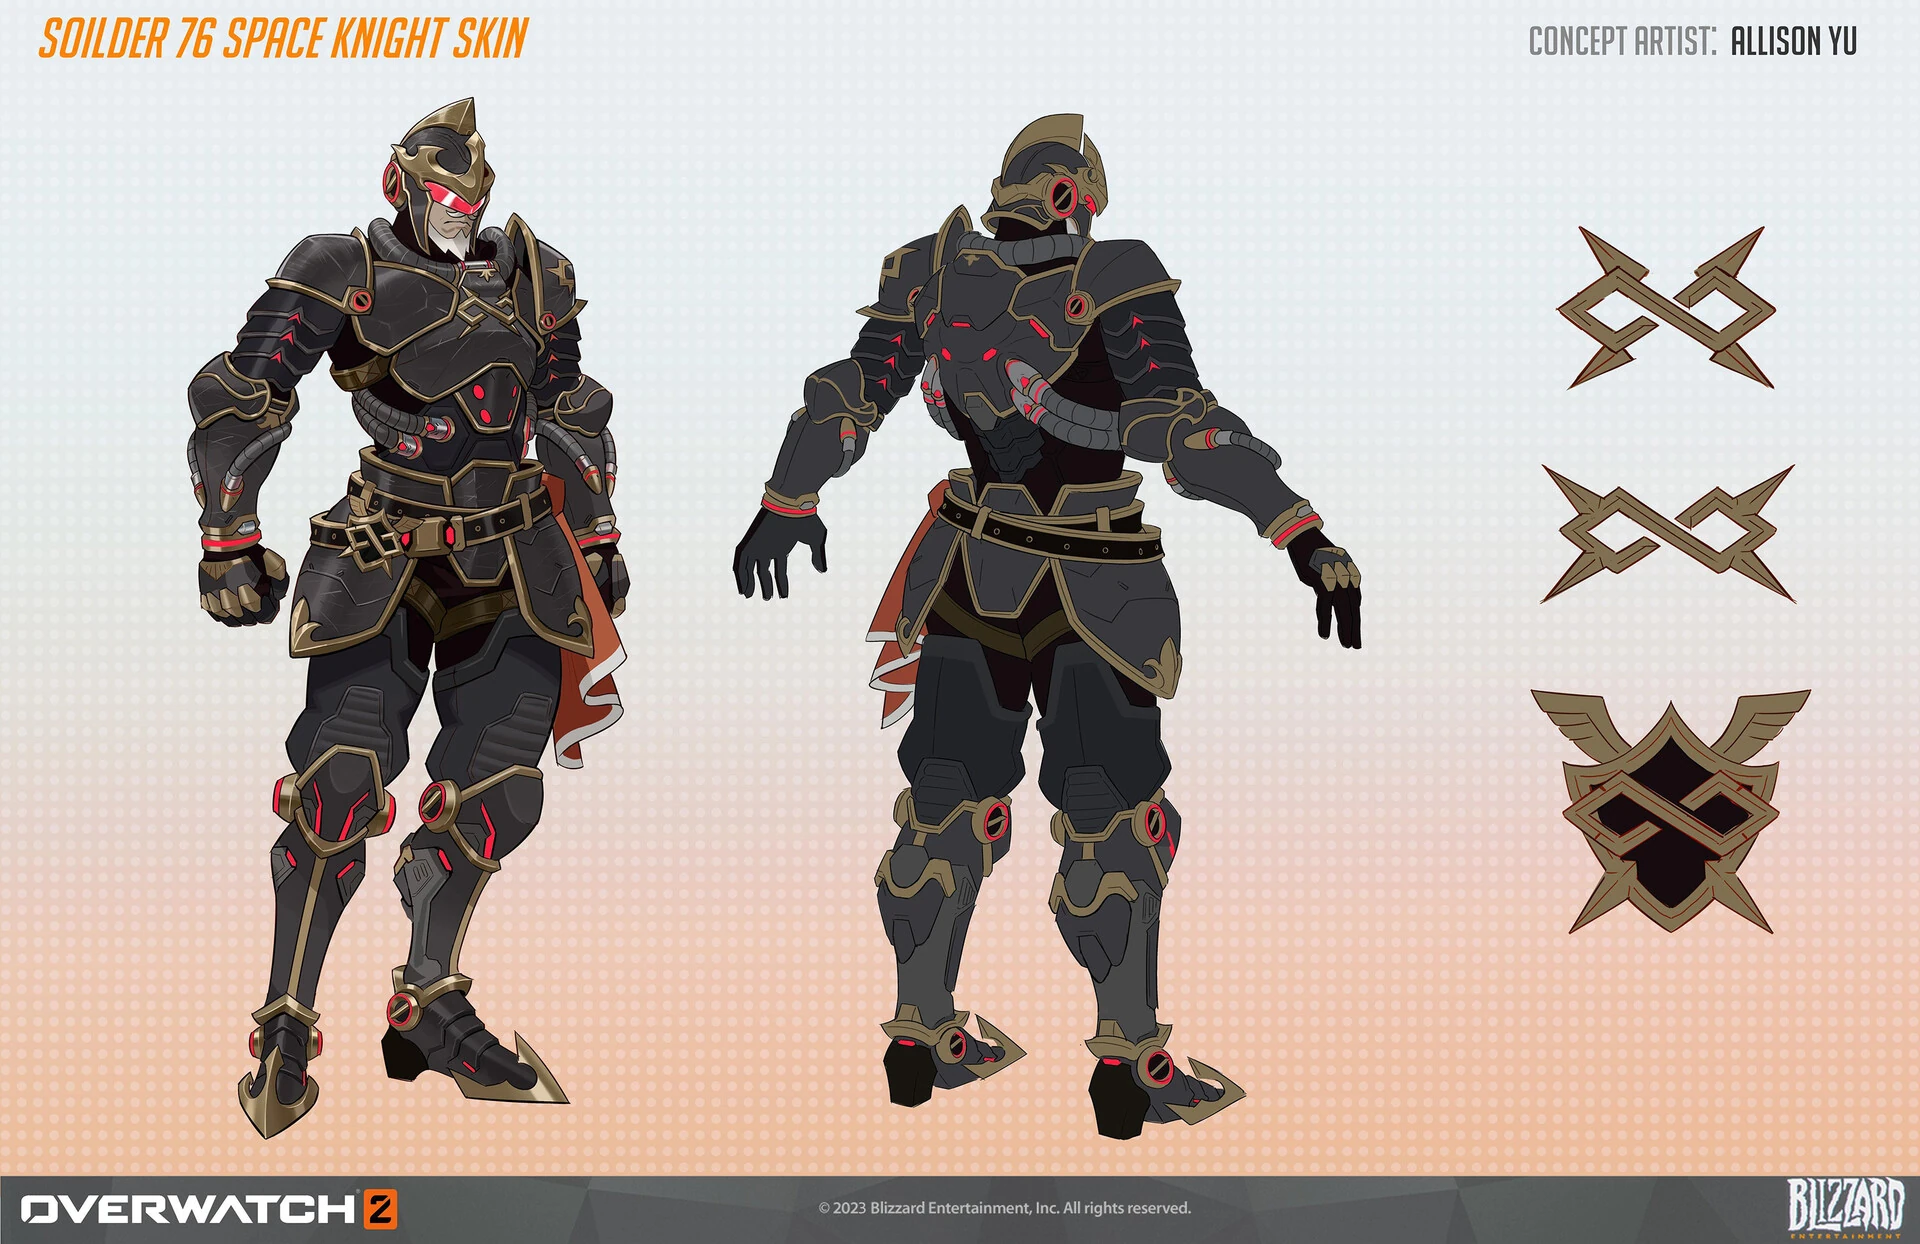
 Infinite Guard Skin Concept Art by Allison Yu
 -
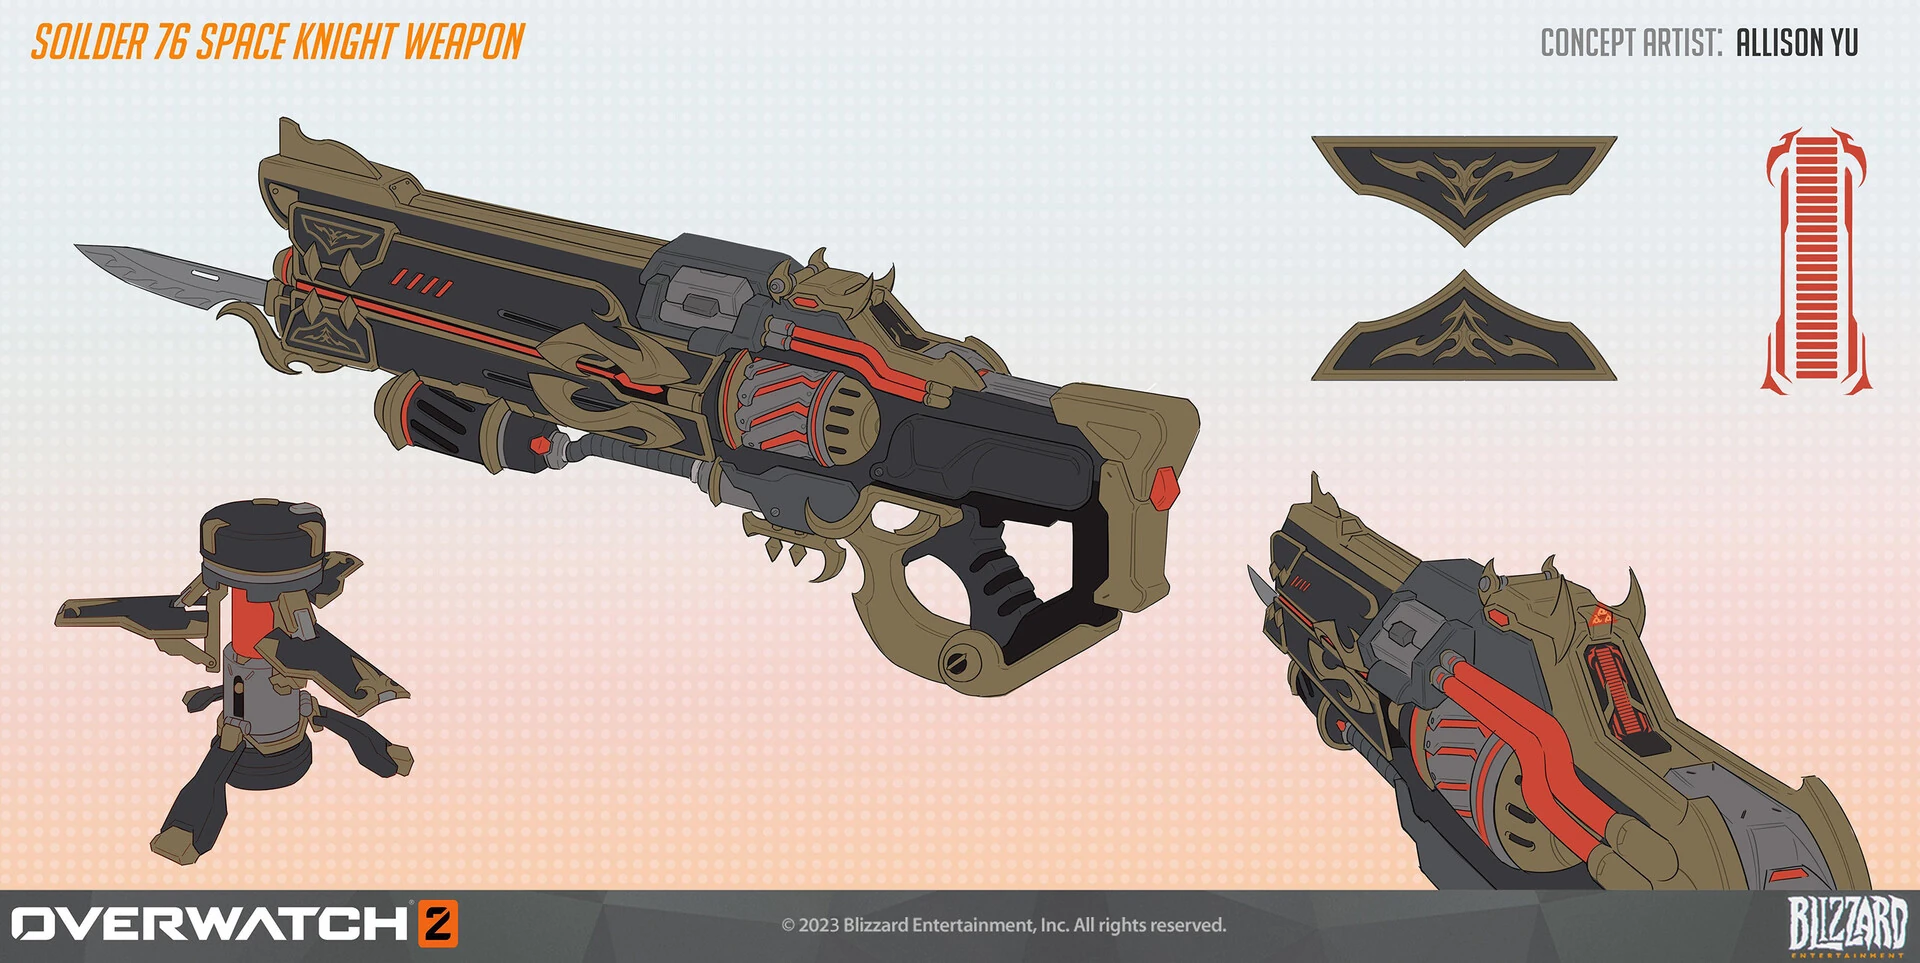
 Infinite Guard Skin Weapon Concept Art by Allison Yu
 -
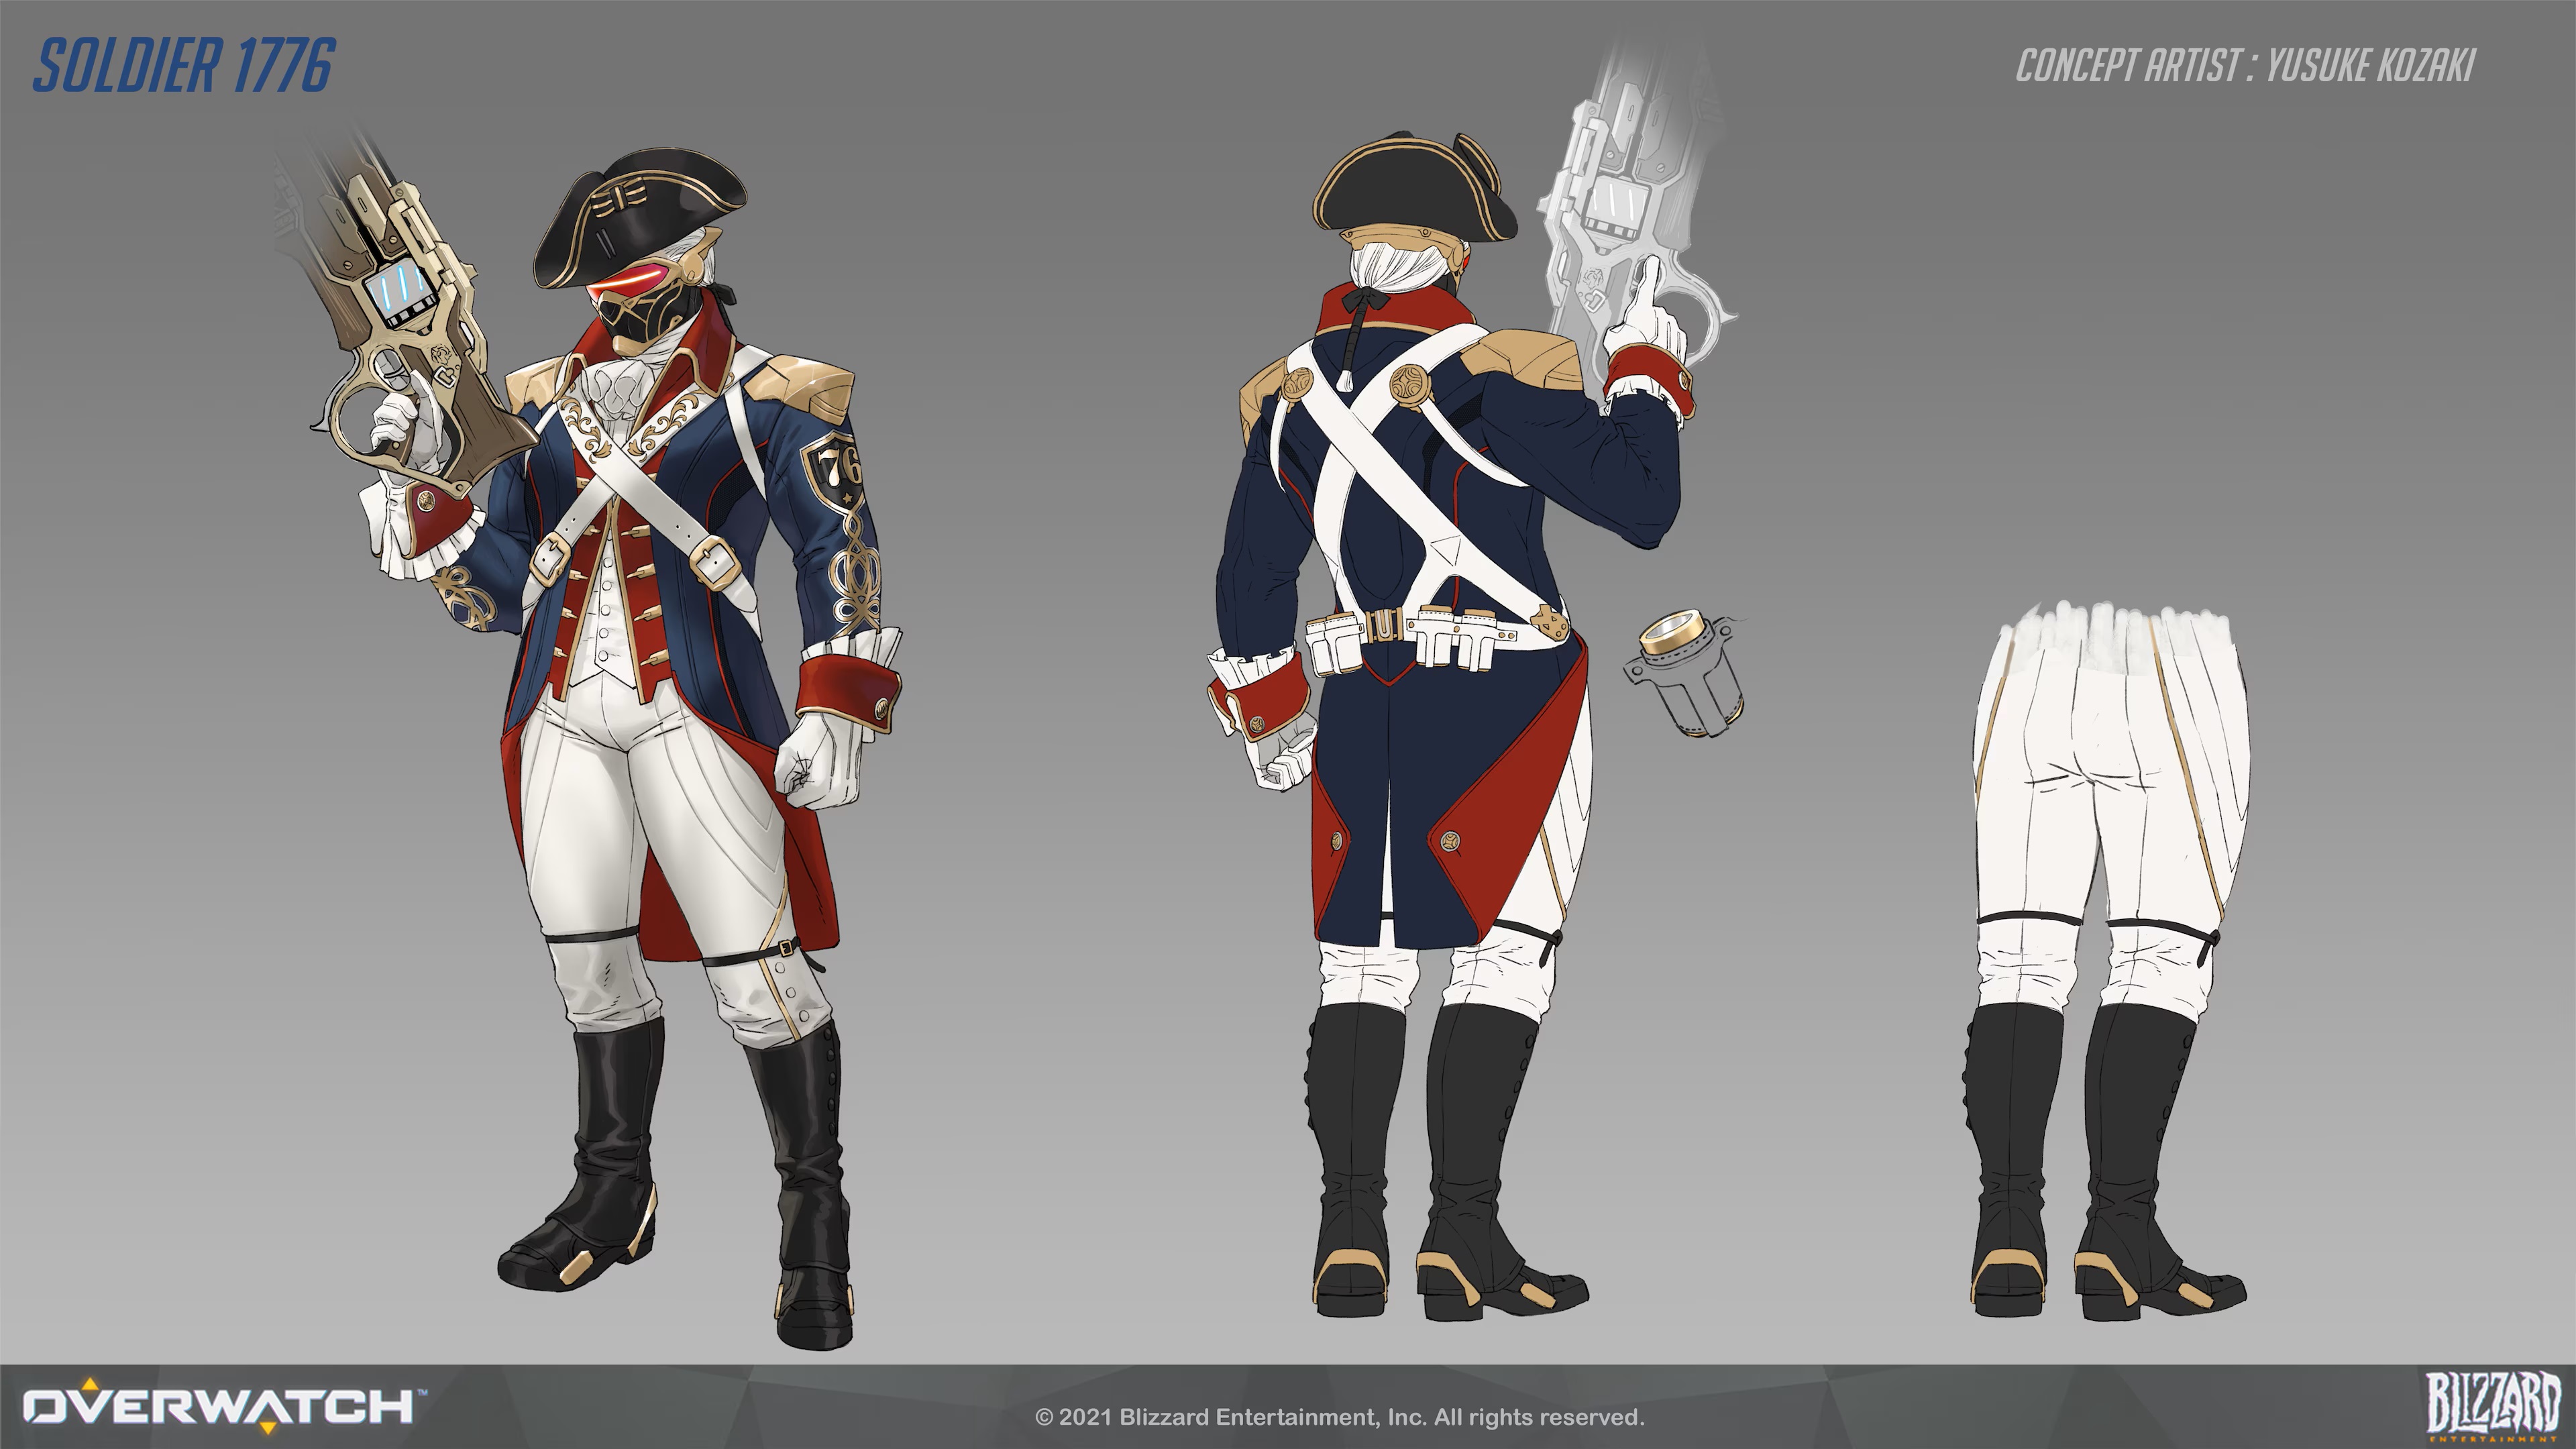
 Soldier: 1776 Skin Concept Art by Yuzuke Kozaki
 -
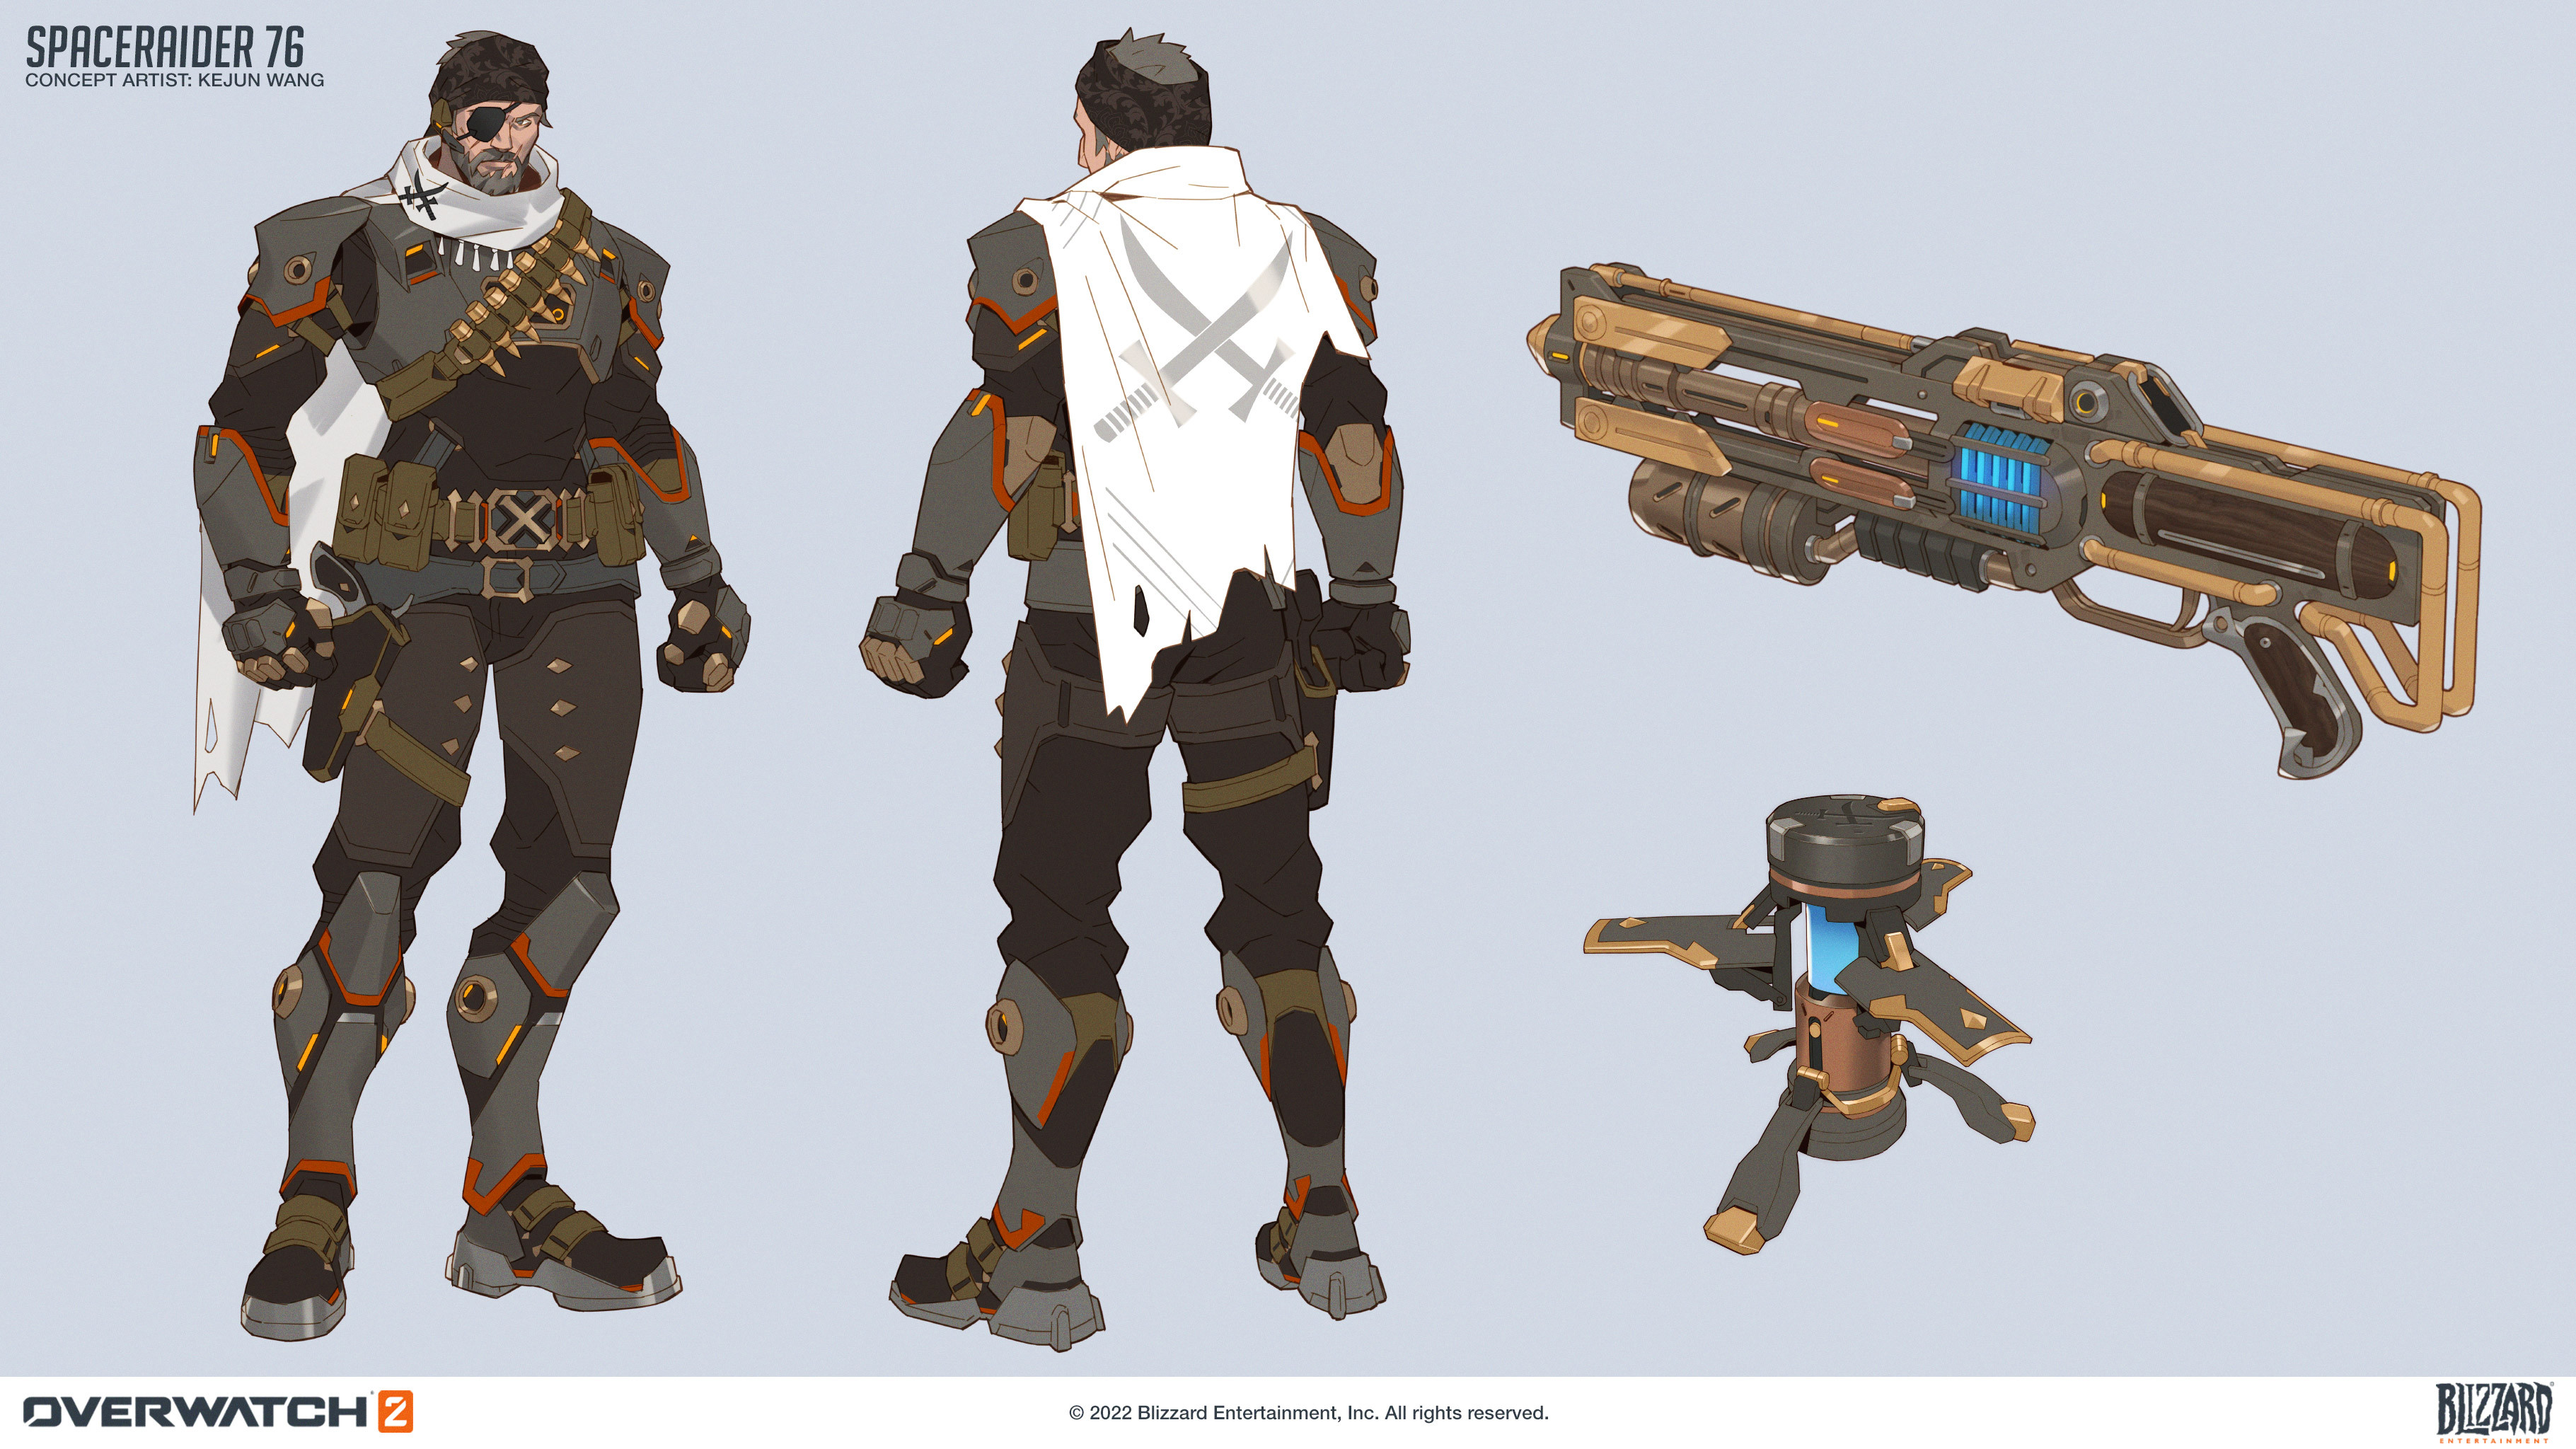
 Space Raider: 76 Skin Concept Art by Kejun Wang
 -
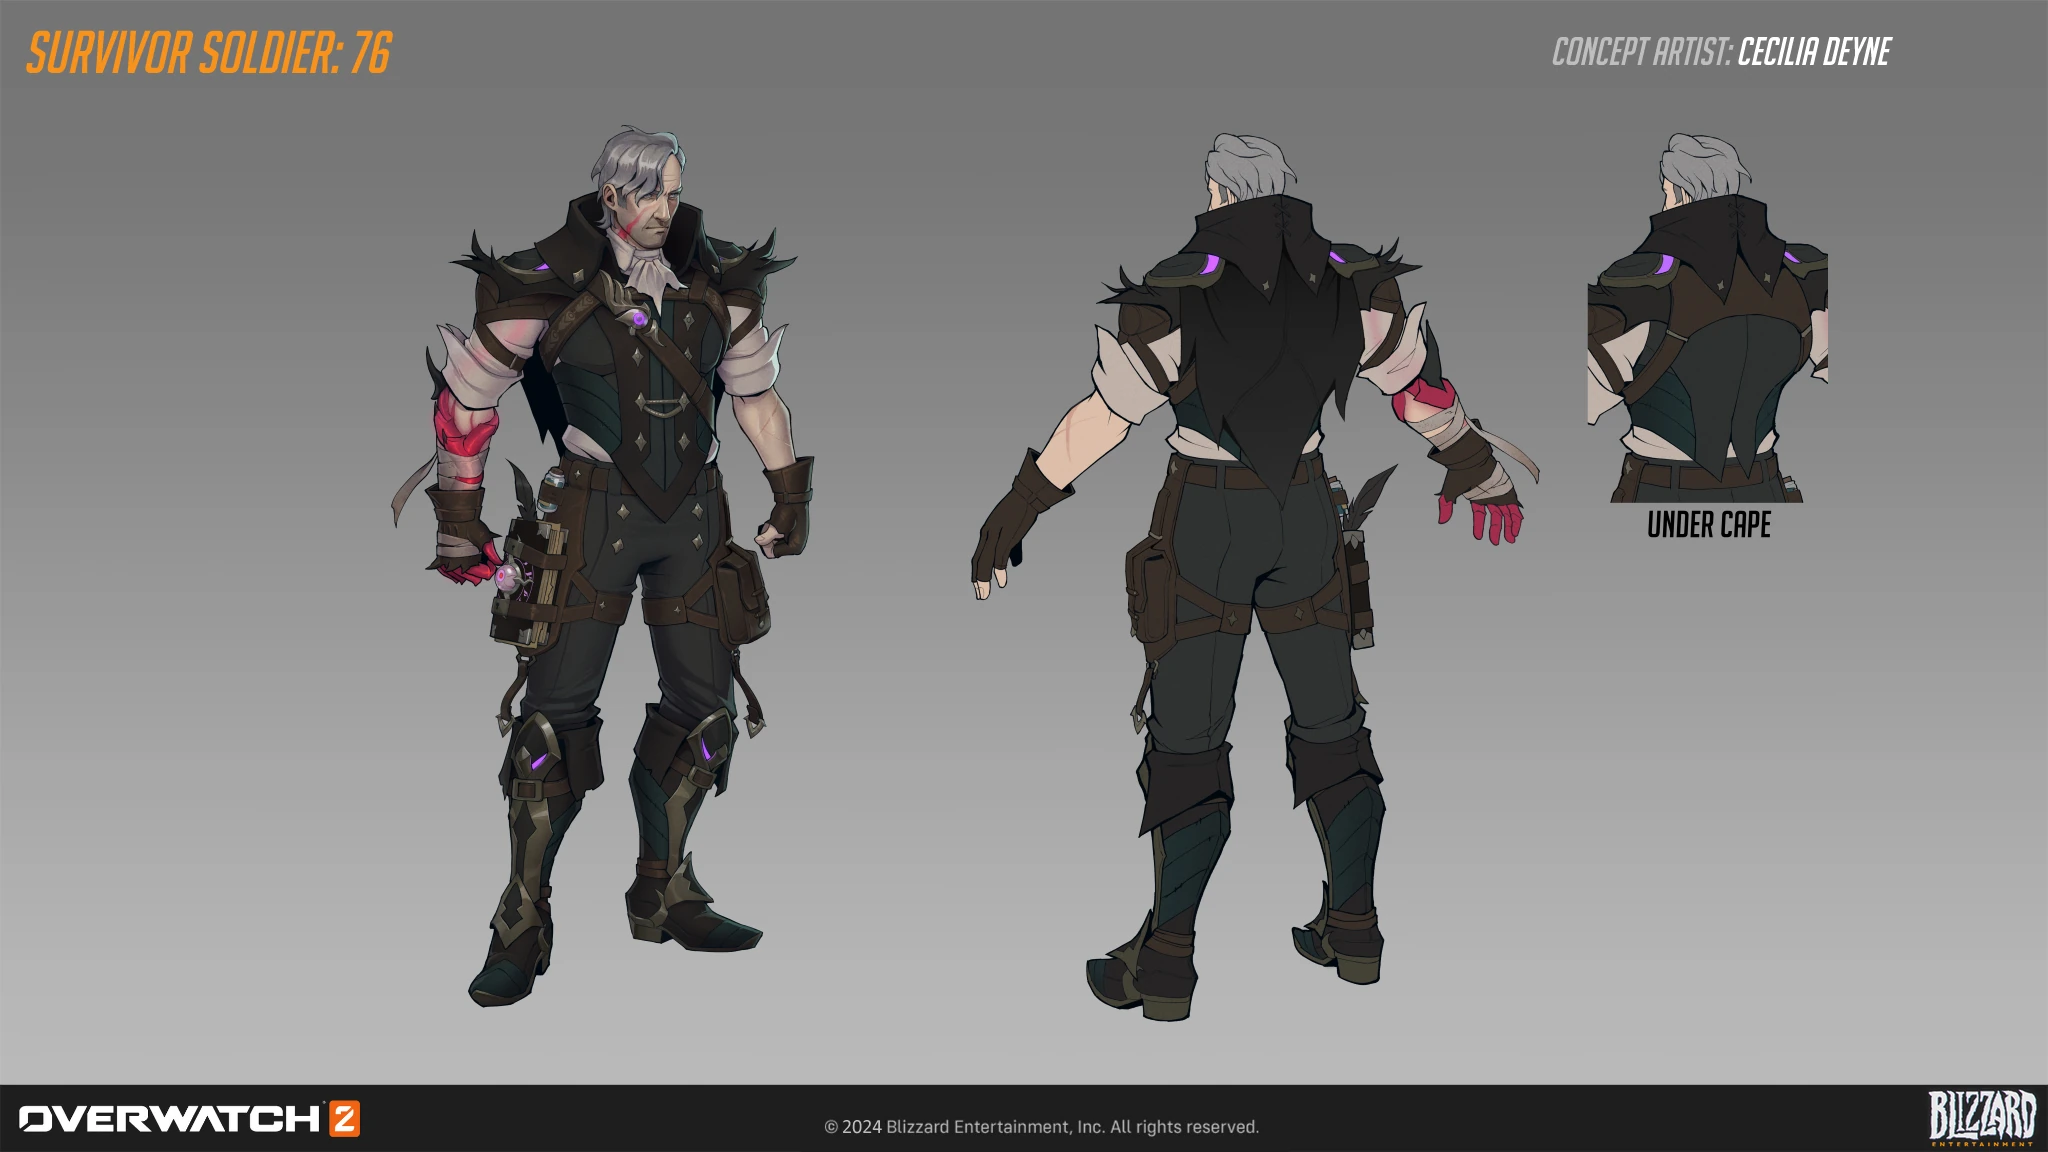
 Survivor: 76 Skin Concept Art by Cecilia Deyne
 -
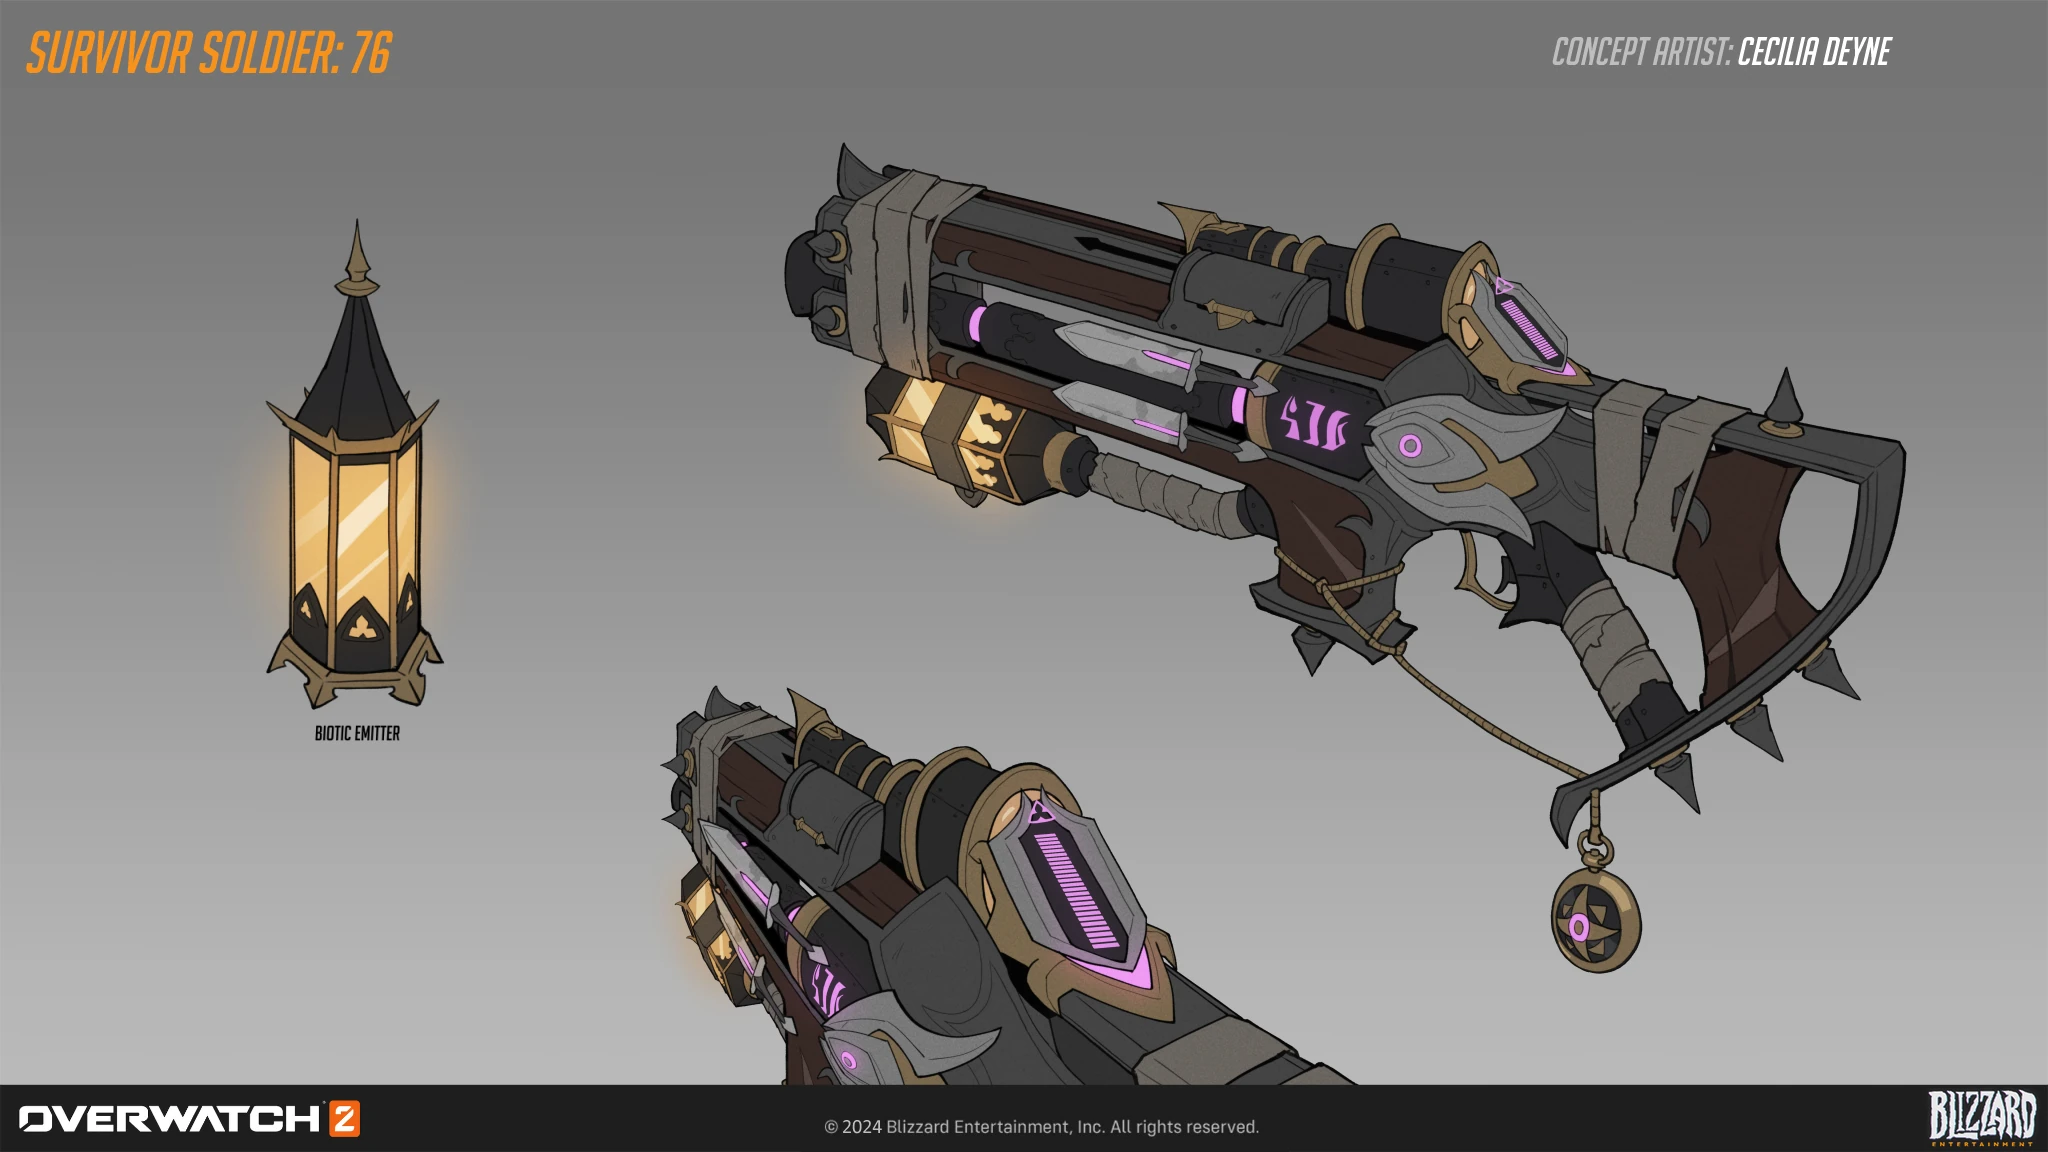
 Survivor: 76 Skin Weapon Concept Art by Cecilia Deyne
Videos
Balance Change Logs
- For more information, see Patch Notes.
- Can now reload while sprinting.
- Reloading while sprinting reduces Sprint’s movement speed bonus by 50%, diminishing over the duration.
- Added a custom setting allowing Sprint to cancel reload.
![]() Agility Training – Major Perk
Agility Training – Major Perk
- Removed.
![]() Full Stride – Major Perk
Full Stride – Major Perk
- New.
- Sprint’s movement speed bonus gradually increases by an additional 25% over 2 seconds.
![]() Tactical Salvo – Minor Perk
Tactical Salvo – Minor Perk
- Added: Using Helix Rockets no longer interrupts primary fire during Tactical Visor.
![]() Recycled Pulse Munitions – Minor Perk
Recycled Pulse Munitions – Minor Perk
- Removed.
![]() Helix Propulsion – Minor Perk
Helix Propulsion – Minor Perk
- Helix Rocket projectile speed increased by 50%.
![]() Field Emergency - Minor Perk
Field Emergency - Minor Perk
- Removed.
![]() Tactical Salvo - Minor Perk
Tactical Salvo - Minor Perk
- New Minor Perk.
- Helix Rockets cooldown is reduced by 80% during Tactical Visor.
![]() Stim Pack - Major Perk
Stim Pack - Major Perk
- Now changed so that Stim Pack replaces Biotic Field and now heals Soldier: 76 for 30 health per second and gains 20% increased attack speed for 5 seconds.
![]() Stim Pack - Major Perk
Stim Pack - Major Perk
- On PC platforms, Stim Pack default button changed from "Next Weapon" to "Equip Weapon 1."
![]() Stim Pack - Major Perk
Stim Pack - Major Perk
- Anti-heal removed. Now deals 75 self-damage on use.
- Is now activated by using Weapon Swap.
- The description has been changed to "Biotic Field's healing is increased by 100% on Low health targets."
- Primary fire now uses the larger projectile size (0.07 meters).
- Cast time reduced from 0.4 to 0.15 seconds.
- Stim Pack anti-heal is now cleansable.
- Hero Perks
- Helix Rockets reload 15 ammo if they damage an enemy.
- Biotic Field's healing is increased by 100% on critical health allies.
- Sprint's speed is increased by 20% and Reload can be performed while Sprint is active.
- Biotic Field can be used as a Stim Pack, increasing Attack Speed and Reload Speed by 30% while being unhealable for 4 seconds.
- Global Projectile Size Bonus
- Hitscan radius large reduced from 0.08 to 0.07 meters.
- Hitscan radius small reduced from 0.05 to 0.04 meters.
- Projectile radius large reduced from 0.15 to 0.12 meters.
- Hero Updates
- Cooldown reduced from 18 to 15 seconds.
- Now uses the smaller 0.05 meter hitscan projectile size modifier. Total projectile size is now 0.05 meters.
- General updates
Most damage-dealing projectile sizes have been increased by a new global modifier added to their base size.
- +0.05 meters for hitscan projectiles with a high rate of fire or spread (e.g., Tracer's Pulse Pistols or Reaper's Hellfire Shotguns).
- +0.08 meters for hitscan projectiles that are more precise (e.g., Cassidy's Peacekeeper or Soldier:76's Heavy Pulse Rifle).
- +0.05 meters for travel time projectiles that are shotguns or have a very high rate of fire (e.g., Roadhog's Scrap Gun or Ramattra's Void Accelerator).
- +0.10 meters for travel time projectile with a speed greater than 50 meters per second (e.g., Zenyatta's Destruction Orb).
- +0.15 meters for travel time projectile with a speed less than or equal to 50 meters per second (e.g., Pharah's Rocket Launcher).
- Very large projectiles with a base size greater than 0.5 meters have been excluded from these increases (e.g., Orisa's Energy Javelin or Reinhardt's Fire Strike).
Hero combined HP (base health/armor/shields) increased by 15-25%.
- 150-175 HP heroes increased by 25 HP.
- 200-300 HP heroes increased by 50 HP.
- 300+ HP (Tanks) increased by 75-100 HP.
- Each hero's precise health increases are listed in their patch notes below.
Ultimate Charge
- All Ultimate ability costs increased by 10%.
Regenerative Passive for All Heroes
- All heroes now regenerate 20 health per second after 5 seconds of not taking damage.
Damage Role Passive
- Reload speed bonus on elimination has been removed.
- New role passive: Dealing damage reduces enemy healing received by 20% for 2 seconds.
Quick Melee
- Damage increased from 30 to 40.
- Hero updates
- Health increased from 200 to 250.
- Cooldown increased from 15 to 18 seconds.
- Explosion damage reduced from 90 to 80.
- Ultimate cost increased 10%.
- Damage increased from 18 to 19.
- Explosion damage increased from 80 to 90.
- Healing per second increased from 35 to 40.
- Number of shots to reach maximum recoil increased from 4 to 6
- Recoil reduced 12%
(beta)
Soldier 76 has always been a high damage output hero, but we are seeing fewer counters to him with one less tank per team. We lowered the damage of his Heavy Pulse Rifle to fit with 5v5.
We wanted to make Tactical Visor a more interesting ultimate for players who want to push their aim skills through the ability. The point of this change isn’t purely to buff him or counterbalance the nerfs. We wanted to make Soldier 76 more fun to play while rewarding mechanical skill.- Damage reduced from 20 to 18
- Movement speed reduced from 50 to 40%
- Now allows for critical hits, if a shot would have been a critical hit outside his ultimate
- No longer removes damage falloff from his Heavy Pulse Rifle
- Damage reduced from 20 to 19. (undocumented)
- Damage increased from 19 to 20.
![]() Frontliners - Power
Frontliners - Power
- Applied reduced effectiveness of Biotic Fields spawned via Hunker Down (50%) to Overhealth.
![]() Frontline - Power
Frontline - Power
- Overhealth now stacks when multiple Biotic Fields are active at once.
- Overhealth based on Max Life reduced to 25% (down from 30%).
![]() Hunker Down – Power
Hunker Down – Power
- Increased Biotic Field duration to 50% reduced duration (up from 30% reduced).
![]() Chaingun - Power
Chaingun - Power
- Decreased Weapon Power per shot to 0.4% (down from 0.5%).
![]() Battery Pack – Rare Ability Hero Item
Battery Pack – Rare Ability Hero Item
- Increased Biotic Field Duration to 40% (up from 30%).
![]() Rapid Response Radius – Epic Ability Hero Item
Rapid Response Radius – Epic Ability Hero Item
- Increased Biotic Field radius to 40% (up from 30%).
![]() Compression Fatigues – Rare Survival Hero Item
Compression Fatigues – Rare Survival Hero Item
- Removed 5% Attack Speed.
- Added 5% Ability Power.
![]() Cratered - Power
Cratered - Power
- Reduced increased Explosion Damage to 15% (down from 25%)
We love that players have been enjoying using Rocket Visor. It's been great to see some players pick up Soldier: 76 who may not have played him much in the past. That said we have always intended for the build centered around Rocket Visor to be a strong accessible build, but not necessarily the build with the highest practical performance ceiling. We've seen that it's overperforming and can feel frustrating to play against. We're hoping to reduce a bit of the power with this change, but we will continue to keep a tactical eye on this build as we move forward with more balance updates.
We felt the payoff for making Biotic Bullseye work was a bit too low to be worth it.- Reduced the amount of Stadium Cash gained from damage and healing by 12.5%.
![]() Rocket Visor – Power
Rocket Visor – Power
- Duration reduced to 0.5 seconds (down from 0.75 seconds).
![]() Biotic Bullseye – Power
Biotic Bullseye – Power
- Increased ammo restoration to 10% per critical hit (up from 5%).
- Introducing Stadium
- Tank Heroes: D.Va, Junker Queen, Orisa, Reinhardt, and Zarya.
- Damage Heroes: Ashe, Cassidy, Genji, Mei, Reaper, and Soldier: 76.
- Support Heroes: Ana, Juno, Kiriko, Lucio, Mercy, and Moira.
- Damage increased from 19 to 20
- Healing reduced from 40 to 35 health per second
The damage-per-shot for the Heavy Pulse Rifle has been adjusted several times now as it's an important tuning breakpoint for Soldier: 76. It was last reduced when his weapon spread was replaced by recoil to help account for the increased accuracy potential, though with the recent reductions to his damage falloff at long range, it's reasonable to increase his damage output once again while pulling some power out of his area-of-effect healing utility.
General
- Hitscan damage now scales to 30% at maximum falloff range, down from 50% for the following heroes:
- Ashe
- Baptiste
- Bastion
- McCree
- Soldier: 76
- Widowmaker
- Wrecking Ball
This change may be difficult to notice immediately as it scales damage over a range slightly more than before, but it will lower the impact of hitscan damage outside of their intended optimal ranges.
- Damage falloff is disabled while Tactical Visor is active
This will make Tactical Visor effective for more than just the aim assist, which slightly loses some value as player aim improves.
- Reduced camera shake to make recoil feel smoother
- Bullet spread removed
- Constant recoil added
- Bullet damage reduced from 20 to 19
- Ammo increased from 25 to 30
- Cooldown reduced from 8 to 6 seconds
- Damage increased from 19 to 20
- Delay before you can fire the weapon after using Sprint reduced from .5 to .3 seconds
- Can target RIP-Tire and Immortality Field
Developer Comments: This change should potentially allow Soldier: 76 to kill an enemy hero one shot sooner. Reducing the time between when you use Sprint and when you can fire should make the ability more fluid and responsive. Giving Tactical Visor the ability to target Junkrat’s RIP-Tire and Baptiste’s Immortality Field drone is a quality of life improvement, since these are both critical targets.
- No longer makes Helix Rockets lock onto enemies
Developer Comments: The intent of Tactical Visor is to make Soldier: 76 unable to miss during its duration. However, Helix Rockets have travel time, so if they were fired directly at an enemy after locking on they would often miss a moving target at further ranges. This change allows players to freely aim Helix Rockets while still auto-aiming his primary fire.
- Number of shots until reaching maximum spread increased from 6 to 9
Developer Comments: Soldier: 76’s damage output was a bit low, but not too far off from where we felt it should be. Making it take a few more shots to reach max spread smooths out the weapon spread curve and should make his damage more consistent.
- Minimum damage at max range increased from 30% to 50%
Developer Comments:The goal of these changes is to slightly reduce the impact of damage falloff on mid-range weapons. While assessing falloff mechanics across the board, weapons intended primarily for close-range combat benefited too greatly from lowering their falloff restrictions. We also normalized a couple of outliers in that Mei had a long-range travel time projectile with falloff applied and Widowmaker's automatic fire did not have any.
- Bullet damage decreased from 20 to 19
Developer Comments: Soldier: 76 is in a much better place lately, but his damage output was making him a must pick, compared to similar roles.
- Bullet damage increased from 17 to 20
- Maximum bullet spread increased from 2.2 to 2.4
Developer Comments: Soldier: 76's damage felt a little low when compared to similar heroes. This increase affects both his normal fire and his ultimate.
- Bullet spread now happens more quickly when unloading fully-automatic pulse fire
- Significantly Increased bullet spread recovery time
Developer Comments: These changes will make burst-firing feel more reliable and increase his effectiveness at longer ranges.
- Spread recovery will begin after a short delay (rather than instantly)
- Ultimate cost increased by 10%
References
- ↑ 2017-10-13, Chris Metzen Twitter, Twitter. Accessed on 2017-10-13
- ↑ 2018-09-27, Michael Chu Twitter, Twitter. Accessed on 2018-09-27
- ↑ Overwatch: The Official Cookbook
- ↑ 4.0 4.1 4.2 Cite error: Invalid
<ref>tag; no text was provided for refs namedOW2Sojourn - ↑ 5.0 5.1 Game Informer #81: Designing Overwatch: From Titan to Torbjörn
- ↑ 2023-10-07, whoever didn't go outside this year needs to confess now. Reddit, accessed on 2023-10-12
- ↑ 2016-09-17, OVERWATCH: A WORLD FANS BUILT. IGN, accessed on 2016-09-18
- ↑ 2015-11-06, Overwatch: Origins Edition (PC) Pre-Orders have Begun. Blizzplanet, accessed on 2015-11-07
- ↑ 9.0 9.1 9.2 9.3 9.4 9.5 Cite error: Invalid
<ref>tag; no text was provided for refs namedOW2Soldier76Quotes - ↑ Michael Chu "Jack and Vincent were in a romantic relationship many years ago. Both identify as gay."
- ↑ Cite error: Invalid
<ref>tag; no text was provided for refs namedOverwatchDeclassified - ↑ 12.0 12.1 Cite error: Invalid
<ref>tag; no text was provided for refs namedFadingGlory - ↑ Cite error: Invalid
<ref>tag; no text was provided for refs namedKaplanReaper - ↑ Cite error: Invalid
<ref>tag; no text was provided for refs namedTracerUprising - ↑ 2015-11-06, Overwatch Collector’s Edition Pre-Orders Begin. Blizzplanet, accessed on 2015-11-07
- ↑ 2017-08-22, Gamescom 2017 swag and more, including new Blizzard exclusives. Blizzard Watch, accessed on 2017-08-23
- ↑ 17.0 17.1 17.2 2014-11-24, BlizzCon 2014 – Overwatch Unveiled Panel Transcript. Blizzplanet, accessed on 2015-03-08
- ↑ 2015-12-10, How Blizzard is making up Overwatch's story as it goes. PC Gamer, accessed on 2015-12-24
- ↑ Forging Worlds: Stories Behind the Art of Blizzard Entertainment
- ↑ 2021-02-19, BlizzConline 2021 | Behind the Scenes of Overwatch 2 | Overwatch. Youtube @PlayOverwatch, accessed on 2024-04-16
- ↑ Battle Reports: Soldier 76, Sons of the Storm. Accessed on 2018-01-08
External links
| Heroes in Overwatch
| ||||||||
|---|---|---|---|---|---|---|---|---|
Tank |
 Bruiser |
|||||||
 Initiator |
||||||||
 Stalwart |
||||||||
Damage |
 Flanker |
|||||||
 Recon |
||||||||
 Sharpshooter |
||||||||
Specialist |
 Soldier: 76 |
|||||||
Support |
 Medic |
|||||||
 Survivor |
||||||||
 Tactician |
||||||||


