Winston is an Initiator Tank hero in Overwatch. He is one of the 21 heroes included in the game's release on 24 May 2016.
Overview
Winston Hero Selection
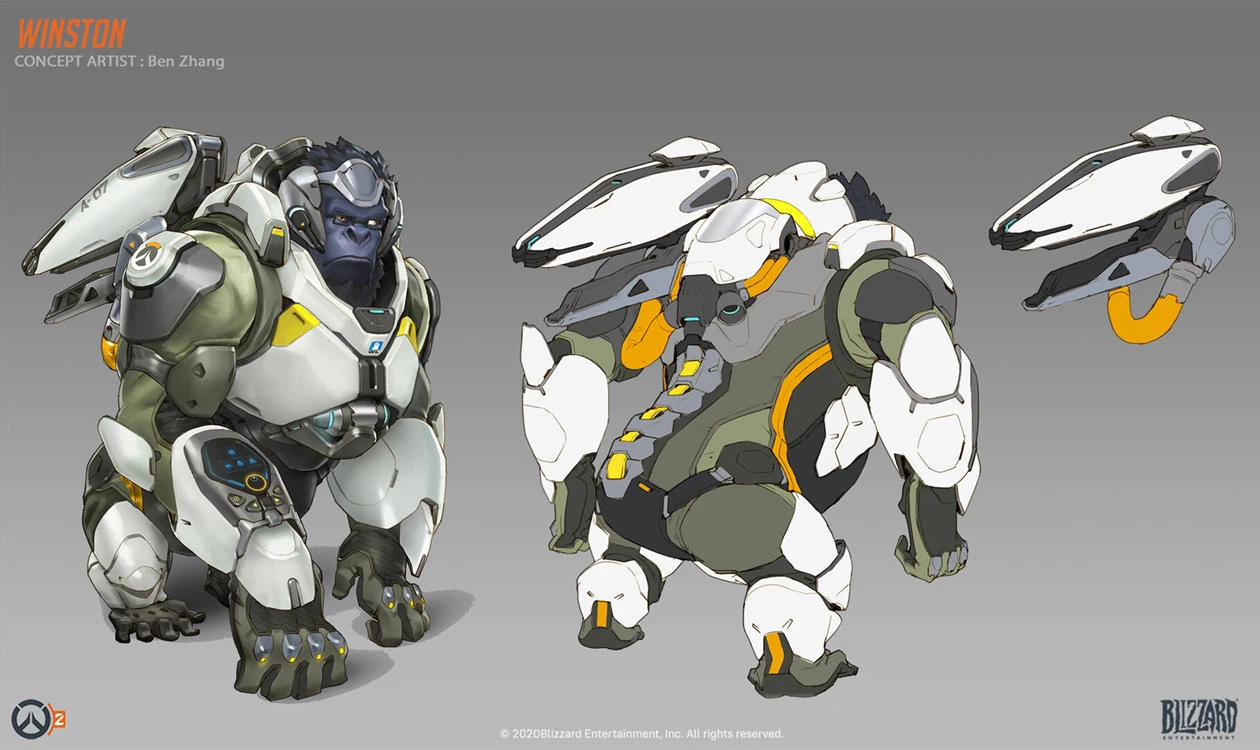
Winston wields impressive inventions—a jump pack, electricity-blasting Tesla Cannon, portable shield projector and more—with literal gorilla strength.
-
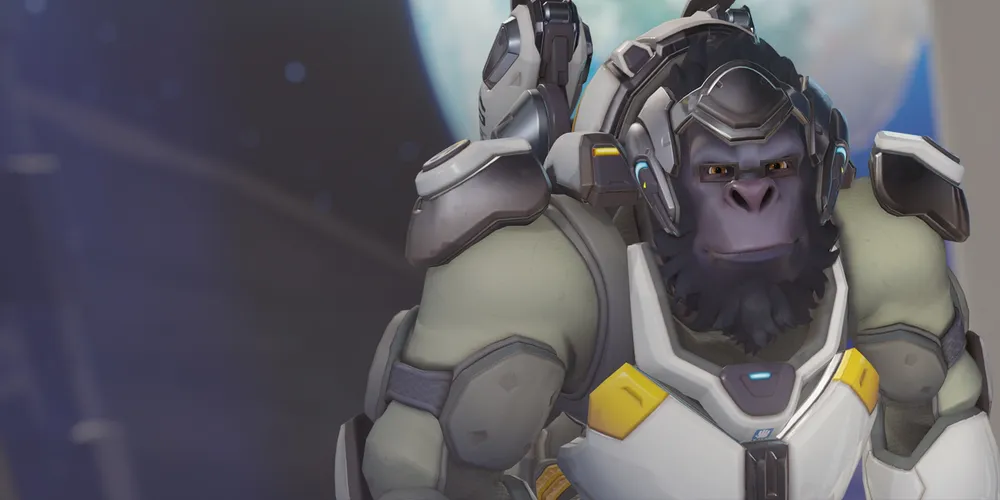
 Overwatch 2 Key Art
 -
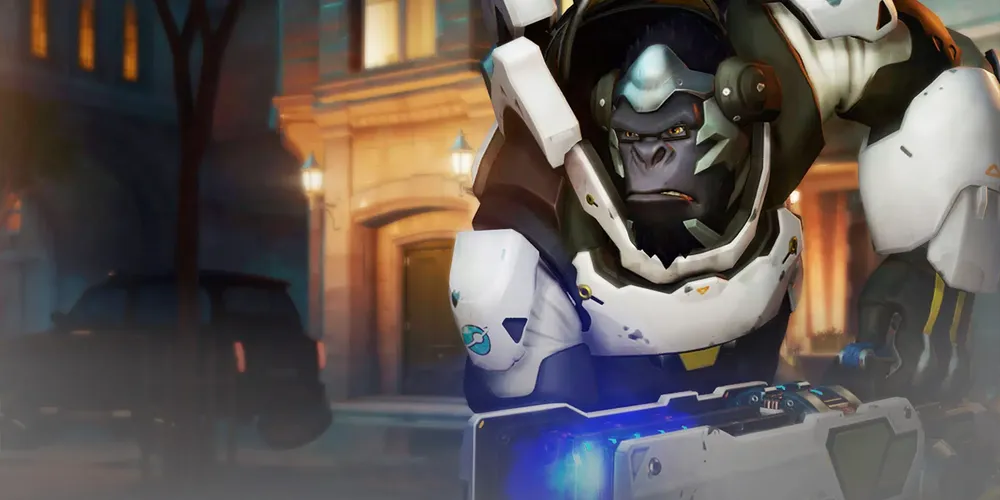
 Overwatch 1 Key Art
-
 3D Portrait
 -
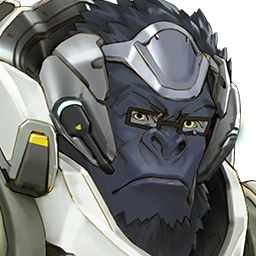
 2D Portrait
Abilities
Passive Abilities


- Ultimate charge and perk progress generation from damage and healing dealt to heroes with the Role: Tank passive is reduced by 40%.
- All tanks have 150 more health in Role Queue. The amount of armor and/or shields remains the same.
- No longer grants increased base health.
- Ultimate charge generation reduction reduced from 40% to 20%.

- Triggers when using certain movement abilities:
- Winston:
 Jump Pack
 - D.Va:
 Boosters
 - Hazard:
 Violent Leap
 - Wrecking Ball:
 Grappling Claw (with fireball)
 - Doomfist:
 Rocket Punch
- Winston:
- Lasts for 1 second with a 5 second cooldown. This is seperate from the cooldown of the ability.
- Once triggered, all 50 healing will be granted, even if the hero takes damage mid-heal.
- The passive doesn't activate if the hero is full health.
Weapons


- Damage per second: 70 while firing (52.24 overall w/reload)
 Barrier Projector and Jump Pack can be used without interrupting fire.
- Ignores armor damage reduction.

60 (max charge)
0.85 second (to full charge)
0.75 recovery
- Damage per second:
- 14.67, continuous fire at minimum charge
- 37.5, continuous fire at max charge
- 19.35, continuous fire with max hold
- The amount of ammo drained increases as the ability is charged, up to 12.
- The cannon automatically fires 1.5 seconds after reaching maximum charge.
- Jump Pack can be used while charging without interrupting it.
- Pressing primary fire cancels the charge, and activating Barrier Projector or using melee resets it.
- Charging is interrupted if Winston is stunned or knocked down.
- If the charging is interrupted or reset through any means, any ammo that went into charging the shot is consumed.
- Ignores armor damage reduction.
- Secondary fire chains up to 4 additional nearby enemies, dealing depreciating damage each chain.
Special Abilities

60 – 1 (landing)
7.3 (mid-leap)
- Cooldown starts immediately after activation.
- The damage scales based on distance to target upon landing.
- Enemies that collide with Winston mid-leap take 1 damage.
- Enemies that are hit by the impact or collide with Winston mid-leap are knocked back.
- Being stunned or slept temporarily prevents the landing effects from applying, but does not fully interrupt the leap. In other words, the landing damage and knockback will apply as long as the negative effects expire before he lands.
- Winston can use (and charge) Tesla Cannon, melee and Barrier Projector and
 Primal Rage while leaping.
 - After using Jump Pack, a standard melee attack right before landing will cancel the melee animation while the damage of the attack is still applied. While the visual animation of the melee is cancelled, Winston still is unable to use his Tesla Cannon until 0.5 seconds after he used the melee attack. This makes using melee right before landing no more or less efficient than interrupting the Tesla Cannon with melee attacks while grounded.
- View angle and use of directional inputs affect the jump length.
- To perform particularly short jumps with the Jump Pack, look straight ahead and press and hold backwards right before using the ability. To jump straight up, look straight up and press and hold backwards right before jumping.
- Landing damage increases while in the air, up to 250% more damage over 2.5 seconds.

- Cooldown starts immediately after activation.
- Barrier becomes active after a 0.13 second delay.
- Cooldown increased from 12 to 13 seconds.
Ultimate Ability

- Winston's maximum health is increased by 700 and his health and armor are fully restored upon activation, resulting in 1175 total hit points (1325 in role queue): 975 health (1125 in role queue) and 200 armor.
- This HP restoration does not count as healing, and cannot be prevented by anti-heal effects.
- If Winston has more than 200 health (350 in role queue) at the end of the duration, it becomes 200 (350 in role queue). If he has any armor, it is transferred over. (E.g. 700 health, 50 armor becomes 200 health, 50 armor. 550 health, 0 armor becomes 200 health, 0 armor.)
- Jump Pack's cooldown is reset upon activation and when Primal Rage ends and lowered to 2 seconds while Primal Rage is active.
- Barrier Projector and
 Tesla Cannon cannot be used during Primal Rage.
 - Melee attacks during Primal Rage have a wide arc and greatly increased knockback.
- The swings alternate direction, starting counter-clockwise.
- The hitbox of the attack lingers slightly longer at the end location of the swing.
- Tesla Cannon's ammunition is restored when the ultimate ends.
- Primal Rage's movement speed buff does not count towards global movement speed buff cap.
- Maximum health gain reduced from 700 to 500.
Perks
Minor Perks
A Minor Perk can be chosen at level 2.


- It takes approximately 2 seconds of airtime to reach the maximum bonus.
- A meter is shown next to the crosshair while leaping.
- If Primal Rage is activated while already using Jump Pack, the damage increase starts accumulating from that moment onward.
- If Primal Rage ends while Winston is airborne, the landing does not gain the bonuses.
Major perks
A Major Perk can be chosen at level 3.

36 (2nd bounce)
- Can bounce to or from any damageable objects, excluding barriers.
- Bounces target the nearest enemy. Heroes are not prioritized.
- Bounces cannot return to the initial target.
- Unlike the initial hit, the bounces are affected by armor.
- The damage of the bounces is amplified by
 Amplification Matrix if the initial shot goes through. The bounces alone going through are not amplified.

Hero-specific options
| Setting name | Options | Description |
|---|---|---|
| Toggle Secondary Fire | Off (default) | Secondary Fire fires when player stops holding the button. |
| On | Secondary Fire fires when player presses the button again. | |
| Primary Fire cancels Secondary Fire | On (default) | Pressing Primary Fire interrupts charging of Secondary Fire, preventing it from firing. |
| Off | Primary Fire cannot be used while charging Secondary Fire. | |
| Relative aim sensitivity during Primal Rage. | 1 ... 500% (default: 100%) | Multiplier to base aim sensitivity during Primal Rage. |
Strategy
Strengths
Winston is one of the game's most mobile Tanks, capable of crossing vast distances in a single leap to bring the fight to his enemies. His Tesla Cannon can't be blocked by a general barrier, given its splash effect, making it very dangerous to most low-health heroes. The agility provided by his Jump Pack makes him a persistent menace that can easily disrupt any enemy team through constant harassment. Barrier Projector is his method of defense for himself or his teammates for a short duration. With the barrier being bubble-shaped, it can be one of the best barriers in the game. Primal Rage not only saves his life by increasing both his current and maximum health, it also greatly reduces the cooldown of Jump Pack and replaces his Tesla Cannon with melee attacks that can disrupt any enemy hit by it. He is of great use for diving into an open space and disrupting enemies.
Weaknesses
Much like Reinhardt, however, he is only capable of fighting at short range, and he is not nearly as consistently durable as the other Tanks. His damage output is considered to be lowest of its class, as any enemy healer will reduce the effectiveness of his weapon or even negate it. His personal barrier is very weak and has a very lengthy cooldown, not suited to be used as a main defensive tool. He has to make use of his Primal Rage to disrupt the enemies as much as possible; otherwise, it is a great ultimate battery due to his higher health and larger collision.
Weapons & Abilities
- Tesla Cannon: Winston's primary weapon. The Tesla Cannon causes continual damage in a cone in front of Winston as long as the primary fire button is held down.
- The Tesla Cannon automatically targets any enemies who are within the cone. Even evasive targets like Tracer cannot avoid being damaged by Winston so long as they are within range of the Cannon.
- The Tesla Cannon has fairly low damage compared to the weapons of other Tanks. It's best not to go head-to-head with other Tanks unless they're already low on Health.
- Tesla Cannon is not blocked by barriers or Genji's Deflect.
- Using melee attacks to repeatedly interrupt the Tesla Cannon fire does slightly more damage per second as simply firing the weapon. When attacking a single target, this technique is optimal for damage output, as it also conserves ammunition. The risk is that Winston needs to get closer to his target than he would usually have to, potentially making him miss out on damage if he loses track of his target.
- Jump Pack: When activated, Winston performs a massive leap forwards. When he lands, he deals damage to all enemies in a small area and knocks them back.
- With Jump Pack, Winston can easily reach distant enemies in a single bound. If your team is being harassed by Widowmaker or Hanzo, don't be afraid to leap onto them and take them out.
- Jump Pack will immediately end if Winston collides with a solid object like a box or short wall when first activating Jump Pack. Make sure you have ample distance to vault over obstacles before using Jump Pack.
- Once in the air, Winston has a small amount of air control, allowing him to curve around in the air. Use this to both evade enemy fire and to land on certain platforms.
- Jump Pack goes in the direction Winston is looking, not straight in the air. Keep this in mind when trying to make longer jumps, as looking straight ahead will not get you as far.
- Try to land as close the enemy as possible, as this does more damage and allows you to melee them immediately for a bigger burst of damage.
- Barrier Projector: When activated, Winston drops a small projector that creates a bubble-shaped barrier, absorbing a certain amount of damage from the enemy team before being destroyed. The bubble is hollow, meaning an enemy inside the bubble can still hit Winston or his allies if they are also inside the bubble. The barrier will disappear automatically after a few seconds.
- Barrier Projector does not inherit Winston's momentum. If he drops it while in mid-air with Jump Pack, it will fall straight downwards.
- Winston can "dance" between the edge of the bubble in order to keep himself safe for its duration. When an enemy enters into the bubble, move outside of it so that the enemy has to exit the bubble to attack you. Once they do, move back into the bubble. This lets you deal constant damage while the barrier absorbs most of your enemy's damage.
- The barrier is rather fragile for a shield, and is best suited to short-term blocking or breaking up a control point. Winston should not rely on this ability to be the only shield on his team, as Reinhardt and Orisa are much more effective.
- Primal Rage (Ultimate): Winston's Ultimate ability. When activated, Winston transforms into a berserk ape, gaining a massive amount of maximum Health, greatly shortening the cooldown on Jump Pack, and changing his primary weapon into fast-hitting hand swipes that deal damage and knock enemies back a great distance. Winston cannot use Barrier Projector while Primal Rage is active. Winston returns to base maximum Health after Primal Rage ends.
- Primal Rage causes Winston's Health to be immediately refilled to the new, higher value. Use Primal Rage when you're in danger of dying.
- Primal Rage has rather low damage output for an Ultimate, but the knockback from his hand swipes is impressive. Use this with frequent jumps to disrupt enemies, lock them in corners and push them off objectives or the map.
- Due to the lingering hitbox of the melee attacks, rotating Winston along with the swing can allow hitting enemies in a wider arc.
- Jump Pack will immediately come off cooldown both when activating Primal Rage and when Primal Rage ends. This guarantees a safe entrance and exit to a skirmish.
General Strategies
- Winston is a great Tank for new players. His Tesla Cannon automatically hits any enemies in front of him, minimizing the amount of aiming you need to do, and his Barrier Projector gives both him and his team extra survivability.
- Winston's charged shot can be combined with Jump Pack and melee when diving an enemy, dealing a burst of up to 130 damage: Start charging Tesla Cannon's secondary fire slightly before leaping and try to hit the leap as close to them as possible. Upon closing the enemy, release the fire and hit them with melee right as you land.
- Winston is a fantastic counter to mobile enemies like Tracer or Genji. The autohit nature of Tesla Cannon prevents them from dodging the constant stream of damage from Winston, and Barrier Projector gives Winston more than enough Health to deal with them. When up against a good player using Tracer or Genji, consider switching to Winston.
- Winston excels at bypassing chokepoints and attacking control points. He can force a defending team to fall back and defend the objective, allowing your team to pass through the chokepoint. Use Winston when you need to be able to get into an enemy's backline and break them up.
- Barrier Projector is weaker than Reinhardt's Barrier Field, though still capable of absorbing a good amount of damage. When it comes to guarding a chokepoint or an objective, Reinhardt is the better pick.
- Don't stay in one place as Winston, as he's squishier than he seems. Use Jump Pack to constantly engage and disengage, retreating when you get low on Health. Memorize the location of large Health Packs, as this will help you get back to fighting more quickly.
- Primal Rage is best used in cases where you need to force an enemy team away from a position. If they've heavily entrenched themselves in an area, use Primal Rage to knock them back so that your team has an opportunity to move in. Remember that you gain a massive amount of Health, and you fully heal to the new health pool when Primal Rage is used, so try to delay using it until you are low on Health to maximize the amount of time you spend in the fight.
- Although Winston may seem as an easy class to play, he is quite difficult to master. Winston can be eliminated rather quickly if he jumps into a new area headfirst without teammates. Consider sticking with teammates and launching at solo targets like Widowmaker, Genji, Tracer, etc.
- Winston is perfect for taking out Support heroes that are alone or have wandered from their team, so don't hesitate to go after them. Make sure you are quick, as the enemy will soon rush to save their Support.
Match-Ups and Team Synergy
Tank
| Hero | Match-Up | Team Synergy |
|---|---|---|
 D.Va |
Should you encounter an enemy D.Va in her Mech, she will be a difficult opponent. While her Defense Matrix may be incapable of blocking your Tesla Cannon, its low damage will be easily outmatched by D.Va's Fusion Cannons and Micro Missiles, which are sometimes enough to burst you to death before you can use Jump Pack to flee. Even if you deploy a Photon Projector, a good D.Va can often straddle it just as well as you can. If you attempt to flee with Jump Pack, D.Va can chase you down and finish you off if you're low health. Typically speaking, don't approach on an enemy D.Va unless you're with your team or you're certain she's near death. Should you get her out of her Mech, though, she's easy pickings. Your Tesla Cannon will home in on even the jumpiest of D.Vas and quickly snuff her out. At a distance she can deal a lot of damage to you, but you can leap to her with Jump Pack, and with her mobility gone she's easy prey. Barrier Projector can block not only Pilot D.Va's attacks, but also a Self-Destruct if deployed at the right time. | (To be added) |
 Doomfist |
Your Tesla Cannon is too weak to have an effect on Doomfist, especially because he can gain shields. Try to bait his Rocket Punch and use Jump Pack to dodge it, making him easier for you and your team to defeat. Try to avoid close-range combat by using Jump Pack to escape, and if he uses Meteor Strike, place a barrier at his landing location and attack him with your team from outside the barrier. | (To be added) |
 Orisa |
(To be added) | (To be added) |
 Reinhardt |
Although your Tesla Cannon will struggle to whittle through Reinhardt's high armor, it ignores his Barrier Field and pierces through it. Rather than harming Reinhardt himself, this is ideal for damaging any enemies clustering around a Reinhardt's barrier. You can use Jump Pack to ambush Reinhardt and those he's protecting. Should Reinhardt drop his barrier to attack you back, that will provide an opening for your teammates to press with an attack. As long as you can survive the encounter, you can flee with Jump Pack, heal, and return to heckle Reinhardt, as other than Charge he has no means of chasing you down. Should Reinhardt hit you with Charge, though, he will take out a huge chunk of your health, so should that happen it's important to immediately retreat. | (To be added) |
 Roadhog |
Roadhog will prove to be one of your worst enemies. Your huge body and head hitboxes make you extremely vulnerable to Roadhog's Scrap Gun, which can potentially kill you in just two shots - and from greater range than against most heroes. Roadhog's enormous health total makes the Tesla Cannon do little more than tickle him, and his hook can pull you in and allow him to take off most of your health with a single combo. However, Barrier Projector can prevent you and your teammates from being hooked, and can even be used reactively in some situations to stop a hook, or to preemptively cover an advance that would otherwise be stymied by Roadhog's hook. Be wary, though, that Barrier Projector's cooldown is much longer than Chain Hook, meaning Roadhog will have plenty of opportunities to hook you before you can protect yourself again. Even in the miraculous situation where you catch a low-health Roadhog on the run, he can often use Take a Breather to nullify your Tesla Cannon's damage and restore his health. Try not to directly engage Roadhog, and if you know one is roaming about, save your Jump Pack to flee from him; if hooked, use Jump Pack to disengage immediately. Avoid diving onto characters being protected by Roadhog, as it will often result in your death instead of the death of your intended target. | (To be added) |
 Sigma |
While Winston is not the best character to confront tanks, you have a few advantages over sigma, Despite his high health, your Tesla cannon will ignore his Experimental barrier and his kinetic grasp, allowing you to do damage to him freely, your barrier can provide protection against his primary fire if you keep “dancing” around it, and since he lacks mobility, you can finish him off or retreat without much worries, still, be wary of accretion or gravitic flux, since accretion can cut off your momentum if you’re using jump pack and if you’re caught in gravitic flux, you’ll lose a significant amount of health. | (To be added) |
 Wrecking Ball |
The only advantage you have over Wrecking ball is that you can easily clear his minefield with your Tesla cannon, since it targets multiple targets and the mines have low health, but otherwise Wrecking ball will hold an advantage over you in a direct fight, his Massive health makes your Tesla cannon a pathetic weapon against his quad cannons, should you retreat he can catch up to you easily in his ball form, Which he can also use to retreat easily, if you’re encountered by a Wrecking ball try to stick with teammates that can handle him better rather than fighting him on your own. | (To be added) |
 Winston |
The Tesla Cannon's low damage output will cause a one on one Winston bout to be a long, drawn-out stalemate. Barrier Projector will do nothing to defend does nothing against each other's Tesla Cannons, so don't bother unless other you need to protect yourself from other enemies in the vicinity. Only bother to pursue an enemy Winston if he's on the brink of death; otherwise, stick with your team and don't waste your time. | Multiple Winstons in a No Limits game can deploy multiple Barrier Projectors, resulting in a large area of protection. |
 Zarya |
Zarya's lack of armor and lower health when compared to other tanks will allow you to kill her faster than you would most other tanks. Jump Pack can allow you to hunt Zarya down while she has low health, while she has no mobility options that can help her escape. Zarya does have you beat in firepower, though, and she will be able to out-damage you even at low energy. Stop firing when she deploys her Particle Barrier, otherwise all you'll do is increase her Energy. Her weapon can't attack you at a distance, but its range is superior to that of your Tesla Cannon, meaning you'll have difficulty avoiding her attacks without Jump Pack. With high Energy, Zarya can make short work of you even if you are inside the Barrier Projector. Zarya can be especially annoying if you leap in to finish off an enemy, only for her to throw a Projected Barrier onto your target, saving her teammate and potentially gaining some Energy. Only engage Zarya when she is at low health and low Energy. If you and your team are grabbed by Zarya's Graviton Surge, quickly deploy a Barrier Projector, as it can help soak up some incoming damage. | (To be added) |
Damage
| Hero | Match-Up | Team Synergy |
|---|---|---|
 Ashe |
Just like other snipers, Ashe is a good target to flank using Jump Pack. If she uses Coach Gun to try and create distance, use your Jump Pack again to attack her and use the "tickle-melee" combo to finish her off. | (To be added) |
 Bastion |
Bastion will have no trouble gunning you down due to your large hitbox, and your Barrier Projector's low health will do little to stop the bullet rain. Even if you can get behind Bastion, the Tesla Cannon cannot headshot, giving Bastion plenty of time to snap around and run you down. Unless protected by the likes of Zarya's Projected Barrier, you should never engage Bastion when he is in Sentry Configuration. You stand a better chance if you catch Bastion in Recon Configuration, but unless he's at low health, he can simply transform and gun you down. Even when you are using Primal Rage, Bastion can chew through a huge amount of your health. Avoid messing with Bastion as much as possible and let your more suitable teammates kill it. | (To be added) |
 Cassidy |
While Cassidy poses a threat at greater distances, Jump Pack will allow you to quickly close the distance. Cassidy's Flashbang and Fan the Hammer combo can still prove dangerous to you, but your high health should usually help you withstand the combo. Barrier Projector provides ample protection from Cassidy's Peacekeeper, and in close-quarters combat you can go in and out of the barrier to make it difficult for Cassidy to land his shots on you. In an emergency situation, you cal always use Jump Pack to flee from the fight; while you have to watch out for any Peacemaker shots he lands while you are midair, he has few means of pursuing you once you create some distance between the two of you. Take advantage of Cassidy's low mobility and your superior health, and you should do fairly well against him. | (To be added) |
 Echo |
Much like Phara, there’s very little you can do to take Echo down, most of the time she’ll be out of your effective range, and when she IS near you where you can deal consistent damage, she can usually just use flight and flee without much trouble, using your jump pack to damage her while she’s airborne will do very little, so don’t bother unless you’re certain she’s near death, The most you can do is deploy your barrier, which will not last long against her abilities, if there’s an enemy echo, do not bother and leave her to your team. | (To be added) |
 Genji |
You are by far one of the strongest counters to Genji. He can't Deflect your Tesla Cannon, which will automatically hit him as long as you are aiming slightly in Genji's direction. This in turn nullifies one of his greatest assets, that being his agility. If Genji is attempting to heckle you from a distance, your Barrier Projector should provide sufficient protection. If Genji attempts to flee from you with a Swift Strike, you can just use your Jump Pack to chase him down and finish him off, which is helped by Jump Pack having a shorter cooldown than Swift Strike. If Genji activates Dragonblade and you have enough health to withstand several sword swings, instead of fleeing attack back with your Tesla Cannon, which may kill him before he can kill any members of your team. | (To be added) |
 Hanzo |
Hanzo fights best against low-health enemies at a distance; thankfully, you fit neither of those bills with your sizeable health and your ability to quickly ambush opponents and attack them at close range. While Hanzo can climb walls and dodge in the air, these mean little to your Tesla Cannon's ability to track wily opponents. One concern you'll need to worry about is the burst damage of his Storm Arrows; this can mitigated by dropping your Barrier Projector after leaping towards Hanzo and dancing back and forth between it. Hanzo's Sonic Arrow can alert himself and his team of your existence, which can be beneficial for timing shots on you, so be careful about peeking from behind corners. | (To be added) |
 Junkrat |
Junkrat's Concussion Mine and Steel Trap can be easily destroyed by your Tesla Cannon, so long as you fire with your weapon before accidentally stepping on a trap. Jump Pack allows you to quickly approach Junkrat; without hus Steel Trap to defend himself, Junkrat is forced to fight in close-range. Your Barrier Projector will allow you to deal consistent damage to Junkrat in relative safety; if your barrier is on cooldown, though, his grenades will easily hit you due to your large hitbox. A few direct hits will melt your health away quickly, so try to only fight Junkrat if your Barrier Projector is ready; if you're caught by surprise by him, don't hesitate to use Jump Pack to retreat to your team, as Junkrat's ability to chase after you is limited. If a wounded Junkrat is retreating, weigh whether or not you believe he'll have regrouped with his team before jumping after him to finish him off. | (To be added) |
 Mei |
What Mei lacks in mobility, she makes up for in being superior to you in close-quarters combat. Barrier Projector can protect you from both her primary and secondary attacks, but if you attempt to kill her up close with your Tesla Cannon, she'll almost always freeze you solid before you get the chance. Even if you get her near death, your last of burst damage means she can safely enter Cryo-Freeze to recover her health. While you are capable of taking a few frozen headshots from Mei and living, in a team fight you'll be much more susceptible to her team. If you know the enemy team has a Mei, be careful about where you leap so you don't end up running into her and getting cornered. | (To be added) |
 Pharah |
As Pharah maintains her high altitude, the only hope for you to attack is to use Jump Pack to jump towards her and deal some damage with Tesla Cannon. You will be mid-air for around 1 or 2 seconds, but this will rarely be enough to deal any significant damage. You also can't do anything against Pharah from a distance, other than putting up a Barrier Projector to shield yourself and your team. With enough firepower for Pharah and her team, though, your barrier will shatter quickly, so be cautious around her. Primal Rage's reduced Jump Pack cooldown can help you reach Pharah's heights if need be. | (To be added) |
 Reaper |
Reaper is one of your worst nightmares. He can tear through your health with only a few rounds of his Hellfire Shotguns, and being such a huge gorilla, you make for an easy target for Reaper to easily land all of bullets on you. You need to maintain a close range to damage enemies with your Tesla Cannon, and close range combat is Reaper's bread and butter. With higher firepower than you, higher health than average heroes, self-heal with The Reaping, and a reliable escape and pursue tool with Wraith Form, Reaper will win in any direct fight with you. Barrier Projector can't soak up Reaper's high damage as it has low health compared to the likes of Reinhardt's or even Orisa's barriers. You should only attempt to engage with a Reaper if he has low health, his Wraith Form is on cooldown, and you think you can finish him before he can start shooting you and regaining health with The Reaping. If you are forced into a fight with Reaper, deploy your Barrier Projector and weave in and out of it to hopefully avoid his attacks until you survive long enough to leap with Jump Pack to safety. Your ability to knock Reaper around during Primal Rage can keep him from landing close shots on you (or sometimes even knock him off a cliff for an environmental kill), but you shouldn't directly confront a group of enemies with Primal Rage when Reaper is among them, as even with your enhanced health he may be able to run you into the ground with help from his friends. | (To be added) |
 Soldier: 76 |
Soldier: 76's attack great range allows him to deal heavy damage to you at a distance, which is only made worse by your large size. Jump Pack can help you close the gap between you and Soldier: 76, and your Tesla Cannon can deal enough continuous damage to force him to retreat and regroup with his team. Should Soldier: 76 stand his ground and activate Biotic Field, though, he will be able to heal himself at a rate that renders your Tesla Cannon's damage null. Even if the tide turns in your favor, Soldier: 76's Sprint can give him the means to escape. With an accurate Jump Pack, jump, you can catch up and finish him off if he's weak enough. However, unless he's near death, you should instead use Jump Jack to escape and regroup with your teammates who will have a better time handling him. Barrier Projector can effectively protect you and your teammates from Soldier: 76's shots and his Tactical Visor, but be mindful of the barrier's low health and short duration. | (To be added) |
 Sombra |
Should Sombra land a Hack on you from far enough away that your Tesla Cannon can't hit her, you'll be stuck with no mobility, no protection, and a weak close range weapon. That being said, the wide arc of your Tesla Cannon is often capable of disrupting Sombra's Hack before it can finish. A quick deployment of Barrier Projector can also cut her hack off, as Sombra is incapable of hacking enemies through Barriers. Hacked or not, in a 1 on 1 close range fight, your auto-aiming Tesla Cannon and your larger health should be sufficient to handle Sombra. Should she keep a good distance on you while you are Hacked, though, she might be able to gun you down due to your lack of attack range; in this scenario, it's best to try to hide behind cover, and if she chases you, you can ambush her at your preferred range. If you know where a Sombra is, you can use Jump Pack to ambush her and kill her, or in the very least force her to retreat with Translocator. Unfortunately Tesla Cannon won't home in on her while she is utilizing her Thermoptic Camo, meaning unless you hit her with a lucky punch (or if she attempts to activate it at point blank range, which will cause your Tesla Cannon to disrupt its activation), she can use it to escape. If you are Hacked during Primal Rage, your Ultimate won't be cancelled, but you will lose your Jump Pack, rendering you a far less mobile threat and making you easy pickings for the enemy team. In a nutshell, you will win most fights against Sombra so long as you don't allow her to ambush you. | (To be added) |
 Symmetra |
Your auto-tracking Tesla Cannon can prove to be a nightmare for Symmetra and her Sentry Turrets. That being said, it's wise not to underestimate her; Symmetra's Photon Projector can quickly demolish your Barrier Projector, and doing so will help her achieve higher energy levels that she can then use to rip you apart. When fighting Symmetra, it's best to either kill her quickly or keep your distance and be ready to flee with Jump Pack; if you prolong a fight with her and let her power up, you won't be able to kill her before she kills you. Instead of hunting down Symmetra, consider jumping to areas where you know she has Sentry Turrets set up, destroying them with your Tesla Cannon, and escaping before she or her teammates can avenge them. | (To be added) |
 Torbjörn |
Torbjörn's Turret can't do much to break through your Barrier Projector. If you use Jump Pack to land near a Turret and deploy a barrier to protect yourself, you should have little difficulty taking down the Turret before Torbjörn can retaliate. If the Torbjörn decides to sit by his Turret and repair it, you may end up taking more time do destroy the Turret, but you gain the benefit of being able to attack both the Turret and Torbjörn at the same time with your Tesla Cannon. Be careful if you don't have Barrier Projectile available; Torbjörn's alt-fire, especially when enhanced by Overload, can pack a mean punch, and you have large hitboxes that will a good number of bullets. If Torbjörn activates Molten Core near you, don't hesitate to use Jump Pack to get out of the general vicinity to avoid stepping in magma. | (To be added) |
 Tracer |
Winston excels in fighting against mobile heroes due to the nature of his auto-targeting Tesla Cannon. Tracer is highly mobile but requires proximity to deal maximum damage; as your Tesla has low range but can track mobile enemies, this makes you a good counter to fend Tracer off. If Tracer is attempting to heckle you from a distance, Barrier Projector will protect you and your team, forcing her to either get closer into your ideal range or retreat. Jump Pack can help you chase down a Tracer attempting to flee while Recall is on cooldown. Don't get too cocky, though, as Tracer's firepower is still significant enough to kill you if she's brave enough to fight you at close range and mobile enough to stay out of your Tesla Cannon's range of fire. If you must, don't be afraid to use Jump Pack to jump to higher elevation where Tracer can't chase you. | (To be added) |
 Widowmaker |
With your ability to leap into the enemy lines and your barrier, you serve an an excellent counter to Widowmaker, who can't hold herself as well in a close-range fight as you can. When you use Jump Pack to approach a Widowmaker on high ground, she will often fall to the ground expecting you to chase her, then use Grappling Hook to regain the high ground. Don't bother chasing her until Jump Pack is ready again; if she tries to be smart, you'll be able to just jump up in her face and heckle her again. At a distance, you have a clear disadvantage with your huge hitbox and low weapon range. Never peek around corners if a Widowmaker is nearby; instead, coordinate with your team so they know it's safe to push onto an objective when you dive in to heckle the enemy team's Widowmaker. | Once your friendly Widowmaker activates Infra-Sight, you'll have a good idea of where all of your opponents are. This can make it easy for you to dive on lone Support heroes or snipers, and can also help you watch for enemy flankers such as Genji that you can easily fend away from your team. |
Support
| Hero | Match-Up | Team Synergy |
|---|---|---|
 Ana |
Some of your best match-ups are against snipers, and Ana is no exception. While she'll prefer to hide in the back line, you can constantly jump to her position with Jump Pack and deploy a Barrier Projector to protect yourself while firing safely inside it. Ana lacks any mobility options to escape you, but a quick Sleep Dart could incapacitate you long enough for her teammates to surround and kill you; it's best to prematurely activate Barrier Projector to avoid this situation. Be especially wary of Sleep Dart when you activate Primal Range, as you'll be a big easy target to be put to sleep. Her Biotic Rile can deal decent damage to you at close and distant proximity, but your high health should be able to withstand most of her attacks With Sleep Dart, when hit, completely stops his rage in both normal and Primal Rage (As long as her teammates don't wake him up). If you're expecting to be healed by your allies in a group fight, Ana's Biotic Grenade could ruin your plans; if hit by it, don't feel ashamed to use Jump Pack to flee if you're near death's door. Primal Rage's self-heal effect will also be disrupted by Biotic Grenade's effect, instead only giving you 500 extra health, so try not to trigger it during that time if possible. | (To be added) |
 Baptiste |
Baptiste should not to be underestimated, he can lay down heavy damage output if he can land his shots, especially if he can land headshots on you, he can also easily gain high ground and regenerate his health with his abilities and his immortality field can give him enough time to finish you off if you’re not careful, if he is healing someone you’re currently attacking, it’ll be tough to actually do significant damage to your current target, however, when he deploys his immortality field try to sneak up to it, most people usually tend to stick close to the immortality field, and since your Tesla cannon can target multiple people at once, you can take this opportunity to gain ultimate charge, as well as dealing some damage to several people at once. | (To be added) |
 Brigitte |
A duel with an enemy Brigitte will prove to be generally long, and resulting with the winner to be left in very low health, both of you have to be at close range to do damage, and while your Tesla cannon will easily lock onto her, her passive ability will make killing Brigitte a hard task, however, she has no means of disengaging or catching up to you due to her lack of mobility, so if the fight turns to your favor she'll have no means of escaping you, alternatively you can easily disengage if the fight isn't going your way with your jump pack. | (To be added) |
 Lúcio |
Even with your constant mobility and auto-tracking Tesla Cannon, Lúcio can be one of the harder Support heroes to take down. Lúcio can negate some of Tesla Cannon's damage from his automatic healing, or he can use his Speed Boost to escape out of your attack range. He can also use Soundwave to push you out of your effective range, leaving Jump Pack as your only means of pursuing him. This will be ineffective while you're in your Barrier Projector, though, so you can activate it near him to continue your attack without getting knocked back. Lúcio's wall riding won't protect him much from your Tesla Cannon; if you can catch him in a corridor where you're forced into close quarters, you'll have the advantage. Sound Barrier's massive health boost will render your Tesla Cannon's damage completely ineffectual; however, as his team will need to gather up when Lúcio activates Sound Barrier, this can be an ideal situation to activate Primal Rage and smack all of your enemies away, splitting them apart and making them easy targets. | (To be added) |
 Mercy |
An enemy Mercy should be one of your top priorities. She doesn't have a good escape mechanic outside of Guardian Angel to flee to her teammate (even it is just a friendly corpse). She can't protect herself if you ambush her, and even if her teammates attempt to body-block you, your Tesla Cannon can attack past them to continue whittling her health down. In a group fight, try your best to focus on Mercy rather than the enemy she's healing, as you'll never be able to outdamage the healing Mercy is distributing with her Caduceus Staff. Don't expect a knockback from Jump Pack or Primal Rage to be a confirmed kill, as her Guardian Angel ability can help her return to safety if she has a nearby ally. | (To be added) |
 Moira |
As long as you keep fighting in close range against Moira, It’ll be an easy matchup, while she can use fade to avoid you, your jump pack can make it easy for you to catch up to her, your barrier projector will also block her primary damage, and while she can negate your damage with her healing orbs, You can still keep applying pressure on her, which’ll most likely lead to a retreat or her death. her primary fire is also pretty insignificant agains your large health, During coalescence do not bother trying to take her out with your Tesla cannon since the self healing of her ultimate provides completely nullifies your damage | (To be added) |
 Zenyatta |
Zenyatta is one of the best tank killers in the game, which can make a fight with him difficult. His Orb of Discord will help him and his teammates tear through your high health, especially if he manages to land headshots. Orb of Harmony will negate half of your Tesla Cannon's damage to whoever it is applied to. You can use Jump Pack to reach Zenyatta's position and activate a Barrier Projector to fight Zenyatta on your terms. Without any escape abilities, so long as you can successfully keep yourself safe within your barrier, you should have no difficulty killing Zenyatta. The enemy Zenyatta will most likely be aware of this, and will try to be near enemies who can come to his aid and fend you off, so be cautious when jumping in to attack him. Transcendence will render your Tesla Cannon's low damage moot; however, Primal Rage can not only knock Zenyatta's teammates around, but also Zenyatta himself, which can help disrupt an enemy push during Transcendence. | When diving enemies, try to stay in the line of sight of a friendly Zenyatta; not only will this ensure that you are receiving his healing to keep yourself safe from counter-attacks, but an Orb of Discord on your target will make your job much easier. |
Map Strategies
Control
| Map | Strategy & Stage Tips |
|---|---|
 Overall Strategy |
TBA RATING | TBA FEATURE
Map strategy details for Overall Strategy are currently missing. You can help the Overwatch Wiki by adding them!
|
 Antarctic Peninsula |
TBA RATING | TBA FEATURE
Map strategy details for Antarctic Peninsula are currently missing. You can help the Overwatch Wiki by adding them! Labs
Strategy details missing.
Sublevel
Strategy details missing.
Icebreaker
Strategy details missing.
|

|
TBA RATING | TBA FEATURE
Map strategy details for Busan are currently missing. You can help the Overwatch Wiki by adding them! Downtown
Strategy details missing.
Sanctuary
Strategy details missing.
MEKA Base
Strategy details missing.
|

|
TBA RATING | TBA FEATURE
Map strategy details for Ilios are currently missing. You can help the Overwatch Wiki by adding them! Lighthouse
Strategy details missing.
Well
Strategy details missing.
Ruins
Strategy details missing.
|

|
TBA RATING | TBA FEATURE
Map strategy details for Lijiang Tower are currently missing. You can help the Overwatch Wiki by adding them! Control Center
Strategy details missing.
Garden
Strategy details missing.
Night Market
Strategy details missing.
|

|
TBA RATING | TBA FEATURE
Map strategy details for Nepal are currently missing. You can help the Overwatch Wiki by adding them! Village
Strategy details missing.
Shrine
Strategy details missing.
Sanctum
Strategy details missing.
|

|
TBA RATING | TBA FEATURE
Map strategy details for Oasis are currently missing. You can help the Overwatch Wiki by adding them! City Center
Strategy details missing.
Gardens
Strategy details missing.
University
Strategy details missing.
|

|
TBA RATING | TBA FEATURE
Map strategy details for Samoa are currently missing. You can help the Overwatch Wiki by adding them! Beach
Strategy details missing.
Downtown
Strategy details missing.
Volcano
Strategy details missing.
|
Escort
| Map | Strategy & Stage Tips |
|---|---|
 Overall Strategy |
TBA RATING | TBA FEATURE
Map strategy details for Overall Strategy are currently missing. You can help the Overwatch Wiki by adding them!
|

|
TBA RATING | TBA FEATURE
Map strategy details for Circuit Royal are currently missing. You can help the Overwatch Wiki by adding them! Attack
Strategy details missing.
Defense
Strategy details missing.
|

|
TBA RATING | TBA FEATURE
Map strategy details for Dorado are currently missing. You can help the Overwatch Wiki by adding them! Attack
Strategy details missing.
Defense
Strategy details missing.
|

|
TBA RATING | TBA FEATURE
Map strategy details for Havana are currently missing. You can help the Overwatch Wiki by adding them! Attack
Strategy details missing.
Defense
Strategy details missing.
|

|
TBA RATING | TBA FEATURE
Map strategy details for Junkertown are currently missing. You can help the Overwatch Wiki by adding them! Attack
Strategy details missing.
Defense
Strategy details missing.
|

|
TBA RATING | TBA FEATURE
Map strategy details for Rialto are currently missing. You can help the Overwatch Wiki by adding them! Attack
Strategy details missing.
Defense
Strategy details missing.
|

|
TBA RATING | TBA FEATURE
Map strategy details for Route 66 are currently missing. You can help the Overwatch Wiki by adding them! Attack
Strategy details missing.
Defense
Strategy details missing.
|

|
TBA RATING | TBA FEATURE
Map strategy details for Shambali Monastery are currently missing. You can help the Overwatch Wiki by adding them! Attack
Strategy details missing.
Defense
Strategy details missing.
|

|
TBA RATING | TBA FEATURE
Map strategy details for Watchpoint: Gibraltar are currently missing. You can help the Overwatch Wiki by adding them! Attack
Strategy details missing.
Defense
Strategy details missing.
|
Hybrid
| Map | Strategy & Stage Tips |
|---|---|
 Overall Strategy |
TBA RATING | TBA FEATURE
Map strategy details for Overall Strategy are currently missing. You can help the Overwatch Wiki by adding them!
|
 Blizzard World |
TBA RATING | TBA FEATURE
Map strategy details for Blizzard World are currently missing. You can help the Overwatch Wiki by adding them! Attack
Strategy details missing.
Defense
Strategy details missing.
|

|
TBA RATING | TBA FEATURE
Map strategy details for Eichenwalde are currently missing. You can help the Overwatch Wiki by adding them! Attack
Strategy details missing.
Defense
Strategy details missing.
|

|
TBA RATING | TBA FEATURE
Map strategy details for Hollywood are currently missing. You can help the Overwatch Wiki by adding them! Attack
Strategy details missing.
Defense
Strategy details missing.
|

|
TBA RATING | TBA FEATURE
Map strategy details for King's Row are currently missing. You can help the Overwatch Wiki by adding them! Attack
Strategy details missing.
Defense
Strategy details missing.
|

|
TBA RATING | TBA FEATURE
Map strategy details for Midtown are currently missing. You can help the Overwatch Wiki by adding them! Attack
Strategy details missing.
Defense
Strategy details missing.
|
 Numbani |
TBA RATING | TBA FEATURE
Map strategy details for Numbani are currently missing. You can help the Overwatch Wiki by adding them! Attack
Strategy details missing.
Defense
Strategy details missing.
|

|
TBA RATING | TBA FEATURE
Map strategy details for Paraíso are currently missing. You can help the Overwatch Wiki by adding them! Attack
Strategy details missing.
Defense
Strategy details missing.
|
Push
| Map | Strategy & Stage Tips |
|---|---|
 Overall Strategy |
TBA RATING | TBA FEATURE
Map strategy details for Overall Strategy are currently missing. You can help the Overwatch Wiki by adding them!
|

|
TBA RATING | TBA FEATURE
Map strategy details for Colosseo are currently missing. You can help the Overwatch Wiki by adding them! Pushing
Strategy details missing.
Defending
Strategy details missing.
|

|
TBA RATING | TBA FEATURE
Map strategy details for Esperança are currently missing. You can help the Overwatch Wiki by adding them! Pushing
Strategy details missing.
Defending
Strategy details missing.
|

|
TBA RATING | TBA FEATURE
Map strategy details for New Queen Street are currently missing. You can help the Overwatch Wiki by adding them! Pushing
Strategy details missing.
Defending
Strategy details missing.
|

|
TBA RATING | TBA FEATURE
Map strategy details for Runasapi are currently missing. You can help the Overwatch Wiki by adding them! Pushing
Strategy details missing.
Defending
Strategy details missing.
|
Flashpoint
| Map | Strategy & Stage Tips |
|---|---|
 Overall Strategy |
TBA RATING | TBA FEATURE
Map strategy details for Overall Strategy are currently missing. You can help the Overwatch Wiki by adding them!
|

|
TBA RATING | TBA FEATURE
Map strategy details for Aatlis are currently missing. You can help the Overwatch Wiki by adding them! Station
Strategy details missing.
Garden
Strategy details missing.
Town Center
Strategy details missing.
Bazaar
Strategy details missing.
Resort
Strategy details missing.
|

|
TBA RATING | TBA FEATURE
Map strategy details for New Junk City are currently missing. You can help the Overwatch Wiki by adding them! Arena
Strategy details missing.
The Ducts
Strategy details missing.
Refinery
Strategy details missing.
Junkyard
Strategy details missing.
Bomb Flats
Strategy details missing.
|

|
TBA RATING | TBA FEATURE
Map strategy details for Suravasa are currently missing. You can help the Overwatch Wiki by adding them! Market
Strategy details missing.
Garden
Strategy details missing.
Palace
Strategy details missing.
Temple
Strategy details missing.
Ruins
Strategy details missing.
|
Achievements
| Name | Icon | Description | Reward |
|---|---|---|---|
| Destroy 10 turrets or traps using Winston's Tesla Cannon without dying in Quick or Competitive play. |  | ||
|
|
Damage 5 enemies during a single use of Winston's Primal Rage in Quick or Competitive play. |  |
Trivia
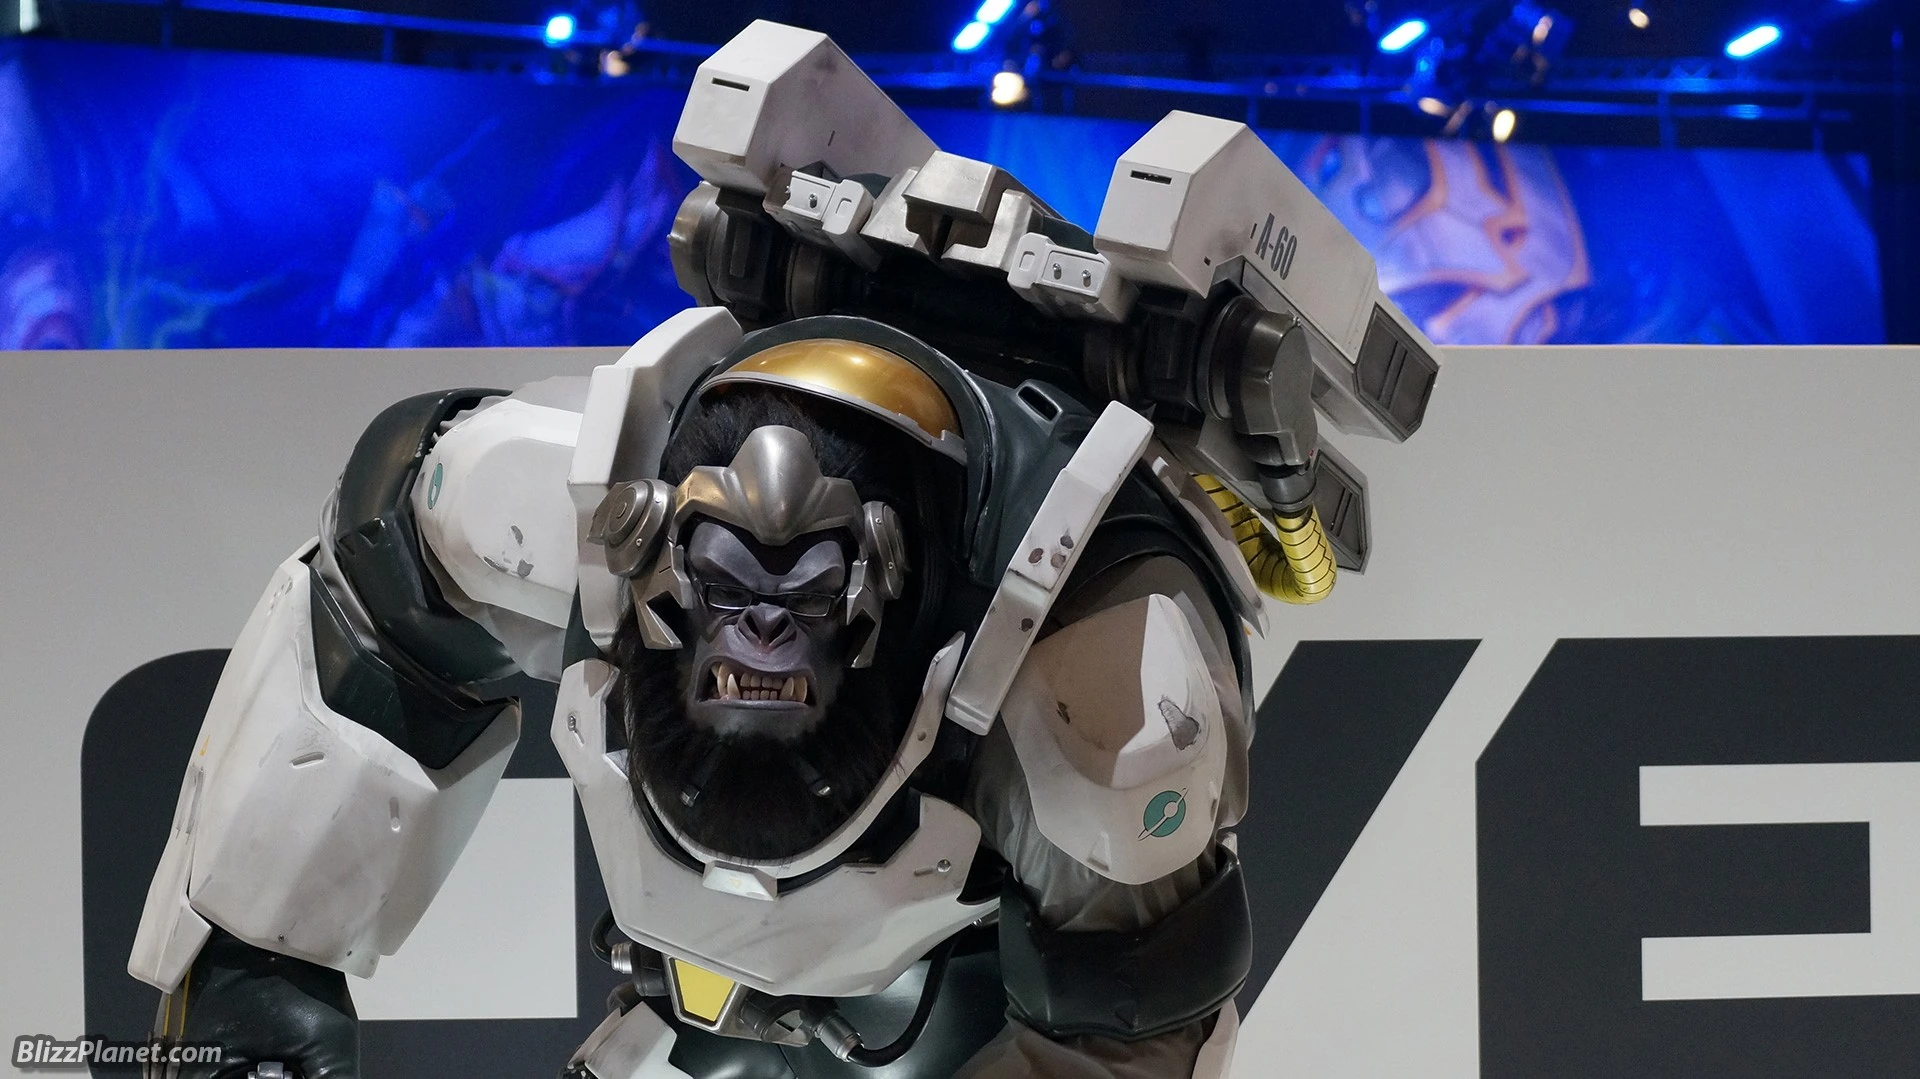
The Winston statue
- A statue of Winston was present at GamesCom 2015.[3]
- A statue of a baby Winston holding the hand of Chris Metzen was presented to the latter as a gift to commemorate his retirement from Blizzard.[4]
- A Funko Pop Winston figurine was released in June, 2016.[5]
Misc. Character Information
- His screen name in Overwatch's computer system is WNSTN.[6]
- Interactions between Winston and Wrecking Ball in Overwatch 2 indicate that Winston was close with (or at least attracted to) Hypatia.
- The glasses Winston wears are the same ones that belonged to Harold Winston. Thematically, they represent the older generation (Harold) handing the world off to the new one.[7]
- Winston has ordered products from BlankieCo.[8]
- At some point, Winston personally took to the field at Route 66, supported by Ziegler.[9]
- Note that this information appears to be exclusive to Hero Missions, which was cut from the game.
Cultural References
- Primal Rage is possibly a reference to the 1994 game Primal Rage, which features two ape-like characters, one of which is named Blizzard.
- Winston's Tesla cannon possibly gets its name from the Tesla Coil, an electrical resonant transformer circuit designed by Serbian-American inventor Nikola Tesla in 1891.
- Winston's voice lines when he respawns, "once more onto the breach" is a possible reference to Henry V.
In Other Games
- A Baby Winston pet was made available in World of Warcraft for those who purchased the Origins Edition,[10] Collector's Edition, Gear of the Year Edition, and Legendary Edition of Overwatch. It was also available in the limited-timed Watchpoint Pack for Overwatch 2.
- A Winston portrait is available in StarCraft II.[11]
Development
Winston's origin lies in a piece of concept art labelled "Orangutank." The design team liked the idea of an ape hero, but wasn't sure how it could fit in. A back and forth ensued between the game design and art team about how it could work.[12]
Winston was one of the hardest characters to animate due to the numerous armor pieces he wears. His rage mode also presented problems due to the changes in movement animation.[13] His design was "top-down" (where developers start with story/art/flavor elements and develop abilities around those ideas afterwards).[14] One of the points of discussion was whether Winston would be sapient. During development, a Dr. Jekyll/Mr. Hyde idea was considered for him.[12]
During development he was equipped with a flak shotgun.[15]
Removed abilities


- Removed in Reign of Talon Season 1
Media
Images
- Former Portrait
-
 Overwatch 1 Hero portrait

- Concept Art
-
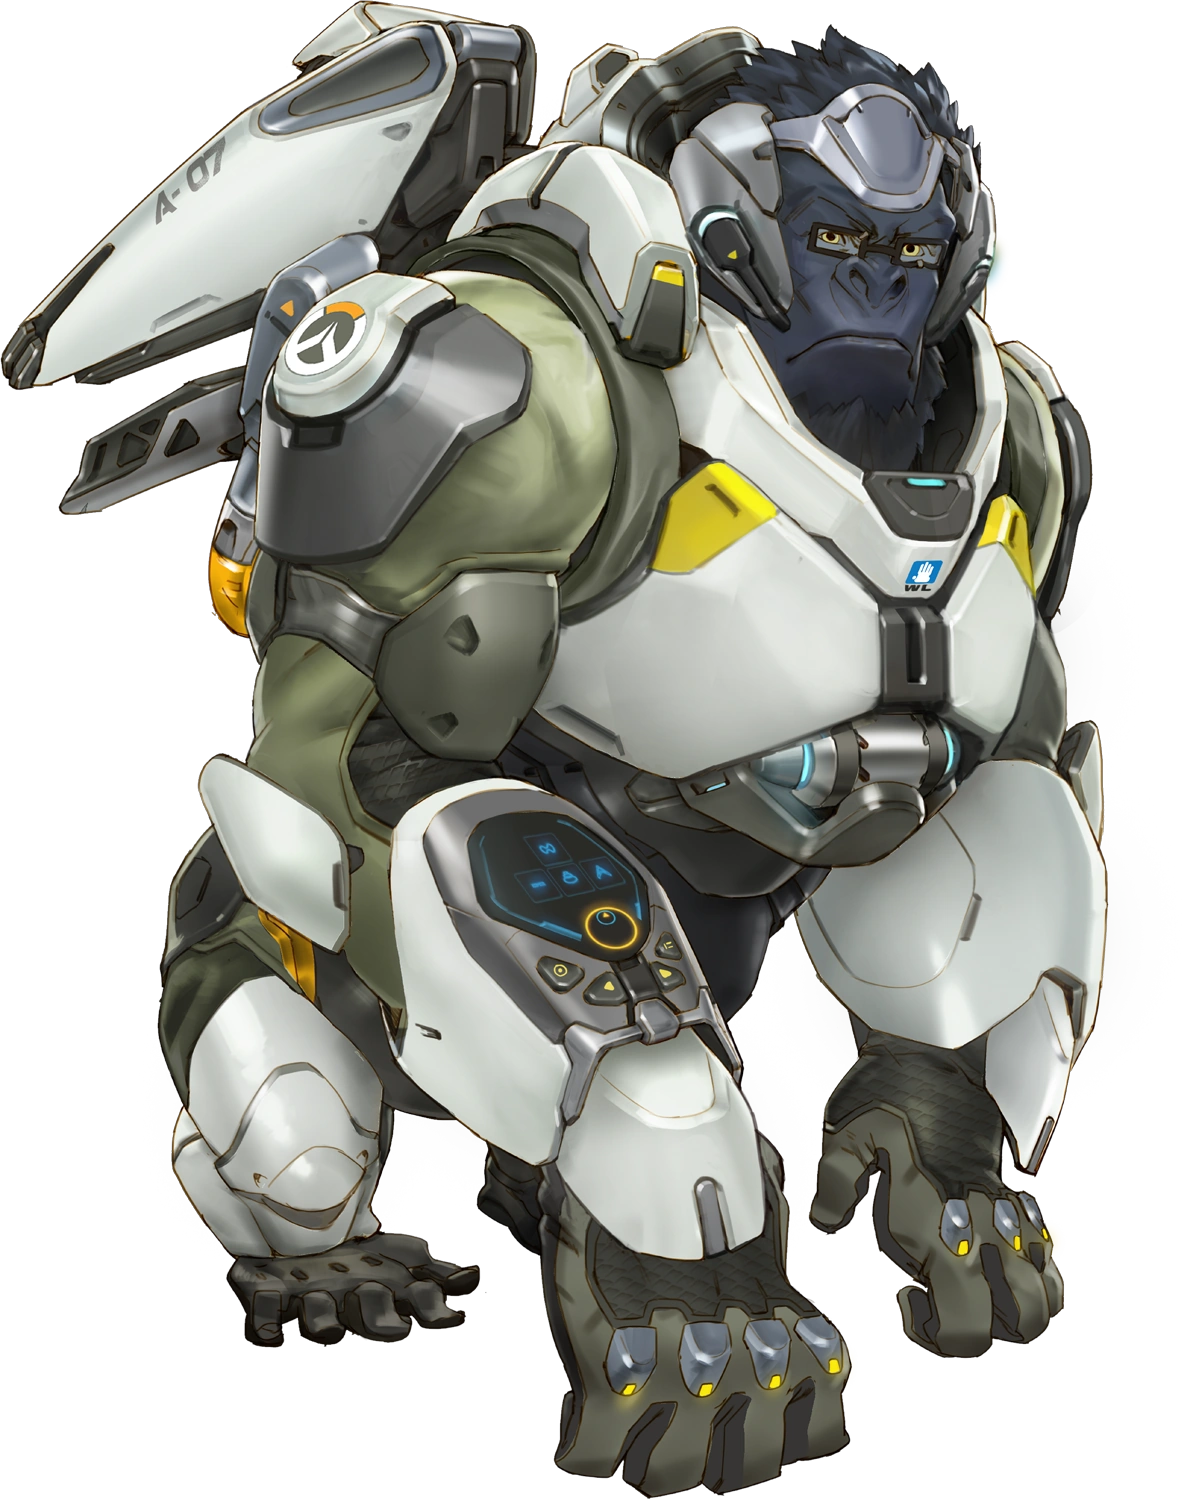
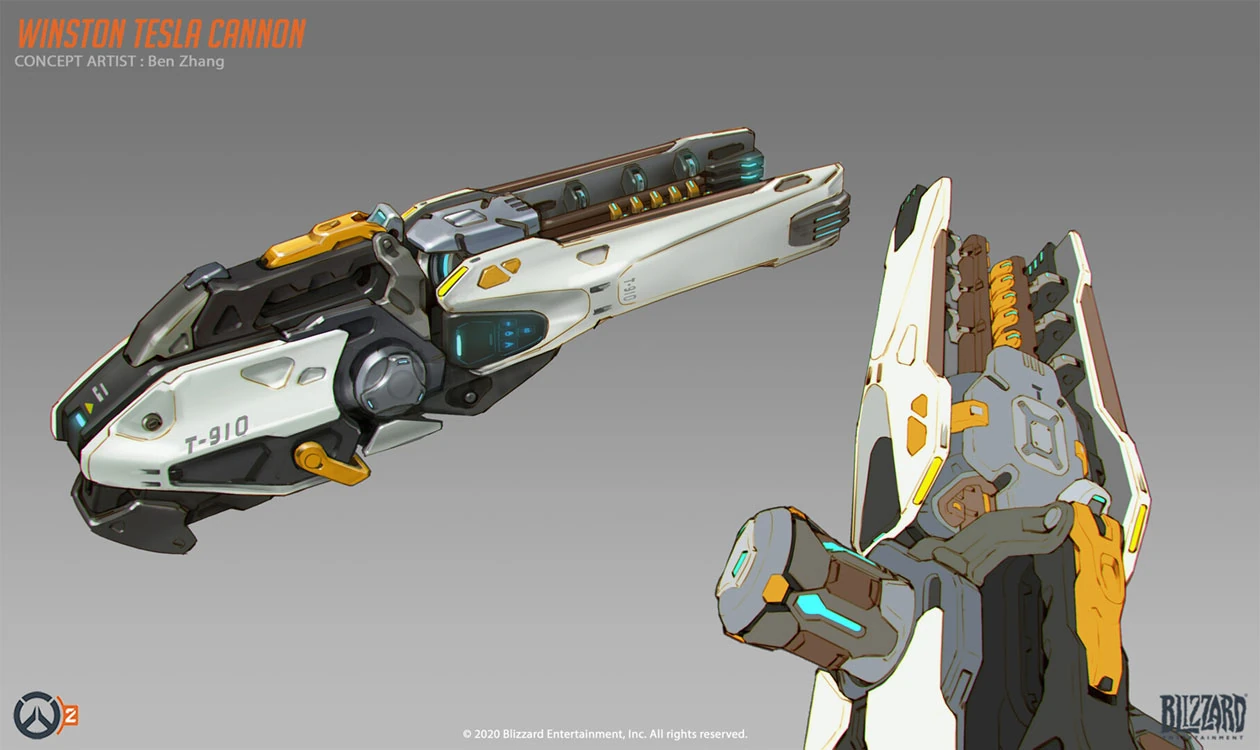
 Overwatch 2 Skin Concept Art by Ben Zhang
 -
 Ditto, with transparent background
 -
 Overwatch 2 Skin Concept Art by Ben Zhang
 -
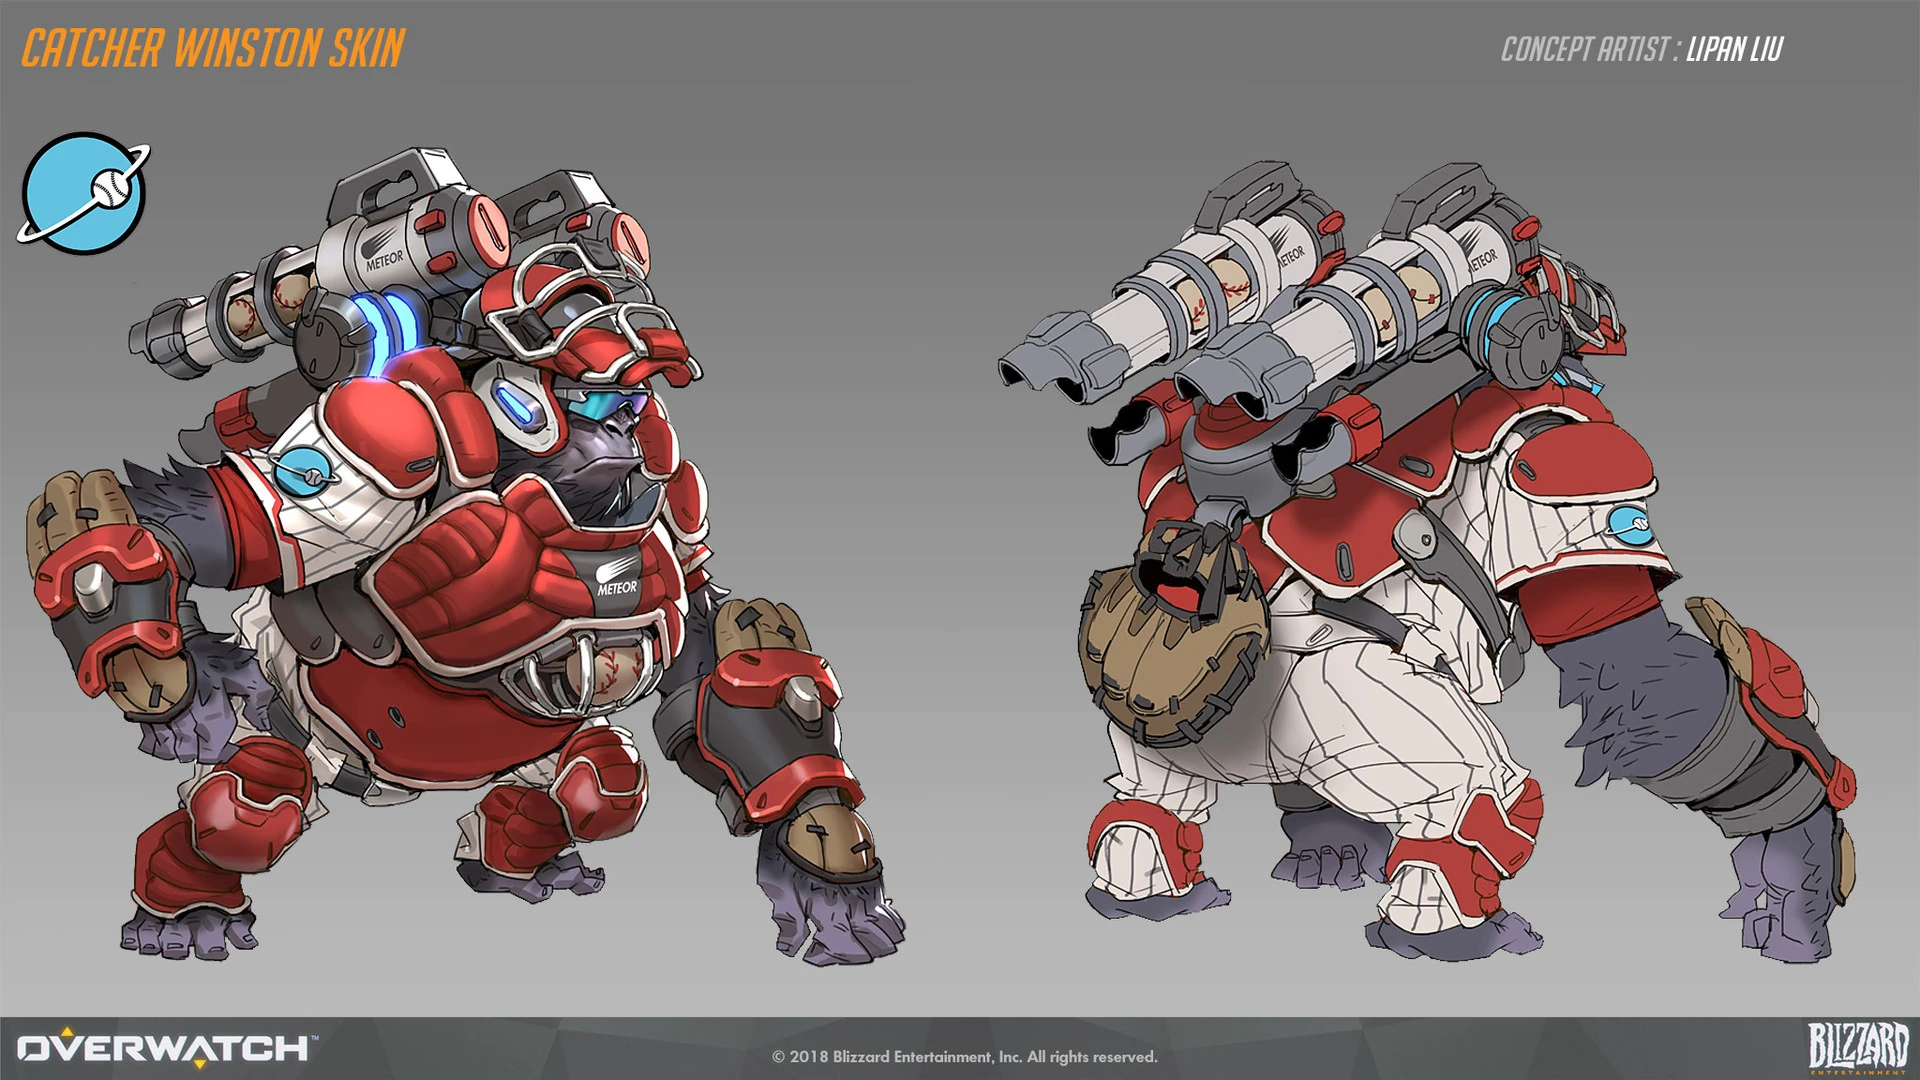
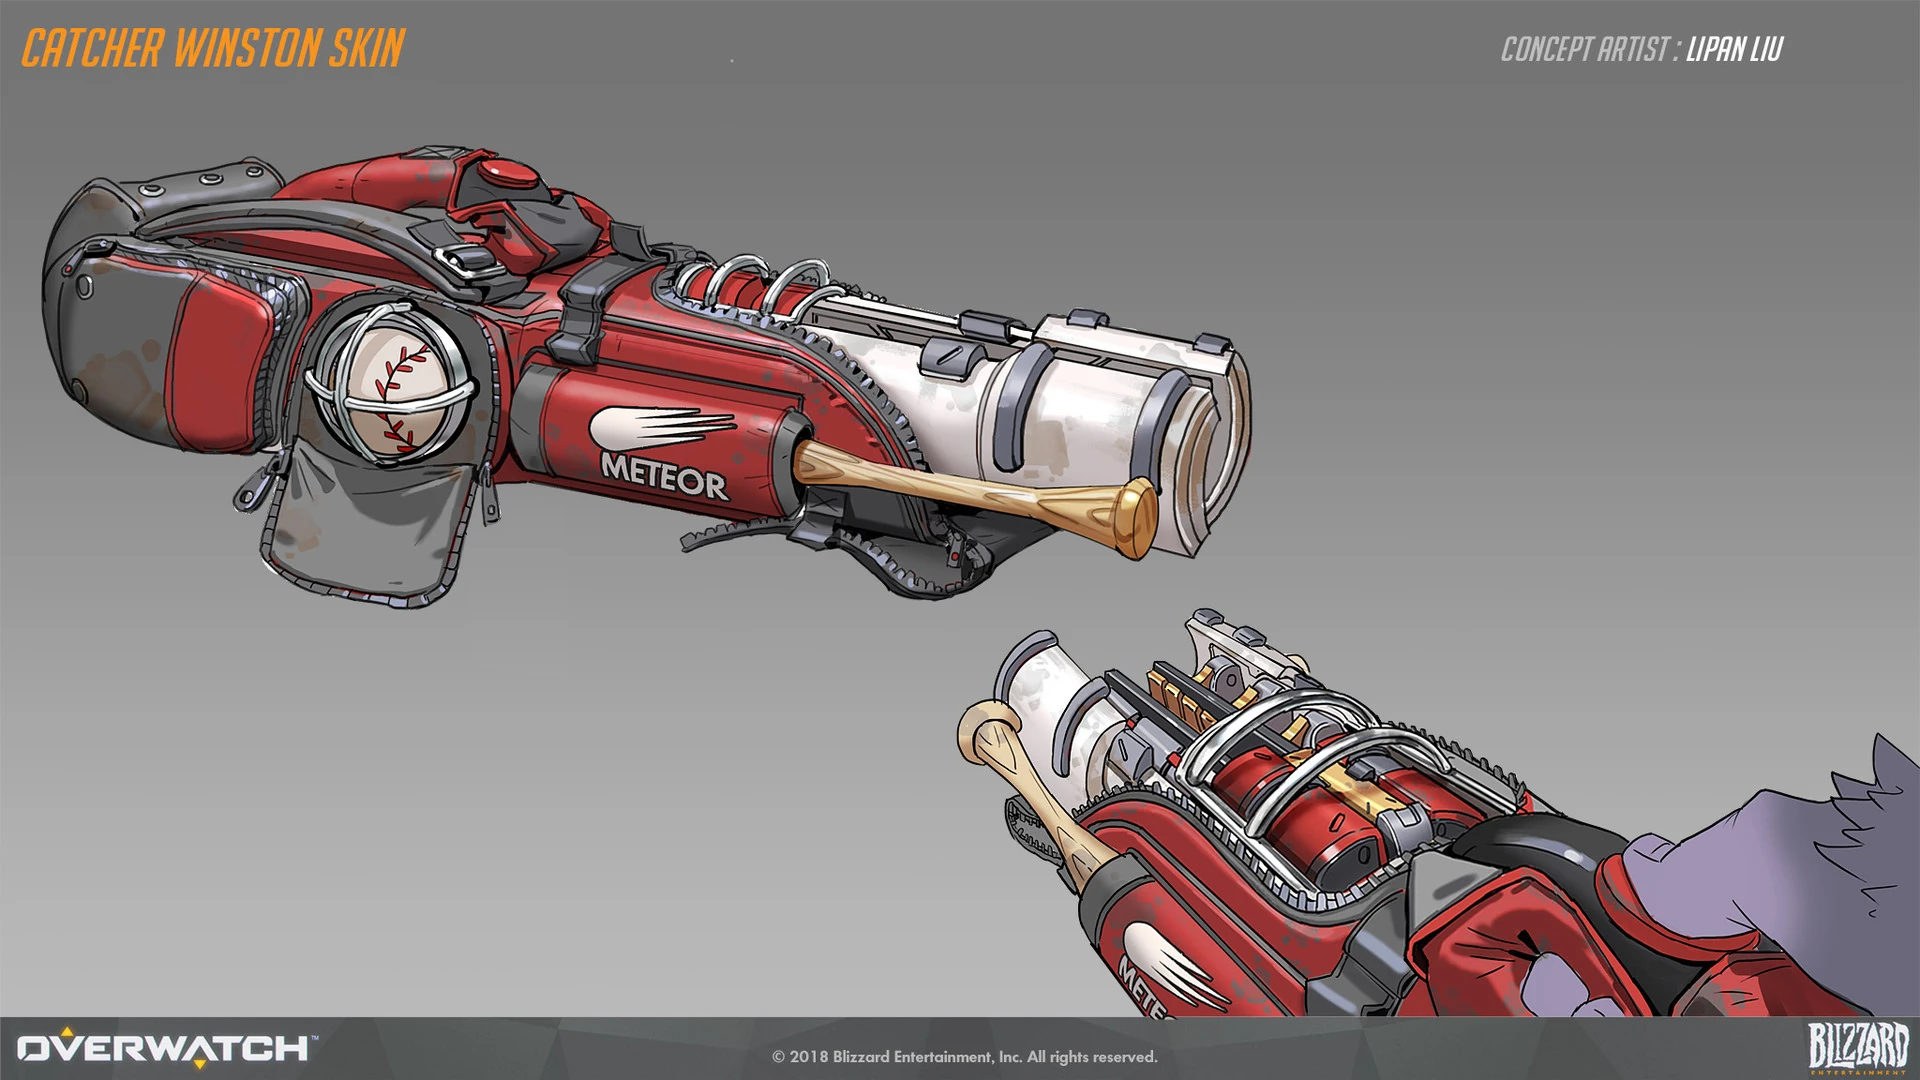
 Catcher Skin Concept Art by Lipan Liu
 -
 Catcher Skin Weapon Concept Art by Lipan Liu
 -
 Gargoyle Skin Concept Art by David Kang
 -
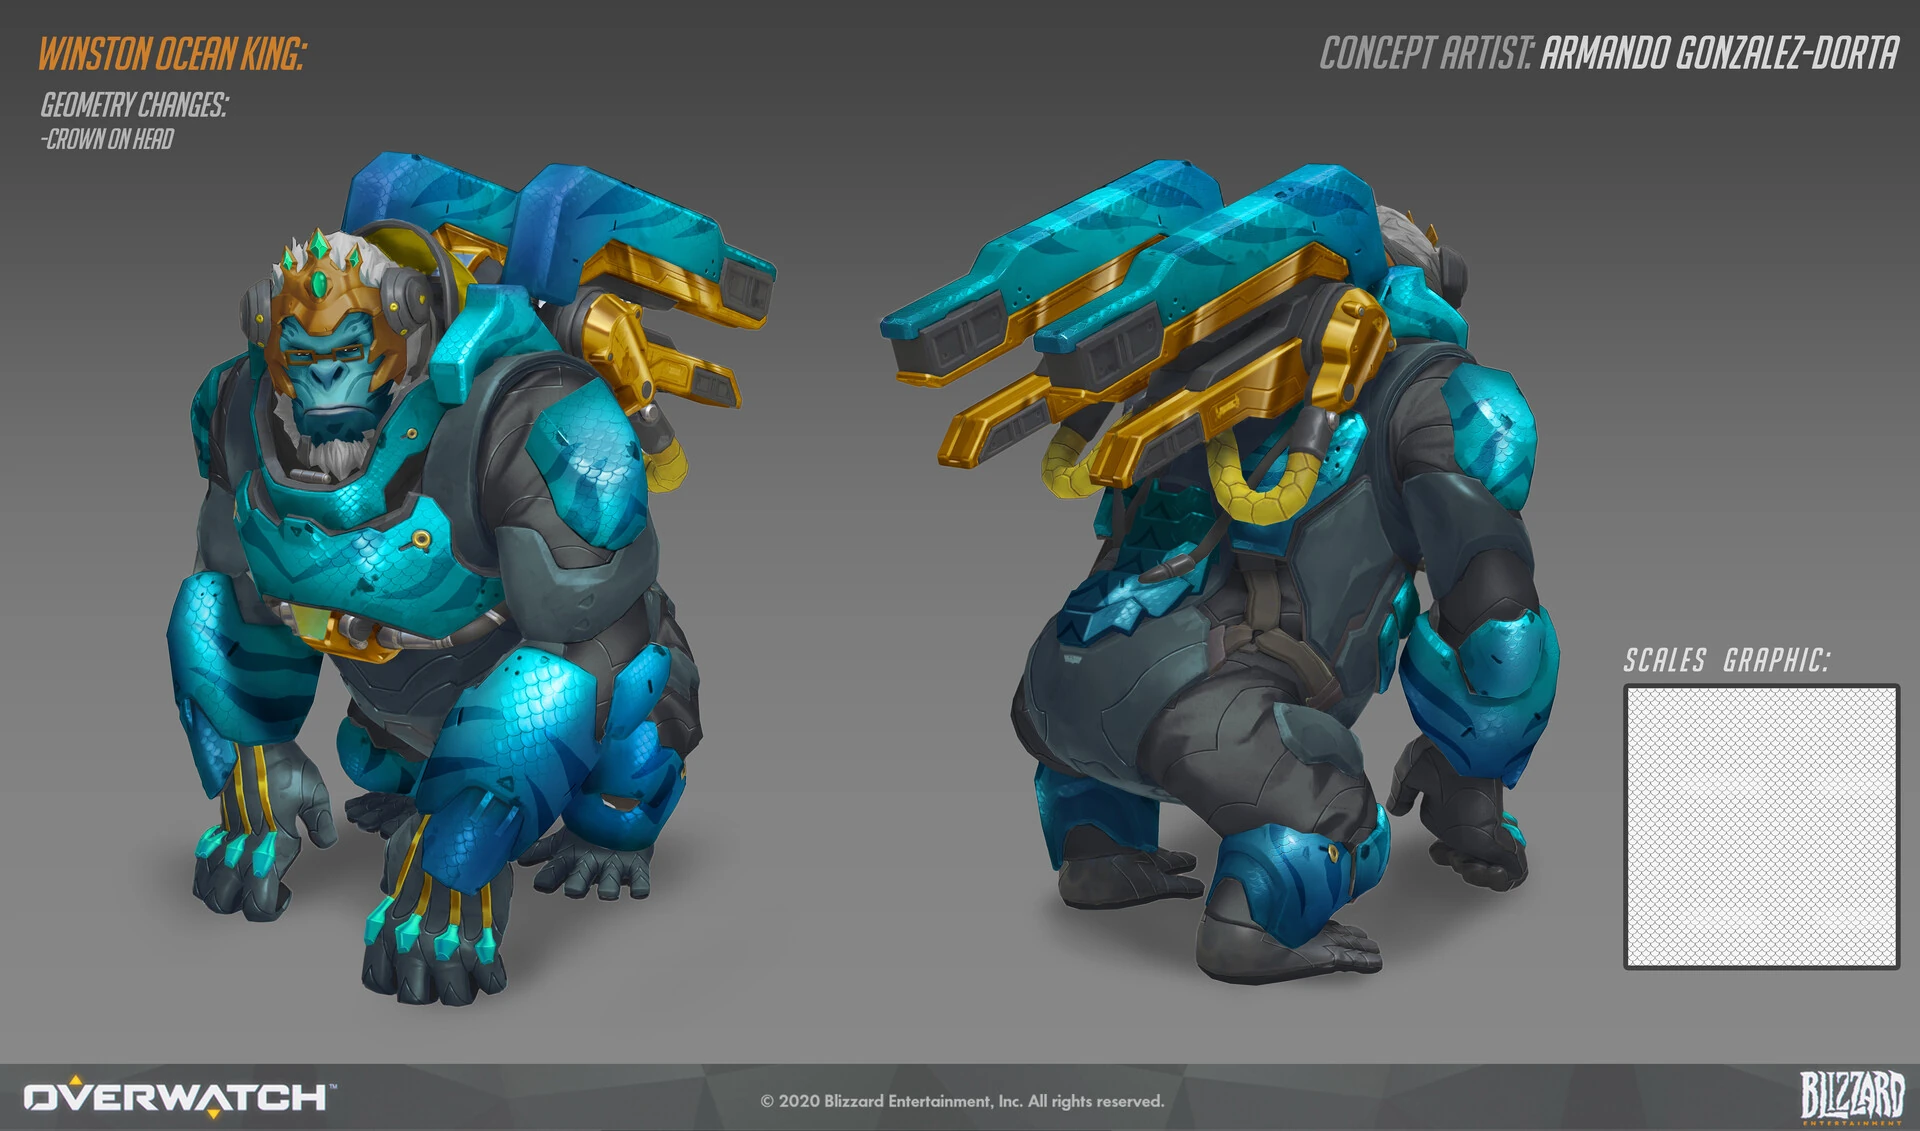
 Ocean King Skin Concept Art by Armando Gonzalez-Dorta
 -
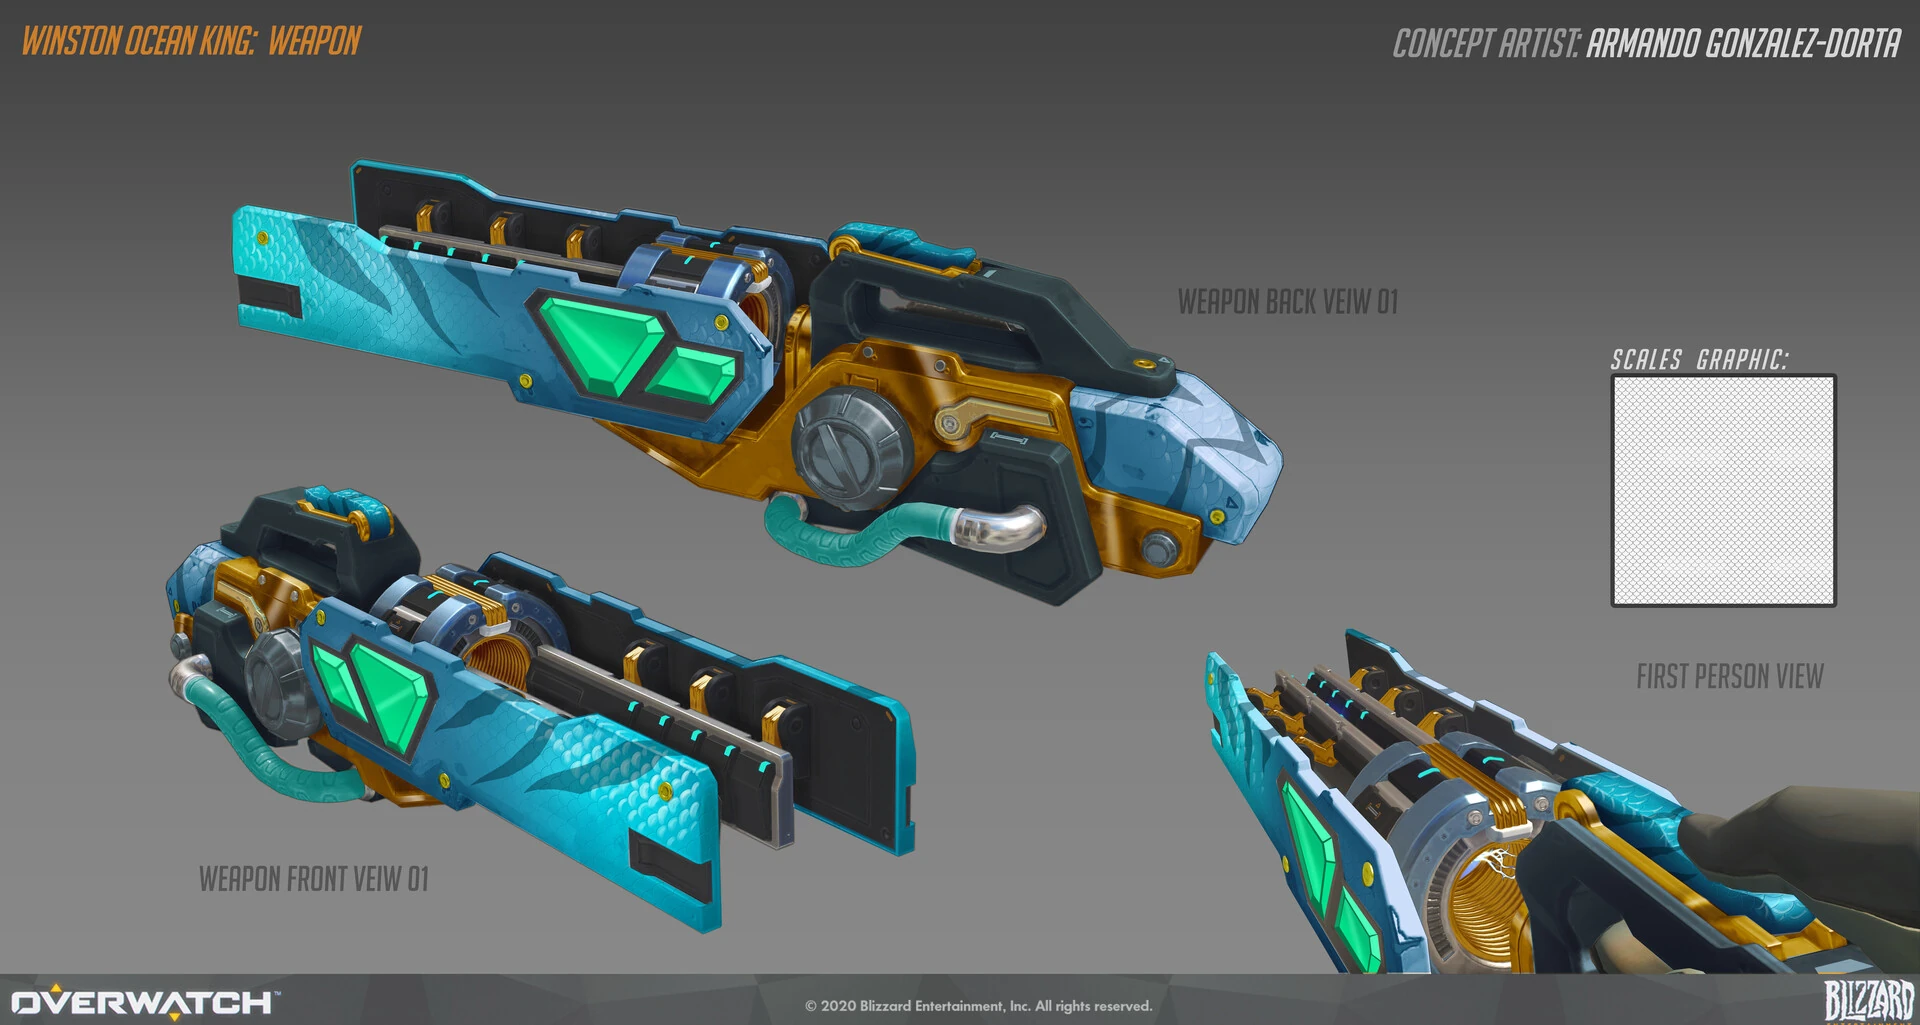
 Ocean King Skin Weapon Concept Art by Armando Gonzalez-Dorta
 -
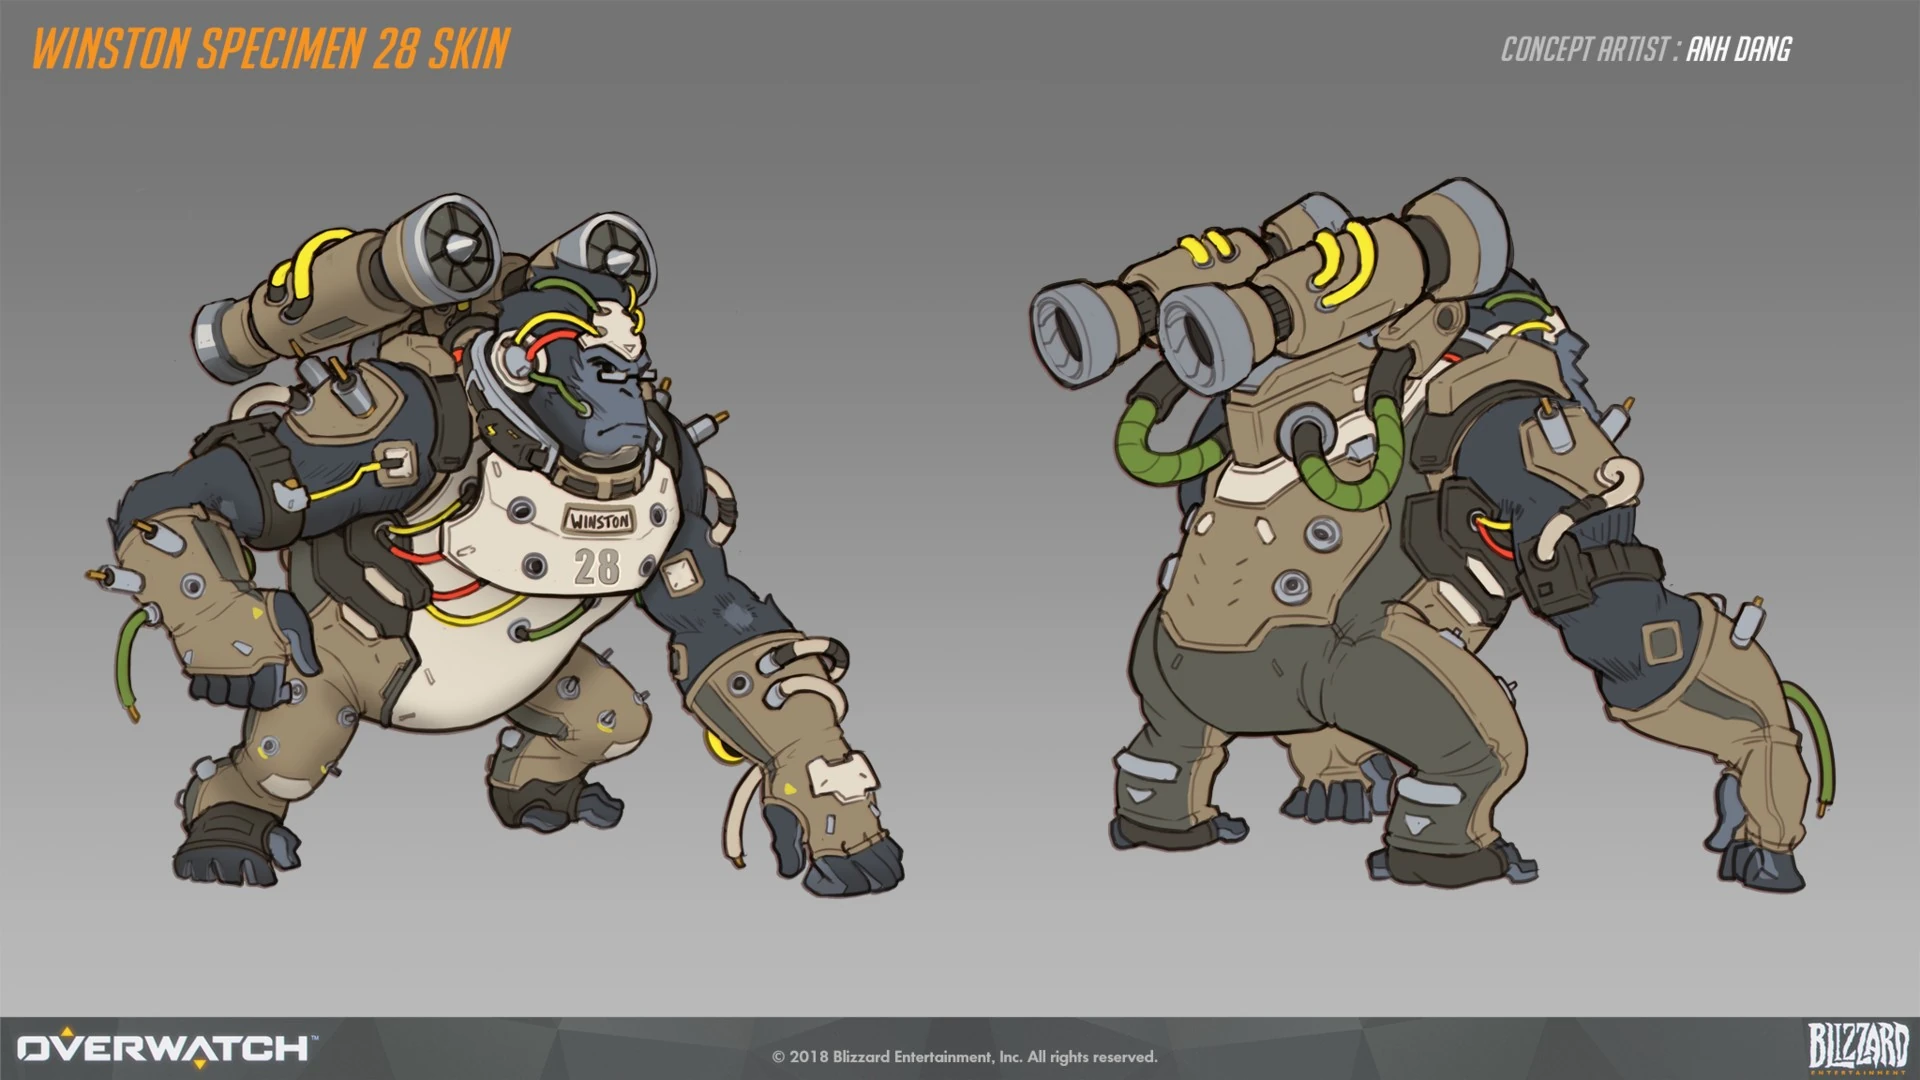
 Specimen 28 Skin Concept Art by Anh Dang
 -
 Specimen 28 Skin Weapon Concept Art by Anh Dang

Videos
Balance Change Logs
- For more information, see Patch Notes.
- Deals 50% increased damage to deployables.
![]() Barrier Toss – Minor Perk
Barrier Toss – Minor Perk
- Removed.
![]() Electric Charge – Minor Perk
Electric Charge – Minor Perk
- Winston gains 10% movement speed for each enemy damaged by his primary fire, up to 30%.
![]() Short Circuit - Minor Perk
Short Circuit - Minor Perk
- Removed.
![]() Barrier Toss - Minor Perk
Barrier Toss - Minor Perk
- New Minor Perk.
- Winston now throws his Barrier Projector forward when used.
![]() Short Circuit - Minor Perk
Short Circuit - Minor Perk
- Bonus damage to buildable objects increased from 50% to 100%.
- Base health increased from 225 to 275.
- Base armor reduced from 250 to 200.
- Ultimate cost increased 10%.
- Damage versus deployable objects increased from 30% to 50%
- Hero Perks
- Tesla Cannon deals 30% more damage to deployable objects.
- During Primal Rage, Jump Pack's damage and area increase by up to 75% while airborne.
- Fully charged Secondary Fire hits bounce to up to 2 additional targets.
- Barrier Projector heals allies within it for 30 health per second.
- Ammo increased from 100 to 120
- Secondary fire max charge damage increased from 50 to 60
- Ultimate ability cost increased by 12%
- Damage increased from 50 to 60.
- Damage per second reduced from 75 to 70.
- Secondary fire charge time reduced from 1 second to 0.85 seconds.
- Maximum health gained increased from 500 to 700.
- General updates
Most damage-dealing projectile sizes have been increased by a new global modifier added to their base size.
- +0.05 meters for hitscan projectiles with a high rate of fire or spread (e.g., Tracer's Pulse Pistols or Reaper's Hellfire Shotguns).
- +0.08 meters for hitscan projectiles that are more precise (e.g., Cassidy's Peacekeeper or Soldier:76's Heavy Pulse Rifle).
- +0.05 meters for travel time projectiles that are shotguns or have a very high rate of fire (e.g., Roadhog's Scrap Gun or Ramattra's Void Accelerator).
- +0.10 meters for travel time projectile with a speed greater than 50 meters per second (e.g., Zenyatta's Destruction Orb).
- +0.15 meters for travel time projectile with a speed less than or equal to 50 meters per second (e.g., Pharah's Rocket Launcher).
- Very large projectiles with a base size greater than 0.5 meters have been excluded from these increases (e.g., Orisa's Energy Javelin or Reinhardt's Fire Strike).
Hero combined HP (base health/armor/shields) increased by 15-25%.
- 150-175 HP heroes increased by 25 HP.
- 200-300 HP heroes increased by 50 HP.
- 300+ HP (Tanks) increased by 75-100 HP.
- Each hero's precise health increases are listed in their patch notes below.
Ultimate Charge
- All Ultimate ability costs increased by 10%.
Regenerative Passive for All Heroes
- All heroes now regenerate 20 health per second after 5 seconds of not taking damage.
Quick Melee
- Damage increased from 30 to 40.
- Hero updates
- Health increased from 200 to 225.
- Armor increased from 200 to 250.
- Primary Fire damage increased from 60 to 75 damage per second.
- Punch damage increased from 40 to 50.
- Now ignores armor damage reduction.
- Secondary fire range increased from 30 to 40 meters.
- Secondary fire charge time reduced from 1.2 to 1 second.
- Secondary fire recovery time increased from 0.5 to 0.75 seconds.
- Damage radius before falloff begins increased from 1 to 1.3 meters
- Base health in Role Queue modes remains the same at 350
- Base health in non-Role Queue modes reduced from 350 to 200
- Health reduced from 700 to 650
(beta)
(beta)
Developer comment: The change to Winston's secondary fire enables him to use it more often without sacrificing as much of his primary fire. We want his secondary fire to feel less restrictive to use and more fluid like his kit.
- Secondary fire ammo cost reduced from 20 to 12
(beta)
- Base armor increased from 150 to 200
- New Secondary Fire
- Hold Secondary Fire to charge, release to fire a 30-meter range jolt of electricity
- Deals up to 50 damage
- Costs up to 20 ammo
- Barrier Projector health increased from 650 to 800
- Barrier Projector duration reduced from 9 to 8 seconds
- Cooldown reduced from 13 to 12 seconds
- Ultimate cost increased by 10%
- (6v6) Base health reduced from 350 to 325. (Total health including armor and shields reduced from 550 to 525.)
- Cooldown reduced from 6 to 5 seconds.
- Is no longer affected by armor's damage reduction. (undocumented)
- Ammo increased from 100 to 120. (undocumented)
- Secondary fire damage increased from 50 to 60. (undocumented)
- Secondary fire ammo cost reduced from 25 to 12. (undocumented)
- Secondary fire charge time reduced from 1.1 to 0.85 seconds. (undocumented)
- Base health increased from 225 to 350.
- Base armor reduced from 250 to 200.
- No longer ignores armor damage reduction.
- Secondary fire charge time increased from 0.85 to 1.1 sec.
- Secondary fire ammo cost increased from 12 to 25.
- Cooldown increased from 5 to 6 seconds.
- Cooldown increased from 12 to 13 seconds.
- Maximum health gain reduced from 700 to 500.
- Currency from damage and healing increased by 12.5%.
![]() Lightning Rod - Power
Lightning Rod - Power
- Bounce Damage increased to 75% (Up from 50%).
![]() Volatile Volt - Power
Volatile Volt - Power
- Critical Damage increased to 200% (Up from 175%).
![]() Thick Skin - Power
Thick Skin - Power
- Added "+25% Starting Ultimate Charge".
![]() Primal Slam - Power
Primal Slam - Power
- Jump Pack cooldown is triggered again with max cooldown when using Primal Slam
![]() Premium Peanut Butter - Rare Survival Item
Premium Peanut Butter - Rare Survival Item
- Rarity changed to Epic (Previously Rare)
- Cost increased to 10000 (Up from 6000)
- Health increased to 50 (Up from 25)
![]() S.PaceArmor - Epic Survival Item
S.PaceArmor - Epic Survival Item
- Rarity changed to Rare (Previously Epic)
- Cost decreased to 4000 (Down from 9000)
- Armor decreased to 25 (Down from 50)
![]() Primal Punch - Power
Primal Punch - Power
- Decreased melee damage to 3% (Down from 5%).
![]() Premium Peanut Butter - Rare Survival Hero Item
Premium Peanut Butter - Rare Survival Hero Item
- Increased cost to 6000 (Up from 4000).
![]() Zero-G Suit - Rare Ability Hero Item
Zero-G Suit - Rare Ability Hero Item
- Increased cost to 6000 (Up from 4000).
- Removed cooldown reduction.
![]() Horizon Expander - Epic Ability Hero Item
Horizon Expander - Epic Ability Hero Item
- Increased cost to 12500 (Up from 11000).
![]() Fortified Jump Pack - Epic Survival Hero Item
Fortified Jump Pack - Epic Survival Hero Item
- Increased cost to 12500 (Up from 10000).
- Decreased damage reduction to 20% (Down from 35%).
![]() Circuit Breaker - Power
Circuit Breaker - Power
- Damage decreased to 2% (Down from 5%).
![]() Electro Cluster - Power
Electro Cluster - Power
- Damage decreased to 2% (Down from 3%).
- Added to the Stadium Hero roster.
![]() Circuit Breaker - Power
Circuit Breaker - Power
- Electric damage is increased by 5%. Gain 15% of Electric damage as Overhealth, up to 100.
![]() Electro Cluster - Power
Electro Cluster - Power
- +20% Tesla Cannon Primary Fire Range.
- Tesla Cannon's Primary Fire deals 3% increased damage per enemy being hit.
![]() Lightning Rod - Power
Lightning Rod - Power
- Hits with Tesla Cannon's fully charged secondary fire bounce to all other enemies within 6 meters for 50% reduced damage.
![]() Volatile Volt - Power
Volatile Volt - Power
- Tesla Cannon's secondary fire can critically hit for 175% damage.
![]() Lunar Leap - Power
Lunar Leap - Power
- Gain 2% bonus Ultimate Charge per enemy damaged by Jump Pack's landing. While using Jump Pack, gain 5% of Max Life as Overhealth every 1s, up to 100.
![]() Moon Landing - Power
Moon Landing - Power
- Heal for 7% of Max Life per enemy damaged by Jump Pack's landing.
![]() Primal Punch - Power
Primal Punch - Power
- Melee or Jump Eliminations reset Jump Pack cooldown.
- For every 25 Armor you have, gain 5% Melee damage.
![]() Pocket Projector - Power
Pocket Projector - Power
- Activating Barrier Projector attaches an additional, smaller Barrier Projector to Winston with 5% health.
![]() Surge Protector - Power
Surge Protector - Power
- Allies within Barrier Proejctor gain 25 temporary Overhealth every 1 second up to 100.
![]() Tesla Field - Power
Tesla Field - Power
- Enemies within Barrier Projector take 40 Electric damage every 1 second.
![]() Primal Slam - Power
Primal Slam - Power
- While using Jump Pack, press jump to quickly slam toward your current facing direction. During Primal Rage slam speed is increased by 50%.
![]() Thick Skin - Power
Thick Skin - Power
- When activating Primal Rage, Winston gains additional Armor equal to 100% of Max Armor.
![]() Current Convertor - Rare Weapon Hero Item
Current Convertor - Rare Weapon Hero Item
- 10% Weapon Lifesteal (Tesla Cannon).
- Gain 15% of damage dealt by Tesla Cannon's secondary fire as Overhealth, up to 100.
- Cost: 4,000.
![]() Deconstructor - Rare Weapon Hero Item
Deconstructor - Rare Weapon Hero Item
- 15% Max Ammo.
- Tesla Cannon deals 50% more damage to deployable objects, such as turrets and barriers.
- Cost: 4,000.
![]() Gibraltar Generator - Epic Weapon Hero Item
Gibraltar Generator - Epic Weapon Hero Item
- 10% Weapon Power.
- Barrier Projector grants Winston 10% increased Weapon Power while inside.
- Cost: 10,000.
![]() Harold's Glasses - Epic Weapon Hero Item
Harold's Glasses - Epic Weapon Hero Item
- 25% Max Ammo.
- Tesla Cannon's secondary fire deals 25% increased damage.
- Cost: 12,000.
![]() Zero-G Suit - Rare Ability Hero Item
Zero-G Suit - Rare Ability Hero Item
- 5% Cooldown Reduction
- 5% Move Speed.
- After activating Jump Pack. Increase Move Speed by 50% for 2 seconds when you next jump.
- Cost: 4,000.
![]() Horizon Expander - Epic Ability Hero Item
Horizon Expander - Epic Ability Hero Item
- 20% Ability Power.
- Jump Pack's landing area can increase by up to 100% while airborne.
- Cost: 11,000.
![]() Unstable Prototype - Epic Ability Hero Item
Unstable Prototype - Epic Ability Hero Item
- 10% Cooldown Reduction.
- Barrier Projector bursts when it is removed, dealing 25% electric damage to nearby enemies.
![]() Lucheng Launchers - Epic Ability Hero Item
Lucheng Launchers - Epic Ability Hero Item
- 50% Primal Rage duration.
- 50% Jump Pack base damage.
- During Primal Rage, Jump Pack's base damage becomes Electric and can increase up to an additional 100% while airborne.
- Cost: 12,000.
![]() Winton - Common Survival Hero Item
Winton - Common Survival Hero Item
- 10 Health.
- Winning a round awards Winston 2000 bonus cash.
- Cost: 3,500.
![]() Premium Peanut Butter - Rare Survival Hero Item
Premium Peanut Butter - Rare Survival Hero Item
- 25 Health.
- Using Jump Pack cleanses all negative effects.
- Cost: 4,000.
![]() Smart-Armor - Rare Survival Hero Item
Smart-Armor - Rare Survival Hero Item
- 25 Armor.
- While below 50% Life, take 25% reduced damage from Shotguns, such as Reaper, Junker Queen, and D.Va's Primary Fire.
- Cost: 4,000.
![]() S.PaceArmor - Epic Survival Hero Item
S.PaceArmor - Epic Survival Hero Item
- 50 Armor.
- When exiting Primary Rage, gain 100 Overhealth.
- Cost: 9,000.
![]() Simian Supplements - Epic Survival Hero Item
Simian Supplements - Epic Survival Hero Item
- 50% Barrier Projection duration.
- Barrier Projector's max health is increased by 300.
- Cost: 10,000.
![]() Fortified Jump Pack - Epic Surival Hero Item
Fortified Jump Pack - Epic Surival Hero Item
- 50 Armor.
- Damage received during Jump Pack is reduced by 35%.
- Cost: 10,000.
- Base Armor/Health has been redistributed from 100/400 to 150/350
Developer Comment: With this change Winston will be slightly more resilient against shotguns, beams, and weapons with a high rate of fire.
- Duration increased from 6 to 9 seconds
- Health increased from 600 to 700
Developer Comment: Winston’s barrier often feels unreliable as a protection tool since it can be destroyed so quickly. Raising the health and duration should allow for him to apply pressure and protect his team more consistently.
- Now restores ammunition after completion
Developer Comment: The change removes the need to immediately reload after a long duration ultimate.
- Now displays a health bar
Developer Comment: This change will help both Winston's allies and enemies know how much more damage his shield can absorb from oncoming attacks.
- Ability cooldown now starts when the barrier is placed, instead of when it ends
Developer Comment: This change should help Winston do what he does best: distract the enemy team and block damage.
References
- ↑ Tracer—London Calling Issue 2
- ↑ 2014-11-07, "So honored to be playing the voice of Winston the Ape in the new #Overwatch game from #Blizzard!". Twitter. Accessed on 2016-05-18
- ↑ 2015-08-06, GamesCom 2015 – Overwatch Life-Size Statues by FX Deco Studio. Blizzplanet, accessed on 2015-08-20
- ↑ 2016-09-18, Chris Metzen’s going away present is this amazing statue. Blizzard Watch, accessed on 2016-09-16
- ↑ 2016-02-26, Pre-Order FUNKO Overwatch POP Vinyl Figures. Blizzplanet, accessed on 2016-03-11
- ↑ Recall
- ↑ Forging Worlds: Stories Behind the Art of Blizzard Entertainment
- ↑ Overwatch 2, Communications Inbox
- ↑ 2019-11-01, Overwatch 2 Gameplay Trailer. YouTube, accessed on 2019-11-08
- ↑ Overwatch, Game.co.uk. Accessed on 2015-11-07
- ↑ 2015-11-06, Overwatch: Origins Edition (PC) Pre-Orders have Begun. Blizzplanet, accessed on 2015-11-07
- ↑ 12.0 12.1 2024-08-19, Overwatch 2 Devs Break Down Juno’s Development, Backstory (Exclusive). Comicbook.com, accessed on 2024-10-17
- ↑ 2015-05-27, BlizzCon 2014 – Overwatch Origins Panel Transcript. Blizzplanet, accessed on 2015-05-31
- ↑ 2014-11-24, BlizzCon 2014 – Overwatch Unveiled Panel Transcript. Blizzplanet, accessed on 2015-03-08
- ↑ 2017-11-13, The evolution of Overwatch’s heroes. Blizzard Watch, accessed on 2017-11-13
External links
| Heroes in Overwatch
| ||||||||
|---|---|---|---|---|---|---|---|---|
Tank |
 Bruiser |
|||||||
Initiator |
 Winston |
|||||||
 Stalwart |
||||||||
Damage |
 Flanker |
|||||||
 Recon |
||||||||
 Sharpshooter |
||||||||
 Specialist |
||||||||
Support |
 Medic |
|||||||
 Survivor |
||||||||
 Tactician |
||||||||


