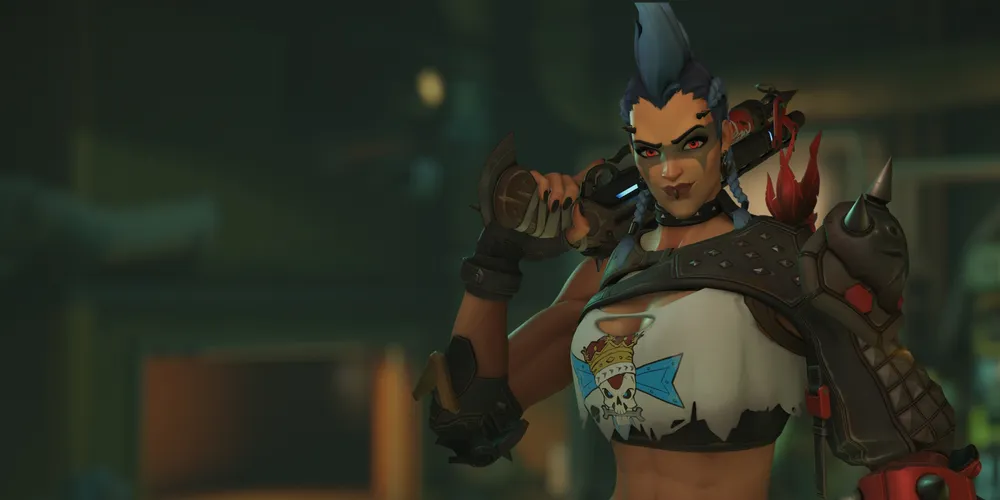
Junker Queen is a Stalwart Tank hero in Overwatch. She was initially playable during the second Overwatch 2 PvP Beta on 28 June 2022, before becoming permanently available to play when the full game launched on 4 October 2022, making her the 34th hero to be added to the game.
Overview
Junker Queen Hero Selection
The Junker Queen is designed to take part in close combat with enemy heroes. Many of her abilities apply wounds that cause enemies to slowly lose health. She also has a life-steal passive that adds to her survivability and aggression. Pushing the boundaries of brawling, Junker Queen can be considered a "berserker tank," whose survivability is directly connected to how many enemies she's wounding.[3]
-
 Main Menu
 -
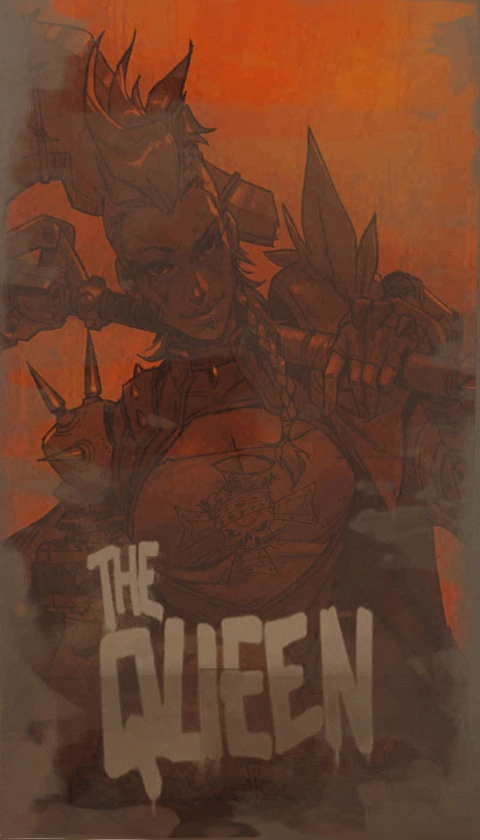
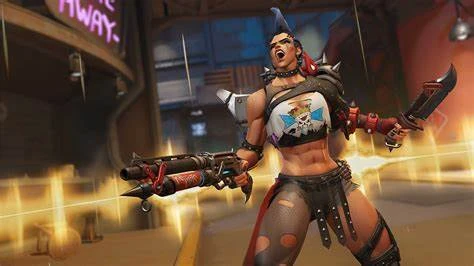
 Key Art

-
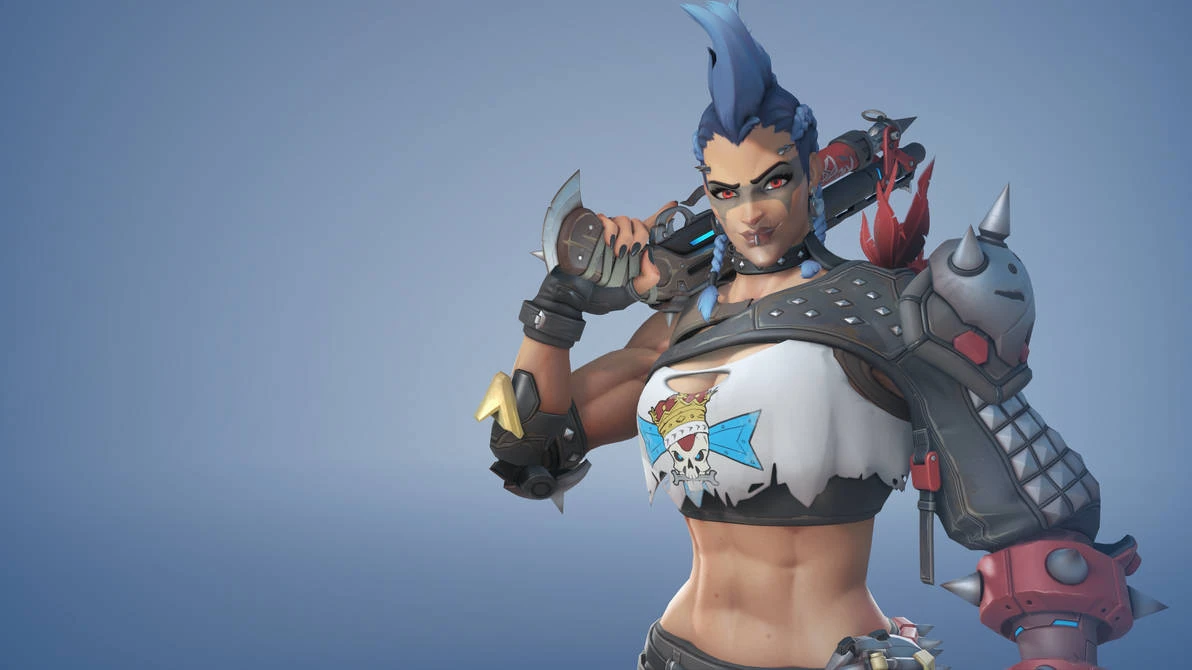
 3D Portrait
 -
 2D Portrait
Abilities
Passive Abilities


- Ultimate charge and perk progress generation from damage and healing dealt to heroes with the Role: Tank passive is reduced by 40%.
- All tanks have 150 more health in Role Queue. The amount of armor and/or shields remains the same.
- No longer grants increased base health.
- Ultimate charge generation reduction reduced from 40% to 20%.

- Reduces the speed of knockback and the effectiveness of slowdown effects received by 40%.
- Self-healing is not reduced by the global healing reduction passive.
- Adrenaline Rush instantly heals for the remaining wound damage when an enemy dies with wounds on them.
- Healing received from Adrenaline Rush grants ultimate charge.
- Wound damage - and therefore also healing - can be affected by damage amplifications on Junker Queen and reductions on the target.
- Wound is a damage over time effect, it can be Cleansed and its damage ignores damage reduction from armor.
- Adrenaline Rush healing is tied to the wound effect, resulting in no healing received if the wound is removed.
- Each enemy can have one wound per ability. Reapplying a wound with the same ability refreshes its duration.
- The wounds from return impact and quick melee of Jagged Blade are considered the same ability, but the wound from the direct impact is considered separate.
- Self-healing from wounds damage scalar reduced from 2.5x to 1.75x.
Weapons


80 – 24 (per volley)
- Damage per second: 106.67 while firing (85.33 w/ reload)
- Fire recovery stops while using melee.
Passive: Wound enemies hit by Quick Melee or Throw, dealing damage over time.
30 over 3 seconds (wound, thrown hit)
15 over 3 seconds (wound, return hit & melee)
37.5 over 3 seconds (recall/melee)
- The cooldown starts when the blade is thrown.
- The blade can be recalled anytime after the throw, even while still in mid-air.
- The blade is automatically recalled, if has travelled for 1.5 seconds (60m) without hitting an enemy or terrain.
- If the blade hits an enemy or terrain, it is automatically recalled 3 seconds after the impact.
- The blade is automatically recalled when blocked by
 Defense Matrix,
  Kinetic Grasp,
  Javelin Spin,
  Deflect,
  Power Matrix or
  Kekkai Sanctuary.
 - The return of Jagged Blade only applies the wound.
- Melee attacks while the blade is thrown do not apply a wound.
- No wound is inflicted, if the attack is blocked by Deflect, Javelin Spin or
 Warding Stance.
- No wound is inflicted, if the attack is blocked by
- Jagged Blade drops down if the enemy it was stuck to dies or becomes phased out (e.g.
 Wraith Form), or if the object it was stuck to is destroyed or recalled.
- The falling knife may stick to another enemy.
- From Season 11 until Mid-Season 12, pull strength against tanks was increased, resulting in only ~25% overall reduction with tank passive taken into account. This change was silently reverted when the global knockback resistance was reduced from 40% to 25%.
Special Abilities
75 (allies)
- Cooldown starts when the duration ends.
- Commanding Shout can be activated while casting any other abilities without interrupting them.
- Movement speed bonus counts towards global movement speed buff cap.
- Cooldown increased from 12 to 15 seconds.
-2 seconds (per enemy hit)
40 over 3 seconds (wound)
0.144 seconds (hitbox active)
- Carnage is not reflected when blocked by Deflect.
- No wound is inflicted, if the attack is blocked by Deflect, Javelin Spin or Warding Stance.
Ultimate Ability
90 over 4.5 seconds
0.7 seconds (dash)
- Walls and enemy barriers can line of sight block the effects from being applied in area.
 Life Grip cannot be used on Junker Queen during Rampage. Activating Rampage also interrupts the pull.
- Rampage's movement speed buff does not count towards global movement speed buff cap.
Perks
Minor Perks
A Minor Perk is unlocked at level 2.

- Unstoppable and a 6 second cooldown deduction are granted immediately upon activation.
- Prevents all stun, knockback and sleep effects and hinder/rooted from
 Downpour,
  Graviton Surge,
  Gravitic Flux and
  Cage Fight.

Major perks
A Major Perk is unlocked at level 3.

- The 30 extra recall damage also applies to the stuck target.

- Unlike
 Adrenaline Rush, the initial burst healing is affected by the global healing reduction passive.
 - Initial burst healing is not given if
 Carnage is deflected by Deflect, Javelin Spin or Warding Stance.
Hero-specific options
| Setting name | Options | Description |
|---|---|---|
| Hold to use Jagged Blade | Off (default) | Jagged Blade returns when player presses the button again. |
| On | Jagged Blade returns when player stops holding the button. | |
| Hide Commanding Shout timer | Off (default) | Timer UI element is displayed around the crosshair. |
| On | Timer UI element is hidden. |
Stadium
Junker Queen is a playable hero in Stadium game mode. See Junker Queen/Stadium for a list of hero-specific Items and Powers.
Strategy
Strengths
Similar to heroes like Reinhardt and Zarya, Junker Queen is a very oppressive brawler. She can be difficult to kill, thanks to her Adrenaline Rush passive along with wounds. Her Scattergun has very tight spread and heavy burst damage, which makes it possible to two-shot 200 health targets from a medium distance. With her Commanding Shout, she can close distance very quickly while also preventing herself and her team from taking damage. Carnage allows for very high burst damage when used in tandem with Jagged Blade and her Scattergun, allowing her to chunk down higher health heroes quickly. Rampage can also be one of the stronger Ultimates in the game, completely denying abilities such as Transcendence, while also applying very high-damage wounds that make it very difficult for the enemy team to stay alive.
Weaknesses
Considering her low health pool for a tank, she can also be very easy to burst down with heroes like Widowmaker and Roadhog. She is also vulnerable to Ana's Biotic Grenade, as it completely negates any healing she receives, which combined with her low health pool, makes her very easy to shut down. While Junker Queen has very high self-sustain and high damage, she can easily be taken down by heroes that have Barriers or similar abilities. These abilities make it very hard for her to use her Scattergun and apply wounds with Jagged Blade, as these abilities will block it. At higher ranges, she can also be easy to kill, as she will be unable to consistently use her Jagged Blade and Carnage, as well as her Scattergun, as it will start to suffer from damage falloff and spread. Abilities that cleanse like Zarya's Barriers and Kiriko's Protection Suzu can also completely negate all of her wounds along with the anti-heal from her Rampage. Once she has used all of her abilities, she is also a very easy target, as her biggest threat is the high burst-damage from Carnage and the sustain from wounds and Commanding Shout. Mei is one of Junker Queen's strongest counters. The high damage primary fire's slow, Ice Wall, and Blizzard all combine to make it very hard for Junker Queen to escape from an enemy Mei and her team.
Weapons & Abilities
- Adrenaline Rush (Passive): Junker Queen's passive ability. When she applies a wound to a target, she will passively heal the damage dealt by the wound.
- Scattergun: Junker Queen's primary weapon. The tight spread and low pellet count makes it extremely powerful against low mobility, large hitbox heroes like Cassidy and Torbjörn, who are very easy to hit with the Scattergun. Higher mobility heroes can be more difficult to hit with it, as they are typically able to increase the distance between Junker Queen and themself quite quickly, but if a Tracer gets too close, Junker Queen is able to one-shot her with a close-distance headshot.
- Jagged Blade: Junker Queen's secondary weapon. When in her hand and Junker Queen melees, she will apply a wound to her victim. When thrown, it will stick to whatever surface it hits, be a player or piece of map geometry. If it does connect with a player, it will deal a small amount of damage and apply a wound on the victim. Once called back, it will fly back to Junker Queen, causing wounds to anyone it passes through. If it is connected to a player when it is called back, it will pull the enemy towards Junker Queen.
- Commanding Shout: Junker Queen's primary ability. When activated, it will provide a temporary speed boost and grant Overhealth to herself and teammates.
- Compared to abilities like Charge, it is a relatively weak mobility tool, but it is extremely strong when used to keep the momentum going during a fight. It is the best way for Junker Queen to have extra sustainability, as the Overhealth pool gives herself and her team a chance to top her up midfight. It is also a very strong closer, as it makes her considerably faster than her opponents.
- Carnage: Junker Queen's secondary ability. When used, she swings a large axe that on hit, damages opponents within a short distance to her and applies a bleed to her victims.
- Carnage is the primary way Junker Queen is going to apply her wounds. Compared to Jagged Blade, the wounds Carnage applies deal more damage, thus in return healing Junker Queen for more. It is best utilized against groups of enemies.
- Carnage can be cancelled through the use of an opponent's stun, so be sure to watch for those before using Carnage.
- As of a Season 3 balance change, Carnage's cooldown is reduced by 2 seconds for every enemy hit, so it is possible to infinitely loop Carnage's on a very grouped up team, inflicting massive burst and bleed damage.
- Rampage: Junker Queen's Ultimate. When activated, Junker Queen will stand still, charge up her gauntlet, and charge forward at a very high speed. During this time, she cannot use abilities or change the direction she is moving in. Any enemy that is close to her will have a very high damage bleed applied along with an anti-heal effect.
- She is relatively vulnerable during her ultimate, as she sits still for a decent amount of time and then moves in a very predictable fashion, allowing heroes like Ana and Orisa to cancel her ultimate with their stun abilities.
- She can be knocked back during Rampage by abilities such as Orisa's Javelin Spin, so it is generally wise to wait for those abilities to be used before considering a Rampage.
General Strategies
- Junker Queen is a very "burst" style hero: Rapidly engage, use your abilities, kill the enemy team. Once you use those abilities, you are very vulnerable, so it is important to time your engages properly. Look for an out of position player on their team and either use Jagged Blade to pull them in, or Commanding Shout to close the distance, as it allows you to use your Scattergun more effectively on that player.
- While Junker Queen's passive does give her self healing capability, it cannot be expected to be as reliable as channeled abilities such as Take a Breather, Cryo-Freeze, or Recall for recovering lost health. It mainly functions to make Junker Queen last longer on the battlefield. Since she isn't able to protect her team very well, it's also very important to play cover and make sure you don't peek into open sight lines. Play around walls and safe map geometry.
- Carnage is a very powerful finishing tool. Not only does it deal high burst damage, but it also applies a high damage wound that can finish off a target hit by it. Also consider that shields except for Zarya's Barriers do not block Carnage, so you are free to use Carnage on a tank that may be low health and is holding their shield up.
- Due to the Scattergun's low ammo, it is wise to not shoot before you have closed distance, as you can end up having to reload before you've gotten a pick. Be careful to not expend the precious ammo on a tank, as tanks can be very hard to kill with their large amounts of health and/or armor. It is much wiser to focus on killing a support such as Zenyatta or Brigitte, as these heroes actively keep their tank alive.
- Be very conservative with your Commanding Shout, as it has a very long cooldown that you probably won't get back in the same fight. Don't use it to walk out of spawn, as you will most likely need it when you get back to the fight, and any time you spend having to wait for it is very unsafe, as you can be quickly taken down without it.
Match-Ups and Team Synergy
Tank
| Hero | Match-Up | Team Synergy |
|---|---|---|
 D.Va |
Junker Queen and D.Va match-ups are very map dependent. Regardless of map, D.Va is capable of denying Junker Queen a heavy amount of damage by using Defense Matrix on the Scattergun and Jagged Blade. Rampage can deny a D.Va a lot of space, as she will be forced to Booster out to survive. On maps with heavy high ground, D.Va exceeds at denying Junker Queen value as D.Va can easily keep Junker Queen out of range by positioning with Boosters. But, on maps that have little-to-no valuable high grounds, Junker Queen is more able to play against D.Va, as she can consistently get close to D.Va and use Carnage and Rampage on her. | There aren't any notable synergies between these two heroes. |
 Doomfist |
A Doomfist matchup as Junker Queen is very skill-dependent. He deals massive AoE damage, which is typically unfavorable against a Junker Queen composition, as she is typically grouped with her team. While, on the inverse, Junker Queen does insanely high single-target burst damage, and can easily force Doomfist's cooldowns out. When facing a Doomfist as Junker Queen, you need to look to force out his Power Block and prevent him from getting an Empowered Rocket Punch. Afterward, toss a Jagged Blade on him to prevent him from escaping with Seismic Slam/Rocket Punch. If he's Empowered, look to use Commanding Shout before getting punched to give yourself some extra sustain.He is able to cancel your Rampage and Carnage, so be careful using them while he has Rocket Punch. Otherwise, just force out his cooldowns by shooting him and he becomes useless. | There aren't any notable synergies between these two heroes. |
| Hazard can be interesting matchup. Both his and Junker Queen primary are shotgun variants with spread. His abilities are more defensive than hers but has Violent leap as more agile tool compared to Junker Queen's speed boost/shield which allows swift insertion/exit from combat, however a well place Knife throw can stop get him back down. He will try to get close to you and use both his Jagged wall to corner you and harass with basic attack and Spike Guard together that can resist bleed effects. If Downpour is cast above Junker Queen, she'll become a pin cushion unless she can escape, but if not then she'll be vulnerable to other attacks unless her commanding shout can give edge. | Hazard and Junker Queen have interesting synergy. Whilst chasing down targets, Junker Queen's Commanding shout with Hazard's leap can give more momentum or under fire whilst Spike Guarding allows more survival. When cornering enemies or in chokepoints, his Jagged Wall gives opportunity for her to prey upon. When calling Downpour, Junker Queen can Rampage at the same line that was cast and/or catch enemies within for extra damage or to position for take down. | |
 Junker Queen |
Junker Queen mirrors are extremely skill-dependent. It's all about using your cooldowns better and engaging at better times. If an enemy Junker Queen uses her Commanding Shout or Carnage poorly, look to use your own and engage onto her, as she will be without survival tools and should be fairly easy to kill.
|
Commanding Shout can stack, so look to use it to get a very strong speed boost along with a large pool of Overhealth when engaging.
|
 Orisa |
Orisa is easily one of Junker Queen's worst tank match-ups. High health pool along with armor, Fortify reducing damage received heavily, and a lot of CC that leads to Junker Queen being unable to confirm picks on Orisa or her backline, as Orisa can easily outpace Junker Queen's cooldowns with her own. If you are looking to face up against an Orisa as Junker Queen, you need to bait her cooldowns out with as little of your own as possible, and look to engage on her backline. Rampage is your best bet, but be weary of a Energy Javelin or Javelin Spin. | While Orisa is one of Junker Queen's worst match-ups, she is also one of her best teammates. Orisa can easily help confirm a low damage target that Junker Queen got a bleed on, she can engage with a Commanding Shout and easily overwhelm the opponents, and can use Terra Surge to pull enemies together for a Carnage or Rampage, leading to total mayhem. |
 Ramattra |
Ramattra is also a fairly strong hero into Junker Queen, with high range and strong close range damage and armor with Nemesis Form, he can be a tough nut to crack as Junker Queen. Similar to Orisa, you need to look to bait out his cooldowns, especially Nemesis Form, and use a Carnage on him to survive, as Junker Queen's bleeds do not get affected by Nemesis' blocks. Once he is out of his Nemesis Form, Ramattra is fairly easy to kill considering his low health pool and large hit box. Look to use Commanding Shout and overwhelm him before he gets his Annihilation or Nemesis Form, or look to engage his backline as he can be rather useless without any cooldowns.
|
Ramattra and Junker Queen work very well together. Ramattra is able to provide protection and cover with his barrier, and Junker Queen is able to enable Ramattra to engage quickly with Commanding Shout and Nemesis Form. Ravenous Vortex can also be used to slow down an enemy team for a heavy Carnage or confirm a kill on a player pulled in by Jagged Blade. Ramattra's Annihilation and Rampage can also be used to quickly end a team fight, as the high damage-over-time can easily wipe out the enemy team if they don't have the proper resources to counter it. |
 Reinhardt |
Reinhardt is another tank that Junker Queen struggles heavily against. With his Barrier Field, unblockable EarthShatter, along with his high damage Rocket Hammer and Charge, all it takes it one Charge and two hammer swings and you'll be saying hello to the respawn room. If you do get pinned, look to use Commanding Shout once you exit the pin and swing your Carnage to get some quick chip damage along with some self-sustain via a wound. If a Reinhardt is out of position, a quick Jagged Blade to the noggin and a good Carnage can easily confirm a kill on Reinhardt. Interestingly, using Carnage or Jagged Blade whilst his shield is deployed, will still damage him at point black range. The latter, thrown onto his shield can stick and if he retracts it, then will contact his body to pull him.
|
Similar to the Rein/Zarya composition, Reinhardt and Junker Queen are very good together. Junker Queen's Commanding Shout enables Reinhardt to quickly engage and overwhelm the enemy team at blazing speed, and Earthshatter and Rampage can help confirm a teamwipe if the enemy team happens to have a Zenyatta saving Transcendence to counter Earthshatter. |
 Roadhog |
Roadhog is a very weird matchup. He can easily demolish your health pool considering you have no armor, but you can do the same to him. If he hooks a teammate, look to either use Commanding Shout to give them a little extra health to survive his combo, or use Jagged Blade to displace Roadhog and mess up his combo. If he uses Take a Breather, it is also wise to use Jagged Blade on him to pull him in, so you can get good follow up damage once it ends. Look to use Rampage either when Roadhog has used his Chain Hook or is using Take a Breather.
|
Roadhog and Junker Queen can be a very volatile and heavy damage pairing, but just be aware your team has absolutely no protection at all. These two can easily deny heroes such as Doomfist from engaging, as Roadhog can hook Doomfist in, and Junker Queen can throw a Jagged Blade on him, so if Doomfist tries to escape after a Hook, you can pull him back in. Commanding Shout can also be used to make Roadhog travel significantly faster while using Whole Hog. |
 Sigma |
Sigma is another very challenging match-up as Junker Queen. He has high damage, good range, a strong stun and a shield, making it very difficult to engage onto his team without taking a large amount of damage. Look to play corners and walls while closing distance to him, as the closer you are to a Sigma, the more killable he is considering he has a relatively weak health pool.
|
Few key points can account for their synnergy as barrier protects Junker Queen when engaging enemies and when Sigma's ult grasps a few targets, Junker Queen can also prey upon close with her weapons. Commanding shout with Kinetic Grasp allows speed and survivability in combat for Sigma. |
 Wrecking Ball |
Similar to Doomfist, Wrecking Ball can be a very hard hero to play Junker Queen into, considering his high HP pool and mobility. Look to outpace his dives and attack his team before he can get into position to kill yours. You can also use Commanding Shout to negate some effects of his Piledriver and throw a Jagged Blade on him when he lands to pull him back in if he rolls away.
|
There aren't any notable synergies between these two heroes. |
 Winston |
A Winston-Junker Queen match-up is very map and skill dependent. Junker Queen has high and effective damage against Winston considering his hitbox size, but Winston can also completely deny Junker Queen space and damage with his barrier. Similar to Doomfist and Wrecking Ball, look to engage his backline before he engages yours, as once a Winston is on top of you and your team, he will easily be able to isolate your backline and kill them. If a Winston does engage on you, look to shoot him and throw a jagged blade on the 3-4th shot, as you can pull him back when he uses his Jump Pack to disengage.
|
Since both he and Junker Queen require to be at close range to deal damage, Winston can jump back and forth with his Jump Pack to get in and out of fights whilst Commanding shout can give him some speed to engage or escape. As Junker Queen can be vulnerable out in the open to attempt closing the gap, a well placed Barrier can give opportunity to turtle away from projectiles and gain more ground. |
 Zarya |
Junker Queen struggles into Zarya in almost every way. Zarya can completely deny Rampage and Wounds with her Barriers, and Zarya's high-charge damage output can melt Junker Queen's low health pool. Look to bait out bubbles by using Carnage and intentionally missing the Zarya, as most Zarya players with instinctively bubble Carnage, expecting to get hit and gain charge. Look to play corners, as your Scattergun will deal more consistent burst damage than Zarya's Particle Cannon will. Be careful using Rampage while the enemy Zarya has bubbles, as it will be fairly easy for her to deny it.
|
When it comes to this pairing, Junker Queen essentially becomes a high-health OP DPS. Zarya enables Junker Queen to use her abilities without risk via her barriers, and Junker Queen enables Zarya to quickly engage with Commanding Shout. Just note you will have low protection for your team besides Zarya's Barriers.
|
Damage
| Hero | Match-Up | Team Synergy |
|---|---|---|
 Ashe |
Ashe being a sniper DPS will always keep her distance. She can be a threat if she is able to provide head shots whilst her Dynamite peels off some of your health. A good throw of Gracie will drag her close to you, especially if being perched up, then finish her off with Carnage. If B.O.B. is sent into the fight, you can save allies with commanding shout. | The only thing that ties them together is Ashe's Dynamite and any bleed effect from Junker Queen's abilities that cause a slow death without the capability of healing. B.O.B. can also assist with being deployed in another direction after Queen has done her Rampage which advanced her behind enemy lines and should attempt to cut down anyone dying whilst the robot butler unleashes a barrage as well. |
 Bastion |
Bastion can pose a threat if he focuses on you, especially when using Configuration: Assault. The price is a slower movement as he sprays ammo and reload which can be benefited. Speed is the best counter by pursuing with Commanding Shout and/or throwing Gracie to displace him from his position which might save allies from being peppered. Additionally Commanding Shout's speed buff can save allies from his Artillery barrage. | Not much synergy other than perhaps providing the necessary speed buff from Commanding Shout to maneuver with Assault Configuration whilst Gracie can keep Bastion's targets from fleeing through tight gaps. |
 Cassidy |
Cassidy has you beat on range but not damage up close. Due to your smaller hitbox, even for a tank, spamming Fan the Hammer won't guarantee all the shots hit. His roll will make it hard to use your Knife Carnage combo since he can roll away or negate most of the burst damage. His grenade also can cancel your Ultimate due to the Hinder effect it causes. Have you or your teammates try to bait his cooldowns, especially if you're going to cast your Ultimate. Try to stay out of his sights on range and you should be able to deal with a Cassidy. | The only thing to consider is Cassidy's Flashbang will slow and disable movement abilities which Junker Queen can exploit with both her melee weapons as she gives chase. |
 Echo |
Echo's can be a dangerous adversary, with her main strategy doing aerial maneuvers to take you down with her abilities. This makes using Carnage difficult whilst Gracie can only just peel some health off unless she is grounded which can attract her close. Additionally her ultimate can turn her to another tank for the opposing team copying all Junker Queen's abilities. It is recommended to strafe away from her projectiles, especially her focusing beam when low on health and try to pepper her with Scattergun. | Any melee attack from Junker Queen's arsenal can melt their health which may also provide opportunity for Echo's focusing beam, the more critical they are. Whilst taking Flight, commanding shout near her vicinity can also give her more momentum. |
 Genji |
Genji may be able to hold against Junker Queen as long as he is nimble, focusing shuriken throws, reflecting her Scattergun and using Swift Strike to position closer or behind. He can be a big threat when Dragonblade is deployed as it takes four swings to destroy her. Being close however can prove fatal as one swing from Carnage and a buck shot will kill him dead easily. | As long as Junker Queen peels health and uses Rampage to deny healing, Genji can get easy kills with Swift Strike and reset ability again and again. |
 Hanzo |
As a sniper, Hanzo will always be perched or hanging back long distances to get headshot kills. Only closer he is more vulnerable so use a tossed Gracie to yank them closer, swing with Carnage and finish off with a buckshot. If he uses Dragonstrike, you can save allies with Commanding Shout to get them out of the way and save health. | As Hanzo if the enemy team is confided into a chokepoint or narrow objective, combining both ultimates can either make them flee or die. |
 Junkrat |
Junkrat can be a menace with bombs, especially trying to get closer. He can semi-counter being dragged by Gracie with a well placed Concussion Mine to escape and with a Steel Trap can immobilize you long enough to blast you. Nevertheless, the closer you are the deadlier with a swing of Carnage and couple of buckshot, but remember to flee before his after death bombs get you. | Steel Trap and Jagged Blade can work both ways. For one if an enemy gets stuck, Gracie can bring them towards you or you can drag them into a deployed trap. Commanding Shout may also save Junkrat particularly when controlling Riptire and leaving himself vulnerable. |
 Mei |
Mei can be a great menace, regardless of distance. Long range icicle shots can sting especially headshots. In closer proximity her spray can slow you down which might be counteracted by Commanding Shout. Her Ice Wall can protect her and team from every ability and also waste the Rampage dash. Even if you try to peel health with knife and axe her Cryo-freeze will regenerate lost health and keep her invulnerable. If you have the upper hand on abilities, always try to drag close and shot her dead. Commanding Shout also may save allies from Blizzard's area of freezing. | Having Mei as your close range DPS is beneficial with allowing her to slow enemies with her spray and Junker Queen's commanding shout allows them to chase down. Mei's Ice Wall can immobilize fleeing enemies that Queen can prey upon and using Rampage with Blizzard can melt more health and the more vulnerable may die without hitting another shot. |
 Pharah |
Pharah can be dangerous if dealt alone in the open with her flying maneuvers and rocket launcher. Even if you get close, She can use her Concussive Blast as a deterrent or knock Junker Queen off to a death pit. Despite her fierceness in combat, she has a weak health pool which can be dealt quickly without care. Combining both Gracie and Carnage will kill her without even a buck shot. | Not much to synergize other than having Pharah's concussive blast reposition targets to Junker Queen for easy killing and her commanding shout gives boost to her flight. |
 Reaper |
Reaper is very one sided. It all depends on if he has his Wraith form up. He can easily shred your health due to the lack of armor, and can negate all wounds by using wraith form, having either Carnage or Gracie on cooldown. Because you both have high damage shotgun, it's more skill dependent. Try to bait out his wraith form using Gracie, then go into a carnage. Gracie having a much lower cooldown that carnage allows more effective self-healing, and then finally secure the kill on the reaper. | There isn't much synergy between Reaper and Junker Queen. If you can, a rampage to a Death blossom is a guaranteed team fight win. As long as you hit them. However, this is unreliable, due to it needing a very specific position for the enemies to be in. |
 Soldier: 76 |
Soldier: 76 can be a very fair matchup. He can sprint out of harms way, especially a Carnage or Gracie attack and even if he is hit by bleeding effects can be mitigated by Biotic Field. Helic Rocket and Tactical Visor can be a threat out in the open. Being a DPS however, can be a very good target to pray with a good throw of Gracie that can bring him to Junker Queen and finish with everything else. | While Junker Queen favors close quarters a nearby Soldier:76 can watch her six. Biotic Field may help in dangerous situations whilst Sprint can be enhanced via commanding shout in order to get to the front faster. Combining Rampage with Tactical Visor can be beneficial to finish off vulnerable targets losing health. |
 Sojourn |
Sojourn can be a medium threat to Junker Queen. Her railgun can excel distancing away from her whilst her charge shots can do significant damage especially when ulting. A well placed Disruptor shot can also peel off some health as long as she is shooting and her slide allows to escape from harms way. At closer range she can be dealt easily, throwing knife at her will displace her slide. Commanding shout can help allies escape her disruptor radius. | Not much synergy to consider apart from having disruptor combined with her bleed effects and also commanding shout can enhance her slide. |
 Sombra |
Sombra can be a pest when left unchecked as her hacks disrupt valuable crowd control abilities and her commanding shout. However she is very fragile and therefore takes few buck shots and bleed effects plus Rampage can negate the use of medkits. | Having Sombra close by is beneficial to secure kills, as her hack can disable any means to escape and virus can synergize bleed attacks as well. |
 Symmetra |
Symmetra is manageable to a certain extent. Her turrets can harass her if left unchecked especially on defense, however Gracie and Carnage can destroy them instantly and buckshot can spread if they are close. Symmetra has a small health/shield pool and she can be handled easily when dragging her close. | Having Symmetra can be beneficial to travel efficiently closer to objectives and her turrets can help secure kills especially using Gracie to keep them from escaping. |
 Torbjörn |
Torbjörn can be a medium threat, the more range he has. His turret can harass her whilst his rivet gun can peel alot with single headshots. He has a higher health pool than other attackers along with Overload which can also be used to escape harm. Buckshot can destroy turret within couple of shots whilst knife and Axe can bleed the turret if needed. | There is not much synergy to consider other than commanding shout can give more speed to an Overloaded Torbjörn and Gracie can bring enemies closer to turrets. |
 Tracer |
Trace is considered a tricky opponent. As long as she is nimble with her blinks and recall, she can avoid any contact with Junker Queen's buckshot and melee weapons. Exhausting her abilities can be opportunity to kill with couple of buckshot while Carnage can finish her with one swing. | There is not much synergy going except commanding shout can give her more nimble. |
 Widowmaker |
Widowmaker is medium to none threat, depending her distance and accuracy. Distance means she can avoid buckshot that won't even scratch her much and accuracy can finish off Junker Queen in two headshots, unless buffed by commanding shout. Closing the gap is best counter whilst if she is perched up, a thrown Gracie can drag her down leaving her vulnerable and one axe full of carnage will finish her off. Commanding shout can assist allies in flanking away her line of sight or save from execution with shields. | There aren't any notable synergies between these two heroes. |
Support
| Hero | Match-Up | Team Synergy |
|---|---|---|
 Ana |
Ana can be quite a pest whether long or short range. Trying to get close to her, you risk being hit by her sleep dart or her biotic grenade. Whoever receives the nanoboost or herself might prove a challenge since they resist bleed effects. Whilst on cooldowns she is vulnerable and a combination of commanding shout, Gracie and Carnage will prove an easy kill. | As a support, Ana can be a helpful mid range to distribute heals with her rifle and biotic grenade whilst Carnage can supplement some chunks in combat. Her sleep dart can catch enemies vulnerable for Junker Queen to approach and her Nanoboost can enhance all her abilities, especially Rampage which cleaves more health which has same effect as her Biotic Grenade to deny heals. |
 Baptiste |
Baptiste can be a medium threat as healer/combatant. His heals affect multiple allies within splash range whilst the pinnacle of his support, his immortality field that can deny fatal blows with both melee weapons, especially bleed effects. Regenerative burst can also save allies just in case. Even without his abilities, his exo boost can save himself from close attacks. However with a low health pool, he can be an easy kill. | Baptiste has good support capability with Junker Queen. Projectile healing can help on the long run especially since she relies on Close Quarter Combat, whilst immortality field can save her from being overwhelmed by the enemy. Amplification Matrix affects both buckshot and thrown Gracie. |
 Brigitte |
Brigitte can be a minor threat, but still can survive. Even though she is Close Quarter as well she can use her flail shot to displace Junker Queen or throw off ledges whilst her shield bash can stun her briefly. When she deploys Rally she can resist her attacks well and gain continuous heal without doing much whilst her flail attack can peel off health slowly. She has low health pool and her shield won't protect her from Carnage so she can be dealt easily with a swing and shot provided her shield breaks first. | Having a close quarter support can be risky especially for Brigitte but as long as you cover each other, you can both survive well. Brigitte heals you by damaging enemies and when needed can throw med packs at you as well. Her shield bash can give opportunity to Junker Queen to attack vulnerable targets and combining Rally with Commanding shout means a relentless charge to the enemy. |
| Juno can be a minor threat but she has plenty of movement utility and damaging capability. Her hyper ring and glide allows her to flee from Junker Queen's attacks while she can harass with her gun and Pulsar torpedoes that damage when aiming her. This also works when others harass for her as her aiming both allies and enemies does both jobs of healing/damaging. When Orbital Ray is deployed enemies heal and do both damage. Even though Junker Can deny heals from her Rampage, they will still have higher damage. | Juno has great support tools whilst her healing depends if her gun's aim is true and Pulsar aims at her as well along with other enemies to lose more chunks and be easy kill. Hyper Ring can be used in conjunction with Commanding shout to give more speed and shield. Orbital Ray is best used in the heat of battle as it helps her survive and even enhance melee weapons and Rampage however it may remove her from the ray's range so care the positioning. | |
 Kiriko |
Kiriko is the most annoying one of them all. They can completely cleanse your wounds, and your ultimate. There isn't much you can do about it, other than try to bait out her abilities, and then go for the kill. | Kiriko's support capabilities are more effective when close, so it puts her at risk. Junker Queen needs a lot of healing ofudas to survive, whilst protection suzu can cleanse her from debuffs. Kitsune Rush gives plenty of edge on par with commanding shout and when both are on, she can rush through enemies with her axe and empty her shotgun fast enough before they have time to flank. |
| Lifeweaver can be a challenge especially if he is supporting his allies. From a distance, he can heal them for a small fragment, but his Life Grip is the most annoying ability since it denies allies to be executed and stops Junker Queen's bleed effects. Tree of life can heal his allies frequently unless Junker Queen Rampage's near it so she can deny further healing and leave others vulnerable. Petal Platform is also an annoyance since it elevates his allies to safety but using Gracie, can pull them down towards her. Since both allies and enemies can use it, its also a benefit to her, see synergy. | A support Lifeweaver has very good utility. Healing depends roughly if he attacks enemies and the charge can help Junker Queen survive. Life Grip is best used to drag her away from fatal blows or when thrown off ledges and Tree of Life allows her to hold out longer in combat. Petal Platform is useful to elevate for breathing room or navigate around higher areas she normaly can't access, but also is best used for a death from above tactic where she drops between squishy enemies to cut them with carnage and harass with knife and buckshot and/or Rampage between them while distancing away from them. | |
 Lúcio |
Lúcio is a fast-moving bullet. However, this also means that he's the perfect med kit for you. Because Lúcio is always on the move, he will most likely run right into your carnage, giving you free health. His ultimate, sound barrier, can completely negate your ultimate. So, try to wait for him to use it, then go in. | As support, Lúcio can be unpredictable to rely on, especially if you are not communicating together. Noting what buff he is using or amplifying can be helpful to utilize on the long run, especially if Junker Queen is attacking or defending. If Lúcio has good aim, he can assist with weakening enemies especially headshots since they do great damage per burst. Sound barrier is an excellent tool to disregard being cautious and charge in whilst leaving Commanding shout as a reserve shield which can also help Lúcio survive and speed up. |
 Mercy |
Mercy isn't even a threat. However, it's not fighting the mercy and her fighting back, it's overall killing her. She can be a tough match up, she can fly and dodge Gracie and Carnage. A good tip is to wait for her to come to the ground, get two shots in, and then use a Carnage on her when she tries to fly to a teammate. This with most of the time end up with a kill. However, this is only if the mercy isn't aware. If they are, then either swap to a Tank or hero with better hitscan, (Ramattra, D.va or Winston.) Or have your DPS deal with her. It's reccomended to have your DPS deal with her, due to them having more effective ways of killing her. | Having a Mercy on your back is best since her heals are higher than other supports and switching to attack boost is effective with all weapons and especially Rampage, as long as the tether was not cut off during initial cast. The only difficulty is due to Junker Queens close quarter is that it also puts Mercy at risk of being killed if there's no other ally to dash to and if Junker Queen is killed, she can revive unless her corpse is between multiple enemies. When Mercy takes to the skies with Valkyrie, she can help Junker Queen survive above her whilst she swings wild. As long everyone focuses on Junker Queen. |
 Moira |
Moria, like reaper, is very one sided. It all depends on if she has her fade. Like reaper, it cleanses your wounds. However, unlike reaper, this isn't much of an issue. Due to your high health pool and her low health pool, you can easily kill a lone Moria in a 1v1. If you need the self-healing, follow the same tips as reaper. Baiting out the fade with Gracie, and then going into carnage. | A Moira who assists is a helpful Moira. An argument is that Moira has to choose which Biotic Orb suits for the exact moment for Junker Queen. Her healing orb is an excellent tool when it comes to casting it from afar in order to save Junker Queen who is attacking others close, whereas her damaging orb peels off health so she can combine it with bleeding effect or finish them with a load of buckshot. This also counts for her Biotic perks where more healing means survivability and damaging gives enemies lesser healing and more bleeding. Her Fade allows her to reposition safely or closely to Junker Queen to heal or attack enemies. Coalescence is an excellent tool to heal Junker Queen and harm enemies that attack her. Combined with Rampage, enemies health will drain swiftly from either Moira's beam or Junker Queen's bleed. |
 Zenyatta |
Due to not having damage drop off and Discord Orb, Zenyatta can easily melt you even when using Commanding Shout, especially at range. If you get bleeds off or even anti him, his Transcendence will wipe those effects away. However, it doesn't remove those effects from his teammates. If you Rampage after he uses Transcendence, you can completely negate any value he might get from his Ultimate. Be careful of an up-close battle as well. Zen can easily get lots of damage off with Discord orb and his kick can keep you at range enough for Carnage to miss. | Zenyatta without his ultimate is more of an offensive utility hero than a healer. His healing orb buff is slow, so you have to rely on Commanding shout shield and Carnage heals to survive. He can harass opponents with his basic attack and use the discord orb for enemies to receive more damage from Junker Queen. Transcendence is a very good ability to use with timing, as Junker Queen can charge in at any moment and leave herself vulnerable unless Zenyatta can keep up with her and heal at the same time. |
Map Strategies
Control
| Map | Strategy & Stage Tips |
|---|---|
 Overall Strategy |
TBA RATING | TBA FEATURE
Map strategy details for Overall Strategy are currently missing. You can help the Overwatch Wiki by adding them!
|
 Antarctic Peninsula |
TBA RATING | TBA FEATURE
Map strategy details for Antarctic Peninsula are currently missing. You can help the Overwatch Wiki by adding them! Labs
Strategy details missing.
Sublevel
Strategy details missing.
Icebreaker
Strategy details missing.
|

|
TBA RATING | TBA FEATURE
Map strategy details for Busan are currently missing. You can help the Overwatch Wiki by adding them! Downtown
Strategy details missing.
Sanctuary
Strategy details missing.
MEKA Base
Strategy details missing.
|

|
TBA RATING | TBA FEATURE
Map strategy details for Ilios are currently missing. You can help the Overwatch Wiki by adding them! Lighthouse
Strategy details missing.
Well
Strategy details missing.
Ruins
Strategy details missing.
|

|
TBA RATING | TBA FEATURE
Map strategy details for Lijiang Tower are currently missing. You can help the Overwatch Wiki by adding them! Control Center
Strategy details missing.
Garden
Strategy details missing.
Night Market
Strategy details missing.
|

|
TBA RATING | TBA FEATURE
Map strategy details for Nepal are currently missing. You can help the Overwatch Wiki by adding them! Village
Strategy details missing.
Shrine
Strategy details missing.
Sanctum
Strategy details missing.
|

|
TBA RATING | TBA FEATURE
Map strategy details for Oasis are currently missing. You can help the Overwatch Wiki by adding them! City Center
Strategy details missing.
Gardens
Strategy details missing.
University
Strategy details missing.
|

|
TBA RATING | TBA FEATURE
Map strategy details for Samoa are currently missing. You can help the Overwatch Wiki by adding them! Beach
Strategy details missing.
Downtown
Strategy details missing.
Volcano
Strategy details missing.
|
Escort
| Map | Strategy & Stage Tips |
|---|---|
 Overall Strategy |
TBA RATING | TBA FEATURE
Map strategy details for Overall Strategy are currently missing. You can help the Overwatch Wiki by adding them!
|

|
TBA RATING | TBA FEATURE
Map strategy details for Circuit Royal are currently missing. You can help the Overwatch Wiki by adding them! Attack
Strategy details missing.
Defense
Strategy details missing.
|

|
TBA RATING | TBA FEATURE
Map strategy details for Dorado are currently missing. You can help the Overwatch Wiki by adding them! Attack
Strategy details missing.
Defense
Strategy details missing.
|

|
TBA RATING | TBA FEATURE
Map strategy details for Havana are currently missing. You can help the Overwatch Wiki by adding them! Attack
Strategy details missing.
Defense
Strategy details missing.
|

|
TBA RATING | TBA FEATURE
Map strategy details for Junkertown are currently missing. You can help the Overwatch Wiki by adding them! Attack
Strategy details missing.
Defense
Strategy details missing.
|

|
TBA RATING | TBA FEATURE
Map strategy details for Rialto are currently missing. You can help the Overwatch Wiki by adding them! Attack
Strategy details missing.
Defense
Strategy details missing.
|

|
TBA RATING | TBA FEATURE
Map strategy details for Route 66 are currently missing. You can help the Overwatch Wiki by adding them! Attack
Strategy details missing.
Defense
Strategy details missing.
|

|
TBA RATING | TBA FEATURE
Map strategy details for Shambali Monastery are currently missing. You can help the Overwatch Wiki by adding them! Attack
Strategy details missing.
Defense
Strategy details missing.
|

|
TBA RATING | TBA FEATURE
Map strategy details for Watchpoint: Gibraltar are currently missing. You can help the Overwatch Wiki by adding them! Attack
Strategy details missing.
Defense
Strategy details missing.
|
Hybrid
| Map | Strategy & Stage Tips |
|---|---|
 Overall Strategy |
TBA RATING | TBA FEATURE
Map strategy details for Overall Strategy are currently missing. You can help the Overwatch Wiki by adding them!
|
 Blizzard World |
TBA RATING | TBA FEATURE
Map strategy details for Blizzard World are currently missing. You can help the Overwatch Wiki by adding them! Attack
Strategy details missing.
Defense
Strategy details missing.
|

|
TBA RATING | TBA FEATURE
Map strategy details for Eichenwalde are currently missing. You can help the Overwatch Wiki by adding them! Attack
Strategy details missing.
Defense
Strategy details missing.
|

|
TBA RATING | TBA FEATURE
Map strategy details for Hollywood are currently missing. You can help the Overwatch Wiki by adding them! Attack
Strategy details missing.
Defense
Strategy details missing.
|

|
TBA RATING | TBA FEATURE
Map strategy details for King's Row are currently missing. You can help the Overwatch Wiki by adding them! Attack
Strategy details missing.
Defense
Strategy details missing.
|

|
TBA RATING | TBA FEATURE
Map strategy details for Midtown are currently missing. You can help the Overwatch Wiki by adding them! Attack
Strategy details missing.
Defense
Strategy details missing.
|
 Numbani |
TBA RATING | TBA FEATURE
Map strategy details for Numbani are currently missing. You can help the Overwatch Wiki by adding them! Attack
Strategy details missing.
Defense
Strategy details missing.
|

|
TBA RATING | TBA FEATURE
Map strategy details for Paraíso are currently missing. You can help the Overwatch Wiki by adding them! Attack
Strategy details missing.
Defense
Strategy details missing.
|
Push
| Map | Strategy & Stage Tips |
|---|---|
 Overall Strategy |
TBA RATING | TBA FEATURE
Map strategy details for Overall Strategy are currently missing. You can help the Overwatch Wiki by adding them!
|

|
TBA RATING | TBA FEATURE
Map strategy details for Colosseo are currently missing. You can help the Overwatch Wiki by adding them! Pushing
Strategy details missing.
Defending
Strategy details missing.
|

|
TBA RATING | TBA FEATURE
Map strategy details for Esperança are currently missing. You can help the Overwatch Wiki by adding them! Pushing
Strategy details missing.
Defending
Strategy details missing.
|

|
TBA RATING | TBA FEATURE
Map strategy details for New Queen Street are currently missing. You can help the Overwatch Wiki by adding them! Pushing
Strategy details missing.
Defending
Strategy details missing.
|

|
TBA RATING | TBA FEATURE
Map strategy details for Runasapi are currently missing. You can help the Overwatch Wiki by adding them! Pushing
Strategy details missing.
Defending
Strategy details missing.
|
Flashpoint
| Map | Strategy & Stage Tips |
|---|---|
 Overall Strategy |
TBA RATING | TBA FEATURE
Map strategy details for Overall Strategy are currently missing. You can help the Overwatch Wiki by adding them!
|

|
TBA RATING | TBA FEATURE
Map strategy details for Aatlis are currently missing. You can help the Overwatch Wiki by adding them! Station
Strategy details missing.
Garden
Strategy details missing.
Town Center
Strategy details missing.
Bazaar
Strategy details missing.
Resort
Strategy details missing.
|

|
TBA RATING | TBA FEATURE
Map strategy details for New Junk City are currently missing. You can help the Overwatch Wiki by adding them! Arena
Strategy details missing.
The Ducts
Strategy details missing.
Refinery
Strategy details missing.
Junkyard
Strategy details missing.
Bomb Flats
Strategy details missing.
|

|
TBA RATING | TBA FEATURE
Map strategy details for Suravasa are currently missing. You can help the Overwatch Wiki by adding them! Market
Strategy details missing.
Garden
Strategy details missing.
Palace
Strategy details missing.
Temple
Strategy details missing.
Ruins
Strategy details missing.
|
Achievements
| Name | Icon | Description | Reward |
|---|---|---|---|
| Have 7 of Junker Queen's wounds active on enemies at the same time in Quick or Competitive Play. |  | ||
| Use Junker Queen's Jagged Blade and Carnage to pull and kill an enemy in Quick or Competitive Play. |  |
Trivia
Junker Queen poster
- Similar to HAL-Fred Glitchbot on the Hollywood map, the Queen has in-game voice lines on certain triggers throughout Junkertown.
- The Queen's voice was missing in the patch prior to the reveal of Wrecking Ball, leading to speculation of her being the next hero. This was later confirmed to be a bug by Michael Chu.[4]
- The Queen's knife is called "Gracie," while her axe is called "Carnage."[2]
- According to Hammond, the Queen is arrogant like most humans, but she, in his view, has earned her arrogance, given that she's the only human ever able to best him in combat.[5]
- Upon the release of Season 16: Stadium, the Queen's 3D icon received minor changes to its lighting to be more consistent with newer heroes' 3D icons.
Development
Junker Queen's old 3D icon prior to Season 16: Stadium
As of April 2019, Arnold Tsang had produced several pieces of concept art for the Junker Queen, and according to Jeff Kaplan, the team had "big plans" for her, though the plans were on more of a long-term timeframe.[6] The Junkertown map showcased her tough, almost brutal, personality, and the developers wanted her abilities and playstyle to match that energy. When designing the Queen, her playstyle and kit were derived from her pre-existing lore. She was designed specifically for Overwatch 2's 5v5 nature.[3]
The Carnage ability was the starting point of the Queen's design, as she had always been depicted with an axe prior. Remembering the issues they'd had with Genji, the axe was made an ability rather than her primary attack. The original iteration of Carnage let her throw her axe following the initial swing before recalling it back to herself with her magnetic gauntlet; however, when implemented, the practice of throwing her axe felt wrong. It led to a rigid playstyle that didn’t allow for the use of other axe-based abilities while her weapon was out-of-hand, so the throw was swapped to a slash with a wound effect. The concept of throwing and recalling her weapon eventually led to her next ability: Jagged Blade.[3]
Jagged Blade was inspired by one of Reinhardt's old abilities, where he could throw his hammer at the enemy. Despite not making it into Reinhardt’s final kit, this prototype ability heavily inspired Jagged Blade. Whereas Reinhardt had to go and pick up his hammer, the Queen is able to recall the blade back to her via her magnetic gauntlet. Care was taken to ensure that the gauntlet didn't make the Queen feel too "mage-y" or similar to Sigma, who can levitate people and objects. Instead, the gauntlet was designed in a way that the Queen uses her magnetic powers to control her axe and knife.[3]
Junker Queen's old 3D Beta Icon
The Commanding Shout ability was implemented to enhance the Queen's "tankiness." This was the first team movement speed buff in the game since Lúcio. The ability was intentionally designed as such, rather than something like a dash or teleport, as it helped reinforce her nature as someone who sprints headfirst into battle.[3]
Initially, her Ultimate was a spinning whirlwind-type ability. However, the developers wanted to incorporate her gauntlet into her Ultimate. They didn't want the Ultimate to feel elegant or magic-influenced, either, because it didn’t align well conceptually with character, so they tried to push her magnetic gauntlet to its limits.[3]
On June 12, 2022 it was revealed that she would be a playable hero in Overwatch 2.[7]
Removed abilities
Removed Perks

- Removed in Season 18.
- Also applies to the automatic recall of the blade.

- Removed in Season 18.
- Can only trigger once per shot per enemy. Multiple pellets from the same shot hitting does not grant more duration increase.
Media
Images
- Concept Art
-
 Concept Art by Arnold Tsang
 -
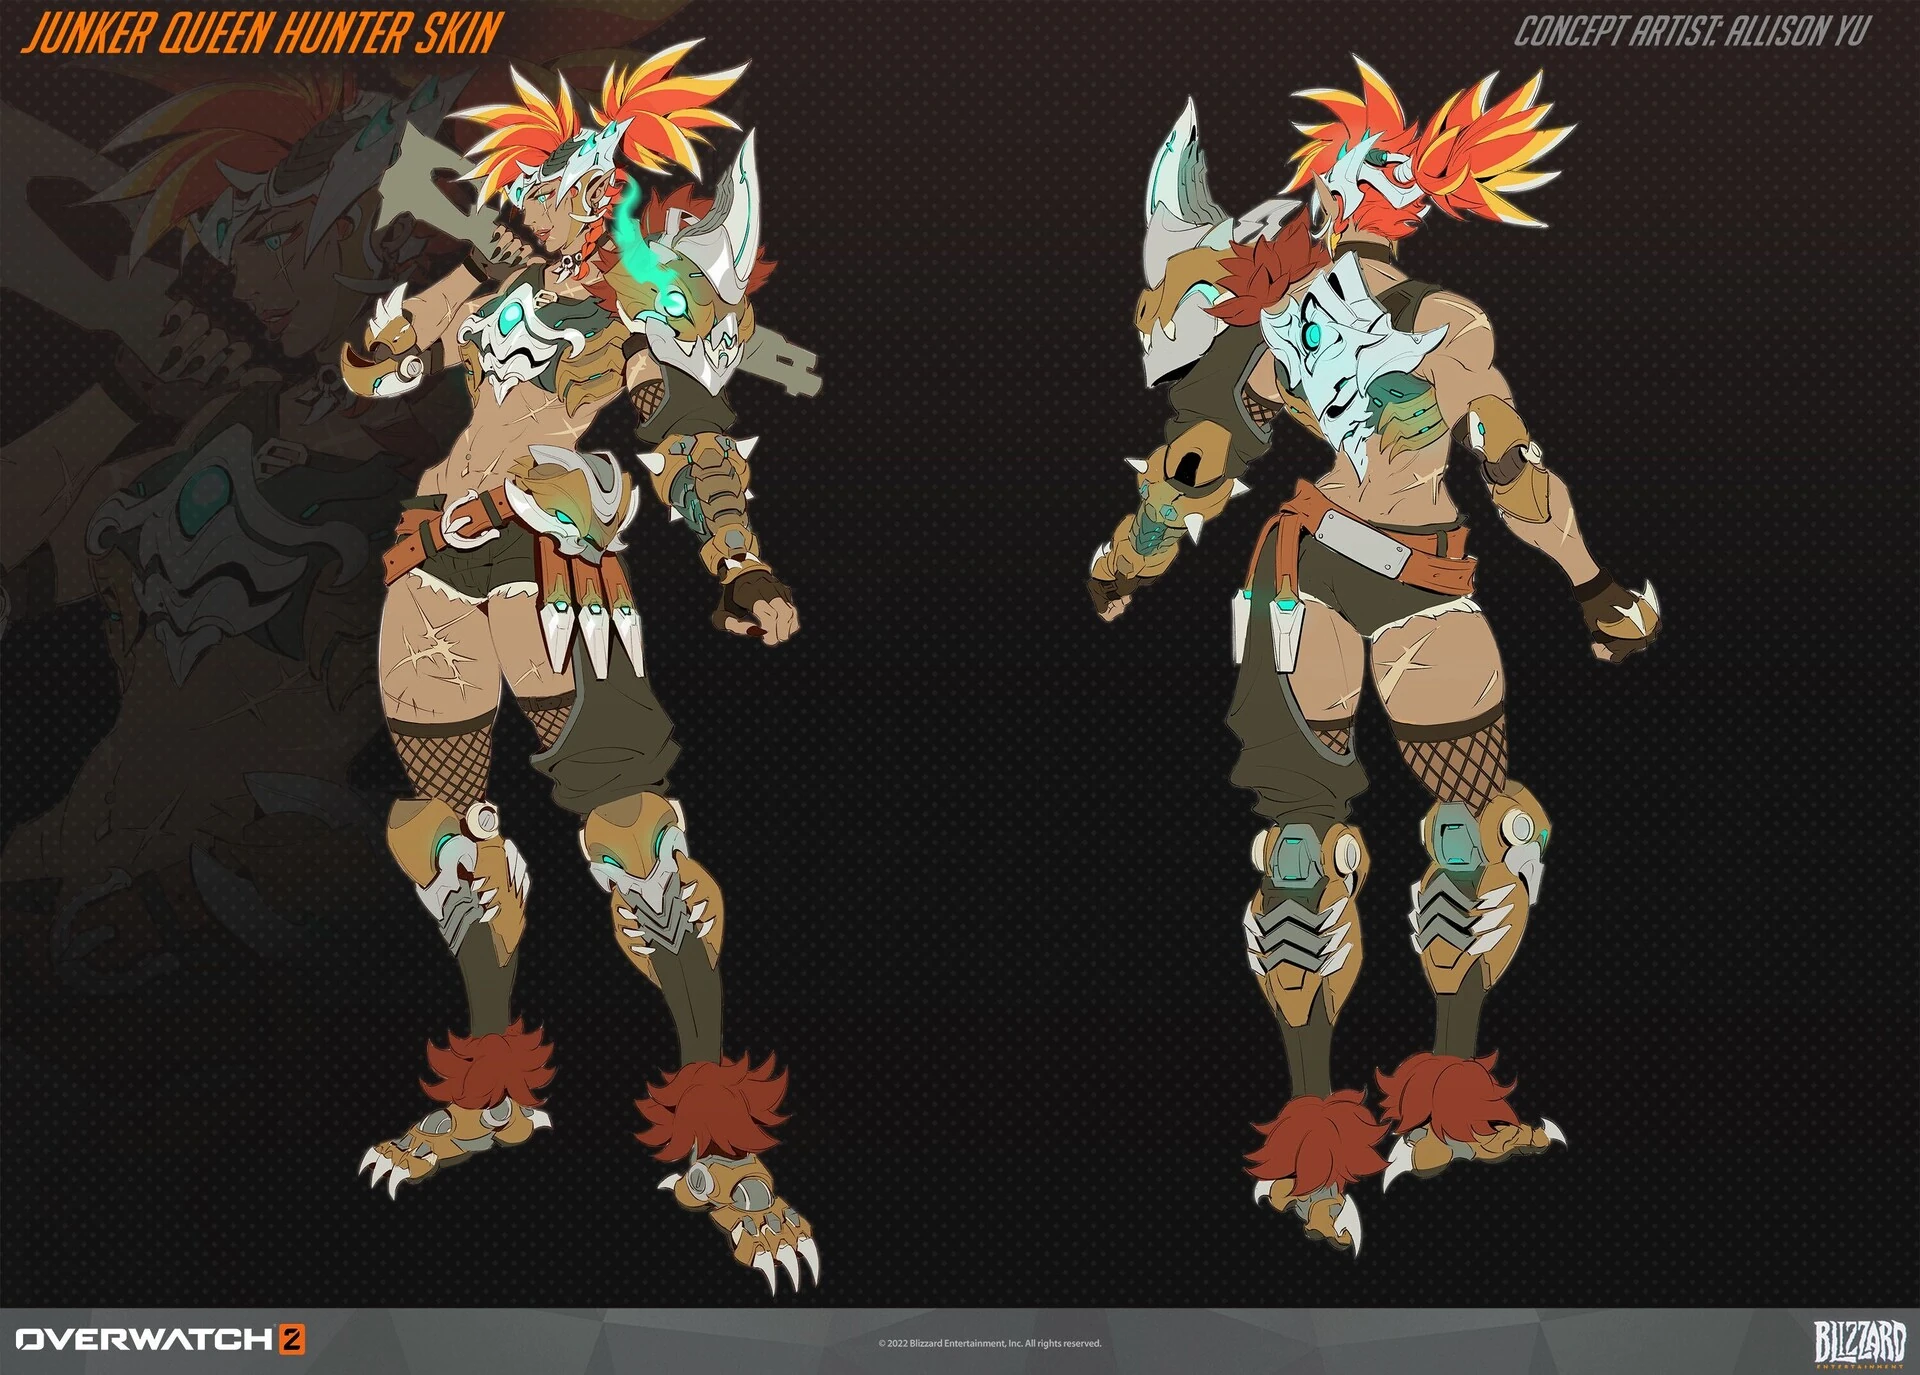
 Huntress Skin Concept Art by Allison Yu
 -
 Huntress Skin Weapons Concept Art by Allison Yu
 -
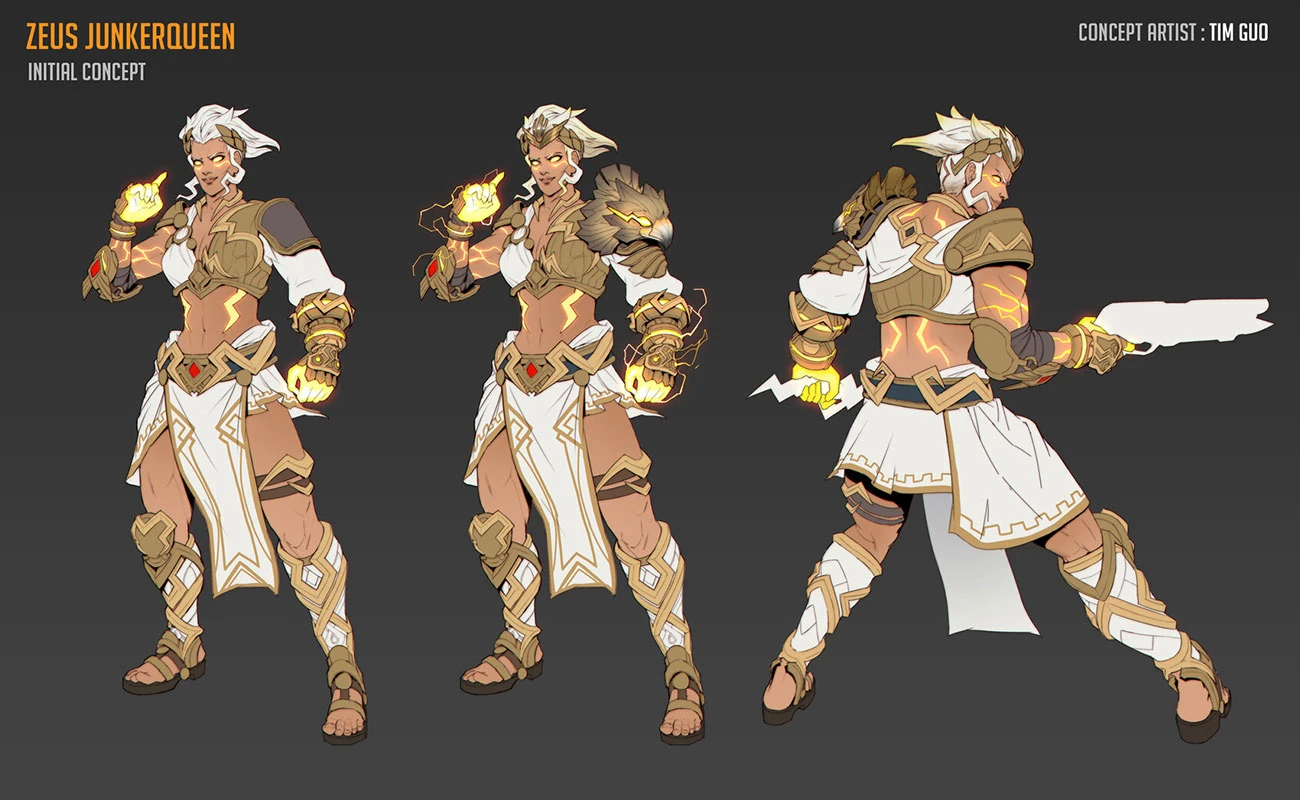
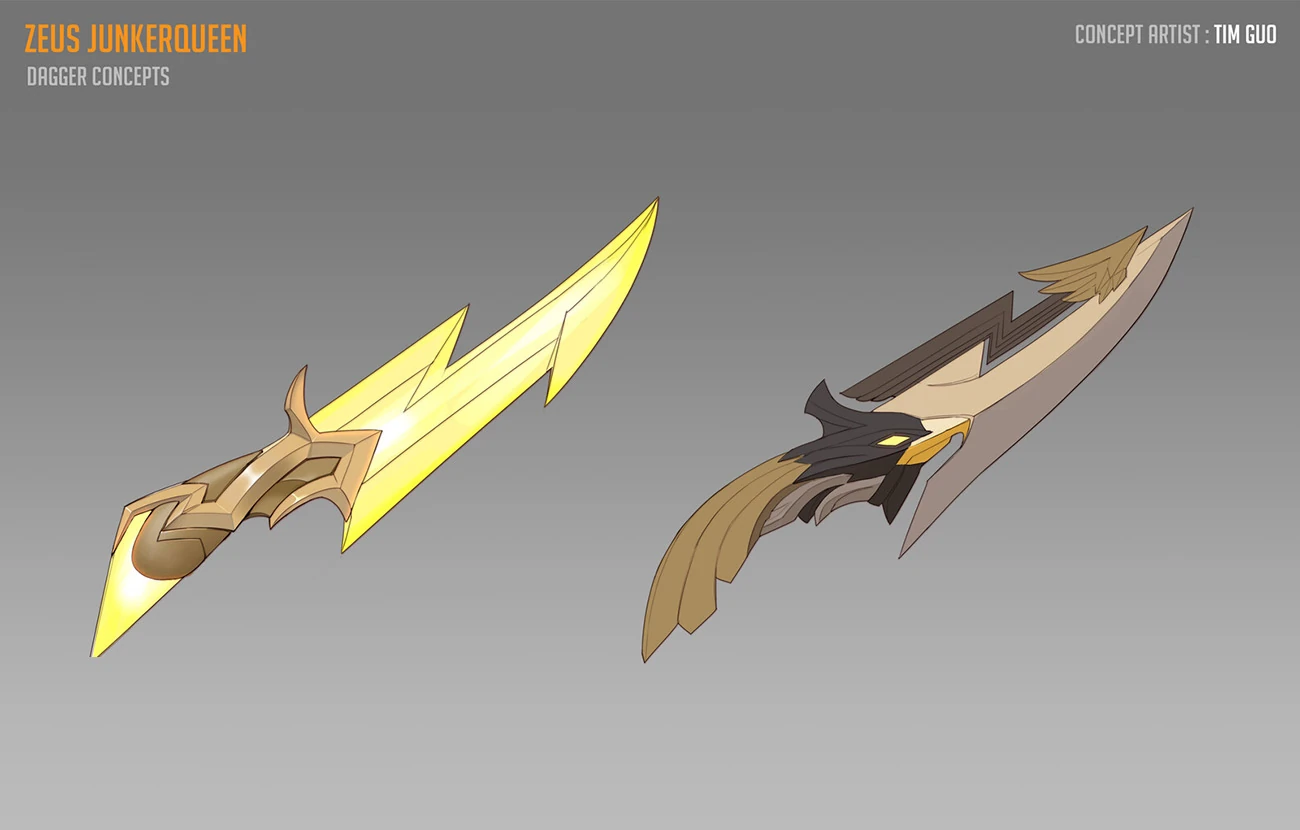
 Zeus Skin Concept Art by Tim Guo
 -
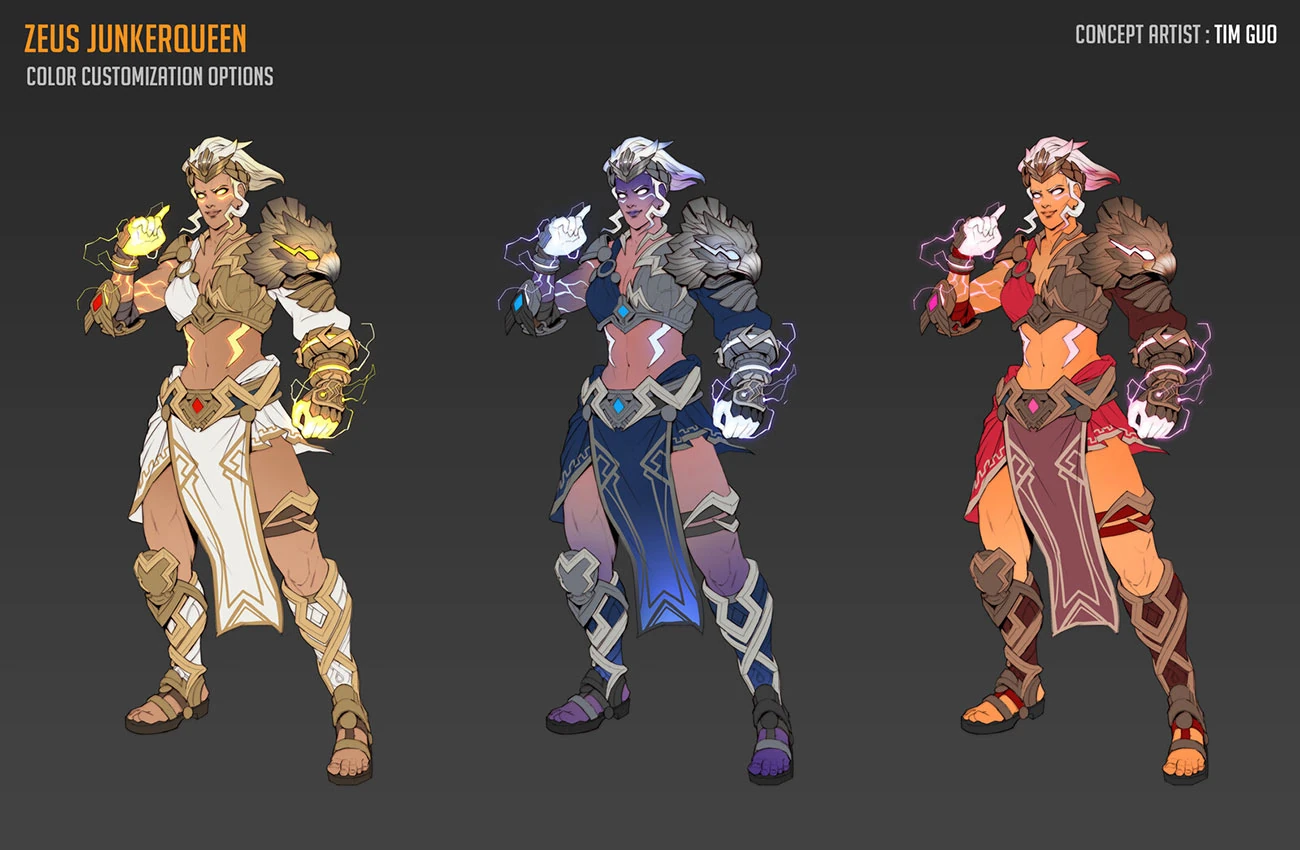
 Zeus Skin Color Concept Art by Tim Guo
 -
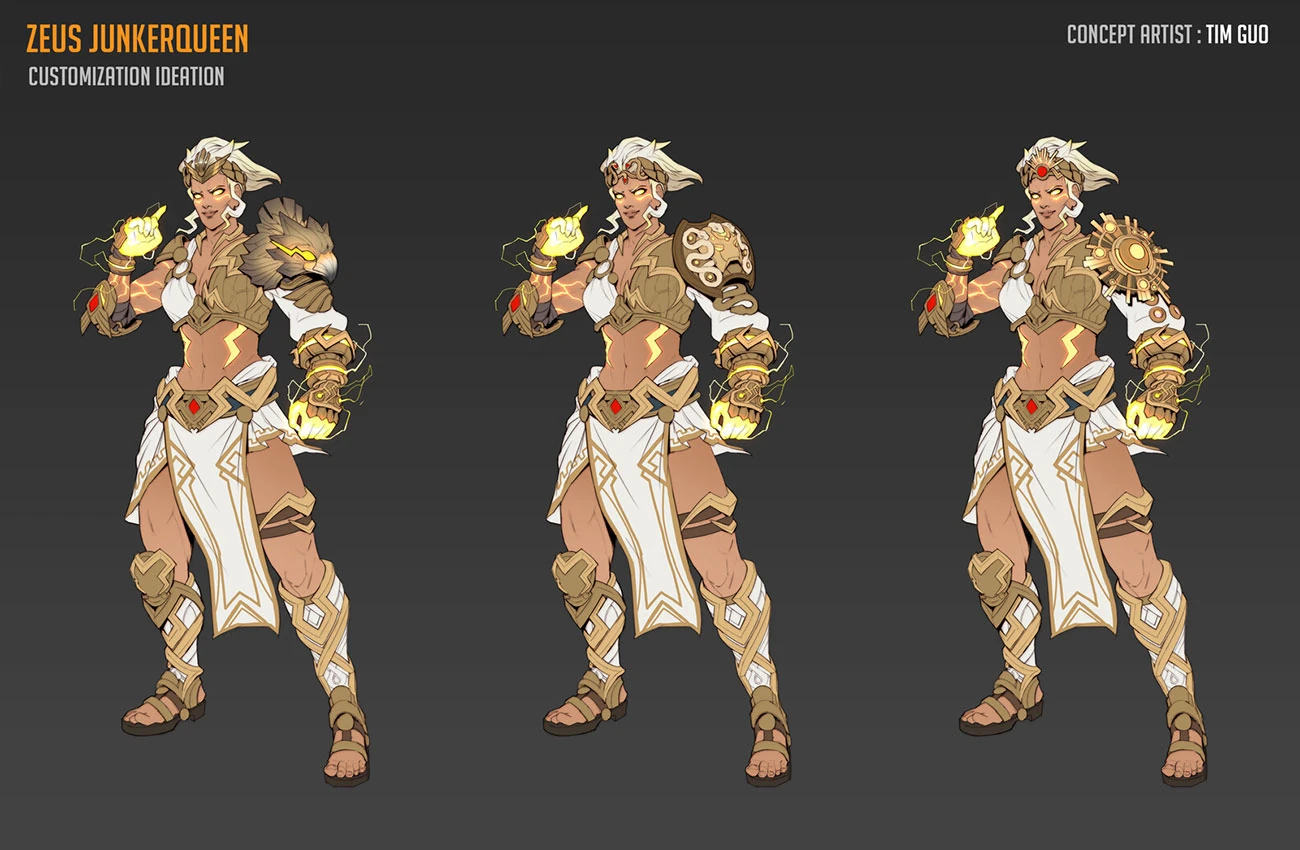
 Zeus Skin Customization Concept Art by Tim Guo
 -
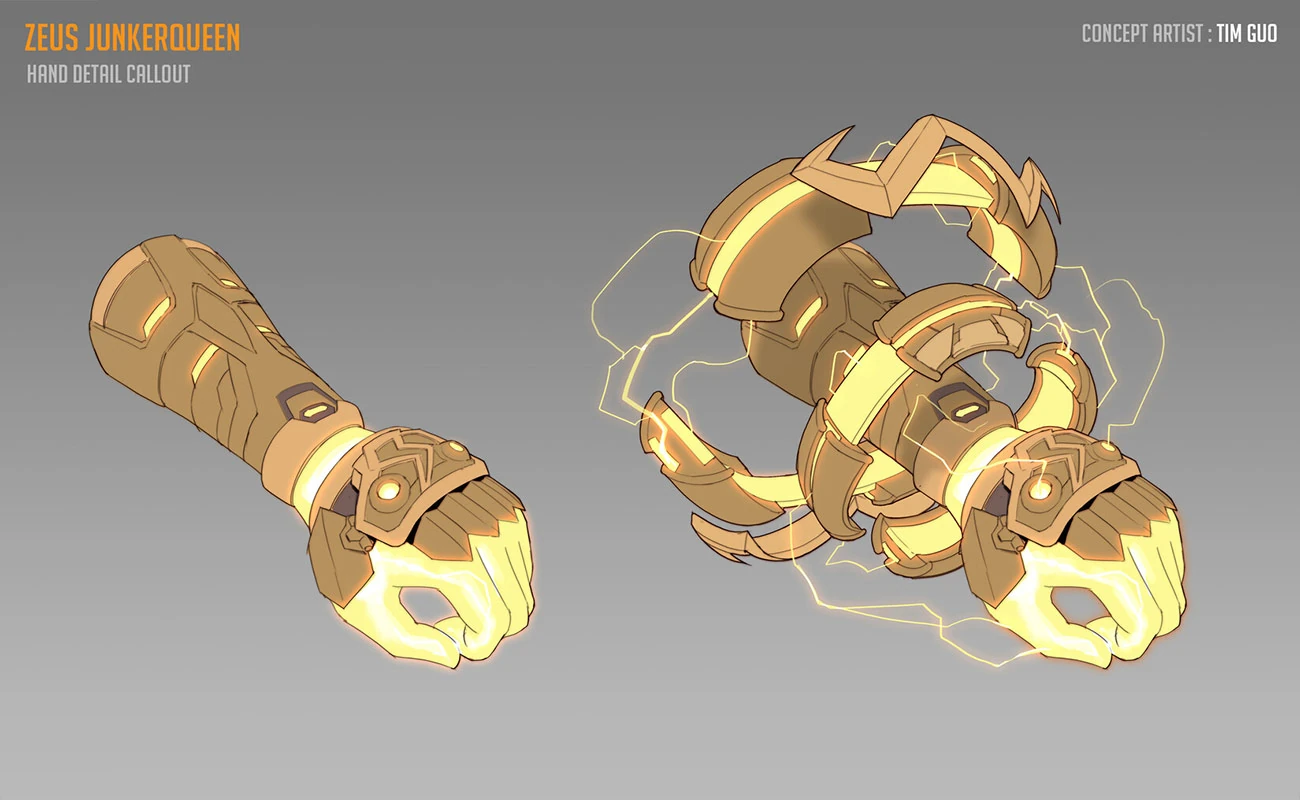
 Zeus Skin Hand Concept Art by Tim Guo
 -
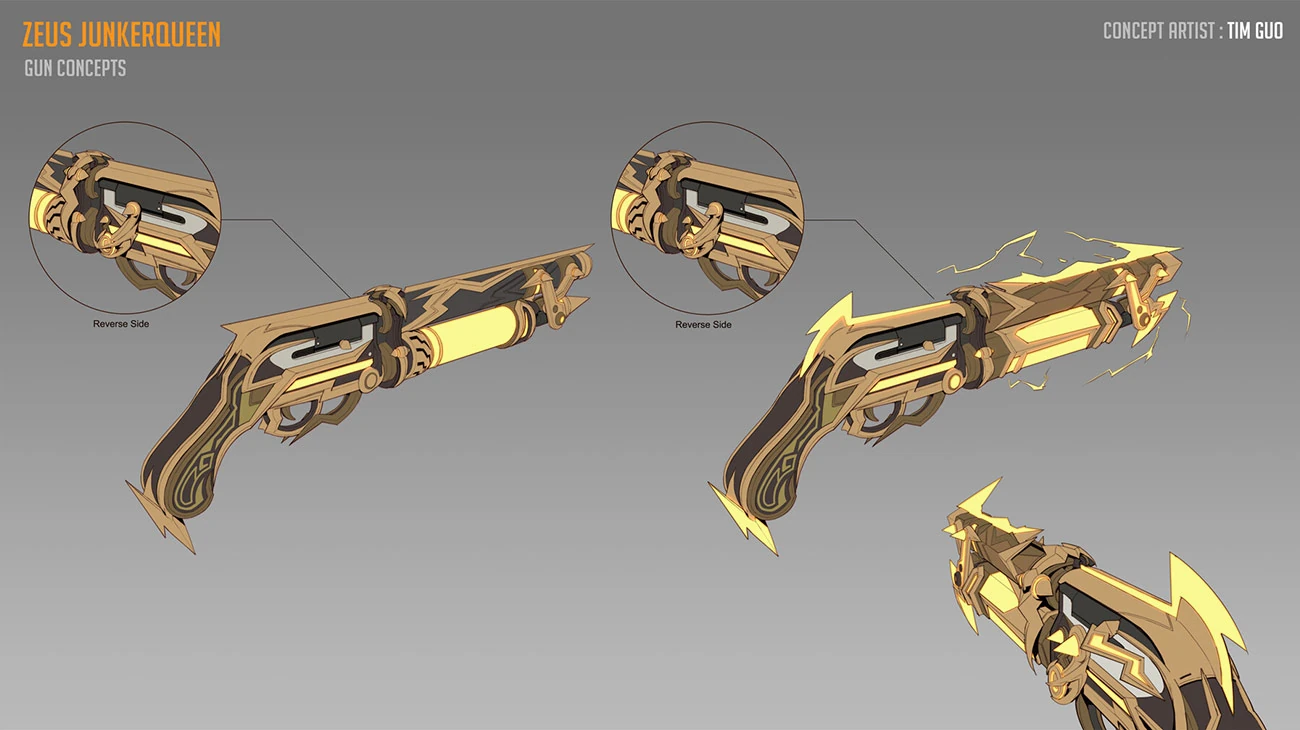
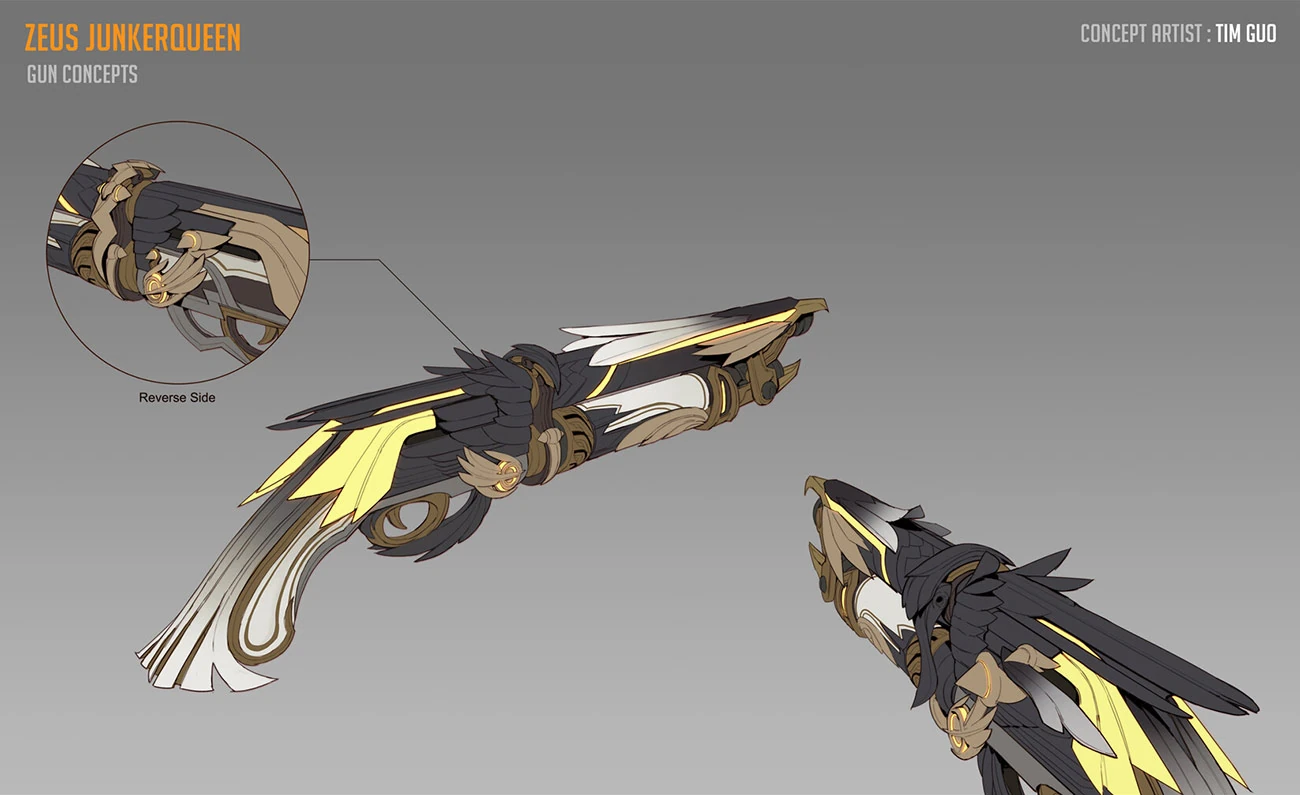
 Zeus Skin Scattergun Concept Art by Tim Guo
 -
 Zeus Skin Scattergun Concept Art by Tim Guo
 -
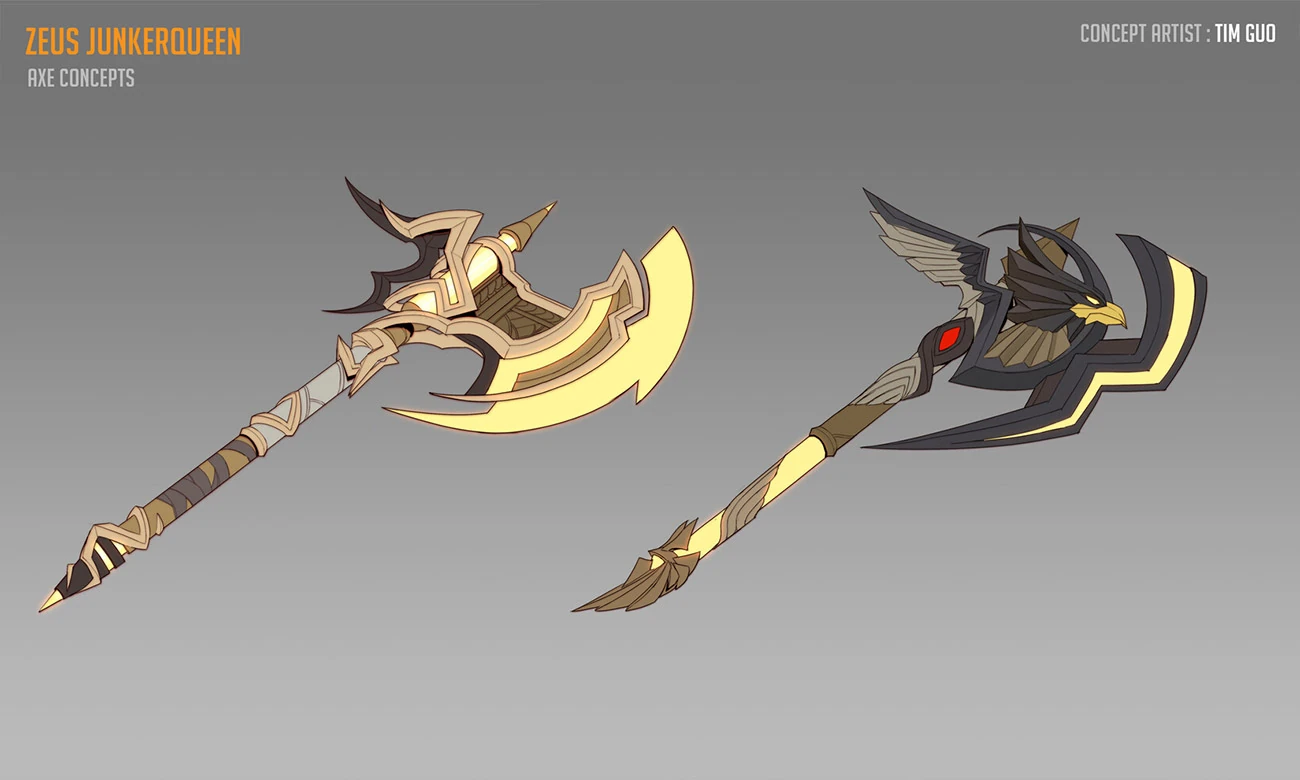
 Zeus Skin "Carnage" Concept Art by Tim Guo
 -
 Zeus Skin "Gracie" Concept Art by Tim Guo

- Other
-
 Junker Queen
 -
 Junker Queen Shout
 -
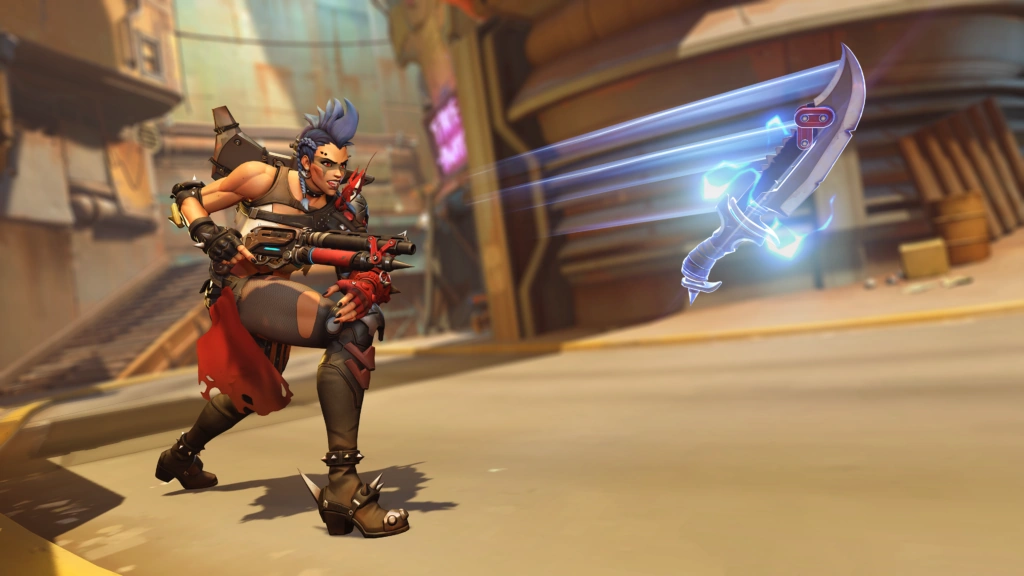
 Junker Queen knife throw
Videos
Balance Change Log
- For more information, see Patch Notes.
- (5v5 only) Wound damage self-healing multiplier increased from 2.25x to 2.5x.
- Cooldown increased from 8 to 9 seconds.
![]() Rampant Charge – Minor Perk
Rampant Charge – Minor Perk
- No longer refreshes all cooldowns.
- Now reduces all cooldowns by 6 seconds.
![]() Rending Recall - Minor Perk
Rending Recall - Minor Perk
- Removed.
![]() Rampant Charge - Minor Perk
Rampant Charge - Minor Perk
- New Minor Perk.
- Gain Unstoppable and refresh all cooldowns when using Rampage.
![]() Deep Wounds - Major Perk
Deep Wounds - Major Perk
- Removed.
- When recalling Jagged Blade, its radius is increased by 100% and it deals 30 additional impact damage.
![]() Commanding Shout - Ability 1
Commanding Shout - Ability 1
- Junker Queen overhealth increased from 175 to 200.
- Allied overhealth increased from 50 to 75.
- Duration for self-reduced from 5 to 4 seconds.
- Allied duration increased from 3 to 4 seconds.
- Extended wound duration increased from 0.25 to 0.5 seconds.
- Hero Perks
- Recalling Jagged Blade from a stuck target refreshes its wound.
- Commanding Shout fully reloads Scatter Gun and increases allied reload speed by 50%.
- Scattergun hits extend your wound durations on those enemies by .25 seconds.
- Carnage's impact damage gains 100% lifesteal.
- Global Projectile Size Bonus
- Hitscan radius small reduced from 0.05 to 0.04 meters.
- Projectile radius large reduced from 0.15 to 0.12 meters.
- Base projectile size reduced from 0.2 to 0.15 meters.
- Wound damage self-healing multiplier reduced from 2.5 to 2.25x.
- Overhealth increased from 150 to 175 HP
- Wound damage self-healing multiplier increased from 2 to 2.5x
- Now pulls tanks further.
- Startup time reduced from 0.75 to 0.5 seconds.
- Can now be activated while using other abilities.
- Cooldown reduced from 14 to 12 seconds.
- Impact damage increased from 90 to 105.
- General updates
Most damage-dealing projectile sizes have been increased by a new global modifier added to their base size.
- +0.05 meters for hitscan projectiles with a high rate of fire or spread (e.g., Tracer's Pulse Pistols or Reaper's Hellfire Shotguns).
- +0.08 meters for hitscan projectiles that are more precise (e.g., Cassidy's Peacekeeper or Soldier:76's Heavy Pulse Rifle).
- +0.05 meters for travel time projectiles that are shotguns or have a very high rate of fire (e.g., Roadhog's Scrap Gun or Ramattra's Void Accelerator).
- +0.10 meters for travel time projectile with a speed greater than 50 meters per second (e.g., Zenyatta's Destruction Orb).
- +0.15 meters for travel time projectile with a speed less than or equal to 50 meters per second (e.g., Pharah's Rocket Launcher).
- Very large projectiles with a base size greater than 0.5 meters have been excluded from these increases (e.g., Orisa's Energy Javelin or Reinhardt's Fire Strike).
Hero combined HP (base health/armor/shields) increased by 15-25%.
- 150-175 HP heroes increased by 25 HP.
- 200-300 HP heroes increased by 50 HP.
- 300+ HP (Tanks) increased by 75-100 HP.
- Each hero's precise health increases are listed in their patch notes below.
Ultimate Charge
- All Ultimate ability costs increased by 10%.
Regenerative Passive for All Heroes
- All heroes now regenerate 20 health per second after 5 seconds of not taking damage.
Quick Melee
- Damage increased from 30 to 40.
- Hero updates
- Health increased from 300 to 375.
- Wound damage over time increased from 60 to 90
- Spread reduced 8%.
- Impact damage increased from 50 to 65.
- Temporary health reduced from 200 to 150.
- Ultimate cost increased by 15%.
- Maximum ammo increased from 6 to 8
- Projectile size increased from 0.15 to 0.20 meters
- Now deals 40 impact damage
- Wound damage decreased from 100 to 60
- Adrenaline passive healing multiplier increased from 1.25 to 2x damage dealt by wounds
- Base health in Role Queue modes increased to 450
- Base health in non-Role Queue modes reduced from 425 to 300
- Now heals for the remaining wound damage when an enemy dies with wounds on them
- Cooldown is now reduced by 2 seconds for each enemy it impacts
- Thrown impact damage reduced from 80 to 50
- Thrown direct impacts now add a 30 damage wound to the stuck target. Stacks with wounds caused by Quick Melee or returning Jagged Blade hits.
- Adrenaline passive healing multiplier increased from 1 to 1.25x damage dealt by wounds
- Cooldown reduced from 15 to 14 seconds
- Wound duration reduced from 5 to 4.5 seconds
- Ultimate cost reduced by 10%
- Allied health bonus reduced from 100 to 50 HP
- Allied duration reduced from 5 to 3 seconds
- Temporary health no longer decays over its duration
- Cooldown increased from 11 to 15 seconds
(beta)
- Radius reduced from 20 to 15 meters
- Allied bonus health now decays over its duration
- Maximum duration increased from 4 to 5 seconds
- Radius reduced from 6 to 5 meters
(beta)
- NEW HERO
![]() Scattergun (Primary Fire)
Scattergun (Primary Fire)
- Pump Action Shotgun
![]() Jagged Blade (Secondary Fire)
Jagged Blade (Secondary Fire)
- Active: Throw the blade and re-activate to pull it back, along with any impaled enemy
- Passive: Wound enemies with Quick Melee or Throw, dealing damage over time
![]() Commanding Shout (Ability 1)
Commanding Shout (Ability 1)
- Temporarily increase health and movement speed for yourself and nearby allies
![]() Carnage (Ability 2)
Carnage (Ability 2)
- Wound all enemies in front of you, dealing damage over time
![]() Adrenaline Rush (Passive)
Adrenaline Rush (Passive)
- Heal from all damage over time dealt by wounds
![]() Rampage (Ultimate)
Rampage (Ultimate)
- Charge forward and wound enemies; dealing damage over time and preventing them from being healed
- 6v6 Hero Changes
- Base health increased from 425 to 450.
- Self-healing from wounds damage scalar increased from 1.5x to 1.75x.
- Wound damage self-healing multiplier increased from 1x to 1.5x. (undocumented)
- Base health increased from 375 to 425.
- Cooldown increased from 12 to 15 seconds.
- Self-healing from wounds damage scalar reduced from 2.5x to 1.0x.
- Wound damage decreased from 40 to 25.
![]() Royal Bullets - Power
Royal Bullets - Power
- Damage decreased to 40 (Down from 50).
![]() Merciless Magnetism - Power
Merciless Magnetism - Power
- Increased distance to 25 meters (Up from 15 meters).
![]() Twist the Knife - Power
Twist the Knife - Power
- Increased duration to 2 seconds (Up from 1 seconds).
![]() Blade Parade - Power
Blade Parade - Power
- Decreased charge time to 0.65 seconds (Down from 1 seconds).
![]() Cut 'Em, Gracie! - Power
Cut 'Em, Gracie! - Power
- Added: Hit enemies are slowed by 35% for 1 seconds.
![]() Royal Bullets - Power
Royal Bullets - Power
- Decreased duration to 2s. (Down from 3s).
- Removed distance condition.
![]() Thrill of Battle - Power
Thrill of Battle - Power
- Increased heal to 100% (Up from 50%).
![]() Bigger Magnet - Rare Ability Hero Item
Bigger Magnet - Rare Ability Hero Item
- Now pulls downward if the enemy is airborne.
![]() Let's Go Win - Power
Let's Go Win - Power
- Decreased cooldown reduction to 50% (down from 100%).
![]() Cut 'Em, Gracie! - Power
Cut 'Em, Gracie! - Power
- Increased reduction on cooldown to 2s per enemy hit (up from 1s).
![]() Royal Bullets - Power
Royal Bullets - Power
- Increased range to 15 meters (Up from 12 meters).
- Increased damage to 50 (Up from 30).
![]() Twist the Knife - Power
Twist the Knife - Power
- Increased Wounds extension to 1 second (Up from 0.5 seconds).
![]() Blade Parade - Power
Blade Parade - Power
- Increased Damage to 100% (Up from 35%).
![]() Merciless Magnetism - Power
Merciless Magnetism - Power
- Increased range to 15 meters (Up from 12 meters).
![]() Thick Skull – Epic Survival Hero Item
Thick Skull – Epic Survival Hero Item
- Increased Damage Reduction to 75% (Up from 50%).
![]() Booming Voice – Epic Ability Item
Booming Voice – Epic Ability Item
- Reduced Ability Power to 15% (down from 25%).
![]() Slicing Spree – Rare Hero Survival Item
Slicing Spree – Rare Hero Survival Item
- Reduced Move Speed stat to 5% (down from 10%).
- Reduced Move Speed while near an enemy with a Wound to 5% (down from 10%).
- Increased Attack Speed while near an enemy with a Wound to 10% (up from 5%).
- Introducing Stadium
- Tank Heroes: D.Va, Junker Queen, Orisa, Reinhardt, and Zarya.
- Damage Heroes: Ashe, Cassidy, Genji, Mei, Reaper, and Soldier: 76.
- Support Heroes: Ana, Juno, Kiriko, Lucio, Mercy, and Moira.
References
- ↑ The Wastelander
- ↑ 2.0 2.1 Junker Queen, Blizzard Entertainment. Accessed on 2022-10-05
- ↑ 3.0 3.1 3.2 3.3 3.4 3.5 2022-06-21, A DESIGN FIT FOR ROYALTY: AN INSIDE LOOK AT HER MAJESTY, THE JUNKER QUEEN. Blizzard Entertainment, accessed on 2022-07-03
- ↑ 2018-06-23 Junkertown queen's voice has been removed from Junkertown Blizzard Forums accessed on 2018-07-02
- ↑ Thoughtless Gods
- ↑ 2019-04-17 Fareeha - Live at Blizzard HQ! EVENT HYPE
- ↑ 2022-06-12 "Release Date Reveal" | Overwatch 2 Youtube accessed on 2022-06-12
| Heroes in Overwatch
| ||||||||
|---|---|---|---|---|---|---|---|---|
Tank |
 Bruiser |
|||||||
 Initiator |
||||||||
Stalwart |
 Junker Queen |
|||||||
Damage |
 Flanker |
|||||||
 Recon |
||||||||
 Sharpshooter |
||||||||
 Specialist |
||||||||
Support |
 Medic |
|||||||
 Survivor |
||||||||
 Tactician |
||||||||


