Reinhardt is a Stalwart Tank hero in Overwatch. He is one of the 21 heroes included in the game's release on 24 May 2016.
Overview
Reinhardt Hero Selection
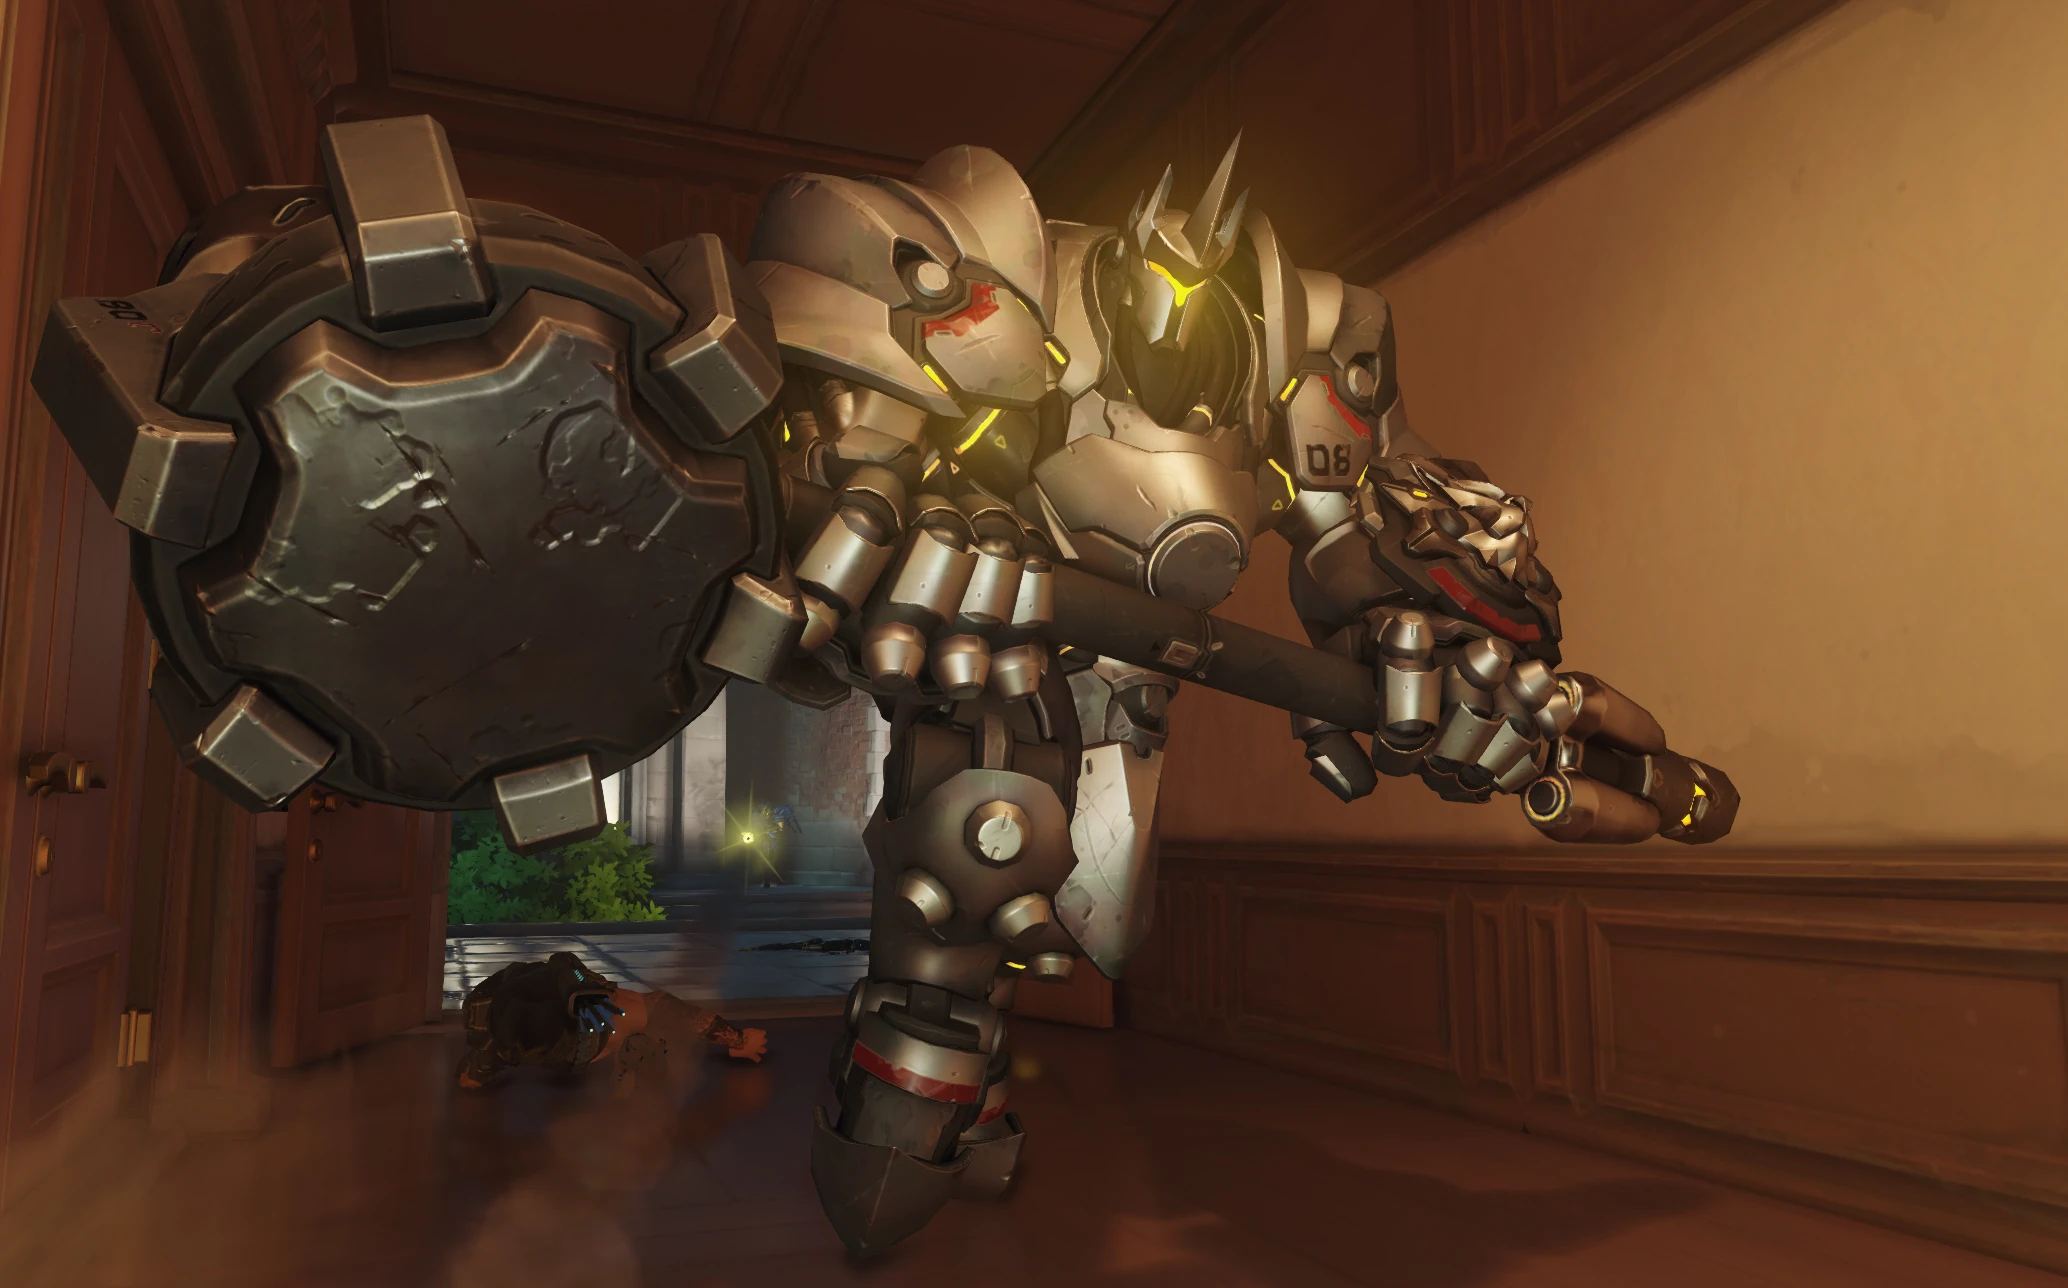
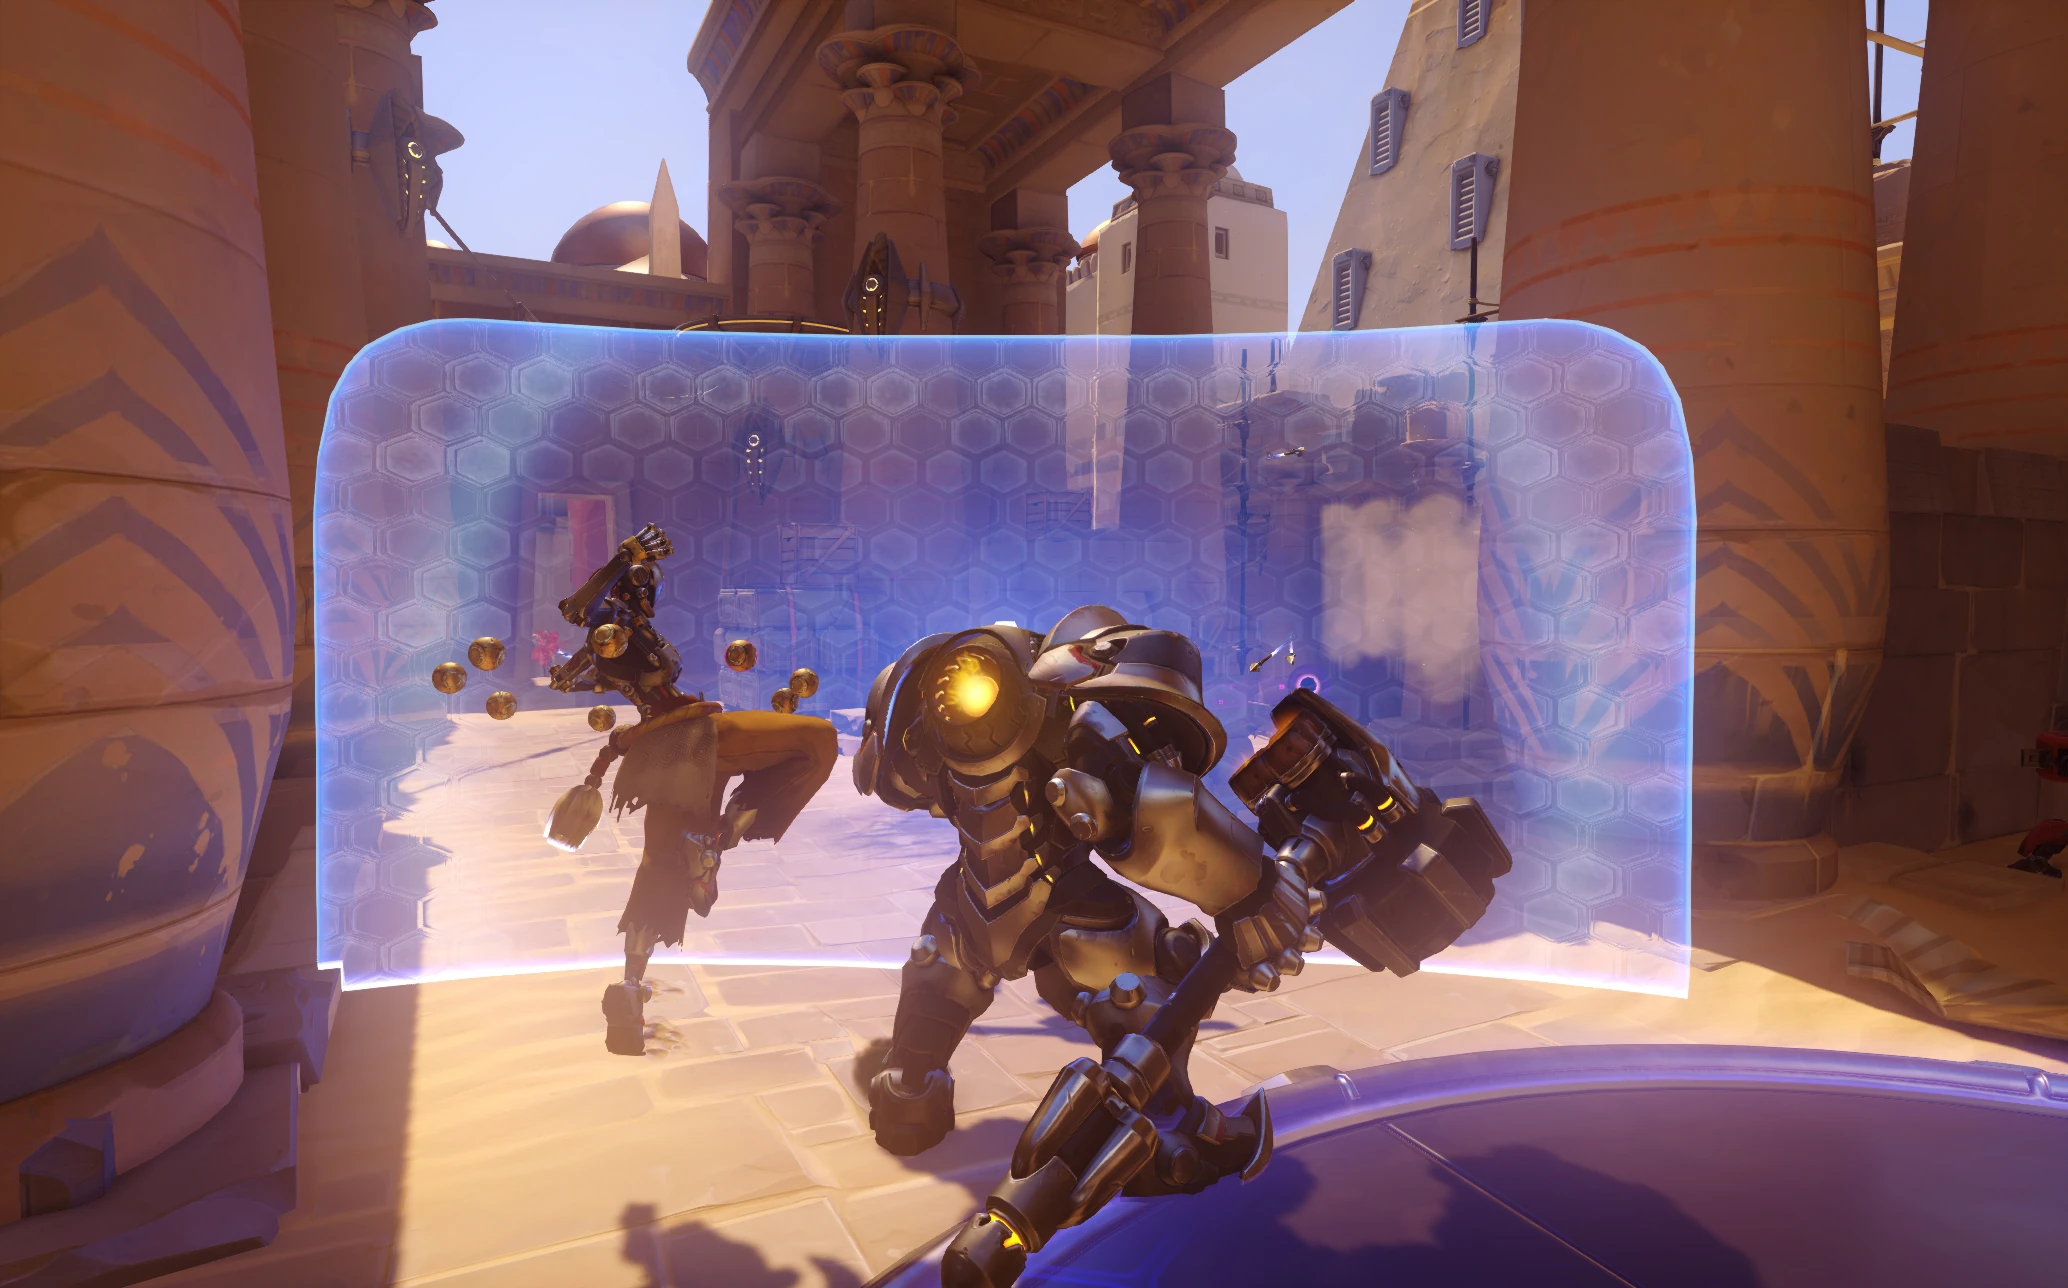
Clad in powered armor and swinging his hammer, Reinhardt leads a rocket-propelled charge across the battleground and defends his squadmates with a massive energy barrier.
-
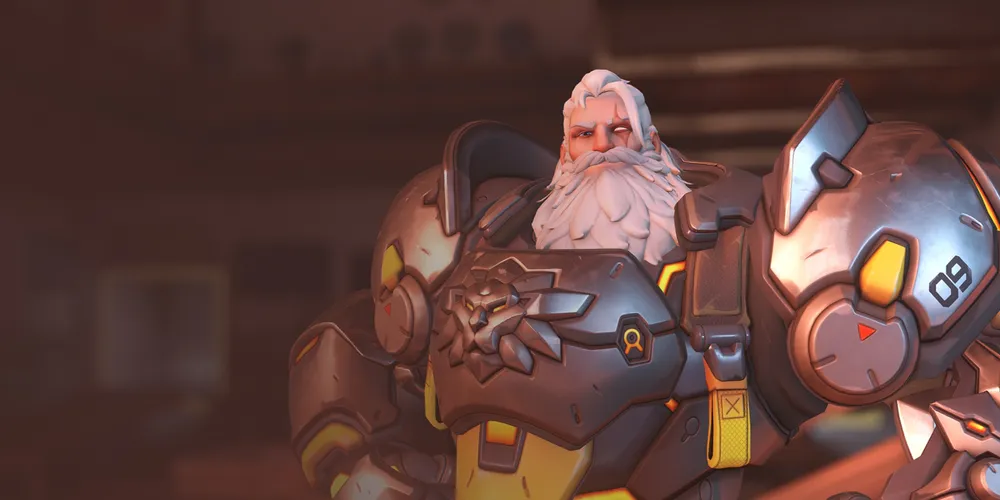
 Overwatch 2 Key Art
 -
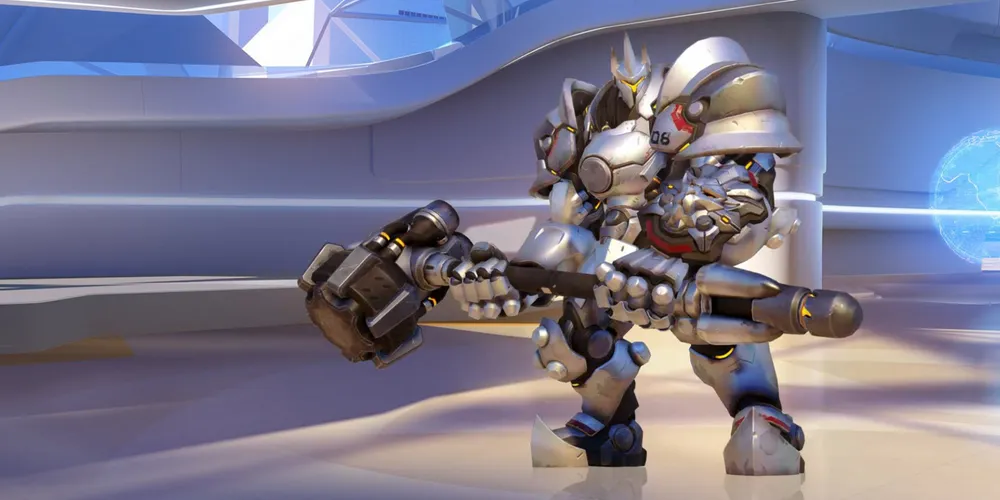
 Overwatch 1 Key Art
-
 3D Portrait
 -
 2D Portrait

Abilities
Passive Abilities


- Ultimate charge and perk progress generation from damage and healing dealt to heroes with the Role: Tank passive is reduced by 40%.
- All tanks have 150 more health in Role Queue. The amount of armor and/or shields remains the same.
- No longer grants increased base health.
- Ultimate charge generation reduction reduced from 40% to 20%.

- Reduces the speed of knockback and the effectiveness of slowdown effects received by 40%.
Weapons


- Damage per second: ~104 while swinging
- Reinhard does not have a quick melee attack. Attempting to use it swings the Rocket Hammer instead.
- Rocket Hammer knocks back enemies in the direction of the swing.
- The direction of consecutive swings alternates, starting counter-clockwise.
- Activating
 Fire Strike,
  Barrier Field,
  Charge or
  Earthshatter interrupts the swing animation.
 - The hitbox of the swings lingers slightly longer at the end position of the hammer.
- Rocket Hammer is not reflected when blocked by
 Deflect.
Special Abilities

- Using Fire Strike, Charge or Earthshatter automatically puts down the barrier to cast the ability. To use Rocket Hammer, the barrier must be first manually released.
- Barrier health regenerates at a rate of 150 per second after being down for 2 seconds.
- Barrier Field is a channeled ability, If Reinhardt is hacked, slept, stunned and knocked down, it will be released.
- Holding secondary fire also raises back the barrier automatically when the cast resolves if Fire Strike or Earthshatter was used.
- The center of shield relative to Reinhard is shifted ~0.075 m to the left.
- Changing the direction of the character's gaze (and hence the shield zone) takes time. It takes ~0.14 seconds to be able block something what was exactly behind you.
- By holding the primary fire key, Reinhardt can look around at his surroundings without turning.
- The barrier cracks once at 50% and again at 25%. At 20%, Reinhardt will say his barrier is failing.
- Shield health increased from 1500 to 1800.

50 (collision w/out pin)
0.6 + 0.1 seconds (canceled)
0.3 seconds (charge, min)
0.65 seconds (stun on wall hit)
11.2 m/s (canceled pin)
- Reinhardt can cancel the charge by pressing the ability button again.
- Reinhardt can turn while charging but his control is reduced.
- If Charge directly collides with an enemy, that enemy is "pinned" (stunned), and if they hit a wall, the pinned target takes the wall hit damage. If Charge ends before hitting a wall, no damage is inflicted, but the target will remain stunned for an additional 0.65 seconds. Only 1 enemy can be pinned at a time.
- If Charge indirectly collides with an enemy, or if there is already a target pinned, the enemy is knocked away and takes 50 damage.
- Colliding with any immovable entity, such as Orisa during
 Fortify or
  Overrun, is also treated as a wall impact.
- Colliding with deployables is also treated as a wall impact, but also deals half of Reinhardt's pin damage to the deployable.
- Charging into Illari's healing pylon disables it for a short time.
- Colliding with deployables is also treated as a wall impact, but also deals half of Reinhardt's pin damage to the deployable.
- Abilities that make the target phased out, like
 Protection Suzu or
  Wraith Form, can prevent a target from being pinned, but once hit the effect can only be removed by
  Life Grip.
 - Abilities that make the target invincible, like
 Projected Barrier or
  Transcendence, do not prevent or remove the pinned effect, but can prevent the target from taking damage.
 - If Charge collides with
 Rocket Punch,
  Shield Bash, a charging
  B.O.B., or another Charge, both participants get knocked down for 1.7 seconds. Any pinned targets will be damaged as if they hit a wall.
 - Charge can break tether effects (except
 Cage Fight because it disables movement abilities).
 - Reinhardt's visible character model is shifted to the right in the Charge animation, causing his left shoulder, rather than the middle of his body, to be the center of his hitbox. Due to this disparity, players should focus on the crosshair position over the character model when aiming.
- Tl;dr: Left shoulder pins, right shoulder boops
- Charge's movement speed buff does not count towards global movement speed buff cap.
- Cooldown increased from 7 to 10 seconds.

2 charges
- Cooldown increased from 6 to 8 seconds.
Ultimate Ability

200 (critical)
25 meters (max)
1.8 meters (climb/drop)
- Requires line of sight.
- Earthshatter will be stopped by barriers, even if the damage from Earthshatter breaks the barrier.
- Earthshatter has a small amount of vertical height (1.77 meters), allowing it to affect enemies in the air.
- This distance is calculated as the difference between the height of the enemy and the height of the surface over them.
- By jumping off the payload at the right time, you can usually gain enough height to avoid being hit.
- Earthshatter is a channeled ability and it is interrupted by becoming hacked, stunned or knocked down.
- Earthshatter deals an additional 150 damage within 1.75m of the impact area. This counts as a critical hit.
- While casting Earthshatter Reinhardt ingnores collision with other heroes.
- If Reinhardt is/becomes airborne while casting Earthshatter, the cast will not finish until he hits the ground.
- Reinhardt is unaffected by
 Graviton Surge while casting Earthshatter.
 - Life Grip cannot be used on Reinhardt while he is casting Earthshatter. Activating Earthshatter will also interrupt an active pull.
Perks
Minor Perks
A Minor Perk can be chosen at level 2.

- The 3rd fire strike charge persists after dying.

- Removed in Season 18, Re-added Reign of Talon Season 1: Conquest
- It is the first removed perk to be re-added
Major perks
A Major Perk can be chosen at level 3.

3.6 meters (hitbox)
- Can be used while airborne.
- The hitbox is blocked by enemy barriers, however it is possible to hit "through" them if the origin of the hitbox, i.e. your barrier, travels past theirs.
- Shield Slam does not have the stalemate behavior, where colliding with other charging abilities, like Charge and Shield Bash, causes a knockdown.

- Additional hits from new casts of Fire Strike will stack with the duration from the first cast.
Hero-specific options
| Setting name | Options | Description |
|---|---|---|
| Toggle Barrier Field | Off (default) | Barrier Field deactivates when player stops holding the button. |
| On | Barrier Field deactivates when player presses the button again. | |
| Hold to use Charge | Off (default) | Charge deactivates when player presses the button again. |
| On | Charge deactivates when player stops holding the button. | |
| Movement relative to camera during barrier free look | On (default) | Movement during free look (hold Primary Fire during barrier) is relative to the camera's facing direction. |
| Off | Movement is relative to Reinhardt's facing direction. | |
| Relative aim sensitivity during Barrier Field | 0% ... 500% (default: 100%) | Multiplier to base aim sensitivity during Barrier Field. |
| Charge cancel input | Ability 1 (default) | Charge deactivates when player presses the Ability 1 button only. |
| All | Charge deactivates when player presses Ability 1, Primary Fire or Secondary Fire. | |
| Primary Fire | Charge deactivates when player presses Primary Fire only. | |
| Secondary Fire | Charge deactivates when player presses Secondary Fire only. | |
| Hide Charge cancel text | Off (default) | Cancel text UI element is displayed to the left of the crosshair. |
| On | Cancel text UI element is hidden. |
Stadium
Reinhardt is a playable hero in Stadium game mode. See Reinhardt/Stadium for a list of hero-specific Items and Powers.
Strategy
Reinhardt is the sturdiest of the Tanks, boasting high base Health and a massive barrier that allows him to protect himself and his team from harm. While largely defense-oriented, Reinhardt can be a deadly offensive threat as well thanks to the high damage of his Rocket Hammer and ability to crush enemies against a wall with Charge. The price he pays for all of this is that he is almost solely restricted to fighting at short range, having only a single, infrequent ranged attack.
Weapons & Abilities
 Rocket Hammer: Reinhardt's primary weapon. Pressing the primary fire button causes Reinhardt to swing the hammer, dealing damage to all enemies in a cone in front of Reinhardt.
- The damage from this hammer is significant, so don't be afraid to start swinging when close to an enemy. Look for opportunities where you can hit more than one enemy with the Rocket Hammer to maximize its effectiveness.
- Due to the lingering hitbox, Rocket Hammer can be swung in 360 degrees by rotating Reinhardt mid-attack, striking everyone in a 10 meter diameter rather than a 5 meter cone.
- Although this is a melee weapon, the range is greater than a normal quick melee attack. Reinhardt does not have a normal quick melee attack like other heroes.
- Rocket Hammer is strong enough to knock enemies back depending on which direction the hammer is being swung, especially when they are airborne. This can be used to cause environmental kills.
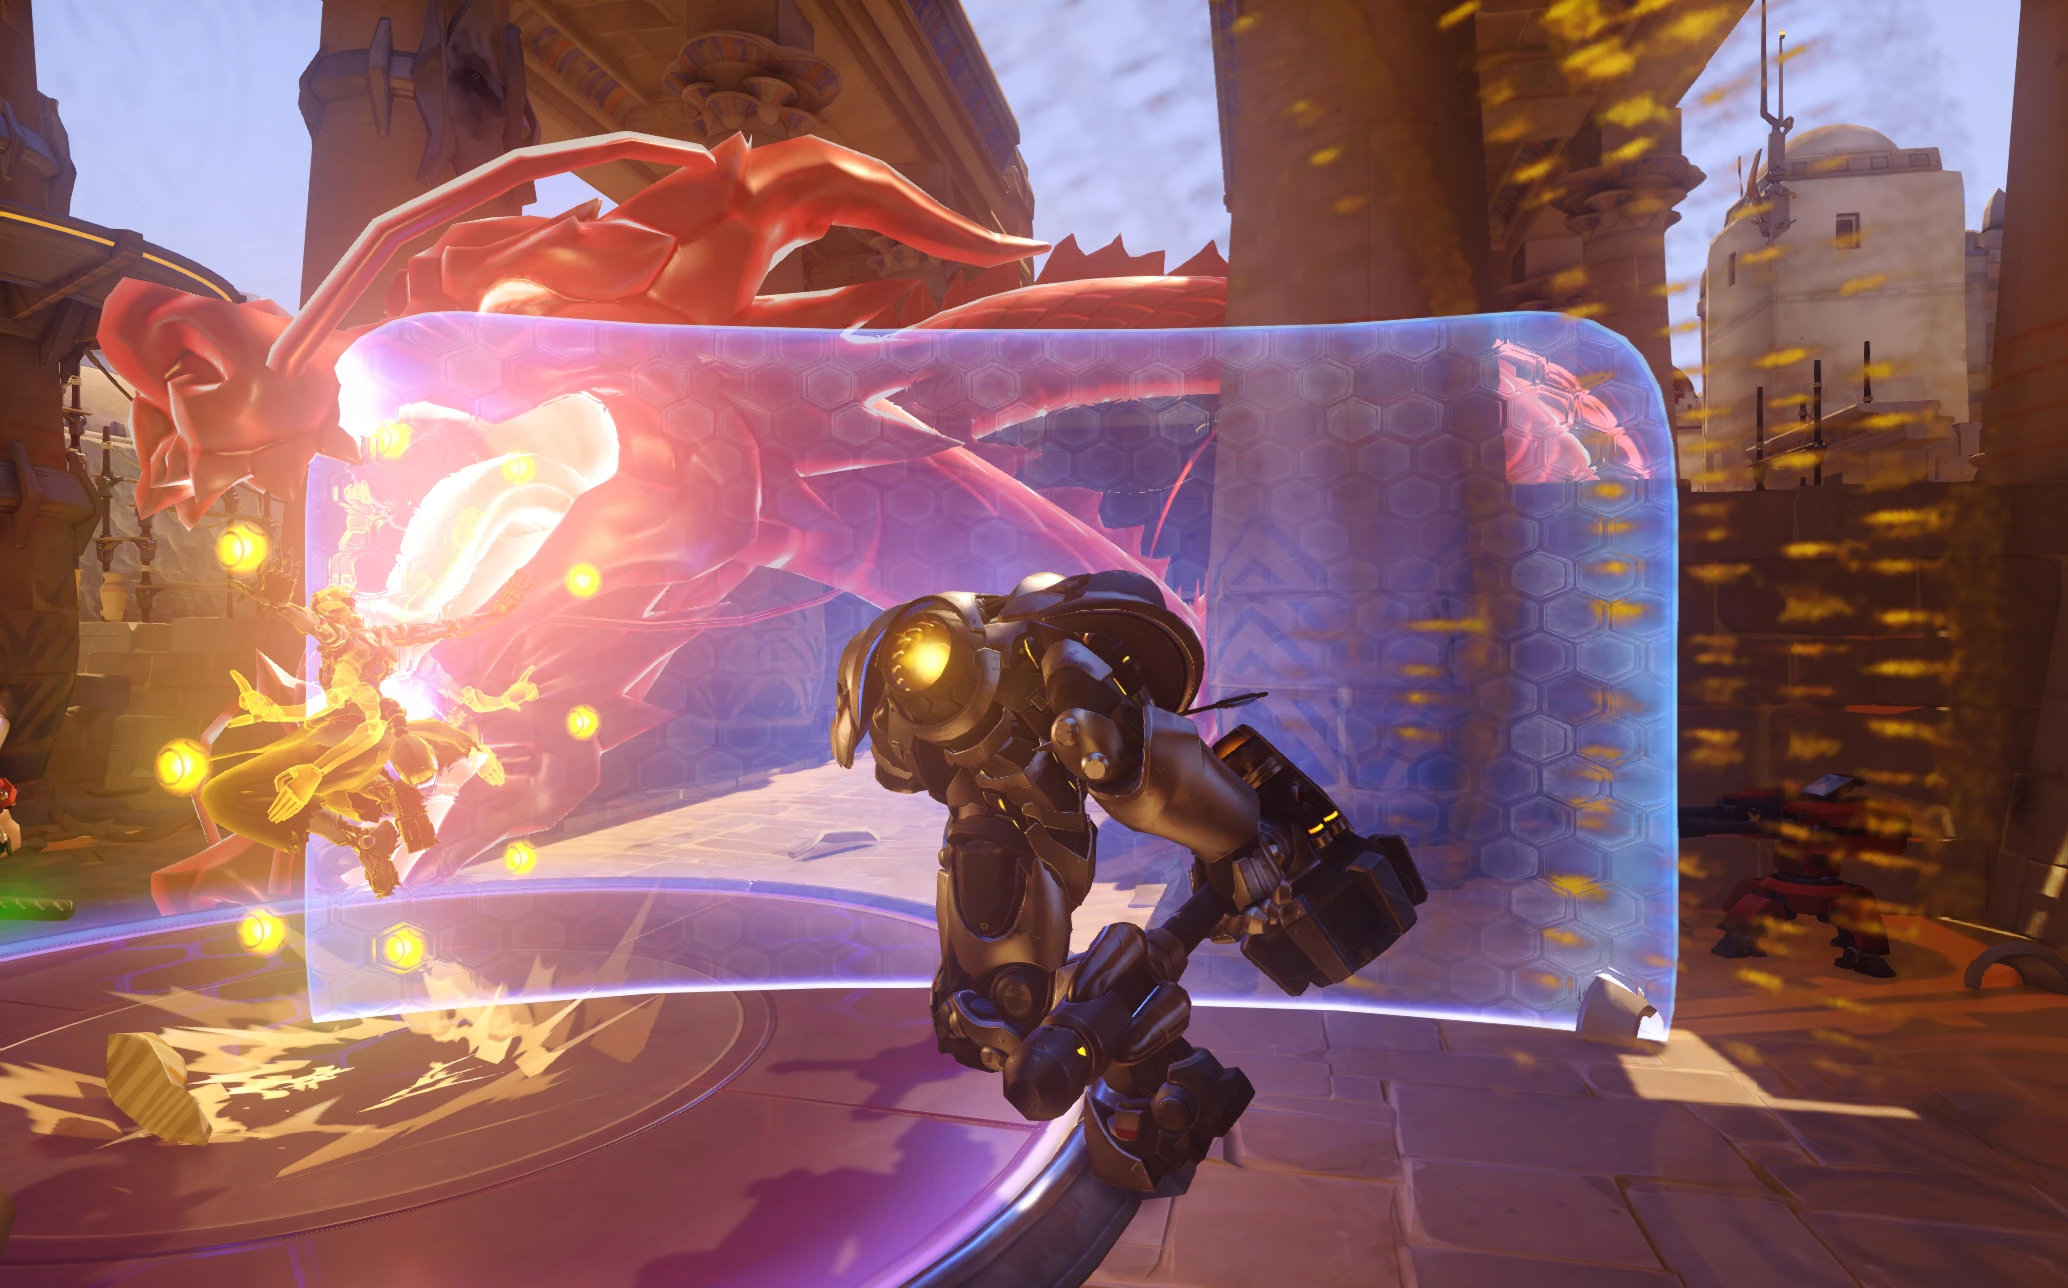
- Barrier Field: The Barrier Field is a powerful, rectangular barrier that Reinhardt carries like a shield, blocking most projectiles and bullets that hit it. It can be activated by pressing and holding down the secondary fire button. The barrier has its own separate Health pool, and Barrier Field is disabled if the barrier's Health drops to 0. Reinhardt will regenerate lost barrier Health after a few seconds of not activating Barrier Field.
- Use Barrier Field to block incoming attacks from your opponents. This is especially helpful for your team, as you can use Barrier Field to let them move through a contested area without taking damage. Try to always stay at the front to keep your team safe.
- Try to check if your teammates are behind your cover or not. You can keep an eye all around while holding the barrier.
- Keep an eye on your barrier Health. If you start to get low, look for a place to take cover so that you can let your barrier Health regenerate.
- Since Barrier Field only blocks attacks from one direction, be cautious of attacks from above or behind.
- While dangerous in some situations, you can move faster to where you are needed (or out of danger) with your shield by taking it down for an instant, jumping in any direction and bringing Barrier Field up while you're in the air - Reinhardt's movement is not slowed by Barrier Field if it is activated during the jump.
- Charge: When activated, Reinhardt will use rocket boosters to propel himself forwards. He gains significant speed, but loses much of his ability to turn. Reinhardt will stop his charge after a period of time, when he collides with a solid surface, or if the player cancels the charge, whichever comes first. The first enemy Reinhardt collides with during his charge will become "pinned" to Reinhardt, and will be dealt heavy damage if Reinhardt then impacts a solid surface. All other enemies will be knocked away from him. Stuns, such as those from Roadhog or Cassidy, will immediately end Charge.
- Charge can be canceled. This is useful in many situations. It can be used to simply close the distance, bait out key abilities by canceling into Barrier Field, as enemies are likely to use them, because you are vulnerable and moving predictably during Charge, or - most importantly - prevent you from getting out of position when it looks like you won't be hitting an enemy or it is dangerous to keep charging.
- While it may be tempting to use Charge to leap into battle, Reinhardt cannot turn well while charging, making it easy for enemies to avoid it. It's best to use Charge at short or medium range or around corners, where enemies have less time to respond.
- Charge has a relatively short cooldown and can be used to get closer to the fight after spawning.
- Crushing a pinned target against a wall will deal massive damage, enough to kill almost any non-Tank instantly.
- If Reinhardt has an enemy pinned and cancels his Charge just as he reaches a pit or ledge, his now-released pin target will continue moving forward due to momentum. This can be used to eliminate heroes by effectively throwing them off map.
- Remember that movement abilities, such as D.Va's Boosters, Genji's Swift Strike, and Mercy's Guardian Angel, may allow them return to the map.
- Jumping right at the end of Charge causes Reinhardt to retain momentum, allowing him to close more distance and jump up slightly higher than normal. On certain maps, this allows him jump over gaps and ledges he normally wouldn't be able to.
- Fire Strike: When activated, Reinhardt will hurl a flaming projectile forwards that deals damage to any enemy it hits. This projectile passes through enemies and barriers, meaning that a single projectile can hit multiple opponents. It stops upon impacting a solid surface.
- Fire Strike is Reinhardt's only ranged attack. It's useful for hurling down choke points to deter enemies from coming through, as well as for hitting distant and slow or stationary targets like Bastion or Torbjörn's Turret.
- While it's easy to think of this as only being a ranged ability, Fire Strike deals a lot of damage no matter the range it's used at. Don't forget to use it in melee engagements as well.
- Reinhardt can use Fire Strike to "animation cancel" his Rocket Hammer swing. As soon as the Hammer impacts an enemy, use Fire Strike to deal fast burst damage to a target. This is useful against evasive targets like Tracer, where you may only have a limited opportunity to hit them. This also assists in quickly finishing tanks after charging them, such as Winston.
- Earthshatter (Ultimate): Reinhardt's Ultimate ability. When activated, Reinhardt slams his hammer into the ground, creating a cone of force that damages and stuns enemies who are hit by it. This ability respects line of sight, so anyone Reinhardt can't see is not affected by it.
- A simple but devastatingly powerful Ultimate when used correctly. An enemy who is stunned cannot perform any action, leaving them helpless and easy to kill.
- While hitting many targets is great, often nailing just one target, is enough to win a teamfight. You can easily burst down even low HP tanks, like Zarya, by yourself, following up with Hammer -> Fire Strike -> Charge combo and more durable tanks with your team's help or, if applicable, by pinning them off the map.
- Try to use Earthshatter in an area without much cover, as enemies can duck out of sight of you and completely avoid Earthshatter otherwise.
- Earthshatter has a small amount of vertical height. Jumping enemies can still be hit by it.
- Reinhardt must be on ground to finish casting Earthshatter. Avoid jumping and look out for being knocked into the air when activating Earthshatter, as that will delay the activation, giving enemies time to react or even completely messing up the cast.
- Be careful when using Earthshatter on tanks, as it will not pass through barriers like that of Zarya, Winston or even other Reinhardts.
General Strategies
- Reinhardt is incredibly hardy, able to absorb the most damage out of any of the Tanks, but suffers from being mostly restricted to melee attacks. As a result, Reinhardt works best as a team player. Stay at the front of your team and use your Barrier Field to absorb incoming attacks as you approach your opponents, allowing your team to move safely through an area and fire back without taking damage. Try to move between points of cover using Barrier Field instead of walking straight towards your enemies. Reinhardt may be tough, but he's not invincible.
- One of Reinhardt's strengths is that he protects high damage-output teammates. If your team is composed mostly of flankers, Reinhardt might be less effective, as flankers generally do not wish to stand behind Reinhardt's shield.
- Using Charge properly can be a challenge. In general, look for targets that are near corners or walls who are distracted by your team. Tanks like Winston and Roadhog are prime targets, as they are easier to hit with Charge due to their larger hitboxes. Charge will only pin enemies who are more-or-less directly in front of Reinhardt, so don't be surprised if you simply sail on by a jumping enemy. Remember, the closer you are to your enemy when you charge, the less time they have to get out of the way.
- Try to avoid charging in a direction that will lead you deep into enemy territory, as that will leave you alone and flanked.
- Reinhardt's shield is a powerful defense, but remember that any enemy can simply walk right through it. When shielding, try to always keep a few meters between you and enemies.
- Reinhardt's defense depends on all enemies being in roughly one direction. Always keep your eyes open for flankers.
- Reinhardt's shield is very effective against certain ultimates such as Graviton Surge, Deadeye, or Self Destruct, while being highly ineffective against others such as Mei's Blizzard, Genji's Dragonblade or Junkrat's Rip Tire. His shield can protect your team from much of the damage from Barrage, but he will most likely die in the process.
- Earthshatter is most effective when used as a combo. A common Earthshatter combo is to use Earthshatter followed up by a Fire Strike, with Rocket Hammer attacks or a Charge to finish off anyone who survives. Remember that Fire Strike can hit multiple enemies when used; aim it so that it hits as many stunned enemies as possible. Make sure that all of your cooldowns are done when using Earthshatter.
- Reinhardt works well when paired with Bastion or marginally Torbjörn, as he can protect their stationary defenses with his shield.
- Reinhardt works extremely well in any kind of situation, as he can defensively protect his team's assets with Barrier Field and aggressively cause havoc among his enemies using Charge.
Match-Ups and Team Synergy
Tank
| Hero | Match-Up | Team Synergy |
|---|---|---|
 D.Va |
D.Va can put a lot of continuous pressure onto your barrier. Her mobility allows her to run circles around you if the two of you are alone, ram you out of position, and get behind your barrier to start attacking you point blank. However, her large hitbox makes her a prime target for Charge, and a successful pin will weaken her enough that a hammer swing or two will knock her out of her Mech. D.Va in Pilot form is no match for Reinhardt's Hammer, and she won't be able to outrun you, so be sure to quickly kill her before she can retreat to her team. Use your barrier to block her Micro Missiles.
If D.Va uses Self-Destruct, try to quickly take her out and then put your barrier up to block the explosion. While it will most likely end up shattered in the process, you'll protect both yourself and any teammates behind you. A wily D.Va may be prepared for this, though, so be wary of her teammates comboing with her to take you or your barrier down before Self-Destruct detonates. Also, remember that D.Va cannot block your Earthshatter. |
Your sturdy barrier frees D.Va to be a more aggressive Tank while you play a more defensive role. She also helps cover some of your checks, specifically Pharah. A well-timed Earthshatter combined with D.Va's Self-Destruct can take out a large number of opponents in one fell swoop. |
 Doomfist |
Doomfist's high mobility makes him hard to deal with if he avoids you. Swing at him if he gets close however. Charge can be used to counter When Doomfist uses |
(To be added) |
 Hazard |
(To be added) | (To be added) |
 Junker Queen |
(To be added) | (To be added) |
 Mauga |
(To be added) | (To be added) |
 Orisa |
Orisa is not a very fun match up for Reinhardt, as all of her abilities deny you in one way or another: |
(To be added) |
 Ramattra |
Ramattra is very similar to Reinhardt and can square off rather well against you in his |
(To be added) |
 Reinhardt |
It is not uncommon to find a Reinhardt on each team, and it's just as likely for said Reinhardts to be staring each other down on the battlefield, protecting their respective teams the other. Killing a Reinhardt as a Reinhardt ultimately comes down to mind games; get your team to focus down the enemy Reinhardt, throw Fire Strikes at him, and if there's a safe opportunity to hit him with a Charge, do it immediately. You will always beat him if he has no support from his team. Try to anticipate the enemy Reinhardt's Charge and either dodge it or Charge into it, cancelling it. Try to keep open areas at your back, as a charging enemy Reinhardt will have to travel farther from their team before they pin you. Reinhardt's Barrier Field is capable of blocking Earthshatter; both you and your enemy will likely be trying to lure the other into wasting their Ultimate with a well-timed block. | In No Limits, multiple Reinhardts can create a sturdy, impenetrable wall of defense. Just keep in mind that, in doing so, you are robbing your team of its offensive potential and will most likely have to resort to turtling. |
 Roadhog |
Roadhog cannot throw his hook through Reinhardt's barrier, but if he can somehow flank behind him, he's more than capable of completely throwing Reinhardt out of position and dealing massive damage to him. Roadhog's high damage also allows him to quickly break Reinhardt's barrier, leaving him and his team vulnerable. While you should always keep your barrier active around Roadhog, ensure that your team either kills him or scares him off. When Roadhog uses |
(To be added) |
 Sigma |
Sigma is a rather easy matchup for Reinhardt. If you can get up close, you can easily beat him in fist fight. Use your Barrier to block Sigma's |
(To be added) |
 Wrecking Ball |
There isn't much you can do against a good Wrecking Ball as Reinhardt. You can attack him when he gets close, but do not attempt to chase him. It is impossible for Reinhardt to keep up with Ball's mobility, so it is often better to just ignore him and play the objective or try to attack the enemy backline yourself. | (To be added) |
 Winston |
Winston can do very little to Reinhardt; while his electricity does pierce through your barrier, your high amount of armor, barrier-piercing Fire Strike and Winston's vulnerability to Charge makes him nothing more than a nuisance to you. Winston will usually rather attempt to ignore you and kill your backline,o be agressive and take swings at him when you can to soften him up before he engages. When he does, it is often better to try to put pressure on his backline in return rather than peel for your team as you cannot really keep up with Winston's mobility. | (To be added) |
 Zarya |
The most important thing against Zarya is keeping track of her barrier cooldowns. They can nullify the damage from your high-damage abilities, while granting her a spike of energy. Zarya can do a lot of damage if she is allowed to get high charge, so avoid attacking her when she uses them and use your barrier to block her damage. When she is not using her barriers, swing at her to bait them out, and only engage on her or her teammates when she has exhausted her charges.
Zarya's barriers can block Earthshatter, however, because the close range damage is applied before the shockwave, if your crit breaks the barrier, you will be able to stun her and everyone behind her. Additionally, if you get caught in Zarya's |
Zarya work well with Reinhardt, as she can cover his engages with her barriers, making Reinhardt very difficult to kill. |
Damage
| Hero | Match-Up | Team Synergy |
|---|---|---|
 Ashe |
Your barrier can take her Viper's shots well, but lobbing a Dynamite over your shield to take you out is Ashe's go-to tactic when she comes across an enemy Reinhardt. As such, be prepared to face upward while shielding when you fight Ashe, but remember that she can also throw her trusty explosive underneath your shield if you do that. Unless it is very necessary, avoid using Charge against her, as she has a small hitbox and can utilize Coach Gun to blast out of harm's way. On the other hand, if need may be, you can remove her B.O.B from the battlefield with Charge, as he stands still after his initial sprint and has the potential to pummel your team. | (To be added) |
 Bastion |
Bastion's extremely high damage output in |
Guarding a friendly Bastion will be mutually beneficial; you'll be protecting him from oncoming fire, and he'll be able to mow down oncoming opponents. Just keep in mind that you are only able to guard what's in front of you; be wary of enemies trying to flank you from the rear. While you are able to walk off with ease, your Bastion will need a second to convert to Recon Configuration. While you should try to protect your Bastion, you also need to be in a mutual agreement of when you need to hold your ground and when you need to retreat, because if you run off and the Bastion didn't get the memo, he'll be torn apart, and you will be next. |
 Cassidy |
Cassidy can do a lot of damage to you with his |
(To be added) |
 Echo |
(To be added) | (To be added) |
 Genji |
Genji can slip past your barrier and cause trouble for you at extreme ranges, flinging shurikens to chip away your health and distract you. However, a 1 on 1 fight will usually tip in Reinhardt's favor, with his high durability outclassing Genji's mediocre damage and rendering his Deflect mostly useless due to how infrequent Fire Strike is used. Even with Dragonblade active, you can usually defeat Genji in single combat if you are anywhere near full health and if you time your swings well. Take note that Genji is able to block physical attacks with Deflect as well, but like projectiles, can only block in front of him. This gives Genji a chance to slip away again using Swift Strike or his agility to get to a safe distance. In general, try having an ally deal with Genji so you can focus on the main offense. | (To be added) |
 Hanzo |
Hanzo's arrows will be stopped cold by Reinhardt's barrier, but enough pressure from his Storm Arrows could bring your barrier close to breaking, so be careful. His Sonic Arrow will warn his allies about any pushes you and your team may be attempting, as teammates often tend to gather behind Reinhardt for protection. Your barrier will provide no protection from Dragonstrike; if you hear Hanzo activating it, drop your barrier and move out of the way. | (To be added) |
 Junkrat |
Junkrat can deal a significant amount of damage to your barrier, and his Concussion Mine can be thrown over your barrier to disrupt you. However, his Steel Trap isn't particularly effective against you, since you can still use your barrier to protect against incoming attacks. The trap can stop the mighty Crusader mid-charge, though, so if you see a Steel Trap, don't ignore it. Your barrier can protect you and your team from RIP-Tire, but only if it detonates on the other side of the barrier, and due to its free-rolling nature, it can roll right up into your face for a massive detonation. Only try protecting your team from it if your teammates have enough firepower to gun it down before it can pass through the barrier, otherwise scatter to avoid getting killed at once. | (To be added) |
 Mei |
Mei deals little damage to both the barrier and Reinhardt (who is capable of absorbing multiple headshots from her, even while frozen), and her Ice Wall often just gives Reinhardt the opportunity to lower his barrier to recharge it. Be careful about being separated from your team by Ice Wall as it allows you along with your team to be picked off. Also, hitting Mei in Ice Block form stops Reinhardt's charge. If Mei is activating Blizzard, a quick Charge away from her may be your best bet to avoid being frozen. | (To be added) |
 Pharah |
Pharah will try to distract you when you're guarding your team as she is more than capable of getting behind them with her jetpack. You have little to no way to fight off an airborne Pharah; focus on guarding your team while they fend her off. | (To be added) |
 Reaper |
Reaper can deal deal high damage to you up close with his shotguns, and can be very difficult to deal with if he is supported. He also has a reliable escape in |
(To be added) |
 Soldier: 76 |
Your barrier will allow you to soak up a lot of damage from Soldier: 76's standard attacks, and it is capable of completely stopping his Tactical Visor cold. However, Soldier: 76 still stands a chance against you in close-long range skirmishes as his damage is far greater than most offense heroes. You have no means with which to attack Soldier: 76 at long-range; stick with your team when he's around, or if necessary try to bait him into a close-quarters fight where you can smash him with your hammer. | (To be added) |
 Sombra |
If an enemy team has a Sombra, you're going to be one of her top targets. Sombra's Hack will force you to drop your Barrier Field and leave your team open, as well as strip you of your Fire Strike and Charge. Thankfully, Sombra cannot hack through Barrier Field itself. If you know a Sombra is about, always be ready to turn your barrier in her direction to avoid a hack. In addition to protecting yourself, this should be able to protect nearby teammates from being Hacked as well. If you catch a Sombra still on cooldown from using Hack, a quick Charge can finish her off instantly. | (To be added) |
 Symmetra |
Your greatest concern when combating an enemy Symmetra is her Photon Projector primary weapon. Not only does it gain more power the longer she's training it on a stationary target (read: you), damaging shields gives her ammo rather than depleting it, meaning if you're not careful, not only will she run through your shield in seconds, she'll then have a full-stocked laser ready to shred you and your team to bits. If a Symmetra is being daring by approaching her with her laser, drop your shield and slap her back with your hammer. If you're in a larger team fight, you may need to keep your barrier up to protect your team, but ask your teammates to focus on her before she becomes too big of a threat. Her turrets can also cause a lot of problems for you if you're focusing on defending your allies, with one or two being enough to slow you to a crawl and to allow her and her team to dogpile you. You can clear out turrets with a single hammer swipe, but this will be difficult if they're placed in higher places your hammer can't reach, and dropping your barrier leaves you and your team vulnerable. A wily Symmetra may deploy her Photon Barrier just before you use Earthshatter, so if you think she may have it ready, try to either kill her first or catch her off guard with your Ultimate. | (To be added) |
 Torbjörn |
Torbjörn's turret deals little damage to Reinhardt's barrier, even with supporting damage from Torbjörn's Rivet Gun. The turret's immobility makes it vulnerable to a Fire Strike, which will cut off a whole third of its health. Be more careful when dealing with Torbjörn himself, as he can effectively deal damage at all ranges when Reinhardt's barrier is down. When Overloaded his gun can put out a large amount of damage. When he activates Molten Core, your barrier won't save your feet from melting; if you can swiftly kill him with a hammer strike then do so, otherwise backpedal away with your shield up. | (To be added) |
 Tracer |
Tracer can blink behind your barrier and rapidly unload her pistols into your large hitbox. Pulse Bomb can bring you down to 105 health, leaving you in a critical condition. 2 blows from the Rocket Hammer is enough to kill Tracer if she does not have Recall, consider doing so when needed, otherwise stick with your team and try to be ready to change direction to block her flanking attacks.. | (To be added) |
 Venture |
(To be added) | (To be added) |
 Widowmaker |
A one-on-one matchup at close range with an enemy widowmaker are very uncommon, due to her staying in the backlines waiting for targets to snipe and you sticking close to your team to protect them, there's very little you can do at long range, other than throwing an easily avoidable projectile or attempt to charge at them, which the enemy widow has time to react to, however your barrier will prove to be a big nuisance to the enemy widowmaker, due to it's large size and high endurance, there's no practical way for an enemy widowmaker to destroy it, making her either wait for you to drop it for whatever reason, wait for her team to destroy it, or try to sneak up in a position in which she can shoot freely at you and your teammates, should the latter option happen try to get your team to deal with her instead of yourself, if you decide to deal with the enemy widow yourself you run the risk of the rest of her team taking the chance you're distracted to attack anyone you were currently protecting. | (To be added) |
Support
| Hero | Match-Up | Team Synergy |
|---|---|---|
 Ana |
All of Ana's attacks are blocked by your barrier: rounds from her Biotic Rifle, her Sleep Dart, the Biotic Grenade, you name it. However, being hit yourself with the Sleep Dart can leave your team in a critical situation. Don't be tempted to drop your barrier and attack Ana with your hammer, as you're just leaving yourself open to a Sleep Dart. Keep the barrier up and leave her to your teammates. | As Reinhardt, you are one of the best potential choices for a Nano-Boost. Sturdier and stronger, you can Charge through a crowd of enemies and smash up the remains with your hammer. Aside from Ana's Ultimate, your hitboxes are massive and you move slowly, making yourself an easy target for her continuous healing, and your barrier can help keep her safe. |
 Baptiste |
(To be added) | As you tank your way through enemy fire, Baptiste's superb area-of-effect healing will keep you well alive. His secondary fire and Regenerative Burst can save you from the copius amount of damage you take, and an Immortaility Field can keep you from meeting an untimely demise as you move forward to wallop nearby enemies. Amplification Matrix has a very powerful combo with Fire Strike, allowing it to one-shot 200 HP enemies. |
 Brigitte |
(To be added) | (To be added) |
 Juno |
(To be added) | (To be added) |
 Kiriko |
While Kiriko's |
(To be added) |
 Lúcio |
Lúcio's weak weapon deals very little damage to your barrier. However his area heal effect, especially with Amp It Up, can negate quite a portion of any damage dealt by you. Do not be afraid to keep your shield up, and use Fire Strike to weaken Lúcio so your teammates can finish him off. Be careful when shielding allies near environmental hazards ; while Lúcio may have difficulty knocking you back, your teammates may be vulnerable to being sent to their doom. | Seeing how you act as an "anchor" for your team to rally behind, Lúcio can reliably stay within your protection and keep your team healthy. His speed boost can also improve your slow walking speed while your barrier is up, helping your team advance upon the enemy team. |
 Mercy |
As Reinhardt, killing Mercy should be a priority for more mobile heroes on your team than for you yourself. However, he does have tools that can force her to retreat when used correctly: landing a Fire Strike will take away 100 HP, and in a situation where she's alone, an accurate Charge will guarantee her elimination. | Naturally, as a main healer, Mercy will often want to take you in as her pocket due to your high health pool and impressive defensive support. As you charge into the fray, keep your shield up for your teammates, but most especially for Mercy, who is a fragile support hero. With her on your side, you now have the insurance for a bit more recklessness, as the extra healing can allow you to get even closer to enemies and bash their heads in with your Rocket Hammer. Be prepared to be resurrected when you die as well, as you are a main target for it in a good Mercy's eyes. |
 Moira |
(To be added) | Moira serves as a support who is, at the same time, an offensive threat. By staying near a friendly Moira's side to protect her, you have not only a healer to bail you out, but a powerful and mobile damager as well. Her ultimate, Coalescence, may not be the most game-changing, but can offer great value when used smartly. Stay in Moira's beam when she uses it, so that you can be healed while foes are being damaged. |
 Zenyatta |
While an enemy Zenyatta cannot cast his Orb of Discord through your barrier, anyone already afflicted with the Orb will still suffer its effects. This includes Reinhardt himself, who will find the Discord Orb to be a great hindrance. When your barrier is down, Zenyatta can also use long range attacks and Discord Orb to deal heavy damage to you, though at close range he is defeated easily. If you catch him alone, either keep your barrier up and back off or close the distance to quickly take him out. | While Zenyatta is generally best suited to fight on the back lines, your barrier can keep him safe while he heals and hurts from behind it. Just be careful not to Charge off without him if he's depending on you for protection. Enemies marked by Zenyatta's Orb of Discord are also prime targets for your Fire Strike, as it already does a large amount of damage by itself. |
Map Strategies
Control
| Map | Strategy & Stage Tips |
|---|---|
 Overall Strategy |
TBA RATING | TBA FEATURE
Map strategy details for Overall Strategy are currently missing. You can help the Overwatch Wiki by adding them!
|
 Antarctic Peninsula |
TBA RATING | TBA FEATURE
Map strategy details for Antarctic Peninsula are currently missing. You can help the Overwatch Wiki by adding them! Labs
Strategy details missing.
Sublevel
Strategy details missing.
Icebreaker
Strategy details missing.
|

|
TBA RATING | TBA FEATURE
Map strategy details for Busan are currently missing. You can help the Overwatch Wiki by adding them! Downtown
Strategy details missing.
Sanctuary
Strategy details missing.
MEKA Base
Strategy details missing.
|

|
TBA RATING | TBA FEATURE
Map strategy details for Ilios are currently missing. You can help the Overwatch Wiki by adding them! Lighthouse
Strategy details missing.
Well
Strategy details missing.
Ruins
Strategy details missing.
|

|
TBA RATING | TBA FEATURE
Map strategy details for Lijiang Tower are currently missing. You can help the Overwatch Wiki by adding them! Control Center
Strategy details missing.
Garden
Strategy details missing.
Night Market
Strategy details missing.
|

|
TBA RATING | TBA FEATURE
Map strategy details for Nepal are currently missing. You can help the Overwatch Wiki by adding them! Village
Strategy details missing.
Shrine
Strategy details missing.
Sanctum
Strategy details missing.
|

|
TBA RATING | TBA FEATURE
Map strategy details for Oasis are currently missing. You can help the Overwatch Wiki by adding them! City Center
Strategy details missing.
Gardens
Strategy details missing.
University
Strategy details missing.
|

|
TBA RATING | TBA FEATURE
Map strategy details for Samoa are currently missing. You can help the Overwatch Wiki by adding them! Beach
Strategy details missing.
Downtown
Strategy details missing.
Volcano
Strategy details missing.
|
Escort
| Map | Strategy & Stage Tips |
|---|---|
 Overall Strategy |
TBA RATING | TBA FEATURE
Map strategy details for Overall Strategy are currently missing. You can help the Overwatch Wiki by adding them!
|

|
TBA RATING | TBA FEATURE
Map strategy details for Circuit Royal are currently missing. You can help the Overwatch Wiki by adding them! Attack
Strategy details missing.
Defense
Strategy details missing.
|

|
TBA RATING | TBA FEATURE
Map strategy details for Dorado are currently missing. You can help the Overwatch Wiki by adding them! Attack
Strategy details missing.
Defense
Strategy details missing.
|

|
TBA RATING | TBA FEATURE
Map strategy details for Havana are currently missing. You can help the Overwatch Wiki by adding them! Attack
Strategy details missing.
Defense
Strategy details missing.
|

|
TBA RATING | TBA FEATURE
Map strategy details for Junkertown are currently missing. You can help the Overwatch Wiki by adding them! Attack
Strategy details missing.
Defense
Strategy details missing.
|

|
TBA RATING | TBA FEATURE
Map strategy details for Rialto are currently missing. You can help the Overwatch Wiki by adding them! Attack
Strategy details missing.
Defense
Strategy details missing.
|

|
TBA RATING | TBA FEATURE
Map strategy details for Route 66 are currently missing. You can help the Overwatch Wiki by adding them! Attack
Strategy details missing.
Defense
Strategy details missing.
|

|
TBA RATING | TBA FEATURE
Map strategy details for Shambali Monastery are currently missing. You can help the Overwatch Wiki by adding them! Attack
Strategy details missing.
Defense
Strategy details missing.
|

|
TBA RATING | TBA FEATURE
Map strategy details for Watchpoint: Gibraltar are currently missing. You can help the Overwatch Wiki by adding them! Attack
Strategy details missing.
Defense
Strategy details missing.
|
Hybrid
| Map | Strategy & Stage Tips |
|---|---|
 Overall Strategy |
TBA RATING | TBA FEATURE
Map strategy details for Overall Strategy are currently missing. You can help the Overwatch Wiki by adding them!
|
 Blizzard World |
TBA RATING | TBA FEATURE
Map strategy details for Blizzard World are currently missing. You can help the Overwatch Wiki by adding them! Attack
Strategy details missing.
Defense
Strategy details missing.
|

|
TBA RATING | TBA FEATURE
Map strategy details for Eichenwalde are currently missing. You can help the Overwatch Wiki by adding them! Attack
Strategy details missing.
Defense
Strategy details missing.
|

|
TBA RATING | TBA FEATURE
Map strategy details for Hollywood are currently missing. You can help the Overwatch Wiki by adding them! Attack
Strategy details missing.
Defense
Strategy details missing.
|

|
TBA RATING | TBA FEATURE
Map strategy details for King's Row are currently missing. You can help the Overwatch Wiki by adding them! Attack
Strategy details missing.
Defense
Strategy details missing.
|

|
TBA RATING | TBA FEATURE
Map strategy details for Midtown are currently missing. You can help the Overwatch Wiki by adding them! Attack
Strategy details missing.
Defense
Strategy details missing.
|
 Numbani |
TBA RATING | TBA FEATURE
Map strategy details for Numbani are currently missing. You can help the Overwatch Wiki by adding them! Attack
Strategy details missing.
Defense
Strategy details missing.
|

|
TBA RATING | TBA FEATURE
Map strategy details for Paraíso are currently missing. You can help the Overwatch Wiki by adding them! Attack
Strategy details missing.
Defense
Strategy details missing.
|
Push
| Map | Strategy & Stage Tips |
|---|---|
 Overall Strategy |
TBA RATING | TBA FEATURE
Map strategy details for Overall Strategy are currently missing. You can help the Overwatch Wiki by adding them!
|

|
TBA RATING | TBA FEATURE
Map strategy details for Colosseo are currently missing. You can help the Overwatch Wiki by adding them! Pushing
Strategy details missing.
Defending
Strategy details missing.
|

|
TBA RATING | TBA FEATURE
Map strategy details for Esperança are currently missing. You can help the Overwatch Wiki by adding them! Pushing
Strategy details missing.
Defending
Strategy details missing.
|

|
TBA RATING | TBA FEATURE
Map strategy details for New Queen Street are currently missing. You can help the Overwatch Wiki by adding them! Pushing
Strategy details missing.
Defending
Strategy details missing.
|

|
TBA RATING | TBA FEATURE
Map strategy details for Runasapi are currently missing. You can help the Overwatch Wiki by adding them! Pushing
Strategy details missing.
Defending
Strategy details missing.
|
Flashpoint
| Map | Strategy & Stage Tips |
|---|---|
 Overall Strategy |
TBA RATING | TBA FEATURE
Map strategy details for Overall Strategy are currently missing. You can help the Overwatch Wiki by adding them!
|

|
TBA RATING | TBA FEATURE
Map strategy details for Aatlis are currently missing. You can help the Overwatch Wiki by adding them! Station
Strategy details missing.
Garden
Strategy details missing.
Town Center
Strategy details missing.
Bazaar
Strategy details missing.
Resort
Strategy details missing.
|

|
TBA RATING | TBA FEATURE
Map strategy details for New Junk City are currently missing. You can help the Overwatch Wiki by adding them! Arena
Strategy details missing.
The Ducts
Strategy details missing.
Refinery
Strategy details missing.
Junkyard
Strategy details missing.
Bomb Flats
Strategy details missing.
|

|
TBA RATING | TBA FEATURE
Map strategy details for Suravasa are currently missing. You can help the Overwatch Wiki by adding them! Market
Strategy details missing.
Garden
Strategy details missing.
Palace
Strategy details missing.
Temple
Strategy details missing.
Ruins
Strategy details missing.
|
Achievements
| Name | Icon | Description | Reward |
|---|---|---|---|

|
Block 7500 damage with Reinhardt's Barrier Field without dying in Quick or Competitive play. |  | |
|
|
Land Reinhardt's Fire Strike and Charge after an Earthshatter stun in Quick or Competitive play. |  |
Trivia
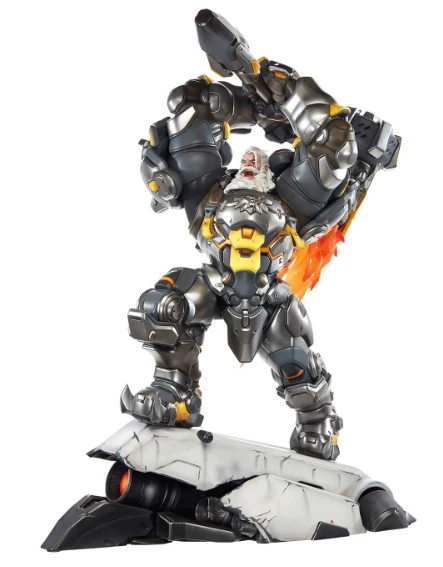
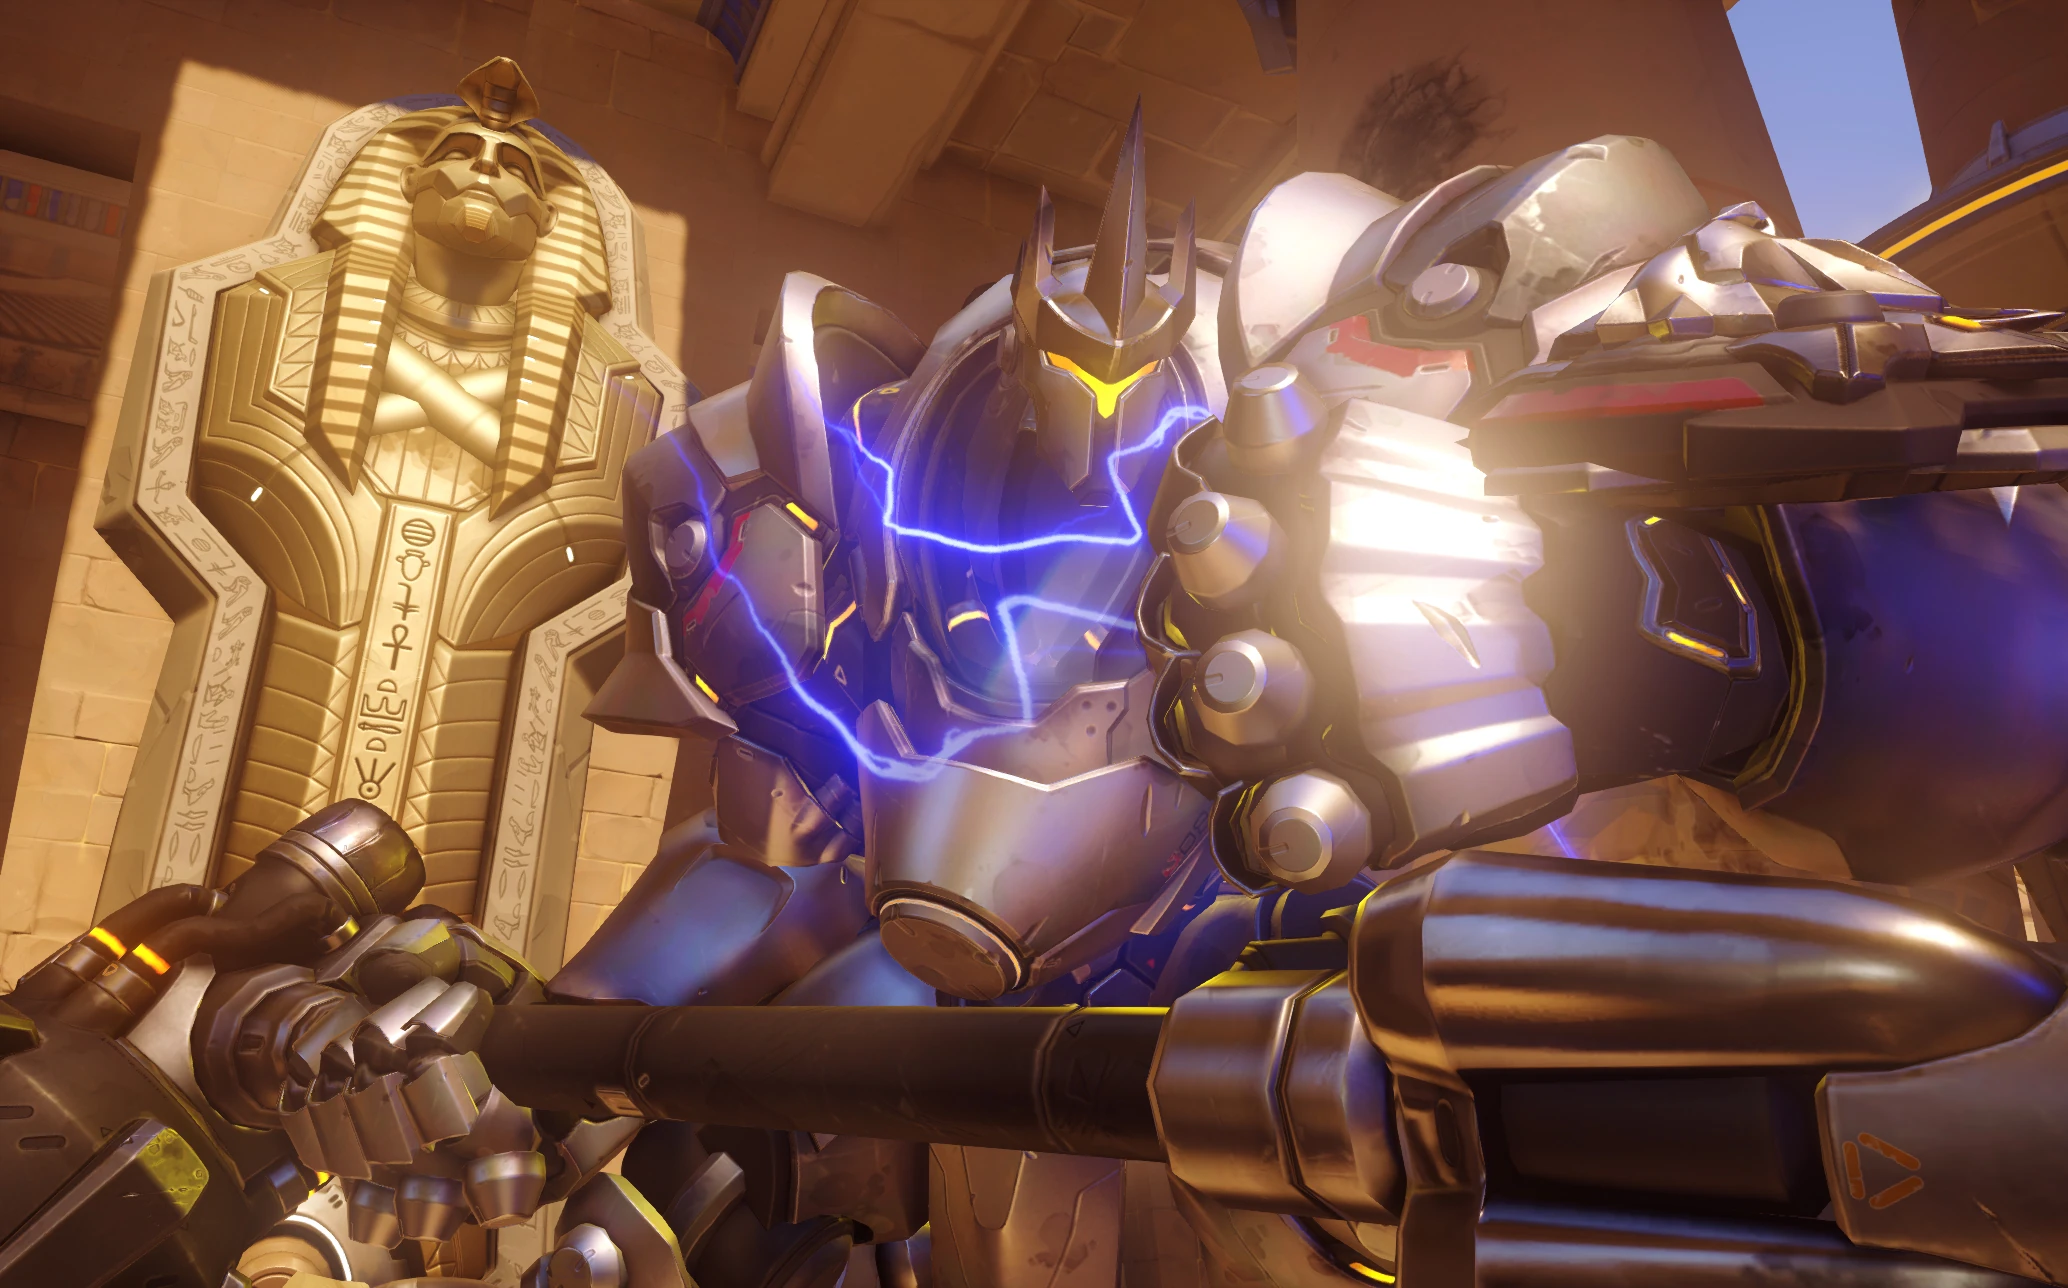
Reinhardt statue
- Chris Metzen has described Reinhardt as "kinda a Don Quixote".[4]
- Darin De Paul performs Reinhardt as an exaggerated version of his father's voice.[5]
- Reinhardt is one of only two heroes to not have a "Quick Melee" attack, as his basic attacks are melee attacks. The other being Brigitte.
- Reinhardt is currently the second oldest character in the hero line-up, with the oldest being Sigma, who is one year older.
- During the game's late alpha (and possibly before), Barrier Field was called Shield.[6]
- Reinhardt appears as a skin for Johanna in Heroes of the Storm.
- Reinhardt's Agent ID number is 3945_47.
- Reinhardt has a rare "Hello!" voice line where he yells "HELLOOOOOO!"
- Before the release of Overwatch 2, there was a glitch where if Reinhardt used Earthshatter inside of an airborne Graviton Surge, Reinhardt would fall down to the ground.
- Reinhardt is Brigitte's godfather.
Merchandise
- An inflatable Reinhardt hammer was available in the "goodie bag" of BlizzCon 2016.[7]>
- A Reinhardt-themed hoodie is available from JINX.[8]
- A Reinhardt statue will go on sale in November, 2022.[9]
Development
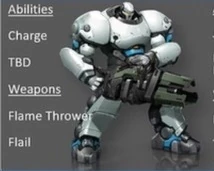
The Juggernaut class
Reinhardt's design stems from the playable Juggernaut class in the cancelled Project Titan. During the initial pitch for the project that would become Overwatch, the Juggernaut was envisioned as wielding a flamethrower and a flail, and used the Charge ability; a flamethrower was also considered for Roadhog's primary weapon early in the development for Overwatch.[10]
Early ideation for Reinhardt's design in Overwatch involved several different versions of humanoid robots, eventually progressing into a robotic hero from Numbani[11] named Wildebeest.[12] When Reinhardt was solidified, the fantasy was of him being a heroic knight; a protector for his team.[13]
When Reinhardt was prototyped, he was able to throw his hammer against the enemy. However, this was awkward to implement, as he had to pick up his hammer every time he threw it. This ability would later inspire the Junker Queen's Jagged Blade ability.[14]
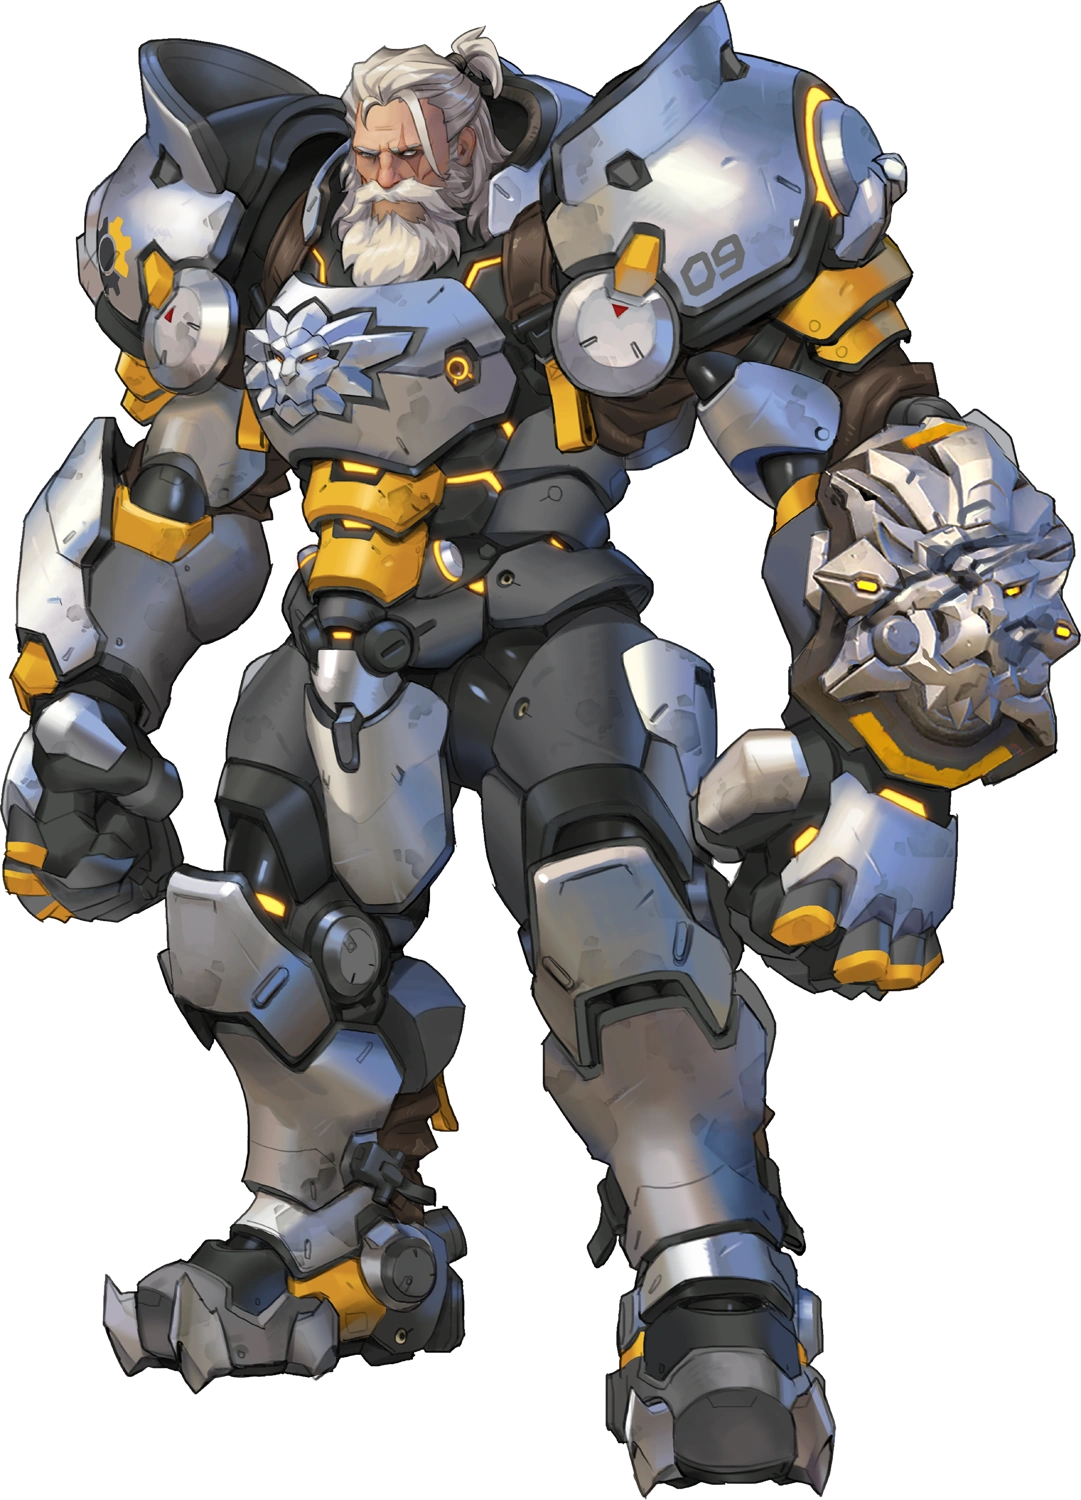
Arnold Tsang revealed that Reinhardt's new design for Overwatch 2 marks the ninth iteration of his armor, progressing from the eighth in the original game. This continues a legacy that dates back to Arnold's concept art for the Juggernaut class in Project Titan, which went through seven iterations before the game was cancelled. Reinhardt's new design incorporates some elements from those scrapped Juggernaut concepts, and features a more technologically advanced appearance to show that Winston helped upgrade it after Reinhardt rejoined the team.[15]
Removed Abilities

- Replaced in Season 1: Conquest with the Stalwart sub-role.
- Reduces the initial velocity from knock back effects by 30%. For example,
 Soundwave sends its victims back 17 m/s, but for Reinhardt, it is 11.9 m/s.
 - The distance in which Reinhardt is knocked back is NOT reduced by 30%; it is reduced by more. This is because the velocity has to accelerate back to normal; a higher initial velocity means more time at higher velocities and more time with a velocity in general.
- Does not affect
 Halt!,
  Chain Hook, Graviton Surge, or
  Gravitic Flux because they are not knock back effects.

- Replaced by
 Crusader's Fire in Season 16.
 - If the barrier has been destroyed, Fire Strike damage will still recharge barrier health, however it will not cause the barrier to become available faster.

- Removed in Season 18.
- Both bump and pin damage count.
- Overhealth starts to decay at a rate of 50/s when the duration ends.

- Removed in Reign of Talon Season 1: Conquest
- If the barrier has been destroyed, this will still recharge barrier health, however it will not cause the barrier to become available faster.
Media
Images
- Former Portrait
-
 Overwatch 1 Hero portrait
- Gameplay Screenshots

- Concept Art
-
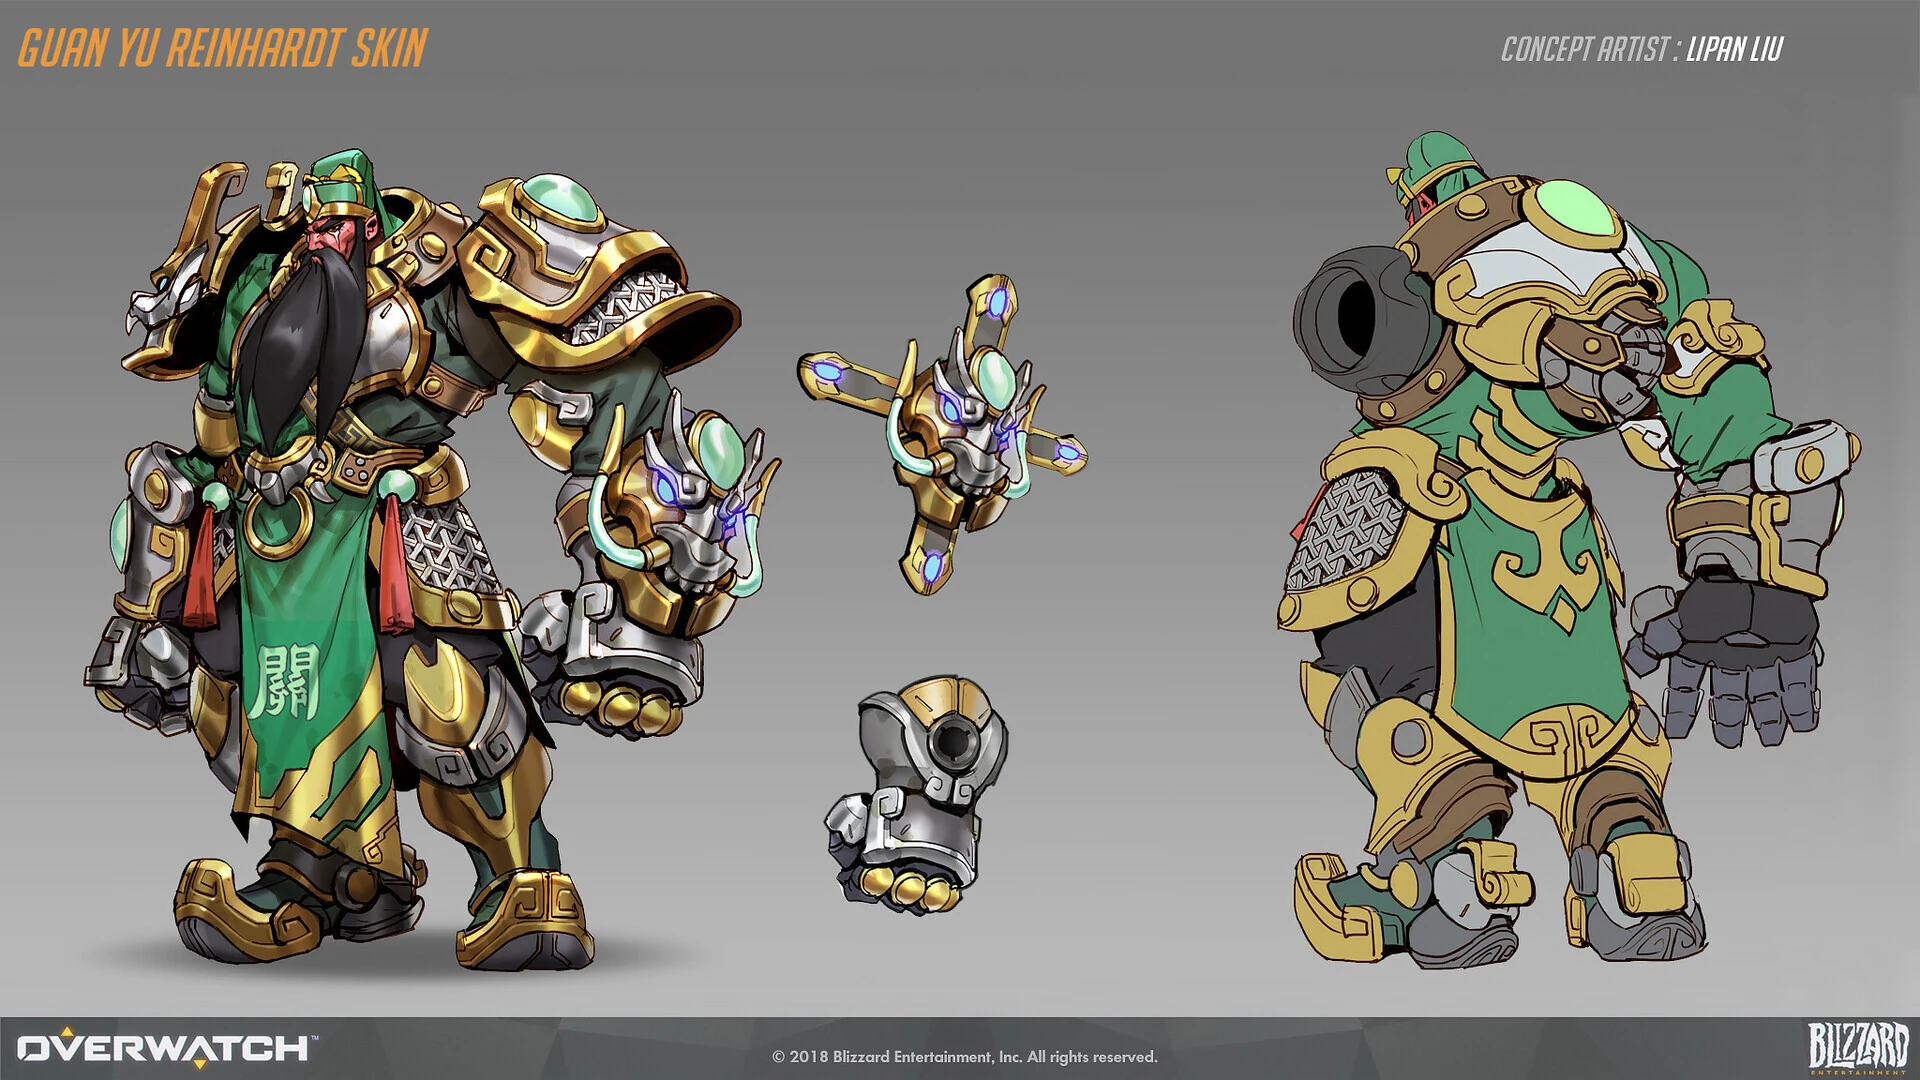
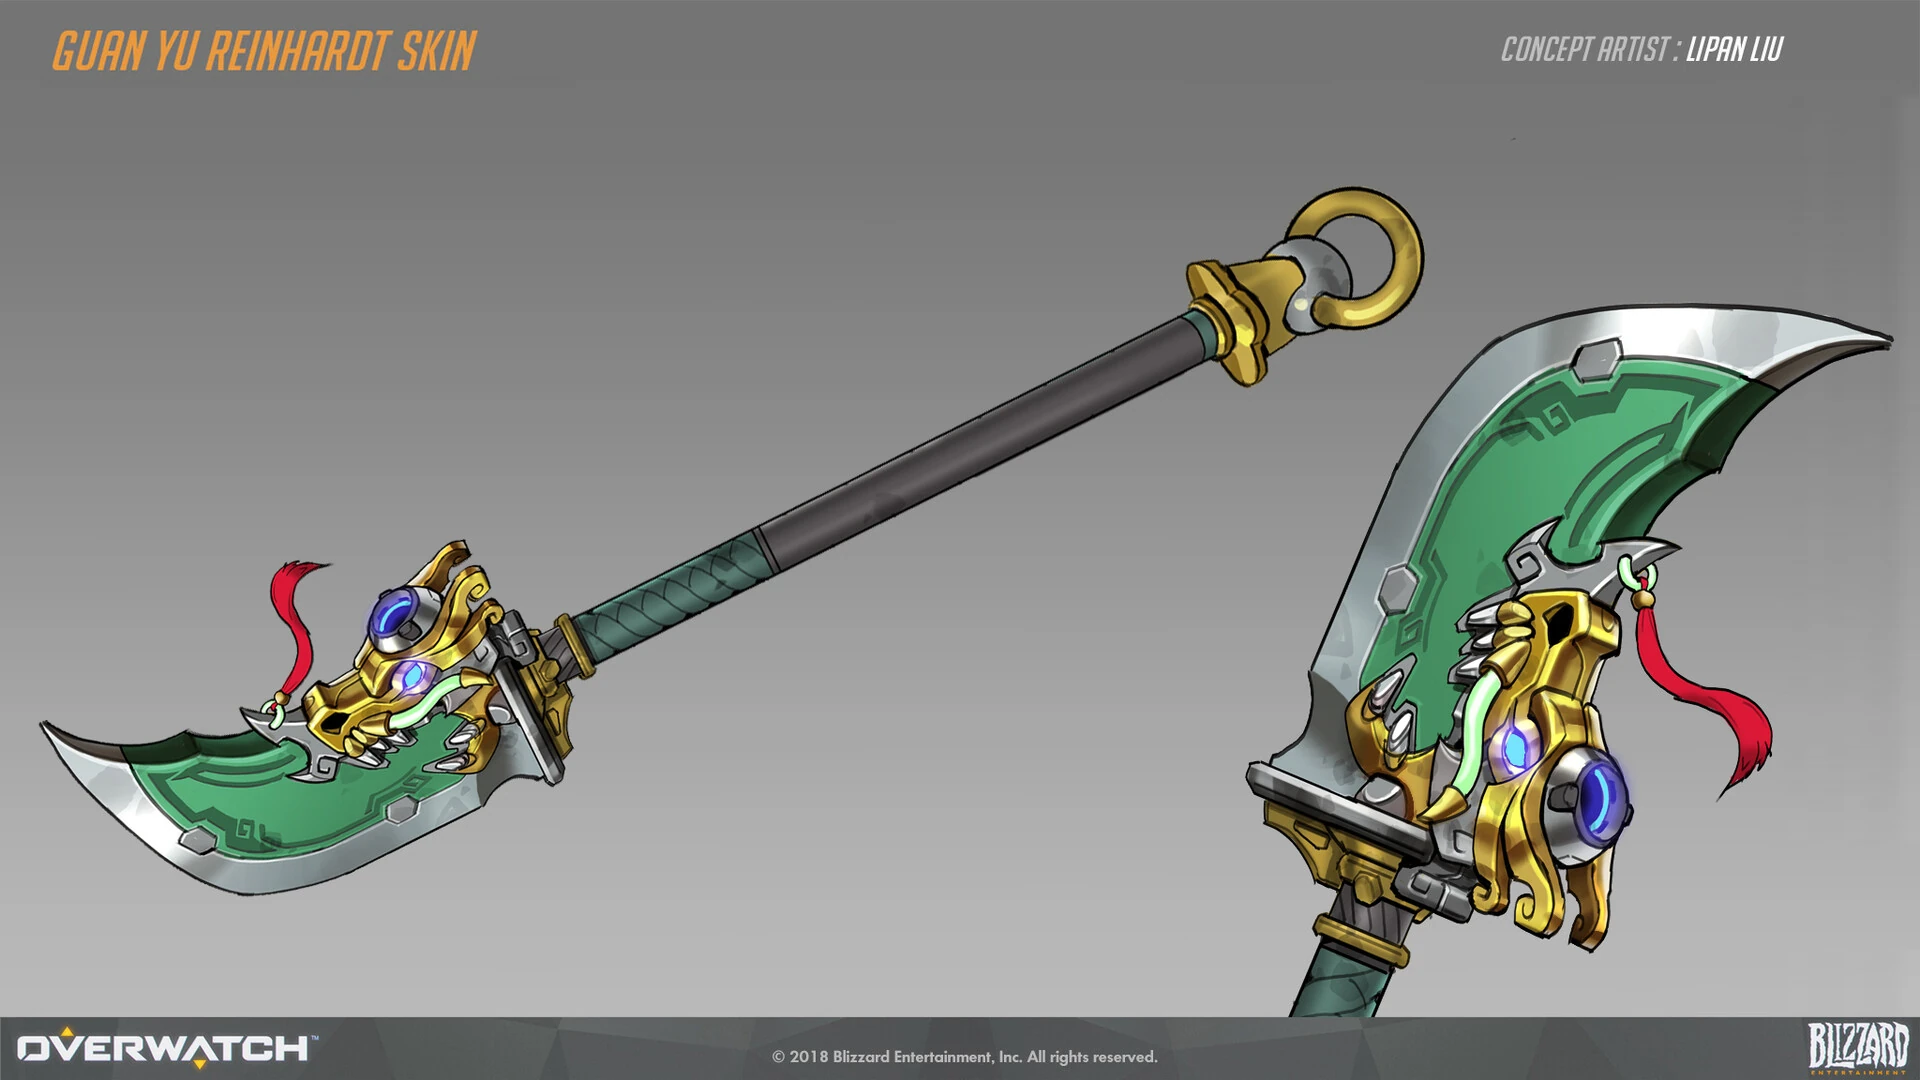
 Guan Yu Skin Concept Art by Lipan Liu
 -
 Guan Yu Skin Weapon Concept Art by Lipan Liu
 -
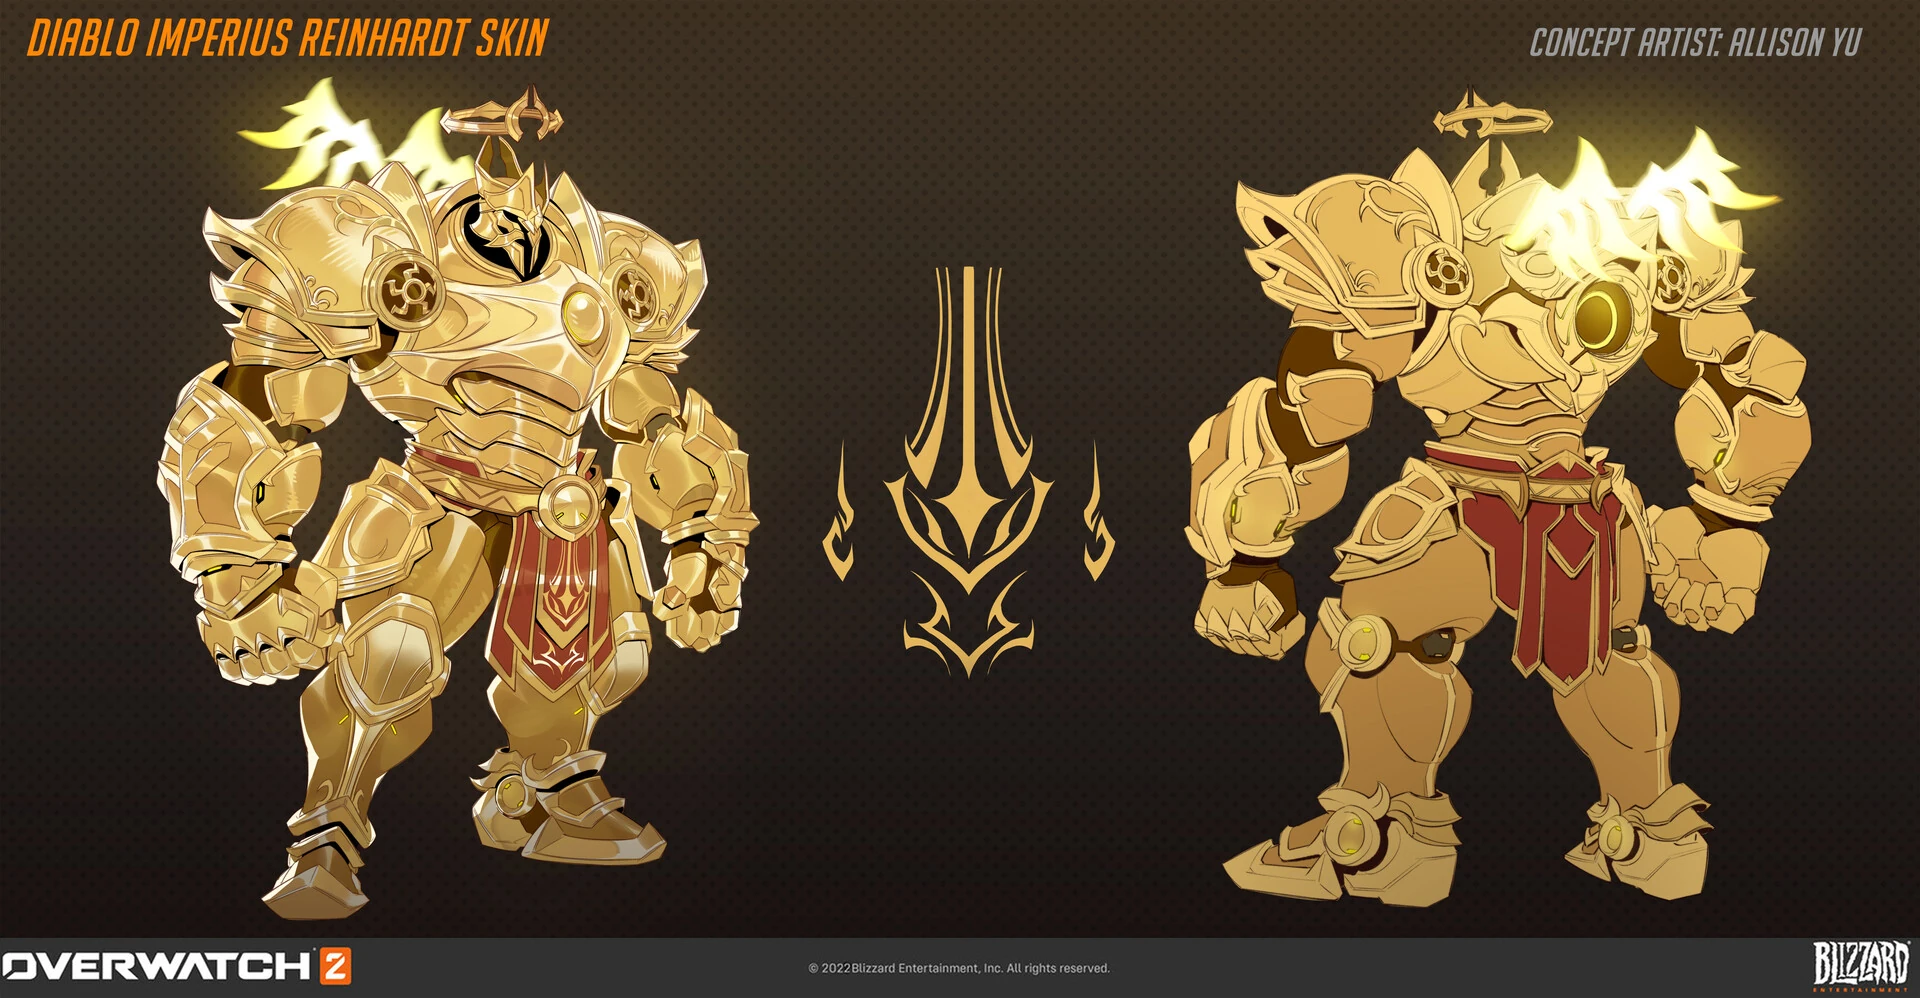
 Imperius Skin Concept Art by Allison Yu
 -
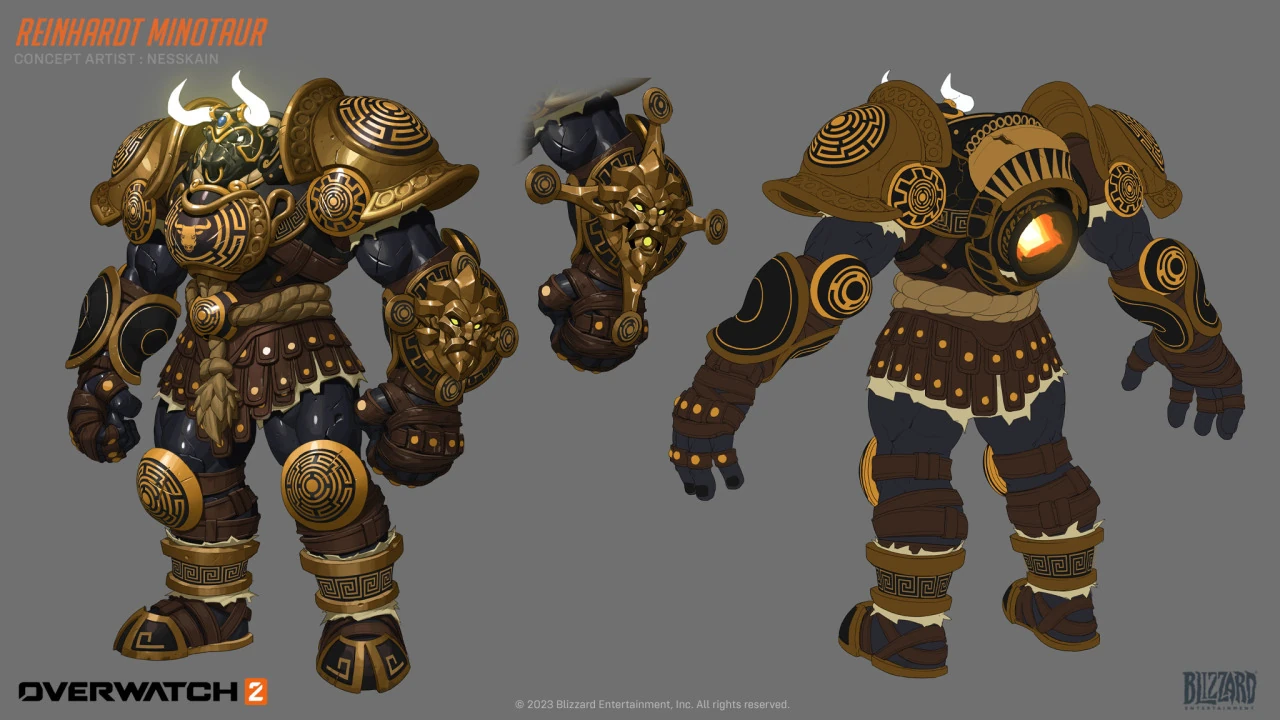
 Minotaur Skin Concept Art by Nesskain
 -
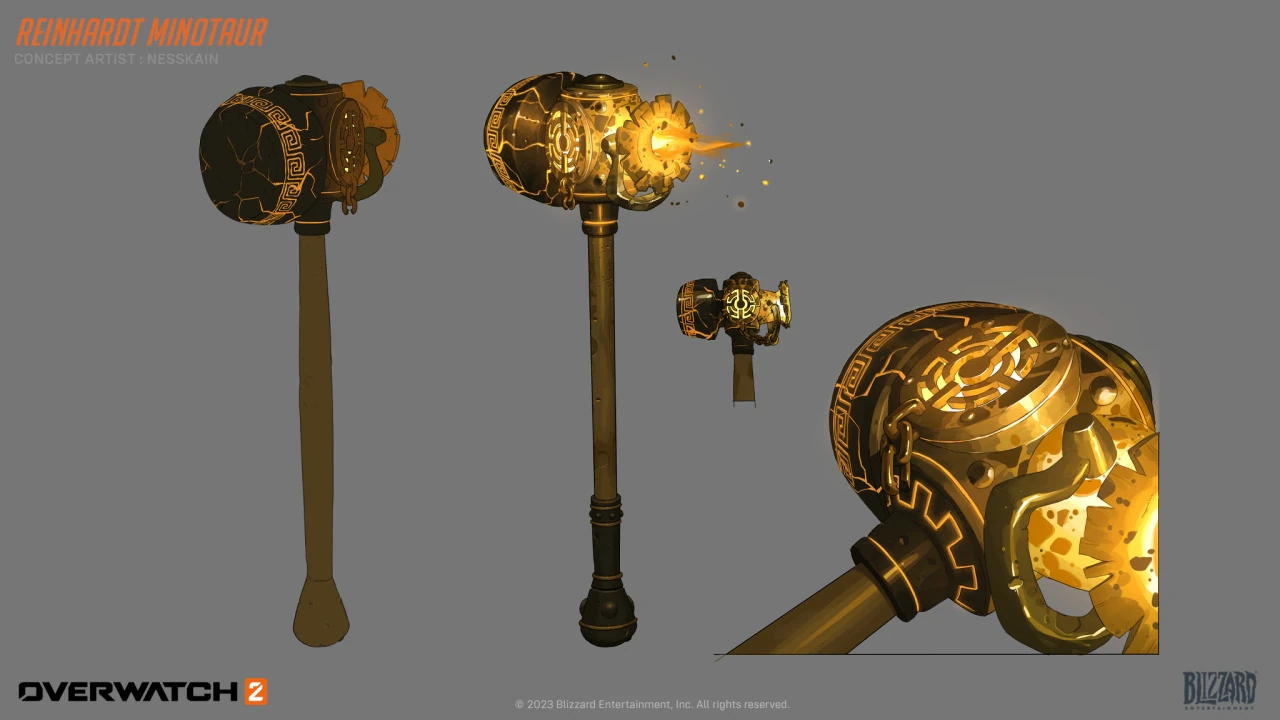
 Minotaur Skin Weapon Concept Art by Nesskain
 -
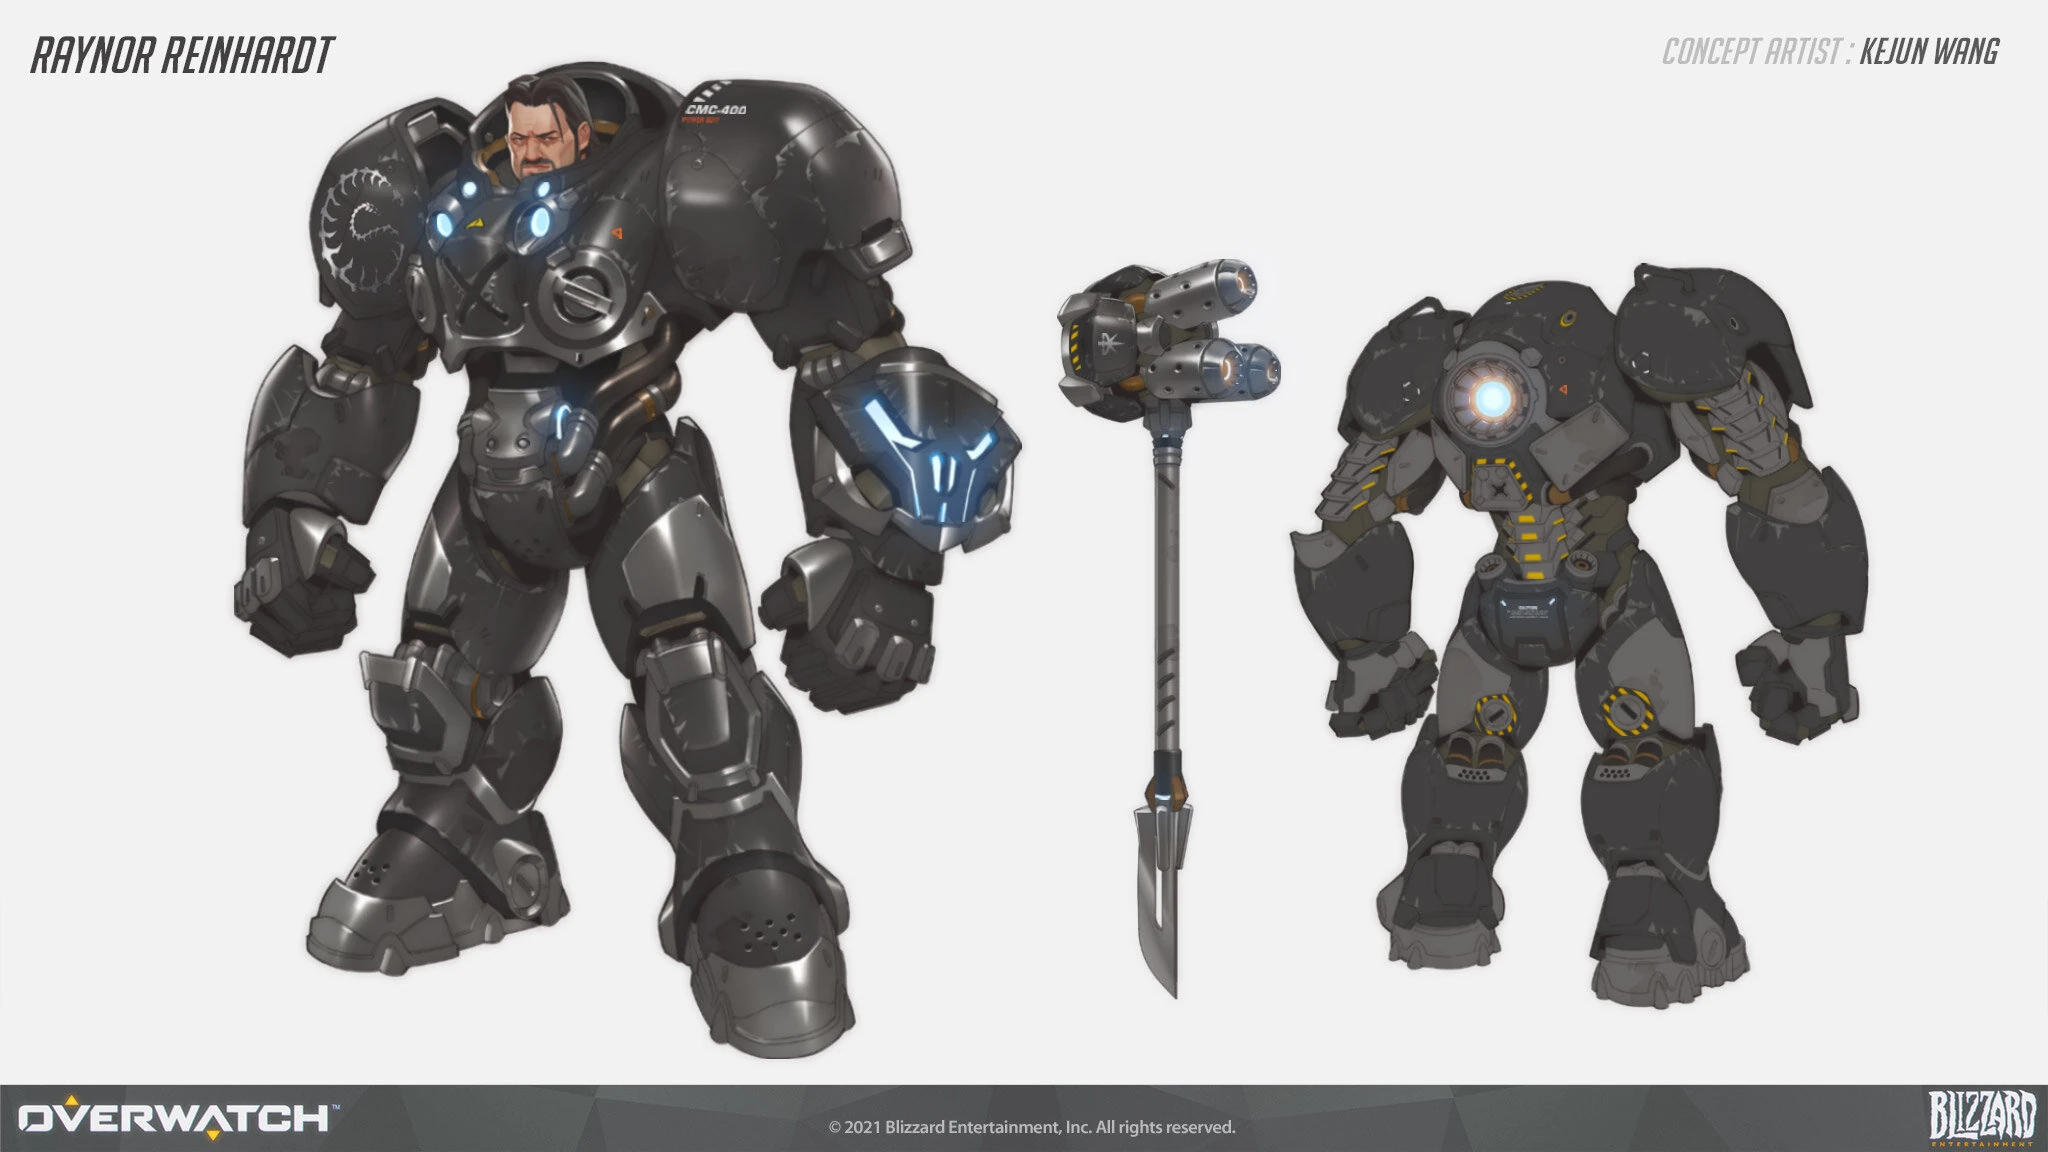
 Raynhardt Skin Concept Art by Kejun Wang
 -
 Overwatch 2 Skin Concept Art
Videos
- Official
- Curse
- Watchpoint O.A.K
Balance Change Log
- For more information, see Patch Notes.
![]() Shield Slam – Major Perk
Shield Slam – Major Perk
- Added a custom setting allowing Shield Slam to be bound to Quick Melee, enabling free look while the perk is equipped.
![]() Barrier Re-charge – Minor Perk
Barrier Re-charge – Minor Perk
- Removed.
![]() Crusader's Resolve – Minor Perk
Crusader's Resolve – Minor Perk
- While using Barrier Field, passive health regeneration triggers 75% sooner.
- Ultimate cost increased by 9%.
![]() Barrier Re-charge – Minor Perk
Barrier Re-charge – Minor Perk
- Barrier Field regeneration rate increased from 150 to 200.
![]() Crusader's Resolve - Minor Perk
Crusader's Resolve - Minor Perk
- Removed.
![]() Barrier Re-charge - Minor Perk
Barrier Re-charge - Minor Perk
- New Minor Perk.
- Distance travelled while using Charge regenerates your Barrier Field by 150 per second.
![]() Crushing Victory - Major Perk
Crushing Victory - Major Perk
- Removed.
![]() Ignited Fury - Major Perk
Ignited Fury - Major Perk
- New Major Perk.
- For each enemy you hit with Fire Strike, gain 2 seconds of 25% increased attack speed.
![]() Crushing Victory - Major Perk
Crushing Victory - Major Perk
- Overhealth gain increased from 50% to 100% of Charge damage.
![]() Fire Strike - Ability 2
Fire Strike - Ability 2
- Projectile speed increased from 25 to 30 meters per second.
- Recovery time reduced from 0.63 to 0.45 seconds.
- Removed.
- New Minor Perk
- Refund a charge of Fire Strike when you stun an enemy, overfilling up to 3.
- Shield Slam distance increased by 50%.
- Passive Regeneration trigger rate increased from 50% to 75%.
- Cooldown reduced from 8 to 6 seconds.
- Hero Perks
- While using Barrier Field, your passive health regeneration triggers 50% sooner.
- Barrier Field is healed for 100% of Fire Strike's damage dealt.
- While Barrier Field is active, use Secondary Fire to damage and knockback enemies.
- Charge damage grants temporary overhealth for 50% of the damage dealt.
- Barrier Field health reduced from 1600 to 1500.
- Maximum health increased from 1400 to 1600.
- Barrier regeneration rate increased from 140 to 160 health per second.
- Wall impact damage increased from 275 to 300.
- General
- Knockdown time when two charging abilities collide reduced from 2 to 1.7 seconds.
- Knockdown duration increased from 2.75 to 3 seconds.
- Shockwave range increased from 20 to 25 meters.
- General updates
Most damage-dealing projectile sizes have been increased by a new global modifier added to their base size.
- +0.05 meters for hitscan projectiles with a high rate of fire or spread (e.g., Tracer's Pulse Pistols or Reaper's Hellfire Shotguns).
- +0.08 meters for hitscan projectiles that are more precise (e.g., Cassidy's Peacekeeper or Soldier:76's Heavy Pulse Rifle).
- +0.05 meters for travel time projectiles that are shotguns or have a very high rate of fire (e.g., Roadhog's Scrap Gun or Ramattra's Void Accelerator).
- +0.10 meters for travel time projectile with a speed greater than 50 meters per second (e.g., Zenyatta's Destruction Orb).
- +0.15 meters for travel time projectile with a speed less than or equal to 50 meters per second (e.g., Pharah's Rocket Launcher).
- Very large projectiles with a base size greater than 0.5 meters have been excluded from these increases (e.g., Orisa's Energy Javelin or Reinhardt's Fire Strike).
Hero combined HP (base health/armor/shields) increased by 15-25%.
- 150-175 HP heroes increased by 25 HP.
- 200-300 HP heroes increased by 50 HP.
- 300+ HP (Tanks) increased by 75-100 HP.
- Each hero's precise health increases are listed in their patch notes below.
Ultimate Charge
- All Ultimate ability costs increased by 10%.
Regenerative Passive for All Heroes
- All heroes now regenerate 20 health per second after 5 seconds of not taking damage.
- Hero updates
- Health increased from 200 to 250.
- Armor increased from 250 to 275.
- Damage increased from 85 to 100.
- Wall impact damage increased from 225 to 275.
- Close range damage increased from 170 to 200. (undocumented)
- Maximum health increased from 1200 to 1400.
- Armor health reduced from 300 to 250
- Base health increased from 175 to 200
For now, we're fine with Charge pin staying lethal to many characters due to the difficulty and risk involved. The Fire Strike damage increase does mean it could once again one-shot when combined with Baptiste's Amplification Matrix, but that requires an ultimate combo with another hero. We'll see how it plays out and adjust if necessary.
The Rocket Hammer knockback reduction sounds like a loss of power though it is actually aiming to reduce the number of times Reinhardt accidentally knocks enemies out of his melee range.- Base health in Role Queue modes remains the same at 325
- Base health in non-Role Queue modes reduced from 325 to 175
- Knockback impulse reduced from 10 to 6
- Cooldown reduced from 8 to 7 seconds
- Damage increased from 90 to 100
- Direct hit damage reduced from 250 to 170
- Knockdown duration increased from 2.5 to 2.75 seconds
- Ultimate cost increased 7%
(beta)
- Armor reduced from 350 to 300
- Health increased from 300 to 325
(beta)
- Base armor increased from 200 to 300
- Base health increased from 300 to 350
- Removed and replaced by Tank passive
- Health reduced from 1600 to 1200
- Regeneration rate reduced from 200 to 144 health per second
- Steering turn rate increased by 50%
- Can now be manually cancelled
- Charge Pin wall impact damage reduced from 300 to 225
- Cooldown from 10 to 8 seconds
- Now has 2 ability charges
- Damage reduced from 100 to 90
- Removed and replaced with Sub-Role: Stalwart. (undocumented)
- Health reduced from 2000 to 1500. (undocumented)
- Steering increased by 50%. (undocumented)
- Now has 2 charges. (undocumented)
- Cooldown increased from 6 to 8 seconds. (undocumented)
- Distance increased from 20 to 25 meters.
- Base health increased from 250 to 325.
- Base armor reduced from 300 to 225.
- Now has the Steadfast passive again, reducing knockback by 30%.
- Health increased from 1500 to 2000.
- Cooldown increased from 7 to 10 seconds.
- Steering reduced 50%.
- Ability charges reduced from 2 to 1.
- Distance reduced from 25 to 20 meters.
![]() To Me, My Friends - Power
To Me, My Friends - Power
- Barrier Healing per 1s decreased to 3% of Max Life (Down from 5%).
![]() Magma Strike - Power
Magma Strike - Power
- Lava duration increased from 1s to 2s.
![]() Blazing Blitz - Power
Blazing Blitz - Power
- Added 25% Starting Ultimate Charge.
![]() Chimera Maw - Epic Ability Hero Item
Chimera Maw - Epic Ability Hero Item
- Removed "For each additional enemy [Fire Strike] damages beyond the initial target, reduce [Fire Strike] cooldown by 5%."
- Added "Hitting an Airborne target above 3m burns them for 20% of Fire Strike damage over 3s."
- Removed
![]() Impact Burst - Power
Impact Burst - Power
- Now only damages other enemies around primary target.
- Explosion damage increased to 30% of Fire Strike damage (Up from 15%).
![]() Magma Strike - Power
Magma Strike - Power
- Trail of lava now triggers on every second Fire Strike instead of every second Fire Strike cast within 2s.
![]() Chimera's Maw - Epic Hero Ability Item
Chimera's Maw - Epic Hero Ability Item
- Rarity changed to Epic (from Rare).
- Added 25% Fire Strike Projectile Speed.
- Added "For each additional enemy Fire Strike damages beyond the initial target, reduce Fire Strike cooldown by 5%".
![]() Rocket Strike - Epic Hero Ability Item
Rocket Strike - Epic Hero Ability Item
- Removed.
![]() Wilhelmwagen - Epic Hero Survival Item
Wilhelmwagen - Epic Hero Survival Item
- Changed to Epic Survival Item (from Power).
- Added 50 Armor.
- 11000 Cost.
- Removed "you heal for 5% of the damage it mitigates".
![]() Infusion Generator - Power
Infusion Generator - Power
- Changed to Power (from Epic Survival Item).
- Barrier Field Health increase now only increases from Bonus Max Life.
- Barrier Field Health scaling increased to 250% (up from 100%).
![]() To Me, My Friends - Power
To Me, My Friends - Power
- Increased healing based on Max Life to 5% (up from 4%).
![]() Barrier Reconstruction - Power
Barrier Reconstruction - Power
- Increased Barrier Health Restoration from Damage to 15% (up from 10%).
![]() Feeling the Burn - Power
Feeling the Burn - Power
- No longer applies to Smashing and Dampener Grip.
![]() Dampener Grip – Epic Weapon Hero Item
Dampener Grip – Epic Weapon Hero Item
- Increased Ability Power to 15% (up from 10%).
![]() Smashing - Power
Smashing - Power
- Reduced Move Speed per stack to 1% (down from 2%).
- Reduced Life Steal per stack to 3% (down from 5%).
- Increased maximum stacks to 10 (up from 5).
- Reduced duration to 2s (down from 3s).
![]() To Me, My Friends! - Power
To Me, My Friends! - Power
- Increased healing based on Max Life to 4% (up from 3%).
![]() Wilhelmwagen - Power
Wilhelmwagen - Power
- Decreased healing from damage mitigated to 5% (down from 15%).
![]() Rocket Strike - Epic Hero Ability Item
Rocket Strike - Epic Hero Ability Item
- Decreased Fire Strike Projectile Speed to 25% (down from 50%).
- Decreased Ability Power to 10% (down from 20%).
![]() Chimera's Maw - Rare Hero Ability Item
Chimera's Maw - Rare Hero Ability Item
- Decreased Ability Power to 5% (down from 10%).
![]() Impact Burst – Power
Impact Burst – Power
- Reduced bonus damage to 15% (down from 20%).
![]() Smashing – Power
Smashing – Power
- Reduced Move Speed per stack to 2% (down from 3%).
- Reduced the amount of Stadium Cash gained from damage and healing by 13.64%
- Introducing Stadium
- Tank Heroes: D.Va, Junker Queen, Orisa, Reinhardt, and Zarya.
- Damage Heroes: Ashe, Cassidy, Genji, Mei, Reaper, and Soldier: 76.
- Support Heroes: Ana, Juno, Kiriko, Lucio, Mercy, and Moira.
- Now deals an additional 200 damage within 1.75m of the impact area
- Armor reduced from 250 to 200 (Health/armor total reduced from 550 to 500)
Reinhardt has been overperforming since his last round of changes. To help increase tank diversity we are reverting his armor to its previous value while keeping the Rocket Hammer damage increase for now as it helps to balance out the reduced crowd control duration of Earthshatter.
- Base Armor increased from 200 to 250
- Damage increased from 75 to 85
Developer Comment: The intent of these changes is to slightly bolster Reinhardt's frontline presence once he closes the distance with an enemy. The increased Rocket Hammer damage will reduce the number of swings necessary to eliminate some heroes so we'll be keeping a close eye on the overall impact of this change.
- Added a voice line stating, "For the Crusaders!", that allies will hear when Reinhardt uses Earthshatter
- Reduced the height of Reinhardt's head hit volume, making it harder to hit him in the head from behind
- Knockdown duration lowered from 3 to 2.5 seconds
- Passive knockback resistance reduced from 50% to 30%
- Health reduced from 2000 to 1600
- Movement speed penalty reduced from 50% to 30%
- Knockback resistance increased from 30% to 50%
Developer Comment: The above changes to armor, Orisa, Sigma, and Reinhardt are aimed at decreasing the overall amount time players spend damaging barriers while improving the individual heroes in other areas. This is a significant change to the pace of the game and we’ll be monitoring these heroes closely to ensure they retain impactful gameplay in the tank role.
- Reduces knock back effects by 30%
Developer Comment: As a frontline, melee-range tank Reinhardt was more adversely affected by knock back abilities than most heroes. To reduce some of this frustration and enable Reinhardt to more easily fulfill his role, he is now more resistant to being knocked back.
- Now consistently hits enemies near walls
- No longer hits enemies that enter the damage cone after the “wave” has passed that area
- No longer damages enemies behind barriers blocking it, even if the barrier is later dropped or destroyed
- Always travels up inclines and around the payload
Developer Comments: We’ve given Earthshatter a complete overhaul to combat inconsistencies with its performance. These changes will make Earthshatter’s behavior more predictable and effective.
- Decorative insignia no longer protrudes from the shield’s surface
Developer Comments: By smoothing out Reinhardt’s Barrier Field, he now will be able to consistently block enemy abilities and projectiles that could sometimes unintentionally sneak through (e.g. Junkrat’s grenades).
- A new “Movement Relative to Camera During Barrier Free Look” option can be found under Settings > Controls. Simply select “Reinhardt” from the dropdown menu. This allows players to change the way Reinhardt moves when Barrier Shield is active and players are controlling the third-person camera movement
- Holding primary fire while your shield is active now allows you to rotate the camera
Developer Comment: This change gives Reinhardt more situational awareness while using his shield, allowing him to keep an eye on the battlefield while still protecting his team.
- Swing speed increased by 10%
Developer Comment: In the last update, Reinhardt’s Rocket Hammer had an issue that allowed players with higher latency to swing faster. We fixed this bug, which suddenly made the swing speed feel too slow, so we’re compensating by increasing his standard swing speed. During this process, we also found and fixed a few bugs with Rocket Hammer’s hit registration. Overall, the hammer should feel much better.
- Effective height has been lowered from 3 meters to 2 meters
- The height threshold of objects that Earthshatter can "climb" has been lowered from 3 meters to 2 meters, making Earthshatter less likely to climb tall objects as it moves along the ground.
Developer Comments: Earthshatter tended to climb unexpectedly high, frequently hitting targets that were significantly above the ground. These changes help the ability stay more grounded.
References
- ↑ 2018-02-24, Story Update: A Letter From Torbjörn to his Wife PlayOverwatch. Accessed on 2018-02-24.
- ↑ Undivided-Episode 15
- ↑ 2015-??-??, "Darin's Resume". Darin De Paul Voice Over. Accessed on 2016-05-18
- ↑ 2014-11-24, BlizzCon 2014 – Overwatch Unveiled Panel Transcript. Blizzplanet, accessed on 2015-03-08
- ↑ 2016-10-30, The voice of Reinhardt: Interview with Darin De Paul Break The Game, accessed on 2016-11-17
- ↑ "Overwatch Pre-Beta Livestream Recap", Overpwn, 16 October 2015. Retrieved on 17 October 2015.
- ↑ 2016-07-21, BLIZZCON 2016 GOODY BAG. Blizzpro, accessed on 2016-07-22
- ↑ 2017-11-22, Overwatch Hoodies. Blizzplanet, accessed on 2017-11-23
- ↑ Overwatch 2 Reinhardt 25in Premium Statue, Blizzard Store. Accessed on 2022-09-07
- ↑ Blizzcon 2017, Overwatch: Archives
- ↑ 2017-5-21, 6 Secrets about Overwatch's Tank Heroes by Jeff Kaplan. IGN, Youtube. Accessed 2017-10-28
- ↑ The Art of Overwatch
- ↑ 2022-11, Overwatch 2 Art Director Dion Rogers Talks About The Design Principles Behind The Dual Modes For Ramattra In Interview. Gamerbraves, accessed on 2022-11-15
- ↑ 2022-06-21, A DESIGN FIT FOR ROYALTY: AN INSIDE LOOK AT HER MAJESTY, THE JUNKER QUEEN. Blizzard Entertainment, accessed on 2022-07-03
- ↑ Blizzcon 2019 Overwatch: Evolving the Art Panel
External links
| Heroes in Overwatch
| ||||||||
|---|---|---|---|---|---|---|---|---|
Tank |
 Bruiser |
|||||||
 Initiator |
||||||||
Stalwart |
 Reinhardt |
|||||||
Damage |
 Flanker |
|||||||
 Recon |
||||||||
 Sharpshooter |
||||||||
 Specialist |
||||||||
Support |
 Medic |
|||||||
 Survivor |
||||||||
 Tactician |
||||||||


