Escort is a game mode in Overwatch 2.
Gameplay
In Escort, there is an attacking and a defending team. The attacking team aims to escort a payload across the map to the objective, while the defending team aims to stop them. The teams' roles are determined randomly when the map is chosen. In Unranked matches, only one round is played, meaning that teams will only get to play the attack or defense round. In Competitive Play, a minimum of two rounds is played, with the teams alternating between attack and defense.
At the start of each round, the defending team is allocated 45 seconds to set up defenses before the attacking team is allowed out of their spawn area. When the set up timer runs out, attackers may leave their spawn area and a 4 minute timer (5 minutes in Unranked) begins counting down. Each map has three sections with a checkpoint at the end of each section. Upon arriving at the first and second checkpoints, the attackers are awarded with 2:30 bonus time and 1:30 bonus time respectively. (3 minutes and 2 minutes in Unranked). The payload also pauses here briefly and teams' Spawn Rooms are moved closer to the end of the map.
If an attacker is within range of the payload when the timer expires, or shortly beforehand, Overtime will be activated. If the attacking team manages to get to a checkpoint during Overtime, the bonus time is added and Overtime ends, with the game proceeding as normal.
In Unranked game modes, the attacking team wins if they manage to escort the payload all the way to the end of the map, and the defending team wins if they do not. In Competitive Play, the winning team is the one that pushed the payload the farthest during their attack round. If both teams managed to push the payload to the end, extra rounds will be played until the victor is determined. During extra rounds, capturing a checkpoint will not grant bonus time.
List of maps
There are 8 Escort maps available:


Payload
If an attacker is within the range of the payload, it will cause the payload to move along the designated path. Each map's payload has a different base move speed and path length. The payload moves faster with more players near it, gaining 16.5% increased speed when two attackers are near it and 33% move speed when three or more attackers are moving it. Attackers within range of the payload are healed at a rate of 5 health per second.
Defending players can stay within range of the payload to contest it, stopping it from moving forward. If no attacking players are near it for ten seconds, the payload will start to roll back towards the last checkpoint at a speed of 0.3 m/s.
Some maps have parts that apply forced movement to the payload, usually when it travels through a gate that closes behind it. During this time, the payload moves as if there were three attacking players near it and cannot be stopped by the defending team.
Map details
| Map | Payload speed | Distance | Pause time | Capture time | |||||||||
|---|---|---|---|---|---|---|---|---|---|---|---|---|---|
| A | B | C | Total | Pause 1 | Pause 2 | Total | A | B | C | Total | With pauses | ||
| Circuit Royal | 1.5 m/s | 96.74 m | 89.79 m | 93.91 m | 280.44 m | 10 s | 10 s | 20 s | 64.6 s | 59.9 s | 62.8 s | 187.3 s | 207.3 s |
| Dorado | 1.5 m/s | 84.94 m | 96.25 m | 85.79 m | 266.98 m | 15 s | 5 s | 20 s | 57.8 s | 64.3 s | 60.3 s | 182.4 s | 202.4 s |
| Havana | 1.35 m/s | 89.36 m | 92.86 m | 103.37 m | 285.59 m | 12 s | 12 s | 24 s | 66.3 s | 68.8 s | 76.7 s | 211.8 s | 235.8 s |
| Junkertown | 1.5 m/s | 90.94 m | 86.58 m | 101.87 m | 279.39 m | 12 s | 12 s | 24 s | 60.8 s | 57.8 s | 68.0 s | 186.6 s | 210.6 s |
| Rialto | 1.65 m/s | 97.11 m | 104.78 m | 88.16 m | 290.05 m | 5 s | 5 s | 10 s | 59.0 s | 63.6 s | 53.5 s | 176.1 s | 186.1 s |
| Route 66 | 1.35 m/s | 85.60 m | 91.40 m | 74.57 m | 251.57 m | 15 s | 15 s | 30 s | 63.5 s | 67.8 s | 55.4 s | 186.7 s | 216.7 s |
| Shambali Monastery | 1.65 m/s | 104.16 m | 104.62 m | 87.16 m | 295.94 m | 10 s | 10 s | 20 s | 63.2 s | 63.5 s | 53.9 s | 180.6 s | 200.6 s |
| Watchpoint: Gibraltar | 1.65 m/s | 86.02 m | 82.30 m | 88.72 m | 257.04 m | 7.5 s | 7.5 s | 15 s | 52.3 s | 50.0 s | 53.9 s | 156.2 s | 171.2 s |
| Map | Payload speed | Distance | Pause time | Capture time | |||||||||
|---|---|---|---|---|---|---|---|---|---|---|---|---|---|
| A | B | C | Total | Pause 1 | Pause 2 | Total | A | B | C | Total | With pauses | ||
| Circuit Royal | 1.75 m/s | 96.74 m | 89.79 m | 93.91 m | 280.44 m | 10 s | 10 s | 20 s | 55.5 s | 51.4 s | 53.9 s | 160.8 s | 180.8 s |
| Dorado | 1.75 m/s | 84.94 m | 96.25 m | 85.79 m | 266.98 m | 15 s | 5 s | 20 s | 49.6 s | 55.2 s | 51.8 s | 156.6 s | 176.6 s |
| Havana | 1.57 m/s | 89.36 m | 92.86 m | 103.37 m | 285.59 m | 12 s | 12 s | 24 s | 56.9 s | 59.1 s | 65.8 s | 181.8 s | 205.8 s |
| Junkertown | 1.75 m/s | 90.94 m | 86.58 m | 101.87 m | 279.39 m | 12 s | 12 s | 24 s | 52.2 s | 49.6 s | 58.4 s | 160.2 s | 184.2 s |
| Rialto | 1.92 m/s | 97.11 m | 104.78 m | 88.16 m | 290.05 m | 5 s | 5 s | 10 s | 50.6 s | 54.6 s | 45.9 s | 151.2 s | 161.2 s |
| Route 66 | 1.57 m/s | 85.60 m | 91.40 m | 74.57 m | 251.57 m | 15 s | 15 s | 30 s | 54.5 s | 58.2 s | 47.6 s | 160.3 s | 190.3 s |
| Shambali Monastery | 1.92 m/s | 104.16 m | 104.62 m | 87.16 m | 295.94 m | 10 s | 10 s | 20 s | 54.2 s | 54.5 s | 46.3 s | 155 s | 175 s |
| Watchpoint: Gibraltar | 1.92 m/s | 86.02 m | 82.30 m | 88.72 m | 257.04 m | 7.5 s | 7.5 s | 15 s | 44.9 s | 42.9 s | 46.3 s | 134.1 s | 149.1 s |
| Map | Payload speed | Distance | Pause time | Capture time | |||||||||
|---|---|---|---|---|---|---|---|---|---|---|---|---|---|
| A | B | C | Total | Pause 1 | Pause 2 | Total | A | B | C | Total | With pauses | ||
| Circuit Royal | 2 m/s | 96.74 m | 89.79 m | 93.91 m | 280.44 m | 10 s | 10 s | 20 s | 48.6 s | 45 s | 47.2 s | 140.8 s | 160.8 s |
| Dorado | 2 m/s | 84.94 m | 96.25 m | 85.79 m | 266.98 m | 15 s | 5 s | 20 s | 43.5 s | 48.3 s | 45.3 s | 137.1 s | 157.1 s |
| Havana | 1.8 m/s | 89.36 m | 92.86 m | 103.37 m | 285.59 m | 12 s | 12 s | 24 s | 49.8 s | 51.7 s | 57.7 s | 159.2 s | 183.2 s |
| Junkertown | 2 m/s | 90.94 m | 86.58 m | 101.87 m | 279.39 m | 12 s | 12 s | 24 s | 45.7 s | 43.5 s | 51.1 s | 140.3 s | 164.3 s |
| Rialto | 2.19 m/s | 97.11 m | 104.78 m | 88.16 m | 290.05 m | 5 s | 5 s | 10 s | 44.4 s | 47.8 s | 40.2 s | 132.4 s | 142.4 s |
| Route 66 | 1.8 m/s | 85.60 m | 91.40 m | 74.57 m | 251.57 m | 15 s | 15 s | 30 s | 47.7 s | 51 s | 41.7 s | 140.4 s | 170.4 s |
| Shambali Monastery | 2.19 m/s | 104.16 m | 104.62 m | 87.16 m | 295.94 m | 10 s | 10 s | 20 s | 47.5 s | 47.7 s | 40.5 s | 135.8 s | 155.8 s |
| Watchpoint: Gibraltar | 2.19 m/s | 86.02 m | 82.30 m | 88.72 m | 257.04 m | 7.5 s | 7.5 s | 15 s | 39.3 s | 37.6 s | 40.5 s | 117.4 s | 132.4 s |
Gallery
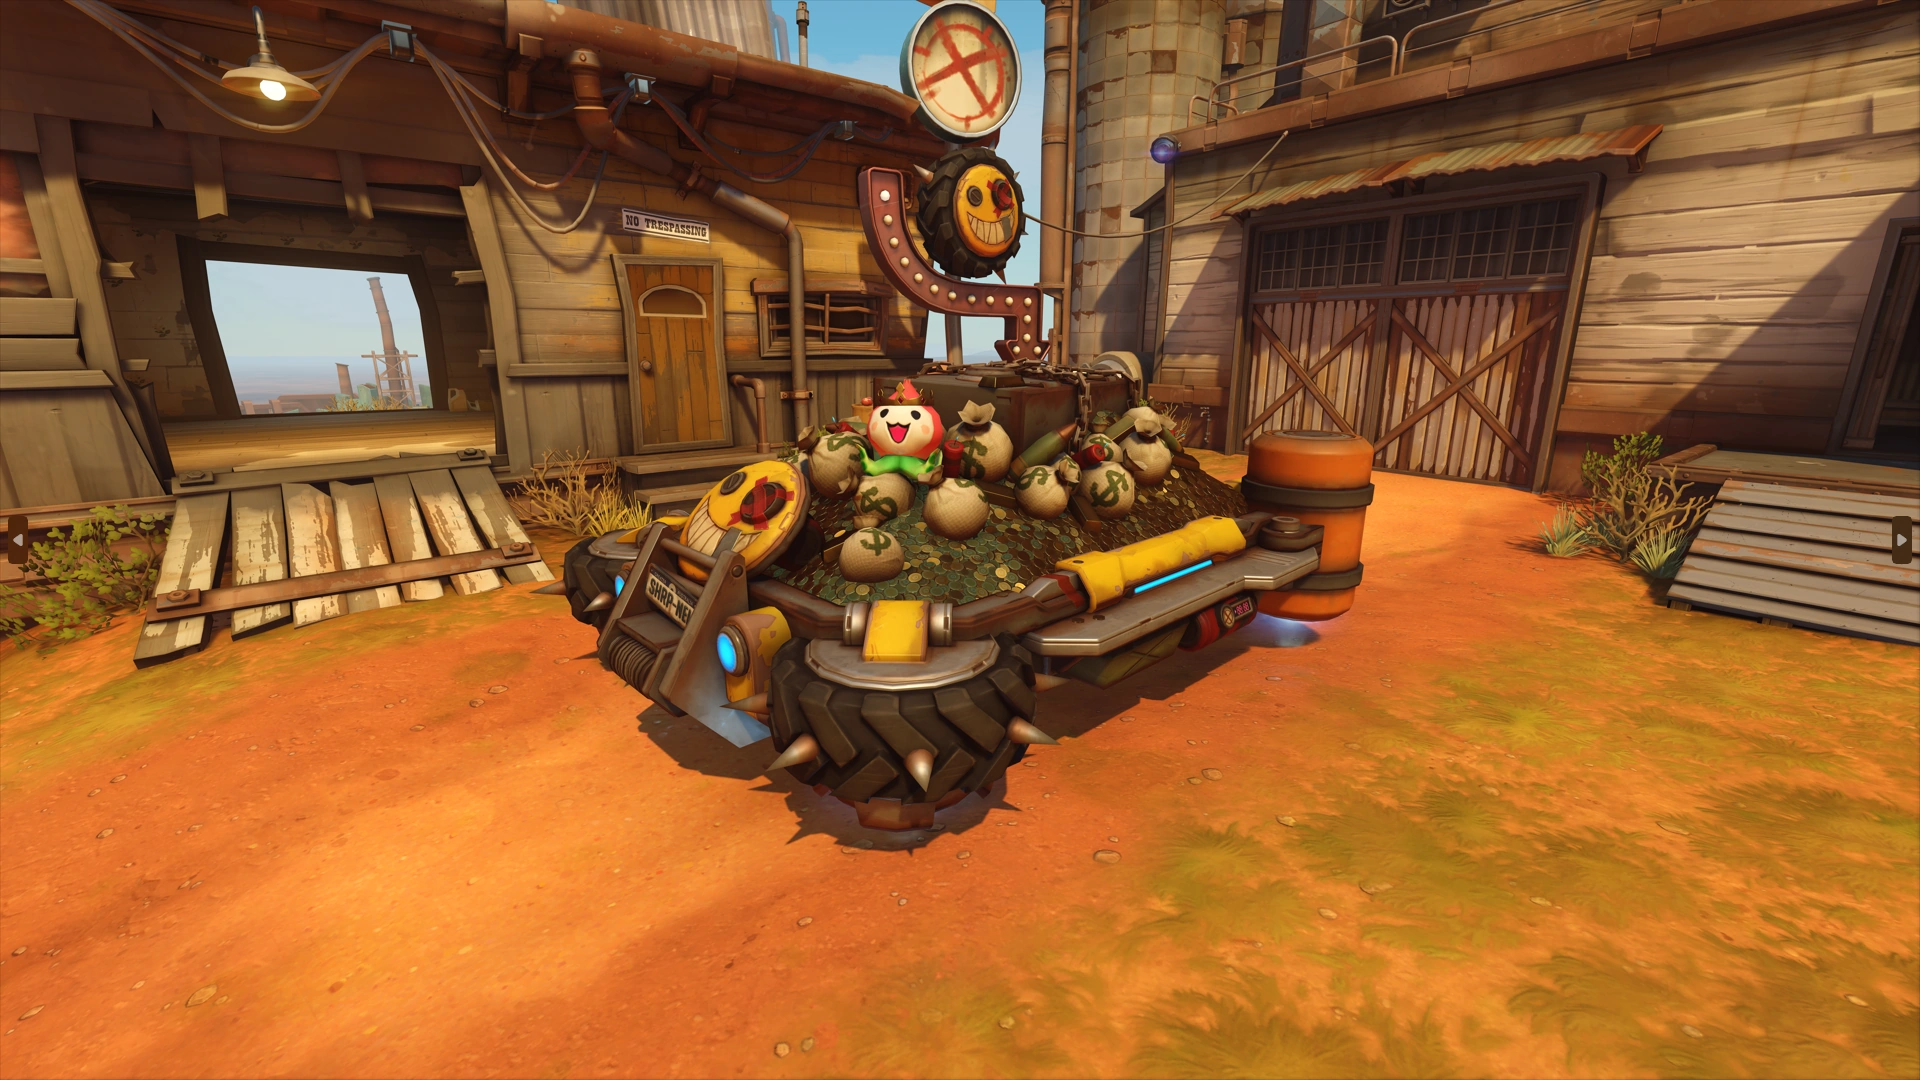
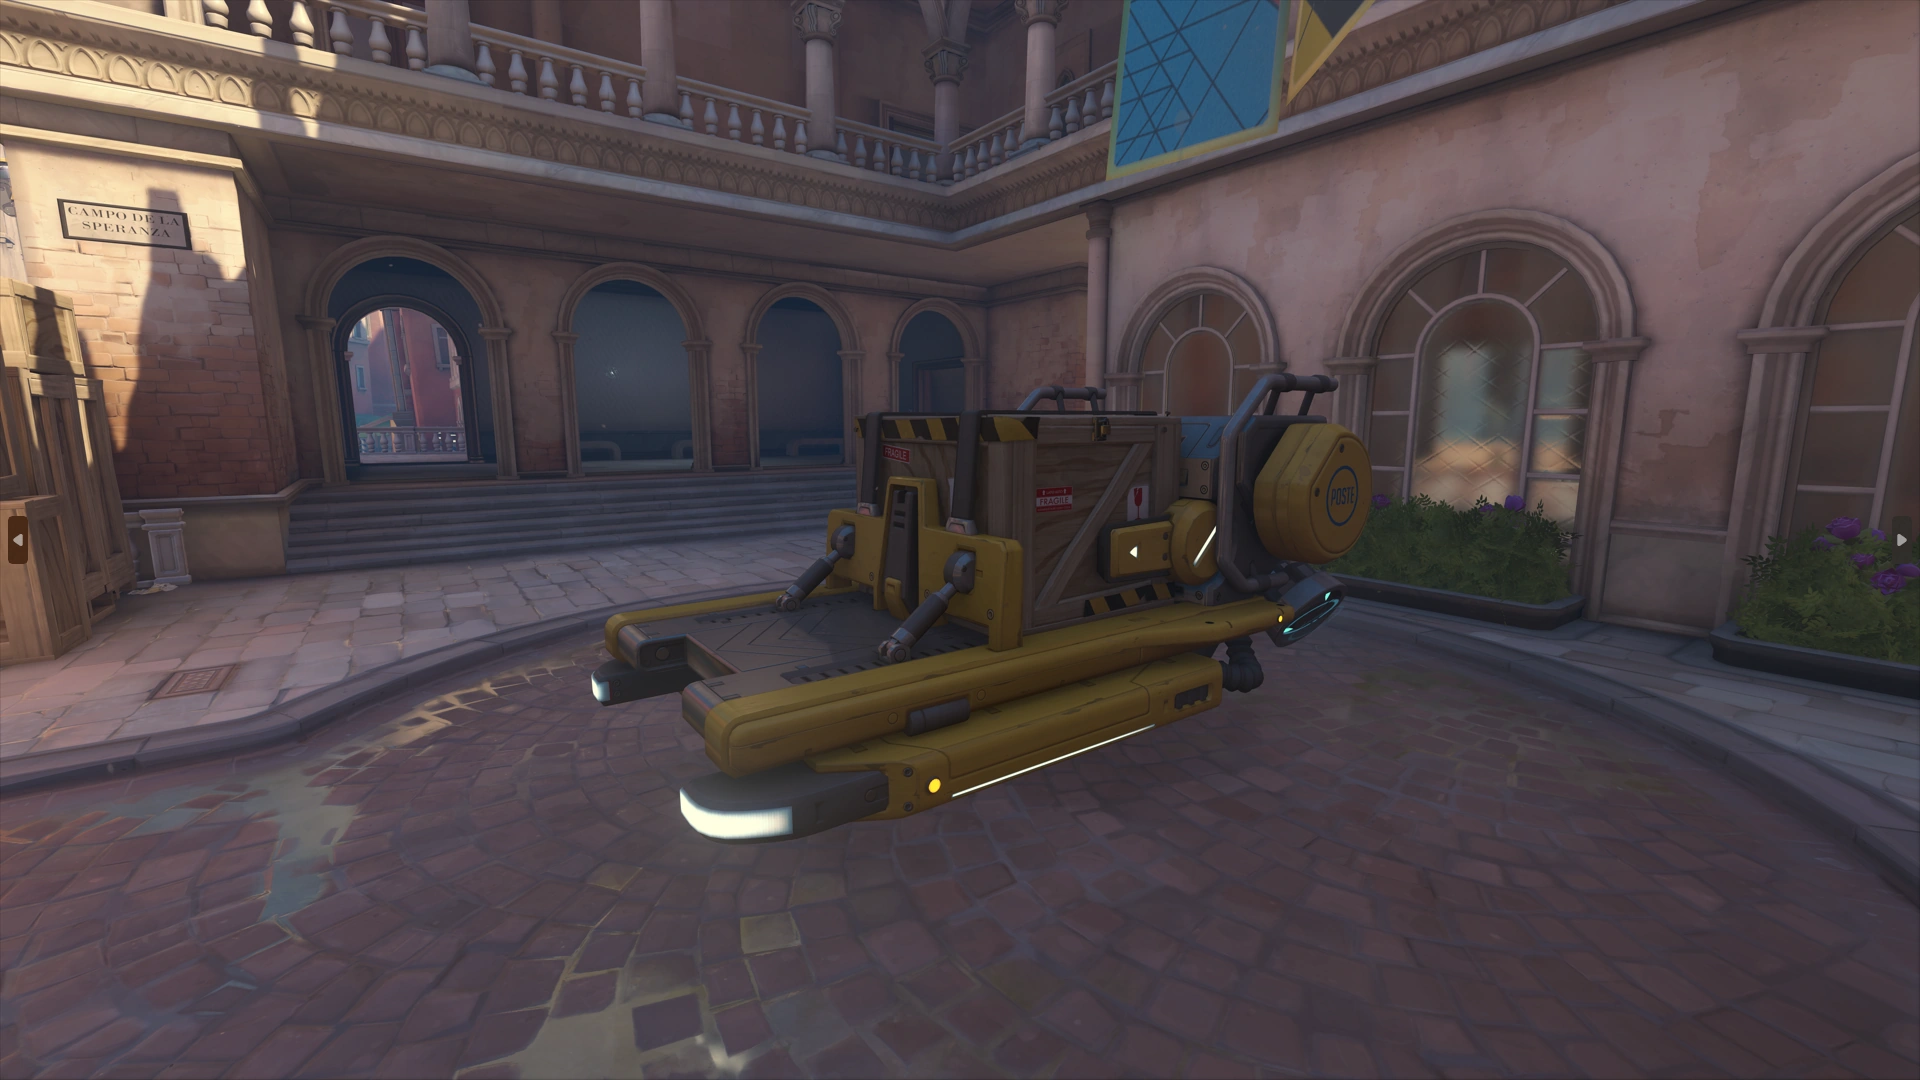
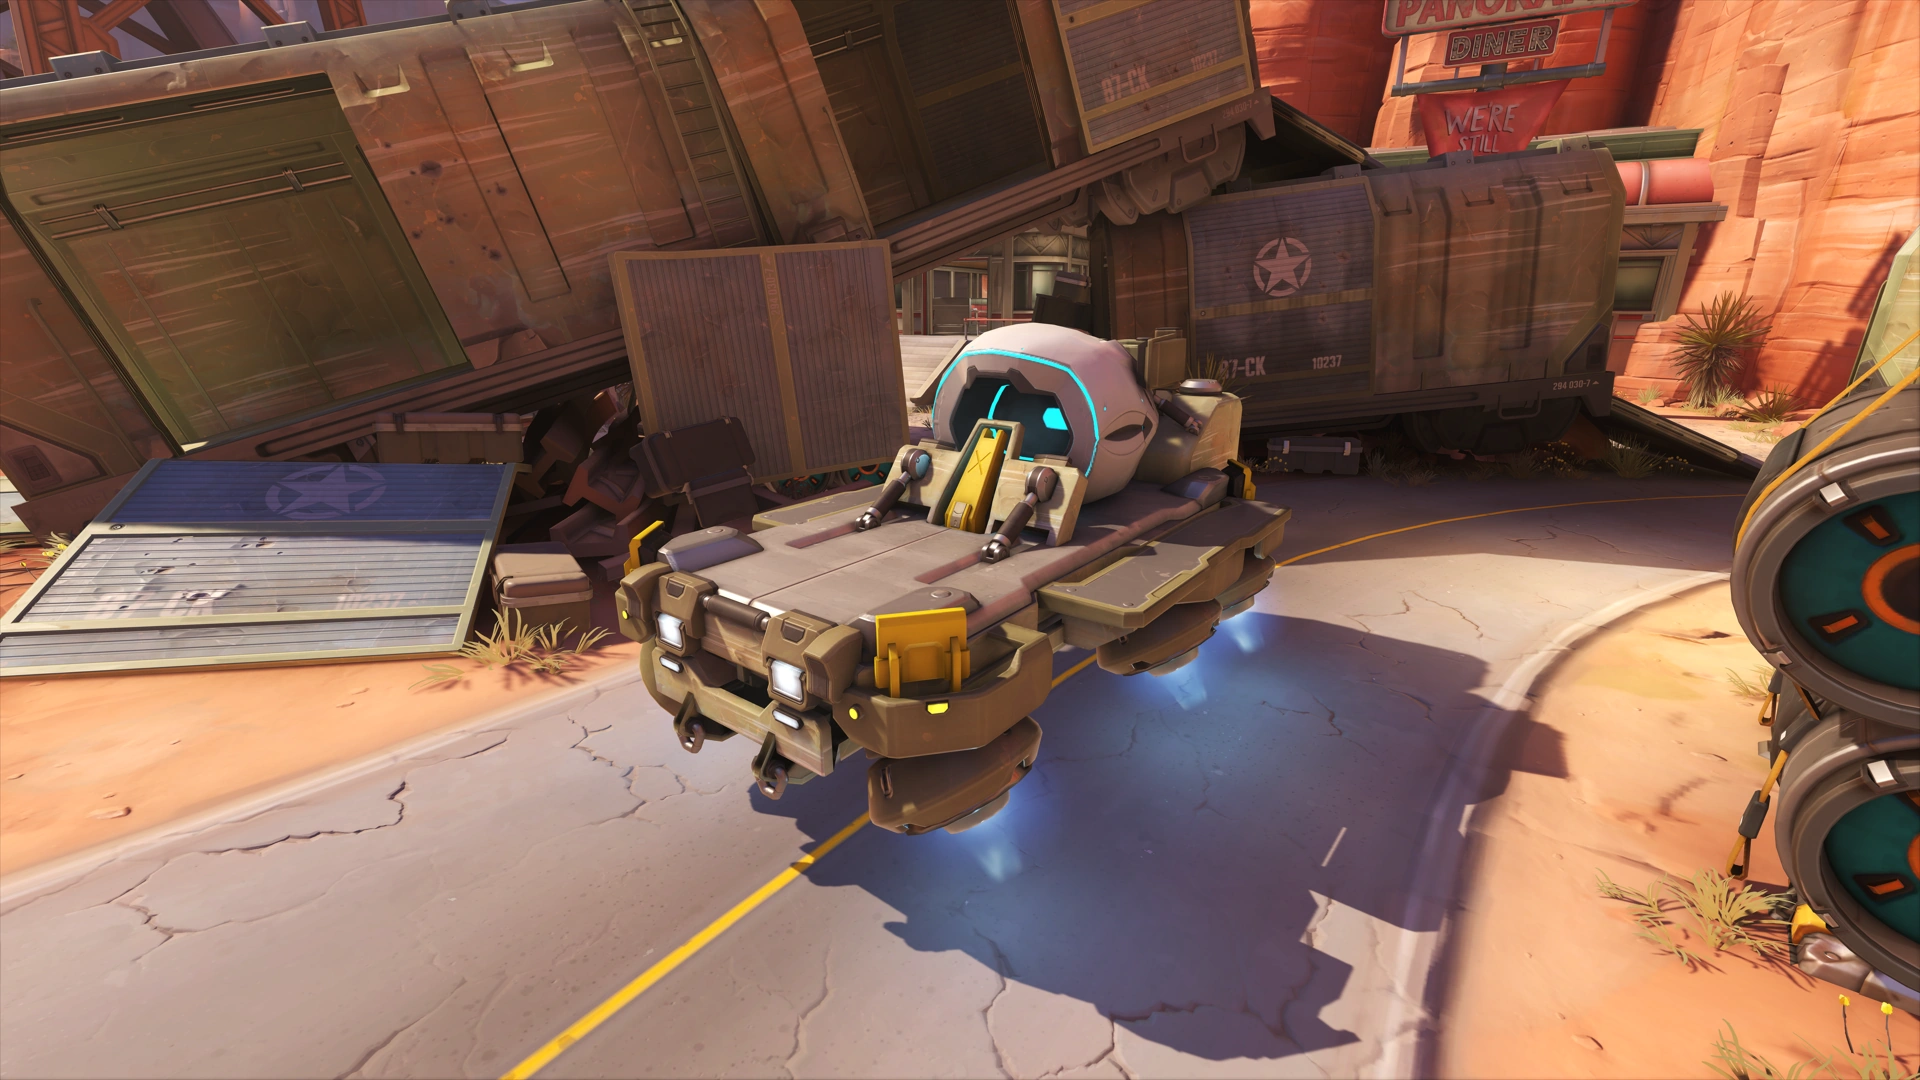
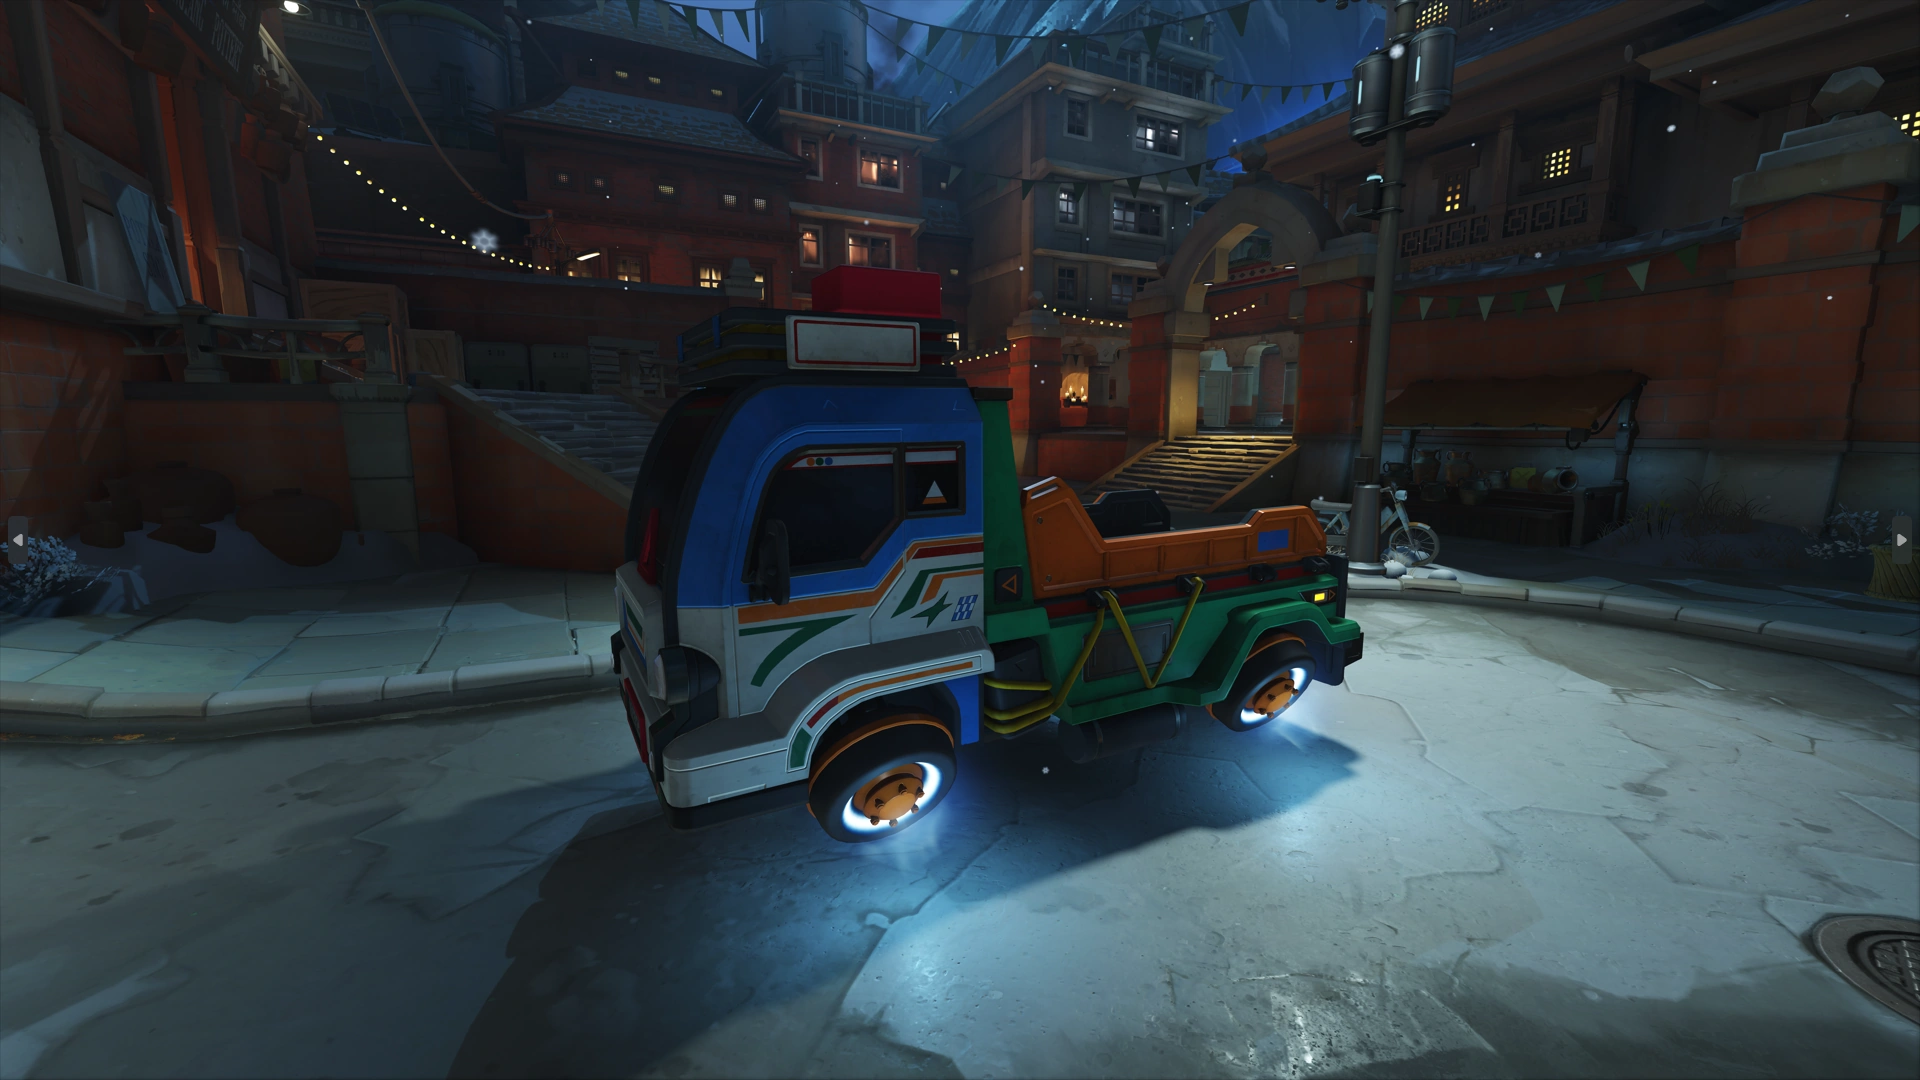
Payload Appearance
-
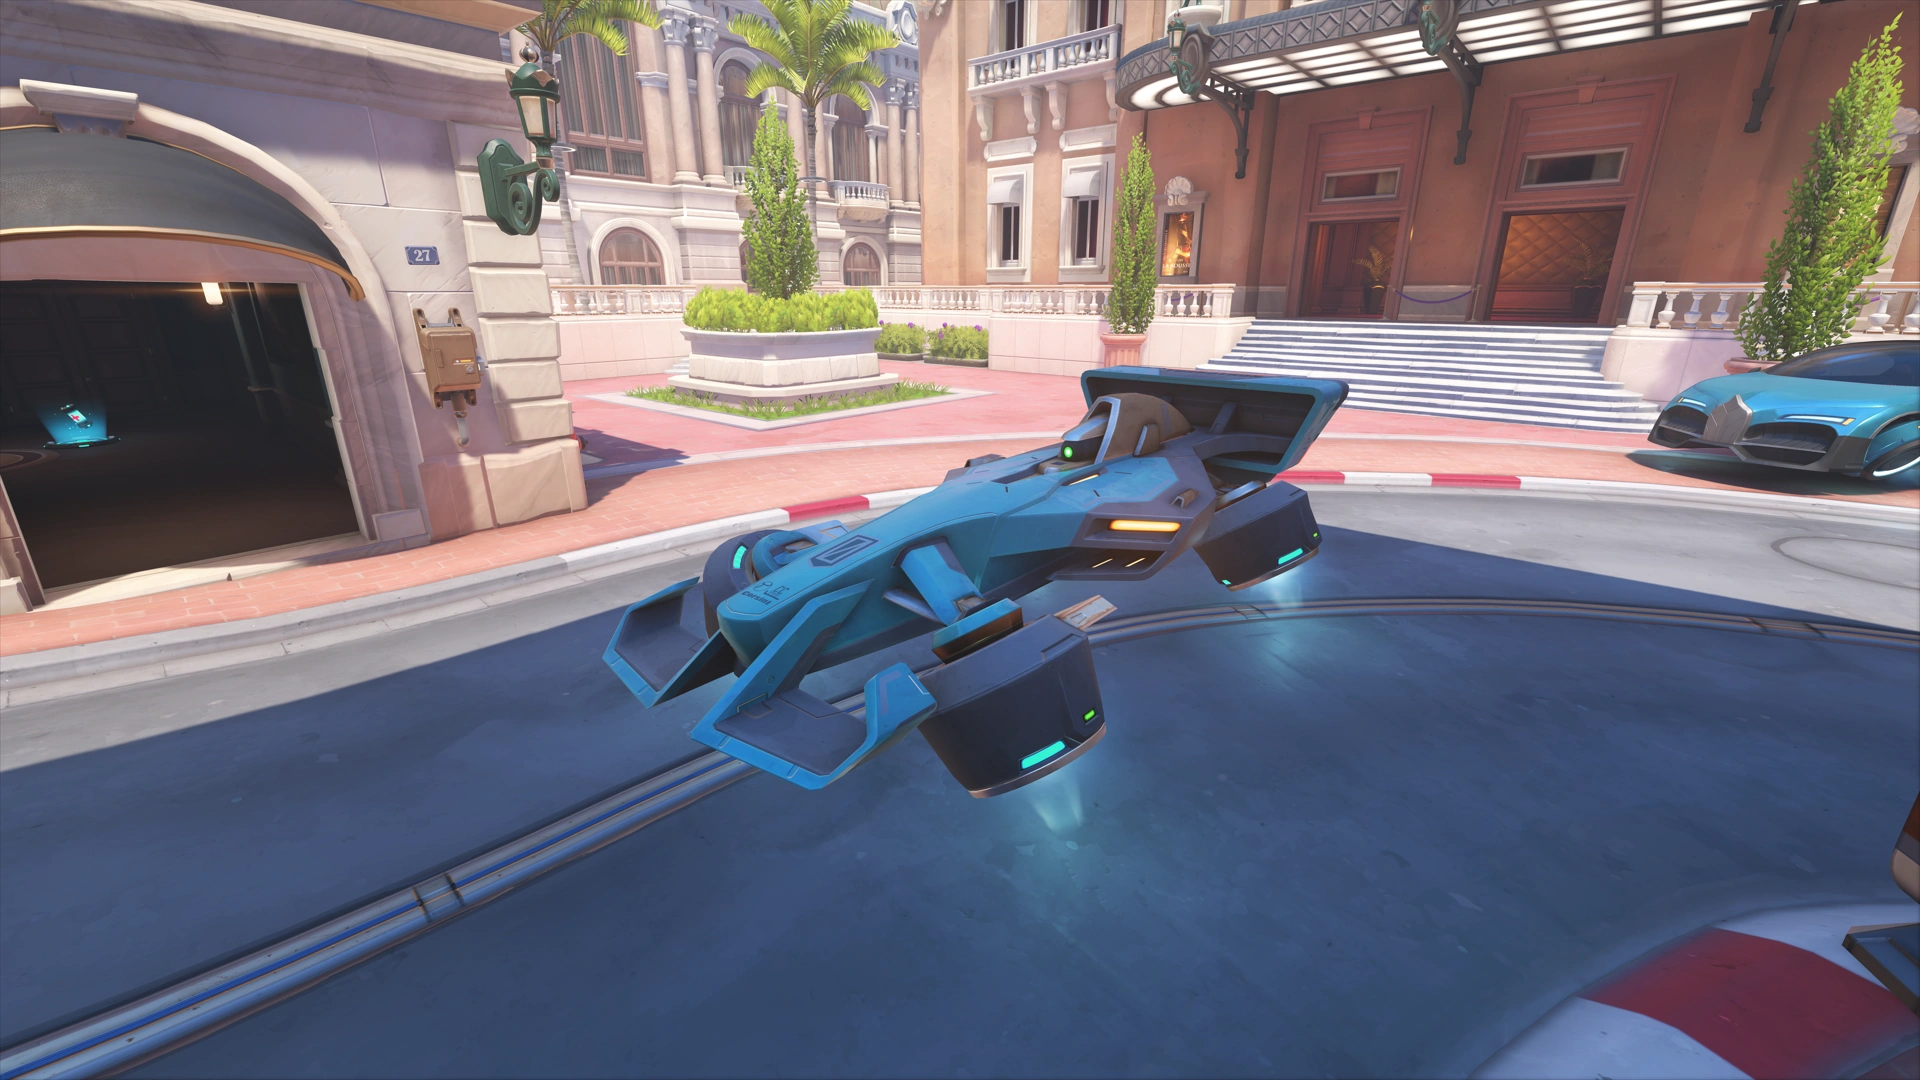
 Circuit Royal (Formula Lux racecar)
 -

-
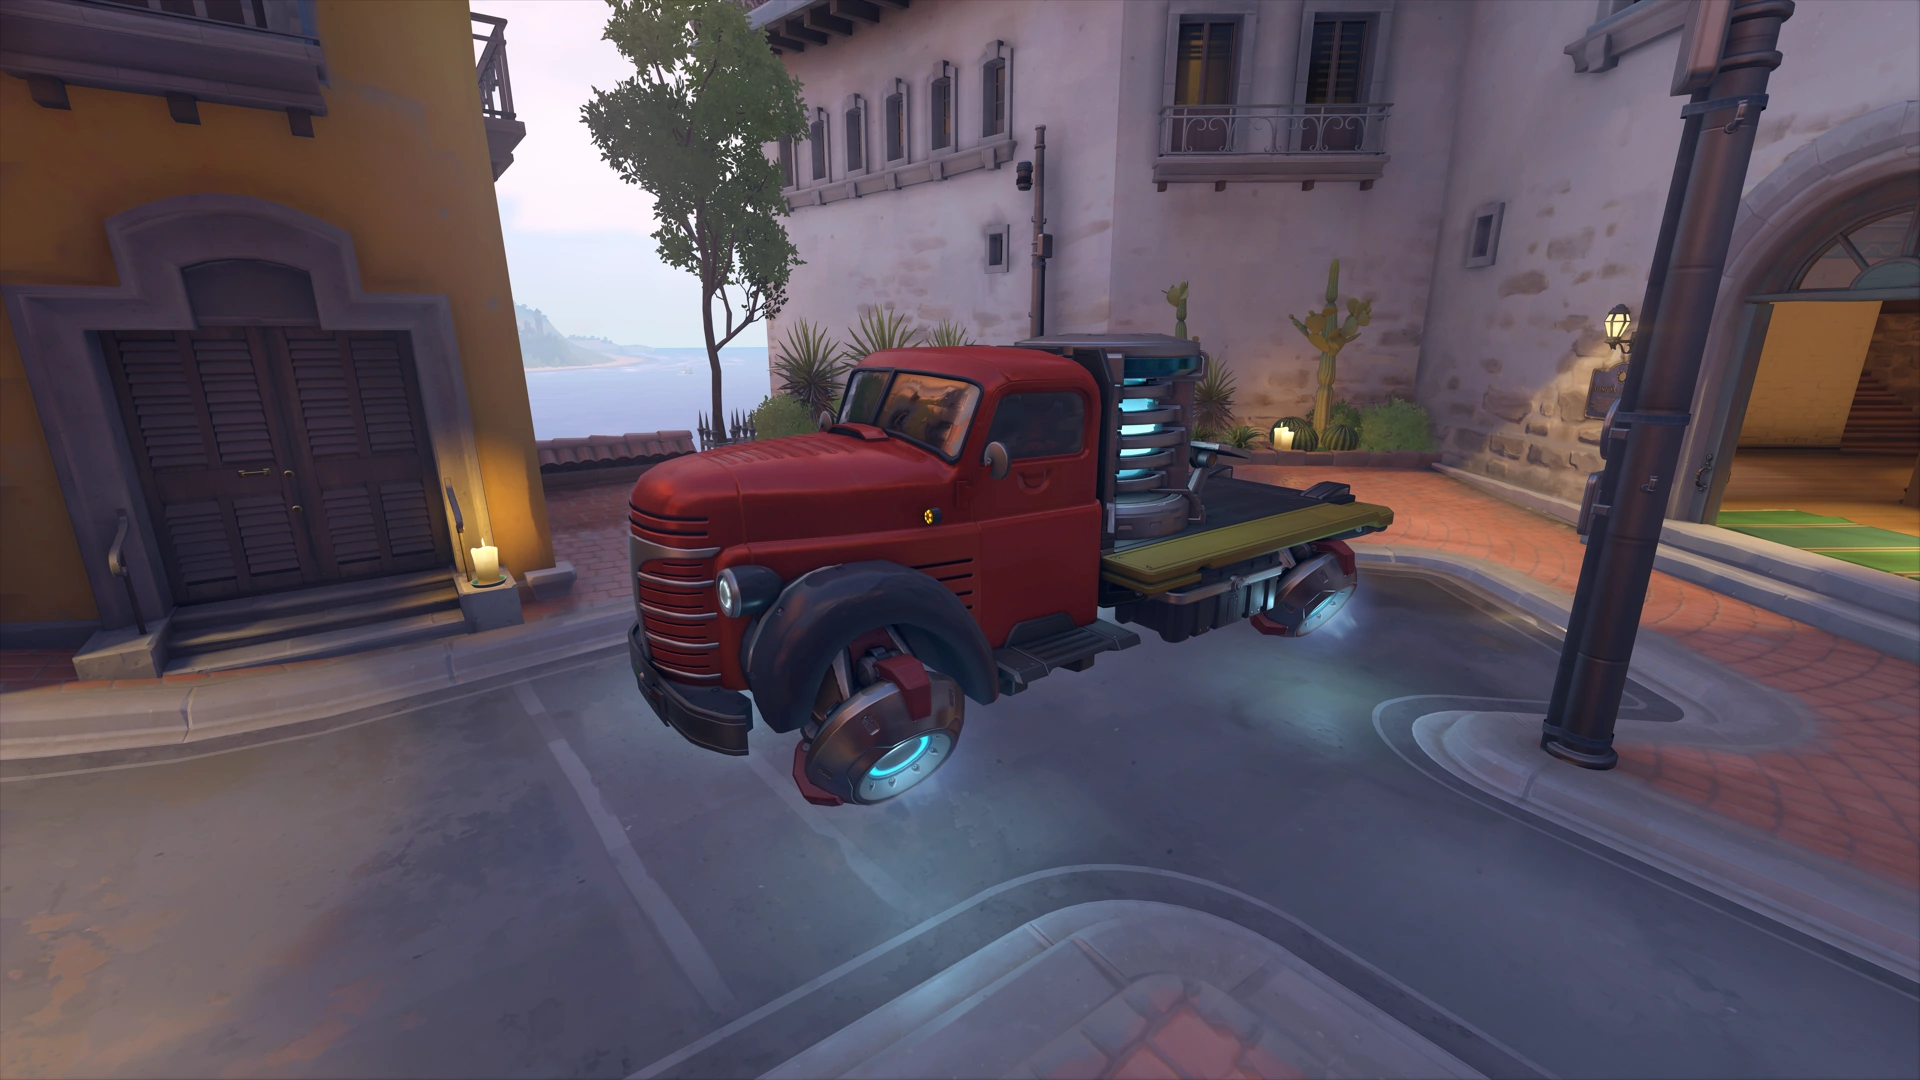
 Havana (Flatbed truck with Don Rumbotico barrels)
 -

-

-

-
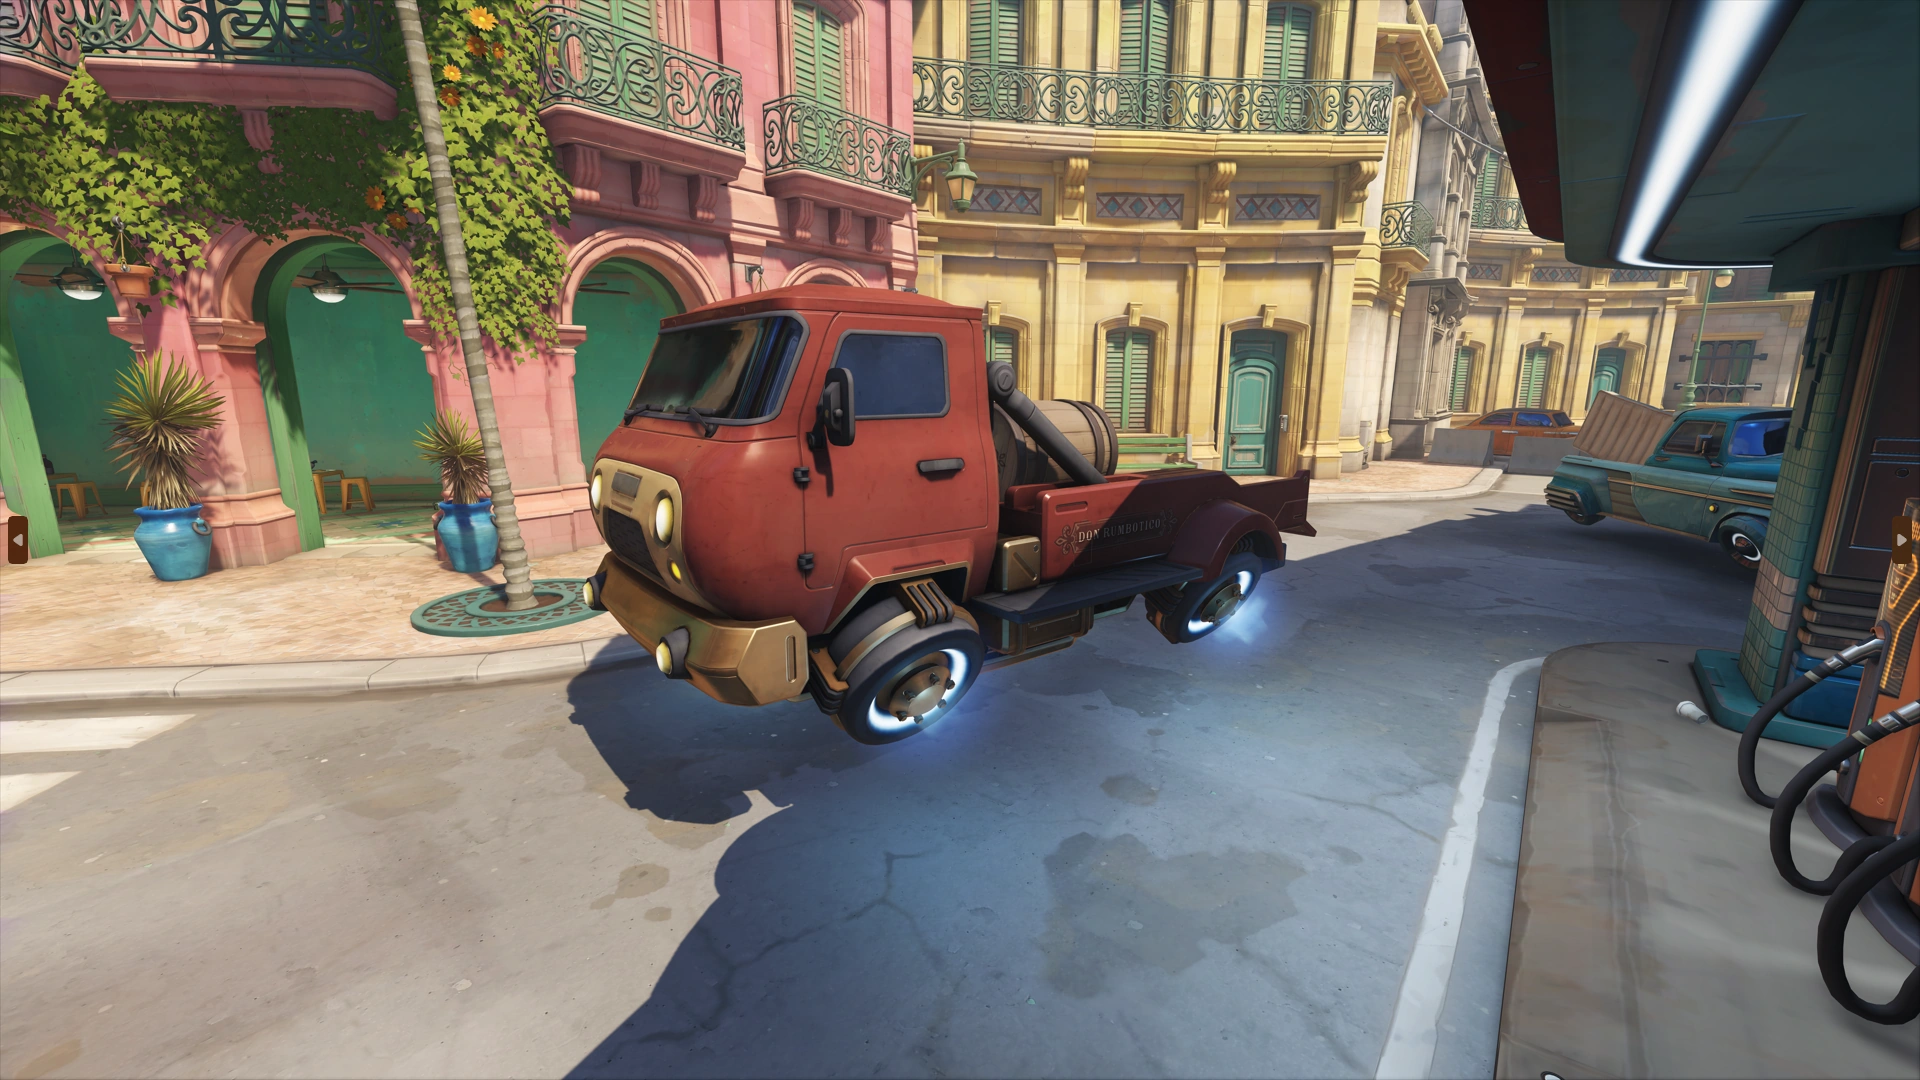
 Shambali Monastery (Local truck)
 -

Trivia
- At an unknown time, the healing attackers gain from staying at the payload was reduced from 10 to 5 healing per second.
References
| Playlists | |
|---|---|
| Maps | |
| Heroes | |
| Mechanics | |
| Systems & Content | |
| Other | |
| Removed features | |
| Unranked & Competitive | |||||||||||||||||||||||
|---|---|---|---|---|---|---|---|---|---|---|---|---|---|---|---|---|---|---|---|---|---|---|---|
| Stadium-exclusive | |||||||||||||||||||||||
| Arcade & Events |
| ||||||||||||||||||||||
| Story Mode & Event Missions |
| ||||||||||||||||||||||
| Canceled Projects |
| ||||||||||||||||||||||
| Custom Games | |||||||||||||||||||||||
| Training | |||||||||||||||||||||||