Wrecking Ball is an Initiator Tank hero in Overwatch. Released on 24 July 2018, he is the 28th hero to be added to the game.
Overview
Wrecking Ball Hero Selection
Wrecking Ball rolls across the battlefield, using his arsenal of weapons and his mech’s powerful body to crush his enemies.
-
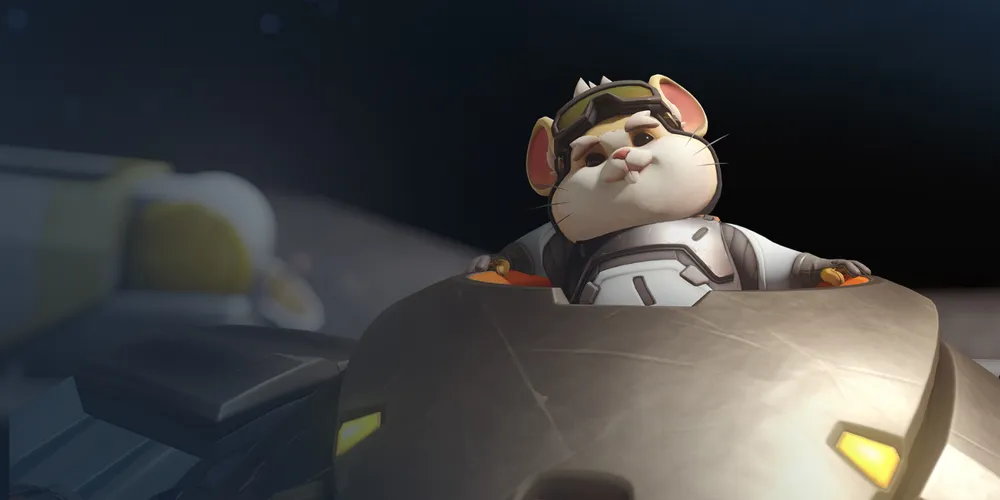
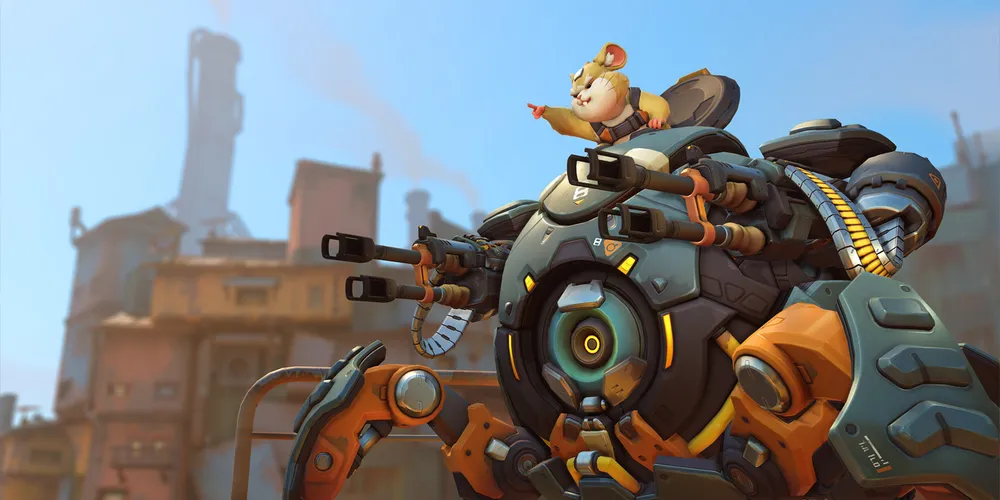
 Overwatch 2 Key Art
 -
 Overwatch 1 Key Art
-
 3D Portrait
 -
 2D Portrait
Abilities
Passive Abilities


- Ultimate charge and perk progress generation from damage and healing dealt to heroes with the Role: Tank passive is reduced by 40%.
- All tanks have 150 more health in Role Queue. The amount of armor and/or shields remains the same.
- No longer grants increased base health.
- Ultimate charge generation reduction reduced from 40% to 20%.

- Triggers when using certain movement abilities:
- Winston:
 Jump Pack
 - D.Va:
 Boosters
 - Hazard:
 Violent Leap
 - Wrecking Ball:
 Grappling Claw (with fireball)
 - Doomfist:
 Rocket Punch
- Winston:
- Lasts for 1 second with a 5 second cooldown. This is seperate from the cooldown of the ability.
- Once triggered, all 50 healing will be granted, even if the hero takes damage mid-heal.
- The passive doesn't activate if the hero is full health.
Weapons


- Damage per second: 125 while firing (83.33 overall w/reload)
- There is a 0.16 seconds delay after releasing the fire button before it can be used again.
- First two shots have perfect accuracy; bullet spread reaches max at 30 shots.
- Automatically reloads if Wrecking Ball is in his
 Roll mode for 1.6 seconds.
Special Abilities

1 second (no fireball)
6 meters (retracted)
+80% (max, released)
- Wrecking Ball automatically enters Roll when Grappling Hook is fired and will remain in it while and after grappling.
- Wrecking Ball can manually retract the line by holding the Jump button.
- If the line is more than 6 meters long and Wrecking Ball moves closer to the claw, the line retracts and stays retracted.
- Wrecking Ball respawns with this ability on cooldown.
- The duration time limit only activates when fireball is activated. [3]
- If the duration ends, Wrecking Ball releases grapple or activates
 Minefield, he will remain in Roll mode.
 - Any actions and abilities that would transform Wrecking Ball back to default mode from Roll will do so and end Grappling Hook.
- If the duration ends, Wrecking Ball releases grapple or activates
- Grappling Hook is a channeled movement ability; being stunned, knocked down, hacked or mobility locked, immediately ends the ability, putting it on cooldown.
- The hook attaches to a surface, allowing Wrecking Ball to swing around the point of contact.
- Grappling Claw can attach to walls and terrain-like objects, such as Lifeweaver's
 Petal Platform and
  Tree of Life.
 - Grappling Claw cannot attach to fences and other breakables, ground surface or ramps, excluding stairs.
- Grappling Claw can attach to walls and terrain-like objects, such as Lifeweaver's
- Adaptive Shields can be used while grappling without interrupting it.
- Wrecking Ball is powered-up while moving at least 15 m/s while grappling or after releasing grapple. This is shown via a fireball effect.
- While powered up, colliding with enemies deals damage and knockback to enemies.
- Grappling Hooks timer only starts counting once Wrecking Ball hits the fireball speed for the first time during the grapple.
- If Wrecking Ball releases the grapple without reaching the fireball speed, Grappling Hook goes on a shorter 1 second cooldown.
- If Grappling Hook is interrupted by enemy crowd control, it will always go on full cooldown.
- Wrecking Ball will not reach fireball speeds while manually retracting, unless he is already at fireball speeds before retracting.
- Once grapple is released, it fireball lasts approximately 1.5 seconds before Wrecking Ball's movements speed falls below the threshold. This duration can be extended by jumping as deceleration while airborne is lower.
- If Wrecking Ball is slowed by more than 25%, this puts him below the threshold and his swings cannot power-up at all.
- Grappling Claw's movement speed buff does not count towards global movement speed buff cap.

- Can be cast while in midair.
- Roll form base speed is the same in all directions (i.e. he is not slower going backwards).
- Roll form rolls faster when going downhill. Going uphill does not affect the speed.
- Roll form automatically rolls downhill if the player is not counteracting it.
- Roll form does not have a critical hitbox (Hammond's body is the "head") and therefore cannot receive headshots.
- Wrecking Ball comes out of Roll if he is
 Hacked,
  slept,
  hooked, or knocked down; or if he tries to shoot or use quick melee.
 - Roll can be deactivated, but not activated while mobility locked. These effects also do not interrupt Roll.
- Destroys fences and other breakables Wrecking Ball rolls through.
- When Wrecking Ball is defeated and respawns, he is automatically in Roll form. The only time he does not spawn in Roll form is when he is first selected.

-50 per ally (max transfer, self)
+75 (max transfer, allies)
4 seconds (allies)
- Cannot be activated while using melee, casting Minefield or
 Piledriver.
 - Adaptive Shields can be reactivated once to redistribute portion of Wrecking Ball's overhealth evenly to all other allied heroes within the radius.
- Cannot be reactivated while no valid allies are within radius.
- The durations for allies' and Wrecking Ball's overhealth are independent from each other.
- Overhealth is transferred at a rate of 150%. This means Wrecking Ball only loses 1 overhealth for every 1.5 points transferred to ally.
- Each ally can receive up to 75 overhealth. With the aforementioned transfer rate, this costs Wrecking Ball 50 overhealth.
- Wrecking Ball cannot lose more than 300 total overhealth from the transfer, however the amount gained by his allies is still based on his total overhealth. Regardless, hitting this limit requires sharing overhealth to at least 7 allies, making this unachievable in most game modes.
 B.O.B. counts as an enemy for creating extra health as well as an ally that health can be transferred to. Constructs, such as
  Turret, do not.
- Radius reduced from 13 to 10 meters.
- Overhealth gained per target reduced from 100 to 50.

0.75 seconds (enemy air lock)
98 m/s (downwards)
- This ability is bound to Crouch/Toggle Crouch, and replaces Wrecking Ball's ability to crouch on the ground.
- Wrecking Ball must be airborne and at a minimum altitude of 3.5 meters of the surface directly below the center of his model to activate.
- For reference, jumping height is 0.98 meters. As such, jumping does not normally grant enough height to activate the ability, however as the height is measured at the center, it is possible to do it near ledges by aligning the center of the hero over it while jumping.
- Wrecking Ball will be transformed to Roll form immediately upon activation.
- As such, there will be an additional 0.4 seconds (= 0.6s total) delay after hitting ground before he can shoot.
- Affected enemies take damage and are knocked into the air, losing air control for 0.75 seconds.
- Cooldown increased from 8 to 10 seconds.
Ultimate Ability

1.25 seconds (arming time)
- Deploys 15 proximity mines around him, arranged into three rings of 1/6/8 mines.
- Activating Minefield in the air increases the spread.
- Mines can pass through barriers when deployed, but explode upon contact once armed.
- Mines emit a high-pitched noise to nearby enemies.
- Wrecking Ball can regain ult charge while Minefield is deployed. However, damage from the mines does not count.
Perks
Minor Perks
A Minor Perk can be chosen at level 2.

- "Tanks" encompasses all heroes with
 Role: Tank passive, which includes B.O.B. and pilot mode D.Va.
 - The hit marker gains a yellow hue and a higher pitch sound plays when damaging a Tank.

Major perks
A Major Perk can be chosen at level 3.

6 m/s (windup, sideways)

- This ability is similar to
 Particle Barrier and
  Projected Barrier.
Hero-specific options
| Setting name | Options | Description |
|---|---|---|
| Toggle Grappling Claw | Off (default) | Grappling Claw deactivates when player stops holding the button. |
| On | Grappling Claw deactivates when player presses the button again. | |
| Grappling Claw retract input | Jump (default) | Jump retracts Grappling Claw. |
| Ability 1 | Ability 1 retracts Grappling Claw and no longer interrupts grapple transforms Wrecking Ball to default mode. | |
| Primary Fire | Primary Fire retracts Grappling Claw and no longer interrupts grapple transforms Wrecking Ball to default mode. | |
| Quick Melee | Quick Melee retracts Grappling Claw and no longer interrupts grapple transforms Wrecking Ball to default mode. | |
| Interact | Interact retracts Grappling Claw. | |
| Relative aim sensitivity while transformed by Roll | 0% ... 500% (default: 100%) | Multiplier to base aim sensitivity while in Roll form. |
| Toggle Quick Melee during Roll | Off (default) | Tapping Quick Melee Button during Roll deactivates Roll without using Quick Melee. Input must be held or pressed again to use Quick Melee. |
| On | Tapping Quick Melee Button during Roll deactivates Roll and Quick Melee will be used right afterwards without an additional input. | |
| Adaptive Shields UI | On (default) | UI element displaying the number of enemies or allies within radius of Adaptive Shields is displayed around the crosshair. |
| Off | Adaptive Shields UI element is hidden. | |
| Hide Adaptive Shields timer | Off (default) | Timer UI element is displayed around the crosshair. |
| On | Timer UI element is hidden. | |
| Piledriver UI | On (default) | Piledriver UI element is displayed above the crosshair. |
| Off | Piledriver UI element is hidden. | |
| Adaptive Shields transfer control UI | On (default) | Transfer input text is shown next to crosshairs. |
| Off | Transfer input text is hidden. | |
| Grappling Claw retract UI | On (default) | Retract input text is shown next to crosshairs. |
| Off | Retract input text is hidden. |
Strategy
As an offense-oriented tank hero, Wrecking Ball's greatest strength lies in his high mobility, which he uses to disrupt the enemy team by forcing them out of position and initiating team fights. A good Wrecking Ball is excellent at establishing area control, knowing when and how to engage and disengage the enemy to create opportunities for his teammates. He can do so at will by switching between walker and ball mode as the situation changes. The dual machine guns deployed in walker mode provide a hitscan-ranged attack in exchange for mobility, while ball mode allows Wrecking Ball to damage enemies up close and quickly travel across the battlefield. Wrecking Ball's grappling hook allows him to tether to a surface to either gain vertical positioning and acceleration or to inflict contact damage within an area at top speed. Should he find himself outnumbered, Wrecking Ball can generate temporary shields to block incoming damage, which increase with the number of enemies nearby. Lastly, Wrecking Ball has strong area denial by deploying a mine field, which inflict heavy damage to any enemy that comes into detonation range.
While Wrecking Ball is a more mobile tank than Winston, he has no way of directly protecting his teammates from damage, beyond marginally providing over health with adaptive shields. His high dependency on his abilities and mobility makes him a sitting target when they are being limited or disabled. Furthermore, his massive size also makes him an easy target for the enemy team to focus fire if he cannot escape.
Use your high mobility to scout the enemy positions, take off-angles, and move unpredictably.
Many of Wrecking Ball's abilities are AOEs, but remember to focus single targets and confirm kills. You don't make space by booping people around if they don't even look at you. Confirming kills will make you more of a disruptor than just giving the enemy team healthbar haircuts.
While Wrecking Ball is one of the most self-sufficient heroes in the game, you still need your team. Always wait until your team is ready to engage the enemy before engaging the enemy yourself.
Wrecking Ball is well equipped to stall the objective in overtime. Remember that you don't have to stay on point, just keep touching it within the overtime timer (between 5 and 1.5 seconds).
Weapons & Abilities
- Quad Cannons: Wrecking Ball's primary fire.
- Due to its low damage, fast fire rate, and relatively low ammo, it is meant for short engagements. Target low-health enemies such as ones damaged by Piledriver.
- Quick melee can help with the damage.
- Quad Cannons automatically reload if Wrecking Ball is in Roll mode.
- Quad Cannons are for the most part ineffective against barriers and high-HP targets.
- Grappling Claw: Wrecking Ball's mobility ability that enables him to swing.
- It allows Wrecking Ball to get to the objective far quicker than most heroes in the game.
- Its short cooldown means Wrecking Ball can engage with it, and then disengage with it. It can also be used to re-engage a fleeing foe.
- By attaching to a pillar or even the payload, terrain permitting, Wrecking Ball can spin in a circle repeatedly until the grapple time runs out, adjusting the radius using grapple retraction.
- Wrecking Ball can contest the objective, damage and knock back enemies, and build ultimate charge while doing this. (However, it can make him vulnerable to stuns or knockback effects.)
- Roll: Wrecking Ball turns into a ball with increased mobility.
- As a ball, Wrecking Ball's default speed is much faster than other heroes. He can use this to disengage from a fight.
- While in roll mode, Wrecking Ball has no critical hitbox.
- If Wrecking Ball is being frozen by Mei, use Roll to prevent her (or her teammates) from headshotting.
- Adaptive Shield: Wrecking Ball gains personal shields with additional shields for each nearby enemy.
- These shields do not give the enemy team ultimate charge, meaning Wrecking Ball can engage without the fear of charging enemy ultimates.
- Despite more enemies generating more shields, Wrecking Ball is much more susceptible to damage. Adaptive Shield should not be overestimated and disengaging is still necessary.
- You cannot activate shields while piledriving, but you can while grappling. Often, it is best to shield while swinging through the enemy team.
- The cooldown for shields is twice as long as piledriver and 3x grapple. It may be tempting to fully engage as soon as piledriver is available, but without shields, this is often not worth it. Instead, play cautious offense until shields are ready again.
- When adaptive shields is about to expire, or if Wrecking Ball feels they will be unused personally, it is beneficial to transfer that shield to allies, as it's a no downside way of temporarily increasing his teammates HP.
- Piledriver: If Wrecking Ball is in the air, he can slam downwards and damage all nearby enemies.
- Enemies are launched into the air, making them easy targets for Quad Cannons.
- However, if you are having trouble surviving, it may be worth sacrificing an easy target, and instead immediately after piledriver roll to the closest local cover before using canons, to reduce incoming fire.
- If high ground is nearby (such as a staircase), go on top to use Piledriver so that Grappling Claw can be saved and Wrecking Ball can escape immediately.
- By jumping off the payload, Wrecking Ball gains enough height to use Piledriver.
- If Wrecking Ball rolls into a corner at an angle and jumps with the right timing, he can gain enough height to use Piledriver.
- Coordinate with your team when using Piledriver, as it can deny friendly ultimates (such as Earthshatter) if mistimed.
- By retracting a vertical grapple, Wrecking Ball can gain the height necessary to cast Piledriver almost anywhere without putting the grapple on long cooldown, providing an easy way to both set up and disengage from a dive.
- Enemies are launched into the air, making them easy targets for Quad Cannons.
- Minefield: Wrecking Ball's ultimate ability.
- Minefield can be used as a great zoning tool. Some examples include separating a tank from their team, cutting off fall back routes, or denying off angles and high grounds.
- If Wrecking Ball uses Minefield while in the air, the mines become more spread out and cover more areas, but may be less lethal as it reduces the chance that enemies are knocked from one mine into another.
- It takes a short delay for the mines to activate.
- A combo to ensure the mines hit something is to have Wrecking Ball launch himself in the air, use Minefield while in the air, and then use Piledriver. Nearby enemies will be launched into the air by Piledriver, and they will fall down to the now active mines.
- Minefield is extremely valuable while in overtime since it can deny access to the objective. For example, Wrecking Ball can go on top of the payload and then use Minefield to deny the entire area around the payload.
General Strategies
Wrecking Ball is all about disruption, quick engagements and disengagements, and denying area (especially choke points and objective areas). Use Grappling Claw and Piledriver to roll through masses of enemies to quickly gain ultimate charge and scattering the enemy team. For example, Wrecking Ball can smack a Reinhardt away from his team, leaving them vulnerable. Roll and Adaptive Shield help to survive and disengage. Once Minefield is ready, Wrecking Ball can combo it with Piledriver to prevent or even end team fights. Wrecking Ball can also target specific enemies by slamming down with Piledriver, shooting them with Quad Cannons, and hitting a quick melee.
Match-Ups and Team Synergy
Tank
| Hero | Match-Up | Team Synergy |
|---|---|---|
 D.Va |
If you and D.Va both stay put and fire away at one another, you're almost certain to lose this matchup. However, due to your high mobility, this will rarely be the case. While it's unlikely that you will ever land a kill on her without support from your allies, your primary asset against her is being a nuisance who will refuse to die. Getting rammed by Boosters can temporarily disrupt your swinging, but even then you can simply roll away from a fight if you don't wish to continue. | If your team decides to run both D.Va and Wrecking Ball as your tanks, you're offering your team extremely minimal protection. That being said, if your team is filled with heroes who prefer to stay mobile and fend for themselves, such as Genji, Tracer, and Lucio, this may be an acceptable, aggressive team composition. |
 Orisa |
(Outdated) Orisa can fight Wrecking Ball far from his reach and where his damage is impactful. Fusion Driver is a rapid-fire weapon with no damage falloff. She can use Fortify to tank some of your damage and avoid being knocked around by your abilities. Halt can be an issue as it can pull you back into the line of fire (which is worse when you're fleeing). | Orisa and Wrecking Ball can make a devastating combo when pushing, as their automatic weapons can provide suppressive fire for sustained periods of time. Wrecking Ball's high mobility can allow him to switch positions quickly should an offense hero flank around the barrier, potentially saving Orisa from a sneaky Reaper or Tracer. At the very least, he can buy Orisa and the team enough time to kill the perpetrator. |
 Reinhardt |
Reinhardt can block your Quad Cannons with his shield. You can run into him and displace him but Reinhardt can use Charge to pin you against a wall. His shield can also block Piledriver if angled correctly. Earthshatter will stop you in your tracks and force you out of Roll. | (To be added) |
 Roadhog |
Watch out for Roadhog's hook as it will force you out of Roll, exposing your critical hitbox. The worse thing that can happen is Roadhog hooks you after you've used Grapple Claw as being pulled towards an environmental hazard or his team will assure your death. Also, Adaptive Shields will not save you from Whole Hog if you get pinned to a wall. | Whole Hog can push enemies into your Minefield, which can most certainly kill them. Piledriver can also knock enemies upward into Roadhog's crosshairs, giving him the opportunity to hook them. |
 Sigma |
Sigma can absorb your Quad Cannons bullets with Kinetic Grasp, giving him bonus shield health. Accretion can stop you in your tracks. This can put your Grapple Claw on cooldown and force you out of Roll. Also, you can roll your way out of Gravitic Flux if you're caught in it. Kinetic Grasp can't absorb your mines, but Sigma can throw his Experimental Barrier to clear a path through them. | When a friendly Sigma lifts an enemy team with Gravitic Flux, you can use Minefield so the enemy team will drop onto your mines. This will not only ensure that they can't avoid your mines, but the explosions will almost certainly kill your weakened opponents. |
 Wrecking Ball |
(To be added) | (To be added) |
 Winston |
Wrecking Ball's enormous health total makes the Tesla Cannon do little more than tickle him, and you have better mobility than him. Also, he has less health than you, so you should be able to kill with Quad Cannons at close range. | You and Winston are one of the most mobile tanks, and one of you has a shield. When your shield starts to run low, he can deploy his Barrier Projector to act as a secondary line of defense. Primal Rage can be used to knock enemies into your Minefield. |
 Zarya |
Zarya might have less health than you, but she can use her bubbles to soak up your damage, gain energy, and strengthen her attacks. Also, Graviton Surge can stop you in your tracks, allowing Zarya and her team to lay down focus fire and kill you. | You can combo Graviton Surge with your Minefield. Since enemies can't escape one inside, they'll feel the full wrath of your mines. This is more compounded when done in tight corridors, where the mines also latch to the ceilings and walls. Zarya can use a Projected Barrier to protect you and gain energy as you dive into the enemy, |
Damage
| Hero | Match-Up | Team Synergy |
|---|---|---|
 Ashe |
You shouldn't have much trouble against Ashe. As long as you're in Roll form, she can't land critical hits on you. You can pursue her with lethal damage, she can knock you back with Coach Gun to put some distance. If you use Piledriver, be careful where you use it as Coach Gun could push you into an environmental hazard (i.e. Ilios well, train in Busan). Adaptive Shields can also be used to soak up some of her shots. Dynamite can be used to melt your shield and your health. At close range, you can shred through her health with Quad Cannon and a Quick Melee. Sure, the Viper can do a lot of damage at close range, it's slow and won't be able to finish you off before you finish her. | (To be added) |
 Bastion |
Bastion is a huge three to you when turret form is active. Its high damage will shred through your health and any shields you have. Don't attempt to fight him head-on when his turret form is active. Flanking to shoot his critical hit box may prove beneficial.In Recon form, Bastion does not provide much threat to Wrecking Ball, and his lack of mobility along with Bastion's large hit box makes Bastion a good dive target.Baiting out the turret cool down can be an effective way of reducing Bastion's impact and survivability. | (To be added) |
 Cassidy |
(Outdated) Magnetic Grenade is among the most dangerous abilities to Wrecking Ball. It's fast enough to catch you during a rollout, stopping your momentum and making you vulnerable to his team. Make sure you're watching Cassidy's ability usage so you know when it's safe to engage. | There's no known synergy with Cassidy. |
 Doomfist |
(To be added) | (To be added) |
 Echo |
As long as Echo's airborne, all you can do is shoot her with your Quad Cannons. Since your primary fire suffers from damage falloff, it might not be enough to kill her. Unlike you, her primary fire and Sticky Bombs have no damage falloff. Be careful about your health pool. If Echo knows you're half health, She can finish you off with Focusing Beam. You're a good target for her Duplicate and she can get Minefield quicker than you do. | Two Wrecking Balls can be a nightmare for the enemy team. placing two Minefields around team means that they will have no way to advance without taking damage (or dying). |
 Genji |
(To be added) | There's no known synergy with Genji. |
 Hanzo |
You shouldn't have much trouble against Hanzo. As long as you're in Roll form, he can't land critical hits on you. You can also pursue him, no matter where he goes, with enough damage to kill him. Adaptive Shield can also be used to soak up some of his arrows. At close range, you can shred through his health with Quad Cannon and a Quick Melee.
|
There's no known synergy with Hanzo. |
 Junkrat |
Watch out for his Steel Trap. If you get caught in one, this will allow Junkrat and his team to focus fire on you (and subsequently eliminate you). Concussion Mines can knock you backward, which can prevent you from fleeing. Also, R.I.P Tire can kill you in one direct hit if you don't have shields. | A trapped target give Wrecking Ball the ability to line up Piledriver or Minefield (or both) to severely damage (or kill) them. |
 Mei |
Mei's Endothermic Blaster almost entirely shuts you down, and Ice Wall can easily halt you. Most of the time, it's better to simply go to your spawn room and switch to a different hero instead of throwing yourself at her over and over again. | Enemies frozen by Blizzard are the prefect targets for Minefield. Just drop your mines from above and watch them get blown to bits. |
 Pharah |
You're at a disadvantage against Pharah. As long as she in the sky, she's essentially out of your reach as you have no means to get to her. Quad Cannon won't do enough damage to kill her quickly. Plus, she can fire rockets at you, even as you try to flee. Be wary of Barrage, because it can chip away both your health and Adaptive Shields (if you have it active). However, Wrecking Ball does have the mobility to finish off a fleeing airborne Pharah though use of his Grapple and Quad Cannons (or even melee, to be extra stylish). | There's no known synergy between her and Wrecking Ball |
 Reaper |
Reapers sustained close range damage and life steal means that in a 1 v 1, Wrecking Ball is unlikely to burst Reaper down and will sustain heavy damage. However, he lacks mobility, and so simply avoiding lingering in space Reaper controls is beneficial. Poke damage from mid range can force out cool downs. However, with the help of his team, Wrecking Ball can still pressure and kill Reaper. | There's no known synergy with Reaper |
 Soldier: 76 |
Soldier can present danger to Wrecking Ball through sustained damage, reducing the time available for engages before retreating. However, Wrecking Ball also has the tools to force Soldier out of a dominant position, force out Biotic Field, and even kill Soldier in a 1 v 1, with accurate aim. | There's no known synergy with Soldier: 76. |
 Sombra |
Much like Mei, Sombra's Hack can easily shut you down. It forces you out of Roll, you can't use Grappling Claw, and there's almost a guarantee that you'll die if you're hacked in the middle of a team fight. | EMP can disable enemies with movement abilities, which means they won't be able to avoid your Minefield as you deploy it. |
 Symmetra |
(To be added) | (To be added) |
 Torbjörn |
(To be added) | (To be added) |
 Tracer |
Tracer's mobility can make it hard for you to kill her. She can quickly zip through your Quad Cannon fire while laying down her own damage. She can recover with Recall if she's low in health and Pulse Bomb can chip away most your health. | (To be added) |
 Widowmaker |
Wrecking Ball is probably one of her biggest counters. As long as he's in Roll form, she can't land critical hits on him. Wrecking Ball can also pursue Widowmaker, no matter where she goes, with enough damage to kill her. Adaptive Shield can also be used to soak up some of her damage. At close range, Wrecking Ball can shred through her health with Quad Cannon and a Quick Melee. | (To be added) |
Support
| Hero | Match-Up | Team Synergy |
|---|---|---|
 Ana |
Ana's Sleep Dart is a danger to Wrecking Ball as it both stops his momentum and force him out of Roll. This can give her team ample time to lay down focus fire and potentially kill you. Listen for it's use, or bait it out, before engaging. Lower skilled Ana players are more predictable with sleep usage, and simply ducking behind cover after a pile drive can cause her to miss and waste the cooldown.As a support without mobility, Ana presents an easy and high value dive target, if care is used about her Sleep Dart. | Ana can heal Wrecking Ball at a distance with scoped shots and use a Biotic Grenade to increase the healing output. Nano Boost applied to Wrecking Ball makes him harder to kill, and that is compounded further when he uses Adaptive Shields. |
 Baptiste |
(To be added) | There's no synergy with Wrecking Ball. Wrecking Ball's high mobility makes it incredibly difficult to land healing grenades at long distances. |
 Brigitte |
Shield Bash is one of the most dangerous abilities to Wrecking Ball. Similar to Flash Bang, t's fast enough to catch you during a rollout, cut off your Ultimate, and make you vulnerable to his team. Make sure you're watching Brigitte's ability usage so you know when it's safe to engage. Also, since you're a large target, Brigitte can easily hit you with her flail and activate Inspire. | Brigitte can heal him at range with Repair Packs. Rally armor can also strengthen his defense and increase his vitality as he dives into the enemy team. |
 Lúcio |
(To be added) | Lucio's Sound Barrier on top of his Adaptive Shield means that, for 8 seconds, Wrecking Ball is incredibly hard to kill and can tank most high-damaging ultimates such as Self-Destruct or R.I.P-Tire. |
 Mercy |
(To be added) | Mercy can damage boost his primary fire and abilities, giving them an additional 30% boost. Unfortunately, this doesn't apply to Minefield. |
 Moira |
(To be added) | (To be added) |
 Zenyatta |
Zenyatta should be easy to deal with at close range. However, at a distance, it could be different. Orbs of Destruction, his weapon, has no damage falloff, and a full volley could deal up to 240 HP of damage. This can be further compounded with Orb of Discord, increasing the damage you take from anything. With Transcendence, Zenyatta can simply charge through your mines without taking damage and heal heavily wound allies. | (To be added) |
Map Strategies
Control
| Map | Strategy & Stage Tips |
|---|---|
 Overall Strategy |
TBA RATING | TBA FEATURE
Map strategy details for Overall Strategy are currently missing. You can help the Overwatch Wiki by adding them!
|
 Antarctic Peninsula |
TBA RATING | TBA FEATURE
Map strategy details for Antarctic Peninsula are currently missing. You can help the Overwatch Wiki by adding them! Labs
Strategy details missing.
Sublevel
Strategy details missing.
Icebreaker
Strategy details missing.
|

|
TBA RATING | TBA FEATURE
Map strategy details for Busan are currently missing. You can help the Overwatch Wiki by adding them! Downtown
Strategy details missing.
Sanctuary
Strategy details missing.
MEKA Base
Strategy details missing.
|

|
TBA RATING | TBA FEATURE
Map strategy details for Ilios are currently missing. You can help the Overwatch Wiki by adding them! Lighthouse
Strategy details missing.
Well
Strategy details missing.
Ruins
Strategy details missing.
|

|
TBA RATING | TBA FEATURE
Map strategy details for Lijiang Tower are currently missing. You can help the Overwatch Wiki by adding them! Control Center
Strategy details missing.
Garden
Strategy details missing.
Night Market
Strategy details missing.
|

|
TBA RATING | TBA FEATURE
Map strategy details for Nepal are currently missing. You can help the Overwatch Wiki by adding them! Village
Strategy details missing.
Shrine
Strategy details missing.
Sanctum
Strategy details missing.
|

|
TBA RATING | TBA FEATURE
Map strategy details for Oasis are currently missing. You can help the Overwatch Wiki by adding them! City Center
Strategy details missing.
Gardens
Strategy details missing.
University
Strategy details missing.
|

|
TBA RATING | TBA FEATURE
Map strategy details for Samoa are currently missing. You can help the Overwatch Wiki by adding them! Beach
Strategy details missing.
Downtown
Strategy details missing.
Volcano
Strategy details missing.
|
Escort
| Map | Strategy & Stage Tips |
|---|---|
 Overall Strategy |
TBA RATING | TBA FEATURE
Map strategy details for Overall Strategy are currently missing. You can help the Overwatch Wiki by adding them!
|

|
TBA RATING | TBA FEATURE
Map strategy details for Circuit Royal are currently missing. You can help the Overwatch Wiki by adding them! Attack
Strategy details missing.
Defense
Strategy details missing.
|

|
TBA RATING | TBA FEATURE
Map strategy details for Dorado are currently missing. You can help the Overwatch Wiki by adding them! Attack
Strategy details missing.
Defense
Strategy details missing.
|

|
TBA RATING | TBA FEATURE
Map strategy details for Havana are currently missing. You can help the Overwatch Wiki by adding them! Attack
Strategy details missing.
Defense
Strategy details missing.
|

|
TBA RATING | TBA FEATURE
Map strategy details for Junkertown are currently missing. You can help the Overwatch Wiki by adding them! Attack
Strategy details missing.
Defense
Strategy details missing.
|

|
TBA RATING | TBA FEATURE
Map strategy details for Rialto are currently missing. You can help the Overwatch Wiki by adding them! Attack
Strategy details missing.
Defense
Strategy details missing.
|

|
TBA RATING | TBA FEATURE
Map strategy details for Route 66 are currently missing. You can help the Overwatch Wiki by adding them! Attack
Strategy details missing.
Defense
Strategy details missing.
|

|
TBA RATING | TBA FEATURE
Map strategy details for Shambali Monastery are currently missing. You can help the Overwatch Wiki by adding them! Attack
Strategy details missing.
Defense
Strategy details missing.
|

|
TBA RATING | TBA FEATURE
Map strategy details for Watchpoint: Gibraltar are currently missing. You can help the Overwatch Wiki by adding them! Attack
Strategy details missing.
Defense
Strategy details missing.
|
Hybrid
| Map | Strategy & Stage Tips |
|---|---|
 Overall Strategy |
TBA RATING | TBA FEATURE
Map strategy details for Overall Strategy are currently missing. You can help the Overwatch Wiki by adding them!
|
 Blizzard World |
TBA RATING | TBA FEATURE
Map strategy details for Blizzard World are currently missing. You can help the Overwatch Wiki by adding them! Attack
Strategy details missing.
Defense
Strategy details missing.
|

|
TBA RATING | TBA FEATURE
Map strategy details for Eichenwalde are currently missing. You can help the Overwatch Wiki by adding them! Attack
Strategy details missing.
Defense
Strategy details missing.
|

|
TBA RATING | TBA FEATURE
Map strategy details for Hollywood are currently missing. You can help the Overwatch Wiki by adding them! Attack
Strategy details missing.
Defense
Strategy details missing.
|

|
TBA RATING | TBA FEATURE
Map strategy details for King's Row are currently missing. You can help the Overwatch Wiki by adding them! Attack
Strategy details missing.
Defense
Strategy details missing.
|

|
TBA RATING | TBA FEATURE
Map strategy details for Midtown are currently missing. You can help the Overwatch Wiki by adding them! Attack
Strategy details missing.
Defense
Strategy details missing.
|
 Numbani |
TBA RATING | TBA FEATURE
Map strategy details for Numbani are currently missing. You can help the Overwatch Wiki by adding them! Attack
Strategy details missing.
Defense
Strategy details missing.
|

|
TBA RATING | TBA FEATURE
Map strategy details for Paraíso are currently missing. You can help the Overwatch Wiki by adding them! Attack
Strategy details missing.
Defense
Strategy details missing.
|
Push
| Map | Strategy & Stage Tips |
|---|---|
 Overall Strategy |
TBA RATING | TBA FEATURE
Map strategy details for Overall Strategy are currently missing. You can help the Overwatch Wiki by adding them!
|

|
TBA RATING | TBA FEATURE
Map strategy details for Colosseo are currently missing. You can help the Overwatch Wiki by adding them! Pushing
Strategy details missing.
Defending
Strategy details missing.
|

|
TBA RATING | TBA FEATURE
Map strategy details for Esperança are currently missing. You can help the Overwatch Wiki by adding them! Pushing
Strategy details missing.
Defending
Strategy details missing.
|

|
TBA RATING | TBA FEATURE
Map strategy details for New Queen Street are currently missing. You can help the Overwatch Wiki by adding them! Pushing
Strategy details missing.
Defending
Strategy details missing.
|

|
TBA RATING | TBA FEATURE
Map strategy details for Runasapi are currently missing. You can help the Overwatch Wiki by adding them! Pushing
Strategy details missing.
Defending
Strategy details missing.
|
Flashpoint
| Map | Strategy & Stage Tips |
|---|---|
 Overall Strategy |
TBA RATING | TBA FEATURE
Map strategy details for Overall Strategy are currently missing. You can help the Overwatch Wiki by adding them!
|

|
TBA RATING | TBA FEATURE
Map strategy details for Aatlis are currently missing. You can help the Overwatch Wiki by adding them! Station
Strategy details missing.
Garden
Strategy details missing.
Town Center
Strategy details missing.
Bazaar
Strategy details missing.
Resort
Strategy details missing.
|

|
TBA RATING | TBA FEATURE
Map strategy details for New Junk City are currently missing. You can help the Overwatch Wiki by adding them! Arena
Strategy details missing.
The Ducts
Strategy details missing.
Refinery
Strategy details missing.
Junkyard
Strategy details missing.
Bomb Flats
Strategy details missing.
|

|
TBA RATING | TBA FEATURE
Map strategy details for Suravasa are currently missing. You can help the Overwatch Wiki by adding them! Market
Strategy details missing.
Garden
Strategy details missing.
Palace
Strategy details missing.
Temple
Strategy details missing.
Ruins
Strategy details missing.
|
Achievements
| Name | Icon | Description | Reward |
|---|---|---|---|
|
|
Absorb 1250 damage with Wrecking Ball's Adaptive Shield without dying in Quick or Competitive play. |  | |
|
|
Roll through 4 enemies within 2 seconds as Wrecking Ball in Quick or Competitive play. |  |
Trivia
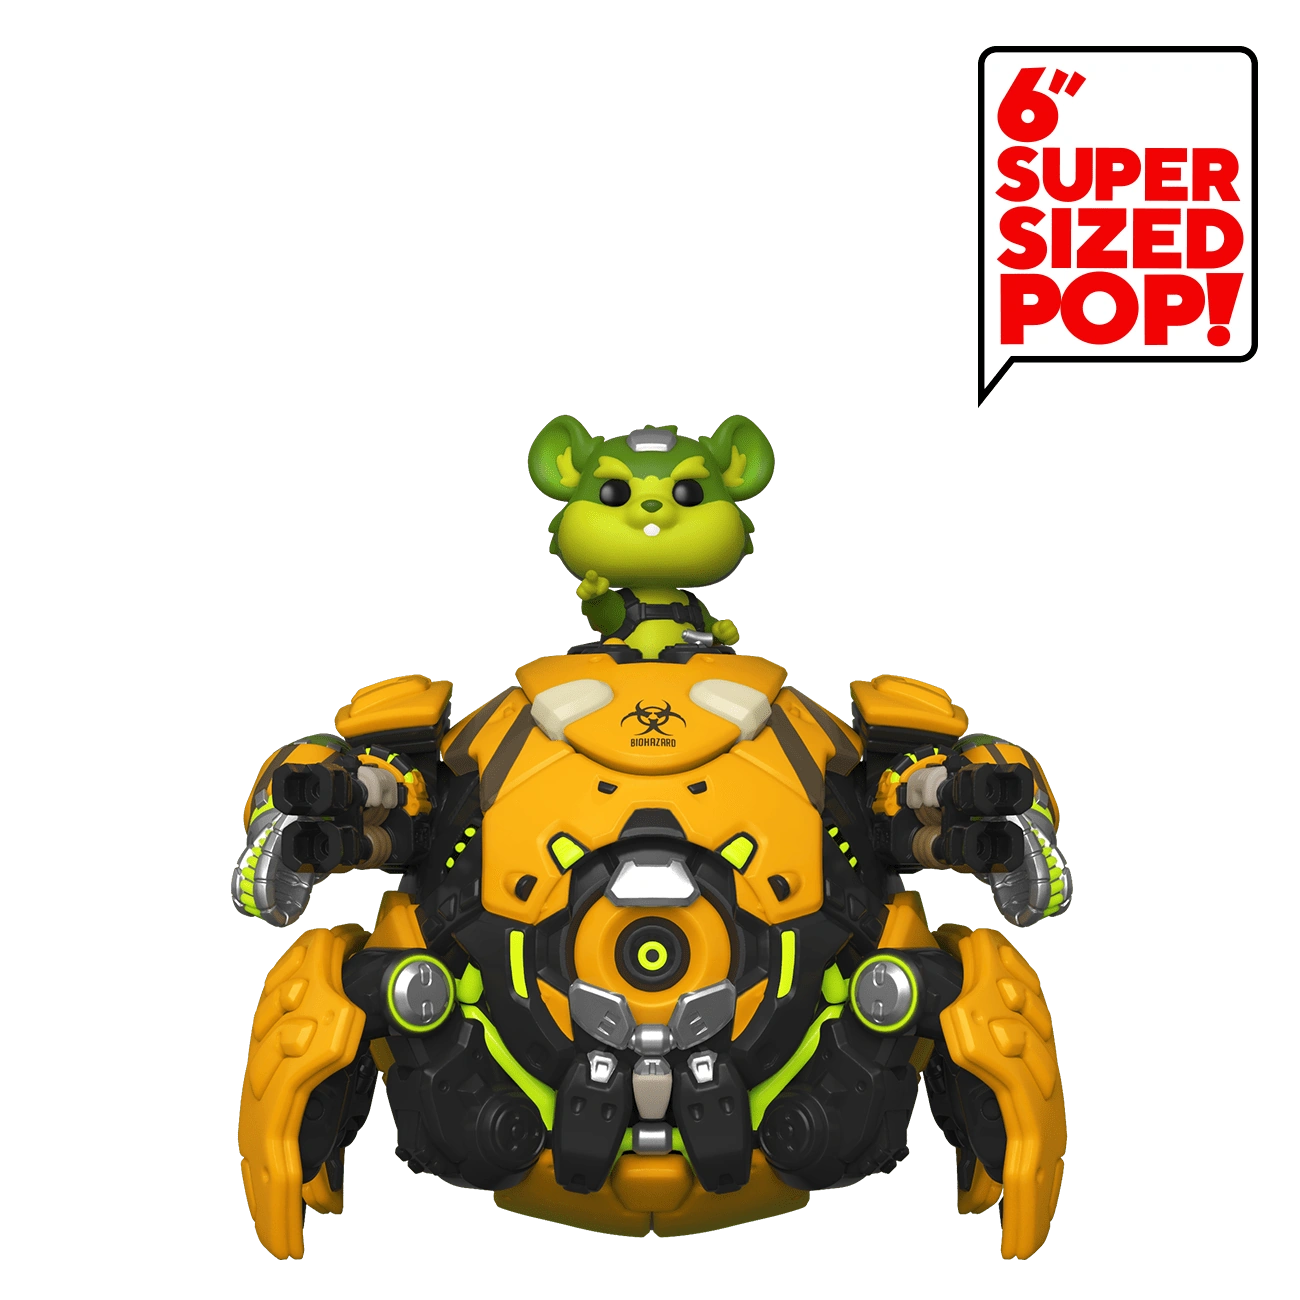
The Wrecking Ball Funko Pop
- Wrecking Ball is Hero 28 and the seventh new hero added to the game.
- Wrecking Ball is the 28th hero, while Winston's designation was 'Specimen 28'.
- The number 8 is painted on the Wrecking Ball chassis, referencing Hammond's official designation: Specimen 8.
- Hammond has the same eyebrow shape as Torbjörn, which Ben Zhang considers to be his favorite feature of the design, noting their many similarities as short statured engineers.[4]
- In the Attacker spawn of Dorado, if the bells are rung in the tune of the Overwatch theme song, Hammond will sing it shortly after.[5]
- Hammond is "Pikachu-sized." In the Pokémon universe, Pikachus are 0.4 m/40 cm (1'04") high and weighs 6 kg (13.2 lbs).
- In 2018, it was stated Hammond himself was not a Junker.[6] This appears to have changed in Overwatch 2, which establishes that Hammond was the Junker Queen's bodyguard. His backstory was further retconned in this regard, as on his original hero page, it was stated that Hammond left Junkertown, whereas in his Overwatch 2 page, it establishes that he never left the Junker Queen's side. If not a retcon, it arguably recontextualizes the original lore by mentioning that Hammond still leaves Junkertown from time to time. The story section of this article has gone for a recontextualized approach.
- Wrecking Ball is the only hero with both armor and shield equipped.
- He is also the only hero capable of equipping all 4 type of heal available in-game (health, armor, shield, overhealth).
- Hammond's name and species can be a joke related to Top Gear/ The Grand Tour's Richard Hammond, who is sometimes referred to as "the Hamster". It's also notable that both drive fast vehicles.
Misc. Character Information
- "Wrecking Ball" is the name that he chose for himself as a competitor in the Scrapyard, whereas Hammond was a name given to him by the scientists on the Lunar Horizon Colony. As such, Wrecking Ball is the primary name used in-game, rather than Hammond.[4]
- Hammond did not create the AI in his mech.[7]
- Hammond can't speak English or any other human language as, according to Jeff Kaplan, that would be "completely ridiculous."[8] Winston can understand Hammond "because, of course, they're animals, and all animals can communicate with one another." Hammond communicates with humans via a soundboard in his mech.
- Hammond has sensible ears.[1]
- Hammond enjoys sunflower seeds[1] and pancakes.[9]
- Nearly every human Hammond has met has been arrogant or overconfident. The Junker Queen is the exception, as in Hammond's view, she's earned her confidence, at least in part due to being the only human to have ever bested him in combat.[1]
- Hammond likes the Junkers. While he finds their cooking terrible, he appreciates they have similar qualities as himself—the ability to to recreate and recycle, and, like him, they live in the moment.[1]
- Hammond's preferred form of humor is slapstick.[1]
- Hammond uses a puffy notebook to record his plans.[9]
Merchandise
- A Wrecking Ball Funko Pop figurine (based on his biohazard skin) went on sale at the October 2019 NYCC.[10]
- A Wrecking Ball pin is available from the Blizzard store.[11]
Development
Overwatch
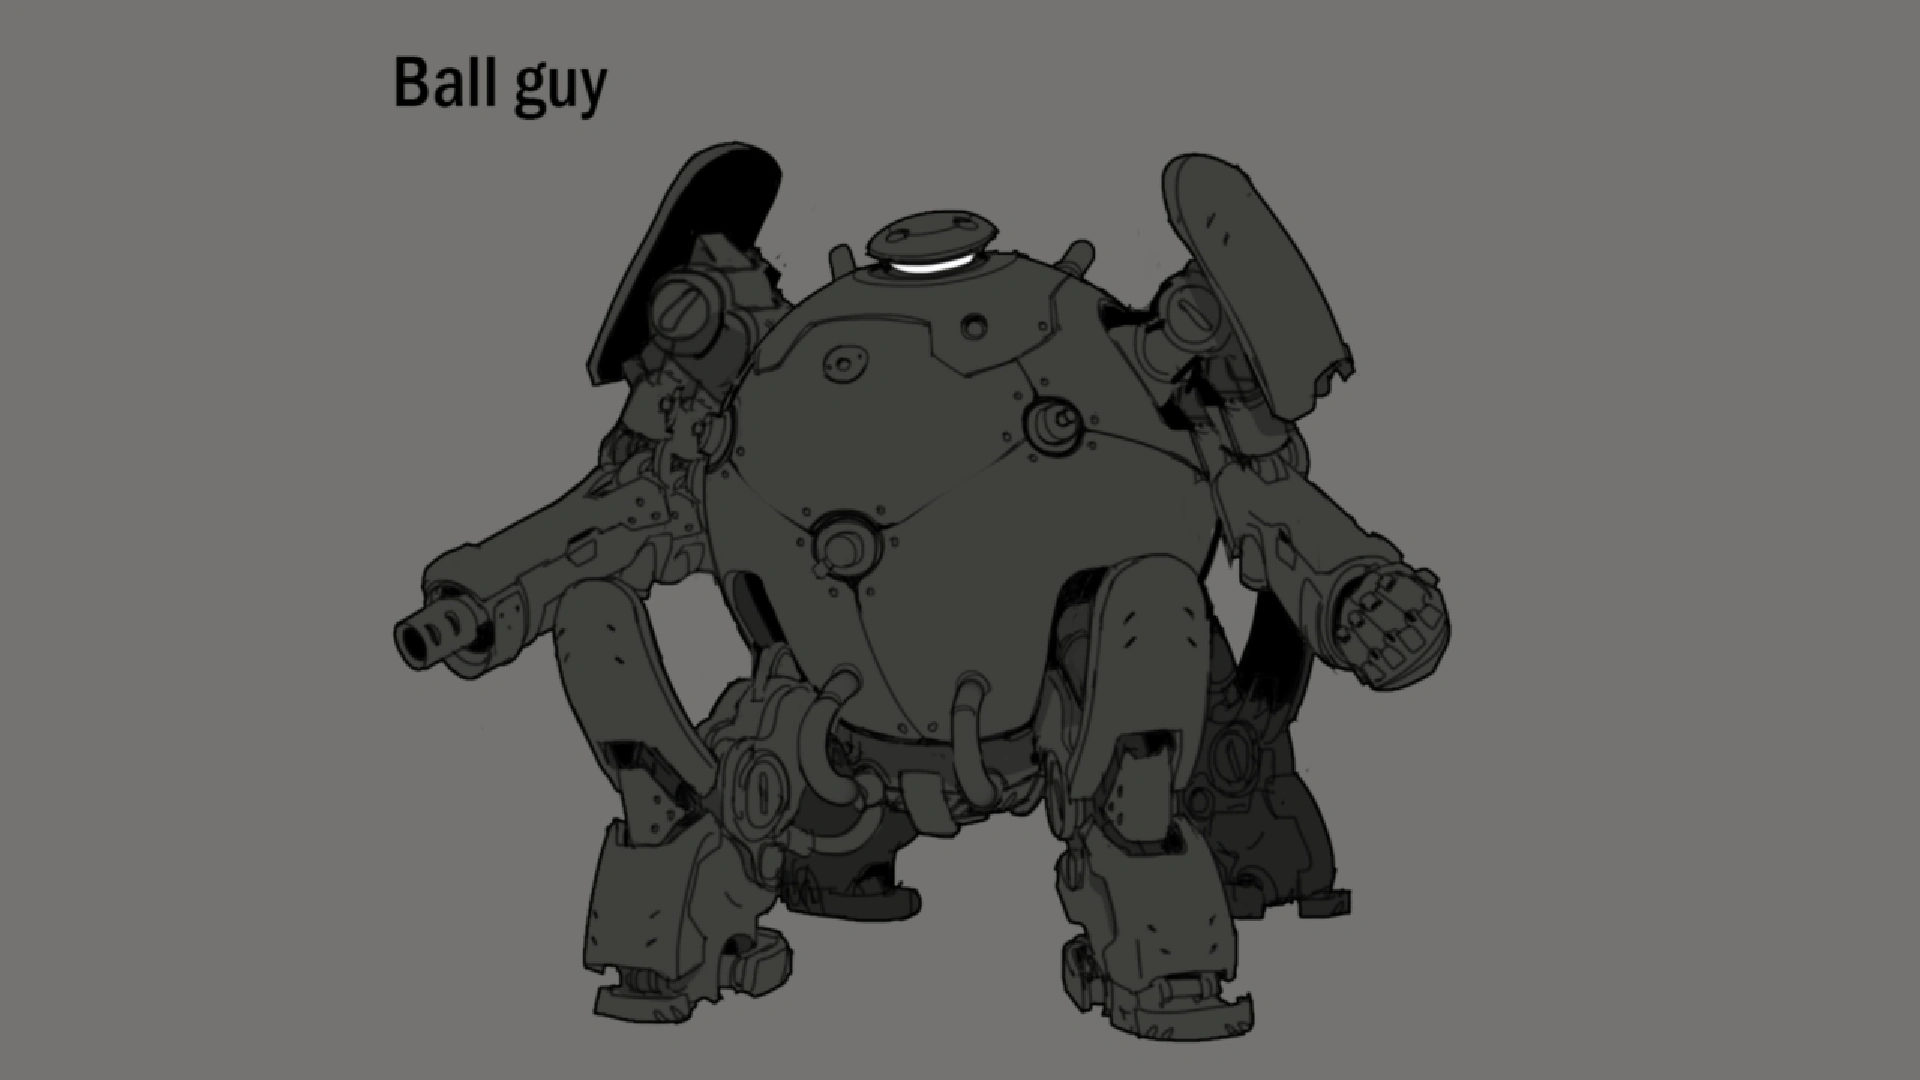
"Ball Guy" concept art.
The concept for Wrecking Ball actually originated early in Overwatch's development, during the game's original character design phase, as "Ball Guy," a spherical robot Arnold Tsang created while exploring circular robot designs, which stemmed from an early unused concept of Junkrat wearing a bomb-shaped suit. Geoff Goodman began designing this version of the hero as a "junkyard magnet bot," a robotic tank hero with a kit themed around magnetism, including abilities that allowed him to attract and repel bullets. At around the same time, the concept artists were doing preliminary ideation for a "cute hero," which included several prototype designs of robots, rodents, and a robotic monkey, as well as precursors to D.Va; this same ideation phase would eventually produce Jetpack Cat. Eventually, these two lines of ideation would converge on the idea of a hamster in a hamster ball, and Arnold Tsang illustrated the first iteration of Wrecking Ball, as a robotic hamster piloting a quadrupedal robot that could transform into a sphere.[4]
Arnold Tsang took some inspiration for Hammond's design and coloration from the pet hamster he owned in college, Zug-Zug.[4]
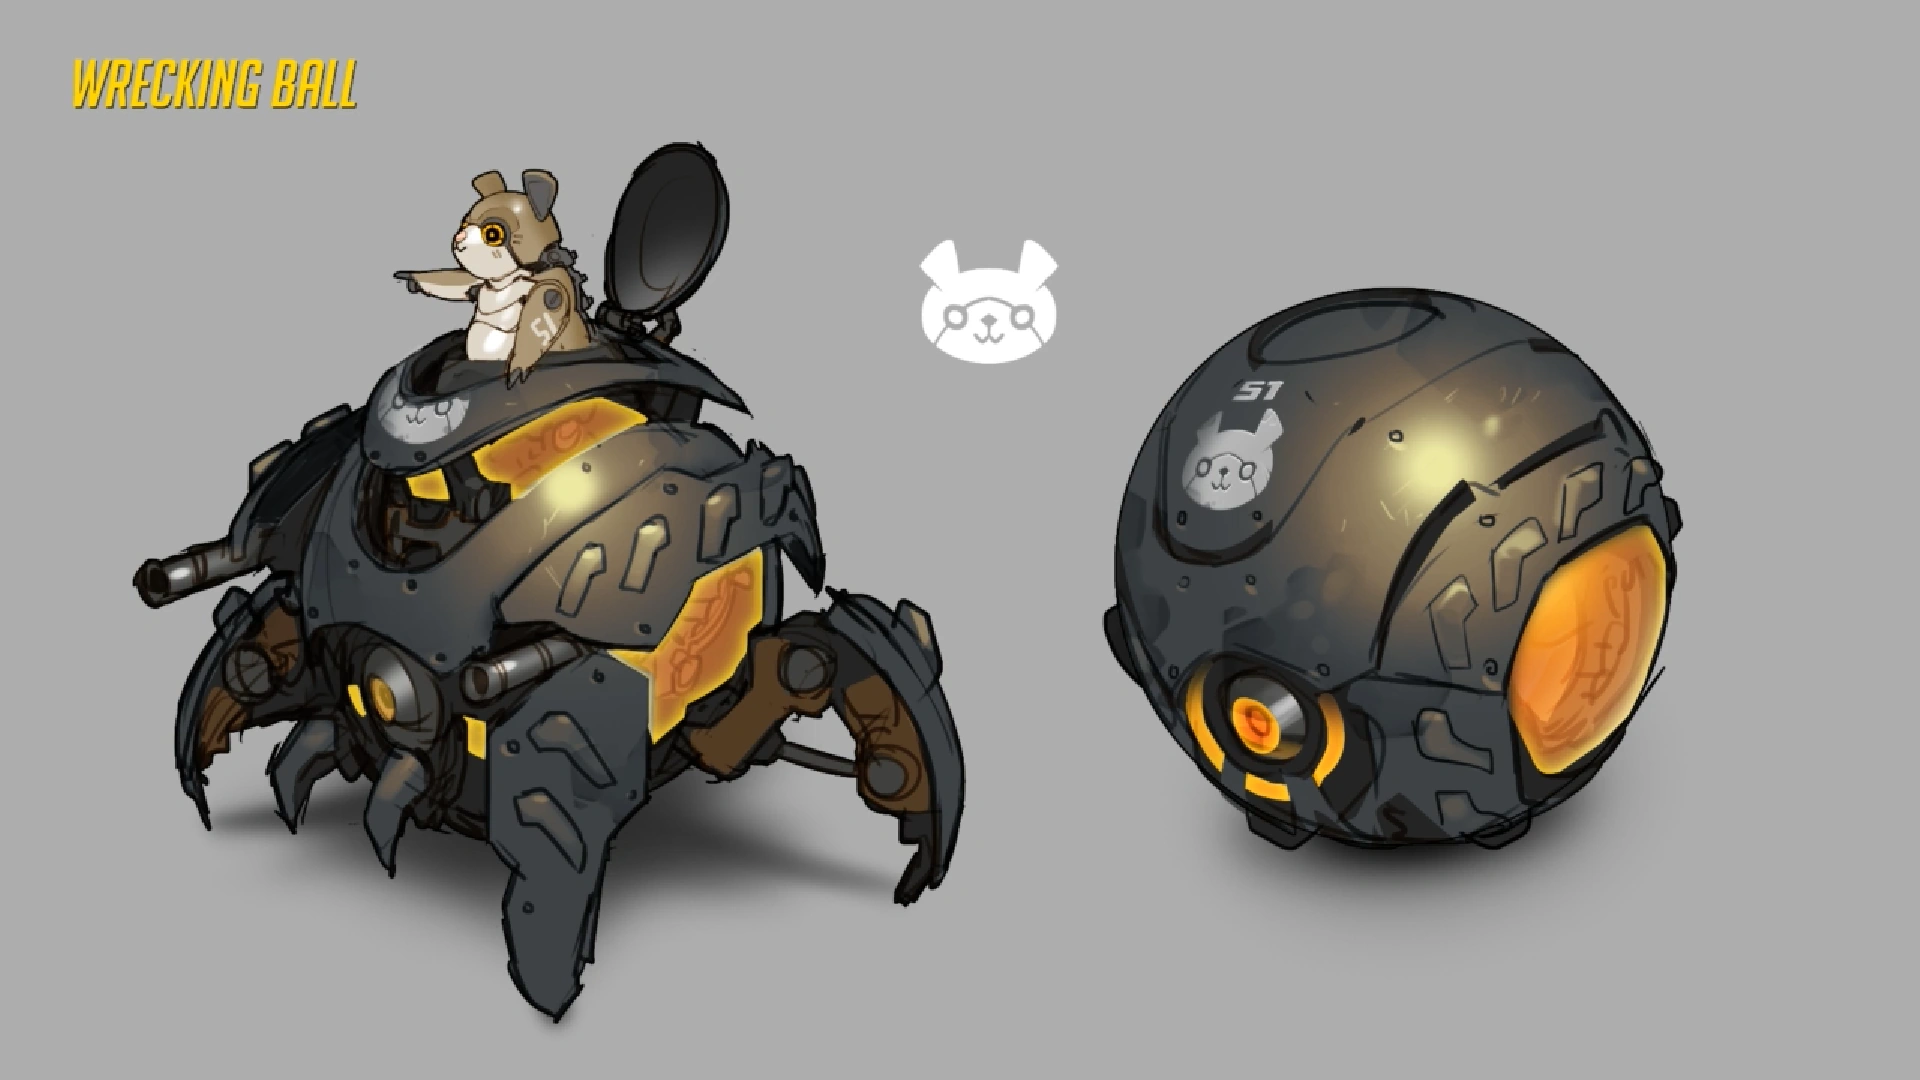
The first iteration of Wrecking Ball.
The illustration was emailed out and clicked with the designers, but this new direction proved to be controversial within the Overwatch development team, with some loving the idea and others believing it would ruin the game. In 2014, Jeff Kaplan, Jeffrey Brill, and Randal Dumoret had a disagreement over the hero's inclusion, with Dumoret falling into the latter camp. The discussion resulted in Brill scheduling a meeting in 2024 to determine whether or not Wrecking Ball had ruined the game, and that if he had, he would be removed from the game at that point. Though the team fully intended to eventually release the hero, they didn't feel it was the right time, and so Wrecking Ball remained shelved until some time in 2017, when he was brought back up and they started seriously discussing his implementation.[4]
Revisiting the concept, they decided that a mechanical hamster couldn't be as cute as an actual hamster. Using Tracer as a reference point they produced a number of hamster concepts to hone in on a specific style that suited Overwatch's "East meets West" aesthetic, ultimately deciding on a design that fell in between Hamtaro and Zootopia.[4] According to Kaplan, they also deliberated over Hammond's size, eventually deciding that he should be "Pikachu-sized."
From there Wrecking Ball went through various design iterations with mechanics that focused on rolling around on the ground and down slopes to gain momentum and smash into enemies. Eventually, the grappling hook was incorporated into his kit, which fit into his wrecking ball theme, and his final design began to take shape with the Piledriver, Adaptive Shield, and Minefield abilities pulling everything together.
While designing Wrecking Ball's legendary skins, because the hero concept was already quite different from the other heroes in the game, they decided to ground his default legendary skins in the existing Overwatch story, with his Junker skin reflecting his time as the Champion of the Scrapyard and his Lunar skin reflecting his time as an experimental test subject on the Horizon Lunar Colony.[4]
Prior to his release, an Overwatch tweet was released containing a video that featured several posters on a wall, one of which was a Horizon commercial displaying most likely a chimpanzee or a similar specimen flying in space.[12] This led to speculation that this was teasing Hammond as a playable hero.[13] With the release of the Patch 1.25, a new room was added to Horizon Lunar Colony neighboring Winston's room with the text "Specimen 8" written on the door, confirming that this was Hammond's room.
Overwatch 2
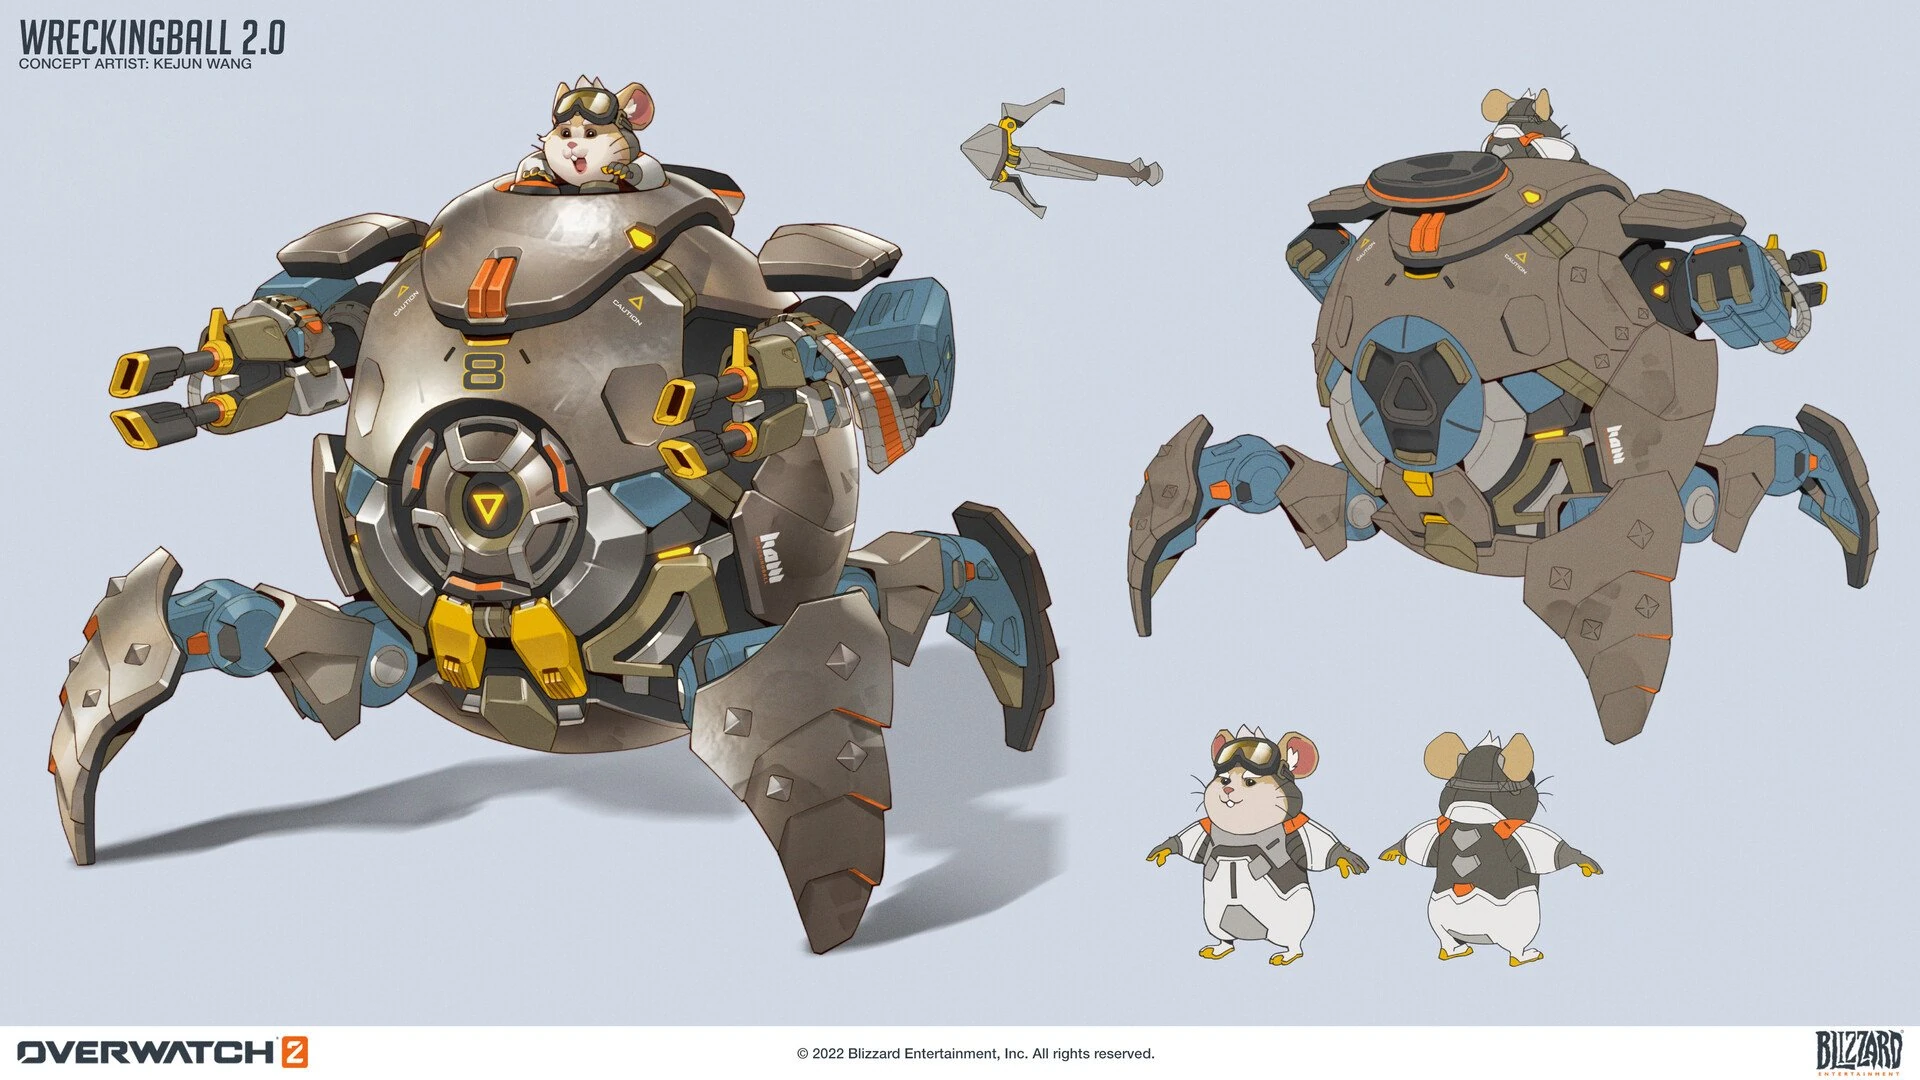
Wrecking Ball's Overwatch 2 Skin Concept Art by Kejun Wang
Like almost all Overwatch Heroes, Wrecking Ball was redesigned and given a new look for Overwatch 2. Kejun Wang was the concept artist behind his Overwatch 2 look, but otherwise not much is known about the idea behind his new look. It was stated that the general scheme concept for all new hero looks for Overwatch 2 to be aimed at keeping the "essence" of the hero, while showing some evolution and character growth in the design.[14]
A Unicron skin for Wrecking Ball was considered for the Transformers collaboration, but was not implemented.[15]
Removed abilities

- Removed in Season 18.
- Reduces the amount of overhealth Wrecking Ball loses from 1 to 0.5 for every 1.5 points of overhealth granted to an ally.
- In other words, for an ally to gain 75 overhealth Wrecking Ball only loses 25.

Media
Former Portrait
-
 Overwatch 1 Hero portrait
Concept Art
-
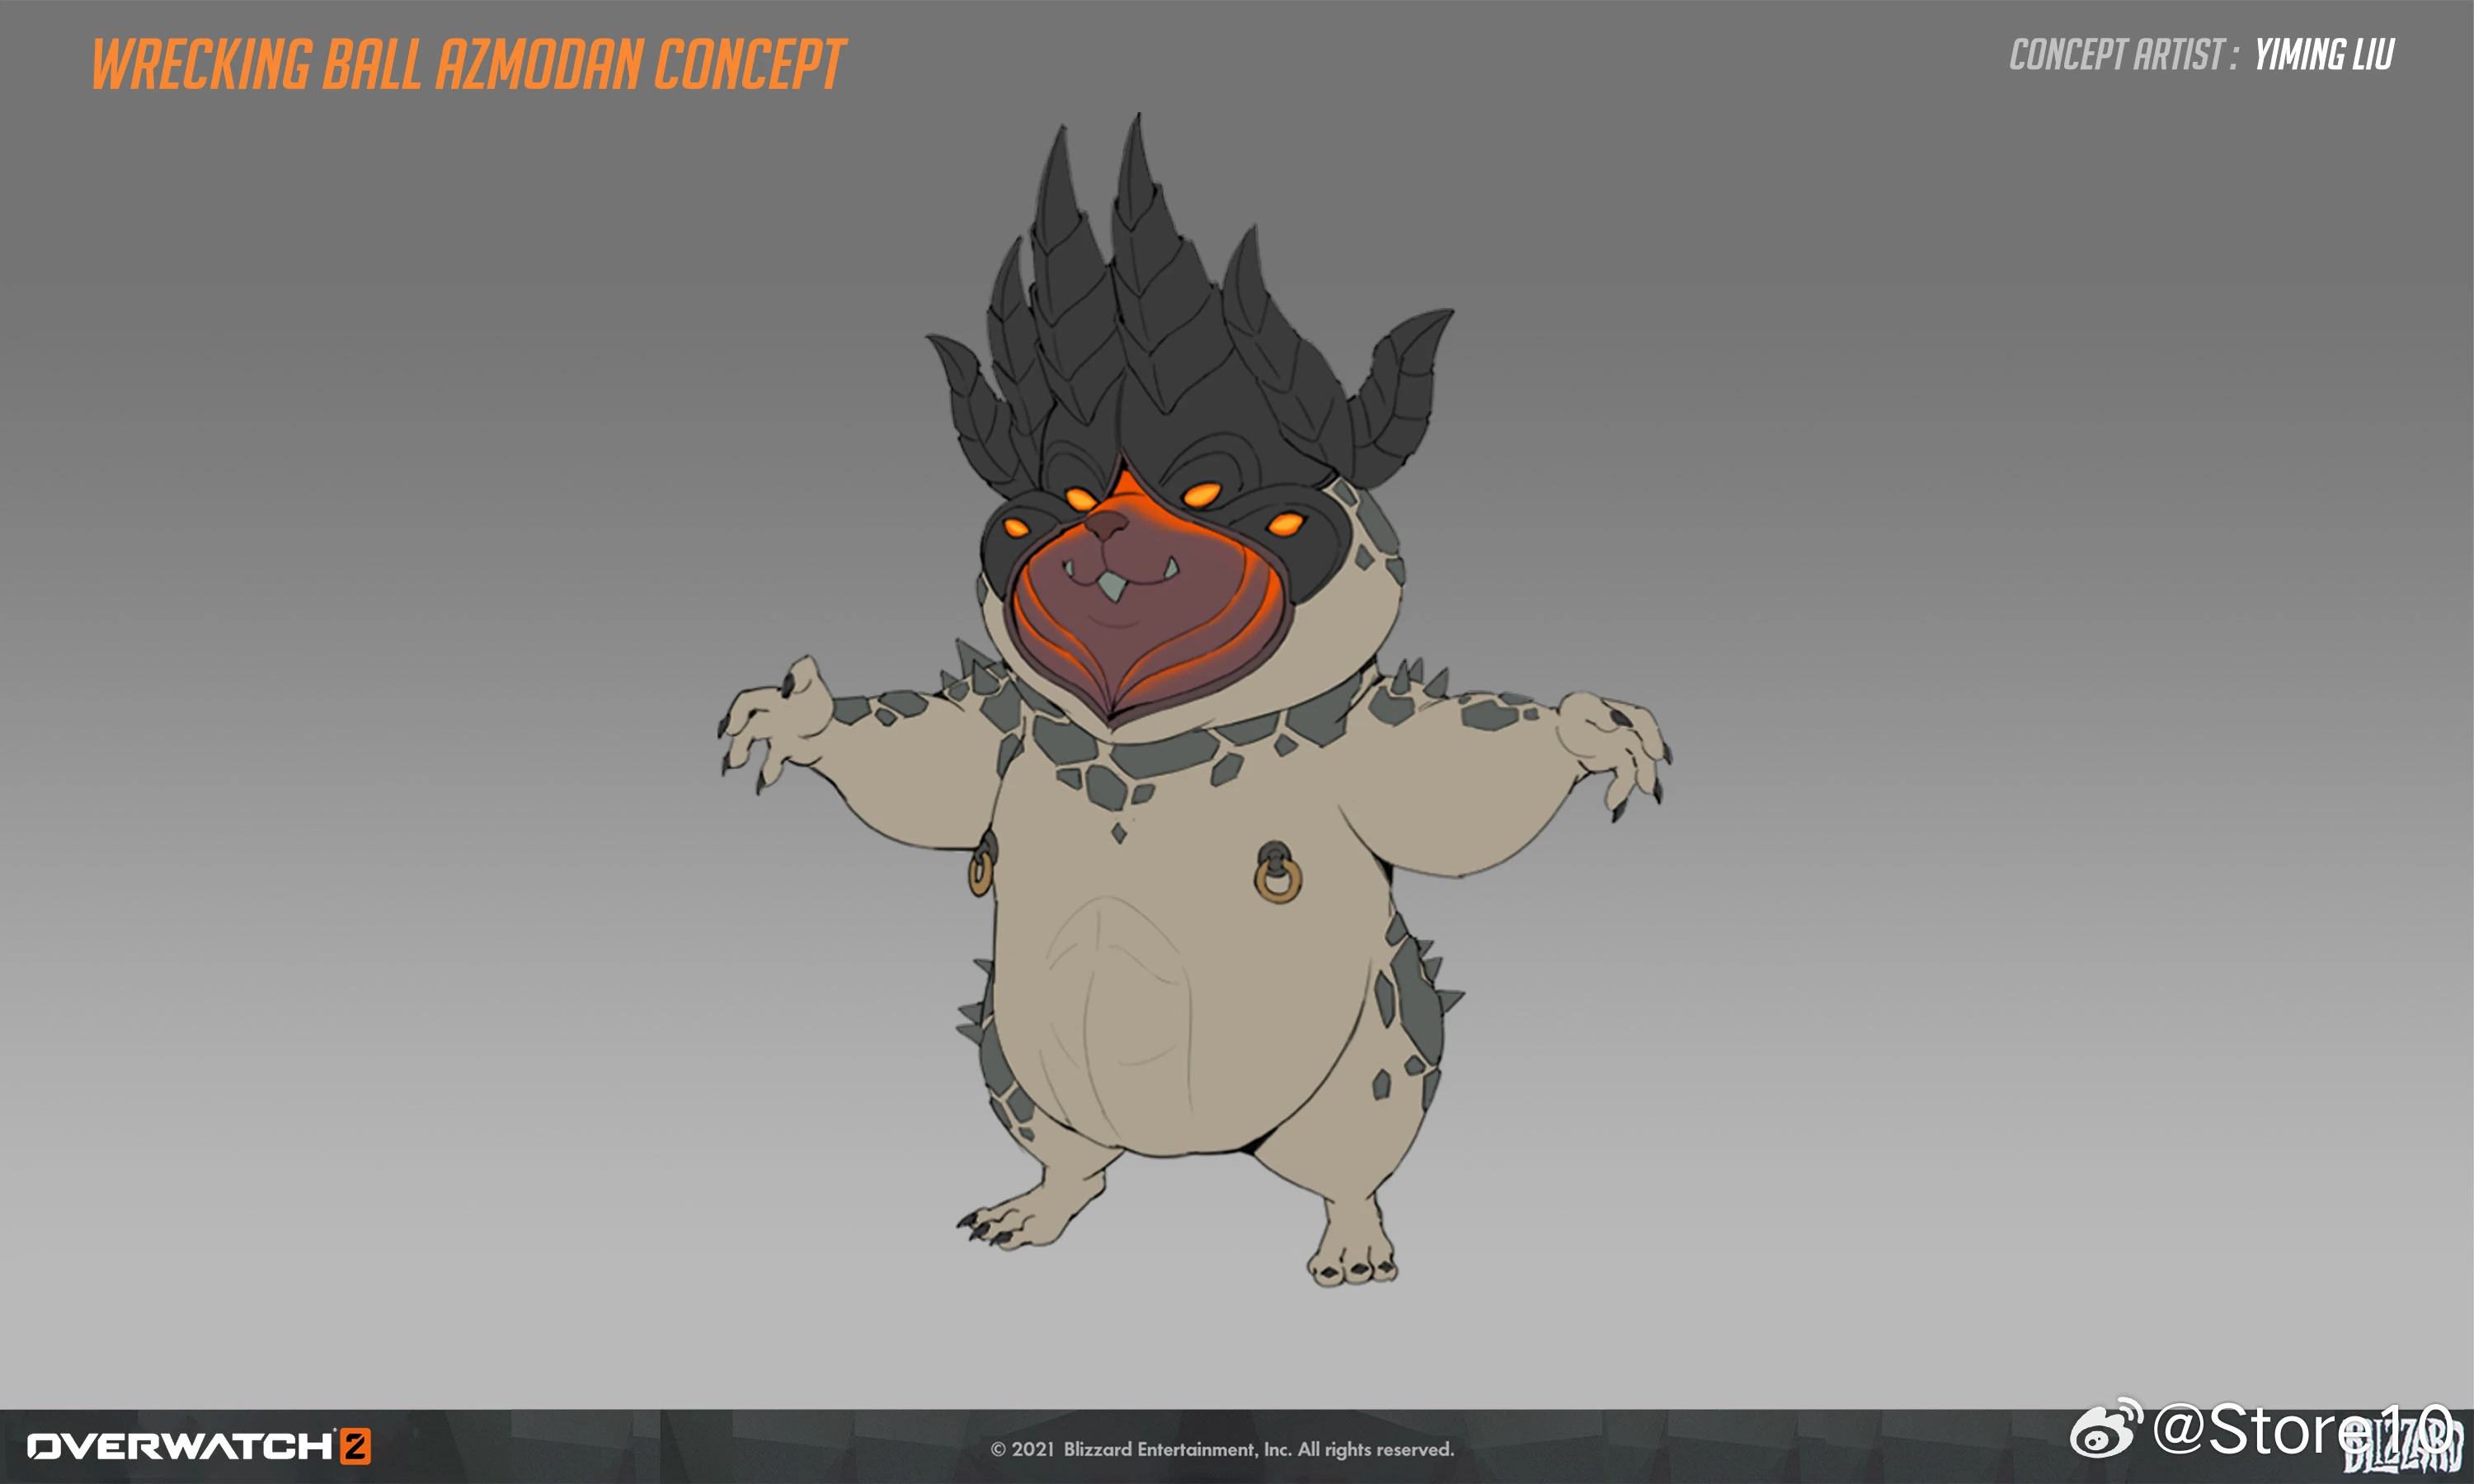
 Azmodan Skin Hammond Concept Art by Yiming Liu
 -
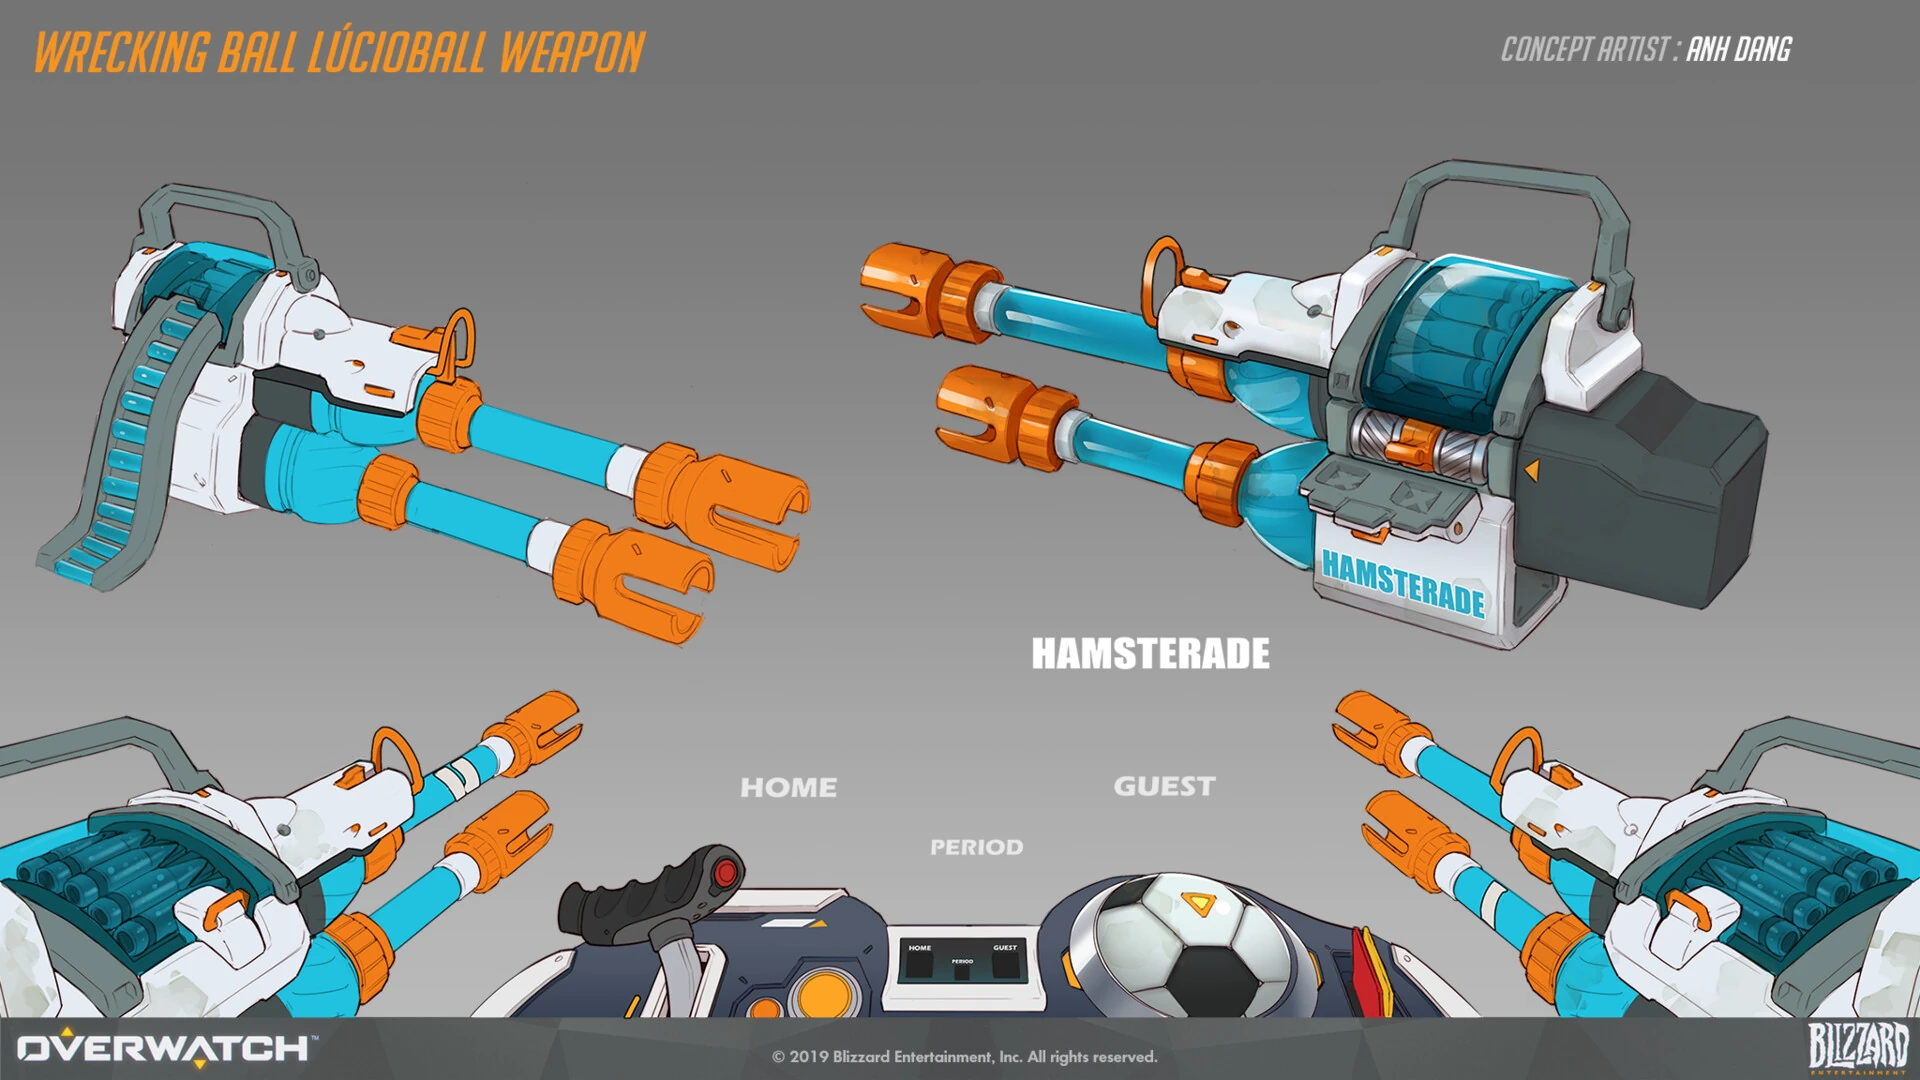
 Lúcioball Skin Concept Art by Anh Dang
 -
 Lúcioball Skin Weapons Concept Art by Anh Dang

Videos
Balance Change Logs
- For more information, see Patch Notes.
![]() Pack Rat – Minor Perk
Pack Rat – Minor Perk
- Removed.
![]() Multi-Ball – Minor Perk
Multi-Ball – Minor Perk
- Press Ultimate within 5 seconds after using Minefield to deploy 7 additional mines.
- Base armor reduced from 175 to 125
- 6v6 Hero Changes
- Base health reduced from 500 to 475.
- Overhealth gain per target reduced from 75 to 50.
![]() Adaptive Barrier – Major Perk
Adaptive Barrier – Major Perk
- No longer consumes overhealth.
- Visual size increased to be in line with Zarya Barriers.
![]() Quad Cannons - Primary Fire
Quad Cannons - Primary Fire
- Maximum ammo reduced from 100 to 80.
![]() Minefield - Ultimate
Minefield - Ultimate
- Mine duration reduced from 20 to 16 seconds.
![]() Transfer Efficiency - Major Perk
Transfer Efficiency - Major Perk
- Removed.
![]() Adaptive Barrier - Major Perk
Adaptive Barrier - Major Perk
- Adaptive Barrier generates a 1.4 second barrier on activation, consuming 50 overhealth.
- Ally transfer cost reduction increased from 33% to 50%.
- Hero Perks
- Roll impacts deal 100% more damage to Tanks.
- Health Packs heal an additional 100 health.
- Piledriver winds up longer, gaining air control and dealing up to 50% more damage.
- Reactivating Adaptive Shield reduces its cooldown by 1.5 seconds per ally affected and ally health gained is increased by 33%.
- Global Projectile Size Bonus
- Hitscan radius small reduced from 0.05 to 0.04 meters.
- Automatic reload time while transformed reduced from 2 to 1.6 seconds.
- Allied Overhealth transfer ratio increased by 50% (Use up to 50 Overhealth per target to grant allies up to 75 HP).
- Impact damage increased from 50 to 60.
- Movement lockout duration for enemies increased from 0.5 to 0.75 seconds.
- Damage increased from 130 to 165.
- Explosion knockback increased from 5 to 10.
- Hold the jump input while the Grappling Claw is attached to terrain to retract it, pulling yourself towards the anchor point. This action can be rebound in his hero settings.
- Now has a one second cooldown if Wrecking Ball never reaches ramming speed before canceling the ability. Interrupting him with Hack, Hinder, and stuns will still trigger the full cooldown.
- The maximum duration timer no longer triggers unless he reaches ramming speed.
- Can now be reactivated to redistribute up to 300 overhealth to nearby allies, capping at 75 per person.
- Enemy and ally detection radius increased from 10 to 13 meters.
- Health increased from 50 to 60.
- General updates
Most damage-dealing projectile sizes have been increased by a new global modifier added to their base size.
- +0.05 meters for hitscan projectiles with a high rate of fire or spread (e.g., Tracer's Pulse Pistols or Reaper's Hellfire Shotguns).
- +0.08 meters for hitscan projectiles that are more precise (e.g., Cassidy's Peacekeeper or Soldier:76's Heavy Pulse Rifle).
- +0.05 meters for travel time projectiles that are shotguns or have a very high rate of fire (e.g., Roadhog's Scrap Gun or Ramattra's Void Accelerator).
- +0.10 meters for travel time projectile with a speed greater than 50 meters per second (e.g., Zenyatta's Destruction Orb).
- +0.15 meters for travel time projectile with a speed less than or equal to 50 meters per second (e.g., Pharah's Rocket Launcher).
- Very large projectiles with a base size greater than 0.5 meters have been excluded from these increases (e.g., Orisa's Energy Javelin or Reinhardt's Fire Strike).
Hero combined HP (base health/armor/shields) increased by 15-25%.
- 150-175 HP heroes increased by 25 HP.
- 200-300 HP heroes increased by 50 HP.
- 300+ HP (Tanks) increased by 75-100 HP.
- Each hero's precise health increases are listed in their patch notes below.
Ultimate Charge
- All Ultimate ability costs increased by 10%.
Regenerative Passive for All Heroes
- All heroes now regenerate 20 health per second after 5 seconds of not taking damage.
Quick Melee
- Damage increased from 30 to 40.
- Hero updates
- Armor increased from 100 to 175.
- Number of shots to reach max spread increased from 20 to 30.
- Manual reload time reduced from 2 to 1.6 seconds. This does not affect the automatic reload while transformed into a ball, which is still 2 seconds.
- Effect duration decreased from 9 to 7 seconds
- Added the hero-specific option "Relative aim sensitivity while rolling"
- Added the hero-specific option "Relative gyro sensitivity while rolling" (Nintendo Switch™ platform only)
- Added a timeout indicator for Grappling Claw located above the ability icon
- Minefield arming time increased from 1 to 1.25 seconds
- Base health in Role Queue modes reduced from 600 to 450
- Base health in non-Role Queue modes reduced from 600 to 300
- Shield health increased from 0 to 150
- Cooldown reduced from 10 to 8 seconds
- Ultimate cost increased 9%
- Arming time reduced from 1.5 to 1 second
(beta)
Developer Comment: We are reverting Roll’s knockback to the original value from when Wrecking Ball was launched. We wanted to give Wrecking Ball a more unique role as a dive tank that can split up enemy teams. We made this change with the Tank passive of 30% knockback resistance in mind.
- Knockback increased by 36%
(beta)
- Base armor increased from 100 to 150
- Base health increased from 500 to 550
- Radius increased from 8 to 10 meters
- Health gained per target increased from 75 to 100 health
- (6v6) Base health reduced from 475 to 450. (Total health including armor and shields reduced from 575 to 550.)
- 6v6 Hero Changes
- Base health reduced from 500 to 475.
- Overhealth gain per target reduced from 75 to 50.
- In 6v6 game modes, Armor health reduced from 150 to 100.
- Can now disperse shields to allies. (undocumented)
- Radius increased from 8 to 10 meters. (undocumented)
- Base shield health removed.
- Base health increased from 300 to 500.
- Base armor reduced from 175 to 150.
- No longer able to disperse shields to allies.
- Radius reduced from 13 to 8 meters.
- Overhealth gained per target reduced from 100 to 75.
- Cooldown increased from 8 to 10 seconds.
- Now has a maximum grapple time of 6 seconds
- Now begins on cooldown after respawning
- Cast time reduced from 0.2 seconds to 0 seconds
- Duration increased from 7 to 9 seconds
- Proximity mines no longer stick to walls
Wrecking Ball is the fastest hero in the game which works well for his disruptive playstyle. However, to help reduce his contribution to objective stalling, his Grappling Claw ability will now start on cooldown upon respawning. Proximity mines will no longer attach to walls as it resulted in accidental bunched up placements, out of range from most enemy targets, more often than any intentional clever uses.
General
- Hitscan damage now scales to 30% at maximum falloff range, down from 50% for the following heroes:
- Ashe
- Baptiste
- Bastion
- McCree
- Soldier: 76
- Widowmaker
- Wrecking Ball
This change may be difficult to notice immediately as it scales damage over a range slightly more than before, but it will lower the impact of hitscan damage outside of their intended optimal ranges.
- Knockback strength reduced 25%
Developer Comment: For how often it can occur, Wrecking Ball's knockback is too strong. We're reducing the distance it moves enemy players to bring it more in line with other low cooldown knockback abilities.
- Shield per target reduced from 100 to 75
Developer Comment: Wrecking Ball's high mobility and potential for massive shield health have left him a bit too survivable after the overall damage and crowd control in the game have been tuned down. We are reducing the amount of additional shields he generates per target though the base 100 shields from the ability remains unchanged.
- Now has improved target detection to help connecting to walls be more consistent.
- Affected players’ loss of air control reduced from 1 second to 0.5 seconds.
Developer Comment: This change allows Wrecking Ball’s enemies to regain control of their movement more quickly to try and avoid attacks, making Piledriver combos a bit less deadly.
- Increased projectile speed from 10 to 12, causing the mines to spread out more.
- Reduced the activation time from 0.25 to 0.1 seconds.
Developer Comment: Wrecking Ball has a very active playstyle, but it often felt difficult to make good use out of his ultimate. This change allows him to spread out his Minefield further if he wants (especially from high in the air), while still allowing for a tighter cluster if he activates it near the ground.
- If a mine lands on a moving platform, it will move along with the platform.
- No longer cancels Roll mode.
Developer Comment: This will make Adaptive Shield a more powerful survival tool, since being forced out of Roll mode left Wrecking Ball more susceptible to fire.
References
- ↑ 1.0 1.1 1.2 1.3 1.4 1.5 Thoughtless Gods
- ↑ 2018-06-28, Michael Chu. Twitter. Accessed on 2018-06-28
- ↑ https://www.reddit.com/r/Overwatch/comments/1iwtngp/is_this_allowed_i_got_reported_by_5_ppl_for/
- ↑ 4.0 4.1 4.2 4.3 4.4 4.5 4.6 Wrecking Ball Live-Drawing & Art Discussion
- ↑ https://www.reddit.com/r/Overwatch/comments/9g801z/til_if_you_play_the_ow_theme_on_dorados_bells/
- ↑ 2018-06-28. Developer Update | Introducing Wrecking Ball Accessed on 2018-06-28.
- ↑ 2019-02-16, Michael Chu. Overwatch Forums, accessed on 2019-02-16
- ↑ NEW HERO FIRST LOOK: WRECKING BALL, Blizzard Entertainment, accessed on 2018-06-28
- ↑ 9.0 9.1 Overwatch 2, Wrecking Ball Quotes
- ↑ 2019-09-23, NYCC 2019 Exclusive: Biohazard Wrecking Ball. Blizzplanet, accessed on 2019-09-25
- ↑ Blizzard Series 8 Blind Packs- 5 Pack Set, Blizzard Gear. Accessed on 2022-05-13
- ↑ 2018-06-21, Overwatch Twitter. Twitter, accessed on 2018-06-22
- ↑ 2018-06-21, IS OVERWATCH TEASING HERO 28?. IGN, accessed on 2018-06-22
- ↑ 2021-02-19, BlizzConline 2021 | Behind the Scenes of Overwatch 2 | Overwatch. Youtube @PlayOverwatch, accessed on 2024-04-16
- ↑ 2024-07-11, Overwatch 2 Reveals Alternate Transformers Characters, Secrets of New Collab (Exclusive). Comicbook, accessed on 2024-07-14
| Heroes in Overwatch
| ||||||||
|---|---|---|---|---|---|---|---|---|
Tank |
 Bruiser |
|||||||
Initiator |
 Wrecking Ball | |||||||
 Stalwart |
||||||||
Damage |
 Flanker |
|||||||
 Recon |
||||||||
 Sharpshooter |
||||||||
 Specialist |
||||||||
Support |
 Medic |
|||||||
 Survivor |
||||||||
 Tactician |
||||||||


