Ashe is a Sharpshooter Damage hero in Overwatch. Released on 13 November 2018, she is the 29th hero to be added to the game.
Overview
As the leader of the Deadlock Gang, Ashe is a rebellious outlaw who's not afraid to get her hands dirty. Ashe can quickly fire her rifle from the hip or use her weapon’s aim-down sights to line up a high damage shot at the cost of fire-rate. She blasts enemies by throwing dynamite, and her coach gun packs enough punch to put some distance between her and her foes, or gain some air to leap to hard to reach places or for an aerial shot. And Ashe is not alone, as she can call on her omnic ally B.O.B. to join the fray when the need arises.
-
 3D portrait
 -
 2D portrait

Abilities
Passive Abilities


- Critical hits will grant cooldown reduction to Movement Abilities based on 0.75% of damage dealt.
Weapons


+0.25 seconds per bullet
3.5 seconds (full reload animation)
- Damage per second: 136.5 while firing (63.86 overall w/ full reload, 34.78 w/ reload after each shot)
- Ashe reloads The Viper one bullet at a time in rapid succession, instead of all at once.
- The more bullets fired, the longer it takes to fully reload.
- If the reload is cancelled before completion, any bullets loaded will remain in the magazine, instead of none at all.
- Unlike most weapons, The Viper is semi-automatic instead of fully automatic.
- Spread resets after 1.5 seconds since the last unscoped shot. Spread starts on the 3rd shot and reaches its maximum upon the 6th shot.
- Each shot raises the Ashe camera (changes the facing angle) by 1 unit.
- If after the shot you turn on the zoom and try to shoot, it will take at least 0.240 seconds.

+0.2 seconds per bullet
2.9 seconds (full reload animation)
0 + 0.16 seconds (scope out)
- Damage per second: 114.33 while firing (41.3 overall w/ full reload, 32.98 w/ reload after each shot)
- Ashe can jump while aiming down sights without interrupting it.
- After the shot, the game raises the Ashe camera (changes the facing angle) by 1 unit, after which it starts lowering the Ashe camera to its previous value. Unlike Cassidy, Ashe will not be able to shoot once the camera is back in position and will have to wait ~0.096 seconds.
Special Abilities

90 per volley
9.4 meters (self-knockback)
18 m/s (self)
- During cast time, you can change the shot direction.
- The bullets do not need to hit anything in order to apply the knockback to Ashe.
- Can be used while rooted or hindered, however it will only knock back the enemy and not Ashe.
- Being rooted, e.g. by
 Steel Trap, mid-air will interrupt the movement but being hindered does not.
- Being rooted, e.g. by

100 over 5 seconds (burn, enemy)
25 - 10 (explosion, self)
50 over 5 seconds (burn, self)
5 seconds (burn)
- Can be shot at with
 The Viper or
  Coach Gun to detonate immediately.
 - The burn also affects barriers and turrets.
- The burn is a damage over time effect. It is removed immediately by phased out status, such as
 Protection Suzu,
  Personal/Projected Barrier or upon taking a Health Pack.
 - The projectile can be destroyed while in air by
 Defense Matrix,
  Kinetic Grasp,
  Javelin Spin,
  Power Matrix and
  Kekkai Sanctuary and reflected by
  Deflect, but the explosion is unaffected.
  Amplification Matrix affects all damage dealt, if the projectile passes through it. Explosion damage alone or a player with DoT going through is not amplified.
Ultimate Ability

17 (arm cannons)
1150
0.5 seconds (immobilize flying)
4 seconds (charging)
10 seconds (after stopping)
40 meters (arm cannons)
- Damage per second: 136 while active
- B.O.B can deal a total of 1326 damage over the duration.
- B.O.B. appears slightly to the right of Ashe and lands 5 meters in front of her, then charges in the direction Ashe is looking at. Once B.O.B. bumps into an enemy or a wall, or travels 65 meters, B.O.B. halts and begins shooting nearby enemies like a turret.
- If B.O.B. bumps into an enemy (or enemies), B.O.B. inflicts 120 damage to them and flings them into the air.
- If a charging B.O.B. collides with
 Charge,
  Rocket Punch,
  Shield Bash, or another charging B.O.B., both participants get knocked down for 1.7 seconds.
 - B.O.B. automatically uses Symmetra's
 Teleporter if it's in his path.
- Unlike other turrets, B.O.B. has spread, meaning if you are far away enough, not every single bullet will land, this is most noticeable at his max range.
- B.O.B. prefers to target enemies that Ashe damages with her rifle.
- Otherwise, B.O.B.'s targeting most likely behaves the same as Torbjorn's turret.
- B.O.B. is treated as an additional player for most effects, such as contesting/capturing objectives or Wrecking Ball's
 Adaptive Shield.
- B.O.B. can be healed, buffed (e.g.
 Nano Boost), and debuffed (e.g.
  Hack).
- If B.O.B. is hacked, B.O.B. becomes inactive for 3 seconds.
- Damaging or healing B.O.B. does not give ultimate charge, but damage boosting as Mercy does.
- B.O.B. can be healed, buffed (e.g.
- B.O.B.'s charge cannot be blocked by barriers, Defense Matrix, Kinetic Grasp, Javelin Spin Deflect, Power Matrix and Kekkai Sanctuary or boosted by Amplification Matrix, but the shots fired by him interact normally with all of the mentioned.
- B.O.B.'s charge counts as a movement ability, and is interrupted by rooted and hindered.
- Damage amplification buffs on Ashe do not affect B.O.B., but he can be directly boosted by them.
- Damage from B.O.B. applies the healing reduction from the
 Role: Damage passive, as if he were a Damage hero.
 - B.O.B. does not receive the healing reduction from damage role passive when hit by a damage hero.
- B.O.B. has the
 Role: Tank passive and is considered a Tank in most regards.
- This includes receiving reduced critical/headshot damage, reduced knockback, reduced
 Sleep Dart duration, additional Hit points in Role Queue, etc.
- This includes receiving reduced critical/headshot damage, reduced knockback, reduced
Perks
Minor Perks
A Minor Perk can be chosen at level 2.

- Manual detonation can also trigger the increased explosion radius from
 Airburst.

Major perks
A Major Perk can be chosen at level 3.

- Applies a damage over time effect.
- The counter is reset if a scoped shot misses, hits another enemy or does not hit the target again within the next 3 seconds.
- Unscoped shots can be fired in between scoped shots and have no effect on the counter.
- The shot that applies Viper's Sting does not count toward the requirement, meaning that from 4 shots fired 2nd and 4th apply the effect.

- Successful air detonations play a louder sound effect.
Hero-specific options
| Setting name | Options | Description |
|---|---|---|
| Recoil recovery aim compensation | On (default) | Stops the recoil's downward pulling return motion, if the player applies enough vertical crosshair movement after the shot. |
| Off | Recoil's return motion is unaffected by player input, always pulling the crosshair back downwards the same amount as the recoil raised it. | |
| Toggle zoom | Off (default) | Zoom deactivates when player stops holding the button. |
| On | Zoom deactivates when player presses the button again. | |
| Relative aim sensitivity while zoomed | 0% ... 100% (default: 60%) | Multiplier to base aim sensitivity while zoomed. |
Stadium
Ashe is a playable hero in Stadium game mode. See Ashe/Stadium for a list of hero-specific Items and Powers.
Strategy
- Strengths
Ashe is a hero who requires good mechanical skill to be played effectively. Her weapon, the Viper, is quite powerful at long mid-range, particularly when the player uses her ADS (aim-down-sight) alternate fire. Dynamite is a dangerous, versatile ability that can be used to threaten space (such as narrow hallways and chokepoints) and deal decent damage in its radius, as well as inflicting a damage over time debuff. Uniquely, Dynamite can be detonated early by shooting it any time between when it's thrown and when its fuse runs out. Her Coach Gun serves as both a defensive "get-off-me" tool (like Lucio's Soundwave) and a potent mobility option (like Pharah's Concussive Blast). Finally, her Ultimate ability calls out her omnic sidekick B.O.B., who rushes in, knocks enemies in the air, and then grounds himself to shoot enemies, much like a turret.
- Weaknesses
Though dominant in midrange, Ashe suffers in close combat. Her primary fire, while quite fast, deals only mild damage, and Coach Gun is on a lengthy cooldown. Most of her abilities require good follow-ups, such as detonating Dynamite and making quick shots after jumping with Coach Gun. Dynamite can be rather tricky. While it deals impressive damage over time, it will also damage Ashe if she's too close to the blast. Overall, Ashe is best played close to her teammates, so she can have backup available if she is being harassed. B.O.B., though incredibly strong, can easily be countered by the enemy team, as he can be hacked, slept, and stunned in the same way he can be boosted by a friendly team.
Weapons & Abilities
- The Viper: Ashe's primary weapon. It has two firing modes: a primary fire that shoots rapidly from the hip at reduced damage, and an ADS (aim-down-sight) secondary fire that deals potent damage at a much lower fire rate.
- Despite its power, an ADS headshot is not enough to one-shot 200 HP enemies, dealing only 150 damage.
- The Viper has a unique reloading mechanic. Rather than doing a whole clip like most of the cast, Ashe reloads one bullet at a time (at roughly the same rate as her hip-fire). Try to reload often, as you don't want to be caught in a fight where you can't afford as many shots.
- Its primary fire is rather weak, best suited to finishing blows and harassing enemies who step out of position.
- Dynamite: Ashe throws a bundle of lit dynamite in front of her in a shallow arc. When detonated, it will explode and burn enemies. Uniquely, it can be detonated before its five-second fuse by shooting it with either the Viper or the Coach Gun.
- Dynamite is designed so that it will automatically fall on the player's crosshair the moment they can act. Provided you don't move the crosshair (or move backwards; forward is fine), you could throw dynamite and immediately hold primary fire to instantly detonate it in front of you.
- The arc it travels at is unusually floaty, which makes it quite easy to predict where it will end up. Positioning your crosshair where the dynamite will land rather than trying to track it may be easier for long-range Dynamite shots.
- Its blast radius is rather small, but the burst damage and debuff are quite powerful. Throwing it into or slightly above a cluster of enemies and detonating it will usually get the most value out of Dynamite.
- Dynamite will bounce off of shields (like Reinhardt's Barrier Field).
- Dynamite tends to get stuck on slopes (like the rooftops on Eichenwalde), so it is best to not rely on geometry to get it where you want it.
- Dynamite can be deflected by Genji, and this will switch its "ownership" to him, causing it to inflict full damage on you.
- Coach Gun: Ashe whips out a shotgun for a strong, close-range blast. Additionally, it deals impressive knockback to enemies and propels Ashe away from the blast.
- The knockback from Coach Gun is consistent across its hitbox, but the damage lessens the further away from Ashe an enemy is.
- Coach Gun is best used for burst mobility and disengagement, not direct damage. That said, it can still serve as a good final blow if you have no other options.
- Its burst mobility is very versatile, as it can allow Ashe to cross gaps she wouldn't normally be able to jump (by blasting horizontally) or reach high ground in a similar fashion (by blasting towards the ground).
- The Coach Gun, despite shooting individual pellets, cannot deal headshots.
- If the shot is deflected by Genji, it will knock you back twice as far. This can throw you off the map if you're not careful.
- B.O.B.: Ashe's ultimate ability calls her omnic butler, B.O.B. into the fight. He has three stages: a charge forward, an uppercut that throws enemies up into the air, and a stationary "turret" mode, where he shoots at enemies within his line of sight.
- B.O.B. can almost be considered another player, as he can be healed, buffed, and debuffed in any way a player could be. Be mindful of this when using B.O.B. during a fight.
- A common, powerful tactic is to use Ana's Nano Boost on B.O.B.
- By the same token, an enemy Ana can neutralize B.O.B with Sleep Dart.
- B.O.B.'s uppercut is the perfect opportunity for Ashe and her team to line up shots on enemies in the air.
- Any hero with 200 HP can be immediately killed with an ADS head shot after they are flung into the air. A body shot will leave them with 5 HP.
- It is also a good setup for a dynamite detonation.
- B.O.B. can contest — and capture — objectives as well as move payloads.
- B.O.B. can almost be considered another player, as he can be healed, buffed, and debuffed in any way a player could be. Be mindful of this when using B.O.B. during a fight.
General Strategies
Use B.O.B Smartly! Don’t just throw him into the enemy team: line B.O.B up for his cannon to do damage and delay them, as the enemy team can counter your B.O.B quite easily. The line of sight you are facing when calling out B.O.B is very important, as it can lead to B.O.B running clean off the map or into a unfavorable position.
Match-Ups and Team Synergy
Tank
| Hero | Match-Up | Team Synergy |
|---|---|---|
 D.Va |
You should never try to 1v1 D.Va in close range, her high health is really difficult to tear through single-handedly as Ashe and she can Defense Matrix a lot of your shots. If she tries to dive you, do not try to Coach Gun her away while her Defense Matrix is up or she is using Boosters as she will not be knocked back. Simply wait for her cooldowns to end before using Coach Gun to maximise the distance between you two. In addition, you can one shot the pilot with a scoped headshot so if you or your allies de-mech the D.Va try to headshot the pilot as she ejects. | When D.Va activates her ultimate, enemies will retreat or use shield to prevent their deaths. However, you can toss your Dynamite at their location to further push them away from the objective or payload. This works especially well when they put themselves in a narrow space or corner. |
 Doomfist |
Never let Doomfist sneak up on you, because it's difficult for you to react in time to save yourself. Coach Gun him away from you when he uppercuts you or uses Seismic Slam, and use a vertical Coach Gun to dodge Rocket Punch. On the flip side, Doomfist is an easy target if he's not going for you; his big hitbox and lack of abilities to combat you at range make landing shots child's play. | (To be added) |
 Orisa |
It is not advisable to take on Orisa by yourself, as Fortify can reduce the damage she takes (therefore, Dynamite would be quite useless), make her immune to the knockback from your Coach Gun and B.O.B.'s knock-up and will also not take headshot damage, making the power of The Viper less effective. In addition, Javelin Spin will destroy your shots and Dynamite. With all of this in mind, it is better to team-shoot her while her abilities are on cooldown or aren't active. When she activates her ultimate, you can Coach Gun out of it to avoid it. | If Orisa uses her ultimate effectively and gathers multiple enemies, you can toss your Dynamite to provide additional damage and likely guarantee Orisa at least a few eliminations. |
 Ramattra |
You should be fine if you play at a safe different, However, surprisingly, Ramattra can actually poke you at range with his |
(To be added) |
 Reinhardt |
Do not waste time trying to destroy the barrier, instead throw a Dynamite over it and detonate it as soon as it is over the barrier to get maximum value. In addition, you can use a vertical Coach Gun to avoid Charge and Earthshatter or use Coach Gun on him before he charges an ally to redirect his charge. Other than that, never 1v1 Reinhardt in close range, because his barrier can stop your shots dead and he can kill you very quickly with just 3 swings. Instead, focus on helping your allies take him out with Dynamites and well placed shots. You can try to shoot at him from an off angle to force him to turn his barrier towards you and allow your team to push. | 200 HP enemies knocked-up by Reinhardt's charge and launched into the air can be eliminated with a well lined-up headshot afterwards. |
 Roadhog |
As long as you stay outside of Roadhog's Chain Hook range, you should be able to win this match-up or at least force him to use Take a Breather or reposition. Make use of high ground, and Coach Gun him when he hooks an ally to throw off his aim and prevent any follow-up shots from landing. In addition, if Roadhog is using Whole Hog, you can try to displace him with Coach Gun and prevent him from hitting your team with it. | (To be added) |
 Sigma |
Similarly to Orisa and Reinhardt, throw your Dynamite over Experimental Barrier and detonate it mid-air rather than wasting time trying to destroy it. Other than that, keep out of Sigma's primary fire range, and he's little trouble. If you need to, you can use a vertical Coach Gun to dodge Accretion or Coach Gun him if he's trying to use it on an ally to displace him and mess up his aim. If he kills one of your tanks with Gravitic Flux, summon B.O.B. to assist your team. | The use of Gravitation Flux can make enemies become easy targets for B.O.B. |
 Wrecking Ball |
Try not to 1v1 Wrecking Ball in close range unless he's low of course. He can typically outgun you and his armour and health is difficult to tear through as Ashe. You can Coach Gun him at the apex of his piledrive when he dives onto you or an ally. Ashe is incredibly effective at clearing Minefield with either Dynamite or B.O.B. Toss a dynamite or B.O.B. into the minefield to clear a path for your team. Just be wary that sending B.O.B into the minefield will chunk a large portion of his health away. | While Wrecking Ball's minefield would provide area denial against enemies, you can place B.O.B in a place that covers a sight line to further prevent enemies from being able to make plays and force them to fall back. |
 Winston |
Use Coach Gun on Winston when he's using Leap because you can keep him suspended in the air where he's an easy target to gun down. Keep this in mind if he dives onto your or nearby allies as you can severely mess up his attack. However, a lot of Winston players tend to drop their bubble while using Leap; in this case, just Coach Gun yourself out of his range. Calling B.O.B to protect your team while he's using Primal Rage is really effective; send him into the allies Winston is trying to attack and you can force him to disengage or seek out other targets, reducing the effectiveness of his ultimate. | (To be added) |
 Zarya |
There's not much to the Zarya matchup: as long as you stay out of her beam range she's not a threat as you can easily dodge the secondary fires at range. The main tip is to use Dynamite after you see her use her bubbles for maximum value. It's also critically important to keep high energy Zaryas away from your team by just poking from a distance and forcing her to retreat. If she gets 3 or more allies in a Graviton Surge you can summon B.O.B. to help your team after you die. | When Zarya uses Gravitation Surge, you can toss a Dynamite to provide additional damage against enemies and charge your ultimate. If Zarya is paying attention to a situation where you must use your Dynamite up close, she can use her Projected Barrier to protect you from the blast. |
Damage
| Hero | Match-Up | Team Synergy |
|---|---|---|
 Ashe |
The Ashe vs Ashe matchup simply comes down to who wins the raw aim duel. Detonate dynamite onto her for a damage head-start and if she's being pocketed by a healer, especially a Mercy, try not to take the duel. If she sends B.O.B. into your team, send yours into theirs and focus their B.O.B. so your B.O.B. survives and hers will get no value. | (To be added) |
 Bastion |
Fighting Bastion comes in two flavors. With your strength at a distance you can safely pressure Bastion in Sentry Mode with some distance and line of sight on a just sliver of its body. Positioned well this will allow you to continuously damage it while also keeping you from being shredded by its Sentry fire. Recon Mode Bastion on the other hand is a large target with a distinct head and a weapon ill-suited to a straight gunfight with you beyond close range. Should Bastion work its way behind you and your team and switch to Sentry mode your one chance is likely to use your Coach Gun to get away from it and/or behind cover. Once safe try using your Dynamite's damage over time effect to, if not shoo it away, mitigate any repairs it attempts on itself. | (To be added) |
 Cassidy |
There are no fancy tips for dealing with Cassidy as Ashe, it really just comes down to the range of the duel. Up close, Cassidy will almost always win with his Flashbang - Fan the Hammer combo and slightly higher health. However, at longer distances Ashe has the advantage because Cassidy's Peacekeeper's damage will start to fall off sooner than your scoped shots do. Just don't take the fight too far or your gun will start to fall off too and while his damage will be significantly weaker, neither of you will be doing enough to actually kill one another. To put it simply, only take mid-range duels with Cassidy because you'll have a natural advantage. | (To be added) |
 Echo |
Your scoped shots are hitscan so you are a natural counter to Echo's flight; however it is difficult to headshot her while she is using the ability so just settle for bodyshots to force her out of the sky. If she lands multiple sticky bombs on you it is vital that you Coach Gun yourself out of Focusing Beam range, or you'll die very quickly. | (To be added) |
 Genji |
When you use Coach Gun on a deflecting Genji, you don't knock him back but gain extra knockback at the cost of some damage, so don't be afraid to do it unless you're already low. Ideally you want to Coach Gun him away after he uses Dash so he can't close the distance on you soon after. Keep this fight at medium range and you should have an advantage. Also, if he's going to dash into you with dragonblade, throw a Dynamite at your feet and Coach Gun it when he dashes in. This way you knock him back and detonate dynamite on him, preventing him from getting a dash reset as well. | (To be added) |
 Hanzo |
Try not to take a duel with Hanzo. Although you both play at similar ranges, he can one shot you with a headshot, burst you down with Storm Arrows, or gain a peeking advantage with Sonic Arrow. If you feel like he misses a lot of arrows, feel free to duel him. Just don't get too overconfident, because you move slowly while scoped and he might just land a headshot. You can try to flank the Hanzo and open up by detonating Dynamite onto him to make him one-shottable with a headshot or to make bodyshot damage very threatening to him. | (To be added) |
 Junkrat |
Junkrat is one of Ashe's easiest targets. At range all he can do is try to spam grenades, which are easy for you to dodge and hard for him to land, while your scoped shots can kill him in a matter of seconds. Even if he tries to close the distance with concussion mines, he's incredibly easy to headshot out of the sky or Coach Gun if he actually gets close. Just don't let him sneak up on you, because he can one shot combo you with a grenade and |
(To be added) |
 Mei |
Mei's icicles do the same damage as your scoped shots, however your scoped shots are much more accurate at range, so like most match-ups, just keep your distance. If she's trying to freeze you, you can attempt to Coach Gun her out of range and land some scoped shots before retreating. Even if you get frozen, if you get the Coach Gun off, it will be very difficult for her to hit the follow-up icicle as you'll be falling through the air. If she uses Ice Block, throw a Dynamite next to her and detonate it as soon as she comes out to deal some free easy damage, and this should be obvious, but Coach Gun yourself out of Blizzard if you're ever caught in it. | (To be added) |
 Pharah |
Because your scoped shots are hitscan, you counter Pharah while she's in the air, so if she's ever in range, it's as simple as gunning her out of the sky. If you're confident in your skills with dynamite, you can throw one at her and detonate it mid-air for additional pressure. If Pharah tries to flank you, you can easily react with Coach Gun because her jetpacks are pretty loud, and remember to Coach Gun back onto the map if she boops you off. She's also very easy to kill while using Barrage as long as she's not firing rockets at you. | (To be added) |
 Reaper |
Like with all close range heroes, Reaper is not a threat to you at range, and is easy prey. He only becomes a problem when he tries to flank you; try to react with Coach Gun. However, some good Reaper players with use Wraith Form to mitigate the Coach Gun, in which case, if he follows you, you're screwed, as your unscoped shots do little in comparison to his shotguns. You can also try to force his Wraith Form by detonating Dynamite onto him as he wants to use it to cleanse the burning effect. Other than that, be wary that Reaper can easily tear through B.O.B.'s health if B.O.B. is focusing someone else. | (To be added) |
 Soldier: 76 |
A good Soldier player will typically always win the 1v1, but to increase the chances of your victory, try to hold high ground over him and be as far away as you can so he has to control his recoil a lot more. Also, do whatever it takes to dodge a direct hit of Helix Rockets, it does a lot of damage and if even if you have to use Coach Gun, just do it, it's definitely worth it. If he's holding his Biotic Field, throw Dynamite onto it, even if you don't detonate it it can force him to run away from his healing pad because 9 times out of 10 he wants to avoid the damage. | (To be added) |
 Sombra |
Sombra is a big threat if she catches you off guard and completes a Hack on you, as you are now forced into close range combat which is where she thrives and will typically outgun you before you get to use Coach Gun again to retreat. Even if she un-stealths and tries to |
(To be added) |
 Symmetra |
Symmetra is not a dangerous enemy as long as you don't get too close where she can take you out with her beam or secondary fire orbs. If you're firing at her from a distance, all she can really do is retaliate by sending secondary fire orbs or sentry turrets to you, the former you can easily dodge and the latter you can easily destroy as they're flying to you. Additionally, if she sets up a teleporter strategy and her teammates are coming through, detonate dynamite as they're all being teleported for a lot of damage and ultimate charge. Against a good Symmetra, she may try to use her Photon Barrier to cut B.O.B's line of sight, so try to think carefully about his position and the status of her ultimate. | (To be added) |
 Torbjörn |
You can destroy Torbjörn's turret with 3 scoped shots, so try to jiggle peek it while firing to minimise the damage you take. You can also throw a dynamite onto the turret to try and disincentivize him from repairing it. Against Torbjörn himself, you can typically beat him in a ranged duel because his shots are projectile and his hitbox is fairly big. An important tip is to throw off his Molten Core placement by knocking him back with Coach Gun; 90% of the time you will cause him to misplace a lot of lava which will prove incredibly valuable in messing up his ultimate. | (To be added) |
 Tracer |
Tracer is really difficult to fight as Ashe, if she catches you off guard she can easily one-clip you before you can react, and Coach Gun is not effective because she can use blinks to close the distance rapidly. Her erratic movement makes close range duels really difficult, so your best hope is to land a scoped headshot, because you can one shot a full health Tracer. However it's much more reliable to just position on high ground where she can't reach you or do much about you. | (To be added) |
 Widowmaker |
Widowmaker is one of your worst enemies as Ashe. Plain and simply, she outranges you significantly and will mostly be playing far back and out of range for your dynamite; if she is, do not try to engage in a sniper duel because she will be able to take you out with one or two well placed shots while your damage falloff at that range will mean you will require multiple shots to eliminate her. If she is not out of your range however you can happen to have an advantage if you catch her off guard while she's scoped in and focusing on something else, but if she is a good Widowmaker, it is not advisable to duel her at all unless you have a source of extra damage like a Mercy damage boost or Orb of Discord. | (To be added) |
Support
| Hero | Match-Up | Team Synergy |
|---|---|---|
 Ana |
Your scope shots deal solid damage at mid-range. However, Ana's rifle has no damage falloff and she can fight you outside of your effective range. One advantage you have is that her weapon cannot inflict headshots while yours can. You can use Dynamite on Ana to force her to use |
|
 Baptiste |
(To be added) | (To be added) |
 Brigitte |
As long as you don't let Brigitte get close to you, she shouldn't be a problem, her shield is pretty fragile, she has no long range options to attack and she has a slow movement speed, if she does manage to close the distance use your coach gun to create distance, she can however disrupt B.O.B with her shield bash and whip shot, which can put B.O.B in an unintended position or stun him mid charge. | (To be added) |
 Illari |
Both of you can effectively duel each other at mid-range. However, Illari doesn't need to scope in to deal the most damage. This also means she doesn't move slow. Her |
(To be added) |
 Kiriko |
(To be added) | (To be added) |
 Lifeweaver |
(To be added) | (To be added) |
 Lúcio |
(To be added) | (To be added) |
 Mercy |
(To be added) | Your high damage at mid-range makes you a good choice for Mercy to boost without straying too far from the rest of your team. Up close your Coach Gun is excellent to peel Mercy's would be killers away from her. |
 Moira |
(To be added) | (To be added) |
 Zenyatta |
(To be added) | (To be added) |
Map Strategies
Control
| Map | Strategy & Stage Tips |
|---|---|
 Overall Strategy |
TBA RATING | TBA FEATURE
Map strategy details for Overall Strategy are currently missing. You can help the Overwatch Wiki by adding them!
|
 Antarctic Peninsula |
TBA RATING | TBA FEATURE
Map strategy details for Antarctic Peninsula are currently missing. You can help the Overwatch Wiki by adding them! Labs
Strategy details missing.
Sublevel
Strategy details missing.
Icebreaker
Strategy details missing.
|

|
TBA RATING | TBA FEATURE
Map strategy details for Busan are currently missing. You can help the Overwatch Wiki by adding them! Downtown
Strategy details missing.
Sanctuary
Strategy details missing.
MEKA Base
Strategy details missing.
|

|
TBA RATING | TBA FEATURE
Map strategy details for Ilios are currently missing. You can help the Overwatch Wiki by adding them! Lighthouse
Strategy details missing.
Well
Strategy details missing.
Ruins
Strategy details missing.
|

|
TBA RATING | TBA FEATURE
Map strategy details for Lijiang Tower are currently missing. You can help the Overwatch Wiki by adding them! Control Center
Strategy details missing.
Garden
Strategy details missing.
Night Market
Strategy details missing.
|

|
TBA RATING | TBA FEATURE
Map strategy details for Nepal are currently missing. You can help the Overwatch Wiki by adding them! Village
Strategy details missing.
Shrine
Strategy details missing.
Sanctum
Strategy details missing.
|

|
TBA RATING | TBA FEATURE
Map strategy details for Oasis are currently missing. You can help the Overwatch Wiki by adding them! City Center
Strategy details missing.
Gardens
Strategy details missing.
University
Strategy details missing.
|

|
TBA RATING | TBA FEATURE
Map strategy details for Samoa are currently missing. You can help the Overwatch Wiki by adding them! Beach
Strategy details missing.
Downtown
Strategy details missing.
Volcano
Strategy details missing.
|
Escort
| Map | Strategy & Stage Tips |
|---|---|
 Overall Strategy |
TBA RATING | TBA FEATURE
Map strategy details for Overall Strategy are currently missing. You can help the Overwatch Wiki by adding them!
|

|
TBA RATING | TBA FEATURE
Map strategy details for Circuit Royal are currently missing. You can help the Overwatch Wiki by adding them! Attack
Strategy details missing.
Defense
Strategy details missing.
|

|
TBA RATING | TBA FEATURE
Map strategy details for Dorado are currently missing. You can help the Overwatch Wiki by adding them! Attack
Strategy details missing.
Defense
Strategy details missing.
|

|
TBA RATING | TBA FEATURE
Map strategy details for Havana are currently missing. You can help the Overwatch Wiki by adding them! Attack
Strategy details missing.
Defense
Strategy details missing.
|

|
TBA RATING | TBA FEATURE
Map strategy details for Junkertown are currently missing. You can help the Overwatch Wiki by adding them! Attack
Strategy details missing.
Defense
Strategy details missing.
|

|
TBA RATING | TBA FEATURE
Map strategy details for Rialto are currently missing. You can help the Overwatch Wiki by adding them! Attack
Strategy details missing.
Defense
Strategy details missing.
|

|
TBA RATING | TBA FEATURE
Map strategy details for Route 66 are currently missing. You can help the Overwatch Wiki by adding them! Attack
Strategy details missing.
Defense
Strategy details missing.
|

|
TBA RATING | TBA FEATURE
Map strategy details for Shambali Monastery are currently missing. You can help the Overwatch Wiki by adding them! Attack
Strategy details missing.
Defense
Strategy details missing.
|

|
TBA RATING | TBA FEATURE
Map strategy details for Watchpoint: Gibraltar are currently missing. You can help the Overwatch Wiki by adding them! Attack
Strategy details missing.
Defense
Strategy details missing.
|
Hybrid
| Map | Strategy & Stage Tips |
|---|---|
 Overall Strategy |
TBA RATING | TBA FEATURE
Map strategy details for Overall Strategy are currently missing. You can help the Overwatch Wiki by adding them!
|
 Blizzard World |
TBA RATING | TBA FEATURE
Map strategy details for Blizzard World are currently missing. You can help the Overwatch Wiki by adding them! Attack
Strategy details missing.
Defense
Strategy details missing.
|

|
TBA RATING | TBA FEATURE
Map strategy details for Eichenwalde are currently missing. You can help the Overwatch Wiki by adding them! Attack
Strategy details missing.
Defense
Strategy details missing.
|

|
TBA RATING | TBA FEATURE
Map strategy details for Hollywood are currently missing. You can help the Overwatch Wiki by adding them! Attack
Strategy details missing.
Defense
Strategy details missing.
|

|
TBA RATING | TBA FEATURE
Map strategy details for King's Row are currently missing. You can help the Overwatch Wiki by adding them! Attack
Strategy details missing.
Defense
Strategy details missing.
|

|
TBA RATING | TBA FEATURE
Map strategy details for Midtown are currently missing. You can help the Overwatch Wiki by adding them! Attack
Strategy details missing.
Defense
Strategy details missing.
|
 Numbani |
TBA RATING | TBA FEATURE
Map strategy details for Numbani are currently missing. You can help the Overwatch Wiki by adding them! Attack
Strategy details missing.
Defense
Strategy details missing.
|

|
TBA RATING | TBA FEATURE
Map strategy details for Paraíso are currently missing. You can help the Overwatch Wiki by adding them! Attack
Strategy details missing.
Defense
Strategy details missing.
|
Push
| Map | Strategy & Stage Tips |
|---|---|
 Overall Strategy |
TBA RATING | TBA FEATURE
Map strategy details for Overall Strategy are currently missing. You can help the Overwatch Wiki by adding them!
|

|
TBA RATING | TBA FEATURE
Map strategy details for Colosseo are currently missing. You can help the Overwatch Wiki by adding them! Pushing
Strategy details missing.
Defending
Strategy details missing.
|

|
TBA RATING | TBA FEATURE
Map strategy details for Esperança are currently missing. You can help the Overwatch Wiki by adding them! Pushing
Strategy details missing.
Defending
Strategy details missing.
|

|
TBA RATING | TBA FEATURE
Map strategy details for New Queen Street are currently missing. You can help the Overwatch Wiki by adding them! Pushing
Strategy details missing.
Defending
Strategy details missing.
|

|
TBA RATING | TBA FEATURE
Map strategy details for Runasapi are currently missing. You can help the Overwatch Wiki by adding them! Pushing
Strategy details missing.
Defending
Strategy details missing.
|
Flashpoint
| Map | Strategy & Stage Tips |
|---|---|
 Overall Strategy |
TBA RATING | TBA FEATURE
Map strategy details for Overall Strategy are currently missing. You can help the Overwatch Wiki by adding them!
|

|
TBA RATING | TBA FEATURE
Map strategy details for Aatlis are currently missing. You can help the Overwatch Wiki by adding them! Station
Strategy details missing.
Garden
Strategy details missing.
Town Center
Strategy details missing.
Bazaar
Strategy details missing.
Resort
Strategy details missing.
|

|
TBA RATING | TBA FEATURE
Map strategy details for New Junk City are currently missing. You can help the Overwatch Wiki by adding them! Arena
Strategy details missing.
The Ducts
Strategy details missing.
Refinery
Strategy details missing.
Junkyard
Strategy details missing.
Bomb Flats
Strategy details missing.
|

|
TBA RATING | TBA FEATURE
Map strategy details for Suravasa are currently missing. You can help the Overwatch Wiki by adding them! Market
Strategy details missing.
Garden
Strategy details missing.
Palace
Strategy details missing.
Temple
Strategy details missing.
Ruins
Strategy details missing.
|
Achievements
| Name | Icon | Description | Reward |
|---|---|---|---|
|
|
Kill an enemy by shooting Ashe's Dynamite from at least 30 meters away in Quick or Competitive play. |  | |

|
Get a killing blow as Ashe on an enemy knocked into the air by B.O.B. in Quick or Competitive play. |  |
Trivia
- Ashe is Hero 29 and the eighth new hero added to the game.
- Ashe was announced by Jeff Kaplan live from the opening ceremonies of Blizzcon 2018, alongside Echo, who Kaplan stated 'needed a little more time'.
- Ashe's nickname, Calamity, is possibly a reference to famed American frontiers-woman Calamity Jane.
- B.O.B. will wave back to Ashe if she waves at him in-game.
- A Funko Pop Ashe figurine is available.[3]
- One can earn a 'Lifesaver' highlight by saving B.O.B.'s life.
- The voice actor of Ashe also voices Jetpack Cat.
Misc. Character Information
- Ashe appears to have a special connection with roses, as she has a rose shown on every skin: Default+Rare+Posh: tattoo on left arm | Thorn: roses all over | Gangster+Mobster: an actual rose on her hat | Jungle+Safari: a (wind)rose on her scarf and on BOB's back.
- Ashe's Dynamite ability is potentially a reference to Julian, given his proficiency with explosives, dynamite included.
- Ashe's interactions in Overwatch 2 provide contradictory hints at her current relationship with her parents. In an interaction with Doomfist, she asks him "Your parents ever pester you about goin' back to the family business?", possibly implying that her parents are still in contact with her. In an interaction with Lifeweaver however, she implies that her parents have given up on her.
- On the subject of her favorite animal, Ashe is partial to scorpions.[4]
- Ashe detests being called by her forename (Elizabeth), and insists on being called by her surname.[5]
- Ashe doesn't believe in Hell.[6]
Development
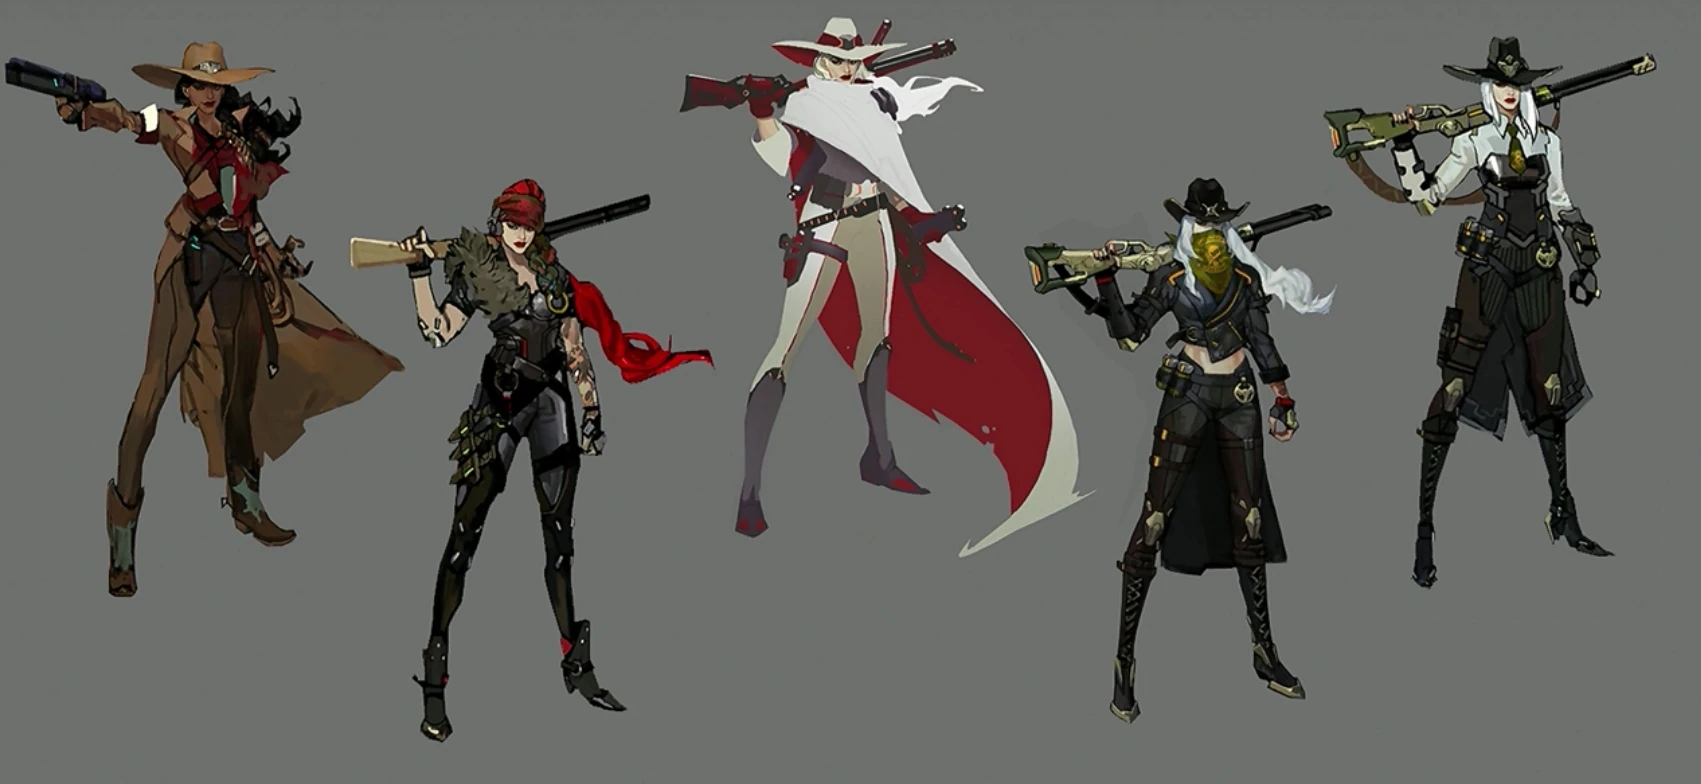
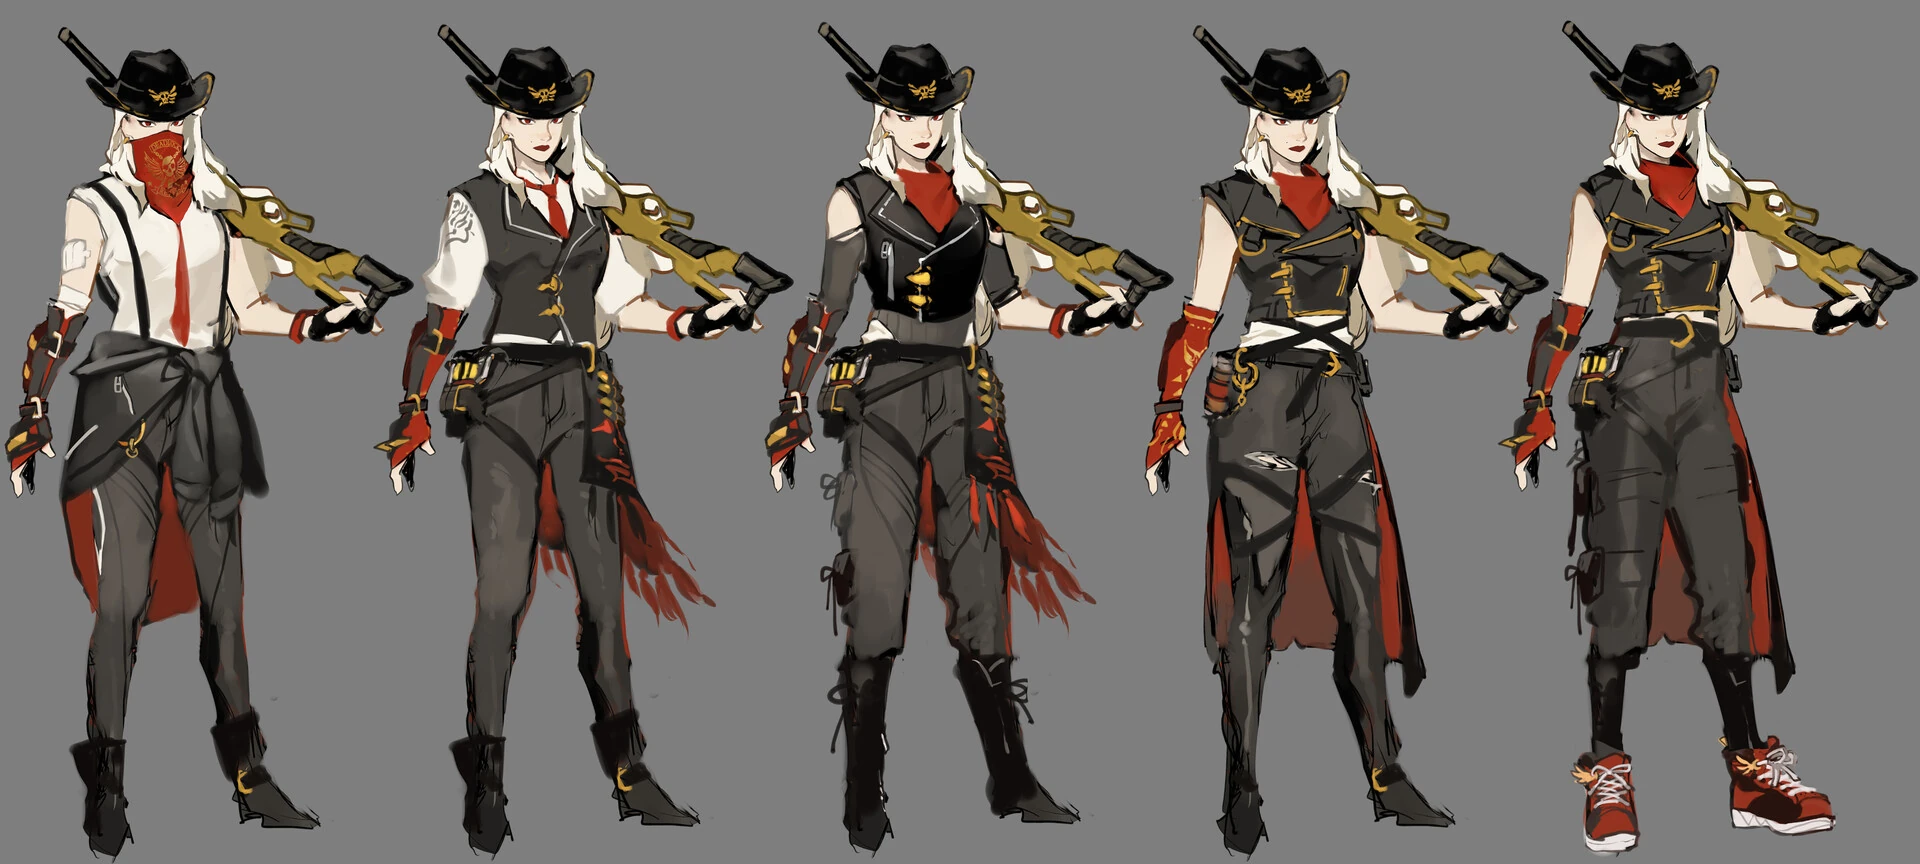
Ashe concept iteration
Ashe is the first hero to have originated from related media rather than game development.[7]
The origins of Ashe differ between sources. In Forging Worlds: Stories Behind the Art of Blizzard Entertainment, Ashe and the Deadlock Gang were created by senior artist Jungah Lee.[7] According to a BlizzCon 2018 panel however, they were created by project director Jason Hill and storyboard artist Mio del Rosario.[8] Lee has stated that in her creation of Ashe, she was inspired by the Route 66 map, and she sprinkled in backstory for Ashe. The picture of Ashe and McCree that is briefly seen in Ashe's hovercycle was created by Lee.[7]
At the time, Ashe wasn't intended to be a playable hero, but rather one of the enemies for McCree to battle, conceived as a female member of the Deadlock Gang with long white hair wearing a duster, wide-brimmed hat, and wielding a lever-action rifle, who would be accompanied by a giant omnic bodyguard and other gang members. During the storyboarding process they found the character to be exceptionally compelling, often coming to the forefront of scenes; realizing that there was something special about her, they decided to further flesh out her character design and backstory. Senior concept artist Jungah Lee produced several iterations of the character in order to hone in on a unique silhouette and color palette that conveyed her youthful appearance and outlaw nature without overlapping with the likes of Reaper and McCree, settling on a final design that married the Western cowgirl and biker themes. Lastly, they shortened her hair by giving her a unique asymmetrical bob, both to sharpen her silhouette and to avoid having to simulate flowing hair.[8]
At around the same time, Geoff Goodman and the game design team were interested in developing a new weapon-focused Damage hero, as the two other post-launch Damage heroes they released, Sombra and Doomfist, were both ability-focused. Upon seeing the early concept and storyboard art for the character, several designers independently came up with their own hero proposals, with the inclusion of B.O.B. being one of the only universally agreed upon ideas. Ashe's final kit revolved heavily around her lever-action rifle, deciding that, like McCree's similarly anachronistic revolver, it would be an extremely powerful, highly personalized weapon. To that end they gave it two firing modes, allowing her to rapidly fire from the hip for her primary fire, or to use iron sights with a reload between each shot for her secondary fire. Additionally, they gave the rifle a unique and satisfying reload mechanic, with Ashe reloading one bullet at a time in a dynamic loop that can be interrupted to resume firing. Her Coach Gun was designed mainly to create distance between her and her enemies, though it can also be used for mobility and trick shots. Ashe's Dynamite ability, originally conceived as a cluster bomb, was designed to be a versatile, high damage ability that is difficult to use.[8]
Her Ultimate, B.O.B., was very technically challenging to implement due to memory and performance restrictions, and almost resulted in Ashe being scrapped, as the team was adamant about B.O.B. being included as part of the hero. Unlike the AI-controlled turrets in the game, B.O.B. is treated more like an additional teammate, and can be healed, buffed, and debuffed accordingly, and can also capture or contest objectives. For a time the team experimented with having the game treat him as a full teammate, but ran into balance issues and bugs.[8]
Removed abilities

- Removed in Season 18.
- Damage per second: 157.5 while firing (2.03 overall w/ full reload, 33.16 w/ reload after each shot)

- Despite the description, only Ashe's knockback strength is affected.
Media
Former Portrait
-
 Overwatch 1 Hero Portrait

Concept Art
- Skins
-
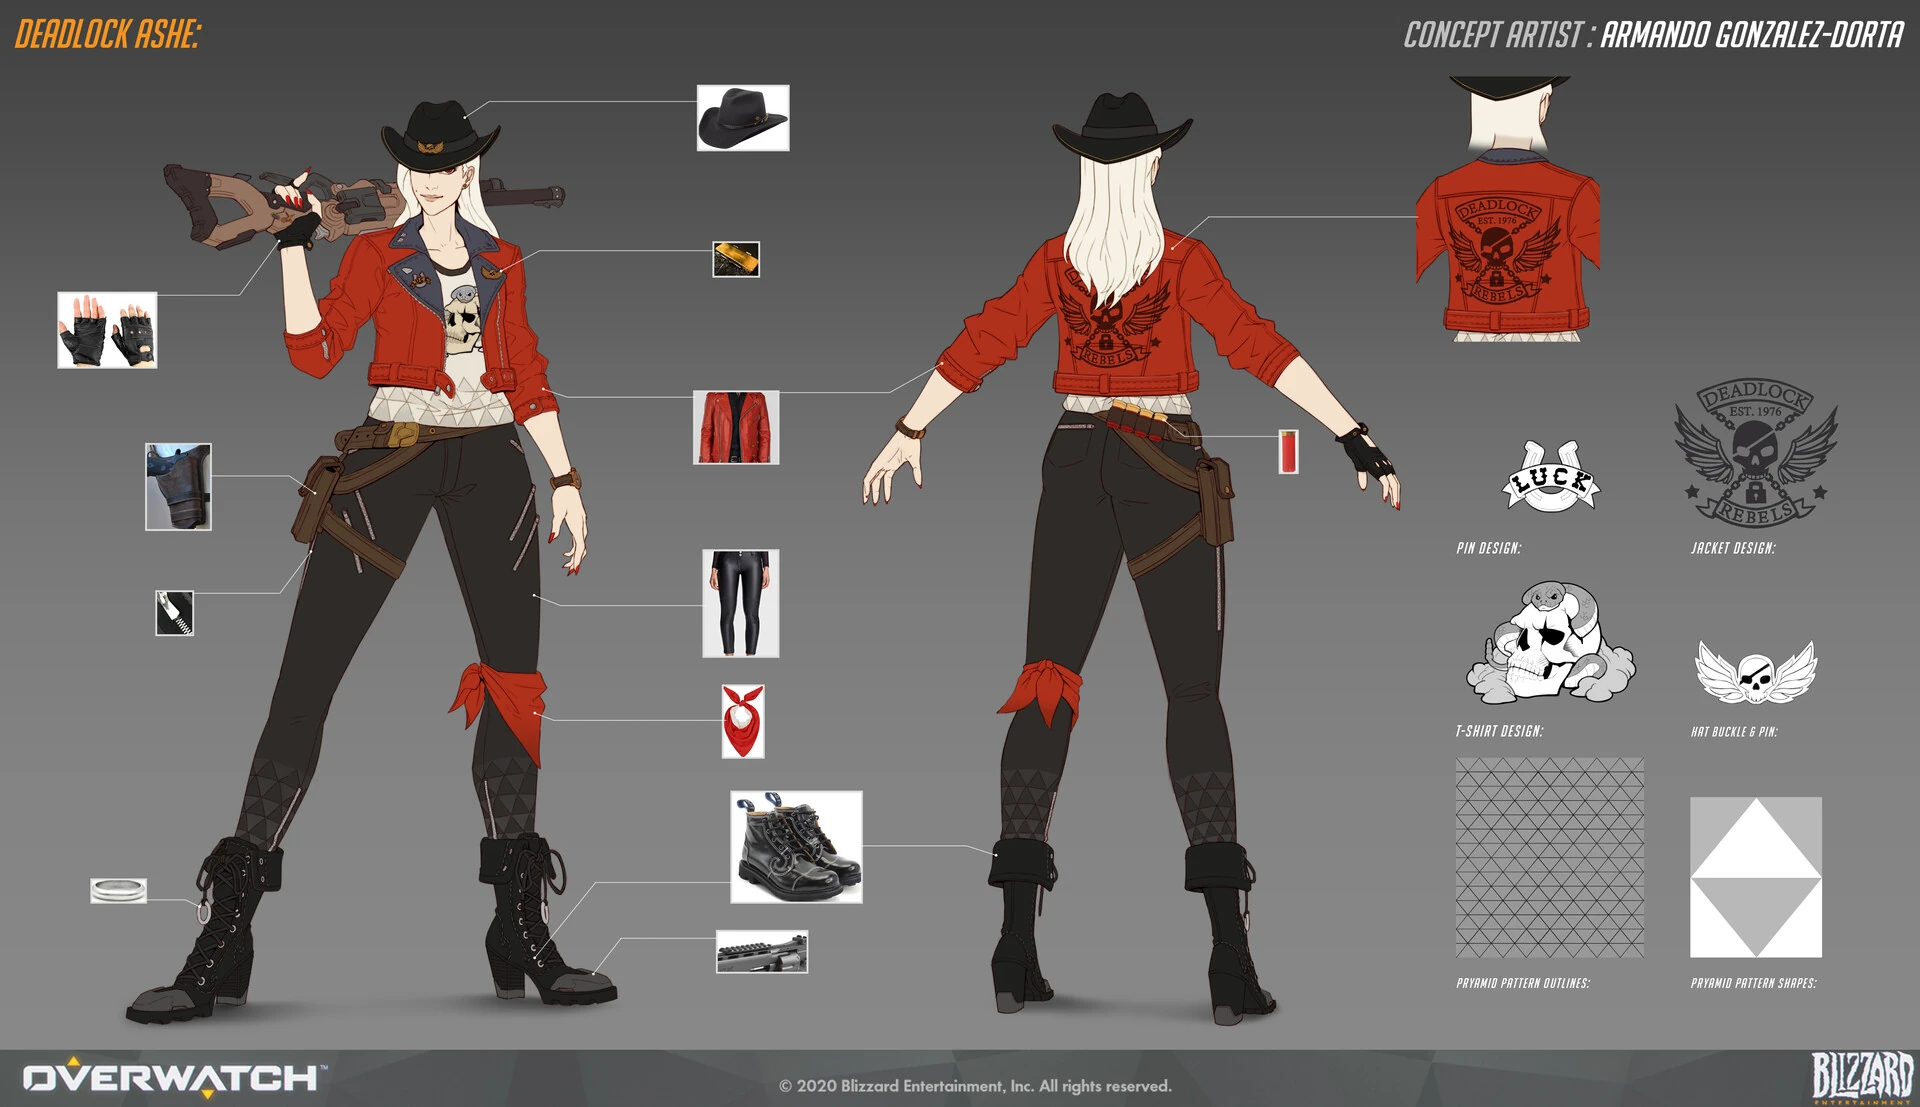
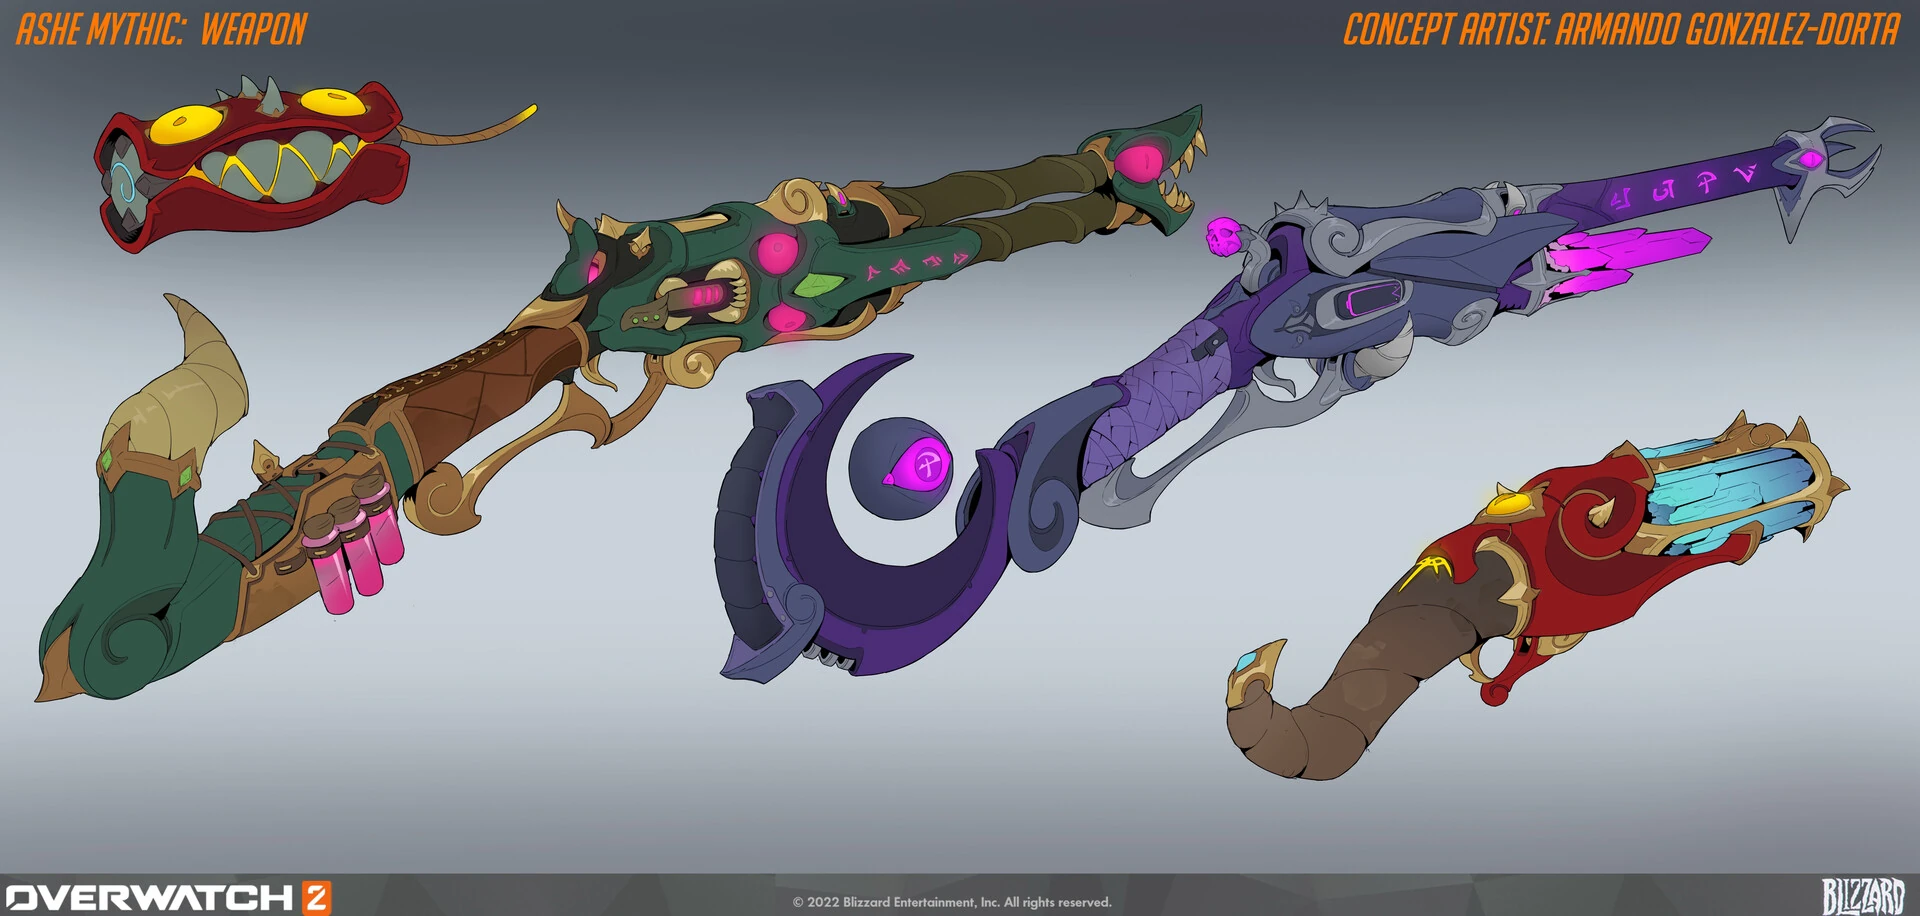
 Deadlock Skin Concept Art by Armando Gonzalez-Dorta
 -
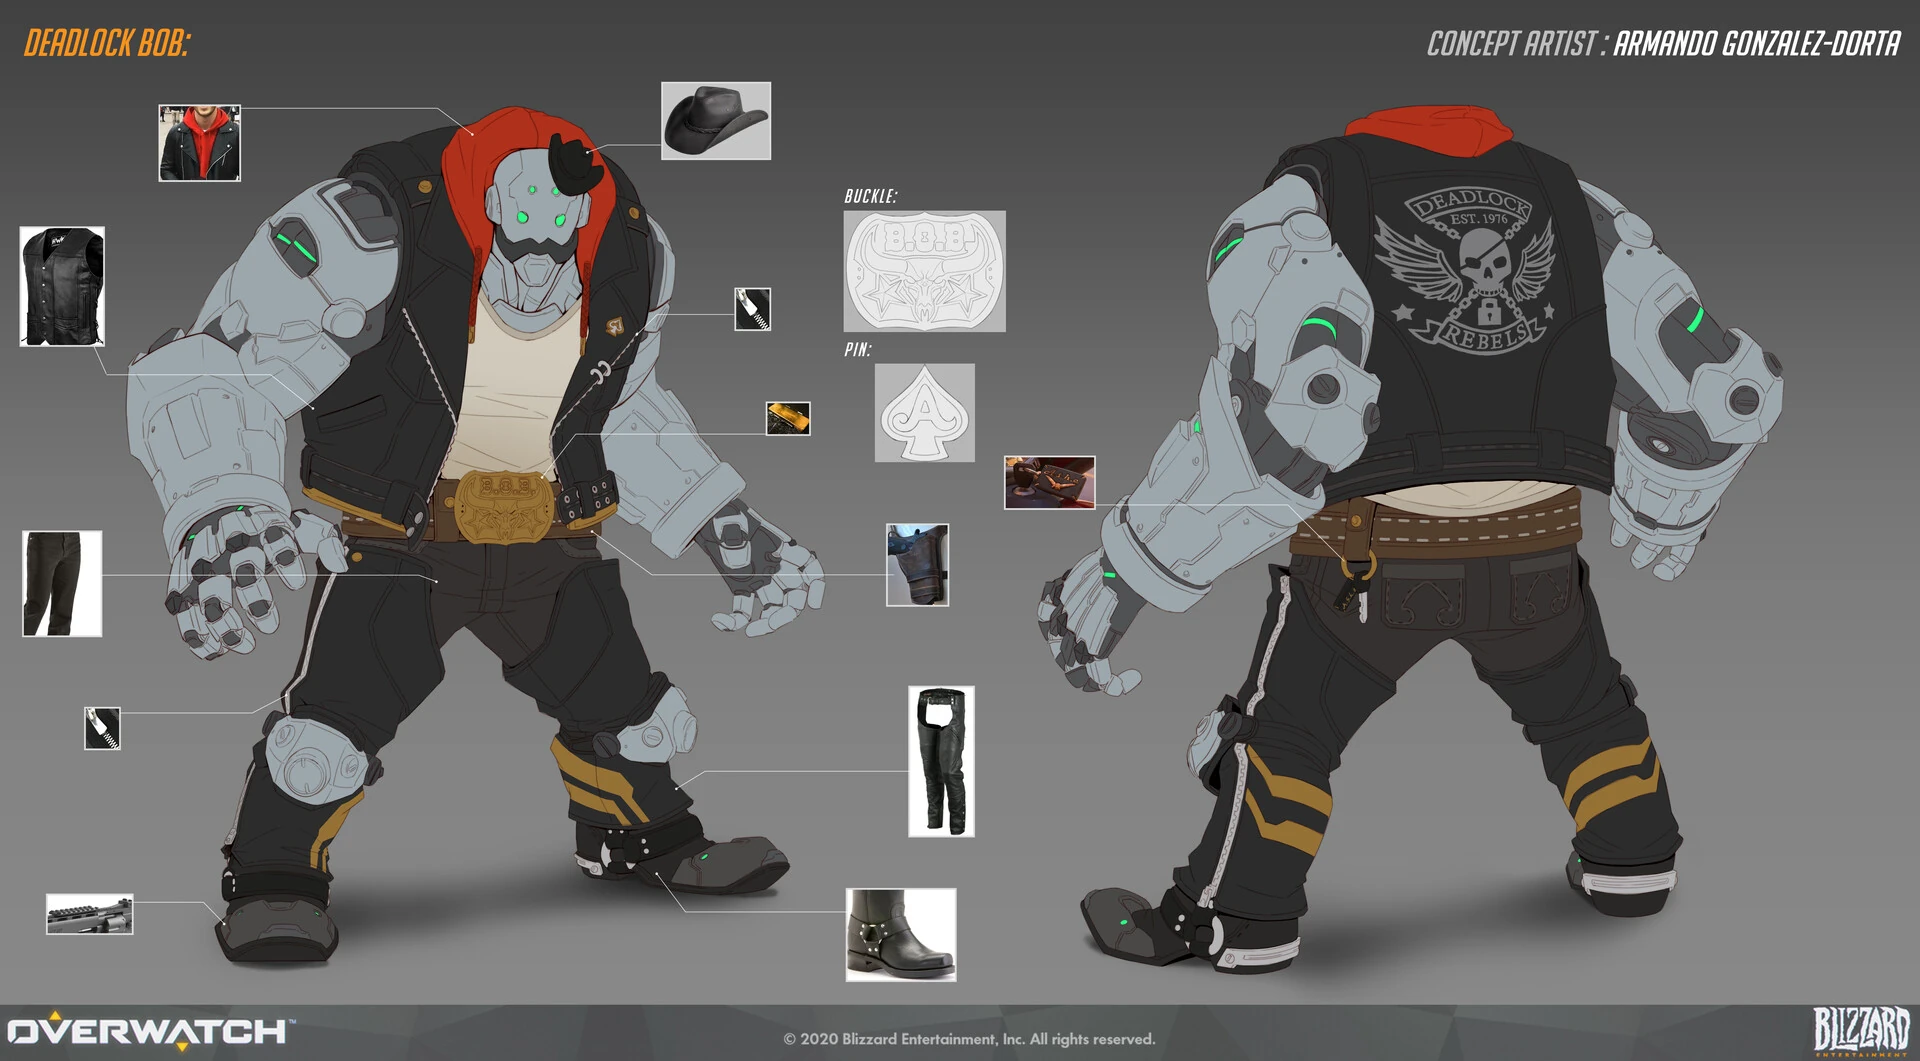
 Deadlock Skin B.O.B Concept Art by Armando Gonzalez-Dorta
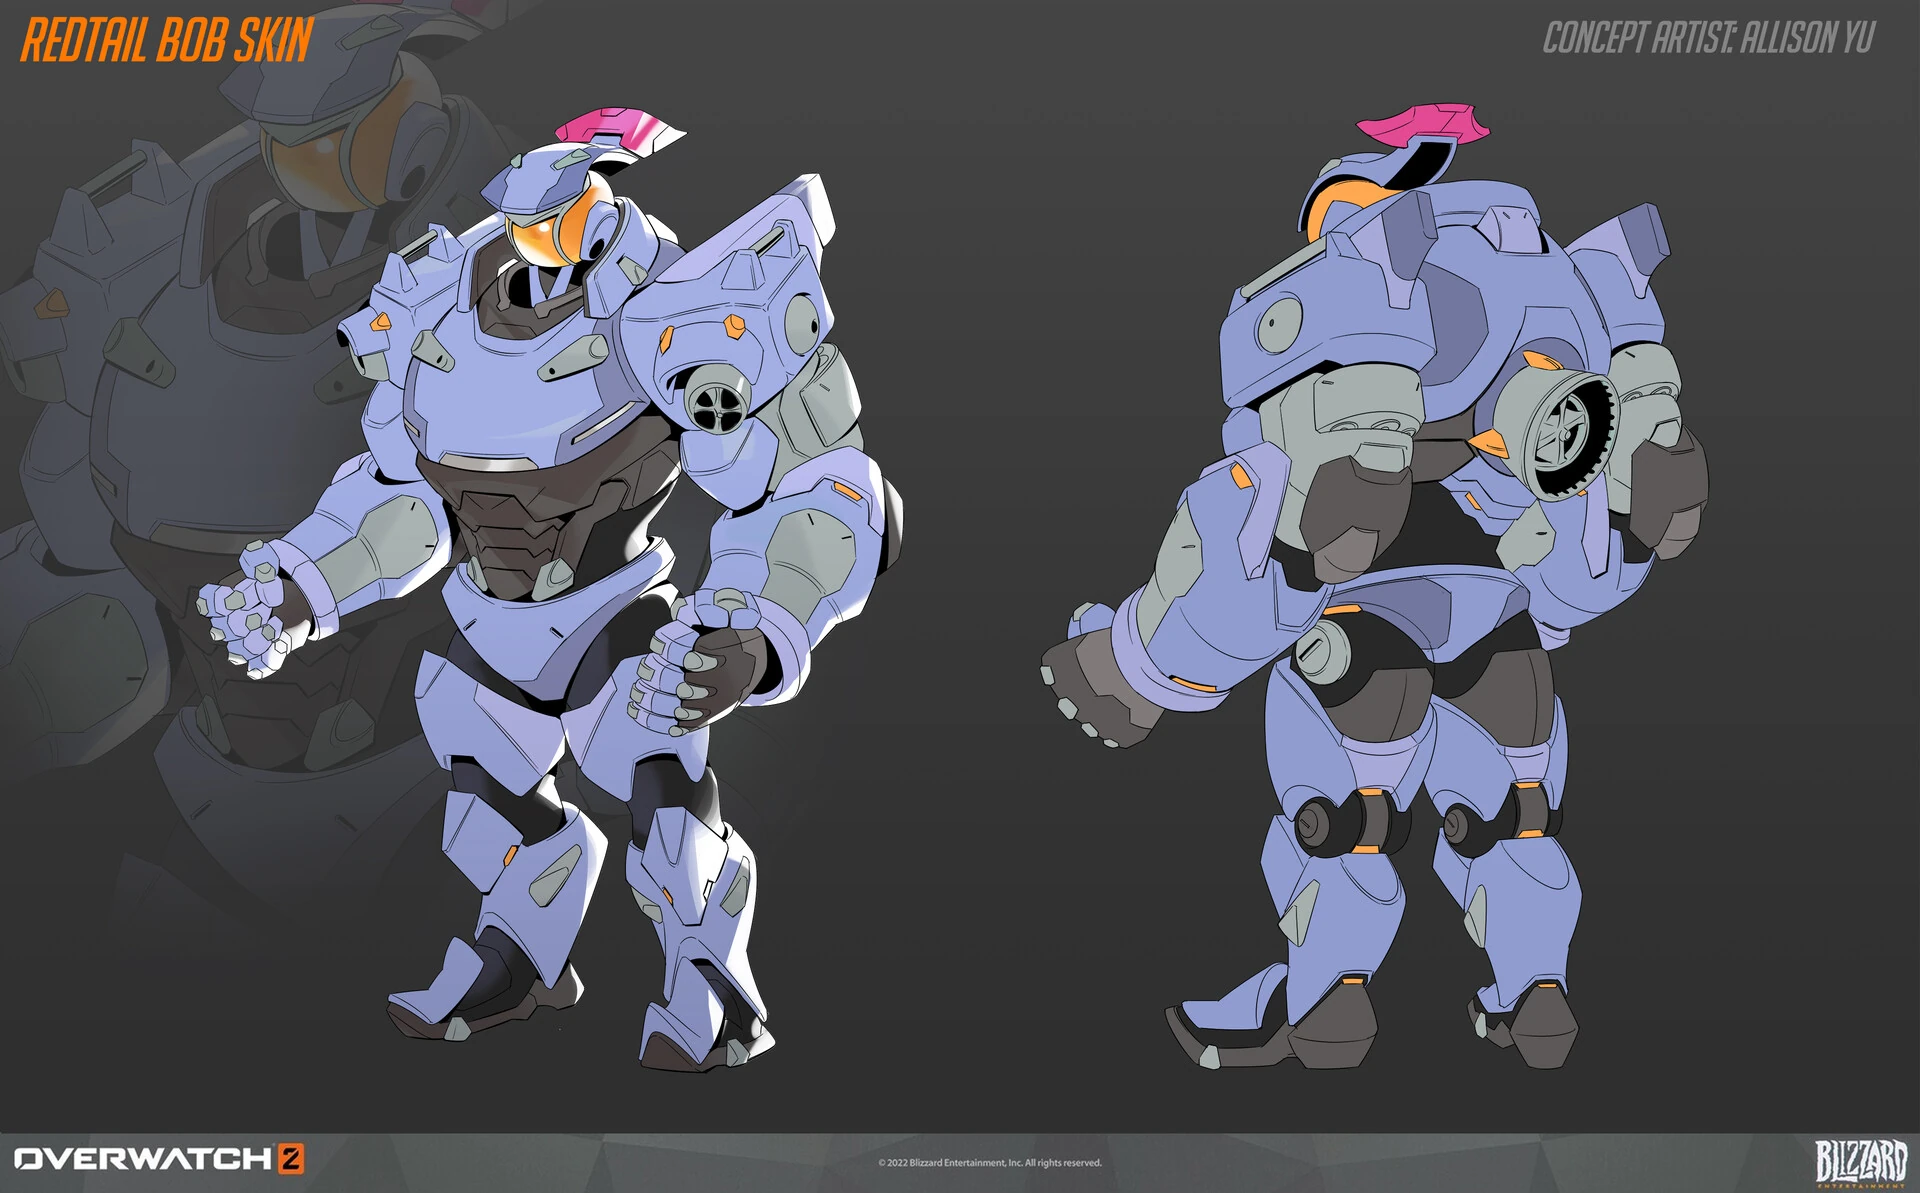
 -
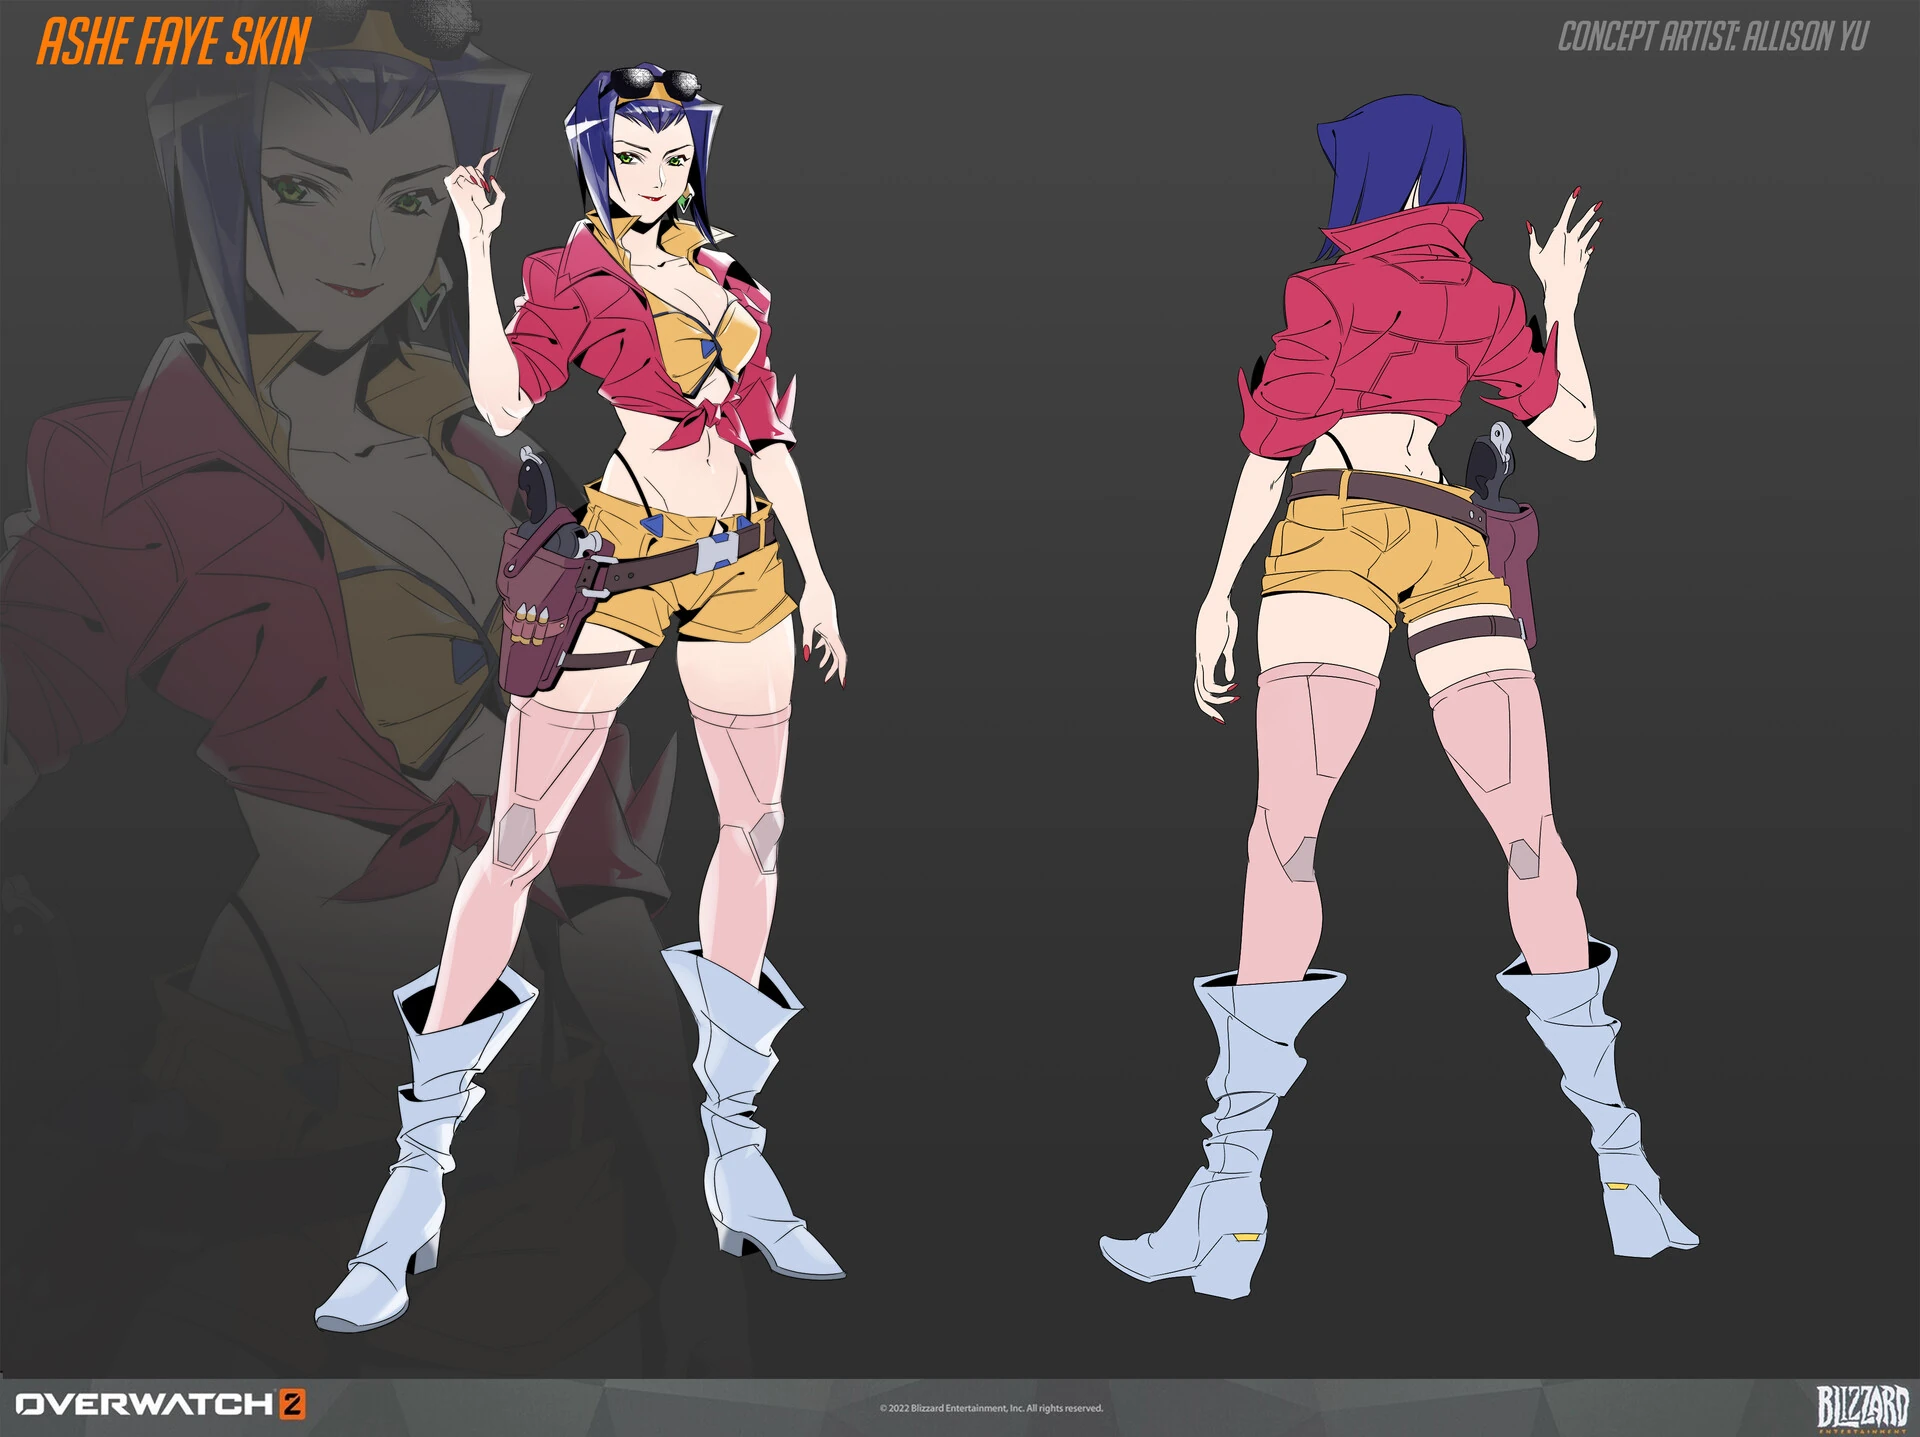
 Faye Valentine Skin Concept Art by Allison Yu
 -
 Faye Valentine Skin B.O.B Concept Art by Allison Yu
 -
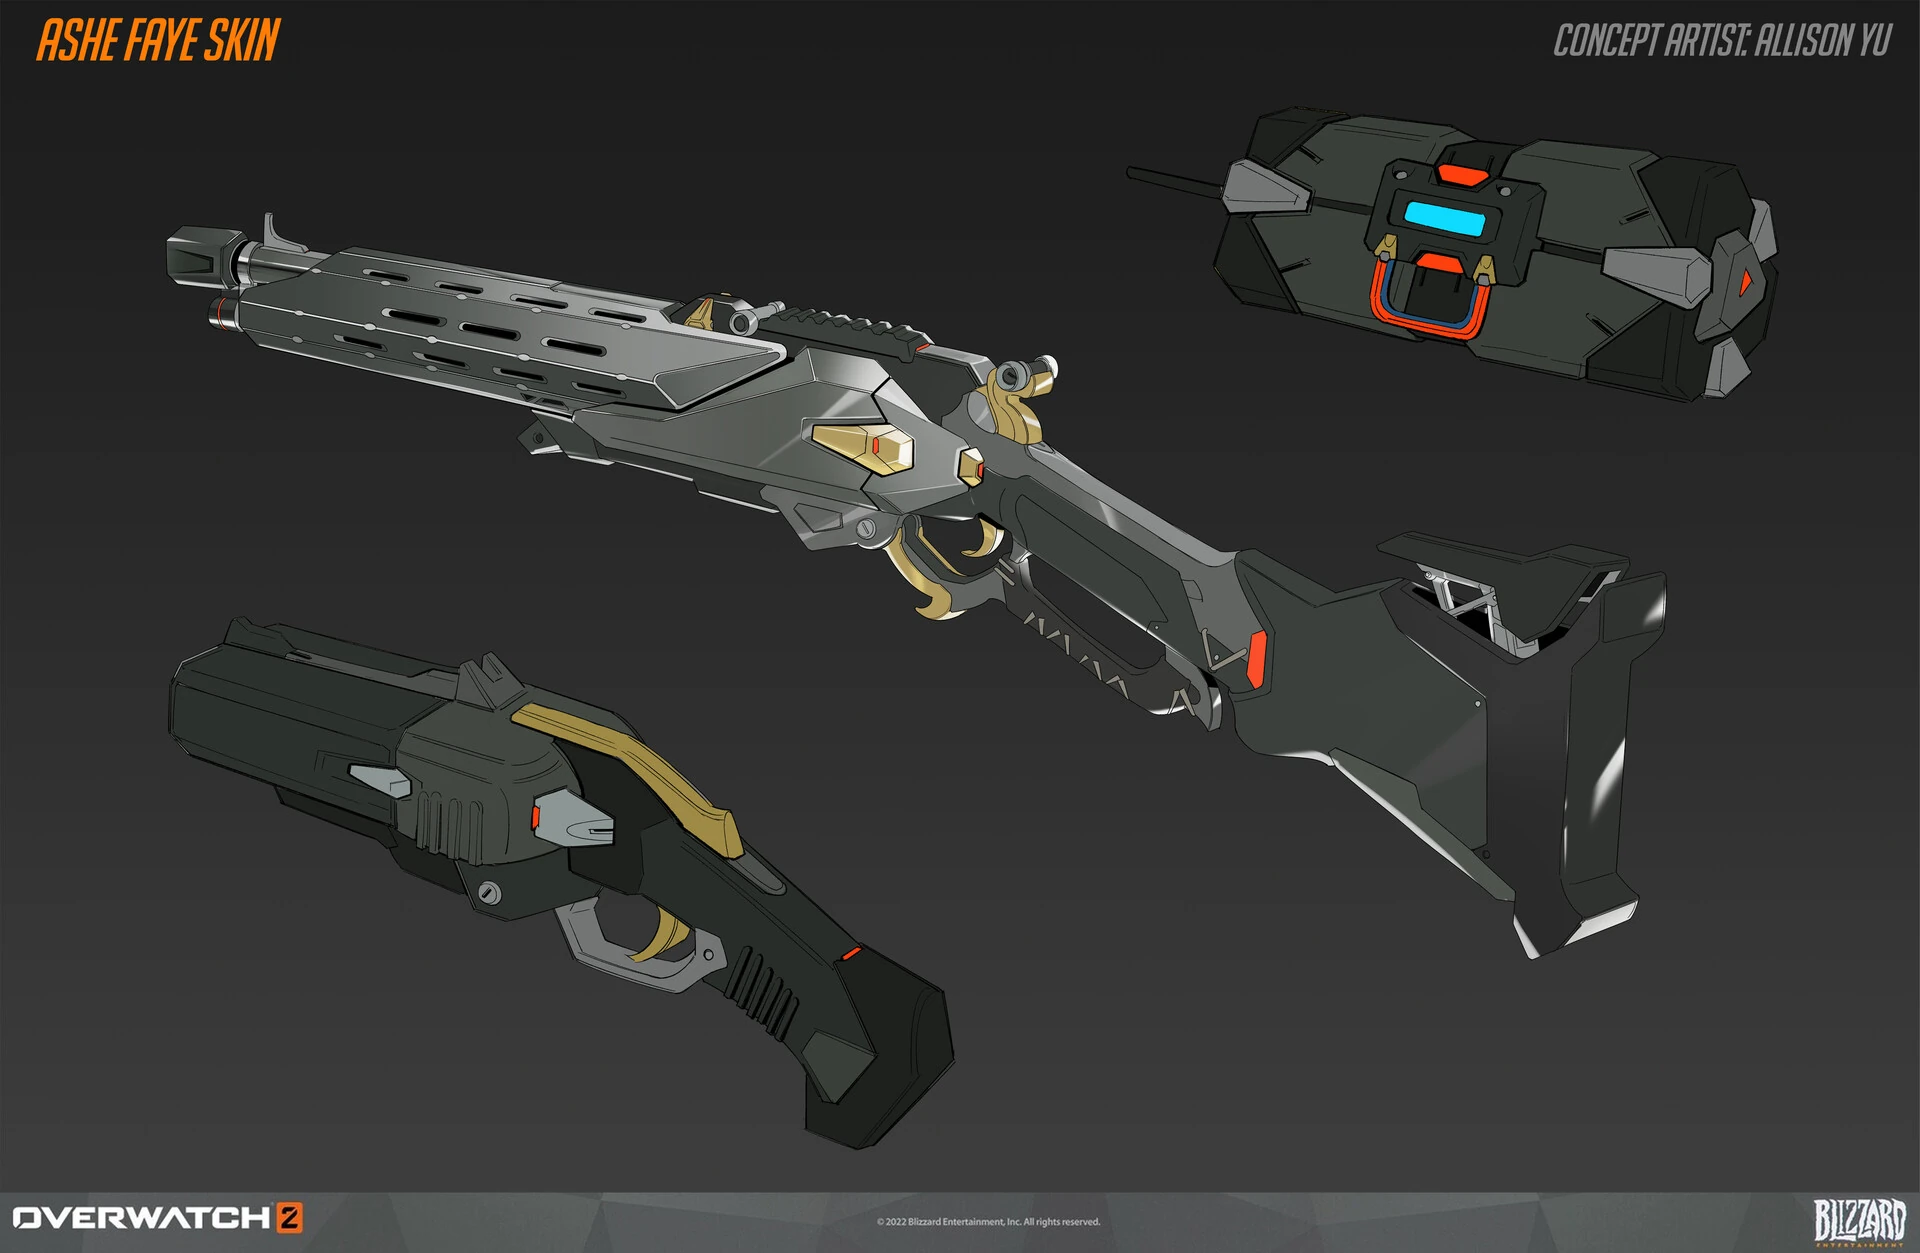
 Faye Valentine Skin Weapons Concept Art by Allison Yu
 -
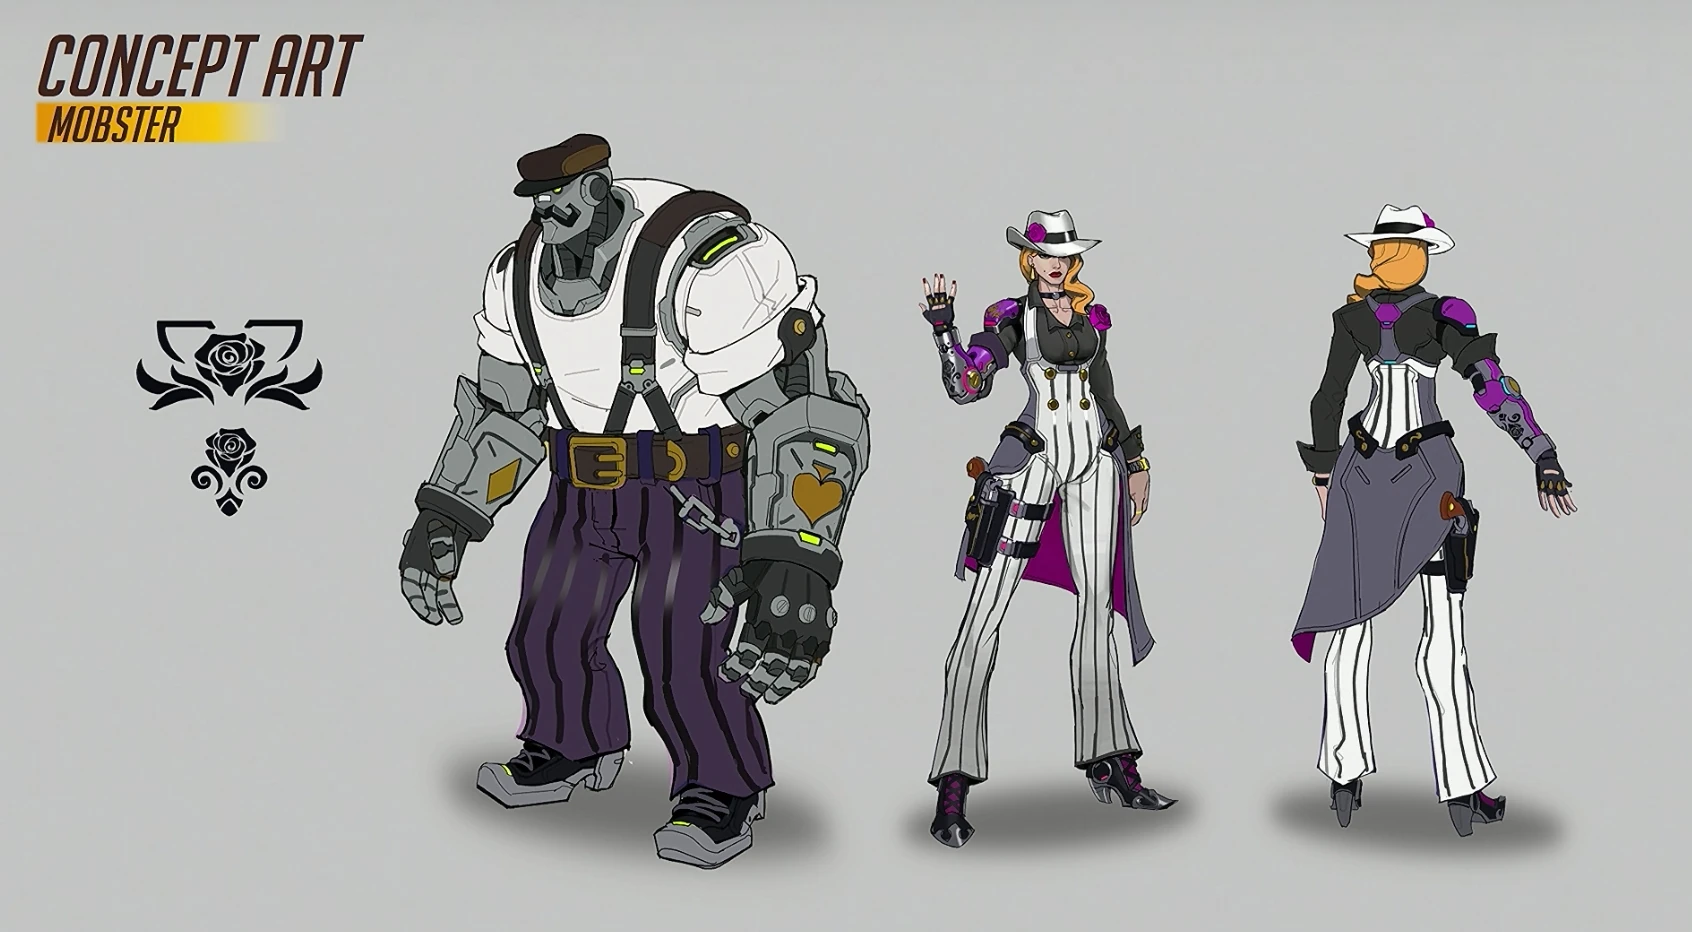
 Mobster Skin Concept Art
 -
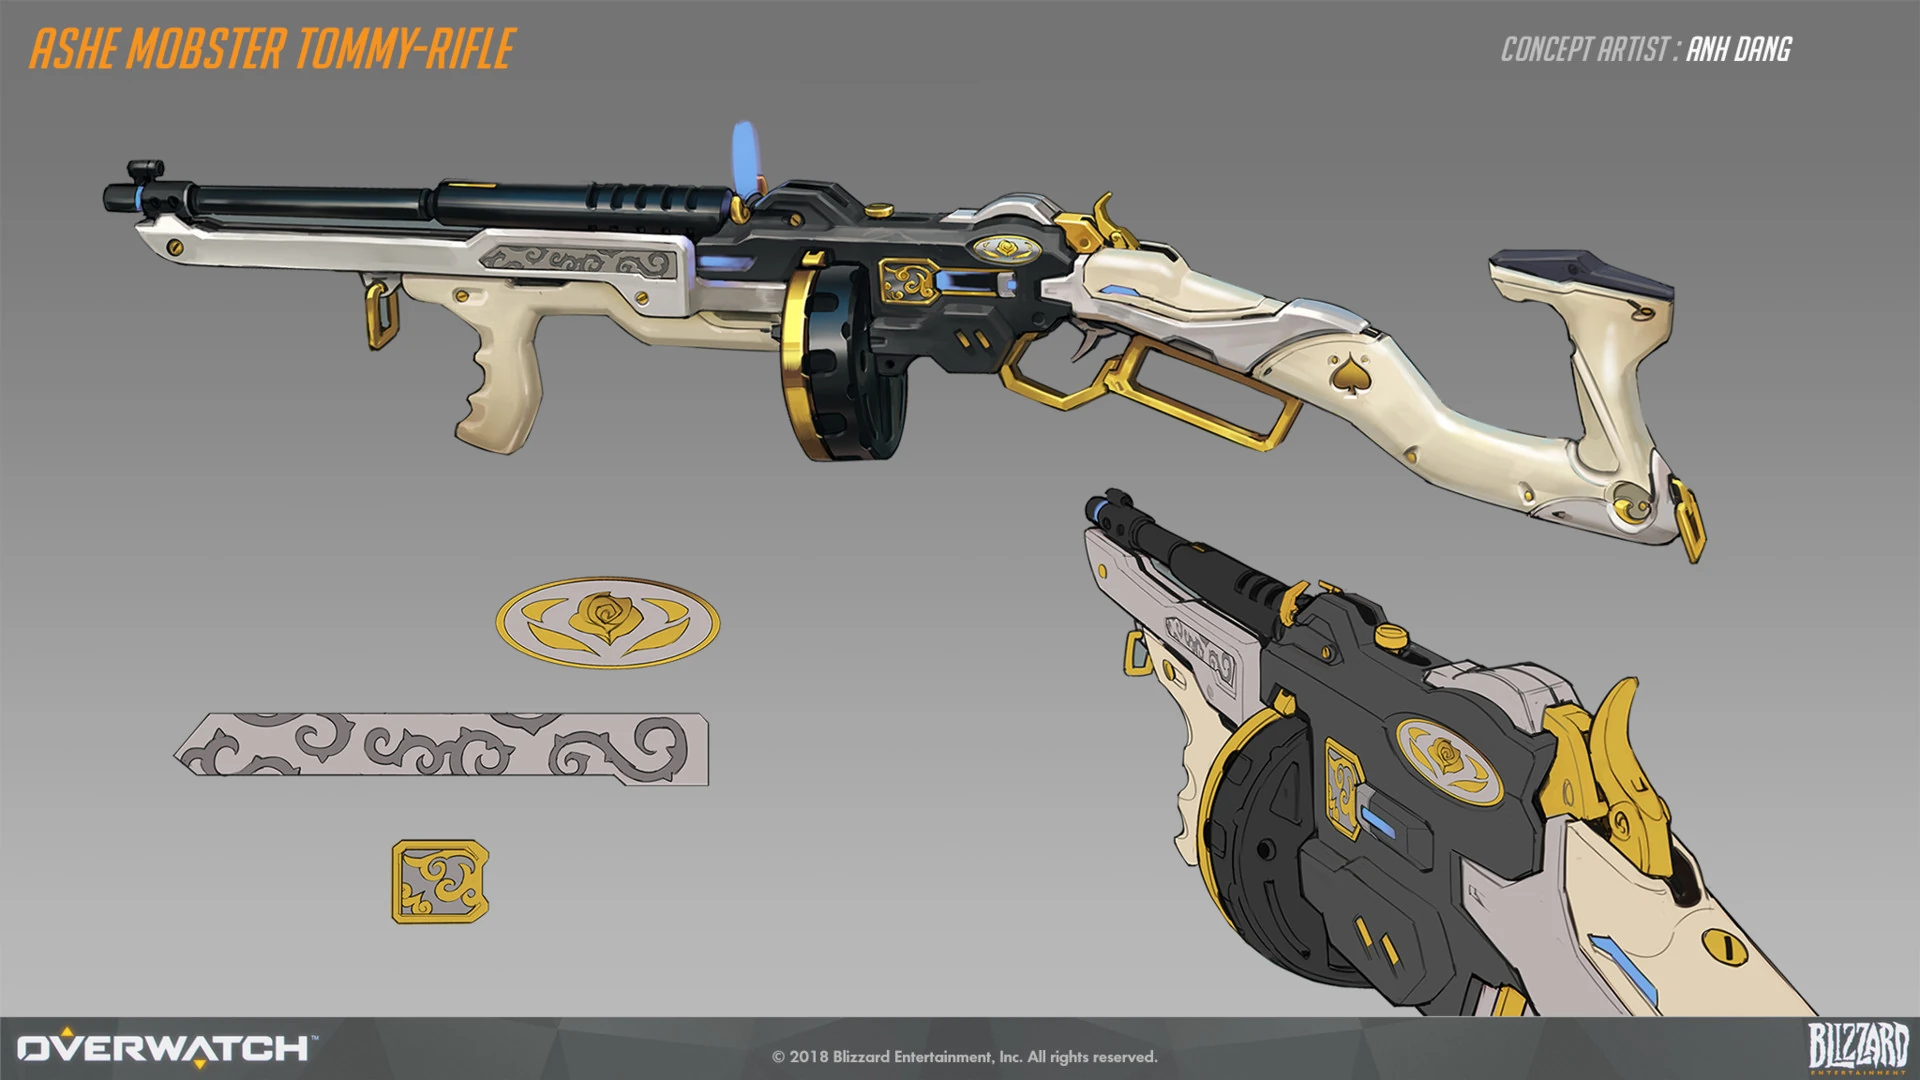
 Mobster Skin Weapon Concept Art by Anh Dang
 -
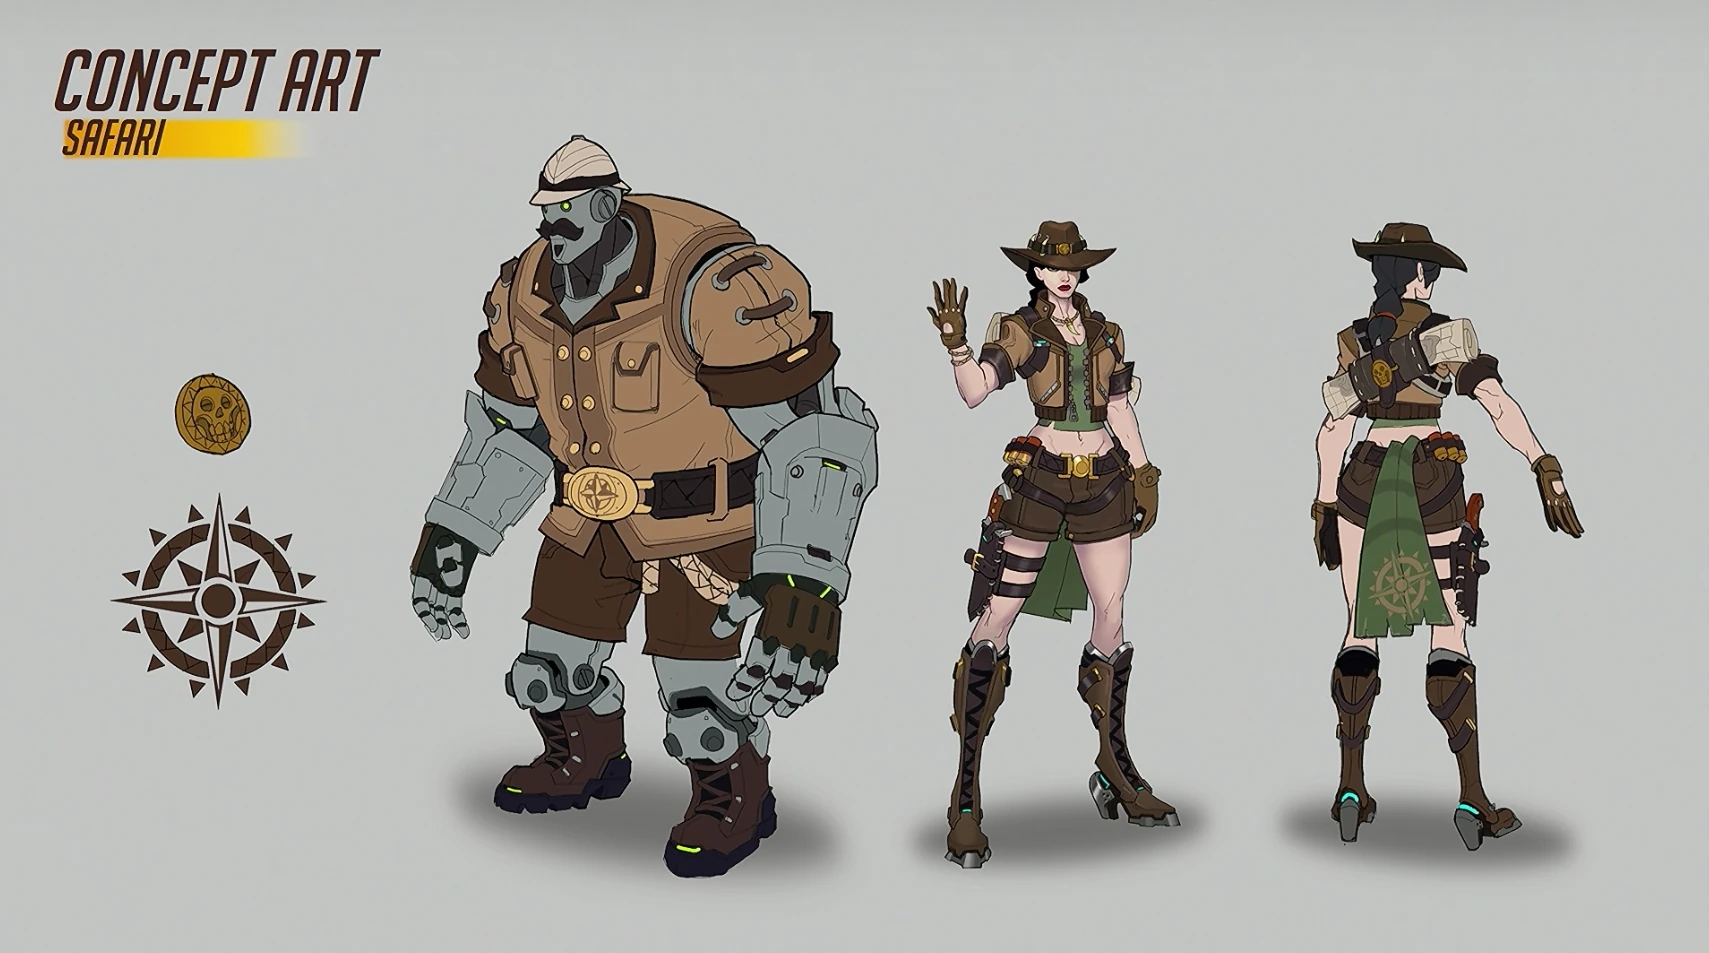
 Safari Skin Concept Art
 -
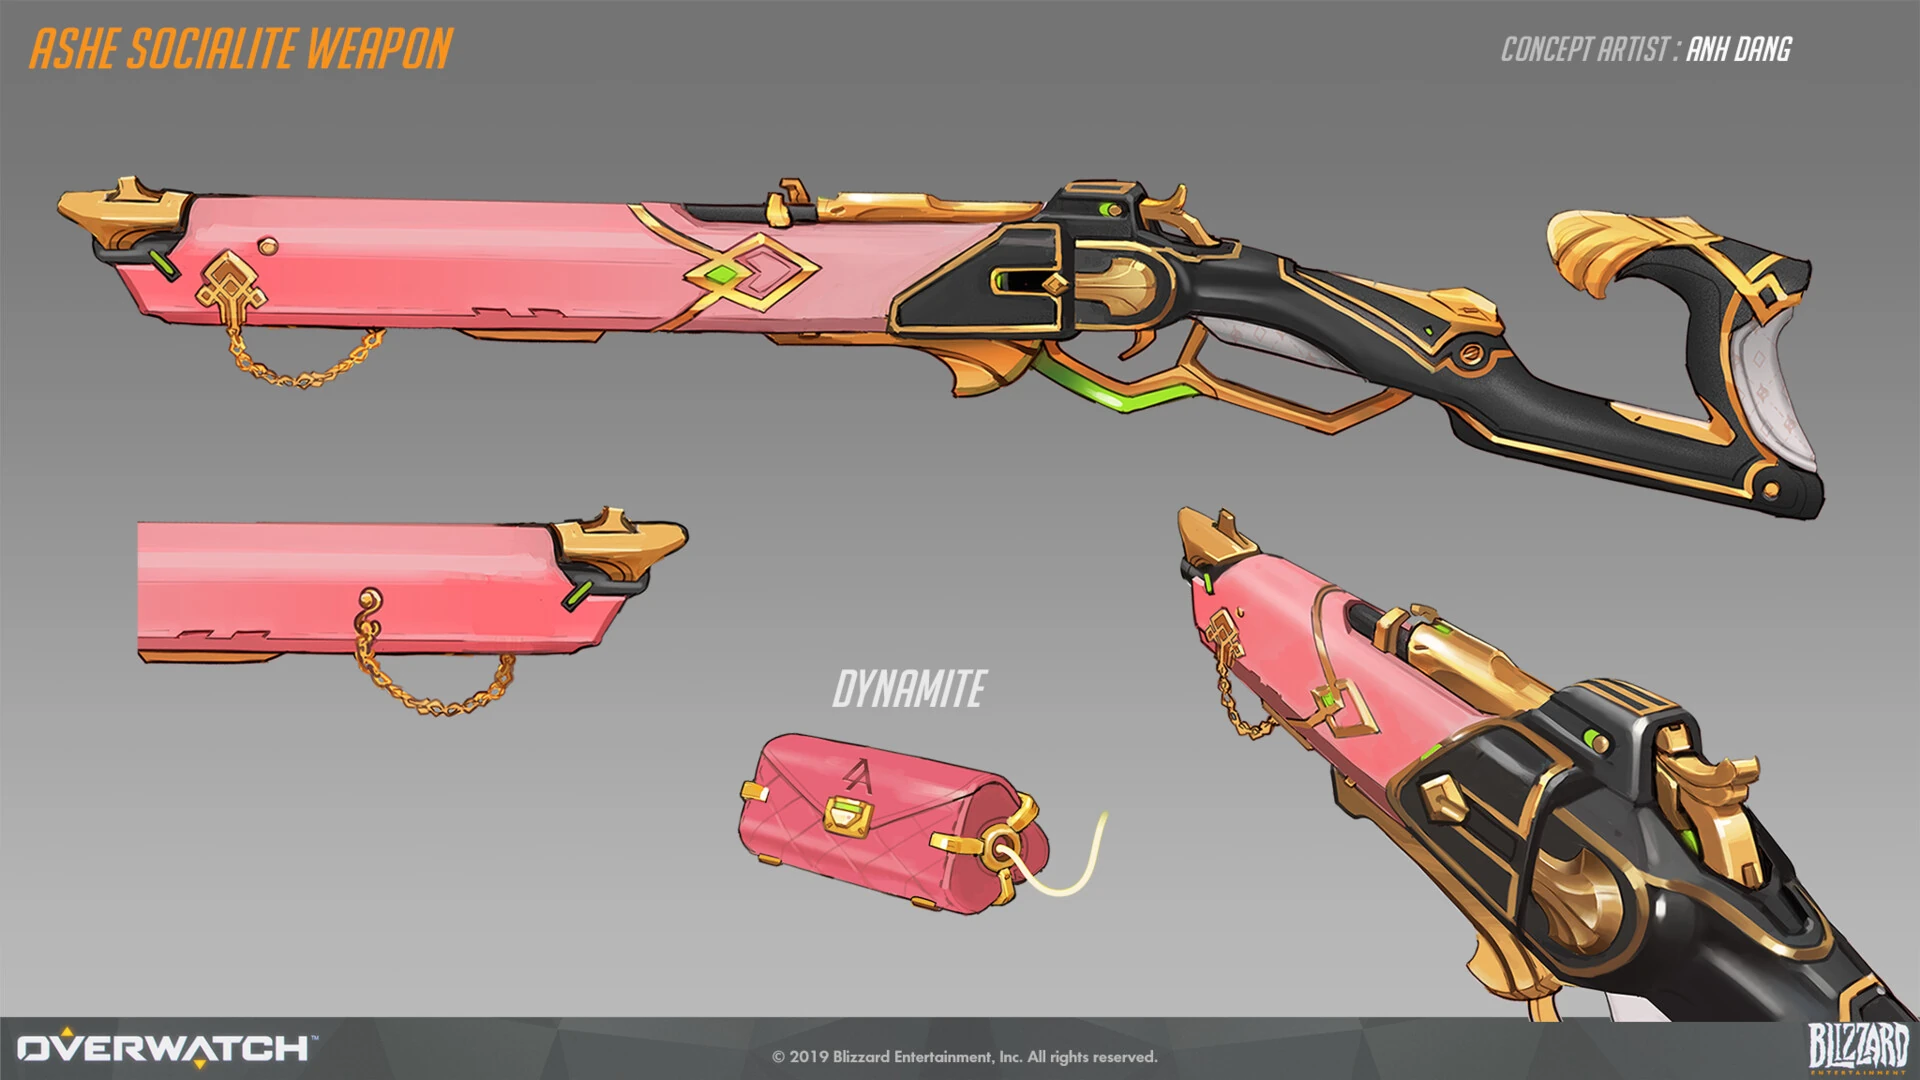
 Socialite Skin Weapon Concept Art by Anh Dang
 -
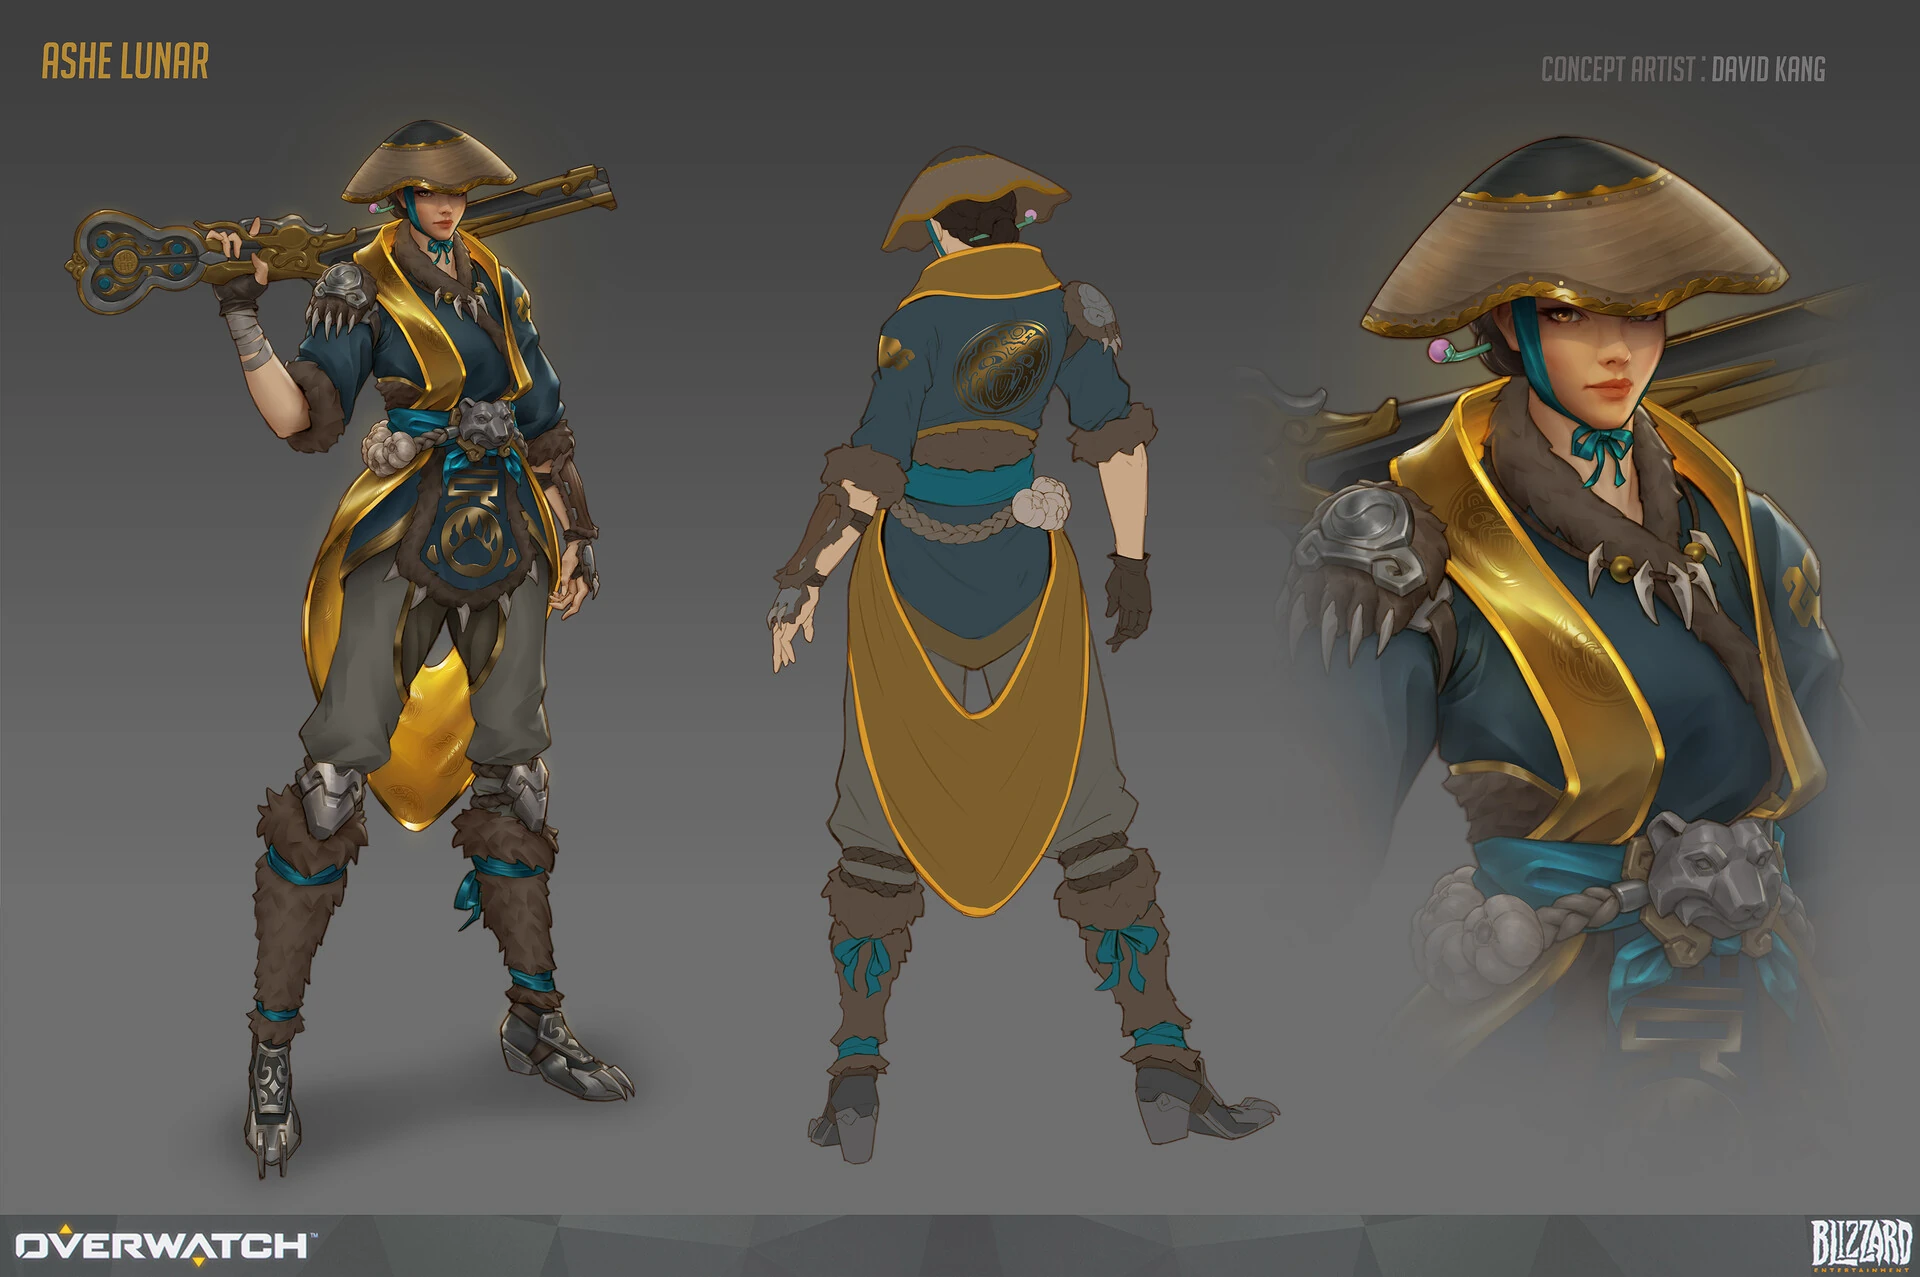
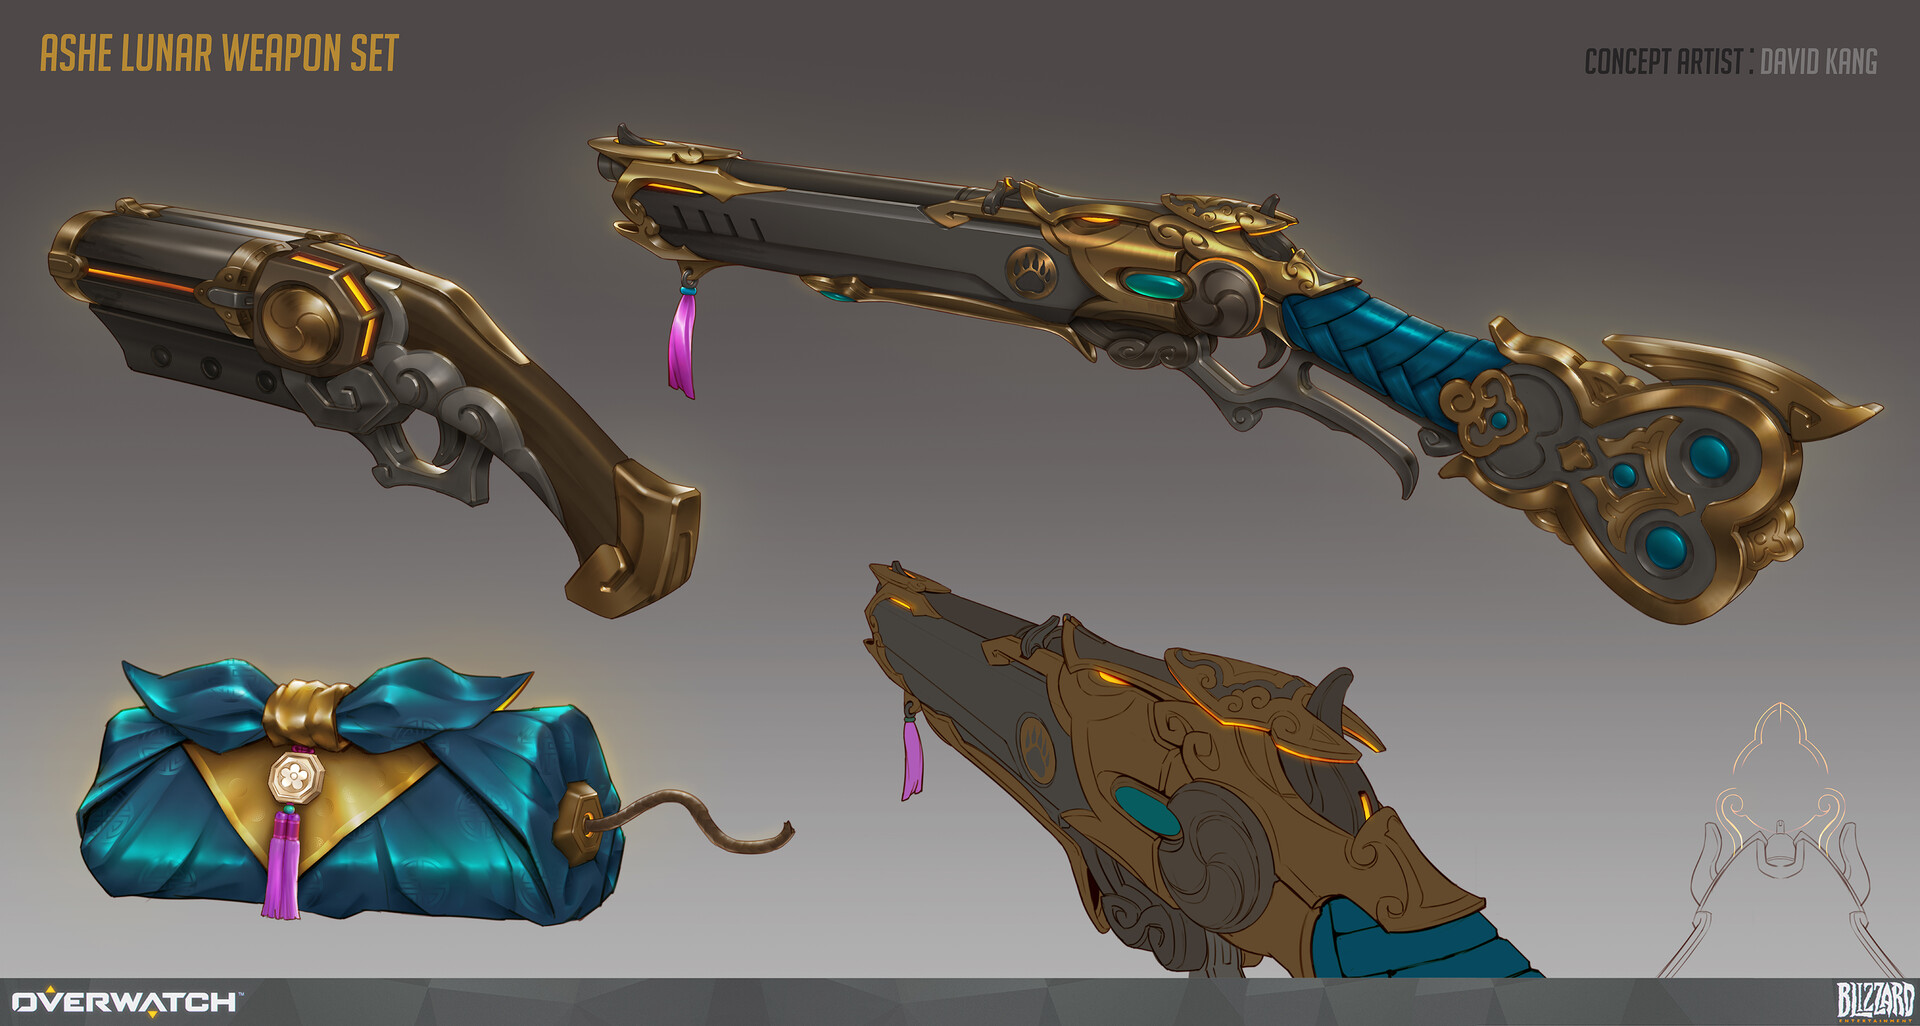
 Tiger Huntress Skin Concept Art by David Kang
 -
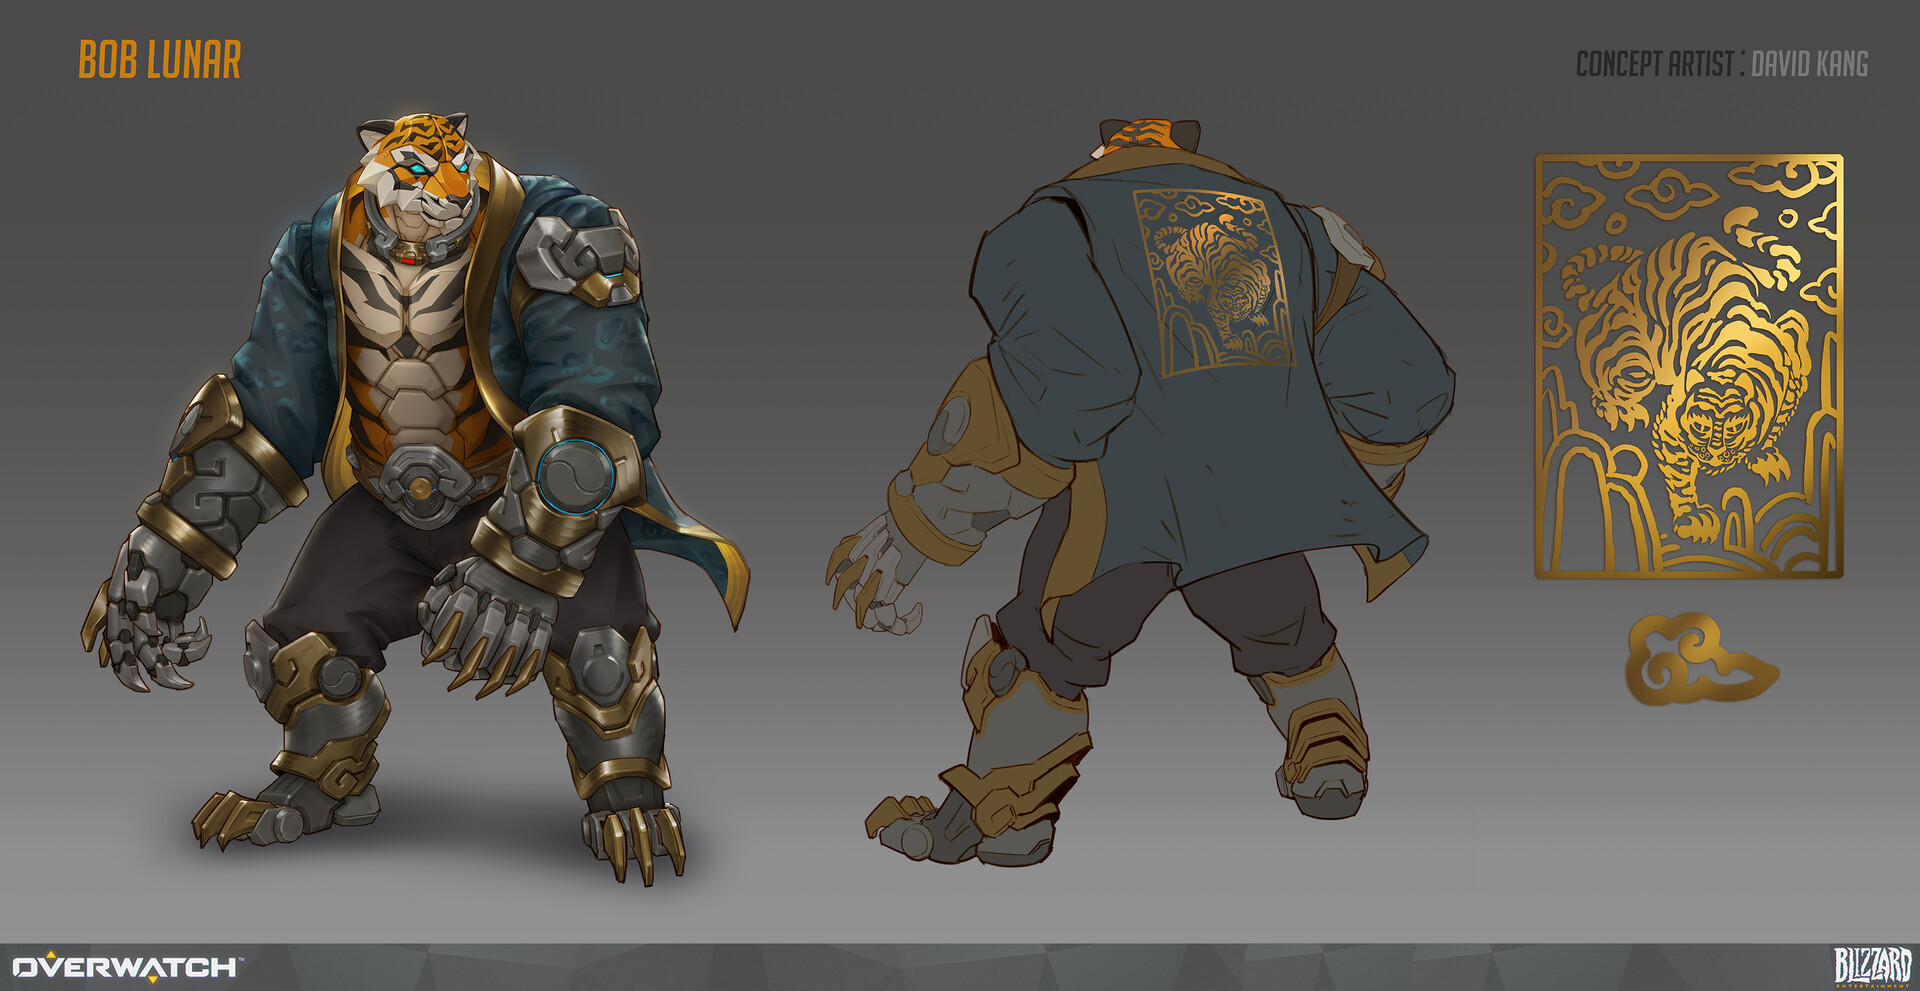
 Tiger Huntress Skin B.O.B Concept Art by David Kang
 -
 Tiger Huntress Skin Weapons Concept Art by David Kang
 -
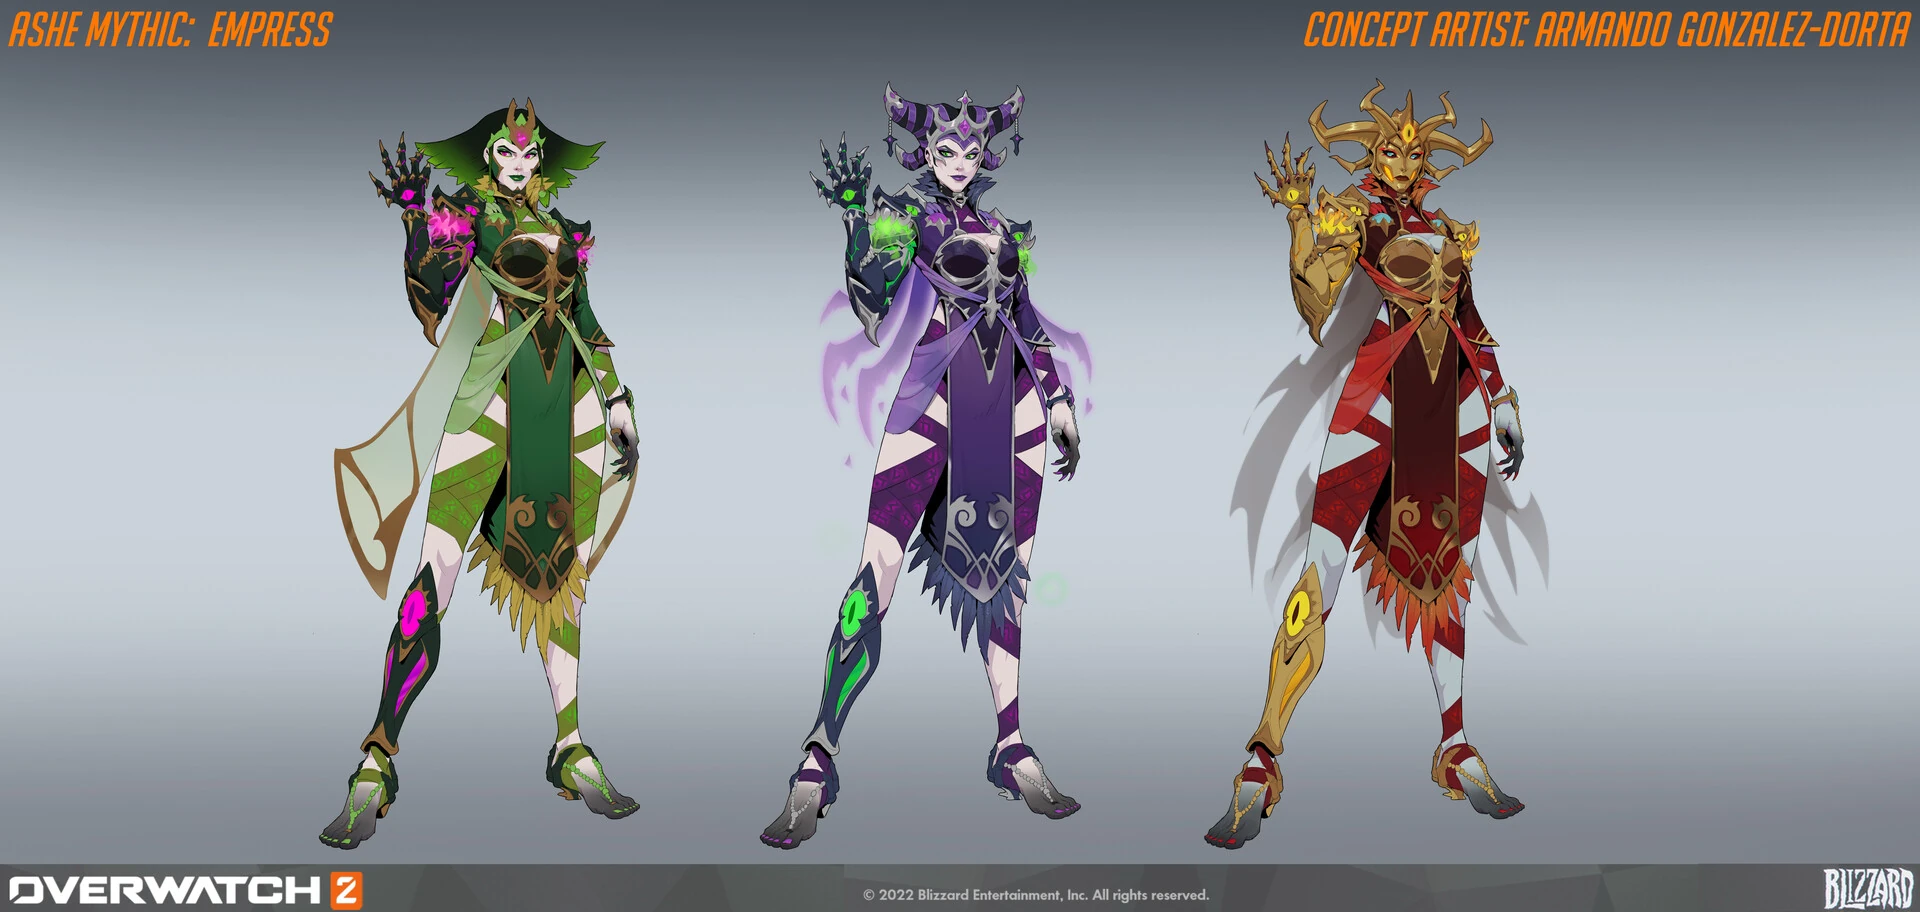
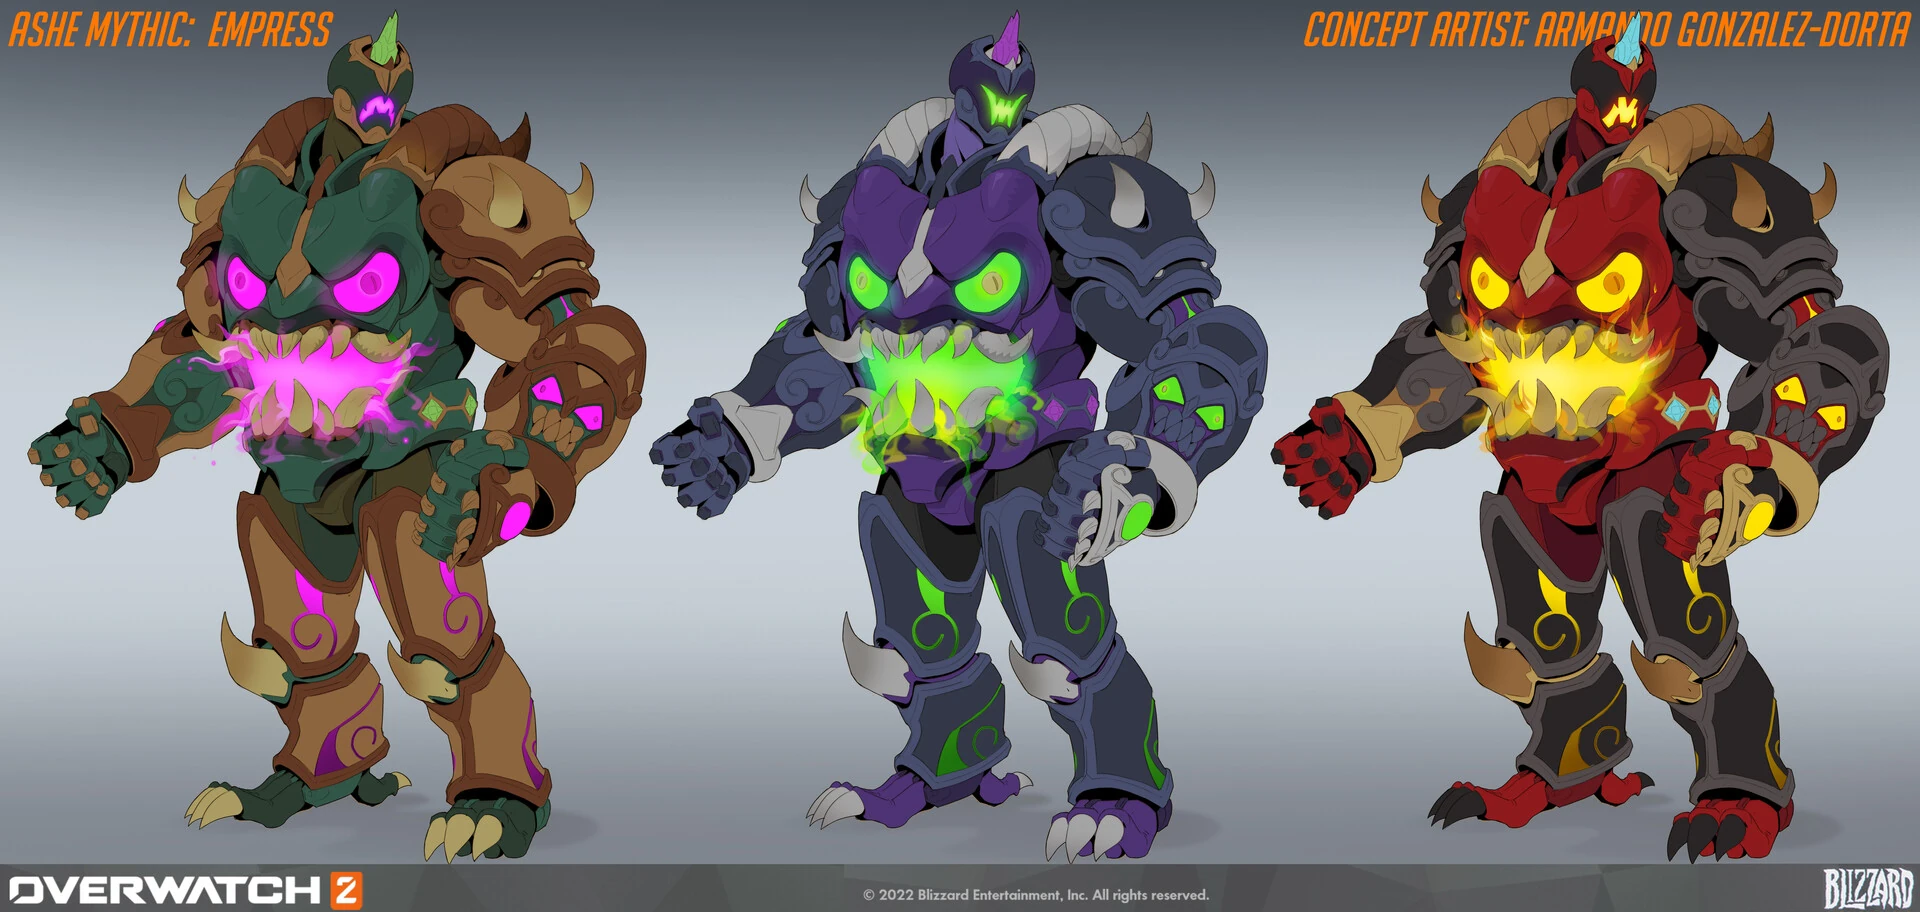
 Calamity Empress Skin Concept Art by Armando Gonzalez-Dorta
 -
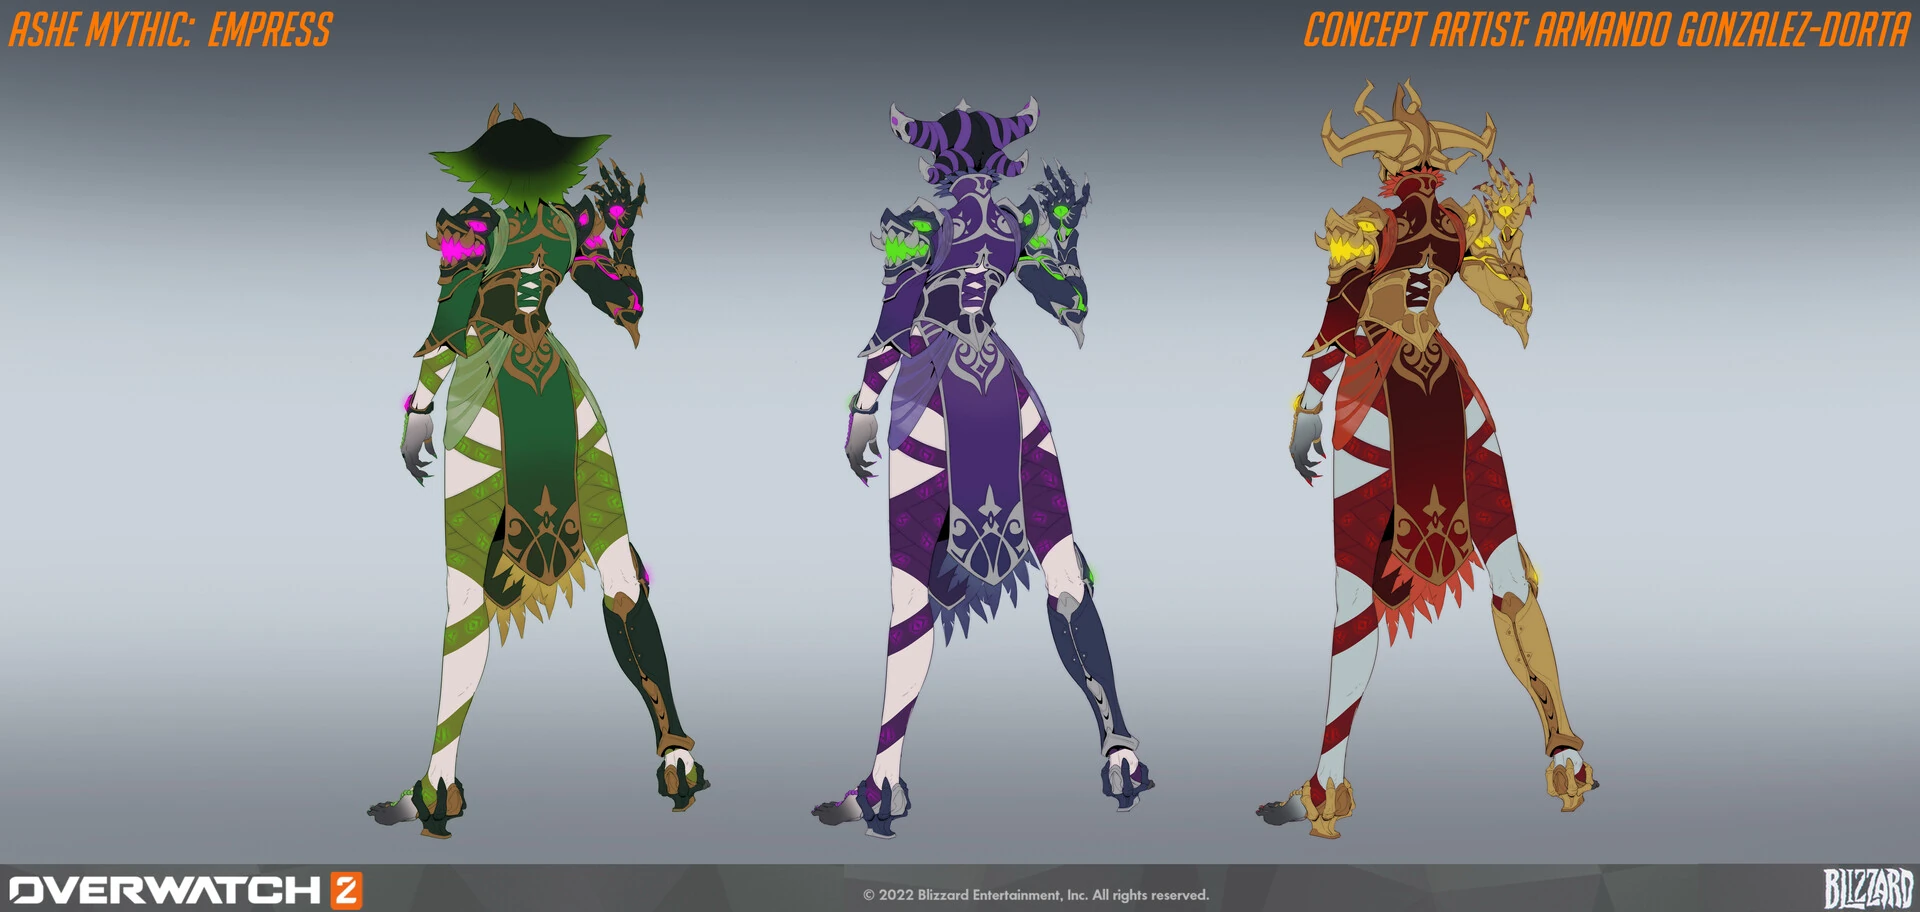
 Calamity Empress Skin Back Concept Art by Armando Gonzalez-Dorta
 -
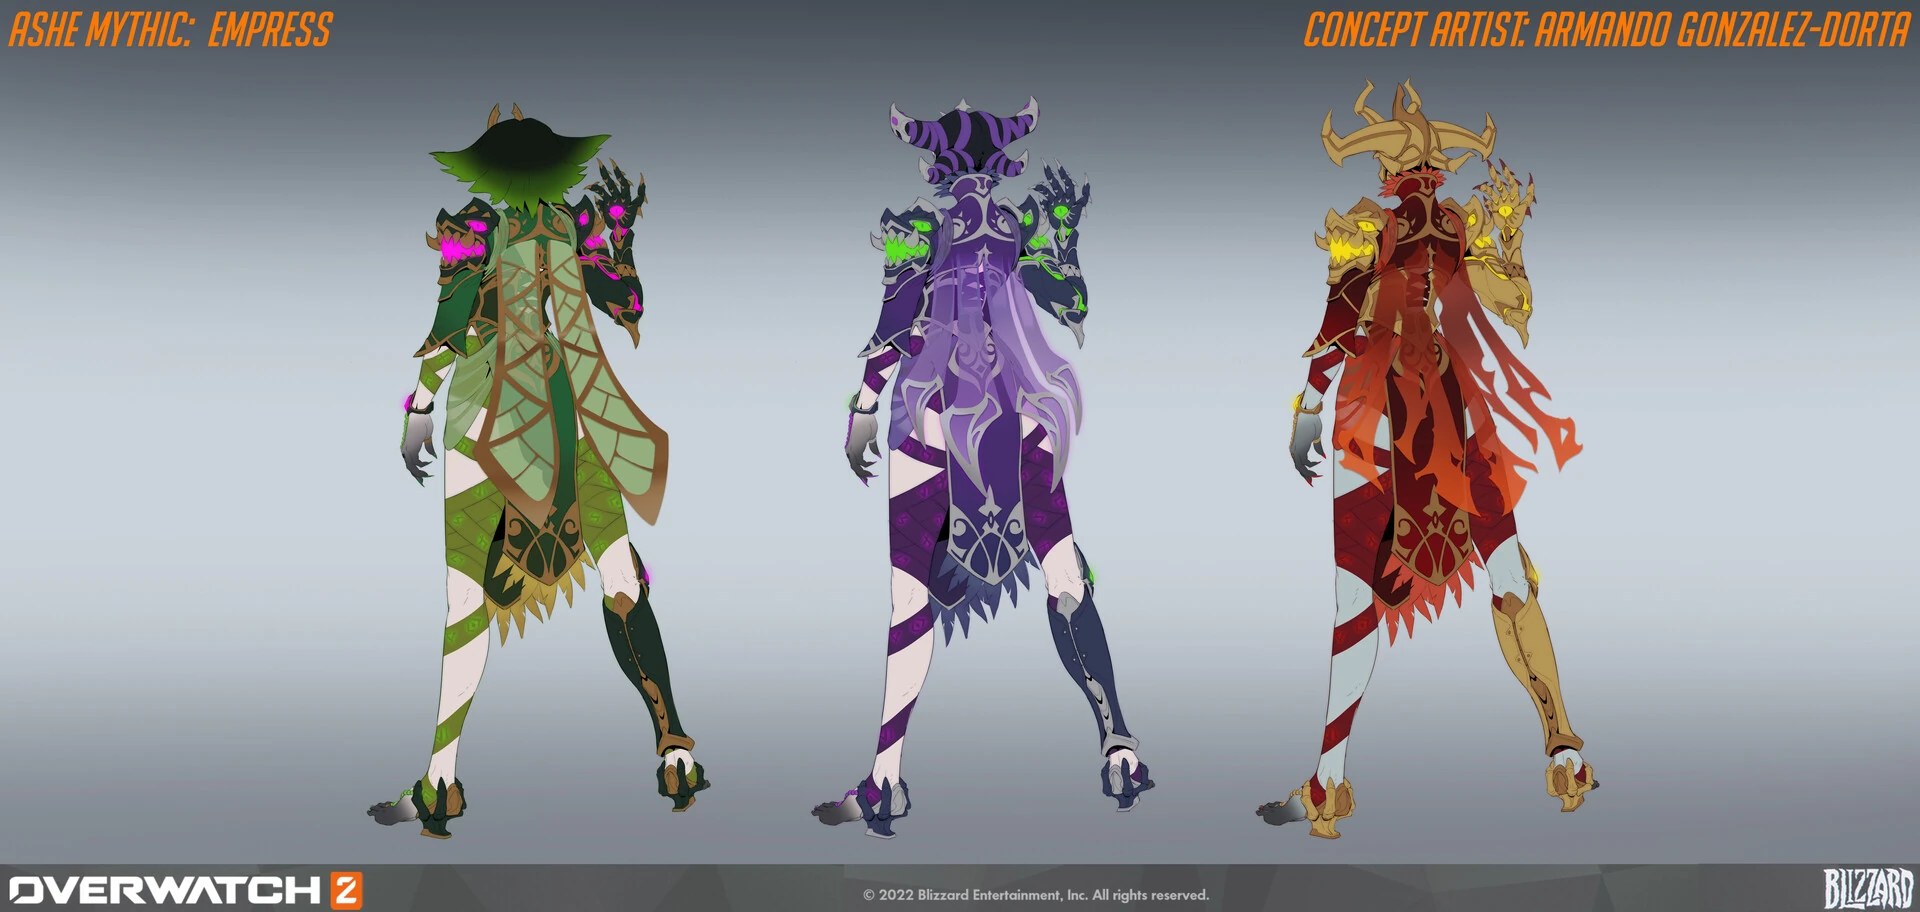
 Calamity Empress Skin Capes Concept Art by Armando Gonzalez-Dorta
 -
 Calamity Empress Skin Capes Concept Art by Armando Gonzalez-Dorta
 -
 Calamity Empress Skin B.O.B Front Concept Art by Armando Gonzalez-Dorta
 -
 Calamity Empress Skin B.O.B Back Concept Art by Armando Gonzalez-Dorta

- Rebels Comic
-
 Rebels Young Ashe Final Design by Xiao Tong Kong
 -
 Rebels Young Ashe Designs by Xiao Tong Kong
 -
 Rebels Young Ashe Designs by Xiao Tong Kong
Videos
Balance Change Log
- For more information, see Patch Notes.
![]() Double Barreled – Minor Perk
Double Barreled – Minor Perk
- Time required to retrigger Coach Gun increased from 1 to 2 seconds.
![]() Sidewinder – Minor Perk
Sidewinder – Minor Perk
- Removed.
![]() Double-Barreled – Minor Perk
Double-Barreled – Minor Perk
- Knocking an enemy back with Coach Gun briefly allows it to be used again with 25% reduced knockback.
![]() Viper's Sting perk
Viper's Sting perk
- Ammo gained reduced from 2 to 1.
- Secondary fire falloff range reduced from 40-60 meters to 35-55 meters.
- Secondary Fire falloff range rescaled from 30–50 meters to 40–60 meters
![]() Rapid Fire - Minor Perk
Rapid Fire - Minor Perk
- Removed.
![]() Remote Detonator - Minor Perk
Remote Detonator - Minor Perk
- New Minor Perk.
- After using Dynamite, pressing E again causes it to detonate after a 0.5 second delay.
![]() Rapid Fire - Minor Perk
Rapid Fire - Minor Perk
- Primary fire damage penalty reduced from 15% to 10%.
![]() Sidewinder - Minor Perk
Sidewinder - Minor Perk
- Knockback increase for both Ashe and enemies reduced from 20% to 12%.
- Hero Perks
- Unscoped shots gain 30% increased attack speed, but deal 15% less damage.
- Coach Gun pushes Ashe and enemies 20% farther.
- Hitting 2 consecutive scoped shots on a target deals 25 extra damage and reloads 2 ammo.
- Dynamite has a 40% increased detonation radius while airborne and refunds 3 ammo when thrown.
- Global Projectile Size Bonus
- Hitscan radius large reduced from 0.08 to 0.07 meters.
- Hero updates
- Can now be activated while affected by mobility locking abilities but won't move Ashe.
- Reload per bullet increased from 0.2 to 0.25 seconds.
- Primary fire damage reduced from 40 to 35.
- B.O.B. now gains the Tank role passive ability.
- General
- Knockdown time when two charging abilities collide reduced from 2 to 1.7 seconds.
- General updates
Most damage-dealing projectile sizes have been increased by a new global modifier added to their base size.
- +0.05 meters for hitscan projectiles with a high rate of fire or spread (e.g., Tracer's Pulse Pistols or Reaper's Hellfire Shotguns).
- +0.08 meters for hitscan projectiles that are more precise (e.g., Cassidy's Peacekeeper or Soldier:76's Heavy Pulse Rifle).
- +0.05 meters for travel time projectiles that are shotguns or have a very high rate of fire (e.g., Roadhog's Scrap Gun or Ramattra's Void Accelerator).
- +0.10 meters for travel time projectile with a speed greater than 50 meters per second (e.g., Zenyatta's Destruction Orb).
- +0.15 meters for travel time projectile with a speed less than or equal to 50 meters per second (e.g., Pharah's Rocket Launcher).
- Very large projectiles with a base size greater than 0.5 meters have been excluded from these increases (e.g., Orisa's Energy Javelin or Reinhardt's Fire Strike).
Hero combined HP (base health/armor/shields) increased by 15-25%.
- 150-175 HP heroes increased by 25 HP.
- 200-300 HP heroes increased by 50 HP.
- 300+ HP (Tanks) increased by 75-100 HP.
- Each hero's precise health increases are listed in their patch notes below.
Ultimate Charge
- All Ultimate ability costs increased by 10%.
Regenerative Passive for All Heroes
- All heroes now regenerate 20 health per second after 5 seconds of not taking damage.
Support Role Passive
- Now reduces the delay before regeneration begins by half (2.5 seconds).
Damage Role Passive
- Reload speed bonus on elimination has been removed.
- New role passive: Dealing damage reduces enemy healing received by 20% for 2 seconds.
Quick Melee
- Damage increased from 30 to 40.
- Hero updates
- Health increased from 200 to 250.
- B.O.B.’s weapon damage increased from 14 to 17.
- Reload time decreased from .25 to .2 seconds.
- B.O.B. now prefers to shoot at enemy targets that Ashe damages with her rifle
(beta)
- BOB base health reduced from 1200 to 1000
- B.O.B.'s health reduced from 1200 to 1000. (undocumented)
- B.O.B.'s health increased from 1000 to 1200.
The following Powers have been removed:
- Head Honcho
- Incendiary Rounds
- Incendiary Blast
- Early Detonation
- Molten Munitions
- Partners in Crime
The following Items have been removed:
- Tripod
- Ironsights
- Sidewinder
![]() Slow Burn - Power
Slow Burn - Power
- New
- Dealing Scoped Critical Damage burns enemies for 30% additional damage over 3s.
![]() Fire At My Fingertips - Power
Fire At My Fingertips - Power
- New
- Dealing weapon damage to burning enemies restores 1 ammo.
![]() Controlled Boom - Power
Controlled Boom - Power
- New
- After using [Dynamite], reactivating the ability causes it to explode after a 0.5 second delay. [Dynamites] that explode mid-air burn for 1s longer.
![]() Stacked Sticks - Power
Stacked Sticks - Power
- Converted to Power (was Epic Ability Hero Item)
- Removed +15% Ability Power
- [Dynamite] has 40% increased Blast Radius and burns 25% faster.
![]() What In Tarnation!? - Power
What In Tarnation!? - Power
- New
- For 2.5s after [Coach Gun] knocks you airborne, gain 20% increased attack speed and fall more slowly while aiming.
![]() PinB.O.B. - Power
PinB.O.B. - Power
- New
- After [B.O.B.] charges, reactivate Ultimate to charge again. Eliminations reset the charge and add 2s duration.
![]() Calamity - Power
Calamity - Power
- Changed from "Using [Coach Gun] reloads 2 Ammo. [The Viper]'s next 2 hits deal 40(AP) additional damage over 3s" to "Using [Coach Gun] reloads 25% of your Ammo. The restored shots burn enemies for 40(WP) over 3s".
![]() Out With a Bang - Power
Out With a Bang - Power
- Additional mini dynamites damage decreased to 50% reduced damage (Down from 30% reduced damage).
![]() Aero-Dynam-ite - Rare Weapon Hero Item
Aero-Dynam-ite - Rare Weapon Hero Item
- New
- +25 Health
- +5% Weapon Power
- When your [Dynamite] explodes, gain 30% Attack Speed and 15% Move Speed for 3s.
- 4000 Cost
![]() Maxed Mag - Epic Weapon Hero Item
Maxed Mag - Epic Weapon Hero Item
- Rarity changed to Epic (was Rare)
- Cost increased to 10000 (Up from 4000)
- Added +50 Health
![]() B.O.B Wire Defense - Epic Ability Hero Item
B.O.B Wire Defense - Epic Ability Hero Item
- Removed 50 Health
- Added 10% Ability Power
![]() Incendiary Blastpaper - Epic Ability Hero Item
Incendiary Blastpaper - Epic Ability Hero Item
- +10% Ability Power
- [Coach Gun] applies Burning, dealing 75 damage over 5s.
![]() Silver Spurs - Rare Survival Hero Item
Silver Spurs - Rare Survival Hero Item
- Added +5% Cooldown Reduction
![]() Build-a-blast Buckshot - Epic Survival Hero Item
Build-a-blast Buckshot - Epic Survival Hero Item
- Added +50 Health
- Removed "[Coach Gun] has 50% increased self knockback"
- Added "Gain 15% Damage Reduction while Airborne"
![]() Head Honcho – Power
Head Honcho – Power
- Remove resets on reload.
- Decreased cap to 15% (Down from 30%).
![]() Early Detonation - Power
Early Detonation - Power
- Now only heals amount of reloaded ammo when restoring health through Reload Therapy.
![]() B.O.B. Jr. - Power
B.O.B. Jr. - Power
- Decreased duration to 10s (Down from 20s).
![]() Reload Therapy - Power
Reload Therapy - Power
- No longer generates currency.
![]() Silver Spurs - Rare Survival Hero Item
Silver Spurs - Rare Survival Hero Item
- Increased duration to 5s (Up from 3s).
- Now reloads 25% of max ammo on coach gun use.
![]() Out With a Bang - Power
Out With a Bang - Power
- Decreased Explosives damage reduction to 30% (Down from 66%).
![]() Molten Munitions - Power
Molten Munitions - Power
- Increased damage to 80 (Up from 50).
- This change will not be represented correctly on the tooltip but it will be functionally set to 80. This information in the tooltip will be fixed next season.
![]() Reload Therapy - Power
Reload Therapy - Power
- Increased heal to 10% (Up from 3%).
![]() Sidewinder – Epic Weapon Hero Item
Sidewinder – Epic Weapon Hero Item
- Increased attack speed to 15% (Up from 10%).
- Increased damage to 25% (Up from 15%).
![]() Head Honcho - Power
Head Honcho - Power
- Increased damage increase per unscoped shot landed to 5% (up from 3%).
![]() B.O.B. Jr. - Power
B.O.B. Jr. - Power
- Reduced Attack Speed reduction to 20% (down from 50%).
![]() Infrared Lenses – Epic Ability Hero Item
Infrared Lenses – Epic Ability Hero Item
- Fixed an issue where the increased damage against Burning targets was only applying to The Viper and B.O.B. Now increases all damage dealt by Ashe to Burning targets.
- Reduced increased damage to Burning targets to 20% (down from 25%).
- Introducing Stadium
- Tank Heroes: D.Va, Junker Queen, Orisa, Reinhardt, and Zarya.
- Damage Heroes: Ashe, Cassidy, Genji, Mei, Reaper, and Soldier: 76.
- Support Heroes: Ana, Juno, Kiriko, Lucio, Mercy, and Moira.
General
- Hitscan damage now scales to 30% at maximum falloff range, down from 50% for the following heroes:
- Ashe
- Baptiste
- Bastion
- McCree
- Soldier: 76
- Widowmaker
- Wrecking Ball
This change may be difficult to notice immediately as it scales damage over a range slightly more than before, but it will lower the impact of hitscan damage outside of their intended optimal ranges.
- (Parity Adjustment) No longer does less damage on console platforms
- Aim-down-sights damage reduced from 80 to 75
- Aim-down-sights recovery time reduced from 0.7 to 0.65 seconds
Developer Comment: Ashe being able to eliminate 200 health enemy heroes with one headshot while assisted by 30% damage boost became too dominant, especially when combined with the other improvements to her weapon. We are lowering the maximum damage but also the shot recovery time to keep her overall damage output relatively the same.
- Explosion damage reduced from 75 to 50
Developer Comment: Ashe is still a bit too powerful, but we'd like to keep her rifle feeling impactful so we're taking some power out of her Dynamite ability.
- Max ammo reduced from 15 to 12
- Aim-down sights damage reduced from 85 to 80
- Cooldown increased from 10 to 12 seconds
Developer Comment: With recent improvements to Ashe's weapon her overall damage output has increased significantly. Toning Dynamite down will lower her overall damage while keeping her damage output focused on her rifle.
- Now reaches max zoom halfway through Ashe's aim down sights, instead of at its conclusion
- Magazine size increased from 12 to 15
- Shots no longer queue up the next shot if pressed slightly before recovery has finished
- Unscoped shots to reach maximum spread increased from 4 to 6
- Unscoped shots can now be fired much more quickly after firing a scoped shot
- You can now start reloading much more quickly after firing a scoped shot
- Reload time per round decreased from 0.3 to 0.25 seconds.
Developer Comment: Ashe's full reload time felt overly restrictive. However, a long reload time is intended to balance out the power of her gun, so we want to be careful not to eliminate that completely.
- Bob will now have a golden tint when Ashe equips her golden weapon
Developer Comment: Our final technical audit on Ashe’s character package allowed us to implement a feature we talked about several times during Bob’s production. Making him part of Ashe’s golden weapon is a great way to celebrate our favorite Big Omnic Butler and let players show off their hard-earned Competitive Points each time they summon him onto the battlefield
New Hero: Ashe (Damage)
References
- ↑ 1.0 1.1 Ashe, PlayOverwatch. Accessed on 2023-09-12
- ↑ Ashe (OW1), Blizzard Entertainment. Accessed on 2018-11-13
- ↑ 2018-11-02, BLIZZARD GEAR: PAST, PRESENT & FUTURE PANEL UNVEILS LOTS OF NEW GEAR. Blizzpro, accessed on 2018-11-16
- ↑ Ashe Quotes
- ↑ Overwatch: Deadlock Rebels
- ↑ Luck of the Draw
- ↑ 7.0 7.1 7.2 Forging Worlds: Stories Behind the Art of Blizzard Entertainment
- ↑ 8.0 8.1 8.2 8.3 2018-11-2, Blizzcon 2018 Overwatch: What's New Panel
| Heroes in Overwatch
| ||||||||
|---|---|---|---|---|---|---|---|---|
Tank |
 Bruiser |
|||||||
 Initiator |
||||||||
 Stalwart |
||||||||
Damage |
 Flanker |
|||||||
 Recon |
||||||||
Sharpshooter |
 Ashe |
|||||||
 Specialist |
||||||||
Support |
 Medic |
|||||||
 Survivor |
||||||||
 Tactician |
||||||||


