Cassidy, originally named McCree until 2021, is a Sharpshooter Damage hero in Overwatch. He is one of the 21 heroes included in the game's release on 24 May 2016.
Overview
Armed with his Peacekeeper revolver, Cassidy takes out targets with deadeye precision and dives out of danger with eagle-like speed.
-
 3D portrait
 -
 2D portrait

Abilities
Passive Abilities


- Critical hits will grant cooldown reduction to Movement Abilities based on 0.75% of damage dealt.
Weapons


- Damage per second: 140 while firing (93.33 overall w/reload)
- After the shot, the game raises the Cassidy camera (changes the facing angle) by 4 units, after which it starts lowering the character's camera to its previous value. As soon as this happens Cassidy can shoot again.

- Damage per second: 416.67 while firing (135.14 overall w/reload)
- Each shot raises the Cassidy camera (changes the facing angle) by 2.5 units.
- The first shot has no spread.
Special Abilities

- Can be used while airborne.
- Cassidy can roll off ledges.
- Travels in the direction Cassidy is walking, not the direction he is facing (unless he is not moving).
- Movement is not blocked by enemy player collision.
- Destroys fences and other breakables Cassidy collides with while rolling.

1.2 seconds (hinder)
- Flashbang explodes immediately upon hitting an enemy or terrain or upon reaching its maximum range, applying its effects to all enemies in radius.
- Enemy heroes hit by the explosion take damage and become "hindered", interrupting and preventing movement abilities and crouching for the duration and slowing them. See Movement abilities for a list of affected abilities.
- The hindered status can be removed by effects that grant phased out status, such as
 Protection Suzu.
 - The projectile can be destroyed while in air by
 Defense Matrix,
  Kinetic Grasp,
  Javelin Spin,
  Power Matrix and
  Kekkai Sanctuary and reflected by
  Deflect, but the splash is unaffected.
  Amplification Matrix affects all damage dealt, if the projectile passes through it. Splash damage alone going through is not amplified.
Ultimate Ability

300 per second (remaining duration)
0.3 + 0.4 seconds (when canceled)
7 seconds (max)
- Activating Deadeye instantly replenishes Peacekeeper's ammo.
- Deadeye can be canceled using Secondary Fire (
 ).
). - Deadeye is a channeled ability; getting stunned, knocked down or hacked, immediately ends the ability without firing.
- Cassidy cannot jump, crouch or use other abilities while channeling Deadeye.
- After Deadeye has been active for 2 seconds (warning time), its charge rate is increased and its movement speed penalty and damage reduction fade to their minimum values over the next 1.4 seconds.
- If the duration runs out, Deadeye ends without firing.
- Deadeye can only lock on to heroes,
 B.O.B. and Baptiste's
  Immortality Field.
 - The targeting area of Deadeye is a 105° wide 3D cone. The player's field-of-view (FOV) settings does not affect this area, meaning that Deadeye may be able to target enemies outside of view (especially vertically) or vice versa, depending on the setting.
- Despite the visuals in-game, the shots are actually aimed at a point at the target's chest instead of their head.[4]
- If the line of sight to this point is obstructed or it is outside the targeting area, the charging is paused and continues from the same amount when the line of sight is restored.
- The lock on is removed and any accumulated damage is reset if the target becomes invisible.
- Deadeye cannot be fired unless there is at least one target with unobstructed line of sight within the targeting area.
- Barriers and invulnerability states (phased out, invincible) can negate/block the shots, but they do not prevent locking on, pause charging or prevent the hero from being fired at.
- The damage relative to the target's health is displayed as a closing red circle. If the accumulated damage is above an enemy's remaining health, a skull will appear.
- The indicator tracks the location of any enemy that has been locked on to through walls as long as the target has not become invisible.
- The indicator takes into account any damage mitigations and amplifications, excluding Amplification Matrix.
- In a normal game (and without modifiers like Mercy's damage amplify), the maximum possible damage per target is 1,800.
- While unlikely in a normal game scenario, Deadeye can lock on to and shoot at more than 6 targets simultaneously.
- Ammo remaining in Peacekeeper's cylinder is not relevant as Deadeye will keep firing even if it runs out of ammo.
- Initial charge rate increased from 130 to 325 damage per second.
- Ramped charge rate increased from 260 to 650 damager per second.
- Has a maximum damage cap of 1560 per target.
Perks
Minor Perks
A Minor Perk can be chosen at level 2.

- The second grenade explodes 0.1 seconds after the first.

- Targets must be in view and fulfill the conditions for accumulating damage to also count for healing.
Major perks
A Major Perk can be chosen at level 3.

- Despite being intended for Combat Roll,
 Deadeye can also trigger this Perk's healing.

70 (bleed)
- Holding secondary fire causes Cassidy to aim down sights. Pressing primary fire then fires the shot.
- Base damage from the shot can critical hit, dealing double damage, but bleed damage is unaffected.
- Shot pierces enemies and deployables, excluding barriers.
- Base damage can be boosted by Amplification Matrix, bleed damage cannot.
- Bleed damage counts as a damage over time effect. It can be cleansed and it ignores armor.
Hero-specific options
| Setting name | Options | Description |
|---|---|---|
| Recoil recovery aim compensation | On (default) | Stops the recoil's downward pulling return motion if the player applies enough vertical crosshair movement after the shot. |
| Off | Recoil's return motion is unaffected by player input, always pulling the crosshair back downwards the same amount as the recoil raised it. | |
| Hide Deadeye fire and cancel text | Off (default) | Cancel text UI element is displayed to the left of the crosshair. |
| On | Cancel text UI element is hidden. | |
| Hide Deadeye timer | Off (default) | Timer UI element is displayed around the crosshair. |
| On | Timer UI element is hidden. |
Stadium
Cassidy is a playable hero in Stadium game mode. See Cassidy/Stadium for a list of hero-specific Items and Powers.
Strategy
Strength
As befits a gunslinger, Cassidy is one of the game's best duelists. He is capable of killing almost anyone he gets up close to with blinding speed his grenade and unloading his Peacekeeper into them. The accurate hitscan nature of his primary weapon also makes him suitable for fighting mobile targets like Genji and Pharah at medium range. Combat Roll not only provides him a quick mobility to escape, but also fully reloads at the same time which is what his playstyle really needs. Deadeye can be used to quick-kill on non-tank heroes within his line of sight or zoning away the opponents due to how the guarantee kill shot.
Weakness
While having a powerful gun, Cassidy's abilities are considered sub-par as a trade-off to his insane damage output. His low mobility means that he has no conventional routes to get up close to his opponents, making it easy to outflank him and kill him before he has a chance to fire back. In close combat, the only way for Cassidy to protect himself is to kill the opponent quickly. Missing the target will likely force him to fight or escape. His low ammunition means that missing one shot poses a far greater loss than those of other heroes. Like other hit scan heroes, Cassidy's damage falls off to 30% at max range, however the Peacekeeper's damage starts falling off earlier than other hit scan heroes, making him a poorer choice for static defense at long range.
Weapons & Abilities
 Peacekeeper: Cassidy's primary weapon. The primary fire shoots a single, perfectly accurate bullet down the crosshairs. The secondary fire "fans" the Peacekeeper's hammer, causing him to unload the remaining cartridges in the Peacekeeper's cylinder at blinding speed. The bullets from secondary fire cannot headshot.
- The deadly accuracy of your primary fire is best used on targets at medium range. It proves particularly useful on agile targets like Tracer who are often difficult to hit with secondary fire.
- Secondary fire is woefully inaccurate past close-range, but will kill anyone with 300 or less hit points in a single volley if all of the bullets hit and no damage reductions are considered. Use it when close to an opponent to quickly deal massive damage to them before they can respond.
 Combat Roll: When activated, Cassidy rolls a short distance in the direction he's currently moving, granting him damage reduction. He also fully reloads his Peacekeeper during the roll.
- While Combat Roll does give Cassidy a small amount of mobility, it's nothing compared to Tracer's Blink. Combat Roll is best used as a quick way for Cassidy to reload his Peacekeeper than anything else. If you're in danger, however, it's best to use Combat Roll to mitigate incoming damage and get to cover instead of saving it for the reload.
- You can get extra distance when combined with jump:
- Jumping right after roll preserves momentum and grants up to 3.6 meters bonus distance when travelling along ground. Jump input can be held during roll to immediately jump when it ends.
- Jump into roll grants extra 0.5-2 meters. The sooner you roll after the jump, the further you go. This method is less consistent but more useful for crossing gaps and reaching high grounds.
- Certain map geometry can allow Cassidy to "climb" or bounce upward on it by jumping and rolling into it.
 Flashbang: A short-ranged projectile that explodes immediately upon contacting an enemy or terrain, dealing modest damage but disabling movement abilities and slowing affected targets by 50% for a short duration.
- Flashbang makes Cassidy a great duelist at close range, and a quintessential counter to high-mobility characters like Tracer, Sombra, and Doomfist. Its ability to deny them an escape option while leaving them wide open to both Cassidy and his team all but guarantees their death if they recklessly try to challenge him.
- Deadeye: Cassidy's Ultimate ability. When activated, Cassidy enters a special targeting mode for a short duration, during which movement speed dramatically slows and he cannot use any other abilities. Enemies are gradually highlighted with a red bullseye as long as they are within Cassidy's vision. Cassidy can press the primary fire button at any point during this time to shoot a bullet at all highlighted targets, with the damage increasing the longer they were within Cassidy's vision. This is a channeled ability, and will immediately end if Cassidy is hit by a stun.
- The outer red circle on each highlighted enemy indicates how much damage Deadeye will do to that specific target, relative to their current HP. When the outer red circle stops shrinking and displays a skull, Deadeye has accumulated enough damage to kill the target.
- The bullet fired by Deadeye will always fire at highlighted enemies, so long as they were within Cassidy's vision when he pressed the primary fire button.
- There are some occurrences where Cassidy will activate his Ultimate after skulls appear on highlighted enemies but not kill them. For example, if he is locked on to 4 targets, he shoots and kills the first 3 targets, but in the time he is shooting the 3 targets, target 4 moves to cover, and Cassidy's bullet misses and hits where the target was last in sight. This could also happen if a Mei puts up an ice wall right before getting shot; the ice wall will protect her from Cassidy's bullet, even though she was locked on to at the time of the Ultimate being fired. Additional examples include protection behind a barrier, having bonus health from an ability like Sound Barrier, or being invulnerable.
- Enemies who were previously targeted but who have left Cassidy's vision will have their bullseye turn grey. It will turn back to red if they return to his line of sight.
- If significant risks present themselves while using Deadeye, the options to either fire or cancel before the killing shot are always present. Doing so will not kill targets, but can still deal significant damage. Doing so can prove useful when a team fight requires an extra hand to progress successfully.
- Due to the channeled nature of Deadeye, the primary weaknesses Cassidy faces include Sleep Darts and Chain Hooks. One effective way to maximize Deadeye's potential is to have a Sombra use her EMP beforehand, preventing any barriers, Chain Hooks, Sleep Darts, or other stuns from interrupting Deadeye.
- It is worth noting Genji's Deflect can send back Cassidy's Deadeye wherever the opposing Genji's cursor is aimed, including Cassidy.
General Strategies
- Cassidy is a powerful anti-flanker and medium range damage dealer. Though it might be tempting to send him out on his own, he actually works best when staying near his team, as he can quickly kill annoying flankers like Genji and deal significant damage to Tanks like Winston, keeping his own team safe. Cassidy's low mobility makes him vulnerable to being picked off by enemies like Widowmaker if he travels by himself, and most enemies will be able to hear him coming a mile away due to his loud footsteps.
- Stick to using the Peacekeeper's primary fire at anything other than short range. Aim for headshots if your enemy is moving in a predictable way, as they deal a large amount of damage.
- It might be a better choice to land a single headshot on a stunned target rather than Fanning the Hammer. Doing so eliminates the need to reload afterwards, potentially proving useful if further engagements immediately present themselves.
- Use Combat Roll to retreat and return fire rather than rolling forward to fight back. Even if you can fully reload without a reloading animation, you will lose your only method of escape if you encounter an engagement against your favor.
- Minimize the risk of enemy fire by peeking around corners when no friendly Barrier is available. Doing so can maintain a compromised, yet safer line of sight while mitigating damage from enemies.
- Try to gain vertical height before using Deadeye, as doing so permits a greater field of vision over targets hiding behind cover. Be aware that Cassidy is extremely easy to kill while using Deadeye, and that enemies like Widowmaker or Soldier: 76 can burst Cassidy down long before he has the chance to confirm his targets.
- Deadeye can be used in one of two ways: to clear out an area by the very threat of the ability, or as a way of assassinating mobile priority targets. The "standard" combination of Mercy and Pharah flying through the air are especially vulnerable to being killed by Deadeye, as it takes little time for Cassidy to line up a killing shot for both of them.
- It is worth noting Deadeye is particularly strong when used unpredictably. It would be best to try and flank the enemy team and use it from behind, so as to relay the idea that Cassidy is in front, providing a stark advantage while attempting to eliminate multiple foes quickly. Note that although Reinhardt's Shield can block the Deadeye shots, Deadeye is still capable of dealing tremendous damage to his shield.
- A notable vantage point when using Deadeye on Dorado is just after the first checkpoint, upon going through the large gate, situated above and to the right, where a small (and very accessible) ledge can be found. The ledge provides a clear view over the long stretch of road ahead of the Payload, making it an excellent spot for Cassidy's Deadeye. This location's notable elevation provides a view of the enemy team otherwise inaccessible from ground level. This ledge also provides access to an area filled with plants, flowers, etc. on the structure to the right, permitting further access to the very small ledge on the building. Be aware that if the enemies find your position, they can easily relocate beneath the ledge to avoid Cassidy's line of sight.
- Cassidy's Peacekeeper can be treated like Widow's Kiss or Hanzo's Storm Bow. While it is tempting to aim for headshots, aim for bodyshots if headshots prove too difficult. It is better to land several body shots than failing to land a headshot and needlessly risking the outcome of a duel.
Match-Ups and Team Synergy
Tank
| Hero | Match-Up | Team Synergy |
|---|---|---|
 D.Va |
WEAK MATCHUP | HIGH RISK
D.Va's
|
TBA SYNERGY
Team synergy details with D.Va are currently missing. You can help the Overwatch Wiki by adding them!
|
 Domina |
TBA MATCHUP OR PRIORITY | TBA RISK
Matchup details for Domina are currently missing. You can help the Overwatch Wiki by adding them!
|
TBA SYNERGY
Team synergy details with Domina are currently missing. You can help the Overwatch Wiki by adding them!
|
 Doomfist |
EVEN MATCHUP | HIGH RISK
Cassidy possesses one of the strongest counters to Doomfist's hyper-mobility:
|
TBA SYNERGY
Team synergy details with Doomfist are currently missing. You can help the Overwatch Wiki by adding them!
|
 Hazard |
TBA MATCHUP OR PRIORITY | TBA RISK
Matchup details for Hazard are currently missing. You can help the Overwatch Wiki by adding them!
|
TBA SYNERGY
Team synergy details with Hazard are currently missing. You can help the Overwatch Wiki by adding them!
|
 Junker Queen |
WEAK MATCHUP | HIGH RISK
Although Junker Queen lacks barriers to block Cassidy's shots, her slender hitbox and erratic movement make her a challenging target to duel. Cassidy must avoid being struck by her
|
TBA SYNERGY
Team synergy details with Junker Queen are currently missing. You can help the Overwatch Wiki by adding them!
|
 Mauga |
TBA MATCHUP OR PRIORITY | TBA RISK
Matchup details for Mauga are currently missing. You can help the Overwatch Wiki by adding them!
|
TBA SYNERGY
Team synergy details with Mauga are currently missing. You can help the Overwatch Wiki by adding them!
|
 Orisa |
WEAK MATCHUP | HIGH RISK
Matchup details for Orisa are currently missing. You can help the Overwatch Wiki by adding them!
|
TBA SYNERGY
Team synergy details with Orisa are currently missing. You can help the Overwatch Wiki by adding them!
|
 Ramattra |
WEAK MATCHUP | HIGH RISK
Ramattra's
|
TBA SYNERGY
Team synergy details with Ramattra are currently missing. You can help the Overwatch Wiki by adding them!
|
 Reinhardt |
STRONG MATCHUP | MEDIUM RISK
Reinhardt's massive
|
TBA SYNERGY
Team synergy details with Reinhardt are currently missing. You can help the Overwatch Wiki by adding them!
|
 Roadhog |
EVEN MATCHUP | EXTREME RISK
As long as Cassidy maintains his distance, Roadhog serves as a massive target for farming ultimate charge. His large hitbox makes landing continuous headshots very easy. However, Roadhog's
|
TBA SYNERGY
Team synergy details with Roadhog are currently missing. You can help the Overwatch Wiki by adding them!
|
 Sigma |
EVEN MATCHUP | MEDIUM RISK
Sigma possesses a versatile toolkit that can heavily disrupt Cassidy's rhythm. His
|
STRONG SYNERGY
Sigma's
|
 Winston |
WEAK MATCHUP | HIGH RISK
Winston's high mobility and barrier make him a difficult target for Cassidy to isolate. His
|
TBA SYNERGY
Team synergy details with Winston are currently missing. You can help the Overwatch Wiki by adding them!
|
 Wrecking Ball |
TBA MATCHUP OR PRIORITY | TBA RISK
Matchup details for Wrecking Ball are currently missing. You can help the Overwatch Wiki by adding them!
|
TBA SYNERGY
Team synergy details with Wrecking Ball are currently missing. You can help the Overwatch Wiki by adding them!
|
 Zarya |
EVEN MATCHUP | MEDIUM RISK
Zarya will struggle to contest Cassidy at mid-to-long ranges where her
|
EXCEPTIONAL SYNERGY
A friendly Zarya's
|
Damage
| Hero | Match-Up | Team Synergy |
|---|---|---|
 Anran |
TBA MATCHUP OR PRIORITY | TBA RISK
Matchup details for Anran are currently missing. You can help the Overwatch Wiki by adding them!
|
TBA SYNERGY
Team synergy details with Anran are currently missing. You can help the Overwatch Wiki by adding them!
|
 Ashe |
EVEN -> WEAK MATCHUP | HIGH RISK
Ashe is a highly dangerous matchup that hinges entirely on engagement distance. At long ranges, Ashe holds a definitive advantage due to the scoped precision of
|
TBA SYNERGY
Team synergy details with Ashe are currently missing. You can help the Overwatch Wiki by adding them!
|
 Bastion |
EVEN MATCHUP | EXTREME RISK
Cassidy holds a significant advantage when fighting Bastion in his
|
TBA SYNERGY
Team synergy details with Bastion are currently missing. You can help the Overwatch Wiki by adding them!
|
 Cassidy |
MIRROR MATCHUP | MEDIUM RISK
The mirror matchup is a pure test of mechanical skill and positioning. At mid-range, the duel is decided by who can land headshots more consistently. In close-quarters, the fight heavily revolves around who successfully lands their
|
MIRROR SYNERGY
Team synergy details with Cassidy are currently missing. You can help the Overwatch Wiki by adding them!
|
 Echo |
VERY STRONG MATCHUP | LOW RISK
Cassidy is one of the premier counters to Echo. His hitscan
|
TBA SYNERGY
Team synergy details with Echo are currently missing. You can help the Overwatch Wiki by adding them!
|
 Emre |
TBA MATCHUP OR PRIORITY | TBA RISK
Matchup details for Emre are currently missing. You can help the Overwatch Wiki by adding them!
|
TBA SYNERGY
Team synergy details with Emre are currently missing. You can help the Overwatch Wiki by adding them!
|
 Freja |
TBA MATCHUP OR PRIORITY | TBA RISK
Matchup details for Freja are currently missing. You can help the Overwatch Wiki by adding them!
|
TBA SYNERGY
Team synergy details with Freja are currently missing. You can help the Overwatch Wiki by adding them!
|
 Genji |
STRONG MATCHUP | HIGH RISK
Cassidy is heavily favored in this duel due to his high burst damage and crowd control. The key to the matchup is playing around Genji's
|
TBA SYNERGY
Team synergy details with Genji are currently missing. You can help the Overwatch Wiki by adding them!
|
 Hanzo |
EVEN MATCHUP | HIGH RISK
Hanzo prefers to duel from long ranges where the
|
TBA SYNERGY
Team synergy details with Hanzo are currently missing. You can help the Overwatch Wiki by adding them!
|
 Junkrat |
EVEN MATCHUP | HIGH RISK
Junkrat thrives in tight corridors and chokepoints where his rebounding
|
TBA SYNERGY
Team synergy details with Junkrat are currently missing. You can help the Overwatch Wiki by adding them!
|
 Mei |
EVEN MATCHUP | MEDIUM RISK
Mei operates at the exact same effective ranges as Cassidy, making this a highly volatile matchup. Up close, Mei's
|
STRONG SYNERGY |
 Pharah |
STRONG MATCHUP | LOW RISK
Alongside Echo, Pharah is a prime target for Cassidy. His hitscan weapon bypasses her aerial evasion, allowing him to consistently pressure her out of the sky with three to four well-placed body shots. However, Cassidy must remain within his 20-30 meter effective range, as Pharah's
|
TBA SYNERGY
Team synergy details with Pharah are currently missing. You can help the Overwatch Wiki by adding them!
|
 Reaper |
EVEN -> STRONG MATCHUP | HIGH RISK
Reaper thrives strictly in point-blank engagements where his
|
TBA SYNERGY
Team synergy details with Reaper are currently missing. You can help the Overwatch Wiki by adding them!
|
Shion |
TBA MATCHUP OR PRIORITY | TBA RISK
Matchup details for Shion are currently missing. You can help the Overwatch Wiki by adding them!
|
TBA SYNERGY
Team synergy details with Shion are currently missing. You can help the Overwatch Wiki by adding them!
|
 Sierra |
TBA MATCHUP OR PRIORITY | TBA RISK
Matchup details for Sierra are currently missing. You can help the Overwatch Wiki by adding them!
|
TBA SYNERGY
Team synergy details with Sierra are currently missing. You can help the Overwatch Wiki by adding them!
|
 Sojourn |
EVEN MATCHUP | HIGH RISK
Sojourn excels at mid-to-long ranges, heavily outclassing Cassidy in poke phases due to his strict damage falloff. Cassidy must avoid her
|
TBA SYNERGY
Team synergy details with Sojourn are currently missing. You can help the Overwatch Wiki by adding them!
|
 Soldier: 76 |
EVEN MATCHUP | MEDIUM RISK
Soldier: 76 boasts superior sustained damage and extreme range advantage over Cassidy. At long ranges, Soldier will win the poke war. In close quarters, however, Cassidy's burst damage is far superior. If Cassidy lands a
|
TBA SYNERGY
Team synergy details with Soldier: 76 are currently missing. You can help the Overwatch Wiki by adding them!
|
 Sombra |
EVEN MATCHUP | HIGH RISK
Sombra relies on her permanent invisibility to choose her engagements, meaning Cassidy will rarely get the drop on her. If she opens with
|
TBA SYNERGY
Team synergy details with Sombra are currently missing. You can help the Overwatch Wiki by adding them!
|
 Symmetra |
STRONG MATCHUP | LOW RISK
Symmetra's lack of burst mobility makes her an easy target for Cassidy's primary fire. While the
|
TBA SYNERGY
Team synergy details with Symmetra are currently missing. You can help the Overwatch Wiki by adding them!
|
 Torbjörn |
STRONG MATCHUP | LOW RISK
Torbjörn's wide hitbox makes him highly susceptible to Cassidy's primary fire. However, when Torbjörn activates
|
TBA SYNERGY
Team synergy details with Torbjörn are currently missing. You can help the Overwatch Wiki by adding them!
|
 Tracer |
EVEN -> STRONG MATCHUP | MEDIUM RISK
Tracer's erratic mobility and tiny hitbox make her incredibly difficult to hit with standard primary fire. However, a single headshot will instantly remove 140 of her 175 HP, forcing her to immediately use
|
TBA SYNERGY
Team synergy details with Tracer are currently missing. You can help the Overwatch Wiki by adding them!
|
 Vendetta |
TBA MATCHUP OR PRIORITY | TBA RISK
Matchup details for Vendetta are currently missing. You can help the Overwatch Wiki by adding them!
|
TBA SYNERGY
Team synergy details with Vendetta are currently missing. You can help the Overwatch Wiki by adding them!
|
 Venture |
TBA MATCHUP OR PRIORITY | TBA RISK
Matchup details for Venture are currently missing. You can help the Overwatch Wiki by adding them!
|
TBA SYNERGY
Team synergy details with Venture are currently missing. You can help the Overwatch Wiki by adding them!
|
 Widowmaker |
VERY WEAK MATCHUP | EXTREME RISK
Widowmaker dominates Cassidy in almost every scenario. Her
|
TBA SYNERGY
Team synergy details with Widowmaker are currently missing. You can help the Overwatch Wiki by adding them!
|
Support
| Hero | Match-Up | Team Synergy |
|---|---|---|
 Ana |
EVEN -> STRONG MATCHUP | HIGH RISK
Ana typically positions herself deep in the backline, far outside of Cassidy's optimal effective range. Her
|
TBA SYNERGY
Team synergy details with Ana are currently missing. You can help the Overwatch Wiki by adding them!
|
 Baptiste |
EVEN MATCHUP | MEDIUM RISK
Baptiste is a highly lethal support who can output damage numbers rivaling Cassidy's own via his
|
TBA SYNERGY
Team synergy details with Baptiste are currently missing. You can help the Overwatch Wiki by adding them!
|
 Brigitte |
TBA MATCHUP OR PRIORITY | TBA RISK
Matchup details for Brigitte are currently missing. You can help the Overwatch Wiki by adding them!
|
TBA SYNERGY
Team synergy details with Brigitte are currently missing. You can help the Overwatch Wiki by adding them!
|
 Illari |
TBA MATCHUP OR PRIORITY | TBA RISK
Matchup details for Illari are currently missing. You can help the Overwatch Wiki by adding them!
|
TBA SYNERGY
Team synergy details with Illari are currently missing. You can help the Overwatch Wiki by adding them!
|
 Jetpack Cat |
EVEN MATCHUP | MEDIUM RISK
Jetpack Cat (Fika) spends the majority of her time airborne, making her tiny hitbox and high mobility difficult to track. However, as a hitscan hero, Cassidy is well-equipped to consistently pressure her out of the sky with primary fire. If she descends to use her close-range abilities,
|
SITUATIONAL SYNERGY |
 Juno |
TBA MATCHUP OR PRIORITY | TBA RISK
Matchup details for Juno are currently missing. You can help the Overwatch Wiki by adding them!
|
TBA SYNERGY
Team synergy details with Juno are currently missing. You can help the Overwatch Wiki by adding them!
|
 Kiriko |
EVEN -> WEAK MATCHUP | HIGH RISK
Kiriko is highly lethal in a duel. Her
|
TBA SYNERGY
Team synergy details with Kiriko are currently missing. You can help the Overwatch Wiki by adding them!
|
 Lifeweaver |
TBA MATCHUP OR PRIORITY | TBA RISK
Lifeweaver may seem like an easy target due to how little he relies on offense, but he can be surprisingly tanky with his self-healing and his
|
STRONG SYNERGY
Lifeweaver provides exceptional positional utility for Cassidy, who otherwise lacks vertical mobility. An allied Lifeweaver can pre-place a
|
 Lúcio |
EVEN MATCHUP | LOW RISK
Lúcio's speed and unpredictable
|
TBA SYNERGY
Team synergy details with Lúcio are currently missing. You can help the Overwatch Wiki by adding them!
|
 Mercy |
STRONG MATCHUP | LOW RISK
Mercy spends most of the match gliding between teammates using
|
TBA SYNERGY
Team synergy details with Mercy are currently missing. You can help the Overwatch Wiki by adding them!
|
 Mizuki |
TBA MATCHUP OR PRIORITY | TBA RISK
Matchup details for Mizuki are currently missing. You can help the Overwatch Wiki by adding them!
|
TBA SYNERGY
Team synergy details with Mizuki are currently missing. You can help the Overwatch Wiki by adding them!
|
 Moira |
EVEN MATCHUP | MEDIUM RISK
Moira is a highly resilient duelist who can easily out-sustain Cassidy if he misses his shots. Her
|
TBA SYNERGY
Team synergy details with Moira are currently missing. You can help the Overwatch Wiki by adding them!
|
 Wuyang |
TBA MATCHUP OR PRIORITY | TBA RISK
Matchup details for Wuyang are currently missing. You can help the Overwatch Wiki by adding them!
|
TBA SYNERGY
Team synergy details with Wuyang are currently missing. You can help the Overwatch Wiki by adding them!
|
 Zenyatta |
EVEN MATCHUP | EXTREME RISK
This matchup is an explosive glass-cannon duel. Zenyatta possesses absolutely zero mobility and a large, round hitbox, making him incredibly easy for Cassidy to hit. However, Zenyatta's
|
TBA SYNERGY
Team synergy details with Zenyatta are currently missing. You can help the Overwatch Wiki by adding them!
|
Map Strategies
Control
| Map | Strategy & Stage Tips |
|---|---|
 Overall Strategy |
TBA RATING | TBA FEATURE
Map strategy details for Overall Strategy are currently missing. You can help the Overwatch Wiki by adding them!
|
 Antarctic Peninsula |
TBA RATING | TBA FEATURE
Map strategy details for Antarctic Peninsula are currently missing. You can help the Overwatch Wiki by adding them! Labs
Strategy details missing.
Sublevel
Strategy details missing.
Icebreaker
Strategy details missing.
|

|
TBA RATING | TBA FEATURE
Map strategy details for Busan are currently missing. You can help the Overwatch Wiki by adding them! Downtown
Strategy details missing.
Sanctuary
Strategy details missing.
MEKA Base
Strategy details missing.
|

|
TBA RATING | TBA FEATURE
Map strategy details for Ilios are currently missing. You can help the Overwatch Wiki by adding them! Lighthouse
Strategy details missing.
Well
Strategy details missing.
Ruins
Strategy details missing.
|

|
TBA RATING | TBA FEATURE
Map strategy details for Lijiang Tower are currently missing. You can help the Overwatch Wiki by adding them! Control Center
Strategy details missing.
Garden
Strategy details missing.
Night Market
Strategy details missing.
|

|
TBA RATING | TBA FEATURE
Map strategy details for Nepal are currently missing. You can help the Overwatch Wiki by adding them! Village
Strategy details missing.
Shrine
Strategy details missing.
Sanctum
Strategy details missing.
|

|
TBA RATING | TBA FEATURE
Map strategy details for Oasis are currently missing. You can help the Overwatch Wiki by adding them! City Center
Strategy details missing.
Gardens
Strategy details missing.
University
Strategy details missing.
|

|
TBA RATING | TBA FEATURE
Map strategy details for Samoa are currently missing. You can help the Overwatch Wiki by adding them! Beach
Strategy details missing.
Downtown
Strategy details missing.
Volcano
Strategy details missing.
|
Escort
| Map | Strategy & Stage Tips |
|---|---|
 Overall Strategy |
TBA RATING | TBA FEATURE
Map strategy details for Overall Strategy are currently missing. You can help the Overwatch Wiki by adding them!
|

|
TBA RATING | TBA FEATURE
Map strategy details for Circuit Royal are currently missing. You can help the Overwatch Wiki by adding them! Attack
Strategy details missing.
Defense
Strategy details missing.
|

|
TBA RATING | TBA FEATURE
Map strategy details for Dorado are currently missing. You can help the Overwatch Wiki by adding them! Attack
Strategy details missing.
Defense
Strategy details missing.
|

|
TBA RATING | TBA FEATURE
Map strategy details for Havana are currently missing. You can help the Overwatch Wiki by adding them! Attack
Strategy details missing.
Defense
Strategy details missing.
|

|
TBA RATING | TBA FEATURE
Map strategy details for Junkertown are currently missing. You can help the Overwatch Wiki by adding them! Attack
Strategy details missing.
Defense
Strategy details missing.
|

|
TBA RATING | TBA FEATURE
Map strategy details for Rialto are currently missing. You can help the Overwatch Wiki by adding them! Attack
Strategy details missing.
Defense
Strategy details missing.
|

|
TBA RATING | TBA FEATURE
Map strategy details for Route 66 are currently missing. You can help the Overwatch Wiki by adding them! Attack
Strategy details missing.
Defense
Strategy details missing.
|

|
TBA RATING | TBA FEATURE
Map strategy details for Shambali Monastery are currently missing. You can help the Overwatch Wiki by adding them! Attack
Strategy details missing.
Defense
Strategy details missing.
|

|
TBA RATING | TBA FEATURE
Map strategy details for Watchpoint: Gibraltar are currently missing. You can help the Overwatch Wiki by adding them! Attack
Strategy details missing.
Defense
Strategy details missing.
|
Hybrid
| Map | Strategy & Stage Tips |
|---|---|
 Overall Strategy |
TBA RATING | TBA FEATURE
Map strategy details for Overall Strategy are currently missing. You can help the Overwatch Wiki by adding them!
|
 Blizzard World |
TBA RATING | TBA FEATURE
Map strategy details for Blizzard World are currently missing. You can help the Overwatch Wiki by adding them! Attack
Strategy details missing.
Defense
Strategy details missing.
|

|
TBA RATING | TBA FEATURE
Map strategy details for Eichenwalde are currently missing. You can help the Overwatch Wiki by adding them! Attack
Strategy details missing.
Defense
Strategy details missing.
|

|
TBA RATING | TBA FEATURE
Map strategy details for Hollywood are currently missing. You can help the Overwatch Wiki by adding them! Attack
Strategy details missing.
Defense
Strategy details missing.
|

|
TBA RATING | TBA FEATURE
Map strategy details for King's Row are currently missing. You can help the Overwatch Wiki by adding them! Attack
Strategy details missing.
Defense
Strategy details missing.
|

|
TBA RATING | TBA FEATURE
Map strategy details for Midtown are currently missing. You can help the Overwatch Wiki by adding them! Attack
Strategy details missing.
Defense
Strategy details missing.
|
 Numbani |
TBA RATING | TBA FEATURE
Map strategy details for Numbani are currently missing. You can help the Overwatch Wiki by adding them! Attack
Strategy details missing.
Defense
Strategy details missing.
|

|
TBA RATING | TBA FEATURE
Map strategy details for Paraíso are currently missing. You can help the Overwatch Wiki by adding them! Attack
Strategy details missing.
Defense
Strategy details missing.
|
Push
| Map | Strategy & Stage Tips |
|---|---|
 Overall Strategy |
TBA RATING | TBA FEATURE
Map strategy details for Overall Strategy are currently missing. You can help the Overwatch Wiki by adding them!
|

|
TBA RATING | TBA FEATURE
Map strategy details for Colosseo are currently missing. You can help the Overwatch Wiki by adding them! Pushing
Strategy details missing.
Defending
Strategy details missing.
|

|
TBA RATING | TBA FEATURE
Map strategy details for Esperança are currently missing. You can help the Overwatch Wiki by adding them! Pushing
Strategy details missing.
Defending
Strategy details missing.
|

|
TBA RATING | TBA FEATURE
Map strategy details for New Queen Street are currently missing. You can help the Overwatch Wiki by adding them! Pushing
Strategy details missing.
Defending
Strategy details missing.
|

|
TBA RATING | TBA FEATURE
Map strategy details for Runasapi are currently missing. You can help the Overwatch Wiki by adding them! Pushing
Strategy details missing.
Defending
Strategy details missing.
|
Flashpoint
| Map | Strategy & Stage Tips |
|---|---|
 Overall Strategy |
TBA RATING | TBA FEATURE
Map strategy details for Overall Strategy are currently missing. You can help the Overwatch Wiki by adding them!
|

|
TBA RATING | TBA FEATURE
Map strategy details for Aatlis are currently missing. You can help the Overwatch Wiki by adding them! Station
Strategy details missing.
Garden
Strategy details missing.
Town Center
Strategy details missing.
Bazaar
Strategy details missing.
Resort
Strategy details missing.
|

|
TBA RATING | TBA FEATURE
Map strategy details for New Junk City are currently missing. You can help the Overwatch Wiki by adding them! Arena
Strategy details missing.
The Ducts
Strategy details missing.
Refinery
Strategy details missing.
Junkyard
Strategy details missing.
Bomb Flats
Strategy details missing.
|

|
TBA RATING | TBA FEATURE
Map strategy details for Suravasa are currently missing. You can help the Overwatch Wiki by adding them! Market
Strategy details missing.
Garden
Strategy details missing.
Palace
Strategy details missing.
Temple
Strategy details missing.
Ruins
Strategy details missing.
|
Achievements
| Name | Icon | Description | Reward |
|---|---|---|---|
|
|
Get 2 killing blows with a single use of Cassidy's Flashbang in Quick or Competitive Play. |  | |
|
|
Get 4 killing blows with a single use of Cassidy's Deadeye in Quick or Competitive play. |  |
Trivia
- A Cassidy Figma statue is available.[5]
- Cassidy has the most ways to reload his weapon out of all characters. These include his standard reload, his Combat Roll and Deadeye abilities, and an emote.
- His English voice actor, Matthew Mercer, cosplayed as Cassidy in the episode of his DND series: "Critical Role" Halloween episode at the Campaign 2 episode "Dark Bargains". which he also states that it is difficult to sit in his costume.
- In Season 5 of Overwatch 2, Cassidy has an unlockable line of "How do you want to do this?", referencing a line often used by Mercer.
Cultural References
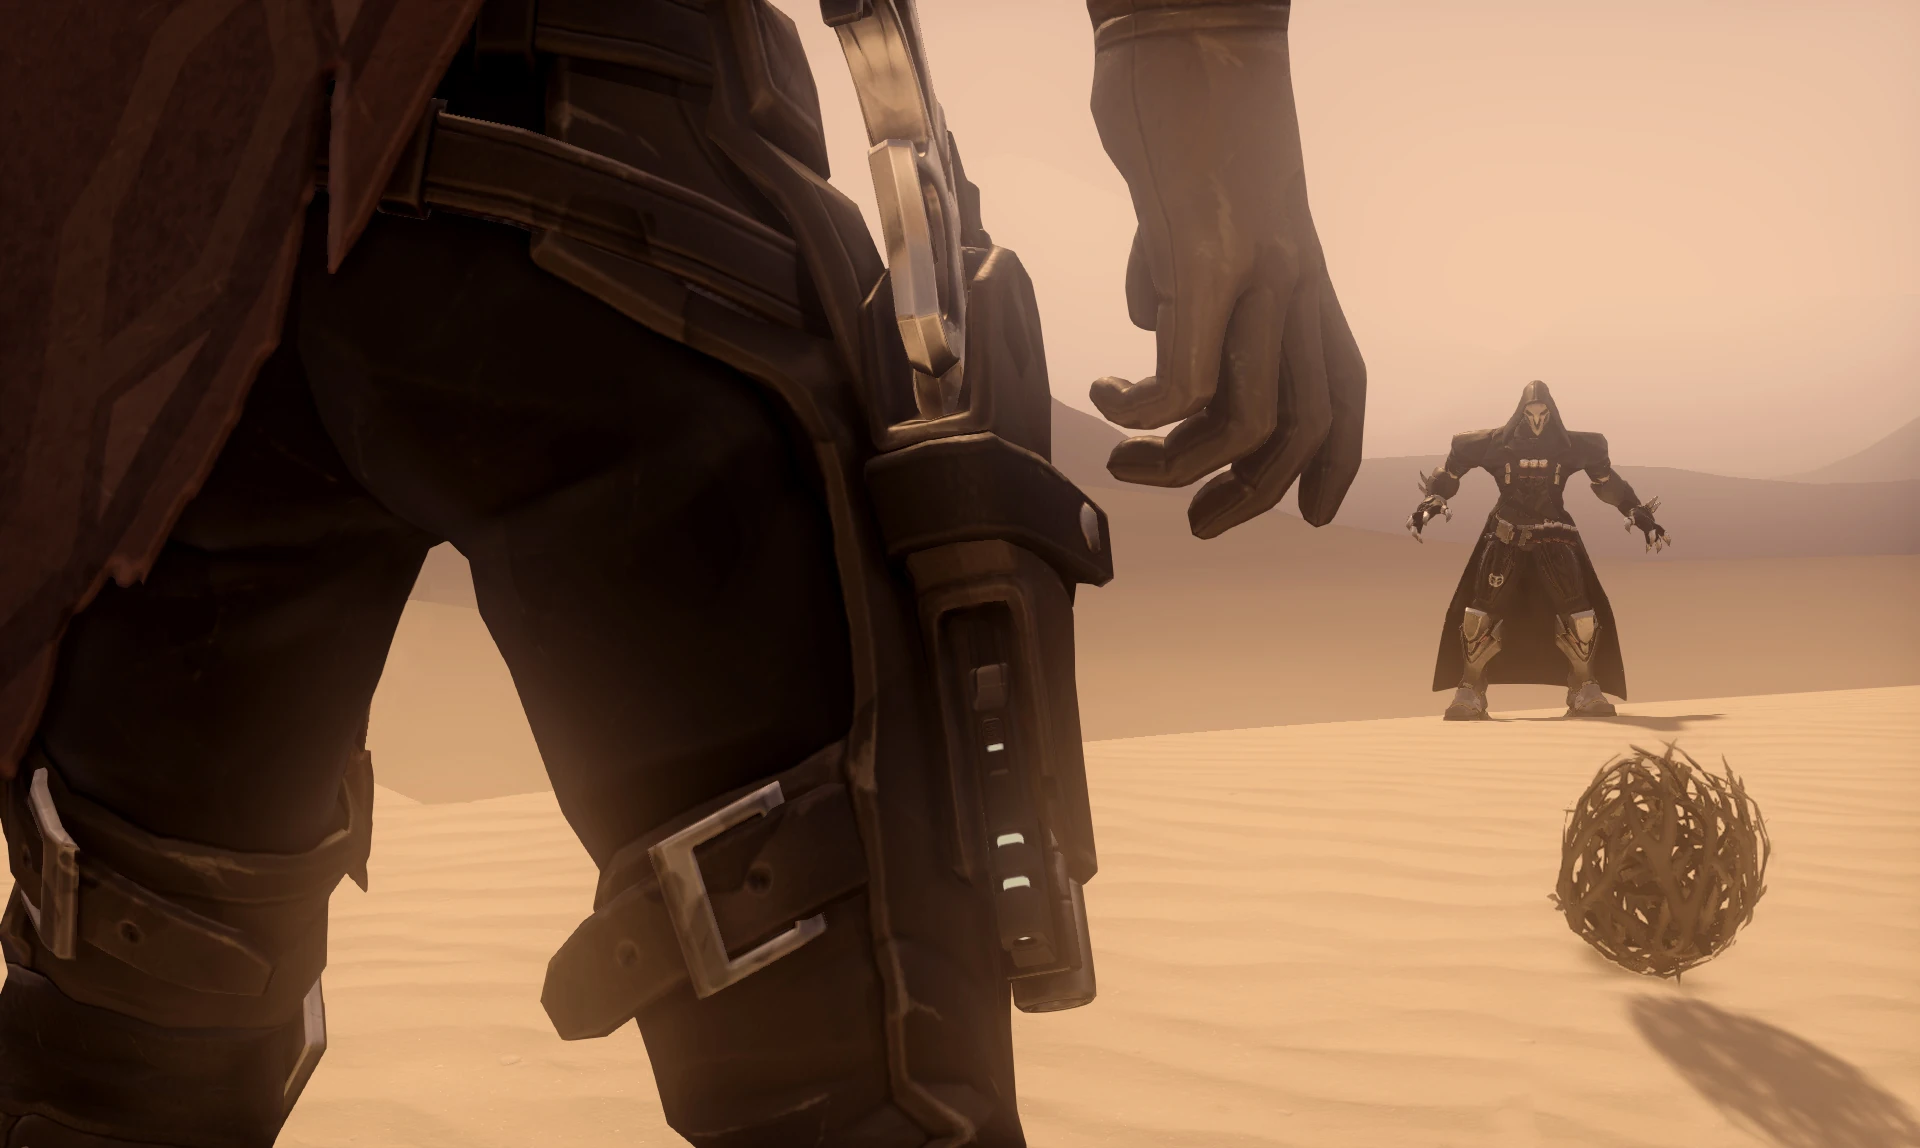
- Fitting with Cassidy's cowboy motif, activating Deadeye causes a tumbleweed to roll in front of him, a common cliché in western films.
- The engraving of Cassidy's belt buckle spells "BAMF," which is an acronym of "Bad Ass Mother Fucker."
- Cassidy has a few possible references to Doc Holiday in the film Tombstone. The most prominent being his voice-line "I'm your Huckleberry.", the others being his Gambler skin and his Gunspinning emote, the former representing Doc Holiday's traits of being a gambler, as well as referencing his appearance, and the latter referencing an action he did in the film.
Misc. Character Info
- Cassidy has an adversarial relationship with Stone Anthony via events in Tucson; voice lines in Overwatch 2 indicate (but don't confirm) that this was while Cassidy was part of the Deadlock Gang.
- Cassidy's Peacekeeper revolver was built by a legendary gunsmith and fires custom high-caliber ammunition with technological enhancements, while his flashbangs are custom non-lethal grenades that were once used by Overwatch.[6] The name "Peacekeeper" is likely a reference to the colloquial nickname of the Colt Single Action Army revolver, which was popularly known as the Colt "Peacemaker".
- Cassidy's skin tone varies greatly throughout his many appearances. Some of his darker skin tones made him appear racially ambiguous, causing many fans to speculate that he might be Hispanic, indigenous, or mixed.[7] On the Overwatch 5th Anniversary AMA on Reddit, it was officially confirmed that Cassidy is Caucasian and is just very tan.[8]
- In Overwatch, in an interaction with Orisa, it is mentioned that there is a $60 million bounty is on Cassidy's head.[9] In Overwatch 2, an interaction with Baptiste confirms that Talon has a bounty on Cassidy's head, and is lower than the one on Ana's. It is not clear if these bounties are one and the same.
- Cassidy appears to be aware that Baptiste is attracted to him.[10]
- Cassidy's favorite animal is the Tapir, described to have the following characteristics—half black, half white, with a dangly nose, a "fancy jungle pig"/jungle animal with a "funky snout."[10]
- At some point, Cassidy had cactus spines in his rectum. He carried out an Internet search on how to get rid of them.[10]
Development

Arnold Tsang and Peter Lee's new illustration of Logann, which served as inspiration for Cassidy
Cassidy's design was based on an old StarCraft sketch by Chris Metzen of a character named Prospector Logann. This sketch helped serve as an inspiration for StarCraft: Frontiers. A new illustration of Logann was created by Arnold Tsang and Peter Lee for the project, as well as a 3D model. Eventually this design became the basis for Cassidy in Overwatch, with only minor alterations to the design, such as changing his duster into a serape.[11][12]
When naming Cassidy, the developers made lists of first and last names to find the best cowboy name, but none of them felt quite right. Someone suggested the name of one of Blizzard's own developers, Jesse McCree, and it came out on top in the end. The real Jesse McCree had to sign his name away for Team 4 to use it.[13] McCree commented in 2019 that "my parents were big Overwatch fans."[14]
However, in 2021, Jesse McCree was fired due to the California lawsuit against Activision Blizzard involving a culture of sexual harassment in the company. In response to this, it was stated in August that McCree would be renamed to something else in the future. New Blood, originally planned for September, was delayed, and was instead implemented in late 2021. To fill in the gap, a new map was released to the PTR.[15] In October, it was announced that McCree had been renamed to "Cole Cassidy." The name change was made permanent on October 26, 2021.[1]
From an in-universe standpoint, it is not entirely clear when Cassidy changes his name from McCree back to Cassidy, but it can be narrowed down. The Overwatch Twitter page makes it clear that the name change must come at some point after receiving Winston's recall,[1] whereas New Blood avoids naming McCree/Cassidy in its first issue (though uses "Cassidy" in its intro), but uses Cole/Cassidy several times in its second issue. At the very latest, the name change must come between the first and second issues, which fits in with the context of the original tweet, of helping the "new Overwatch," which Ana (re)introduces him to in the first issue.
Since 2021 however, Overwatch media has referred to Cassidy/McCree by the former name, even when he was canonically using the "McCree" pseudonym.
Overwatch 2
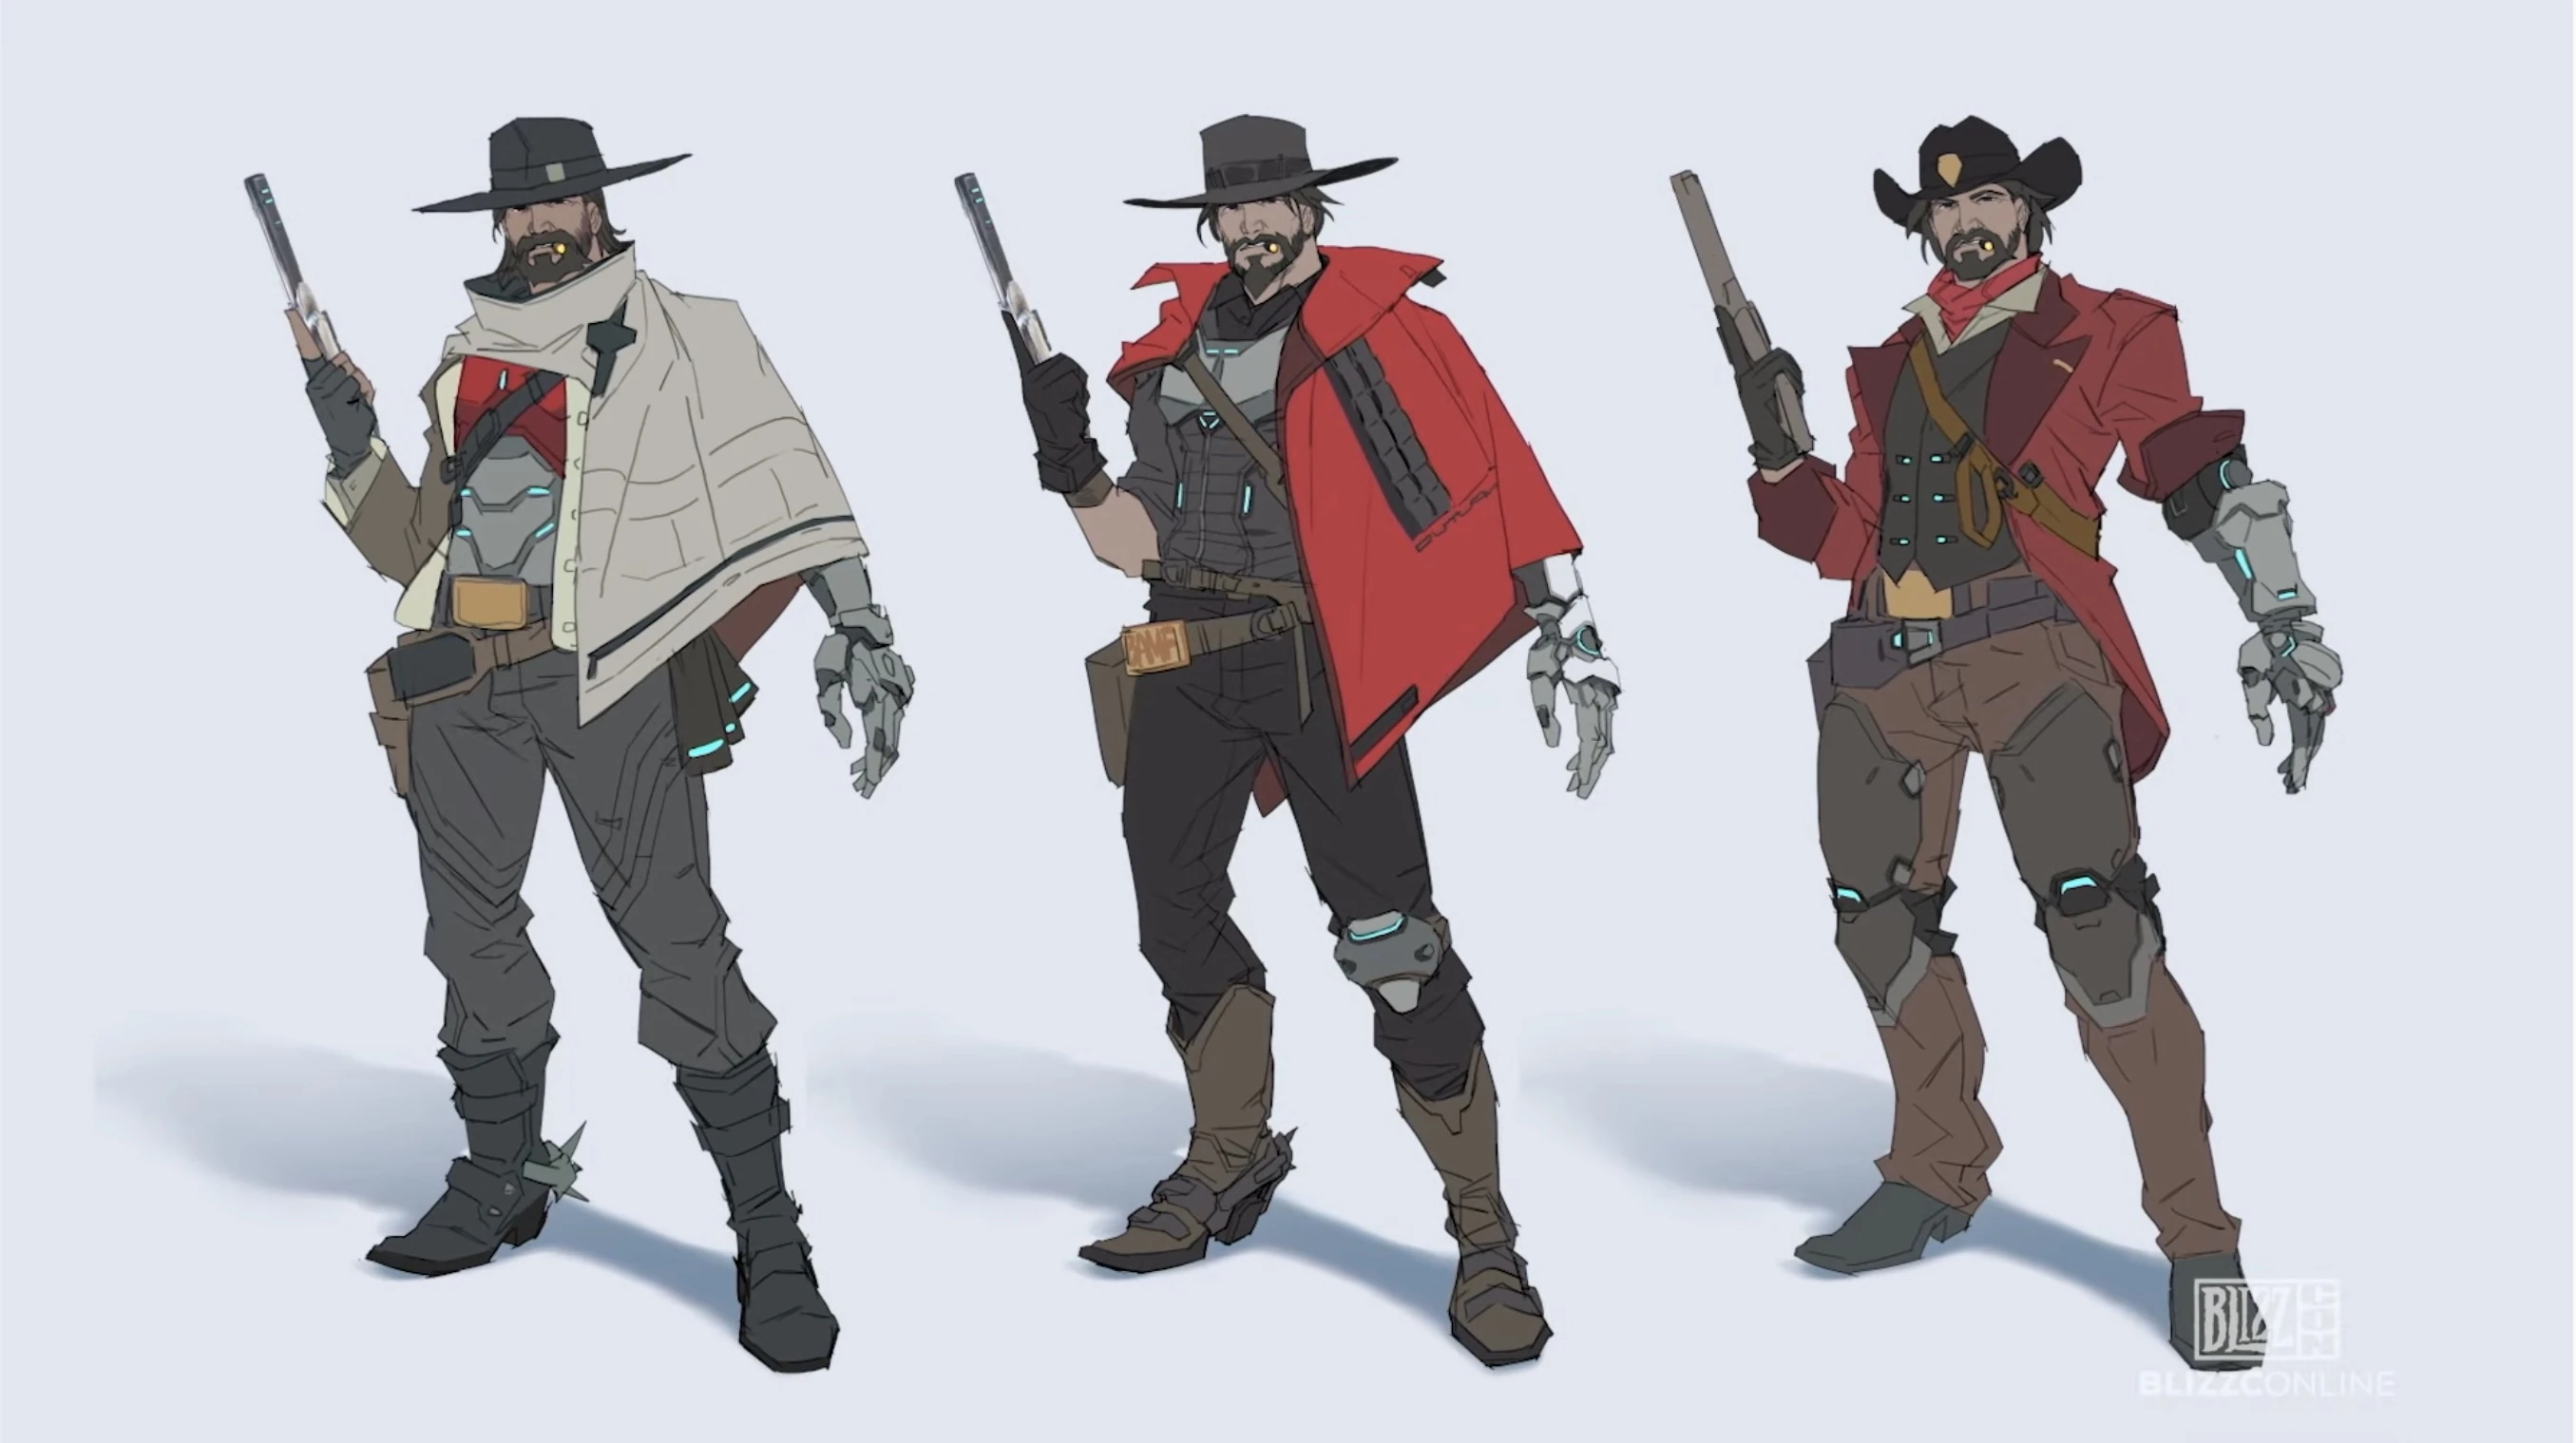
Overwatch 2 Skin Early Concept Arts
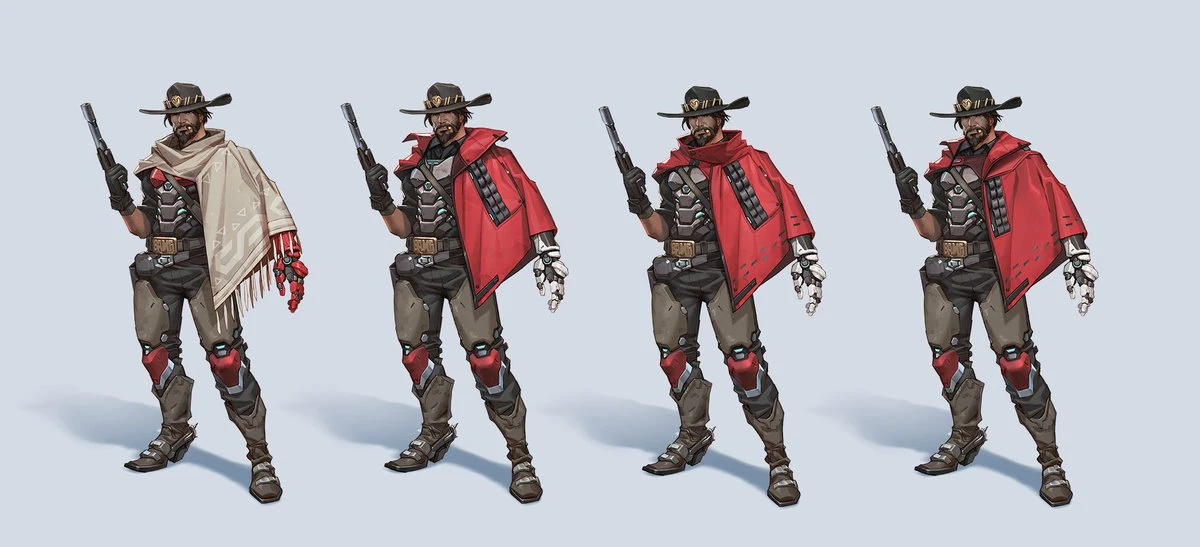
Overwatch 2 Skin Serape Concept Arts
Like almost all Overwatch Heroes, McCree, now Cassidy, was redesigned and given a new look for Overwatch 2. For Cassidy, they had difficulties in changing his classic 'cowboy' aesthetic as it didn't feel right. They experimented with his looks, trying different styles of cowboy hats without changing too much as it's a signature aspect of Cassidy's appearance. They also kept his iconic red serape. They experimented with more tech-orientated looks and more classic cowboy-orientated looks. One noticable difference is the longer beard to signify a more aged look. This coincided with the general concept for all new hero looks for Overwatch 2, which was aimed at keeping the "essence" of the hero, while showing some evolution and character growth in the design. [16]
Removed Abilities

0.65 seconds before cooldown starts
- Initially replaced in Overwatch 2 by Magnetic Grenade.
- Flashbang can affect enemies up to 10 m away.
- Reworked in Season 5.
- Explodes immediately upon reaching maximum range.
- If the grenade sticks to an enemy or terrain, it explodes after a delay.
- Movement abilities that teleport can unstick the grenade.
- The projectile can be destroyed while in air by Defense Matrix, Kinetic Grasp and Javelin Spin and reflected by Deflect, but a stuck grenade and the splash are unaffected.
- Amplification Matrix affects all damage dealt, if the projectile passes through it. Splash damage alone going through is not amplified.
70 - 18 (explosion)
35 - 9 (explosion, self)
1.5 seconds (max travel time)
1.25 seconds (stick duration)
3 meters (explosion)
10 m/s (homing)
- Replaced in Season 11 by reworked Flashbang.
- The grenade has a travel time limit which corresponds to ~37.5m distance along the grenade's trajectory.
- While in air, the grenade locks on to the first hero that enters 1.3 meter radius of the projectile. Once locked on, the grenade will continuously chase them regardless of range or until it reaches its homing or maximum travel time limit.
- The grenade will follow locked heroes through movement abilities, unless the ability causes the hero to phase out, which disjoints the grenade.
- The grenade will explode if fails to reach the hero it was locked on to within the aforementioned time limit.
- The grenade will stick to enemies and surfaces upon contact. The stuck grenade explodes after 1.25 seconds, dealing damage in an area.
- The enemy hero that is stuck by the grenade becomes "hindered", interrupting and preventing movement abilities for the duration. See Movement speed#Movement abilities for a list of affected abilities.
- The grenade can be unstuck by Protection Suzu, removing the hindered status.
- The projectile can be destroyed while in air by Defense Matrix, Kinetic Grasp and Javelin Spin and reflected by Deflect, but a stuck grenade and the splash are unaffected.
- Amplification Matrix affects all damage dealt, if the projectile passes through it. Splash damage alone going through is not amplified.
Removed Perks

- Replaced by
 Even the Odds in Season 16.

- Removed in Season 18.
- Hold down secondary fire to rapid-fire the entire clip (like normal).
- Secondary Fire can be tapped to shoot individually or held to shoot continuously.
- Whether shooting individually or continuously, Secondary Fire can now be cancelled without consuming all remaining ammo.

Media
Images
- Former Portrait
-
 Overwatch 1 Hero portrait

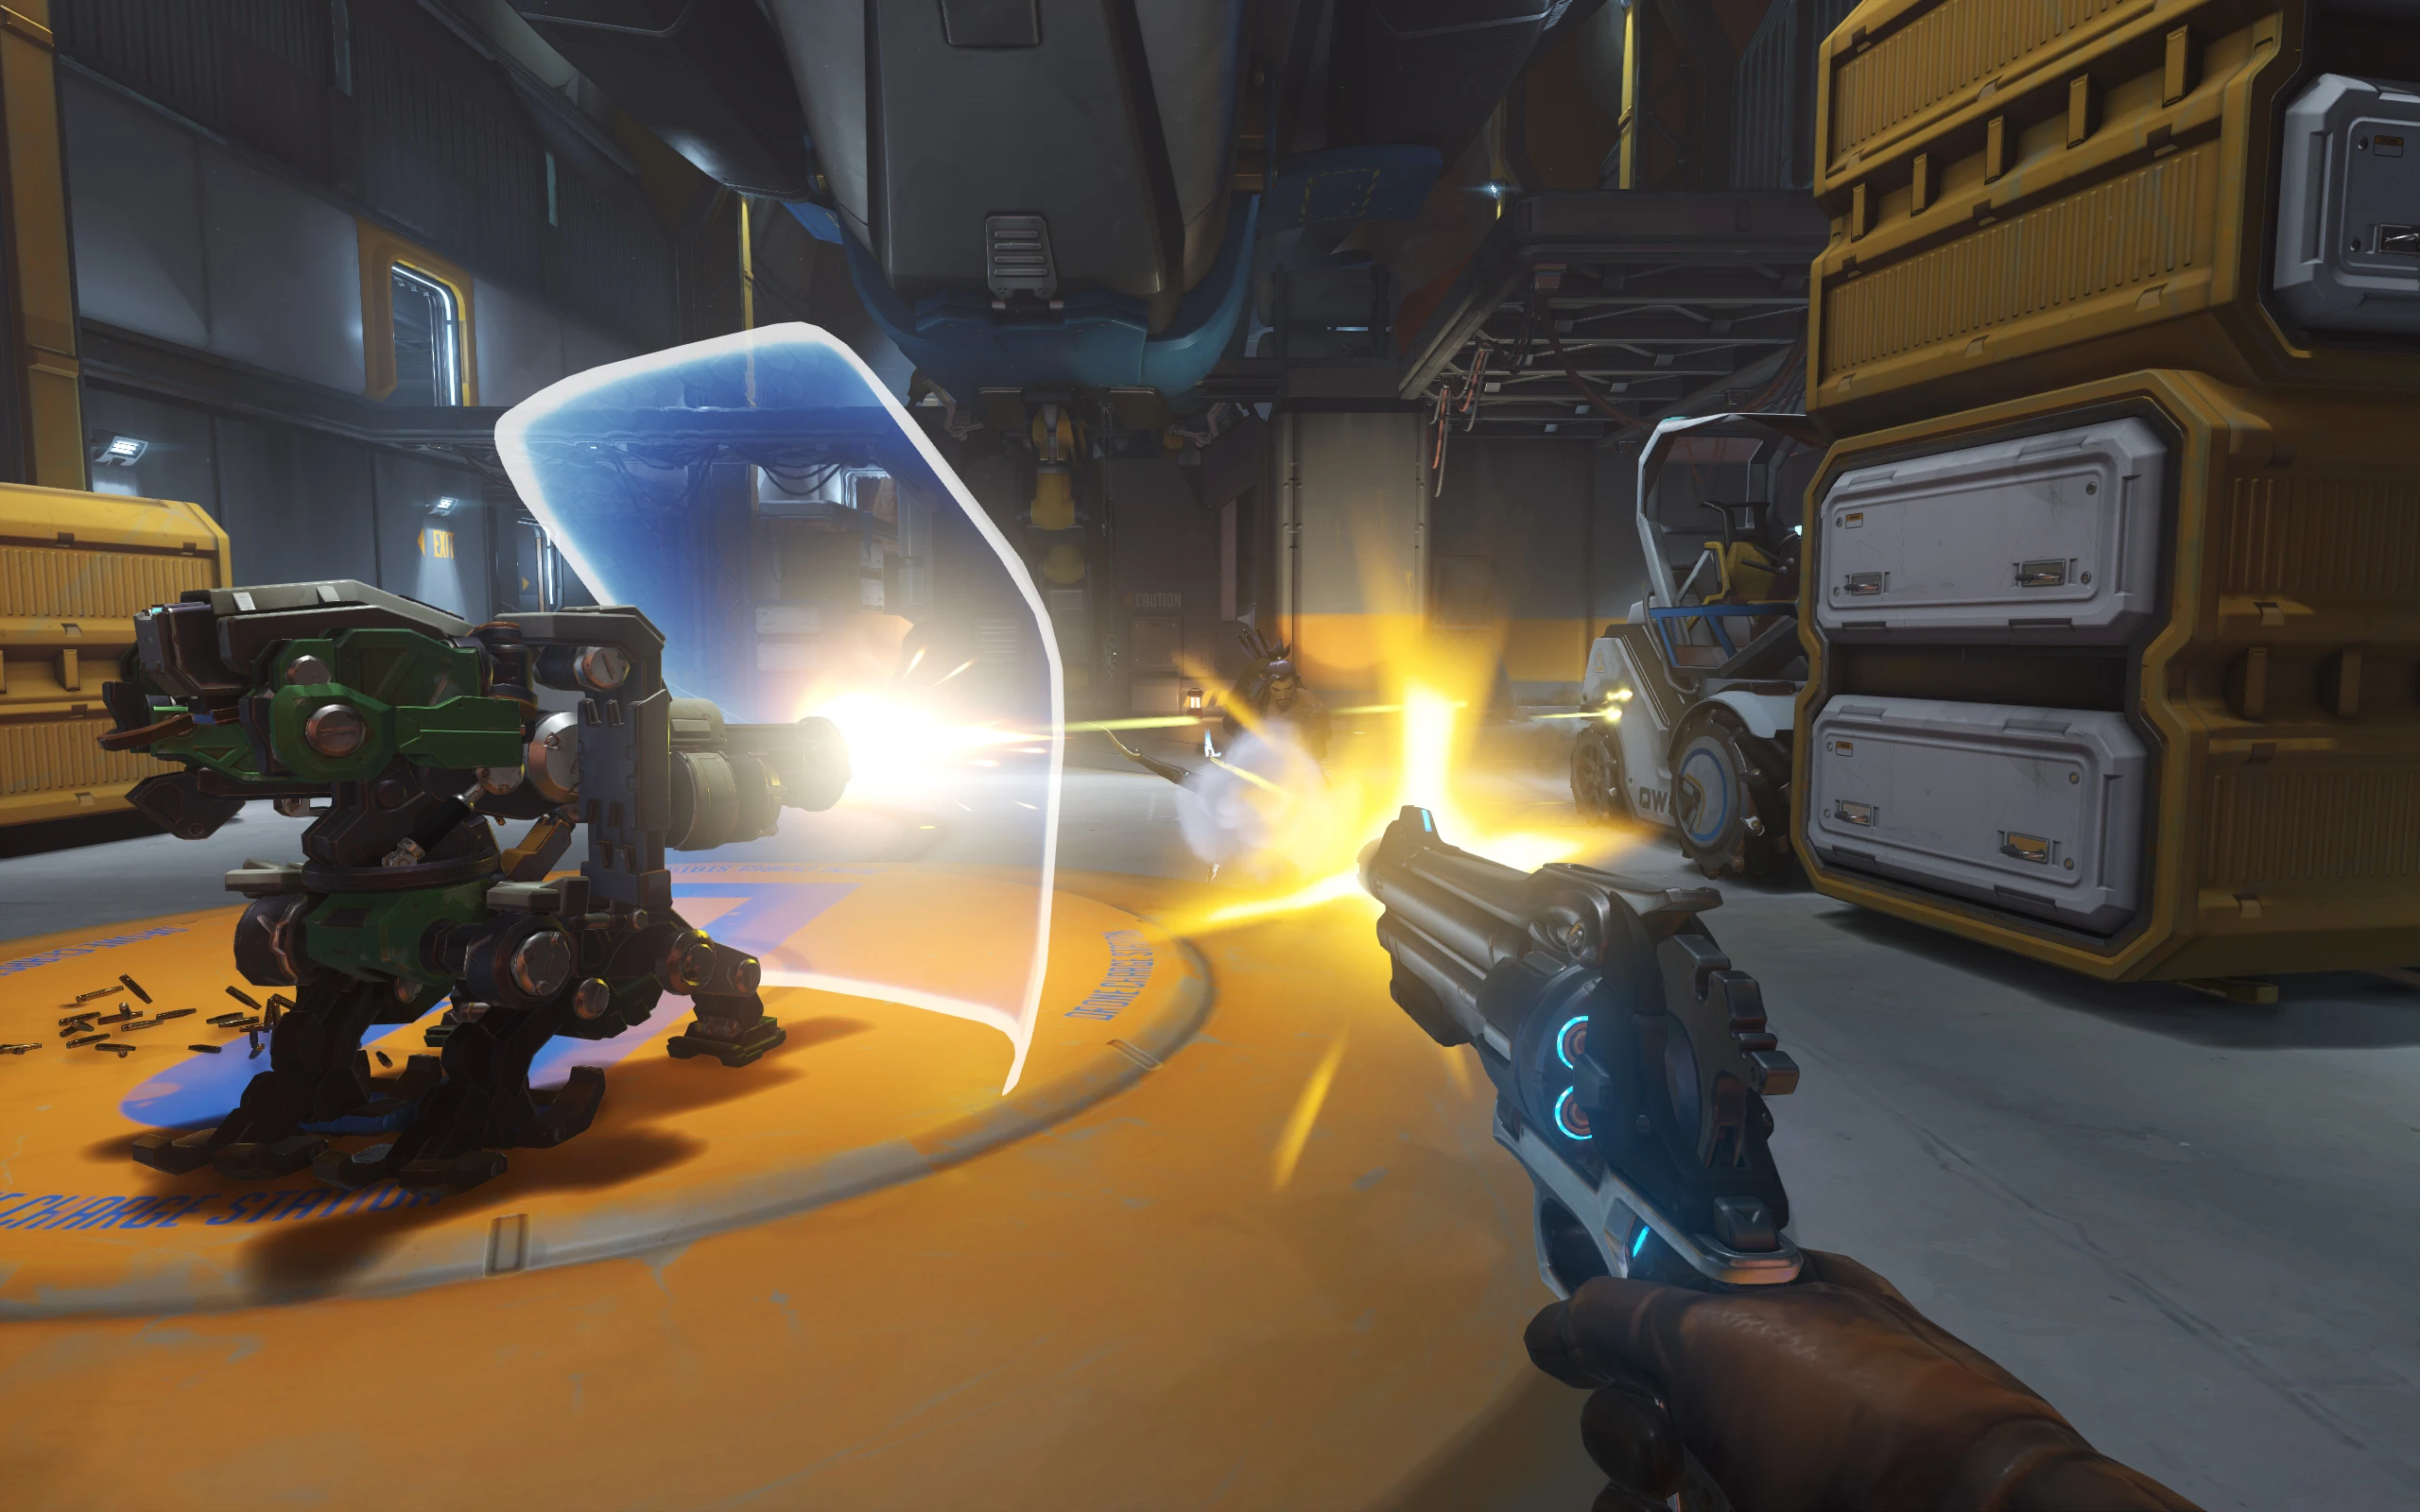
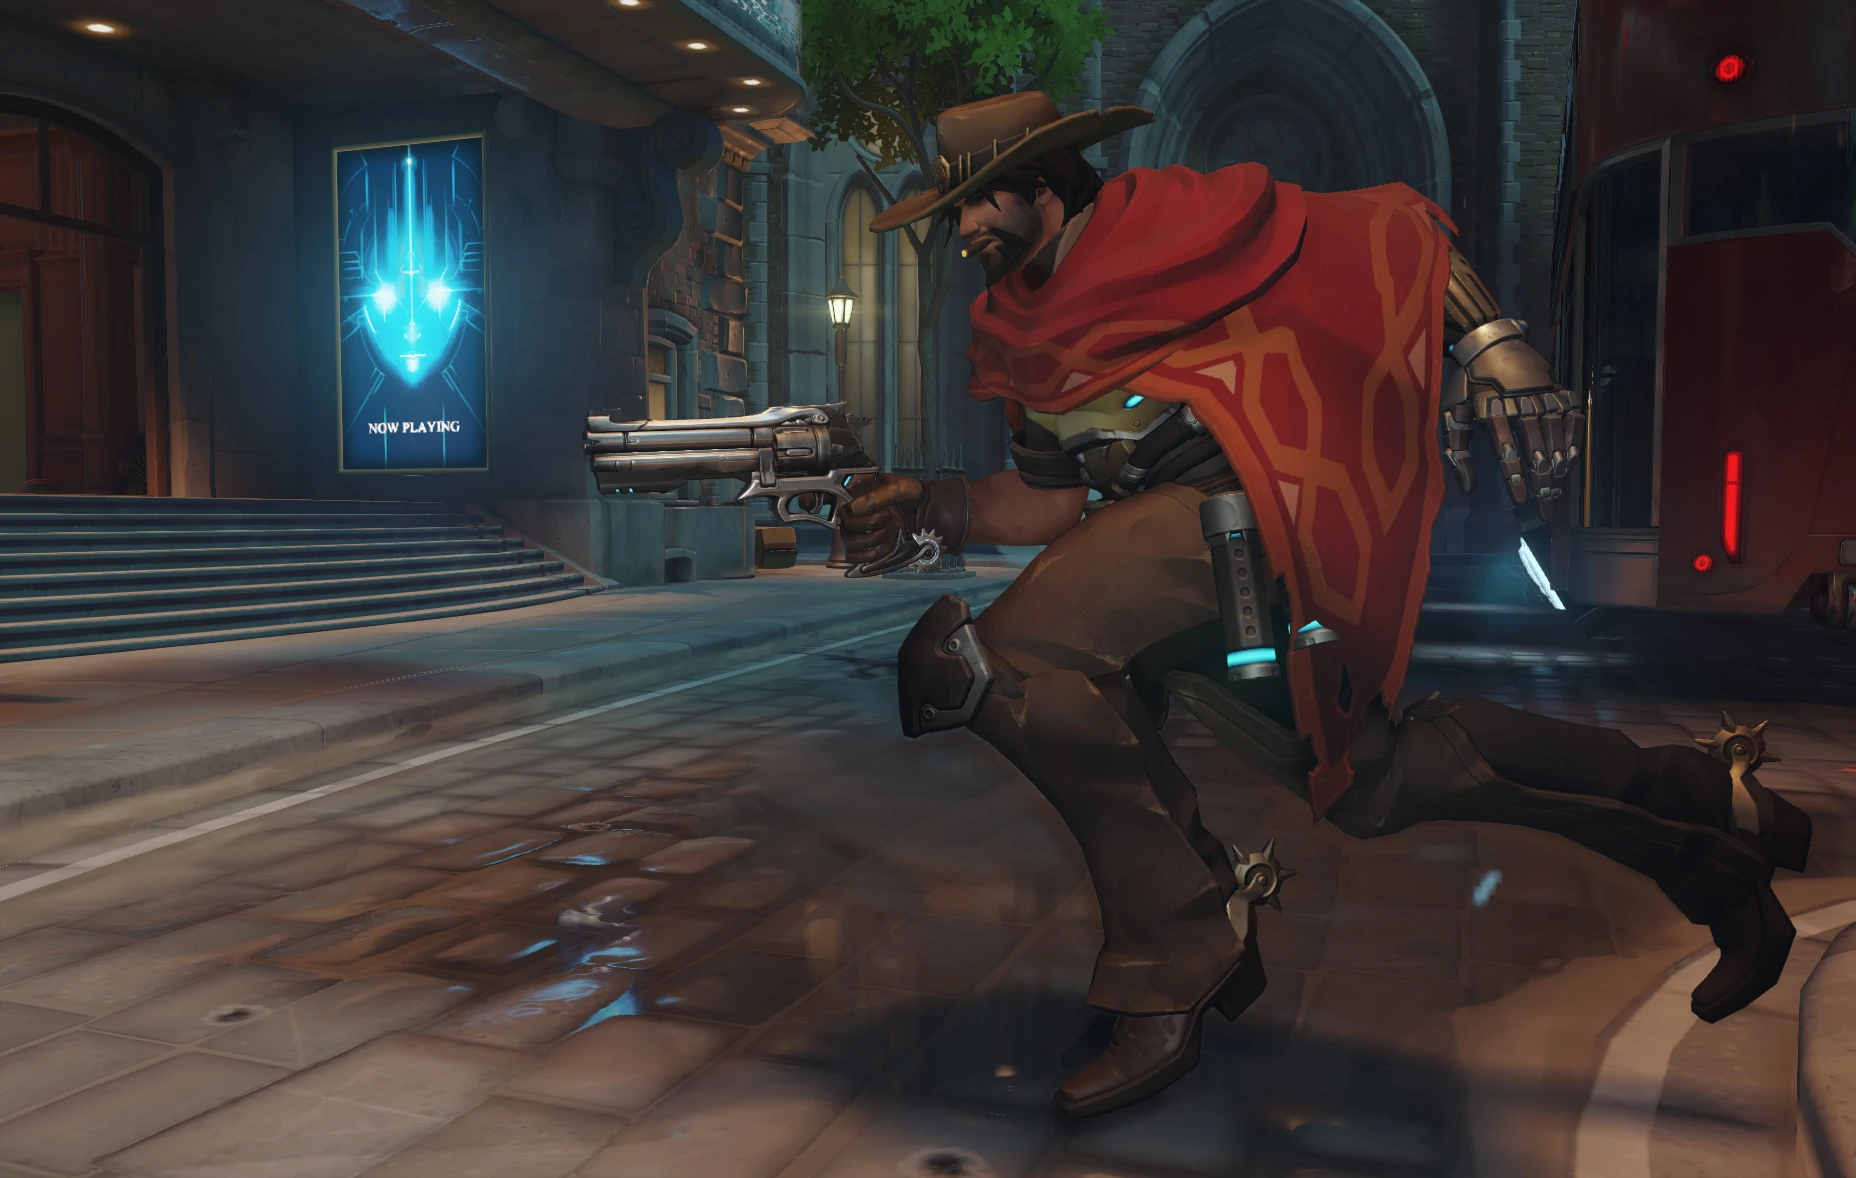
- Gameplay Screenshots

- Concept Art
-
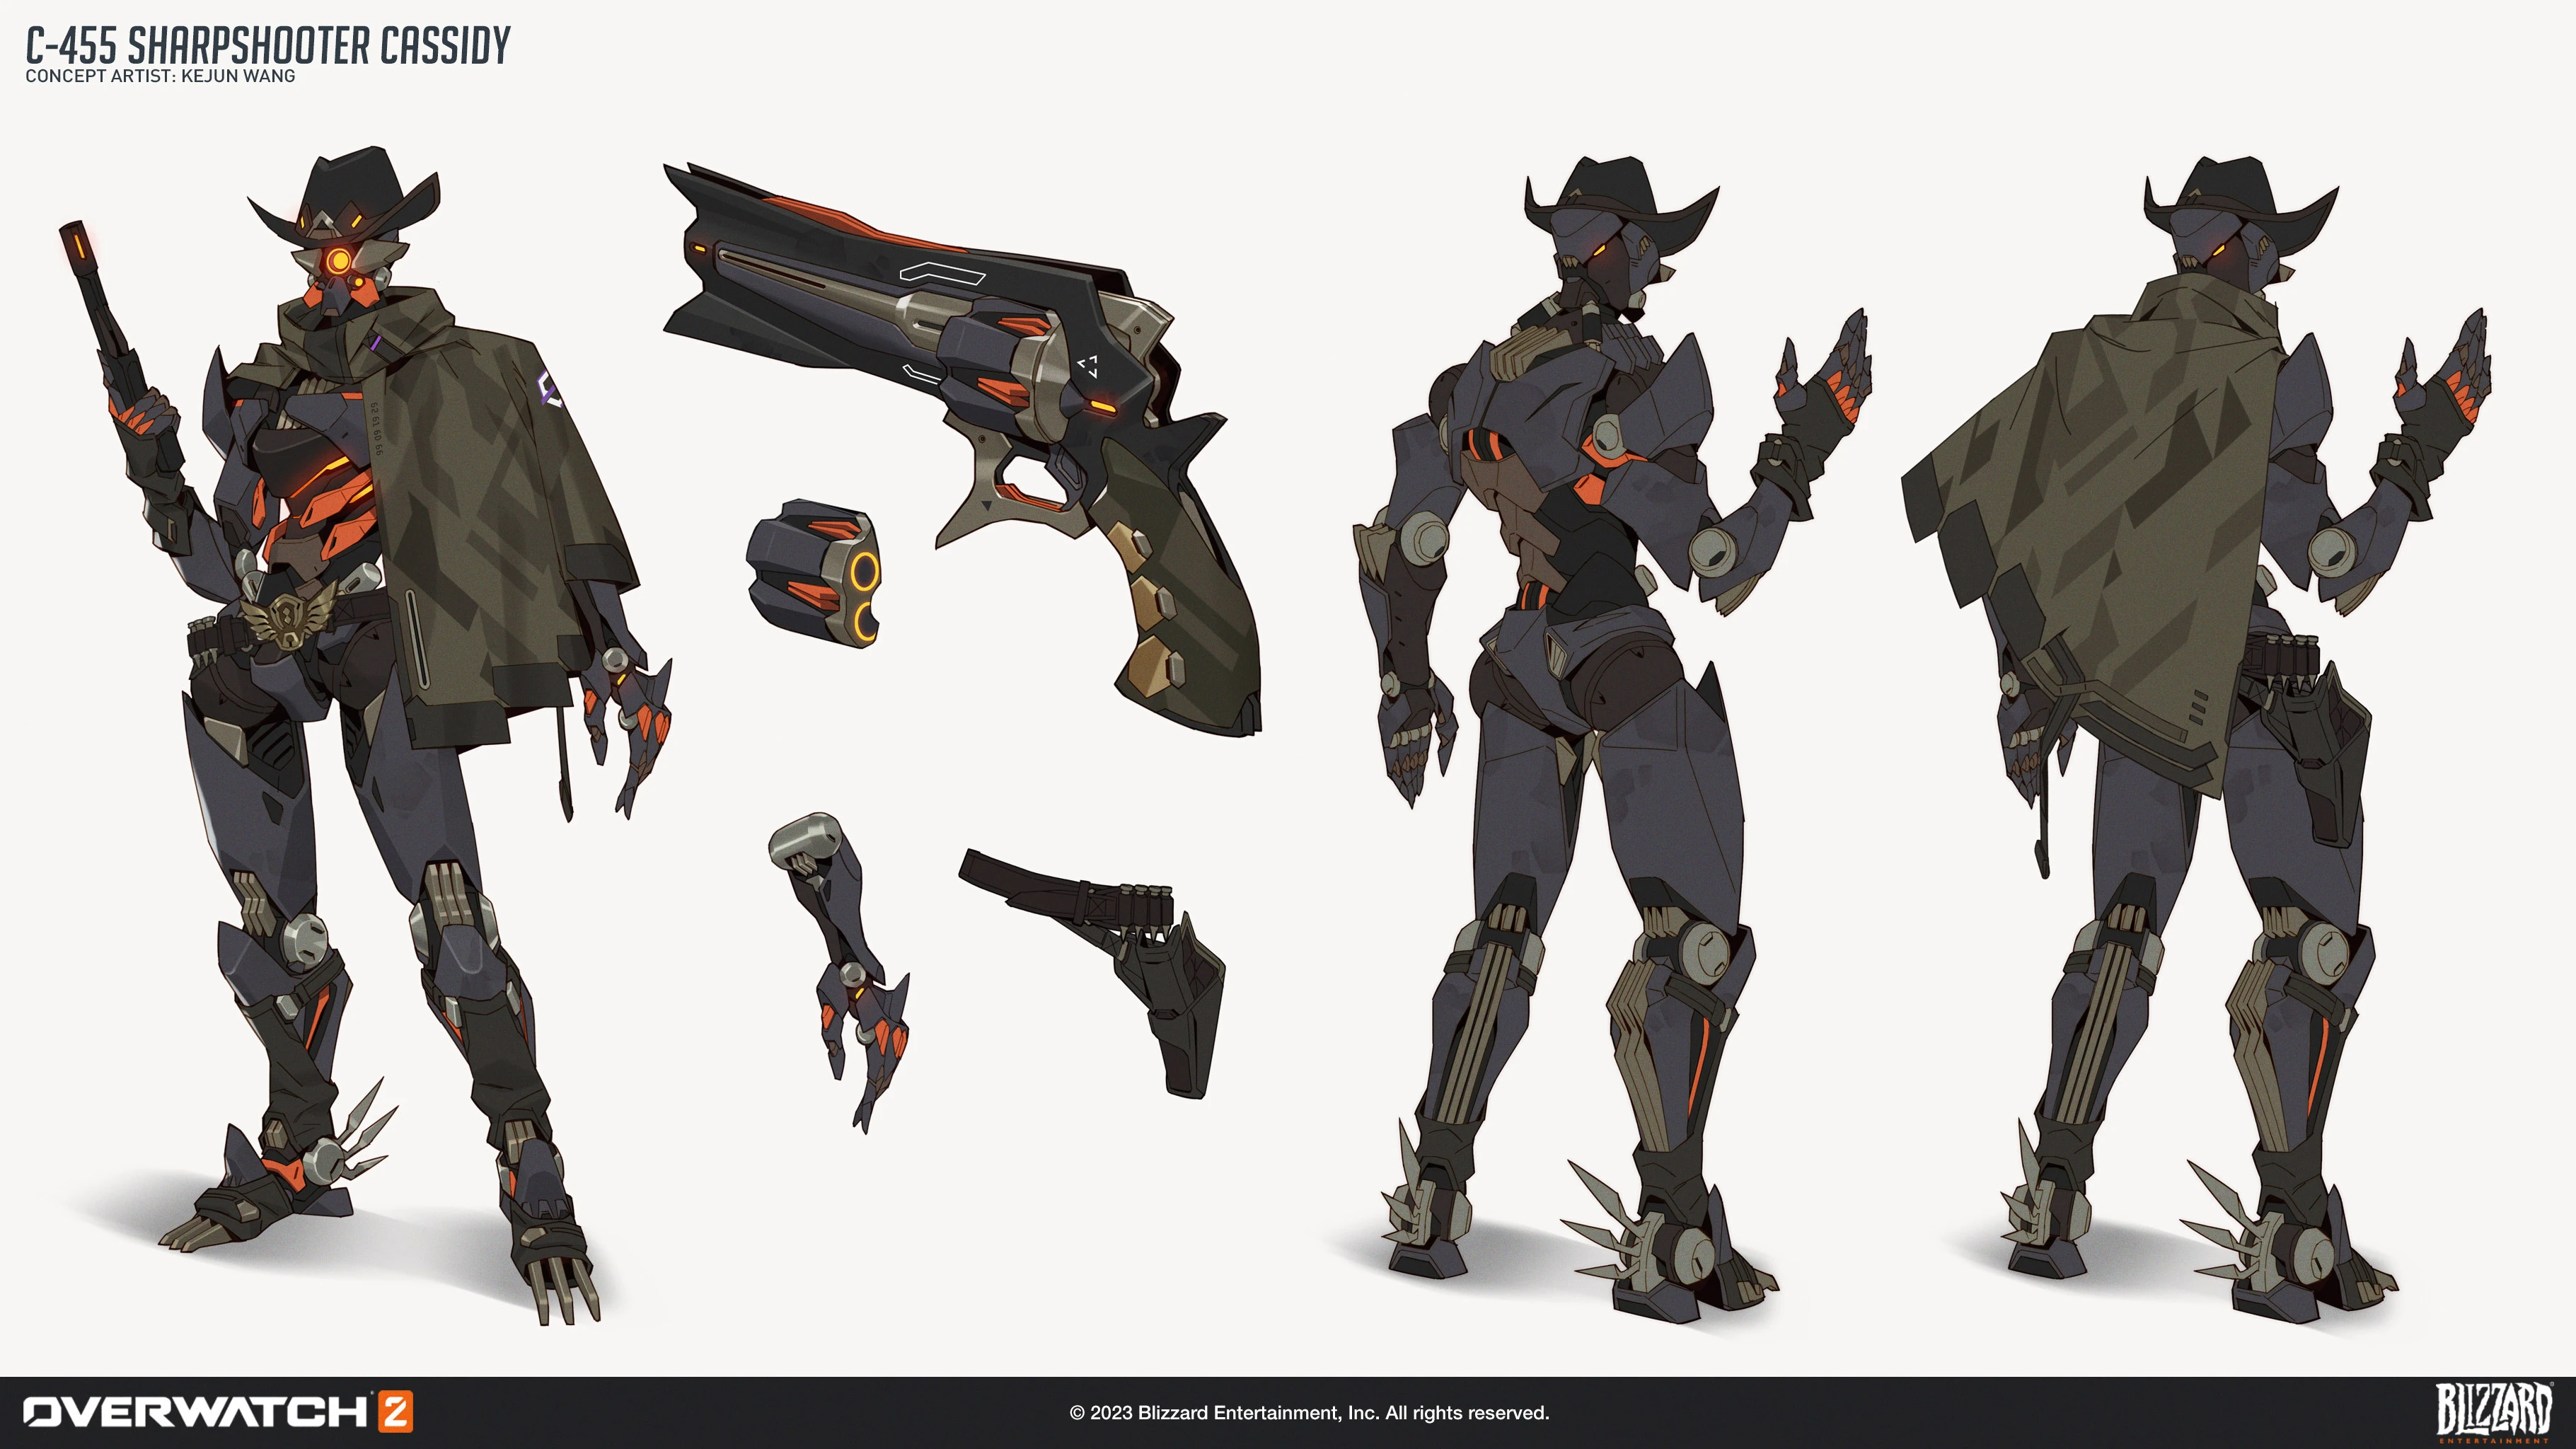
 C-455 Sharpshooter Skin Concept Art by Kejun Wang
 -
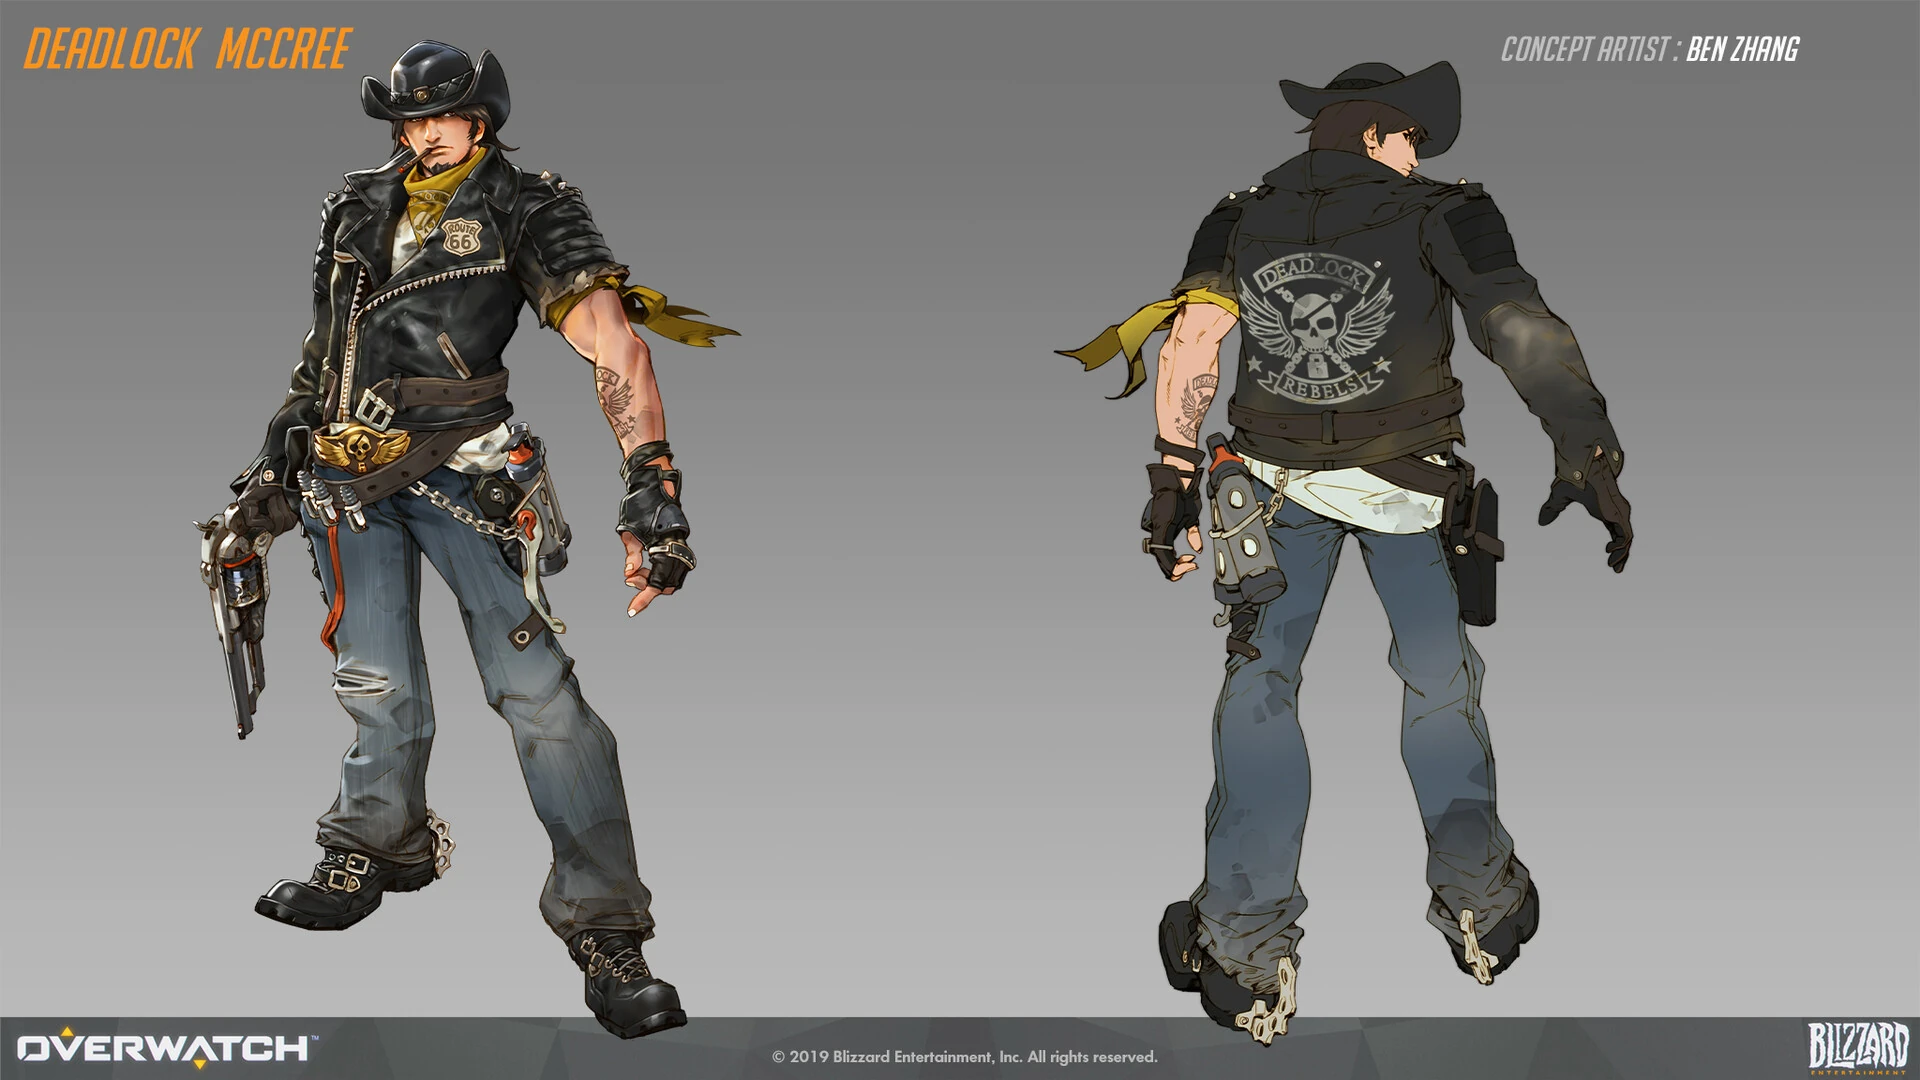
 Deadlock Skin Concept Art by Ben Zhang
 -
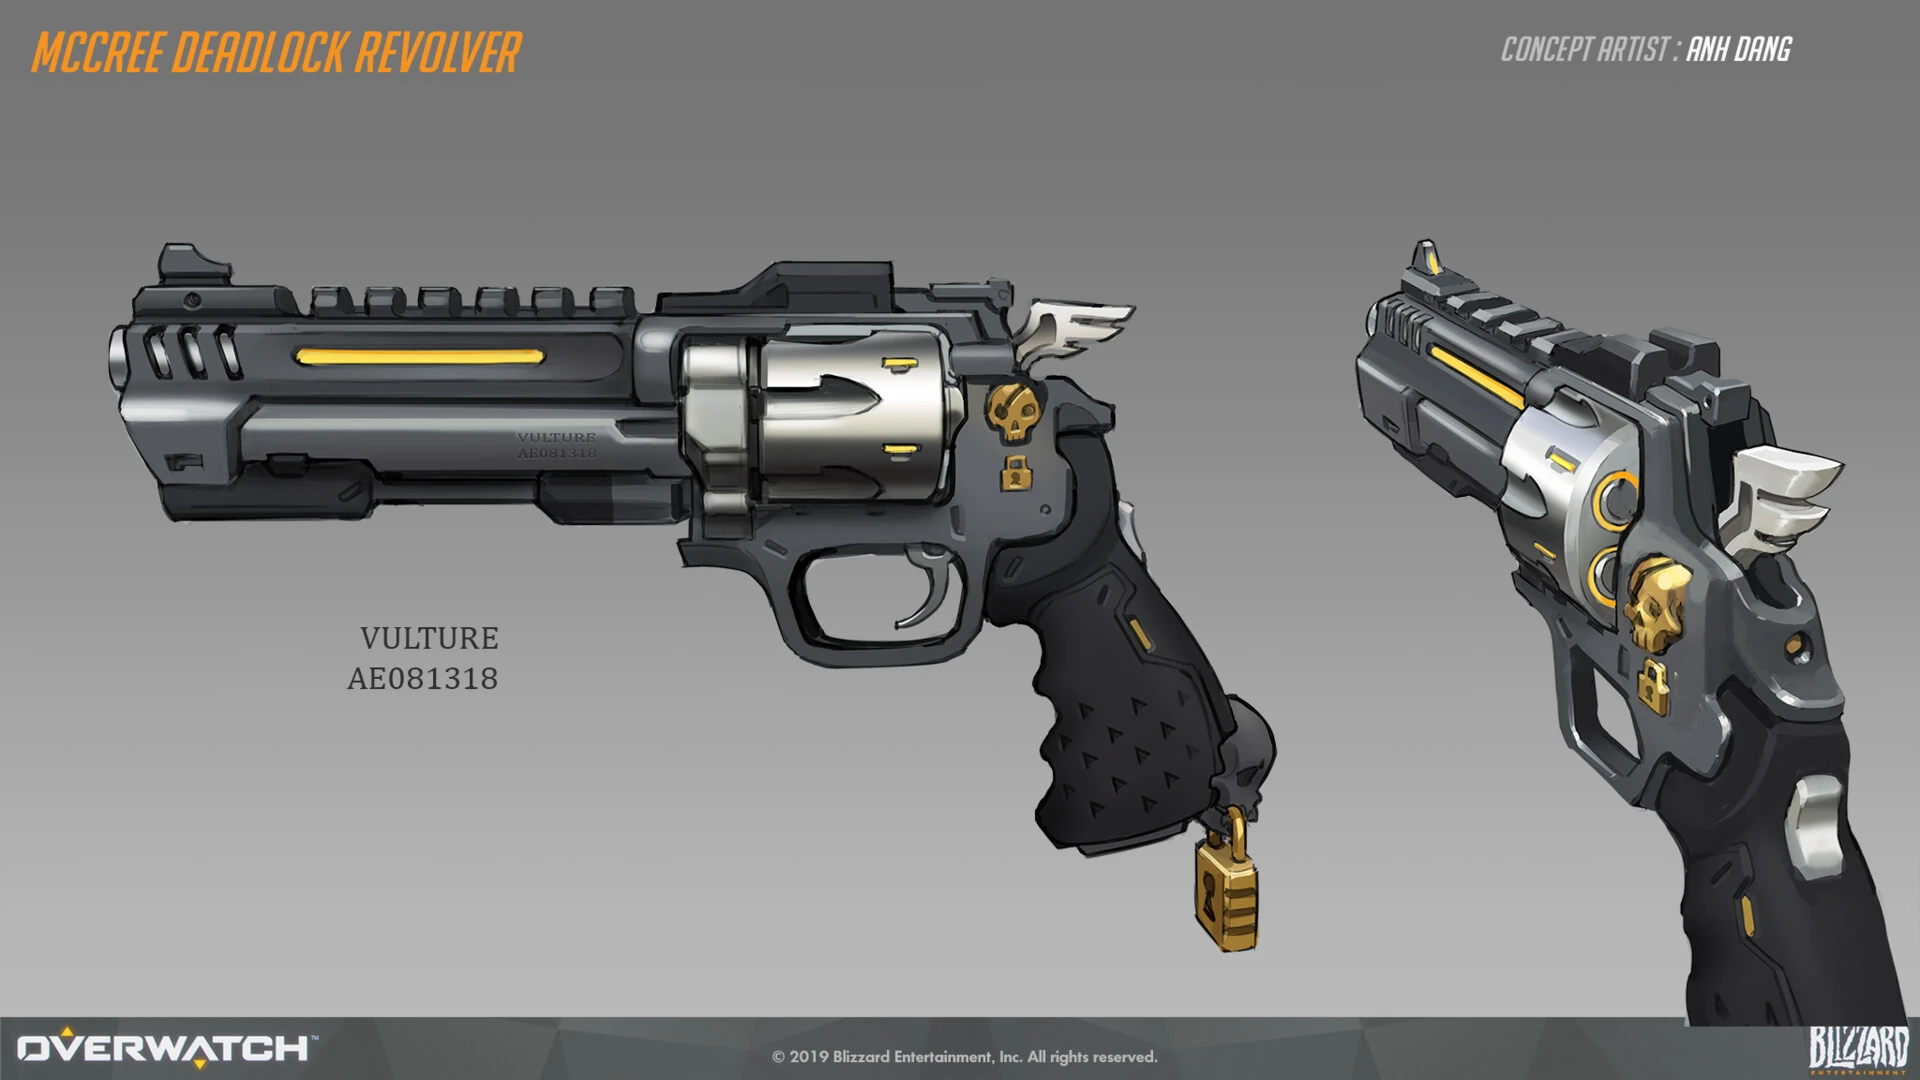
 Deadlock Skin Weapon Concept Art by Anh Dang
 -
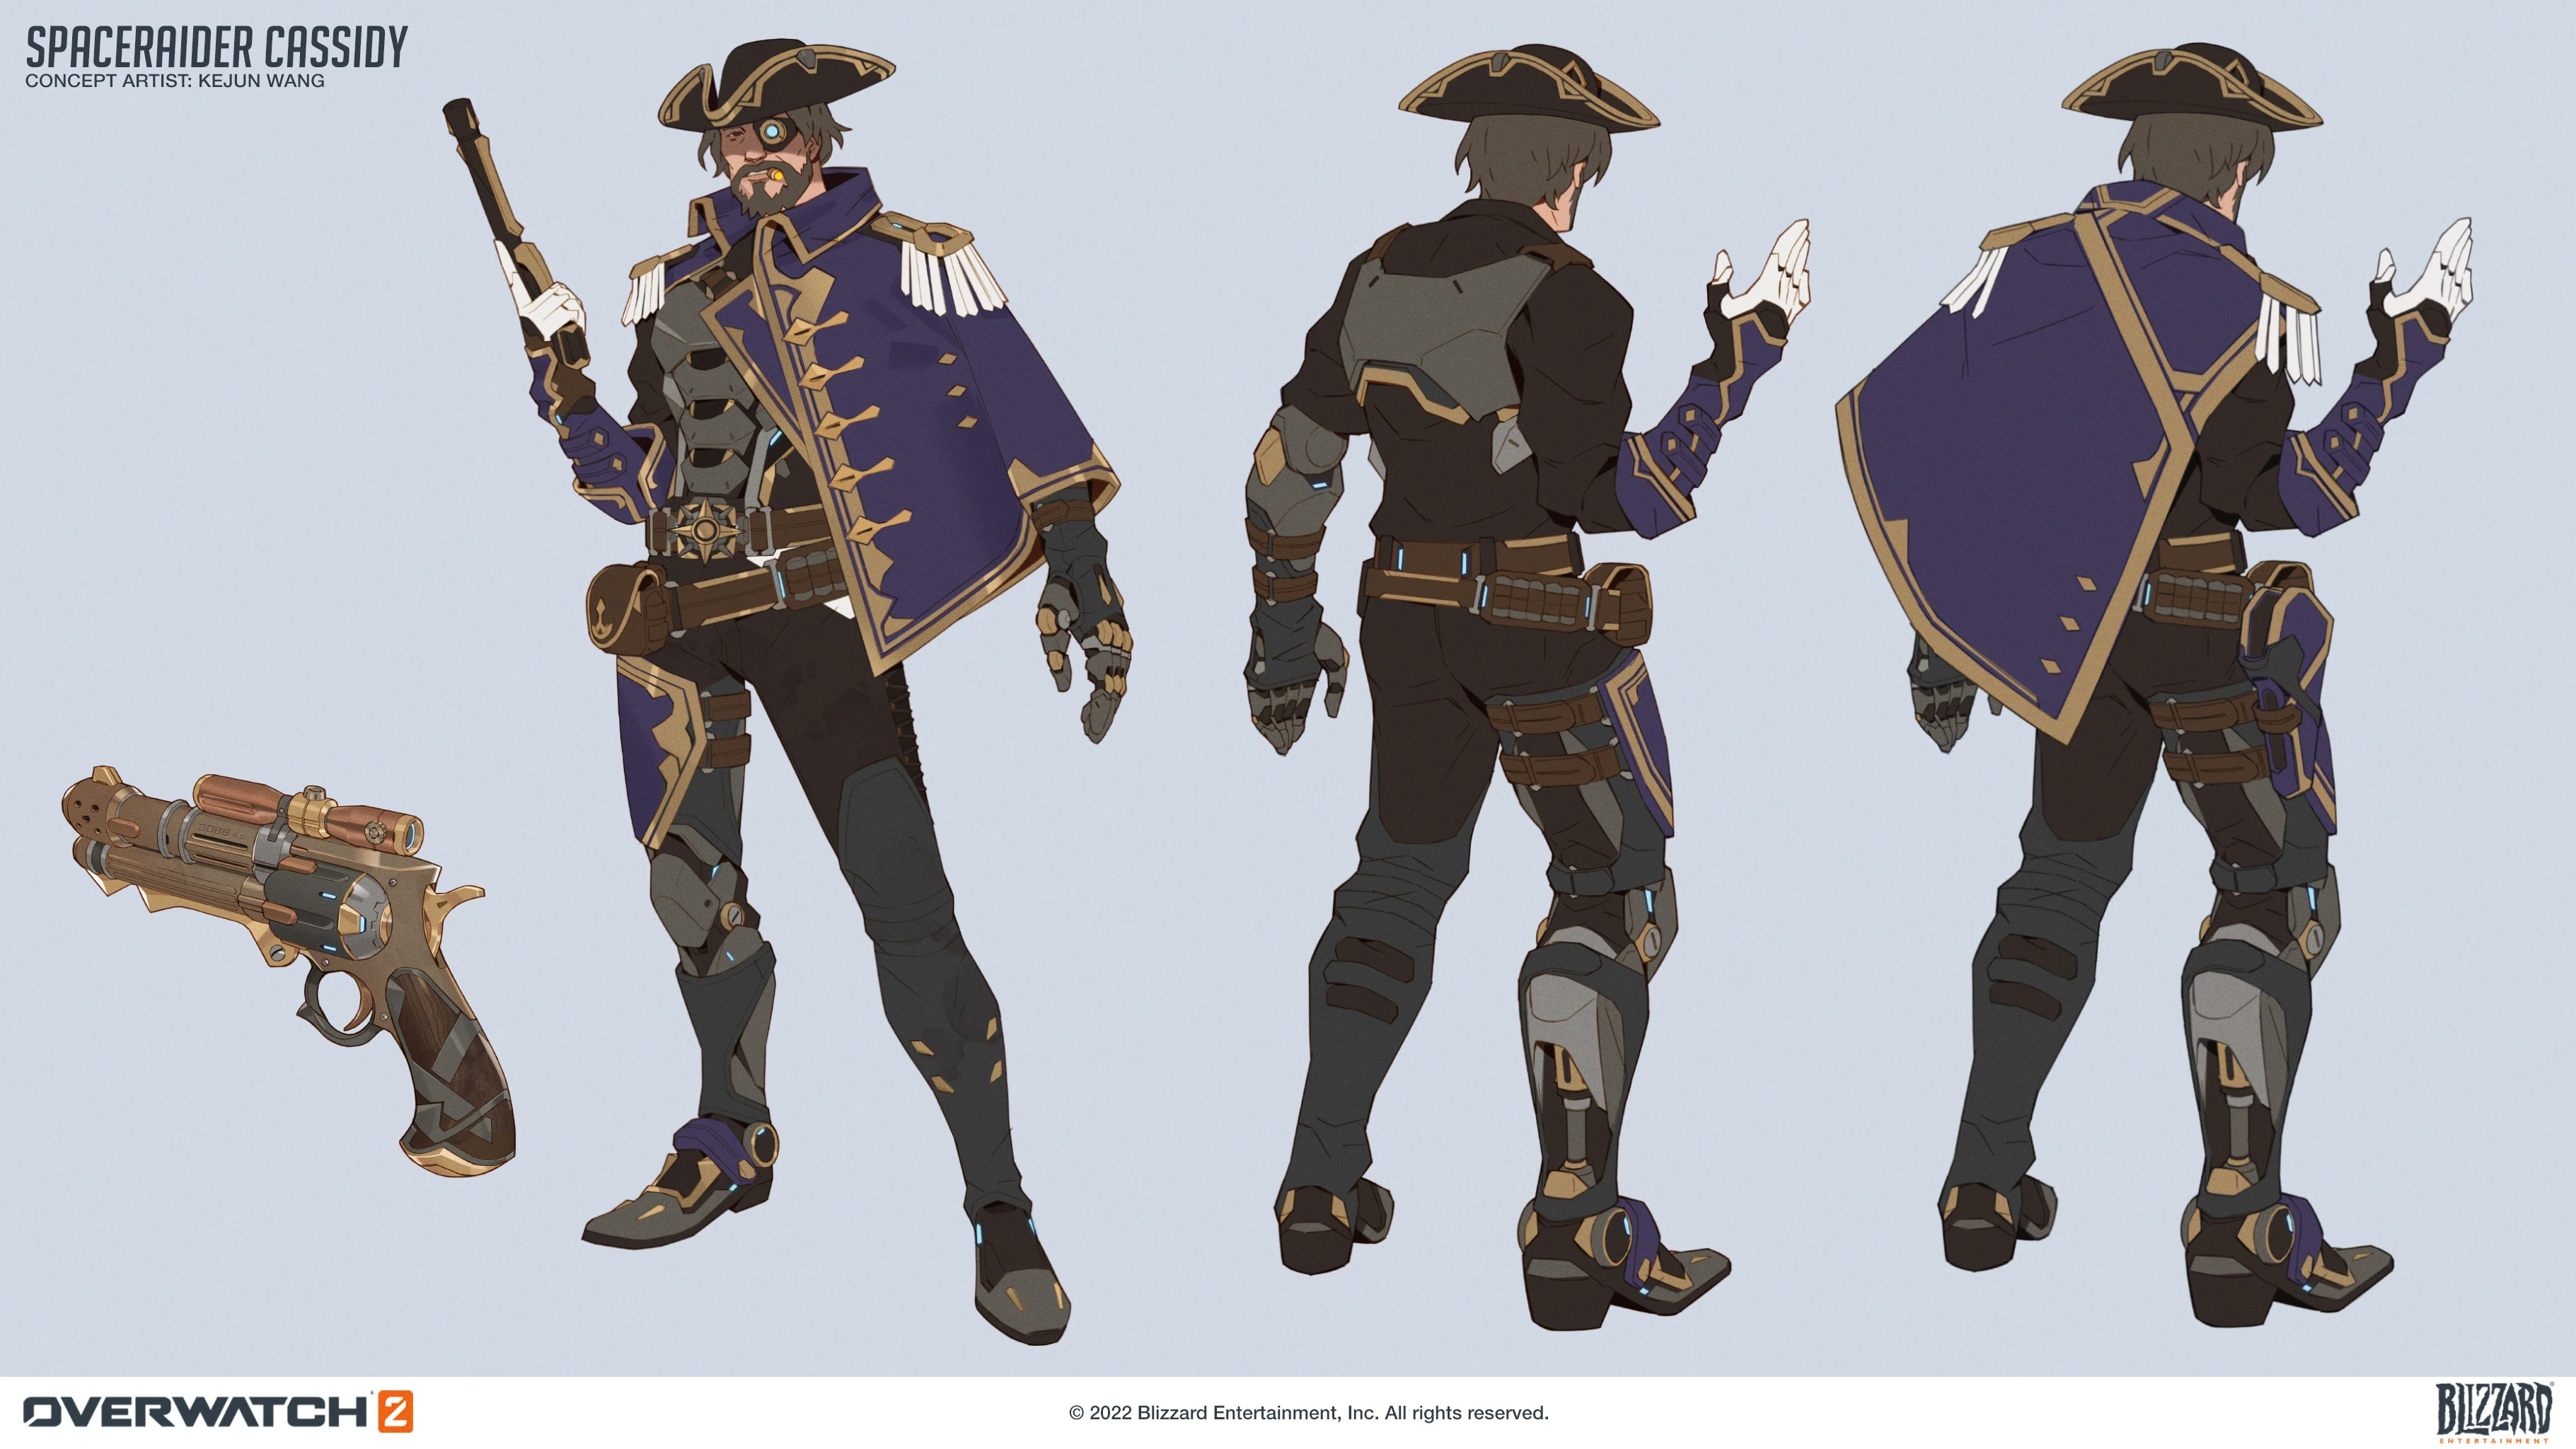
 Space Raider Skin Concept Art by Kejun Wang
 -
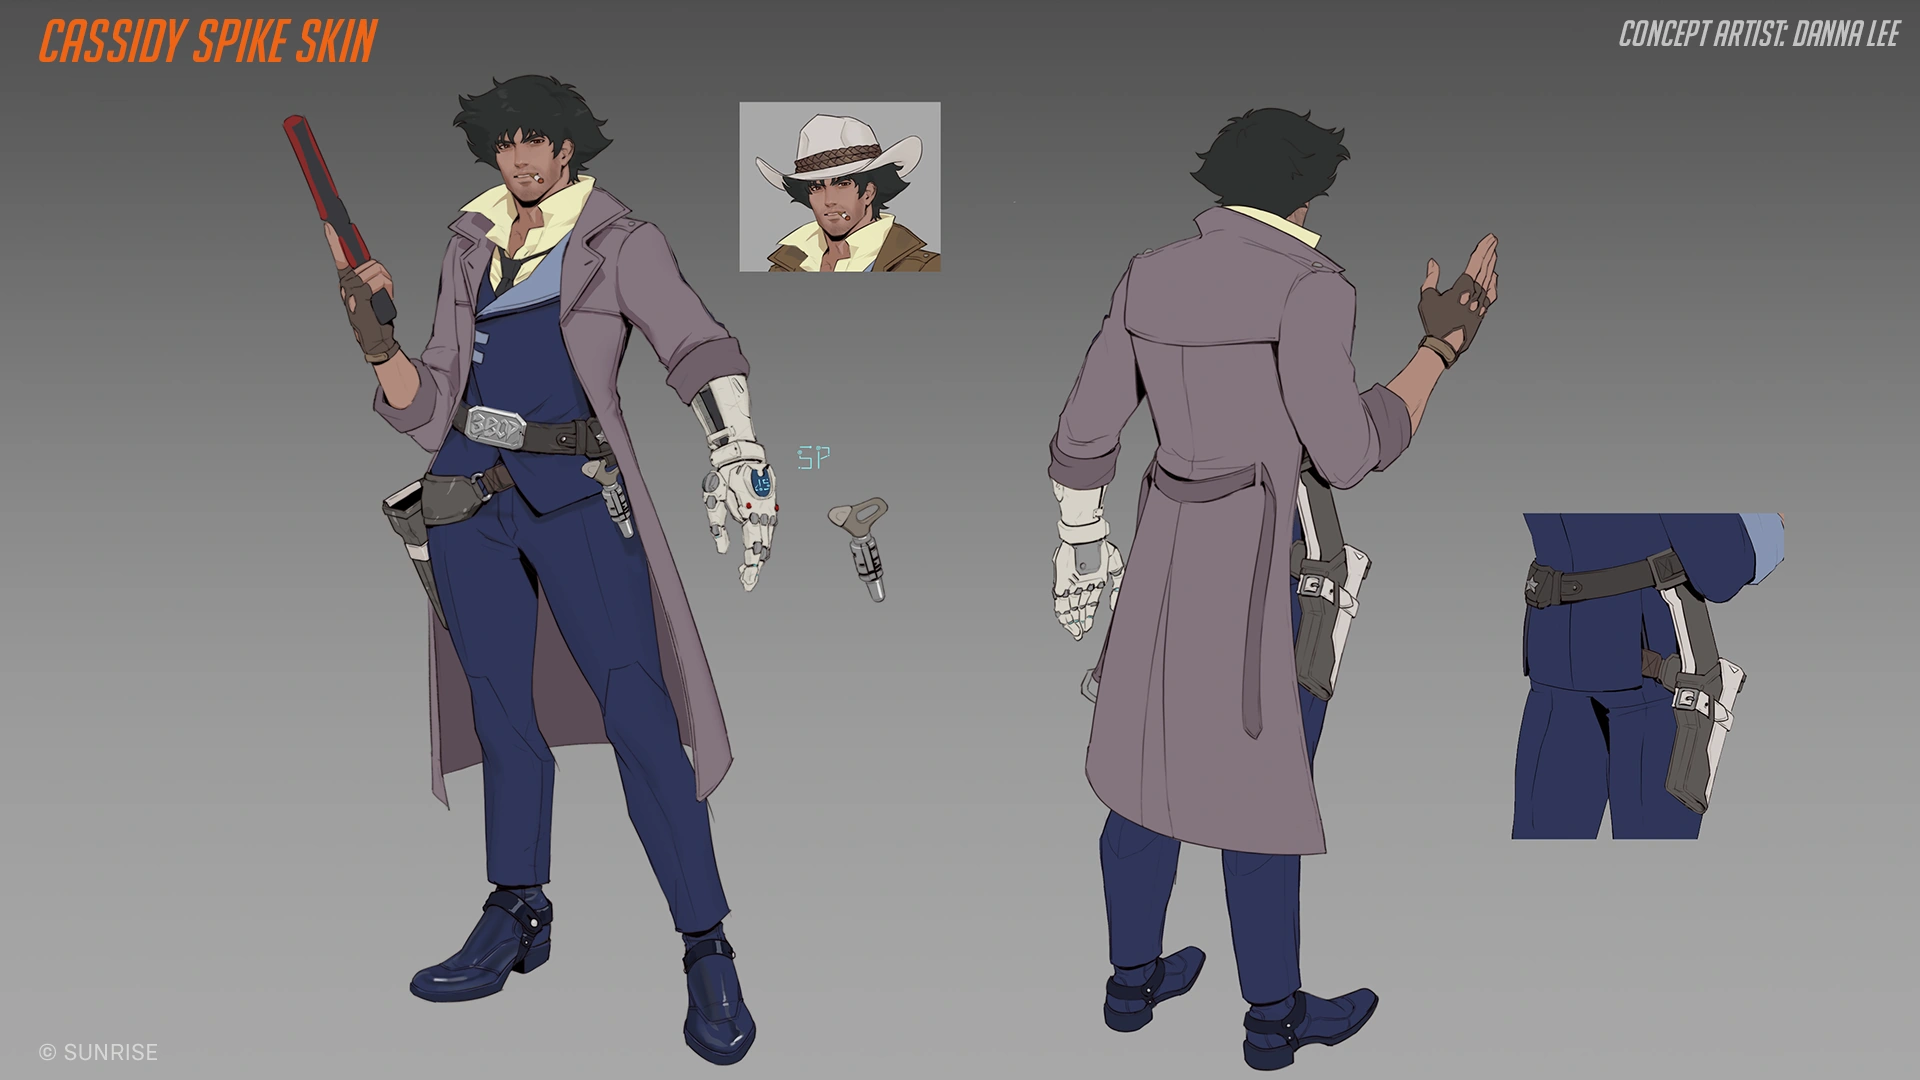
 Spike Spiegel Skin Concept Art by Danna Lee
 -
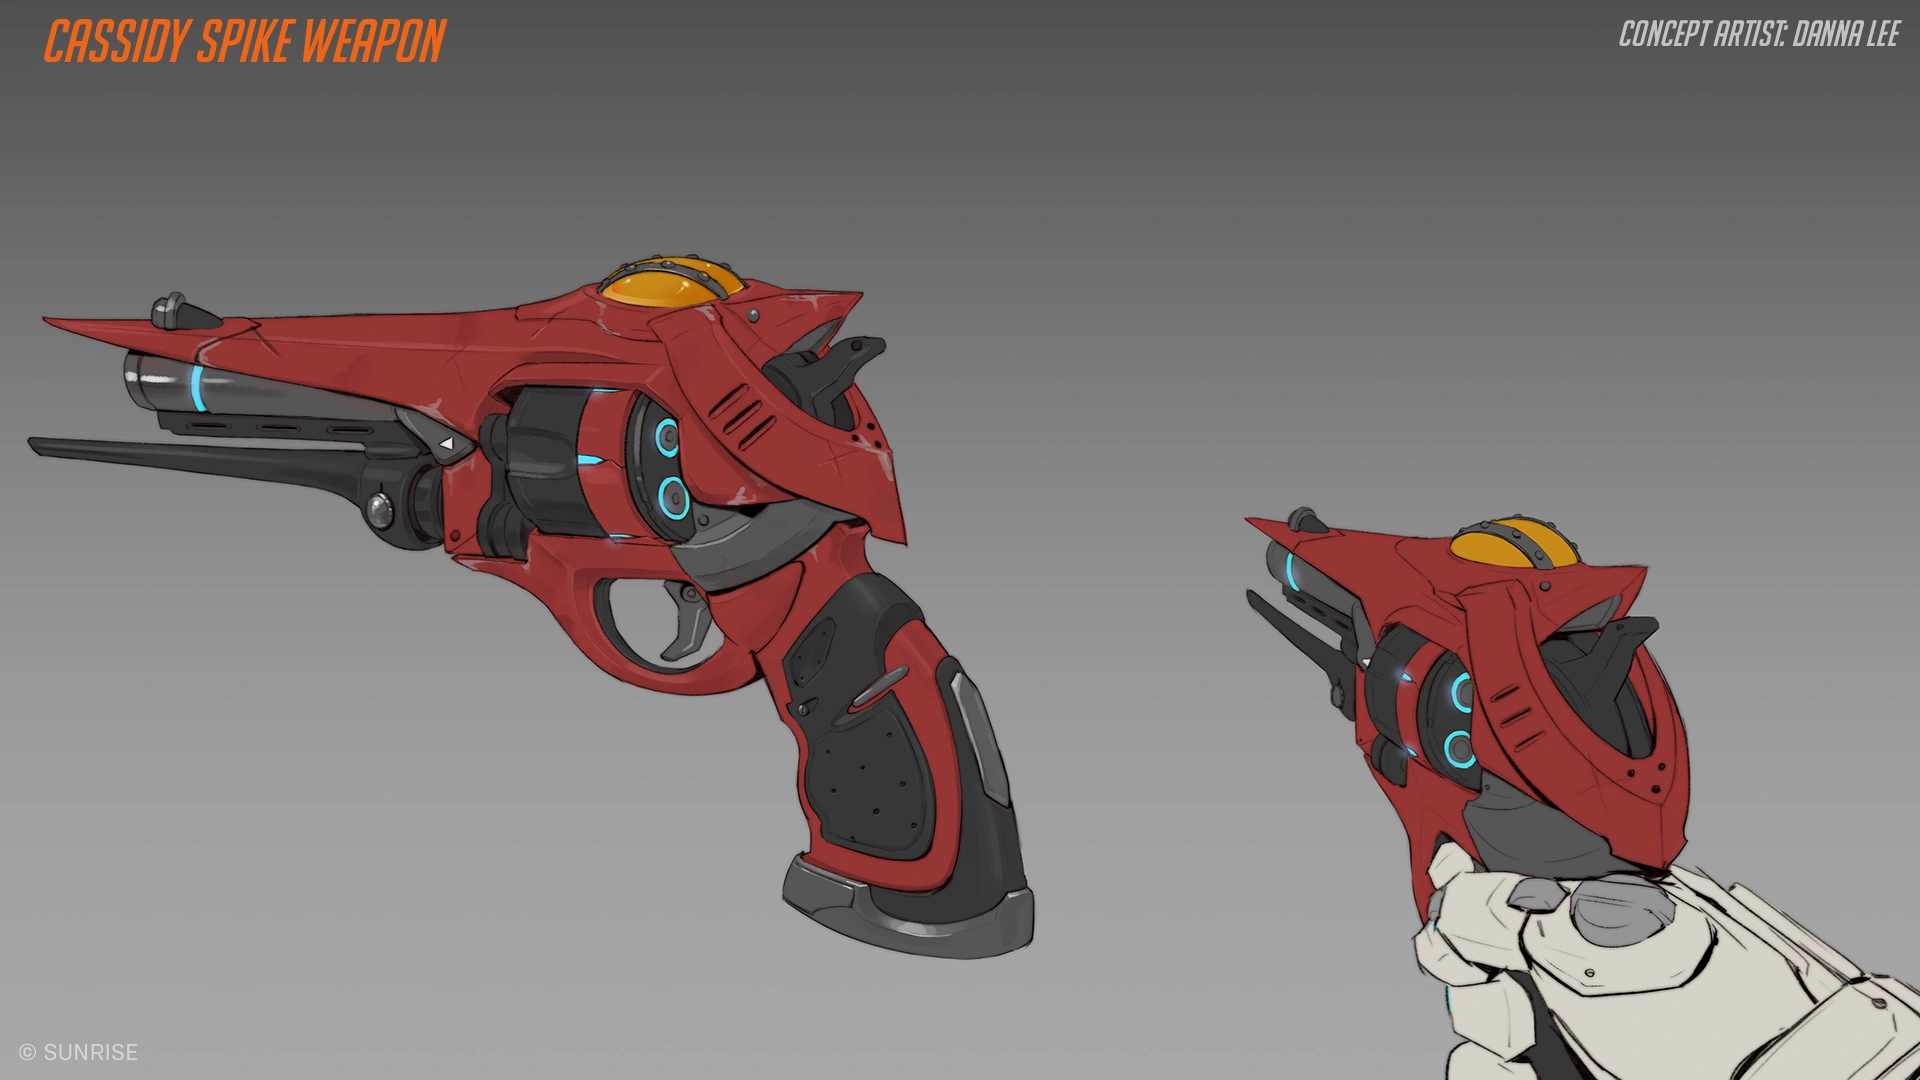
 Spike Spiegel Skin Weapon Concept Art by Danna Lee
 -
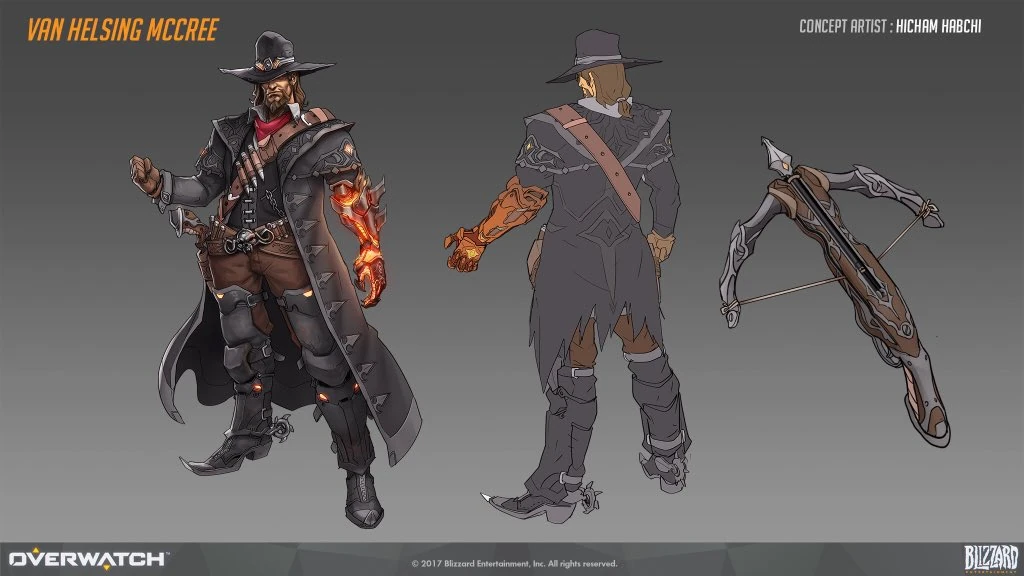
 Van Helsing Skin Concept Art by Hicham Habchi
 -
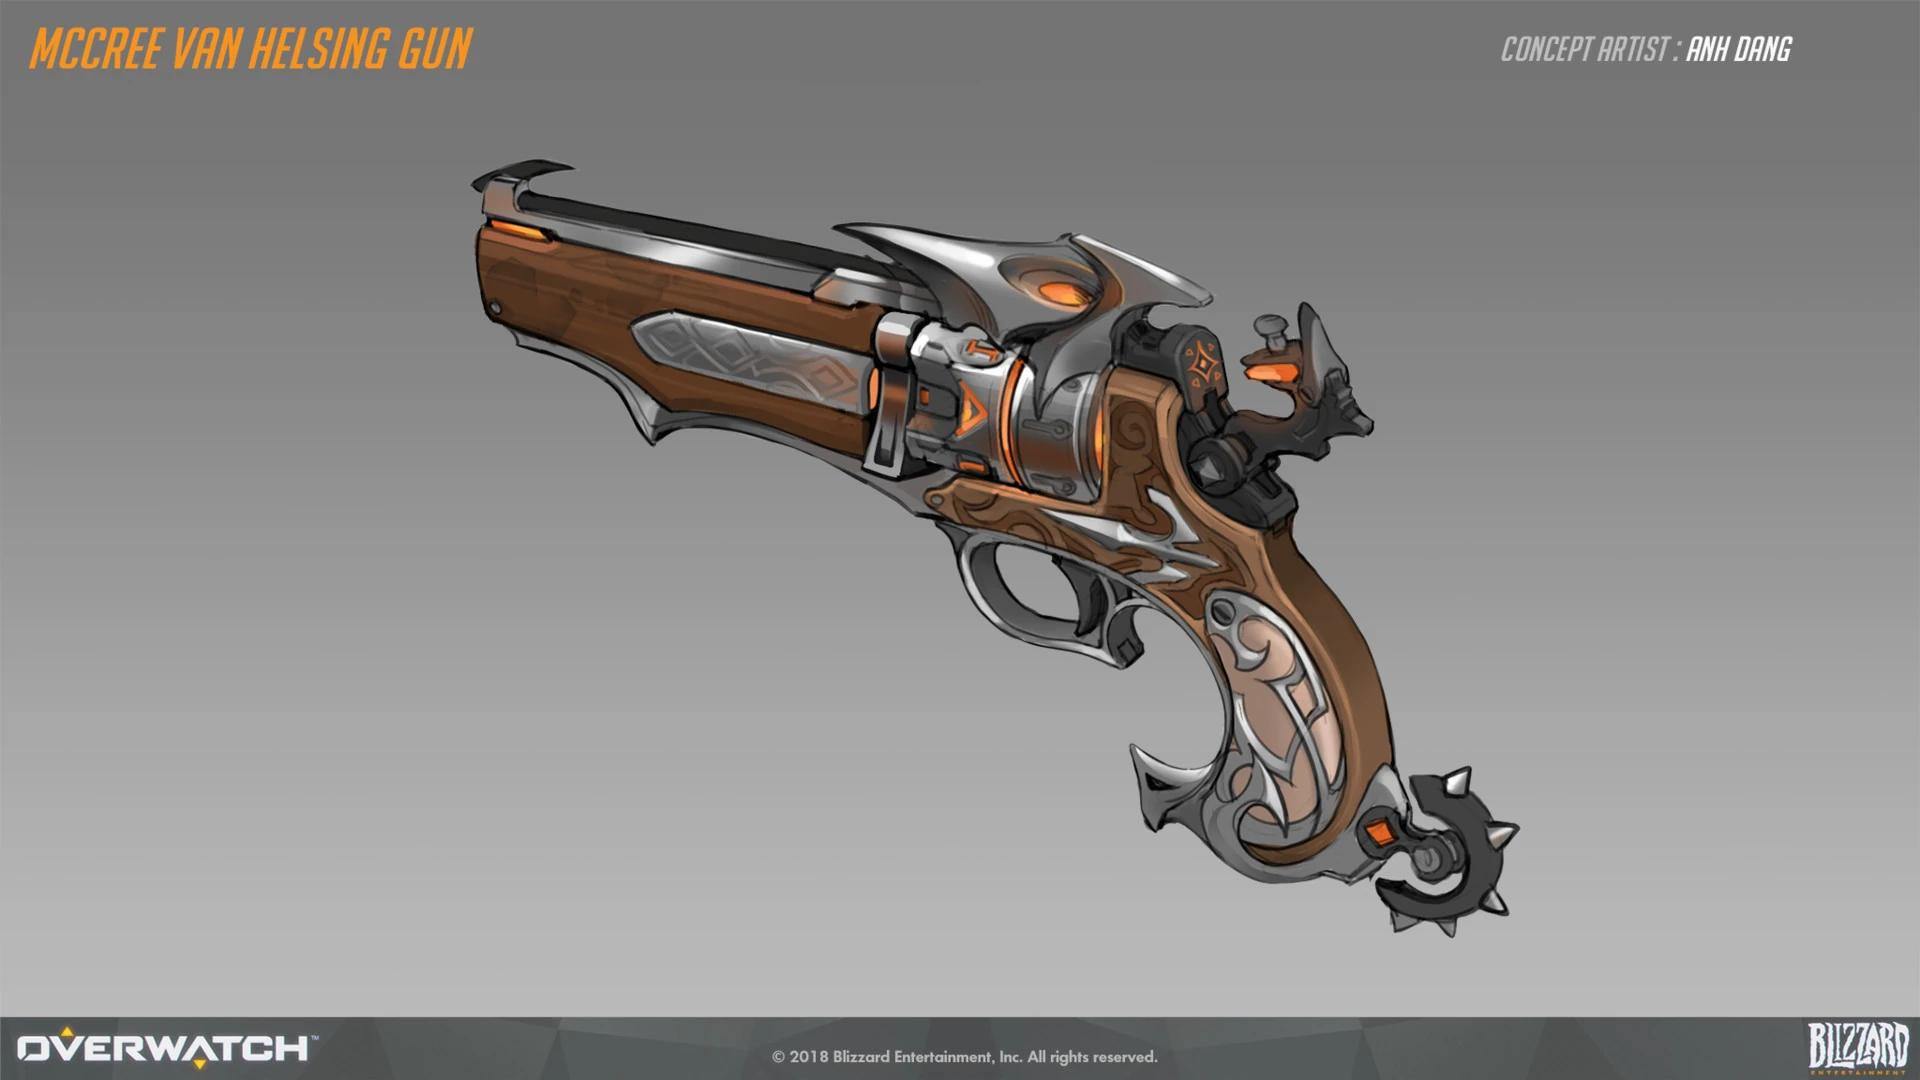
 Van Helsing Skin Weapon Concept Art by Anh Dang
Videos
Balance Change Log
- For more information, see Patch Notes.
- Cooldown reduced from 6 to 5 seconds.
![]() Gun Slingin' – Major Perk
Gun Slingin' – Major Perk
- Removed.
![]() Rollin' Round-Up – Major Perk
Rollin' Round-Up – Major Perk
- Combat Roll heals 15 health for each bullet reloaded.
- Hinder duration increased from 0.9 to 1.2 seconds
![]() Even the Odds – Minor Perk
Even the Odds – Minor Perk
- Healing per second increased from 20 to 30.
- Base health reduced from 275 to 250.
![]() Quick Draw - Minor Perk
Quick Draw - Minor Perk
- Removed.
![]() Bang Bang - Minor Perk
Bang Bang - Minor Perk
- Changed to a Minor Perk.
- Now reduces the damage from both Flashbangs by 40% (up from 30%).
![]() Silver Bullet - Major Perk
Silver Bullet - Major Perk
- New Major Perk.
- Peacekeeper's secondary fire is replaced with a piercing shot that inflicts bleeding. Combat Roll and Deadeye reset its cooldown.
- Removed.
- New Minor Perk
- Regenerate 20 health per second for each enemy targeted by Deadeye.
- Secondary Fire can now be held to continuously shoot, just as without the perk. (undocumented)
- Primary fire falloff range increased from 20 to 25 meters.
- Secondary fire damage increased from 45 to 50.
- Ultimate charge refunded increased from 30% to 40%.
- Hero Perks
- Fan the Hammer shots are individually controlled and can crit for 50% more damage.
- Deadeye refunds 30% Ultimate Charge if it fully expires.
- Critical hits with Primary Fire reduce the cooldown of Combat Roll by 3 seconds.
- Cassidy throws a second Flashbang that travels farther, but both Flashbangs deal 30% reduced damage.
- Global Projectile Size Bonus
- Hitscan radius large reduced from 0.08 to 0.07 meters.
- Hinder duration reduced from 1.2 to 0.9 seconds.
- Explosion damage increased from 45 to 75.
- Ultimate cost reduced 10%.
- Primary fire falloff range rescaled from 25-35 meters to 20-30 meters.
- Secondary fire "Fan the Hammer" damage reduced from 50 to 45.
- Damage reduction reduced from 75 to 50%.
- Magnetic Grenade ability is now Flashbang.
- Hinders enemies instead of Stunning them for 1.2 seconds.
- Movement speed reduction increased from 30% to 50%.
- Hinder now prevents crouching movement.
- 45 explosive damage.
- 12 second cooldown.
- Movement speed penalty now scales down over time, from 70% to 35%.
- Damage reduction now scales down over time, from 40% to 0%.
- General updates
Most damage-dealing projectile sizes have been increased by a new global modifier added to their base size.
- +0.05 meters for hitscan projectiles with a high rate of fire or spread (e.g., Tracer's Pulse Pistols or Reaper's Hellfire Shotguns).
- +0.08 meters for hitscan projectiles that are more precise (e.g., Cassidy's Peacekeeper or Soldier:76's Heavy Pulse Rifle).
- +0.05 meters for travel time projectiles that are shotguns or have a very high rate of fire (e.g., Roadhog's Scrap Gun or Ramattra's Void Accelerator).
- +0.10 meters for travel time projectile with a speed greater than 50 meters per second (e.g., Zenyatta's Destruction Orb).
- +0.15 meters for travel time projectile with a speed less than or equal to 50 meters per second (e.g., Pharah's Rocket Launcher).
- Very large projectiles with a base size greater than 0.5 meters have been excluded from these increases (e.g., Orisa's Energy Javelin or Reinhardt's Fire Strike).
Hero combined HP (base health/armor/shields) increased by 15-25%.
- 150-175 HP heroes increased by 25 HP.
- 200-300 HP heroes increased by 50 HP.
- 300+ HP (Tanks) increased by 75-100 HP.
- Each hero's precise health increases are listed in their patch notes below.
Ultimate Charge
- All Ultimate ability costs increased by 10%.
Regenerative Passive for All Heroes
- All heroes now regenerate 20 health per second after 5 seconds of not taking damage.
Damage Role Passive
- Reload speed bonus on elimination has been removed.
- New role passive: Dealing damage reduces enemy healing received by 20% for 2 seconds.
Quick Melee
- Damage increased from 30 to 40.
- Hero updates
- Health increased from 225 to 275.
- Initial damage rate increased from 130 to 150.
- Damage rate increased from 260 to 300.
- Cooldown increased from 10 to 12 seconds.
- Damage reduction increased from 50% to 75%.
- Base health increased from 200 to 225.
- Peacekeeper damage falloff range rescaled from 25-45 meters to 25-35 meters.
- Projectile now has a maximum travel time of 1.5 seconds.
- Slow amount reduced from 30 to 25%.
- Seeking radius lowered from 1.5 to 1.3 meters.
- Homing duration lowered from 1 to 0.75 seconds.
- No longer has a maximum projectile travel range of 10 meters.
- The projectile now magnetizes toward an enemy target from 1.5 meters away and chases them for up to 1 second.
- Impact damage increased from 0 to 10.
- Explosion damage reduced from 120 to 70.
- Stuck targets now have their movement slowed by 30%.
- Stuck targets are now affected by a "Hindered" status effect, interrupting and preventing movement abilities from being activated.
- Base health reduced from 225 to 200
- Damage reduced from 131 to 120
- Primary fire falloff range increased from 20 to 25 meters
- Movement is no longer blocked by enemy player collision
(beta)
- Now grants 50% damage reduction for its 0.4 second duration
(beta)
- Ability removed and replaced by Magnetic Grenade
- Secondary fire “Fan the Hammer” fire rate increased by around 7.5%
- Throws a grenade that can stick to enemies
- Automatically homes in on an enemy close to the reticle when thrown within 10 meters of the target and can chase up to 13 meters
- Deals 131 damage split between: 1 impact damage, 65 explosion damage, and an additional 65 damage to the stuck target at the time of detonation
- Now grants 40% damage reduction while channeling the Ultimate
- Damage now builds at 130 damage-per-second for the first 2 seconds and then at 260 damage-per-second for the remaining duration
- Maximum duration increased from 6 to 7 seconds
- Ultimate cost increased by 10%
- Damage reduced from 50 to 45. (undocumented)
(Note: This change was reverted in both formats on March 25, 2025)
- Fan the hammer secondary fire damage increased from 45 to 50.
- Hero Reworks
![]() Full House (New) - Power
Full House (New) - Power
- Original functionality removed.
- (New) Flashbang hits reduce Fan the Hammer's spread by 25% for 2s.
![]() Bang Bang (New) - Power
Bang Bang (New) - Power
- Peacekeeper hits against enemies recently damaged by Flashbang (within 2s) reduce its cooldown by 0.5s.
![]() Buck Wild (New) - Power
Buck Wild (New) - Power
- Peacekeeper hits grant 1% Move Speed for 5s, stacking up to 15 times. At Max Stacks, gain 10% Damage Reduction.
![]() Dead Man Walkin' (New) - Power
Dead Man Walkin' (New) - Power
- Original functionality removed.
- (New) Enemies below 30% HP have their heads marked. Marked heads are larger and Critical Hits against marked enemies have 50% Weapon Lifesteal.
![]() Hot Potato (New) - Power
Hot Potato (New) - Power
- Original functionality removed.
- (New) Flashbang becomes magnetic and has 50% increased throw distance.
![]() Bullseye (New) - Power
Bullseye (New) - Power
- Flashbang hits and Critical Hits reduce Combat Roll's cooldown by 2s.
![]() It's Twelve O'clock Somewhere (New) - Power
It's Twelve O'clock Somewhere (New) - Power
- Deadeye eliminations grant 25% Ultimate Charge each. If you get no eliminations with Deadeye, refund 33% Ultimate Charge.
![]() Sunset - Power
Sunset - Power
- Removed and combined into It's 12 O'Clock Somewhere.
![]() Easy Rider (New) - Power
Easy Rider (New) - Power
- Eliminating an enemy recently damaged by Flashbang grants 20% Ultimate Charge. While using Deadeye, gain 100 Overhealth and 25% Move Speed.
![]() Flash in the Pan - Power
Flash in the Pan - Power
- Removed and combined with Easy Rider.
![]() Sunrise - Power
Sunrise - Power
- Removed and converted to a Hero Item (Snakebite).
![]() Snake Bite (New) - Item
Snake Bite (New) - Item
- +25 Health
- +15% Ability Power
- Using Deadeye slows all visible enemies by 20% for 2.5s
![]() Duck and Roll (New) - Item
Duck and Roll (New) - Item
- +25 Health
- +5% Cooldown Reduction
- +50% Combat Roll distance.
![]() Frankie's Fixer - Item
Frankie's Fixer - Item
- +50 Health
- (New) - Heal 2.5% of your Max Life for each Ammo loaded using Combat Roll.
- Now heals a percentage of your Max Life per ammo instead of a flat number.
![]() Competitive Analysis (New) - Item
+15% Weapon Power
Gain 20% Weapon Lifesteal against enemies in the Damage role.
Swapped the conditional stat and main stat.
Competitive Analysis (New) - Item
+15% Weapon Power
Gain 20% Weapon Lifesteal against enemies in the Damage role.
Swapped the conditional stat and main stat.
![]() Sunrise - Power
Sunrise - Power
- Increased slow duration to 2.5s (Up from 1.5s).
![]() Think Flasht - Power
Think Flasht - Power
- Added: Flashbang's hinder duration is increased by 50%.
![]() Flash in the Pan - Power
Flash in the Pan - Power
- Increased ultimate charge to 20% (Up from 15%).
![]() Quick Draw – Power
Quick Draw – Power
- Increased distance to 15m (Up from 9m).
![]() Wanted Poster – Rare Survival Hero Item
Wanted Poster – Rare Survival Hero Item
- Added: Deadeye damage charges 35% faster on airborne enemies.
![]() Fan the Hammer - Secondary Fire
Fan the Hammer - Secondary Fire
- Only in the Stadium mode, after 6th shot, weapon spread is increased.
![]() Dead Man Walkin' - Power
Dead Man Walkin' - Power
- Bonus ammo is now gained on critical final blow.
- Added max cap of bonus ammo set to 4.
![]() Just Roll with It - Power
Just Roll with It - Power
- Decreased damage reduction to 25% (Down from 50%), total damage reduction is now 75% during the combat roll.
- Reduced income from damage and healing by 12.5%.
- Reduced the amount of Stadium Cash Cassidy gains from dealing damage and healing to 40% (down from 50%).
- Tank Heroes: D.Va, Junker Queen, Orisa, Reinhardt, and Zarya.
- Damage Heroes: Ashe, Cassidy, Genji, Mei, Reaper, and Soldier: 76.
- Support Heroes: Ana, Juno, Kiriko, Lucio, Mercy, and Moira.
- Initial charge rate increased from 130 to 325 damage per second.
- Ramped charge rate increased from 260 to 650 damager per second.
- Now has a maximum damage cap of 1560 per target.
- Can now roll while in the air
- Introduction of a new hero name
General
- Hitscan damage now scales to 30% at maximum falloff range, down from 50% for the following heroes:
- Ashe
- Baptiste
- Bastion
- McCree
- Soldier: 76
- Widowmaker
- Wrecking Ball
This change may be difficult to notice immediately as it scales damage over a range slightly more than before, but it will lower the impact of hitscan damage outside of their intended optimal ranges.
- Reload time increased from 1.2 to 1.5 seconds
- Distance reduced by 20%
Developer Comment: Much of Cassidy's recent success can be attributed to his increased maximum health and we think that aspect is working well to help solidify a close-to-mid-range role for him. We're reverting the Combat Roll distance and Peacekeeper reload times as they lead to longer distance Flashbang initiations and made the burst damage from 'Fan the Hammer' less of a costly investment.
- Distance increased 20%
- Stun duration increased from 0.7 to 0.8 seconds
After scaling down the damage output of McCree's primary fire, we're looking to give back a bit of power through improvements to his abilities.
- Primary Fire recovery increased from 0.42 to 0.50
- Stun duration lowered from 0.85 to 0.7 seconds
- Firing Deadeye no longer locks the player’s aim
- Primary fire recovery reduced from 0.5 seconds to 0.42 seconds.
Developer Comments: On average, McCree’s damage output wasn’t quite making up for the relatively low mobility or utility in his kit. Reducing his weapon’s recovery time improves the potential damage output without affecting the number of successful shots to kill an enemy.
- Damage reduced from 55 to 50
- Damage per second increased from 275 to 550 after locking onto targets for 1.5 seconds
Developer Comments: After reducing armor’s effectiveness for all heroes, Fan the Hammer doesn’t need to deal quite as much damage. Increasing Deadeye’s damage after being locked on for a bit makes it more effective when attacking high health, static targets (like barriers) and heroes with over 250 health. It will not impact how dangerous this is for heroes under 250 health.
- Damage increased from 45 to 55
Developer Comments: McCree’s Fan the Hammer wasn’t as reliable against higher health heroes as it should be. Increasing its damage will make it more potent in close-range engagements where it is intended to be most effective.
- Cooldown reduced from 8 to 6 seconds
Developer Comments: Previously, McCree’s Combat Roll cooldown felt too restrictive, which sometimes prohibited players from using it. The new, faster cooldown allows for more flexibility when choosing between using it for mobility or an instant reload.
- Minimum damage at max range increased from 30% to 50%
Developer Comments:The goal of these changes is to slightly reduce the impact of damage falloff on mid-range weapons. While assessing falloff mechanics across the board, weapons intended primarily for close-range combat benefited too greatly from lowering their falloff restrictions. We also normalized a couple of outliers in that Mei had a long-range travel time projectile with falloff applied and Widowmaker's automatic fire did not have any.
- Range increased from 70 meters to 200 meters
Developer Comments: While McCree’s Deadeye rarely came into play at 70 meters, we are increasing the range so it cannot be a limiting factor during normal gameplay.
- Added additional voice lines for Lifeguard McCree
- Stunned targets are now slowed heavily, meaning they're less likely to escape while stunned (especially while in the air)
Developer Comment: This change will make McCree's Flashbang consistent against fast-moving targets like Genji or Lúcio.
- Targets now begin locking on after 0.2 seconds, instead of 0.8 seconds
- Damage accumulated over the first 1.0 seconds increased from 20 to 80 (damage per second after the first 1.0 seconds is unchanged)
Developer Comment: McCree’s ultimate can deal a lot of damage if it has a lot of time to build up, but it was often too difficult to get even a small amount of damage out before being stopped or killed. These changes make it more flexible and powerful.
General
- Recoil Recovery Aim Compensation can now be disabled for Ana, McCree, and Widowmaker. The option can be found under the “Control” tab in the “Options” menu. Simply select the appropriate hero under the dropdown menu and look for the “Hero” section
- Now drains over a .25-second period (instead of displaying a 50% reduction on the ultimate meter when activated and 0% when confirmed)
Developer Comments: If players managed to counter or avoid McCree's ultimate, it would often regenerate very quickly since only half of the ultimate charge was spent. Now, this ultimate works like every other ultimate that has a duration.
- Damage falloff range decreased by 10 meters
- Damage falloff amount is unchanged
- As a result, even with this change, McCree’s effective range is still higher than it was at launch
- Rate of fire increased by 15%
- Recovery time (i.e. the amount of time before Cassidy can fire again) decreased from 0.5 seconds to 0.35 seconds
Developer Comments: McCree’s latest range increase helped him quite a bit, but it was a bit too much in the right hands. This change weakens his long range damage somewhat, but still keeps it stronger than it has been in the recent past. The other changes combine to allow him to land more alternate fire shots on targets that he has hit with Flashbang.
- Now maintains full damage at longer distances, but will deal less damage at extreme ranges
Developer Notes: While the game does feel better following the nerf to McCree’s close-range damage in a previous patch, it left him a little too weak. So, we're increasing his effective distance, making his range similar to Soldier: 76’s. This should hopefully give players another option for dealing with pesky long-range damage dealing heroes like Pharah and Hanzo.
- Recovery time (i.e. the amount of time before Cassidy starts reloading) decreased from 0.75 seconds to 0.3 seconds
- Bullet damage decreased from 70 to 45
Developer Comments: McCree was performing too well against all targets, making him feel like a must-pick in many situations. By reducing the damage of his alternate fire, McCree is now significantly weaker against tanks like Roadhog and Reinhardt, but still maintains his lethality against smaller targets like Tracer and Genji.
References
- ↑ 1.0 1.1 1.2 2021-10-23, Overwatch Twitter. Twitter, accessed on 2021-10-23
- ↑ Overwatch 2, Intel Database: Heroes
- ↑ 2015-10-02, "Justice ain't gonna dispense itself.". Twitter. Accessed on 2016-05-18
- ↑ 05-03-2023, Deadeye Can Miss (a lot). YouTube video by Marblr.
- ↑ 2020-02-24, Toy Fair NY 2020: Figma Overwatch Action Figures. Blizzplanet, accessed on 2020-04-10
- ↑ Overwatch Visual Source Book, pages 46-47
- ↑ 2021-02-20, Overwatch Fans Have Mixed Reaction to OW2 Cassidy. Game Rant, accessed on 2021-06-01.
- ↑ 2021-05-24, Ask Us Anything! - Join the Overwatch development team for the fifth anniversary AMA. Reddit, accessed on 2021-06-01.
- ↑ Overwatch, McCree Quotes
- ↑ 10.0 10.1 10.2 Overwatch 2, Cassidy Quotes
- ↑ The Art of Overwatch, pg. 50-51
- ↑ BlizzCon 2017, Overwatch - Archives
- ↑ 2017-12-22, Every Overwatch Hero Explained by Blizzard’s Michael Chu | WIRED (2:26). Youtube, accessed on 2017-12-23
- ↑ 2019-11-11, BlizzCon 2019 Diablo IV: World and Lore Panel Transcript. Blizzplanet, accessed on 2020-04-18
- ↑ 2021-08-26, "A message from the Overwatch team.". Twitter. Accessed on 2021-08-26
- ↑ 2021-02-19, BlizzConline 2021 | Behind the Scenes of Overwatch 2 | Overwatch. Youtube @PlayOverwatch, accessed on 2024-04-16
External links
| Heroes in Overwatch
| ||||||||
|---|---|---|---|---|---|---|---|---|
Tank |
 Bruiser |
|||||||
 Initiator |
||||||||
 Stalwart |
||||||||
Damage |
 Flanker |
|||||||
 Recon |
||||||||
Sharpshooter |
 Cassidy |
|||||||
 Specialist |
||||||||
Support |
 Medic |
|||||||
 Survivor |
||||||||
 Tactician |
||||||||


.jpg)