- This article is about the playable hero. For information on the generational title and his predecessors, see Doomfist (title).
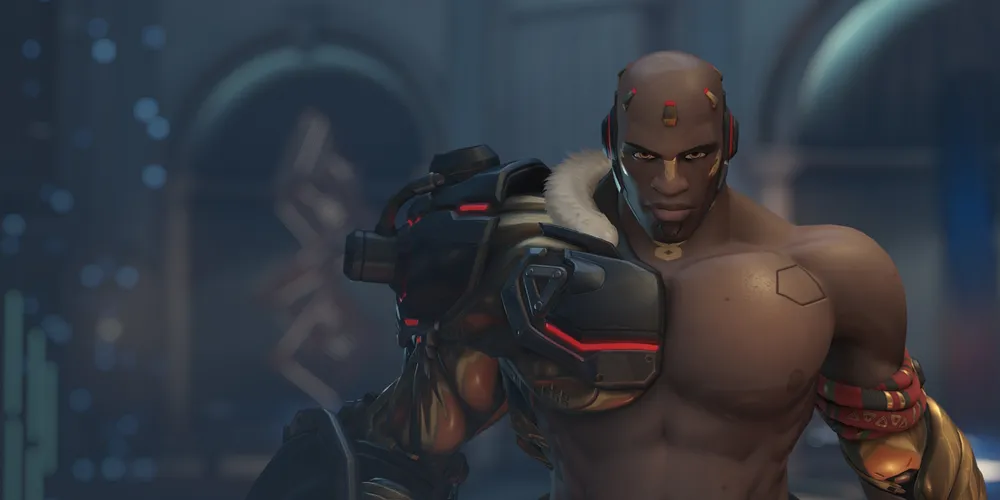
Doomfist is an Initiator Tank hero in Overwatch. Released on 27 July 2017, he is the 25th hero to be added to the game.
Overview
Doomfist Hero Selection
Doomfist’s cybernetics make him a highly-mobile, powerful frontline fighter. In addition to dealing ranged damage with his Hand Cannon, Doomfist can slam the ground, knock enemies into the air and off balance, or charge into the fray with his Rocket Punch. When facing a tightly packed group, Doomfist leaps out of view, then crashes down to earth with a spectacular Meteor Strike.
-
 Overwatch 2 Key Art
 -
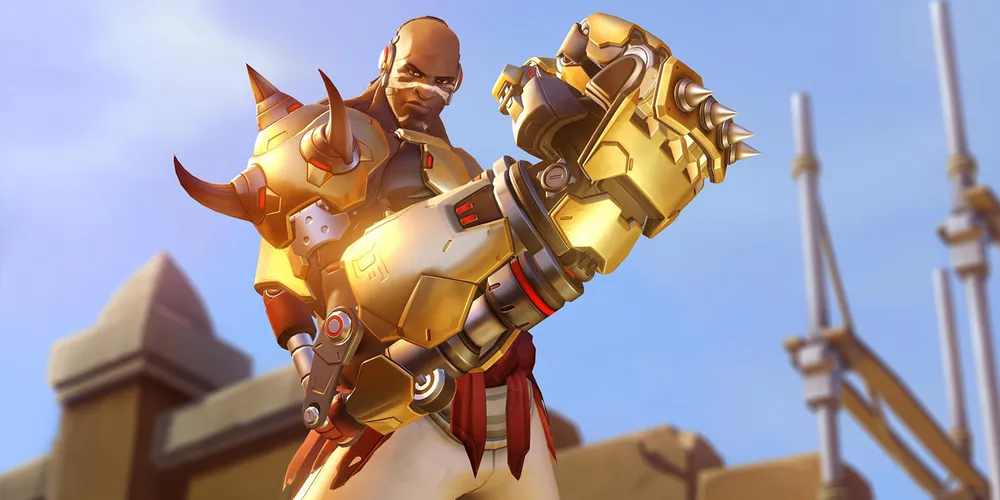
 Overwatch 1 Key Art
-
 3D Portrait
 -
 2D Portrait

Abilities
Passive Abilities


- Ultimate charge and perk progress generation from damage and healing dealt to heroes with the Role: Tank passive is reduced by 40%.
- All tanks have 150 more health in Role Queue. The amount of armor and/or shields remains the same.
- No longer grants increased base health.
- Ultimate charge generation reduction reduced from 40% to 20%.

- Triggers when using certain movement abilities:
- Winston:
 Jump Pack
 - D.Va:
 Boosters
 - Hazard:
 Violent Leap
 - Wrecking Ball:
 Grappling Claw (with fireball)
 - Doomfist:
 Rocket Punch
- Winston:
- Lasts for 1 second with a 5 second cooldown. This is seperate from the cooldown of the ability.
- Once triggered, all 50 healing will be granted, even if the hero takes damage mid-heal.
- The passive doesn't activate if the hero is full health.

75 per enemy (Meteor Strike)
200 (max total)
- The total amount of overhealth gained through both methods is capped at +200 overhealth.
- After 3 seconds, the overhealth starts decaying at 3 health per second. Dealing more ability damage will reset this condition.
- Overhealth is only generated if the ability damages an enemy player.
- E.g. Hitting Zenyatta during
 Transcendence or a construct such as Torbjörn's
  Deploy Turret does not grant any overhealth.
- E.g. Hitting Zenyatta during
- Overhealth gained per target reduced from 40 to 25 HP.
- Maximum temporary health reduced from 200 to 150 health.
Weapons


55 – 16.5 (per volley)
1.36 volleys/s (continuous fire of final shot)
1.6 seconds (from empty)
- Reloading automatically begins once the recovery (0.33 seconds) from previous shot ends, resulting the first projectile to be loaded after 0.73 seconds delay in total.
- Reloading is interrupted if Hand Cannons is fired.
- Using quick melee does not interfere with the reload timer.
- Damage per second: 73.3 while firing continuously, 165 burst from full ammo.
Special Abilities

10 - 40 (base, wall slam)
38 - 113 (empowered, impact damage)
15 - 60 (empowered, wall slam)
1 seconds (full charge)
1.6 second (max)
0.4 seconds (fire recovery)
0.5 seconds (stun, punch impact)
0.15 seconds (stun, wall slam)
0.15 - 0.6 seconds (stun, empowered wall slam)
20 seconds (Empowered Rocket Punch max duration)
9.3 - 29.4 meters (self, empowered)
5.5 - 13.2 meters (knockback)
+1100% (empowered punch)
- In addition to damage, charge also affects the distance the punch will travel and the distance of the knockback.
- The punch impact hitbox is roughly the same size as Doomfist.
- If Rocket Punch connects, it will also apply its effects to all targets in a small area behind the punched target. This is called 'Blastback'.
- The following deployables are applicable punch targets to trigger the Blastback. Mei's
 Ice Wall, Torbjörn's Deploy Turret, Baptiste's
  Immortality Field, Illari's
  Healing Pylon, Lifeweaver's
  Tree of Life and Hazard's
  Jagged Wall.
- The following deployables are applicable punch targets to trigger the Blastback. Mei's
- Rocket Punch briefly stuns enemies on initial impact and again for 0.15 seconds if the enemy is knocked against a wall.
- Rocket Punch can be empowered by
 Power Block:
- An empowered Rocket Punch deals +50% damage, has +50% speed/distance, greatly increased blastback area, and the wall slam stuns the target for 0.15 - 0.6 seconds based on charge.
- Rocket Punch has natural power limiters in the form of what is known as ‘Sliders’ & ‘Bouncers’. Both are intentional parts of controlling how often and easily punched targets will impact a surface and will only activate if specific conditions are met.
- A Slider will trigger if a punched target impacts a surface at an angle greater than 55° relative to their knockback trajectory.
- A Bouncer will trigger if a punched target impacts an obstacle in their trajectory path with less than 50% of their hitbox vertically. Bouncers tend to occur less often as they depend heavily on the shape of nearby geometry.
- If Rocket Punch collides with another ability with Collide property (
 Charge,
  Shield Bash,
  Whirlwind Dash, a charging
  B.O.B., or another Rocket Punch) both participants get knocked down for 1.7 seconds. This is also called 'The Stalemate Mechanic'.
- The Blastback effect of Rocket Punch will ignore and override the Stalemate mechanic where applicable.
- While the Melee keyword states that it is blocked by Ignore Melee abilities (e.g.
 Javelin Spin,
  Deflect), the Stun can go through and interrupt these abilities, which allows the punch to connect.
- If the target is Unstoppable or the Ignore Melee ability cannot be interrupted, for example Orisa during
 Fortify, they will not take damage from the punch, but the blastback effect to enemies behind them will still apply.
- If the target is Unstoppable or the Ignore Melee ability cannot be interrupted, for example Orisa during
- Rocket Punch's wall-impact trajectory can be altered mid-motion by other knockback effects.
- Rocket Punch can be cancelled by activating any other ability or pressing primary fire.
- If Rocket Punch is cancelled through aforementioned means by Doomfist during the charge, the empowered state is not consumed. But if the punch has already started, the empowered state will be consumed.
- If Rocket Punch is interrupted by enemy crowd control, it goes on cooldown and the empowered state is lost.
- Rocket Punch's speed buff while punching does not count towards global speed buff cap.
- The punch is not stopped by fences or other breakables in its path, destroying them as it passes through.

1.45 meters (climb and drop)
- Seismic Slam features a micro-lock that will fully stop a target's movement if they are airborne, but will do virtually nothing to a grounded target.
- Seismic Slam can climb both up & down surfaces within its vertical range, similar to
 Earthshatter.
 - Doomfist's momentum is retained if the ability is cancelled by Sleep Dart or Hack.
- Seismic Slam can be canceled by reactivating the ability or activating any other ability.
- Destroys fences and other breakables Doomfist collides with while leaping.
- Cooldown increased from 6.5 to 7.5 seconds.

2.5 seconds (max)
- After mitigating 100 or more damage, the cooldown of Rocket Punch is immediately reset and the next Rocket Punch is empowered.
- If Doomfist is already Empowered, blocking 100 or more damage with Power Block will not reset the cooldown of Rocket Punch.
- The damage requirement is based on the damage mitigated rather than the raw incoming damage, therefore at least 133 incoming damage is required to empower a punch, as Power Block provides an 75% reduction (
100 damage mitigated ÷ 75% = 133.3 raw incoming damage).
- Power Block is a channeled ability; the ability is interrupted when Doomfist is affected by stunned, knocked down or hacked, including subsidiary effects.
- The impact damage from the instance that applied the effect will still be blocked with the exception of another Doomfist's Rocket Punch.
- Damage is blocked if the horizontal angle between the direction Doomfist is facing and the direction from the impact location to its source is less than ~53 degrees.
- Doomfists's vertical view angle does not affect blocking, however his head hitbox may be exposed from some angles, allowing critical hits.
- Effectiveness extends to area abilities and splash damage from projectiles. Damage is generally blocked when facing the center of the AoE.
- Damage from
 Dragonstrike and
  Molten Core is blocked regardless of facing direction.
 - Does not reduce damage from Sombra's
 EMP or Sigma's
  Gravitic Flux (incl. both lift and slam).
- Damage from
- Power Block mitigates delayed or triggered detonation damage from stuck projectiles and debuffs, regardless of the direction Doomfist is facing.
- Following abilities are affected:
 A-36 Tactical Grenade,
  Sticky Bombs,
  Pulse Bomb and
  Captive Sun.
- Following abilities are affected:
- Does not affect damage over time effects from abilities.
- Power Block can be canceled by reactivating the ability, activating any other ability, or pressing primary fire.
- Maximum duration reduced from 2.5 to 2 seconds.
- Cooldown increased from 7 to 8 seconds.
- Amount of damage to gain Empowered Punch increased from 100 to 120.
Ultimate Ability

100 – 50 (outer sphere)
1 + 0.8 seconds (landing)
3 seconds (slow)
8 meters (outer sphere)
- Empowers Rocket Punch on landing.
- While in Meteor Strike, Doomfist regenerates health and his ability cooldown rates are accelerated by 100%.
- While in Meteor Strike, Doomfist is untargetable and invisible to by both allies and enemies and and cannot contest objectives while in Meteor Strike. He also becomes phased out, cleansing most negative effects and stuck projectiles, such as Tracer's Pulse Bomb.
- While targeting, the "Zoom Out" option on secondary fire allows moving to the highest elevation level as opposed to staying on current level.
- Contrary to Meteor Strike’s display reticle, the Ultimate's area of effect is not a 2-D circle on the floor, but is actually a 3-D sphere. The display reticle is a cross section of the central point of the Ultimate.
- If Doomfist selects his landing zone in a void/death pit, he will be instantly eliminated and will lose the Ultimate.
- If there is a Tree of Life at the landing location, Doomfist will slide to its side upon landing.
- Meteor Strike's speed buff while targeting does not count towards global speed buff cap.
Perks
Minor Perks
A Minor Perk is unlocked at level 2.


- Max overhealth gained to 250
- 200 (6v6)
Major perks
A Major Perk is unlocked at level 3.


- The absorption functions similarly to
 Defense Matrix and
  Kinetic Grasp, fully negating the projectile before it hits. Melee, AoE and beam attacks and certain projectiles, like
  Accretion and
  Chain Hook, cannot be absorbed.
 - Absorbed projectiles' damage charges empowered Rocket Punch an equivalent amount to Power Block.
- Any form of damage that cannot be absorbed still receives the baseline 80% mitigation from front.
- The absorption area extends slightly forward, allowing Doomfist to absorb projectiles that would normally not hit him.
Hero-specific options
| Setting name | Options | Description |
|---|---|---|
| Hold to use Power Block | Off (default) | Power Block deactivates when player presses the button again. |
| On | Power Block deactivates when player stops holding the button. | |
| Hand Cannon UI | On (default) | Hand Cannon ammo UI element is displayed below the crosshair. |
| Off | Hand Cannon ammo UI element is hidden. | |
| Hide Rocket Punch cancel text | Off (default) | Cancel text UI element is displayed to the left of the crosshair. |
| On | Cancel text UI element is hidden. | |
| Hide Rocket Punch charge meter | Off (default) | Charge meter UI element is displayed below the crosshair while charging Rocket Punch. |
| On | Charge meter UI element is hidden. | |
|
Hide Power Block cancel text |
Off (default) | Cancel text UI element is displayed to the left of the crosshair. |
| On | Cancel text UI element is hidden. | |
| Relative aim sensitivity during Power Block | 1% ... 500% (default: 100%) | Multiplier to base aim sensitivity during Power Block. |
| Swap Meteor Strike confirm and zoom-out inputs | Off (default) | Primary Fire confirms and Secondary Fire zooms out. |
| On | Secondary Fire confirms and Primary Fire zooms out. |
Strategy
Doomfist is a close-combat fighter who excels in taking down enemy targets with his powerful combos. With his signature ability, Rocket Punch, he is incredibly mobile and can deal damage and knockback to enemies, doing added damage and stunning if they hit a wall. Seismic Slam is also a dual-purpose ability that provides both high mobility, reasonable damage, and a large hitbox to gain overhealth from The Best Defense. Power Block is Doomfist's only defensive ability and is used primarily to Empower his gauntlet, allowing him to survive longer and amplifying the effects of his next Rocket Punch with even greater power. After casting Meteor Strike, Doomfist becomes invulnerable while choosing his landing location and then drops down, dealing damage in a large area. The Best Defense... helps him to mitigate punishment from the enemy team as long as he can continue dealing damage with his abilities. While Doomfist is strong up close, his damage falls off heavily at mid-to-long range, so unless he can close the distance between himself and an enemy, his only option is to use Hand Cannon, a shotgun style weapon with an automatic reload mechanic. Like other tanks, he typically takes more damage than other heroes due to his large hitbox.
Weapon & Ability Strategies
 The Best Defense...: Doomfist's passive ability. When Doomfist deals damage with his abilities, he gains overhealth akin to Lúcio's
  Sound Barrier. The overhealth can accumulate up to a maximum of 200, giving Doomfist a maximum of 725 effective health without any other bonuses. After a short delay, the overhealth begins to decay.
- Doomfist receives more overhealth from Meteor Strike than from his other abilities, precisely 75 overhealth per enemy hit.
- Doomfist increases his durability by quickly and continually replenishing his overhealth in the midst of combat.
- All of Doomfist's abilities provide overhealth in proportion to the number of enemies hit. For Rocket Punch and Seismic Slam, that rate is 35 overhealth per enemy hit (1 enemy hit = +35 overhealth, 2 enemies hit = +70 overhealth, etc). For Meteor Strike, the rate is 75 overhealth per enemy hit (1 enemy hit = +75 overhealth, 2 enemies hit = +150 overhealth, etc).
 Hand Cannon: Doomfist's primary weapon. Doomfist shoots pellets in a hexagram spread from his knuckles. Unlike other weapons, it automatically reloads.
- This is Doomfist's main form of self-followup to combos and general source of damage output.
- Hand Cannon is slightly off-set to the left similar to Zarya's Particle Cannon beam. This makes aiming at ranges within 10 meters a little more challenging.
- While strong at close range, the spread and damage falloff of this weapon makes it much less effective at medium to long range.
- While falloff begins at 15 meters, the spread of Hand Cannon will typically cause a portion of bullets per shot to miss starting at 12 meters.
- While ammo does replenish automatically, it does not happen instantly. Efficient use of ammo is key.
- Hand Cannon should be used just before and in between ability combinations to deal quick bursts of extra damage at no cost.
 Seismic Slam: Doomfist lunges at the ground and slams it with his gauntlet.
- Seismic Slam can be used to move in and out of fights very quickly.
- Seismic Slam can be utilised to very quickly farm ultimate charge and personal shields for Doomfist to work with.
- Seismic Slam can be cancelled with any other ability and will retain its momentum. The sooner it is cancelled, the more momentum is kept. This is a useful method to use for traversing maps at high speeds and navigating between high and low ground positions.
- Seismic Slam can be used after a Rocket Punch to carry the momentum of the Punch and extend the effective leap distance of Seismic Slam. This is commonly known as a Super Slam.
- Seismic Slam's micro-lock can be used to stop enemies trying to escape by controlling their movement if timed correctly.
- This micro-lock effect will always work on Wrecking Ball when in his Ball Form, regardless of if he is airborne or on the ground.
- Rocket Punch: Doomfist unleashes the power of his gauntlet to propel himself forward and impact the first object he hits. The ability will knock back enemy heroes and potentially slam them against walls, stunning them and dealing bonus damage.
- While charging his gauntlet, Doomfist is basically immobile. Use it to quickly enter battle or retreat. If deciding to attack with this ability, try to charge it behind a wall or from a safe position.
- Enemies hit will also knockback their nearby teammates alongside their pathway, potentially knocking them into walls, while receiving equal damage and stun. When empowered, the size of this extra knockback radius increases dramatically.
- For this knockback area to correctly apply when punching a construct Doomfist requires direct line of sight to the character.
- Rocket Punch will temporarily stun affected enemies when punched. It can be used to interrupt channeled ultimates and abilities such as Roadhog's
 Take a Breather or Cassidy's
  Deadeye. An extra stun of 0.15 seconds (up to 0.65 when Empowered) is also applied if the targets hit a wall.
 - Following up Rocket Punch with primary fire is a good way to get high burst damage. Punching enemies typically only helps Doomfist to guarantee a single followup shot, regardless of wall slam. An Empowered punch allows for more shots depending on the wall stun duration achieved.
- Rocket Punch can be cancelled during its charge at any time. If cancelled while Empowered, Rocket Punch will retain the Empowerment status unless cancelled with Seismic Slam.
- Rocket Punches stun effect will override and knock enemy players out of the frozen effect from Mei's
 Blizzard.
- Power Block: Doomfist puts up his fist in a blocking stance and blocks 75% of all damage taken from the front only. Mitigating 100 or more damage empowers your next Rocket Punch.
- While blocking, Doomfist is slowed to 65% of his normal movement speed.
- To maximize the probability of getting charged, looking down at approximately a 45° angle will expose Doomfist's head hitbox, effectively doubling the incoming damage to be blocked.
- There are two main methods to utilise Power Block effectively. Blocking/Tanking damage & Catching damage.
- Blocking/Tanking damage is self explanatory. Using block on incoming damage targeted at Doomfist will reduce it, allowing him to tank the incoming damage while simultaneously empowering his gauntlet. Be careful though as this method has the highest chance of failing to empower Doomfist's gauntlet since Doomfist is the primary target and players can chose to stop shooting him at any given moment, resulting in no empowerment and a wasted cooldown.
- Catching damage is a little different and can be risky to use depending on the enemies' team composition. Using block while jumping in front of allies who are the primary targets of incoming damage will allow Doomfist to simultaneously block incoming damage for his teammates and empower his gauntlet at the same time. This method almost always guarantees empowerment as Doomfist was not the primary target for the damage, so players will not typically register that they are feeding him a free empowerment and can't chose to not shoot him as easily.
- A 3rd more risky, selfish, and stylish method to utilise Power Block is what is known as Parrying or Flashing. Parrying is reserved for instances of incredibly high burst damage such as Cassidy's Deadeye or a Widowmaker taking a scoped shot, that can be held and let loose in a very controlled manner. Using block just before these abilities are fired at Doomfist will guarantee empowerment, but be careful as mis-timing Power Block will more often than not result in being eliminated.
 Meteor Strike (Ultimate): Doomfist's ultimate ability. Doomfist launches into the sky and disappears. He will then strike down with the force of a meteor.
- Meteor Strike is a good zoning tool — it can be used on the objective to force enemies to move away.
- For maximum effect, Meteor Strike should be combined with other crowd control effects like Mei's Blizzard or Junkrat's
 Steel Trap or used to repeatedly chain ability comobs together for extended periods of time.
 - During the landing animation, Doomfist is vulnerable to attacks and crowd control. Avoid using this ability without backup.
- Meteor Strike is best utilised as a tool to freely reposition and refresh Doomfist's cooldowns for another rotation in a fight or a tactical reset.
- This ability can be used to destroy important enemy units such as Symmetra's
 Teleporter, Torbjörn's Turret, Wrecking Ball's
  Minefield, Baptiste's Immortality Field or Mercy during
  Resurrect.
 - Meteor Strike applies a very powerful slow effect to all enemies caught within it's area of effect, use this slow to set up allied attacks to secure damage and eliminations much faster.
- Remember: Meteor Strike is a 3-D sphere, so it can affect enemies above and below the targeting reticle if placed correctly.
General Strategies
- Target Prioritisation: Who Should Doomfist Fight?
- Unlike other tanks, Doomfist should not focus very much of his attention on the tank matchup, even if it’s in his favour. While he can very easily control most tanks' movements and stop their advances, he does not present enough sustained threat to make a long-term impact on a team fight focusing the other tank. Doomfist’s time is better spent prioritising Damage and Support eliminations, only focusing on fighting the other tank when the risk of engaging his ideal targets outweighs the priority.
- Ideally, Doomfist should be looking to try and pick off targets that are alone and isolated from the team, or have just used resources for other things and don’t have capacity to fight back beyond simply shooting back. Targets like a Widowmaker that just used
 Grappling Hook or an Ana that has just used
  Sleep Dart are prime examples of targets deserving of Doomfist’s focus, as they have used key resources and are isolated away from the team.
 - A lot of Supports come with an increased measure of risk, as the more accessible targets often have strong countermeasures that can easily turn an engagement against Doomfist. Weighing up the risk/reward ratio of engaging any character is key.
- Maps, Modes, & Engagements: How to Manoeuvre the Battlefield
- Doomfist’s strengths and weaknesses are amplified by the maps he is on and the way they are designed. Some maps help Doomfist by providing ample amounts of natural cover and allow him to easily control how and when he engages enemies, while other maps might not provide much cover at all and may naturally force Doomfist into unfavourable scenarios, even when played well.
- Maps & Modes:
- Control (a.k.a King of the Hill/KotH) is where Doomfist is at his strongest. Maps like Oasis, Lijiang Tower, & Nepal make it very easy for Doomfist to work on as the objectives are locked in one place, allowing for Doomfist to freely move in and around them to engage enemies. Utilising the abundant natural cover, complex verticality, unique pathways and hazards crammed into their designs aid Doomfist into forcing unfavourable situations on enemy players.
- Hybrid & Escort (a.k.a Payload) modes are heavily map dependant for Doomfist to succeed. Maps like Circuit Royal, Dorado, Havana, and Blizzard World, are examples of maps that are very difficult for Doomfist to work on, as they’re open, very linear, and do not provide much natural cover, making Doomfist’s approach to engagements much harder to take securely and reliably. On the other side, maps like Numbani, King's Row, and Rialto give Doomfist ample flexibility to work on as they possess a lot of flank routes, unique designs, and abundant natural cover.
- Flashpoint is very similar to control and plays almost the exact same way, allowing Doomfist to succeed with ease. The only major difference is the map size and amount of control points. Flashpoint maps are the largest maps in the entire game and can cover up to 200 meters between two flashpoints. While this means nothing for Doomfist who can leap across most maps in an instant, it does mean that his team will often be far behind him in the transitions between flashpoints, leaving him alone and open to a group attack.
- Push is not too bad for Doomfist to work on, as the objective is constantly shifting positions. He is one of few characters that can reliably keep up with it, but it can be very hit-or-miss, depending on how the map is designed.
- Colosseo, for example, is designed somewhat like Circuit Royal and Havana, being very linear and open, making it difficult for Doomfist to be particularly effective, whereas Esperança is very complex and has a lot of verticality and flank potential to it, providing Doomfist with ample opportunity to make plays and initiate engagements.
- Doomfist can also struggle on map areas that become very enclosed and claustrophobic. Places like Eichenwalde's final section, Route 66's final section, and Antarctic Peninsula's Sublevel are all very enclosed areas that do not allow for very much freedom to move about. While they may offer flank routes, natural cover, and unique areas to work with, they still limit how freely Doomfist can move about the maps.
- Engagements:
- Engaging correctly as Doomfist is paramount to succeeding in a team fight. Unlike most other heroes in the game, Doomfist does not build up to a big impactful Ultimate ability. All of his power resides in his ability cycles, or his “neutral game”, which does not leave very much room for error, so care must be taken to ensure that engagements are properly and accurately assessed before they're taken. Measured and controlled use of abilities is incredibly important as each scenario dictates a different engagement method.
- For example, opening with Seismic Slam can be used to generate overhealth, brawl with and bruise enemy teams before selecting a target or two to isolate and focus on. It can also be used to initiate a dive on an isolated target. Alternatively, Seismic Slam could be left to last and used as a disengagement tool, if Doomfist chose to engage with Rocket Punch. Determining the best way to apply each ability for each scenario is what separates a good Doomfist from a bad Doomfist.
- For example, opening with
- Target acquisition and control is also incredibly important for Doomfist, as some scenarios require Doomfist to rapidly follow or swap between targets during fights. Keeping track of who is being targeted, and which targets can be swapped to for maximum effect can change the flow of a fight.
- If Doomfist has his ultimate Meteor Strike, he can play much more aggressively without fear of over-commitment, as the ultimate can be utilised as a dual purpose “get-out-of-jail-free” card and neutral reset, allowing him to cycle more cooldown rotations.
- Engaging correctly as Doomfist is paramount to succeeding in a team fight. Unlike most other heroes in the game, Doomfist does not build up to a big impactful Ultimate ability. All of his power resides in his ability cycles, or his “neutral game”, which does not leave very much room for error, so care must be taken to ensure that engagements are properly and accurately assessed before they're taken. Measured and controlled use of abilities is incredibly important as each scenario dictates a different engagement method.
- Maps & Modes:
- Space Creation & Area Denial
- Unlike other tanks, Doomfist’s space creation and denial is not as tangible or obvious as a Barrier or high impact cooldown, it is more abstract and can often be harder for his team to recognise. Doomfist cycles his cooldowns to apply pressure, uses cover and positions intelligently around the map to create off angles and draw attention away from the rest of his team to create space, essentially becoming a big distraction/threat the enemy team must deal with. This sounds very easy and simple to do, however, this is just step one. Doomfist must recognise if he can capitalise on whether the enemy team ignores him or focuses him.
- If the enemy team decides to focus Doomfist, he must continue to cycle cooldowns and look to survive their assault while disrupting as much as he can while his team capitalises on the space created. It is also important for Doomfist to understand if his team can recognise the space he has created in this situation or not and if they are enacting on it.
- If the enemy team choose to ignore Doomfist, that is when he must seek a target to pick himself, creating more direct and tangible space for his allies to capitalise on and more often than not immediately drawing all attention to himself once he attacks.
- Doomfist also excels at stalling objectives, especially when he has his ultimate. Cycling his cooldowns allows Doomfist to deal wide area damage, control when & where the enemy team can contest and sustain himself all at once.
- Play Smart, Not Hard: Brains > Brawn!
- Intelligent play is always encouraged on any hero in the game, but none more than Doomfist. Doomfist possesses the utility and means to elevate smarter play and grant opportunities to counter his counters, however, he lacks the raw power and threat to do this completely independently. A large part of Doomfist's gameplay is observing and gauging enemy and ally intelligence, and whether they possess the knowledge and capacities required to counteract or work with Doomfist properly. Doomfist must also be able to recognise if enemies or allies have the capacity to learn and adapt to the things Doomfist does mid-game.
- Mind-gaming enemy players is an incredibly strong tool for any tank to utilise, but Doomfist can utilise it a little more effectively than most. Baiting enemies into doing specific things or forcing cooldowns is one way for Doomfist to mind game enemy players and make them either waste resources, or in the case of the Punch/Block bait (where Doomfist charges Rocket Punch then cancels it with Power Block before releasing) to feed his empowerment. Doomfist can also use his hyper mobility to zoom around enemies to confuse and distract them without ever actually engaging on them.
- Voice line spamming can also mess with and infuriate enemy players to a degree. The most common voice line to perform this tactic with is the "And they say chivalry is dead" voice line. Be careful though, as there are hidden game mechanics in place to dampen this, so spacing out the voice lines is required.
AN DEY SAY! AN DEY SAY! AN DEY SAY! AN DEY SAY!..
- Getting Hard Countered
Countering Doomfist is all about resources and how they are utilised. Certain characters, pairings and entire team compositions can utilise and/or combine certain resources to hard-stop Doomfist and prevent him from attaining any value at all, no matter how well he plays. This section is dedicated to some of the hardest things Doomfist can face, wherein almost all these cases swapping to another tank is strongly advised, as Doomfist simply will not be able to get value playing against them. In cases where swapping is not required, Doomfist is recommended to ignore and avoid the problematic characters if he can.
- The Hard Stop Comp
- This specific composition is not a composition Doomfist can fight at all. It is recommended to swap to another tank that will be able to attain more value simply by existing. Featuring heroes like Roadhog, Echo, Sombra, Mercy & Zenyatta or Ana, this composition does not provide Doomfist with any room to work or any targets to try and engage on as all of the heroes involved are considered to be Doomfist’s hardest counters, so swapping is the only truly viable option.
- Chunky & Survivable Comps
- Featuring Roadhog, Zarya, Mauga or Orisa as the main tank and utilising any or all the characters with a base HP value greater than 250 provides Doomfist with very little opportunity to pick targets or create space. The raw HP pool to burn through alongside the utilities all of the bulkier heroes possess is far too much for Doomfist to handle. In cases like this, it can be map dependent on whether Doomfist should swap or not. Case-by-case judgement is required, but generally swapping is a better option.
- Counter Engagement Combos
- When paired together, Reinhardt & Mei work incredibly well. They both provide the utility and means to fully stop and counter a Doomfist’s engagement and ensure he is eliminated as a result. Reinhardt possesses the means to counter-charge and stun Doomfist while Mei can stop his engagements with her abilities and cut him off to prevent him disengaging. This is just one example, bit hero pairings like these can be quite dangerous for Doomfist, and it is recommended to avoid them and engage on other targets, or risk being entirely shut down.
- Support Combos
- Certain Support compositions can be extremely detrimental to Doomfist as they feed into each other repeatedly, preventing Doomfist from being able to do anything impactful. Combinations such as Brigitte/Zenyatta, Mercy/Baptiste and Kiriko/Lúcio all feed each other so incredibly powerfully that they make it difficult for Doomfist to attain any value. Note: These are not the only troublesome Support combinations, just some examples.
- The Brigitte/Zenyatta combo sees Brigitte act as a babysitter to Zenyatta, ensuring he stays alive for the purpose of amplifying his and the teams damage output with
 Orb of Discord which can be incredibly dangerous for Doomfist to deal with. On top of this, Brigitte is quite tanky for a support and poses a significant threat with her Shield Bash as it can stalemate a Rocket Punch very easily.
 - The Mercy/Baptiste combo is incredibly difficult to deal with as both of these supports combined output insane amounts of healing and can very easily undo/prevent any impact Doomfist provides. Baptiste’s
 Regenerative Burst (which is also AoE) doubles in strength for targets below 50% HP and Mercy’s Healing Beam is an easy to use, constant stream of HP/s. This makes them the ultimate combo in elimination prevention outside of instant burst damage eliminations, like a Hanzo or Widowmaker headshot. Targeting one or the other for elimination is also quite difficult, as either can heal the other or simply evade Doomfist with ease.
 - The Kiriko/Lúcio combo is difficult to deal with for two reasons. Doomfist struggles to reliably target both heroes and eliminate them as they are both incredibly mobile characters able to simply avoid Doomfist. Kiriko alone outputs a large amount of healing and possesses
 Protection Suzu to completely nullify anything Doomfist wants to do.
- The Brigitte/Zenyatta combo sees Brigitte act as a babysitter to Zenyatta, ensuring he stays alive for the purpose of amplifying his and the teams damage output with
- Certain Support compositions can be extremely detrimental to Doomfist as they feed into each other repeatedly, preventing Doomfist from being able to do anything impactful. Combinations such as Brigitte/Zenyatta, Mercy/Baptiste and Kiriko/Lúcio all feed each other so incredibly powerfully that they make it difficult for Doomfist to attain any value. Note: These are not the only troublesome Support combinations, just some examples.
- Pocketed Characters
- Certain characters when pocketed are too much for Doomfist to handle, even if he has a decent matchup against them. His hardest counters are virtually impossible to counteract when pocketed, no matter the skill difference.
- Characters like Sombra, Echo, Pharah, Tracer & Cassidy are exceptionally troublesome when pocketed, though that’s not to dismiss other pocketed characters as easy to deal with when pocketed. Depending on the Support pocketing them, almost all characters are impossible to eliminate without utilising an Empowered Rocket Punch and perfectly nailing the follow up shots in the head.
- Certain characters when pocketed are too much for Doomfist to handle, even if he has a decent matchup against them. His hardest counters are virtually impossible to counteract when pocketed, no matter the skill difference.
- Styling on Enemies: Counter the Counters
- Because of Doomfist’s virtually limitless potential, he has both the means and opportunity to completely counteract his hardest counters in the game (except for his Tank counters). The player’s confidence in their own ability can enable them to chase after those that have swapped to or are playing a strong counter to Doomfist to discourage them, break their confidence and affect their performance. Though this is a dangerous game to play, as making even one error in this chase or failing to secure the elimination will result in feeding.
- It has become somewhat of an unspoken culture among the more diehard Doomfist mains to always try and target the hardest counters wherever they can for the reason mentioned above, along with the idea of it providing an extra challenge to gameplay. Plus, it looks and feels awesome to punch a Pharah out of the sky or perfectly predict a Tracer’s Recall & Blinks.
- Player discretion is heavily advised when attempting to engage in these chases.
- Techs: Knowledge is Power
- Doomfist is one of the most complex and unique characters in the game, and as a result, various ability techniques dubbed “techs” (short for techniques) have been discovered and refined for application during gameplay. While these techs have played a defining role in Doomfist as a character ever since his introduction to the game, their utilisation is not entirely necessary for success.
- The 5 most common techs will be listed here, but that does not mean these at the only techs available to Doomfist. For a more comprehensive list along with guides on how to execute all of these plus more, head to GetQuakedOn’s YouTube Channel. They are the community creator pioneering Doomfist’s skill ceiling with new and unique techs.
- Only one tech is absolutely necessary for Doomfist to play well and that is our first tech.
- Momentum Conservation:
- This is a universal tech for all mobility in the game, but sees its application applied more on Doomfist than anywhere else. Momentum conservation is essentially cancelling an ability mid-motion to stop the abilities effects from happening, while conserving and utilising the momentum gained by it. This is the only essential tech for Doomfist to regularly apply, as it is what grants him his hyper mobility. The best example of its application on Doomfist is cancelling Rocket Punch with jump to fly forward freely.
- The Rocket Bounce:
- The Rocket Bounce was one of the first ever techs to be discovered for Doomfist and grants his Rocket Punch vertical mobility. This tech is executed by cancelling Rocket Punch just before impacting a surface with Doomfist’s feet and can send him flying upwards into the sky. The later the cancel, the higher the bounce can be.
- Is this tech necessary for effective play? No, but if time is invested to learning and understanding the way it works, it can open more opportunities to path find around maps in unique and unpredictable ways, including using enemy players as surfaces.
- The Rocket Bounce was one of the first ever techs to be discovered for Doomfist and grants his Rocket Punch vertical mobility. This tech is executed by cancelling Rocket Punch just before impacting a surface with Doomfist’s feet and can send him flying upwards into the sky. The later the cancel, the higher the bounce can be.
- The Diagonal Punch:
- Much like the Rocket Bounce, the Diagonal Punch adds vertical momentum to Rocket Punch, however, it does not require the punch to be cancelled, allowing the ability to retain its damage and stunning properties.
- Is this tech necessary for effective play? No, although it is extremely useful for engaging with Rocket Punch from different elevations, as not many players consider the Diagonal Punch as an option for Doomfist to fight them with while they are at a different elevation.
- Much like the Rocket Bounce, the Diagonal Punch adds vertical momentum to Rocket Punch, however, it does not require the punch to be cancelled, allowing the ability to retain its damage and stunning properties.
- The Super Slam:
- The Super Slam is a combination tech featuring Rocket Punch, Seismic Slam and the application of the momentum conservation tech. Utilising the momentum conservation tech to carry the momentum of a Rocket Punch into a Seismic Slam this tech can increase the distance that can be travelled by the Seismic Slam by up to 3x. Executing this tech is as easy as cancelling a Rocket Punch with jump then immediately using Seismic Slam.
- Is this tech necessary for effective play? Kind of. The Super Slam is a very useful hyper mobility tech to allow Doomfist to rollout from spawn with unmatched speed, so it is recommended to always use it out of spawn unless the fight is at or near the spawn room.
- The Super Slam is a combination tech featuring Rocket Punch, Seismic Slam and the application of the momentum conservation tech. Utilising the momentum conservation tech to carry the momentum of a Rocket Punch into a Seismic Slam this tech can increase the distance that can be travelled by the Seismic Slam by up to 3x. Executing this tech is as easy as cancelling a Rocket Punch with jump then immediately using Seismic Slam.
- The Crouch Slam Effect:
- The Crouch Slam Effect is an intriguing effect with multiple trigger methods. It essentially removes the arcing leap from Seismic Slam, and in return, Doomfist sticks to the floor and glides along it before slamming. The most common trigger method for this tech is a tech known as the Stair Slam, but it can also be triggered by enemy abilities that possess high gravity effects like Ramattra’s Ravenous Vortex or Sigma’s Gravitic Flux.
- Is this tech necessary for effective play? No. If anything, this effect can actually be detrimental to the player unless they are keenly aware of it, how it can be triggered and what can be done with it, as it cuts the mobility and flexibility out of Seismic Slam and forces Seismic Slam to become very limited.
- The Crouch Slam Effect is an intriguing effect with multiple trigger methods. It essentially removes the arcing leap from Seismic Slam, and in return, Doomfist sticks to the floor and glides along it before slamming. The most common trigger method for this tech is a tech known as the Stair Slam, but it can also be triggered by enemy abilities that possess high gravity effects like Ramattra’s Ravenous Vortex or Sigma’s Gravitic Flux.
- Bugs: How Bad is It?
- Doomfist is a very problematic hero when it comes to his functionality. His entire kit is designed around hyper mobility and melee attacks which don’t particularly mix together too well. As a result, Doomfist usually has a lengthy list of issues plaguing one or more aspects of his kit, ranging from incredibly minor animation issues to game changing ability failures and everything in between. It is important to familiarise oneself with these issues so that the player can avoid situations where they might occur more frequently or recognise when they do and don’t occur.
- All of these issues are tracked and updated each patch in a document dubbed The Hydra
(name selected for comedic purposes).
Match-Ups and Team Synergy
Tank
| Hero | Match-Up | Team Synergy |
|---|---|---|
 D.Va |
EVEN -> STRONG MATCHUP | MEDIUM RISK
Compared to most other Heroes, D.Va cannot negate most of Doomfist’s damage with her
Doomfist can also effectively negate D.Va's attempts to dive a target of choice with Rocket Punch, as it is on a slightly shorter cooldown than D.Va's D.Va's D.Va's D.Va vs. Doomfist is very much a skill- and knowledge-based matchup as both heroes share similar goals in team fights, though Doomfist features more utility and direct threat, so it is a little bit easier for him to be on the front foot. |
This Synergy can only occur in Gamemodes with no role-locks or if an Echo is present. STRONG SYNERGY Like Doomfist, D.Va fits well into brawl and dive compositions. She can protect Doomfist and enable him to be extra tanky in brawl situations while also being able to dive with him and more efficiently eliminate targets.
|
 Domina |
EVEN -> WEAK MATCHUP | HIGH RISK
Domina’s architectural lockdown can be extremely frustrating for Doomfist to navigate. While Rocket Punch naturally ignores her
Domina's Ultimate, |
This Synergy can only occur in Gamemodes with no role-locks or if an Echo is present. STRONG SYNERGY Domina's ability to command space perfectly complements Doomfist. She can provide long-range poke and a massive 6075-HP
|
 Doomfist |
MIRROR MATCHUP | MEDIUM RISK
Mirror matchups always boil down to one major factor: Who has the better team resources?
Possessing a team that can more efficiently and effectively work with and against a Doomfist will provide the player with a significant advantage when engaging in the mirror matchup. If one Doomfist has an easier time engaging, then he has more freedom and flexibility to dominate the game. This is especially powerful when Empowerment is factored in, as the Doomfist who utilises It is important to note that the mirror matchup is one of two matchups where Doomfist can focus the other tank reliably, as he can very effectively control and negate his own abilities without sacrificing his regular value. Interrupting an enemy Doomfist's ability cycling can prevent him from building overhealth and ultimate charge, slowing his process down considerably. It is also important to keep in mind that Rocket Punch is one of two abilities in the game that can directly disrupt |
This Synergy can only occur in Gamemodes with no role-locks or if an Echo is present. MIRROR SYNERGY Doomfist's mirror synergy is a hellish combination to deal with. Doomfist has enough self-sustain, mobility, and damage output that when doubled can wipe entire teams with little to no effort. Doomfist requires a lot of resources to pin down, so double the Doom means double the resources required.
|
 Hazard |
STRONG MATCHUP | MEDIUM RISK
Hazard is a highly mobile, close-range brawler much like Doomfist, but Doomfist possesses a distinct advantage in their duels. Hazard relies heavily on
Be mindful of Hazard's Hazard's Ultimate, |
This Synergy can only occur in Gamemodes with no role-locks or if an Echo is present. STRONG SYNERGY Hazard and Doomfist form a terrifying, hyper-mobile dive duo. Hazard's
|
 Junker Queen |
EVEN -> WEAK MATCHUP | HIGH RISK
Junker Queen is not a particularly favourable matchup for Doomfist as she outputs a much higher amount of damage over a more sustained period, though he can dampen and restrict this output quite easily. Because Rocket Punch has such a short cooldown, Doomfist can look to cancel Junker Queen's
Doomfist must take care not to get stuck by her Doomfist cannot block any of the bleed damage Junker Queen inflicts but can block the impact damage each ability deals. It is also important to be aware of Junker Queen's Commanding Shout, as it provides her allies with +50 Overhealth, making it quite painful to finish off a target if they gain its effects. Both Doomfist and Junker Queen are quite similar and share similar goals in team fights. Each aims to severely punish and capitalise on mistakes made by the enemy team or focus on eliminating squishy characters; the first to do either of these successfully is usually the winner of the team engagement. |
This Synergy can only occur in Gamemodes with no role-locks or if an Echo is present. STRONG SYNERGY Like Doomfist, Junker Queen is a brawl master aiming to output steady and high damage while also sustaining herself in a fight, making this combo a nightmare to fight. Capitalising on each other's damage and ability usage to secure eliminations is the key to success. One specific combo to make short work of entire enemy teams is using Rocket Punch to bunch everyone up before Junker Queen uses her
|
 Mauga |
WEAK -> VERY WEAK MATCHUP | EXTREME RISK
Mauga has only one goal on the battlefield: tank busting. His sheer damage output from his weapons "Cha-Cha" (
Doomfist must also be mindful of Mauga's Mauga’s Mauga’s |
This Synergy can only occur in Gamemodes with no role-locks or if an Echo is present. GOOD SYNERGY Like most other heroes, Doomfist can benefit greatly from the effects of an allied Mauga’s
Mauga’s |
 Orisa |
WEAK -> VERY WEAK MATCHUP | EXTREME RISK
Orisa’s
Rocket Punch can be used to interrupt Orisa's Orisa's Orisa's Ultimate |
This Synergy can only occur in Gamemodes with no role-locks or if an Echo is present. GOOD SYNERGY Orisa has excellent crowd control and resistance capabilities, allowing her to effectively act like a large distraction and control where the enemy team is positioned, enabling Doomfist's brawling style and allowing him to make effective use of the AoE portions of his abilities.
|
 Ramattra |
EVEN -> STRONG MATCHUP | MEDIUM RISK
Ramattra can square off quite well against Doomfist; he has very strong poke capabilities,
Utilizing Rocket Punch to continuously disrupt him in his Omnic form will keep him at bay for the rest of the team to focus him down. Keep in mind that Ramattra's When in Nemesis form, Ramattra will usually want to get up close to deal damage or take focus with his block. Ideally, Doomfist will want to keep punching Ramattra away from his team to minimize any damage he can do, but getting behind him and timing a Rocket Punch to knock him into allied team members as Nemesis form ends can leave Ramattra vulnerable to focus fire. Ramattra's ultimate, |
This Synergy can only occur in Gamemodes with no role-locks or if an Echo is present. SITUATIONAL SYNERGY Ramattra and Doomfist don't have very much direct synergy outside of
|
 Reinhardt |
EVEN -> STRONG MATCHUP | HIGH RISK
Reinhardt is a challenging tank to “toss around” like Doomfist can do to other tanks, simply because both Doomfist and Reinhardt occupy the same effective attacking range, with Reinhardt having a much higher damage output and health pool than Doomfist. Reinhardt will have a hard time keeping up with Doomfist's mobility, though, so he can use this to his advantage.
Rocket Punch can be used to force Reinhardt’s Reinhardt can very easily provide Doomfist with Empowerment. His Taking the full force of Reinhardt's |
This Synergy can only occur in Gamemodes with no role-locks or if an Echo is present. STRONG SYNERGY Reinhardt and Doomfist work very well together due to the fact they must both engage at a very close range (brawl). Having Reinhardt nearby allows Doomfist to focus more on dealing damage and less on escaping, as Reinhardt can use his
|
 Roadhog |
VERY WEAK MATCHUP | EXTREME RISK
Facing a Roadhog is usually a bad idea unless elimination is guaranteed. Both characters excel at close-range combat; however, Roadhog deals far more damage than Doomfist, has far more health, and can out-sustain Doomfist with his
Roadhog's Roadhog's ultimate Doomfist should refrain from engaging in combat with Roadhog at all costs and make sure to keep out of his hook range. Doomfist should avoid Roadhog and disrupt his team resources so that he can be focused down more easily by the rest of Doomfist's allies. A surefire way for Doomfist to gain a small advantage is to try using Rocket Punch to cancel Roadhog's self-heal or interrupt his hook when an ally is caught, though these advantages are very small and difficult to exploit. |
This Synergy can only occur in Gamemodes with no role-locks or if an Echo is present. WEAK SYNERGY There is no known synergy between Roadhog and Doomfist other than capitalising on an ally Roadhog's
|
 Sigma |
STRONG MATCHUP | LOW RISK
Sigma is generally a favourable match-up for Doomfist. Sigma's incredibly high damage output is very useful for Power Block, as a single volley of his
Accretion does feature a stun, which can make Doomfist vulnerable if hit by it. Wait for Sigma to use Accretion on another target before engaging him or try to cancel it with Rocket Punch. A well-timed Rocket Punch can also cancel Sigma's Doomfist must be mindful of Sigma's Sigma's ultimate Gravitic Flux cannot be blocked using Power Block, so do not try to. |
This Synergy can only occur in Gamemodes with no role-locks or if an Echo is present. SITUATIONAL SYNERGY |
 Winston |
EVEN -> STRONG MATCHUP | LOW RISK
Winston's value comes from the team resources he receives along with the way he plays around his
Doomfist does not possess enough damage to break Winston's barrier, so utilising Rocket Punch can lower its value by pushing Winston out of it to take damage and cut him off from his team, forcing him to retreat. The Best Defense... can help keep Doomfist alive in a 1v1 duel with Winston; however, his Seismic Slam's micro-lock can be used to prevent Winston from leaping away back to his team with his Doomfist can also control Winston for a short amount of time during his |
This Synergy can only occur in Gamemodes with no role-locks or if an Echo is present. STRONG SYNERGY Winston and Doomfist diving into the enemy team is a strong combination; Winston's
|
 Wrecking Ball |
EVEN MATCHUP | LOW RISK
The Wrecking Ball match-up is one of Doomfist's most even matchups in the tank roster, as he is essentially a less lethal but vastly more bulky version of Doomfist. Both Seismic Slam and Rocket Punch will stop a Wrecking Ball from achieving his 'Fireball' state, and Rocket Punch can completely nullify a
The best Doomfist can do is try to stall and stop a Wrecking Ball from setting up his allies or from being a general nuisance to the team. Alternatively, should the Doomfist have the freedom to do so, eliminating an enemy Wrecking Ball's team faster than he can setup will drastically reduce his value as the team's focus will no longer be split. Wrecking Ball's Piledriver can almost provide enough damage to fully empower Doomfist's gauntlet, provided he is close enough to the impact point, and walking into an active |
This Synergy can only occur in Gamemodes with no role-locks or if an Echo is present. STRONG SYNERGY Wrecking Ball has high synergy potential with Doomfist as both characters are great at controlling where enemies are positioned. Wrecking Ball can knock enemies into positions for Doomfist to capitalise on and vice versa. More specifically, Wrecking Ball can set up a Meteor Strike with his
|
 Zarya |
EVEN -> WEAK MATCHUP | HIGH RISK
Be careful of Zarya's
If Zarya is charged up high enough, she can very easily empower Doomfist's gauntlet with her primary and secondary fires. Her |
This Synergy can only occur in Gamemodes with no role-locks or if an Echo is present. EXCEPTIONAL SYNERGY Zarya and Doomfist pair exceptionally well together. Zarya can apply her
|
Damage
| Hero | Match-Up | Team Synergy |
|---|---|---|
 Anran |
MEDIUM PRIORITY TARGET | HIGH RISK
Anran’s extreme mobility and Flanker sub-role passive make her very difficult to track down, as she can sustain herself behind enemy lines without her team. Her
Her |
STRONG SYNERGY
Anran and Doomfist thrive in a split-dive composition. Because Anran gains 325 HP from large health packs, Doomfist's supports do not need to split their attention to keep her alive. If Doomfist initiates with Seismic Slam and draws the enemy's cooldowns, Anran is free to safely build her Ignition meter on the distracted targets.
|
 Ashe |
HIGH PRIORITY TARGET | MEDIUM RISK
Due to Doomfist's large hitbox, Ashe won’t have a hard time landing damage from her weapon
Doomfist can use Power Block against an Ashe to Empower Rocket Punch relatively easily since Ashe deals very high damage; however, it is worth noting that her Doomfist can also effectively counter and displace |
GOOD SYNERGY
Ashe and Doomfist don't have any direct or notable synergies outside of capitalizing on the space Doomfist creates. Using this space can allow Ashe to deal damage and pick off targets of her choice from a safe range.
Doomfist & |
 Bastion |
MEDIUM PRIORITY TARGET | EXTREME RISK
It is advised that Doomfist plays extra carefully when going up against a Bastion, as his raw damage output (particularly in
While Doomfist can attain Empowerment from an Assault Mode Bastion very easily, it is advised to do this at a range where Doomfist can retreat safely once Empowered. Doomfist cannot use Rocket Punch to knock Bastion out of Assault mode, so being close to him is usually a death sentence due to how large Doomfist is and how much damage Bastion can pump out. Bastion's Ultimate: |
SITUATIONAL SYNERGY
Bastion and Doomfist don't have any direct or notable synergies outside of capitalizing on the space Doomfist creates. Using this space can allow Bastion to freely mow down any targets of choice from a safe distance or even secure free kills with his Ultimate:
|
 Cassidy |
MEDIUM PRIORITY TARGET | HIGH RISK
Cassidy is a bit painful for Doomfist to deal with. He is quite tanky for a DPS, has strong damage output and minor CC capabilities, and both his
Cassidy is an easy source for Empowerment, as his Cassidy's Deadeye is a lethal ultimate, but Doomfist has two ways to counteract it. Doomfist can interrupt it with Rocket Punch and cancel it entirely or take a risk and Parry the ultimate with Power Block for free Empowerment. |
GOOD SYNERGY
Cassidy and Doomfist don't have any direct or notable synergies outside of capitalizing on the space Doomfist creates. Using this space can give Cassidy the freedom to pick off key targets or go on flanks without anyone noticing.
If someone is trying to hide from an ally Cassidy's |
 Echo |
LOW PRIORITY TARGET | MEDIUM RISK
Echo usually spends most of her time flying in the air well outside of Doomfist's normal reach using her
Everything in Echo's kit can be blocked by Power Block, including her Since Echo's Ultimate |
EXCEPTIONAL SYNERGY
Doomfist is exceptionally efficient at bursting targets down to just below half HP with his combos; combining a Doomfist's dive with Echo's
Echo's |
 Emre |
MEDIUM PRIORITY TARGET | HIGH RISK
Emre's aggressive run-and-gun combat style means he wants to fight in the same brawling range as Doomfist. His
However, Emre heals himself for 80% of the damage dealt by his Siphon Blaster. Doomfist must use Power Block to deny him this lifesteal if Doomfist cannot secure the stun, or Emre will effortlessly out-sustain the duel. When Emre enters |
GOOD SYNERGY
Emre's high tempo matches Doomfist perfectly. Because Emre can self-sustain incredibly well with
|
 Freja |
HIGH PRIORITY TARGET | HIGH RISK
Freja controls engagements through verticality and tethers, making her a massive nuisance to Doomfist. Her
Her ultimate, |
EXCEPTIONAL SYNERGY
Freja's kit feels specifically designed to set up Doomfist. Her
Additionally, her Recon sub-role passive provides Doomfist with thermal silhouettes of any enemy below 50% health, telling him exactly who to dive through walls for an easy execution. |
 Genji |
MEDIUM -> HIGH PRIORITY TARGET | MEDIUM RISK
Genji is much like Doomfist with his diving and burst potential qualities, so keeping track of him is key, and pinning him down alone is difficult due to his extreme mobility. Genji will often poke from a distance before trying to all-in onto an ally and burst them down with a quick combo, something that Doomfist can interrupt with Rocket Punch if he is fast enough.
Should a Genji be When Genji uses his If a Genji tries to wall climb to escape from Doomfist's Meteor Strike, simply landing where he falls after his wall climb expires, or on the higher surface he is climbing to, is a reliable way to eliminate Genji with Meteor Strike, provided he does not have his |
STRONG SYNERGY
Genji and Doomfist synergize together exceptionally well in a Dive composition but also both require excessive healing to work well; expert coordination is key as the healing requirements of both characters will put extra strain on the supports.
Diving the same targets together will make extremely short work of them and allow both characters to chain into the next engagement efficiently. However, if the engagement goes wrong, both Genji and Doomfist have escape options and can protect or draw focus away from each other to make their escape. |
 Hanzo |
MEDIUM -> HIGH PRIORITY TARGET | HIGH RISK
Hanzo is a very useful character to fight as Doomfist, albeit also very annoying. All of Hanzo's damage is incredibly high burst damage, making it virtually guaranteed to attain Empowerment if Doomfist catches a shot or two with Power Block. Hanzo's Ultimate:
Hanzo is quite easy to pin down and eliminate, regardless of whether he has used his Hanzo's If a Hanzo tries to wall climb to escape from Doomfist's Meteor Strike, simply landing where he falls after his wall climb expires or on the higher surface he is climbing to is a reliable way to eliminate him with Meteor Strike, provided he does not have his lunge. |
GOOD SYNERGY
Hanzo and Doomfist synergize quite nicely together purely because of Hanzo's
|
 Junkrat |
MEDIUM -> HIGH PRIORITY TARGET | HIGH RISK
Junkrat is quite useful for Doomfist to fight as his damage is incredibly high and often uncontrolled, making Empowerment incredibly easy to get from random bombs around the map. One bomb is enough to fully empower Doomfist's gauntlet.
Junkrat can be quite easy to burst down and eliminate quickly so long as he doesn't have a Junkrat’s Steel Trap can almost fully Empower Doomfist's gauntlet on its own, so it can be used to finish off an Empowerment or bait people into finishing Doomfist's Empowerment, though this is ill-advised as being trapped usually results in death. Junkrat's passive Junkrat's |
GOOD SYNERGY
Junkrat and Doomfist don't have any direct or notable synergies outside of capitalising on the space each character creates.
Outside of space creation, Junkrat's |
 Mei |
LOW -> MEDIUM PRIORITY TARGET | HIGH RISK
Mei can be extremely painful for Doomfist to fight but also possesses the capacity to help Doomfist bully the enemy team harder. Mei is less of a priority elimination target than other characters and more of an avoid character, as she has high HP for a DPS alongside good survivability and extreme utility. The high DPS output from her
Mei's Mei's There is nothing Doomfist can realistically do about a Mei's |
STRONG SYNERGY
Mei and Doomfist pair exceptionally well together in a death ball or brawl composition. Mei's
Mei's |
 Pharah |
LOW PRIORITY TARGET | MEDIUM RISK
Pharah usually spends most of her time flying in the air well outside of Doomfist's normal reach using a combination of her
Pharah's Pharah's |
SITUATIONAL SYNERGY
Pharah and Doomfist don't have any direct or notable synergies outside of capitalizing on the space each character creates.
Doomfist's setups can also often help an ally Pharah land direct hits or increased splash damage. |
 Reaper |
LOW -> MEDIUM PRIORITY TARGET | HIGH RISK
Reaper and Doomfist both excel in close-quarters combat; however, Reaper possesses an edge over Doomfist as his damage output is far greater than Doomfist's, plus he heals a portion of the damage he deals. Reaper is a low-priority elimination target and more of an avoid target, as he will outclass Doomfist more often than not, even with Power Block.
It is not ever advised to take a Reaper head-on. However, if Doomfist does choose to fight a Reaper, he must use his abilities effectively to bait out Reaper's Reaper's |
STRONG SYNERGY
Reaper and Doomfist pair quite well together in most team compositions.
For more dive-oriented compositions, Reaper's For brawl and death ball-oriented compositions, Reaper's exceptional strength in close-quarters combat allows him to make short work of targets alongside Doomfist. |
Shion |
TBA MATCHUP OR PRIORITY | TBA RISK
Matchup details for Shion are currently missing. You can help the Overwatch Wiki by adding them!
|
TBA SYNERGY
Team synergy details with Shion are currently missing. You can help the Overwatch Wiki by adding them!
|
 Sierra |
HIGH PRIORITY TARGET | LOW RISK
Sierra operates heavily at mid-range, making her vulnerable when Doomfist closes the gap. Her
Sierra's |
STRONG SYNERGY
Sierra's
|
 Sojourn |
HIGH PRIORITY TARGET | HIGH RISK
Sojourn is a very difficult character to fight.
Sojourn can avoid Doomfist with her Sojourn's incredible damage output makes it relatively easy for Doomfist to farm Empowerment from her. Her Railgun Alt-Fire will provide guaranteed Empowerment if it is fully charged regardless of whether she lands a headshot or not. Doomfist can also very easily farm Empowerment off her Sojourn's |
GOOD SYNERGY
Sojourn and Doomfist don't have any direct or notable synergies outside of capitalizing on the space Doomfist creates. Using this space can allow Sojourn to deal damage and pick off targets of her choice from a safe range or go on flanks without anyone noticing.
|
 Soldier: 76 |
HIGH PRIORITY TARGET | LOW RISK
Soldier: 76 is an easy pick for Doomfist. While a Soldier will beat Doomfist if he keeps his distance, Doomfist can very easily close that distance and combo Soldier out of the game. A Soldier: 76 will likely drop his
Soldier: 76 can also provide quick and easy Empowerment charge with his Soldier: 76 can also be forced to provide Doomfist with Empowerment through his Ultimate: |
GOOD SYNERGY
Soldier: 76 and Doomfist don't have any direct or notable synergies outside of capitalizing on the space Doomfist creates. Using this space can allow Soldier to deal damage and pick off targets of his choice from a safe range or go on flanks without anyone noticing.
|
 Sombra |
LOW PRIORITY TARGET | EXTREME RISK
Sombra is one of the largest threats to Doomfist in the DPS roster, as she can disrupt him at any given moment and shut him down, forcing him to retreat with her
Depending on when Doomfist is hacked determines how he recovers; if Doomfist is hacked during Rocket Punch or Seismic Slam he is usually forced to stop his attacks and retreat. If he is hacked while blocking though, he needs to try and attain some overhealth with one ability then escape with the other. Committing and going deeper is not an option as being hacked also reveals Doomfist's location through walls similar to Widowmaker's Sombra's Sombra's |
EXCEPTIONAL SYNERGY
Sombra and Doomfist pair exceptionally well together. Sombra can reveal up to two enemies at a time with
|
 Symmetra |
MEDIUM -> HIGH PRIORITY TARGET | HIGH RISK
Symmetra is a little tricky to fight: she has an incredibly slim hitbox alongside semi-decent mobility, tricky utilities to mess with players, and can wield damage that cannot be out-healed. Symmetra's
Fighting Symmetra near her Symmetra's Symmetra's |
STRONG SYNERGY
Symmetra and Doomfist synergize quite well together. Her
Doomfist can also ensure that targets stay within range of Symmetra's |
 Torbjörn |
MEDIUM PRIORITY TARGET | MEDIUM RISK
Torbjörn isn’t a problem for Doomfist unless he’s in
Although Torbjörn’s Punching the Turret will still trigger the blastback effects of Rocket Punch, something that not many players are aware of and will be caught off guard by. Torbjörn’s |
SITUATIONAL SYNERGY
Torbjörn and Doomfist don't have any direct or notable synergies outside of capitalizing on the space Doomfist creates. Using this space can allow Torbjörn to deal damage and pick off targets of his choice from a safe range or go on flanks without anyone noticing.
Outside of space creation, Doomfist can ensure that enemies stay within allied |
 Tracer |
LOW PRIORITY TARGET | HIGH RISK
Tracer is one of Doomfist's hardest counters in the entire game. She is the only character that can easily and reliably avoid all of Doomfist's abilities and burn him or his team down with ease. Doomfist should not try to hunt down and fight a Tracer; he is better off leaving her for the rest of the team to deal with or using a Rocket Punch to catch her off guard mid-dive and force her to retreat.
Tracer vs. Doomfist becomes somewhat of a dance when in a 1v1; Doomfist can only win if he can out-mind-game the Tracer and bait her into Empowering him, which is exceedingly difficult to do. Should Tracer stick Doomfist with her |
STRONG SYNERGY
Tracer and Doomfist pair exceptionally well together in a dive-oriented composition. Doomfist can all in on a target of choice while Tracer zips in and out of the fight to help secure eliminations.
|
 Vendetta |
MEDIUM PRIORITY TARGET | EXTREME RISK
Vendetta is a highly aggressive melee fighter, meaning you both occupy the exact same engagement range. Doomfist has the upper hand in neutral brawls because his Rocket Punch completely bypasses Vendetta's
However, Vendetta's ultimate, |
STRONG SYNERGY
Vendetta is one of the best dive partners for Doomfist. Because her
|
 Venture |
MEDIUM PRIORITY TARGET | MEDIUM RISK
Venture can be difficult to deal with, but it's ultimately dependent on who can manage their cooldowns better. Venture's kit deals fairly big burst damage in comparison to other damage heroes, but this can be used to Doomfist's advantage. They'll likely want to avoid you, as they get most of their value from eliminating your damage and support teammates with their burst damage, so while you can trust your team to deal with them, helping can resolve the issue quicker.
Both their Burrow and Drill Dash can be cancelled with a well-timed Rocket Punch, which can prevent a lot of their damage potential, as well as prevent them from getting away if they're trying to escape. Just be wary of their Smart Excavator, as it can deal good consistent damage to Doomfist, especially as he's an easy to hit target. Their ultimate Tectonic Shock deals big, heavy damage, but more importantly it lasts a long while. Doomfist has no way of defending his teammates from it, so the best option is to either avoid it completely or try eliminating Venture without getting eliminated first. |
STRONG SYNERGY
Venture is a high-speed type of damage hero. If they fully engage, they'll have to commit all their cooldowns and will likely secure a kill. Due to their limited range and variety of movement abilities, they pair well with Doomfist as they both work best in close-range fights.
To say the least, if Doomfist and Venture team up, it'll be a pain for the enemy team. Together, they can eliminate most enemies, including tanks. But it may be a challenge for your team to keep up, so be considerate of others on your team, as they may be targeted by the enemy. |
 Widowmaker |
EXTREMELY HIGH PRIORITY TARGET | LOW RISK
Widowmaker is a huge threat to all players in the game; with her low HP, she is priority target #1 for Doomfist at all times. Doomfist can very easily dive a Widowmaker and secure her elimination. Communication is key, and use of the ping system is important to let allies know where she is at all times to minimize her impact. Widowmaker will likely try to escape back to her team with her
Doomfist can bait Widowmaker into shooting at him and Parry the shot for guaranteed Empowerment, though this is a very risky strategy to employ, so it is not always recommended. When a Widowmaker activates her |
GOOD SYNERGY
Widowmaker and Doomfist don't have any direct or notable synergies outside of capitalizing on the information Widowmaker's
|
Support
| Hero | Match-Up | Team Synergy |
|---|---|---|
 Ana |
HIGH PRIORITY TARGET | EXTREME RISK
Ana is a very strong counter option to Doomfist's 'all-in' nature. Aside from being a very generally strong source of healing, Ana's
It is important to keep both abilities in mind when initiating an engagement; it is usually best to wait them out before engaging, as they both have incredibly long cooldowns, leaving Ana open and vulnerable to being burst down as she possesses no mobility. Ana's |
EXCEPTIONAL SYNERGY
Ana and Doomfist pair exceptionally well together with only one glaring flaw in their synergy: positioning. It can be difficult for an Ana to position well enough to maintain consistent healing on Doomfist, as she is usually in the allied backline while Doomfist spends a lot of time in the enemy backlines. However, all of Ana's abilities provide Doomfist with immense power surges, allowing him to more easily secure eliminations and sustain lengthy fights.
Ana's |
 Baptiste |
HIGH PRIORITY TARGET | MEDIUM RISK
Baptiste's incredibly high healing output coupled with his
While Immortality Field (a.k.a "Lamp") can be destroyed with ease, it does provide Doomfist with some challenges. So long as Baptiste has his lamp, Doomfist is unable to reliably all-in on a target on his own, as he does not possess the capabilities to burst down a character and the lamp in the same dive, even while Empowered. While Doomfist can knock people out of the lamp's radius with Rocket Punch, they can still get healing from Baptiste's When diving as a coordinated team, it is possible to overcome the lamp and healing output through sheer force, so coordination is key when fighting a Baptiste. Baptiste's |
GOOD SYNERGY
Baptiste and Doomfist pair well together but suffer from different positioning priorities. While Baptiste can lob his healing projectiles and
|
 Brigitte |
MEDIUM PRIORITY TARGET | MEDIUM -> HIGH RISK
Brigitte occupies the same damage range as Doomfist but can very easily outlast Doomfist in a 1v1, as her passive
Doomfist must be careful when using Rocket Punch to engage near a Brigitte, as her Shield Bash can stun Doomfist and knock both characters to the ground. While this scenario is not favourable for either party, Brigitte's passive healing and armor puts her at a small advantage to survive. Brigitte’s When Brigitte uses |
STRONG SYNERGY
Brigitte and Doomfist pair exceptionally well together in brawl-oriented compositions as they both share the same damage range and self-sustain through fighting. So long as Brigitte can reliably trigger
Outside of a brawl setting, Brigitte cannot help Doomfist very much. |
 Illari |
MEDIUM -> HIGH PRIORITY TARGET | MEDIUM RISK
Illari is a very dangerous support for Doomfist to fight. Her Solar Rifle is a long-ranged, high-damage-dealing weapon that will chip Doomfist's health down quite quickly. Two fully charged shots will provide Doomfist with empowerment, so it is worth trying to bait her into shooting Doomfist. Illari is somewhat weak to being dove, so getting in close and bursting her down quickly is the key to success. Bursting an Illari down (or any other squishy target) can prove exceptionally challenging if her Healing Pylon is nearby. This pylon is a construct, and acts as an automatic healer for nearby enemies and begins healing the instant they lose HP, forcing Doomfist to overcommit to try and secure the elimination. Ensuring the Pylon is destroyed before engaging or engaging on targets not near it will make securing eliminations much easier. Like other select constructs in the game, Rocket Punch's blastback can be triggered by punching it, a feature not many people are aware of.
Her Solar Rifle Alt Fire heals 105 HP/s, ensuring that whoever she is healing in the moment with this beam does not die short of being focused by 4 enemy players or being anti-naded. The moment Illari begins healing someone with this beam, they cannot be eliminated by Doomfist alone unless he stuns them with an Empowered Punch. Disengaging is generally advised. Illari also has a minor form of burst mobility and knockback through her Outburst ability. This presents more of an inconvenience than a problem to Doomfist, as it forces him to re-adjust slightly to secure the elimination unless Illari makes it up onto a small-ledged high-ground, wherein she will usually escape. Illari's Captive Sun is one of the most dangerous support Ultimates in the game, and can very quickly wipe entire teams. There is not very much Doomfist can do against this Ultimate, so retreating is generally advised. However, Doomfist can stun Illari out of the Ultimate with Rocket Punch if she has not yet fired the main projectile. Should Doomfist be struck by Captive Sun and then Sunstruck, he can block the detonation and receive a free empowerment. |
POOR SYNERGY
Illari's Solar Rifle Alt Fire and Healing Pylon can output immense amounts of healing, but they are also quite limited in range. Unlike a lot of other supports, Illari cannot reliably keep up with Doomfist's mobility to heal him, forcing Doomfist to retreat back to her for healing and making their pairing quite unfavourable. Illari is quite strong at range though and can help to finish off targets Doomfist has chosen to Dive from a safe distance.
Doomfist can followup on Illari's captive sun better than most other heroes and force detonations as all of his abilities possess strong AoE effects. |
 Jetpack Cat |
LOW PRIORITY TARGET | HIGH RISK
Jetpack Cat (Fika) operates almost entirely in the skybox using her passive flight, meaning Doomfist will struggle to reach her consistently. Do not waste time trying to engage her with Seismic Slam unless she drops low to the ground to cast
While she is a low-priority target, she poses a very high risk to Doomfist. Her |
SITUATIONAL SYNERGY
Jetpack Cat struggles to keep up with Doomfist's erratic, corner-heavy movement. While her
However, when she utilizes her |
 Juno |
MEDIUM PRIORITY TARGET | LOW RISK
Juno is highly evasive due to her
If Juno drops her |
STRONG SYNERGY
Juno's
|
 Kiriko |
MEDIUM -> HIGH PRIORITY TARGET | MEDIUM RISK
Kiriko is one of the more frustrating supports for Doomfist to fight as she can very easily avoid everything he throws at her with either of her abilities or her
Kiriko's |
EXCEPTIONAL SYNERGY
Kiriko and Doomfist pair exceptionally well together. Kiriko's healing output, while somewhat slow, is constant and high, which allows her to easily sustain Doomfist when committing to fights. Her exceptional mobility allows her to keep up with Doomfist and further enhance his sustain; coupled with
Her |
 Lifeweaver |
HIGH PRIORITY TARGET | LOW RISK
Lifeweaver is one of the easiest supports for Doomfist to fight against, although one of the most frustrating to pin down. He has a rather large hitbox and generally lacks an easy escape option, but is quite tanky for a support, possessing an extra 25HP totaling to 225HP. He can prevent Doomfist from securing an elimination with a well-placed
Doomfist must keep an eye out for Lifeweaver's Petal Platform and when he uses his Lifeweaver does not typically focus very much on outputting damage; however, his Lifeweaver's Life Grip is much like Baptiste's |
EXCEPTIONAL SYNERGY
Lifeweaver pairs exceptionally well with Doomfist. His healing output is quite high and can very reliably follow Doomfist a considerable distance.
Using his Petal Platform he can create new angles to support Doomfist from in almost every scenario or even use it to help Doomfist create new angles to apply pressure from. Coupling this with Lifegrip can allow Lifeweaver to remove Doomfist from any situation that turns against him or allow him to over-commit to a situation without risk of elimination. His Tree of Life is one of the more useful ults for Doomfist to work with, as it creates cover and a safe space for him to work effectively in and around. |
 Lúcio |
LOW PRIORITY TARGET | LOW RISK
Lúcio is one of the few supports that can completely ignore Doomfist and still do their job effectively. Lúcio's
Lúcio's Generally, it is not advised to spend time trying to eliminate a Lúcio unless they are on the ground in the open where they are slightly more vulnerable to be picked, though it is recommended to always keep them in mind as they will likely try to bypass the team to isolate and pick off an ally support. |
STRONG SYNERGY
Lúcio and Doomfist pair quite well together. Lúcio's accelerated mobility allows him to keep up with Doomfist quite easily and amplify his mobility even higher. Diving targets together with a Lúcio is a sure-fire way to guarantee eliminations as the combined damage output and the amplified power to engage and disengage much faster grants immense flexibility to both Doomfist and Lúcio.
|
 Mercy |
HIGH PRIORITY TARGET | LOW RISK
Mercy is a very difficult target to pin down and an extremely painful support to go up against. Her
Mercy requires an extreme amount of focus fire and resources to pin down and requires a keen eye to keep track of; diving her or her healing target alone is never recommended unless they are afflicted with the anti-heal debuff, as securing the elimination alone is incredibly difficult. Her Damage Boost from her Mercy's |
STRONG SYNERGY
Mercy's extreme mobility and pocketing power allow her to follow Doomfist closely across the battlefield and keep him alive to further enhance his sustain or amplify his damage output to secure eliminations much faster and chain onto new targets more quickly, all of which is even further magnified by
|
 Mizuki |
HIGH PRIORITY TARGET | EXTREME RISK
Mizuki’s
However, Mizuki's ultimate, |
GOOD SYNERGY
Mizuki is a fantastic enabler for Doomfist. His
However, Mizuki lacks vertical mobility, so Doomfist must be mindful not to isolate himself on high ground where Mizuki cannot reach him. |
 Moira |
HIGH PRIORITY TARGET | LOW RISK
Moira is a very easy target to fight, albeit somewhat difficult to pin down. Moira's
Moira deals low but consistent damage at a surprising range with her Moira's |
GOOD SYNERGY
Moira and Doomfist pair reasonably well together. Her strong healing output and exceptional mobility allow her to keep up with Doomfist and sustain him in fights or help end them much faster.
|
 Wuyang |
MEDIUM PRIORITY TARGET | LOW RISK
Wuyang is highly vulnerable to Doomfist dives. He has no crowd control to stop your engagement, and you can easily chase down his
Wuyang's |
EXCEPTIONAL SYNERGY
Wuyang and Doomfist form one of the strongest synergies in the game. Wuyang's
Furthermore, Doomfist is the ultimate target for |
 Zenyatta |
EXTREMELY HIGH PRIORITY TARGET | EXTREME RISK
Zenyatta is a very DPS-oriented support character. Functioning like a glass cannon, Zenyatta has very low healing output, no mobility, and is quite squishy, but boasts incredible damage output that is only further amplified by his
While this matchup is very strongly in favour of Doomfist, as he can dive and burst Zenyatta down extremely quickly with ease, Doomfist will not likely do so without taking an incredible amount of damage in the process thanks to the Orb of Discord and Zenyatta's high damage output, so some caution is advised. It's not all bad though: Doomfist is the only tank in the game that can actively turn Orb of Discord's effect against itself. Using Power Block while discorded will enable Doomfist to gain Empowerment far easier than normal, allowing Doomfist to churn out Empowered Punches consistently. Zenyatta's |
STRONG SYNERGY
Zenyatta and Doomfist pair quite well together. Zenyatta's
|
Map Strategies
Control
| Map | Strategy & Stage Tips |
|---|---|
 Overall Strategy |
TBA RATING | TBA FEATURE
Map strategy details for Overall Strategy are currently missing. You can help the Overwatch Wiki by adding them!
|
 Antarctic Peninsula |
TBA RATING | TBA FEATURE
Map strategy details for Antarctic Peninsula are currently missing. You can help the Overwatch Wiki by adding them! Labs
Strategy details missing.
Sublevel
Strategy details missing.
Icebreaker
Strategy details missing.
|

|
TBA RATING | TBA FEATURE
Map strategy details for Busan are currently missing. You can help the Overwatch Wiki by adding them! Downtown
Strategy details missing.
Sanctuary
Strategy details missing.
MEKA Base
Strategy details missing.
|

|
TBA RATING | TBA FEATURE
Map strategy details for Ilios are currently missing. You can help the Overwatch Wiki by adding them! Lighthouse
Strategy details missing.
Well
Strategy details missing.
Ruins
Strategy details missing.
|

|
TBA RATING | TBA FEATURE
Map strategy details for Lijiang Tower are currently missing. You can help the Overwatch Wiki by adding them! Control Center
Strategy details missing.
Garden
Strategy details missing.
Night Market
Strategy details missing.
|

|
TBA RATING | TBA FEATURE
Map strategy details for Nepal are currently missing. You can help the Overwatch Wiki by adding them! Village
Strategy details missing.
Shrine
Strategy details missing.
Sanctum
Strategy details missing.
|

|
TBA RATING | TBA FEATURE
Map strategy details for Oasis are currently missing. You can help the Overwatch Wiki by adding them! City Center
Strategy details missing.
Gardens
Strategy details missing.
University
Strategy details missing.
|

|
TBA RATING | TBA FEATURE
Map strategy details for Samoa are currently missing. You can help the Overwatch Wiki by adding them! Beach
Strategy details missing.
Downtown
Strategy details missing.
Volcano
Strategy details missing.
|
Escort
| Map | Strategy & Stage Tips |
|---|---|
 Overall Strategy |
TBA RATING | TBA FEATURE
Map strategy details for Overall Strategy are currently missing. You can help the Overwatch Wiki by adding them!
|

|
TBA RATING | TBA FEATURE
Map strategy details for Circuit Royal are currently missing. You can help the Overwatch Wiki by adding them! Attack
Strategy details missing.
Defense
Strategy details missing.
|

|
TBA RATING | TBA FEATURE
Map strategy details for Dorado are currently missing. You can help the Overwatch Wiki by adding them! Attack
Strategy details missing.
Defense
Strategy details missing.
|

|
TBA RATING | TBA FEATURE
Map strategy details for Havana are currently missing. You can help the Overwatch Wiki by adding them! Attack
Strategy details missing.
Defense
Strategy details missing.
|

|
TBA RATING | TBA FEATURE
Map strategy details for Junkertown are currently missing. You can help the Overwatch Wiki by adding them! Attack
Strategy details missing.
Defense
Strategy details missing.
|

|
TBA RATING | TBA FEATURE
Map strategy details for Rialto are currently missing. You can help the Overwatch Wiki by adding them! Attack
Strategy details missing.
Defense
Strategy details missing.
|

|
TBA RATING | TBA FEATURE
Map strategy details for Route 66 are currently missing. You can help the Overwatch Wiki by adding them! Attack
Strategy details missing.
Defense
Strategy details missing.
|

|
TBA RATING | TBA FEATURE
Map strategy details for Shambali Monastery are currently missing. You can help the Overwatch Wiki by adding them! Attack
Strategy details missing.
Defense
Strategy details missing.
|

|
TBA RATING | TBA FEATURE
Map strategy details for Watchpoint: Gibraltar are currently missing. You can help the Overwatch Wiki by adding them! Attack
Strategy details missing.
Defense
Strategy details missing.
|
Hybrid
| Map | Strategy & Stage Tips |
|---|---|
 Overall Strategy |
TBA RATING | TBA FEATURE
Map strategy details for Overall Strategy are currently missing. You can help the Overwatch Wiki by adding them!
|
 Blizzard World |
TBA RATING | TBA FEATURE
Map strategy details for Blizzard World are currently missing. You can help the Overwatch Wiki by adding them! Attack
Strategy details missing.
Defense
Strategy details missing.
|

|
TBA RATING | TBA FEATURE
Map strategy details for Eichenwalde are currently missing. You can help the Overwatch Wiki by adding them! Attack
Strategy details missing.
Defense
Strategy details missing.
|

|
TBA RATING | TBA FEATURE
Map strategy details for Hollywood are currently missing. You can help the Overwatch Wiki by adding them! Attack
Strategy details missing.
Defense
Strategy details missing.
|

|
TBA RATING | TBA FEATURE
Map strategy details for King's Row are currently missing. You can help the Overwatch Wiki by adding them! Attack
Strategy details missing.
Defense
Strategy details missing.
|

|
TBA RATING | TBA FEATURE
Map strategy details for Midtown are currently missing. You can help the Overwatch Wiki by adding them! Attack
Strategy details missing.
Defense
Strategy details missing.
|
 Numbani |
TBA RATING | TBA FEATURE
Map strategy details for Numbani are currently missing. You can help the Overwatch Wiki by adding them! Attack
Strategy details missing.
Defense
Strategy details missing.
|

|
TBA RATING | TBA FEATURE
Map strategy details for Paraíso are currently missing. You can help the Overwatch Wiki by adding them! Attack
Strategy details missing.
Defense
Strategy details missing.
|
Push
| Map | Strategy & Stage Tips |
|---|---|
 Overall Strategy |
TBA RATING | TBA FEATURE
Map strategy details for Overall Strategy are currently missing. You can help the Overwatch Wiki by adding them!
|

|
TBA RATING | TBA FEATURE
Map strategy details for Colosseo are currently missing. You can help the Overwatch Wiki by adding them! Pushing
Strategy details missing.
Defending
Strategy details missing.
|

|
TBA RATING | TBA FEATURE
Map strategy details for Esperança are currently missing. You can help the Overwatch Wiki by adding them! Pushing
Strategy details missing.
Defending
Strategy details missing.
|

|
TBA RATING | TBA FEATURE
Map strategy details for New Queen Street are currently missing. You can help the Overwatch Wiki by adding them! Pushing
Strategy details missing.
Defending
Strategy details missing.
|

|
TBA RATING | TBA FEATURE
Map strategy details for Runasapi are currently missing. You can help the Overwatch Wiki by adding them! Pushing
Strategy details missing.
Defending
Strategy details missing.
|
Flashpoint
| Map | Strategy & Stage Tips |
|---|---|
 Overall Strategy |
TBA RATING | TBA FEATURE
Map strategy details for Overall Strategy are currently missing. You can help the Overwatch Wiki by adding them!
|

|
TBA RATING | TBA FEATURE
Map strategy details for Aatlis are currently missing. You can help the Overwatch Wiki by adding them! Station
Strategy details missing.
Garden
Strategy details missing.
Town Center
Strategy details missing.
Bazaar
Strategy details missing.
Resort
Strategy details missing.
|

|
TBA RATING | TBA FEATURE
Map strategy details for New Junk City are currently missing. You can help the Overwatch Wiki by adding them! Arena
Strategy details missing.
The Ducts
Strategy details missing.
Refinery
Strategy details missing.
Junkyard
Strategy details missing.
Bomb Flats
Strategy details missing.
|

|
TBA RATING | TBA FEATURE
Map strategy details for Suravasa are currently missing. You can help the Overwatch Wiki by adding them! Market
Strategy details missing.
Garden
Strategy details missing.
Palace
Strategy details missing.
Temple
Strategy details missing.
Ruins
Strategy details missing.
|
Achievements
| Name | Icon | Description | Reward |
|---|---|---|---|
|
|
Slam 3 enemies into a wall with Doomfist's Empowered Rocket Punch in Quick or Competitive play. |  | |
|
|
Hit 4 enemies with a single use of Doomfist's Meteor Strike in Quick or Competitive play. |  |
Trivia
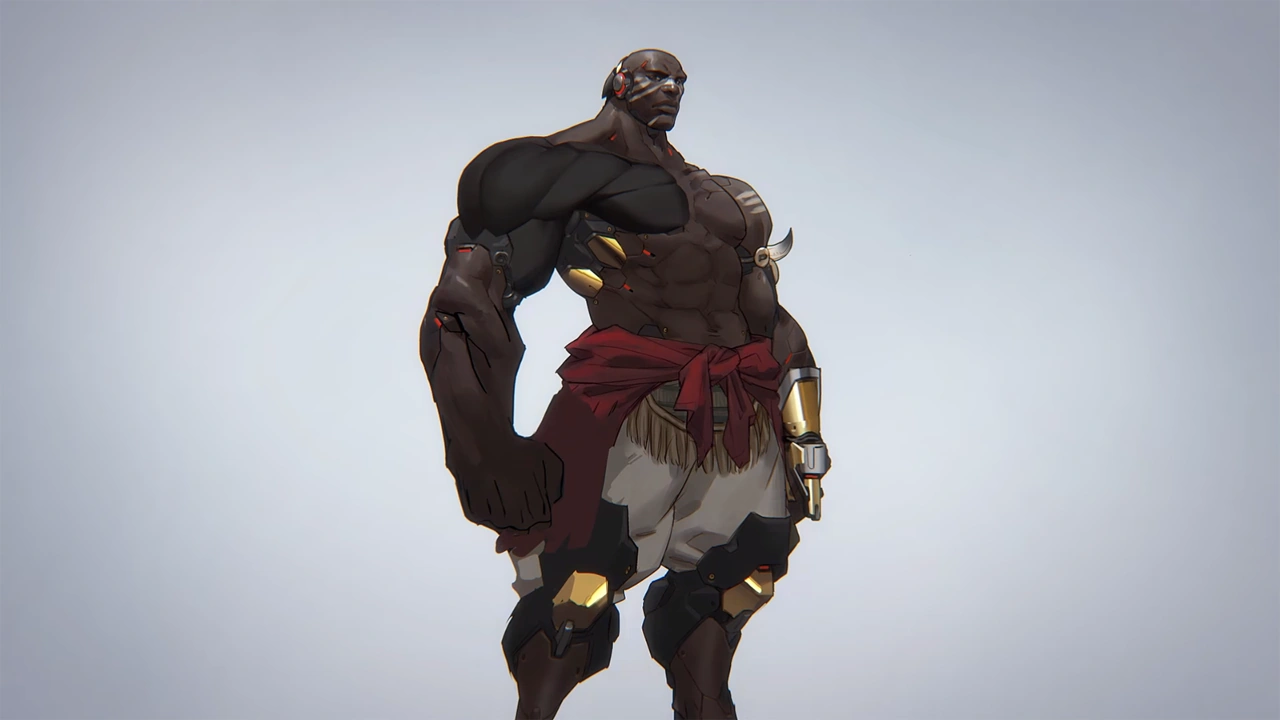
Concept art depicting Doomfist's augmented right arm.
- Doomfist is Hero 25 and the fourth new hero added to the game.
- Akande is a male Yoruba name meaning "firstborn." Ogun is a Yoruba god of war and metalwork, and dimu is Yoruba for "grasping." Akande Ogundimu can therefore be roughly translated as, "heir to the god who grasps iron and war," likely referring to his role as Akinjide Adeyemi's successor.
- Doomfist's cell number in the Helix maximum security installation was 88503.
- Doomfist's cybernetic right arm has been extensively augmented with cybernetics that receive and interface with his gauntlet.
- PTR version 1.13.37644 (2017 June 24) contained the text "Doomfist / Summer Games" in the crash logs, inadvertently leaking him as the game's 25th hero.
- Doomfist released on the PTR on July 6th, 2017, while his cosmetics were added on July 13th, 2017.
- Doomfist is the first new hero to be launched with five emotes.
- His HollaGram account (at least during his attacks against Numbani) is "Anonymous088503."[1]
- The upcoming Overwatch Rush game has Doomfist with a beard, hinting at him possibly surviving his fight with Vendetta.
Development
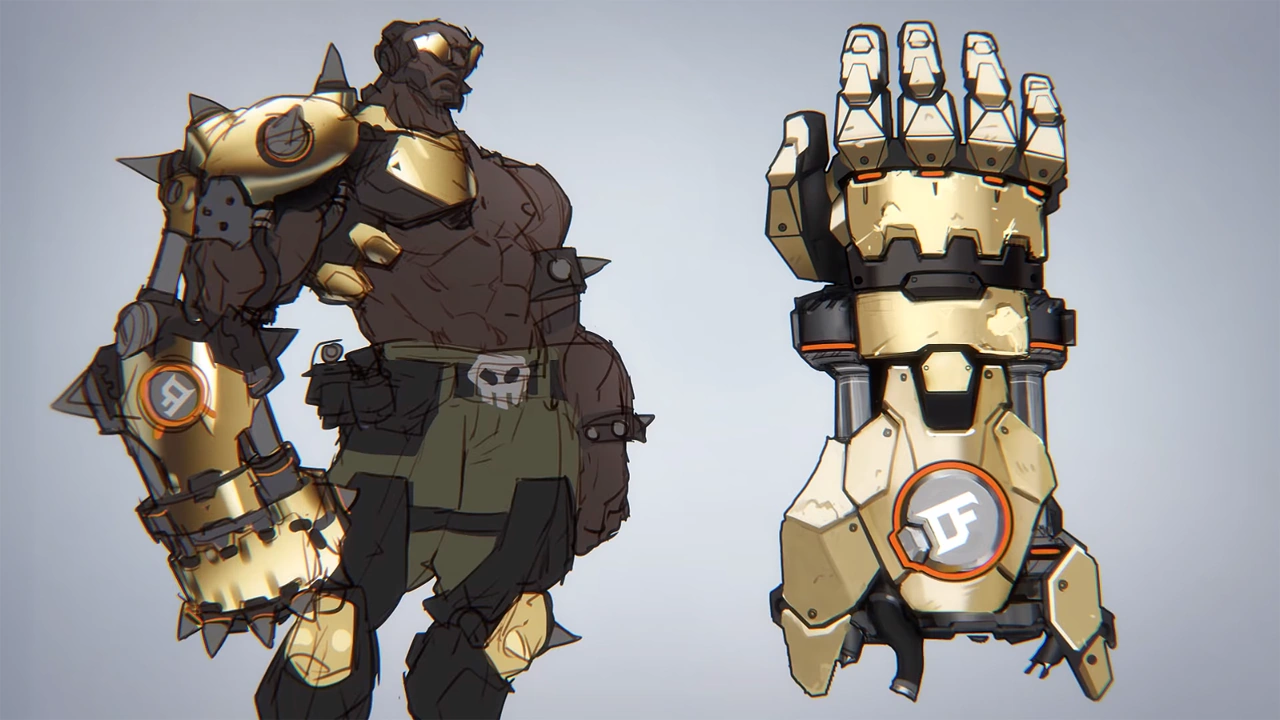
Doomfist's initial prototype character design.
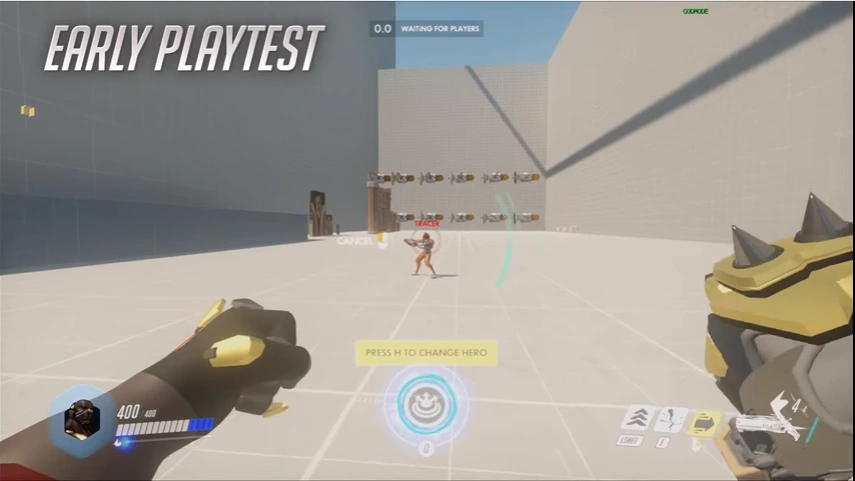
Doomfist's prototype abilities in an early playtest.
Doomfist is a rare example of a hero that began as nothing more than a name — Chris Metzen offered it as the first suggestion in a brainstorming session for random villain names. With only a general notion of who or what the character would be, Doomfist's gauntlet was created as a MacGuffin for the Blizzcon 2014 Overwatch announcement cinematic, and a rough prototype sketch of the character was designed, with the intention of fleshing it out and developing him into a full character at a later date.[2] An early version of this design would even appear in the initial hero lineup key art, alongside other prototype heroes such as Wildebeest and Recluse. After his gauntlet featured in the announcement cinematic and references were made to him in Numbani, it was decided to make him a "generational character," similar to comic book heroes that take up the mantles of their predecessors; Metzen has used The Flash and Green Lantern as examples of this concept.
Doomfist's kit was developed as a love letter to classic 2D fighting games, and care was taken to replicate the look and feel of special moves in those titles. A strong emphasis was also placed on making his attacks feel strong and impactful through visual and audio cues, and colors like red and gold were chosen for his design to convey a regal presence, while his gauntlet was created to "look as badass as possible from every angle," and to deliver pneumatic, impact-driven movements that would look and feel physical rather than magical. Extensive cybernetic augmentations were added to his body, contributing to his overall menacing appearance. His animations were designed to convey his strength and confidence, with the idea that each of his movements is carefully calculated. This idea also carried through to gameplay, with the way his abilities can be linked together to form combos that suit the player's current situation.[2]
At SDCC 2017[3], there was a test footage shown which dated back to 2016 December 8.[4] The video shown below.
Removed Abilities
The following is a list of Doomfist's abilities as they existed in the original Overwatch:
+75 shields per enemy hit with the ultimate ability
Maximum of 150
- This ability has a statistic card named "Shields created."
- After 1 second, the shields start decaying at 3 shields per second.
19.8 - 66 per shot
+0.656 second (per bullet)
- Unlike most weapons, Hand Cannon cannot be forced to reload by using the "Reload" key.

- Enemies knocked into the air lose air control for 0.6 seconds.
- Doomfist is briefly suspended in the air after the uppercut, slowing his fall speed.
- This ability is removed in Overwatch 2.
- Damage scales with the time spent in air during the slam, up to a maximum of 125.
- While airborne, a blue, arc-shaped indicator will show where the ability will land. The orientation of the slam can be changed in the air.
- On flat ground, Seismic Slam horizontally propels Doomfist 8.22 meters and deals 49 damage. Adding a jump can increase this damage to 62.
- Locks camera for ~0.56 s. Then locks shooting for ~0.32 s.
50 - 150 (wall impact)
1.4 seconds to fully charge
2 second max. charge time
- Damage, distance traveled, and knock back all scale with the charge time.
- It takes ~0.93 seconds of charging in order to kill a 200 HP target, assuming wall impact. This translates to about 2.67 bars of charge in the HUD.
- Rocket Punch stops if it hits an enemy.
- If Rocket Punch collides with Charge, Shield Bash, a charging B.O.B., or another Rocket Punch, both participants get knocked down for 2 seconds.
- While charging, Rocket Punch can be cancelled by pressing the Primary Fire button.
- After being released, Rocket Punch can still be cancelled with the Jump key. This pushes Doomfist further than what he would have gone without cancelling.
Outer ring: 15-200
1 second landing + 0.5 s. recovery (invulnerability)
Outer ring: 6 meters
Overall radius: 8 meters
60 meters per second
- This ability works even when used inside an interior area and will land in that area unless Doomfist moves outside.
- Holding right click enables a birds-eye view of the impact zone, which can also be used to climb up platforms.
- The impact zone is only visible to the enemy team once Doomfist is coming down.
- Doomfist is completely invincible during this ultimate.
- Meteor Strike has two rings that do different damage. If an enemy is touching both rings, the inner ring takes precedence.
- Doomfist's other abilities recharge twice as fast while Doomfist is in the air.
Removed Perks

- Removed in Season 18.
Media
Former Portrait
-
 Overwatch 1 Hero portrait
Promotional
-
 Doomfist
 -
 Doomfist Meteor Strike
 -
 Doomfist charging his fist
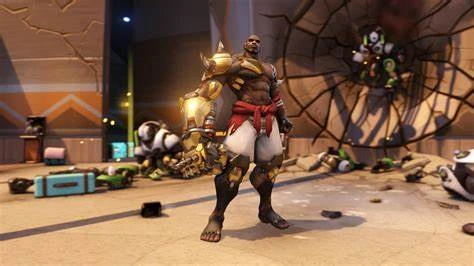
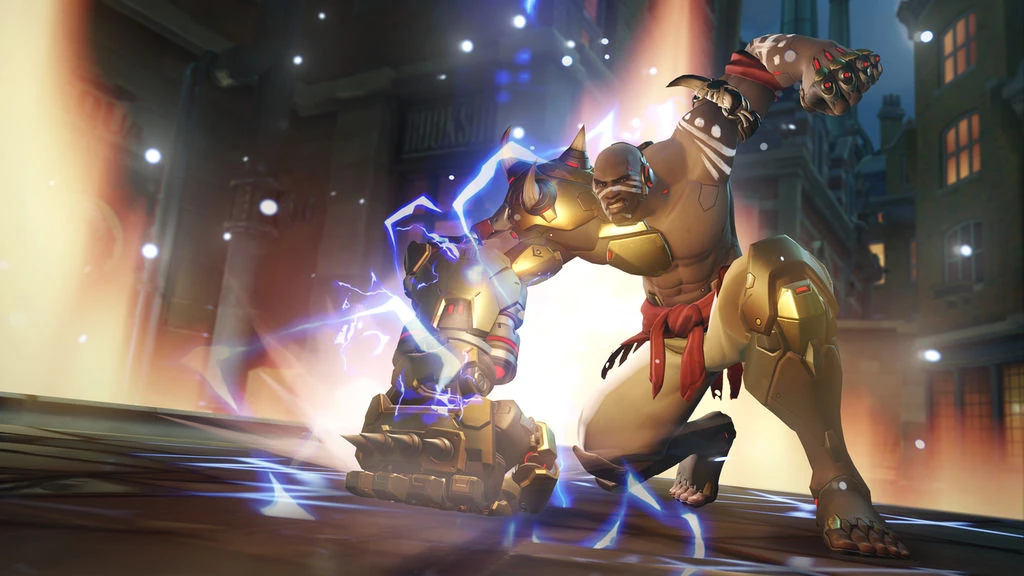
Concept Art
-
![Overwatch 2 Default Skin Concept Art[5]](/_images?url=https%3A%2F%2Fstatic.wikia.nocookie.net%2Foverwatch_gamepedia%2Fimages%2Fb%2Fbe%2FDoomfist_ArtworkOW2.png%2Frevision%2Flatest%2Fscale-to-width-down%2F120%3Fcb%3D20251209081253) Overwatch 2 Default Skin Concept Art[5]
Overwatch 2 Default Skin Concept Art[5] -
 Skin Exploration Concept Art by Armando Gonzalez-Dort
 -
 Bonebreaker Skin Concept Art by Armando Gonzalez-Dorta
 -
 Bonebreaker Skin Concept Art by Armando Gonzalez-Dorta
 -
 Bonebreaker Skin Concept Art by Armando Gonzalez-Dorta
 -
 Blackhand Skin Weapon Concept Art by Anh Dang
 -
 Blackhand Skin Concept Art by Anh Dang
 -
 Formal Skin Concept Art by Qiu Fang
 -
 Funky Skin Concept Art by Kim-Seang Hong
 -
 General Skin Concept Art by Armando Gonzalez-Dorta
 -
 Karate Skin Concept Art by Kejun Wang
 -
 Thunder Skin Concept Art
 -
 Saitama Skin Concept Art by Kejun Wang
![Overwatch 2 Default Skin Concept Art[5]](https://static.wikia.nocookie.net/overwatch_gamepedia/images/b/be/Doomfist_ArtworkOW2.png/revision/latest?cb=20251209081253)
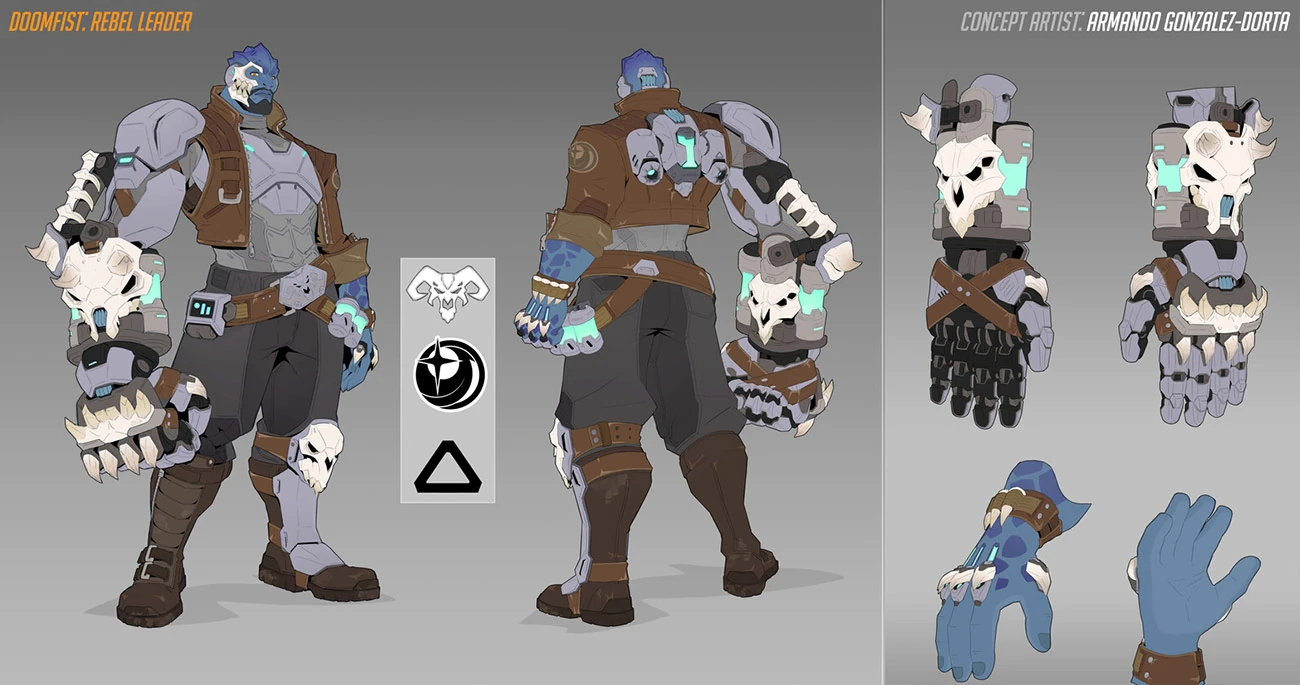
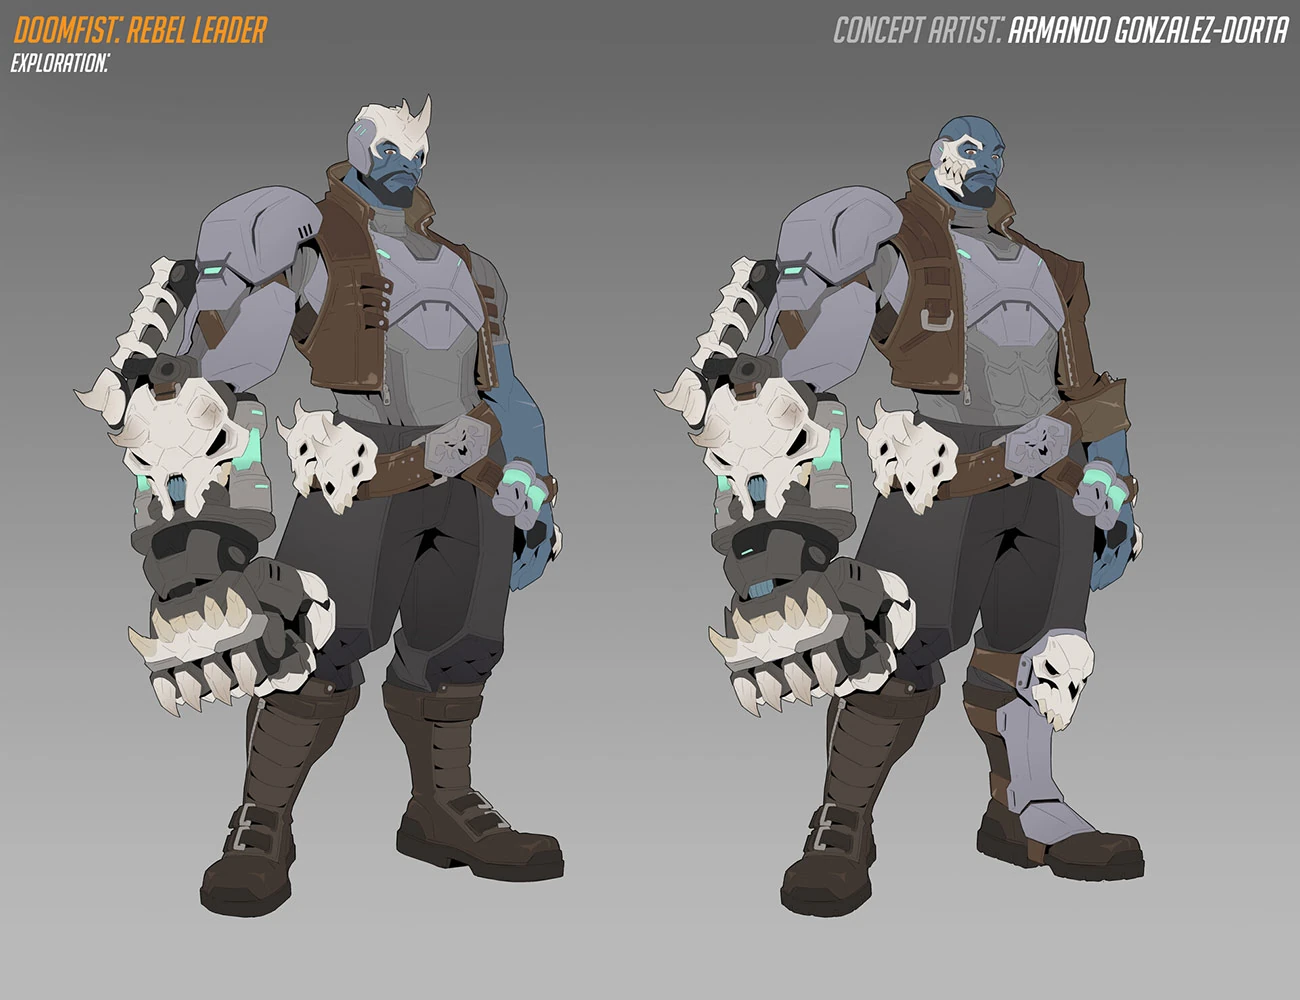
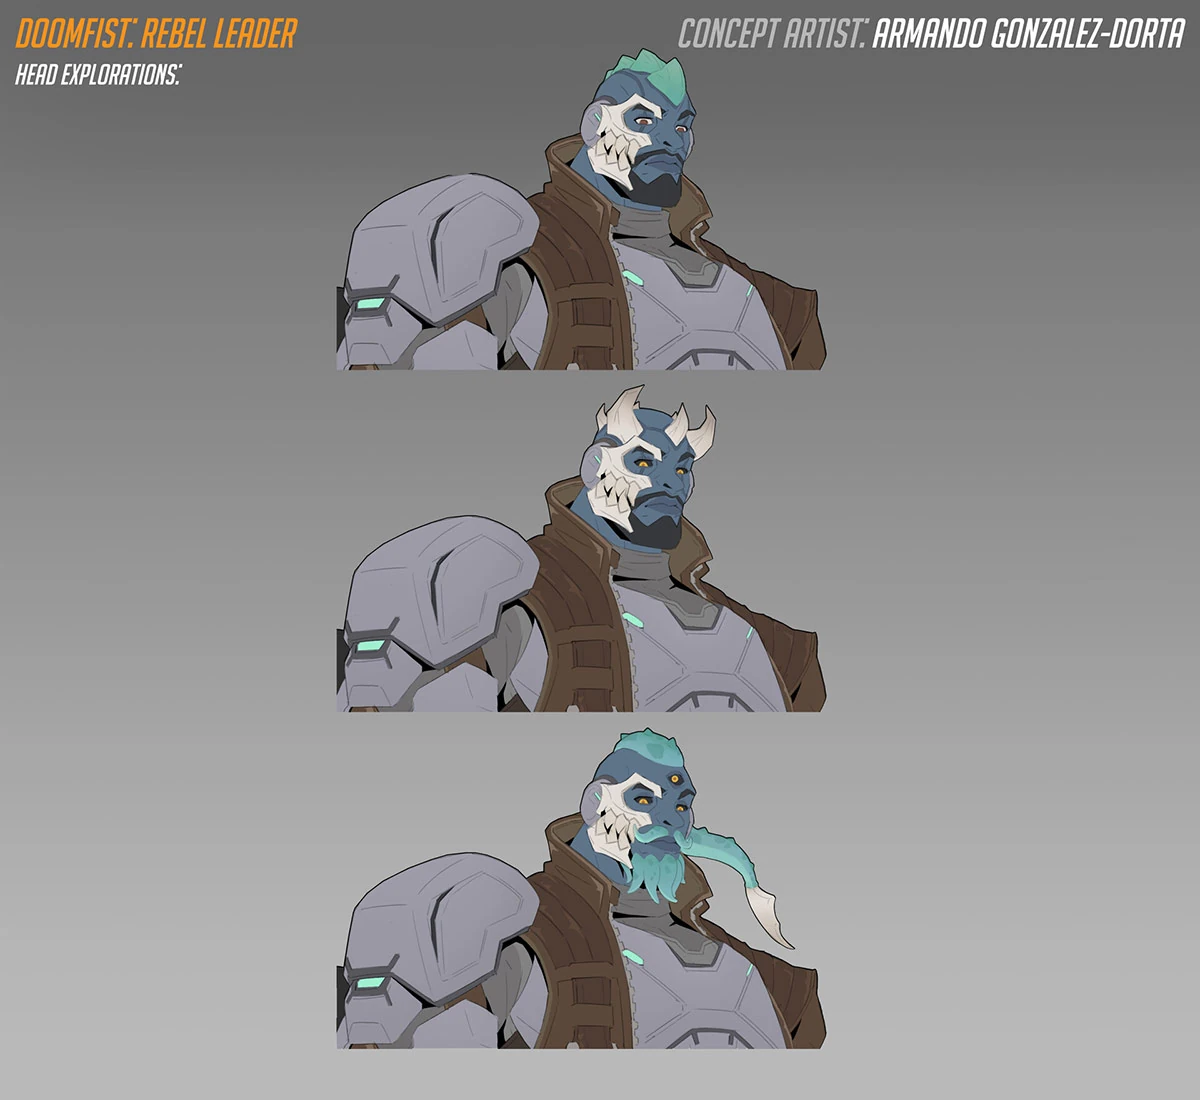
Videos
Balance Change Logs
- For more information, see Patch Notes.
- Camera lock and shockwave effects now trigger later to better align with the animation.
- Added new visual and sound effects that play when Empowered Punch is about to time out.
- Empowered punch now deteriorates after 20 seconds.
![]() Power Matrix perk
Power Matrix perk
- Projectile absorption area scaled down to more closely match the size of Doomfist's model.
![]() Power Block – Ability 2
Power Block – Ability 2
- Damage reduction reduced from 80% to 75%.
![]() Aftershock – Major Perk
Aftershock – Major Perk
- Slow duration increased from 1.5 to 2 seconds.
- Slow amount increased from 30% to 40%.
![]() One-Two - Minor Perk
One-Two - Minor Perk
- Now updated to where hitting an enemy into a wall with Rocket Punch reloads Hand Cannon and overfills ammo by 2.
![]() Seismic Empowerment - Major Perk
Seismic Empowerment - Major Perk
- Removed.
![]() Aftershock - Major Perk
Aftershock - Major Perk
- New Major Perk.
- Enemies hit by Seismic Slam are slowed by 30% for 1.5 seconds.
![]() Power Matrix - Major Perk
Power Matrix - Major Perk
- Damage absorbed during Power Matrix now provides equivalent Empowered Punch amount to Power Block.
- Hero Perks
- Hitting an enemy with Rocket Punch reloads all Hand Cannon ammo.
- The Best Defense grants 25 overhealth from eliminations and its max overhealth is increased by 50.
- Hitting 3 or more enemies with Seismic Slam empowers Rocket Punch.
- Power Block absorbs projectiles for the first second of its duration.
- Shockwave range reduced from 18 to 15 meters.
- Cooldown increased from 6 to 6.5 seconds.
- Angle required for wall slam increased from 44 to 55 degrees.
- Ultimate cost reduced 8%.
- Healing per second while in the air increased from 75 to 90.
- Overhealth gained per target increased from 35 to 40 HP.
- Delay before Overhealth begins to drain increased from 1 to 3 seconds.
- General
- Knockdown time when two charging abilities collide reduced from 2 to 1.7 seconds.
- The empowered punch is no longer consumed when the windup is canceled by using Seismic Slam or Power Block.
- Minimum damage increased from 15 to 50.
- General updates
Most damage-dealing projectile sizes have been increased by a new global modifier added to their base size.
- +0.05 meters for hitscan projectiles with a high rate of fire or spread (e.g., Tracer's Pulse Pistols or Reaper's Hellfire Shotguns).
- +0.08 meters for hitscan projectiles that are more precise (e.g., Cassidy's Peacekeeper or Soldier:76's Heavy Pulse Rifle).
- +0.05 meters for travel time projectiles that are shotguns or have a very high rate of fire (e.g., Roadhog's Scrap Gun or Ramattra's Void Accelerator).
- +0.10 meters for travel time projectile with a speed greater than 50 meters per second (e.g., Zenyatta's Destruction Orb).
- +0.15 meters for travel time projectile with a speed less than or equal to 50 meters per second (e.g., Pharah's Rocket Launcher).
- Very large projectiles with a base size greater than 0.5 meters have been excluded from these increases (e.g., Orisa's Energy Javelin or Reinhardt's Fire Strike).
Hero combined HP (base health/armor/shields) increased by 15-25%.
- 150-175 HP heroes increased by 25 HP.
- 200-300 HP heroes increased by 50 HP.
- 300+ HP (Tanks) increased by 75-100 HP.
- Each hero's precise health increases are listed in their patch notes below.
Ultimate Charge
- All Ultimate ability costs increased by 10%.
Regenerative Passive for All Heroes
- All heroes now regenerate 20 health per second after 5 seconds of not taking damage.
Quick Melee
- Damage increased from 30 to 40.
- Hero Updates
- Health increased from 300 to 375.
- Max impact damage increased from 50 to 75.
- Max wall slam damage increased from 30 to 40.
- Now regenerates 75 health per second while in the air.
- Ultimate cost increased 16%.
- Minimum wall stun duration decreased from 0.25 to 0.15 seconds.
- Maximum wall stun duration decreased from 0.75 to 0.6 seconds.
- Cooldown reduced from 7 to 6 seconds.
- Now reduces damage from stuck projectiles.
- Base health in Role Queue modes remains the same at 450
- Base health in non-Role Queue modes reduced from 450 to 300
- Cooldown increased from 3 to 4 seconds
- Minimum damage mitigated required to empower Rocket Punch increased from 80 to 100 damage
- Temporary health gained per target hit with abilities decreased from 40 to 35 health
There are several changes here for Doomfist with the intent to increase his presence as a disruptive brawler-style tank. The buff to his passive ability will help him stay in the fight longer, especially when he’s hitting multiple enemies with his abilities.
The changes to Power Block and Meteor Strike are intended to increase the availability of Empowered Rocket Punch, which enables him to more easily disrupt enemies and impact multiple targets. Due to gaining Empowered Rocket Punch more consistently, the stun duration and size are slightly decreased to reduce some of the frustration in playing against it.
For Rocket Punch we’re shifting some of its damage away from requiring wall impacts so that it's broadly more useful regardless of where fights are taken.- Maximum temporary health increased from 150 to 200 health
- Temporary health gained per target hit with abilities increased from 30 to 40 health
- Cooldown reduced from 8 to 7 seconds
- Duration increased from 2 to 2.5 seconds
- Minimum damage mitigated required to empower Rocket Punch reduced from 90 to 80 damage
- Impact damage range (minimum-maximum) increased from 15-30 to 25-50 damage
- Wall slam damage range (minimum-maximum) reduced from 20-40 to 10-30 damage
- Empowered Rocket Punch wall slam stun duration range reduced from 0.5-1 to 0.25-0.75 seconds
- Non-Empowered Rocket Punch now stuns for the minimum 0.25 second duration on wall slam
- Empowered Rocket Punch knockback radius reduced from 4 to 3 meters
- Minimum time before cancel option becomes available reduced from 0.25 to 0.12 seconds
- Cooldown reduced from 4 to 3 seconds
- This has been in since his rework but was not mentioned
- Now empowers Rocket Punch on landing
- Enemy slow duration increased from 2 to 3 seconds
(beta)
- Minimum damage mitigated required to empower Rocket Punch reduced from 100 to 90 damage
- Movement speed penalty while blocking reduced from 50 to 35%
- Now deals damage to all enemies knocked back instead of only the first target impacted
(beta)
(beta)
- Moved from Damage to Tank role
- Base health increased from 250 to 450
- Ability removed
- Damage reduced from 6 to 5 per pellet
- Ammo regeneration rate increased from once every 0.65 seconds to 0.4 seconds
- Impact damage range reduced from 50 - 100 to 15 - 30 damage
- Wall slam damage range reduced from 50 - 150 to 20 - 40 damage
- Maximum charge up time reduced from 1.4 to 1.0 seconds
- Impacting a target now causes a secondary larger cone area check to grab extra targets to potentially knock them back as well
- New Ability 2
- Enter a blocking stance, reducing damage taken from the front by 90%
- Blocking at least 100 damage causes Doomfist’s gauntlet to become supercharged, empowering the next Rocket Punch in the following ways:
- Increases damage by 50%
- Travels 50% faster and further
- The area-of-effect blast that knocks back additional targets is twice as large
- Targets impacting a wall will be stunned for an additional 0.5 to 1.0 seconds, depending on charge amount
- Moved from Ability 2 to Ability 1
- Now launches Doomfist into the air in the direction the player is aiming
- Creates a wide arc shockwave upon landing, dealing 50 damage and slowing enemy movement speed by 30%
- No longer has different behavior between being activated in the air or on the ground
- No longer pulls in enemies
- Can be canceled by pressing the ability key again
- Damage range reduced from 15 - 200 to 15 - 100
- Impact damage at the center 1 meter radius unchanged from 300 damage
- Knockback removed
- Now additionally slows the movement speed of all enemies hit by 50% for 2 seconds
- Cast time reduced from 1.0 to 0.5 seconds
- 6v6 Hero Changes
- Overhealth gained per target reduced from 35 to 25 HP.
- Amount of damage to gain Empowered Punch increased from 100 to 120.
- Base health increased from 375 to 425.
- Cooldown increased from 6.5 to 7.5 seconds.
- Maximum duration reduced from 2.5 to 2 seconds.
- Cooldown increased from 7 to 8 seconds.
![]() The Best Defense... (Passive)
The Best Defense... (Passive)
- Overhealth gained per target reduced from 40 to 35 HP.
- Maximum temporary health reduced from 200 to 150 health.
- [The Best Defense] now scales proportionally with the Passive Health Gain from Currency.
![]() Asteroid Smash - Power
Asteroid Smash - Power
- Cooldown reduced to 8s (Down from 10s).
![]() Block Party - Power
Block Party - Power
- Ally Healing increased to 20% (Up from 15%).
![]() Helping Hand - Power
Helping Hand - Power
- Overhealth Max Life Scaling increased to 10% (Up from 8%).
![]() Overpowered - Power
Overpowered - Power
- Level 3 Punch Bonus Damage increased to 50% (Up from 25%).
![]() Rising Uppercut - Power
Rising Uppercut - Power
- Bonus damage increased to 20 (Up from 10).
![]() Seismic Rally - Power
Seismic Rally - Power
- Max Life Overhealth gained per second increased from 3% to 5%.
![]() Block Party - Power
Block Party - Power
- Self Heal increased from 5% to 8% of Max Life per second.
![]() Rising Uppercut - Power
Rising Uppercut - Power
- Cooldown reduced from 12s to 10s.
![]() Asteroid Smash - Power
Asteroid Smash - Power
- Cooldown reduced from 12s to 10s.
- Maximum impact damage increased from 150 to 200.
- Now triggers Overhealth from The Best Defense
![]() Quickcharger - Epic Ability Hero Item
Quickcharger - Epic Ability Hero Item
- Cost reduced to 10000 (Down from 12000).
- Currency gained from damage and healing increased by 25%.
![]() Aftershock (Power) - Power
Aftershock (Power) - Power
- Increased secondary shockwave damage to 60% (Up from 50%).
![]() Asteroid Smash - Power
Asteroid Smash - Power
- Now grants ultimate charge.
- Cooldown reduced to 12s (Down from 15s).
![]() Block Party - Power
Block Party - Power
- Block Party has been disabled at this time due to an issue
![]() Jab Cross - Power
Jab Cross - Power
- Increased Melee Attack Speed after using an ability to 75% (Up from 50%).
![]() Jetforce Jab - Power
Jetforce Jab - Power
- Increased Burn Damage on Rocket Punch to 20% (Up from 15%).
![]() Slam Wham - Power
Slam Wham - Power
- Increased Seismic Slam Range per meter travelled to 6% (Up from 4%).
- New Heroes Added
- New heroes added to the roster
![]() Jab Cross - Power
Jab Cross - Power
- After you use an ability, gain 50% [Quick Melee] Attack Speed and increase [Quick Melee] Range by 1m for 3s
![]() Rising Uppercut - Power
Rising Uppercut - Power
- Ability: Your next [Quick Melee] becomes a [Rising Uppercut], dealing 10 extra damage (12s Cooldown).
![]() The Best Defense - Power
The Best Defense - Power
- [Quick Melee] hits and [Hand Cannon] critical hits trigger [The Best Defense] at 35% effectiveness.
![]() Aftershock (Power) - Power
Aftershock (Power) - Power
- [Seismic Slam]'s shockwave repeats itself after a 1.5s delay, dealing 50% damage.
![]() Seismic Rally - Power
Seismic Rally - Power
- Every 1s while leaping with [Seismic Slam], grant Overhealth equal to 3% of your Max Life to all allies within line of sight for 3s.
- Increase [Seismic Slam]'s damage by 2%, and range by 4% for every 1m traveled downward.
![]() Boomfist - Power
Boomfist - Power
- Hitting multiple enemies with [Rocket Punch] grants 5% Ultimate Charge and reduces the cooldown of [Power Block] by 0.5s for each extra enemy hit.
![]() Overpowered - Power
Overpowered - Power
- [Rocket Punch] can be further empowered when blocking 150% more damage with [Power Block], granting 25% more damage and 50% more range.
- Ability: Crouching while airborne will trigger a mini [Meteroid Strike], dealing up to 150 direct hit damage based on distance traveled downward (15s cooldown).
![]() Block Party - Power
Block Party - Power
- While [Power Block] is active, heal yourself for 3% of Max Life and all other allies within 8m for 10% of Max Life every 1s.
![]() Helping Hand - Power
Helping Hand - Power
- [The Best Defense] grants bonus Overhealth equal to 8% of Bonus Max Life. Whenever you gain Overhealth from yourself, grant 25% to the nearest ally.
![]() Loaded Knuckles - Legendary Hero Item
Loaded Knuckles - Legendary Hero Item
- 25 Armor -20% Melee Damage
- [Quick Melee] hits restore 1 ammo. [Rocket Punch] hits restore 100% of your ammo
- Cost: 10,000
![]() Wing Clipper - Legendary Hero Item
Wing Clipper - Legendary Hero Item
- 10% Ability Power
- [Meteor Strike] pulls airborne enemies to the ground
- Cost: 4,500
![]() Power Bank - Legendary Hero Item
Power Bank - Legendary Hero Item
- 25 Health
- 5% Ability Power
- You can charge [Rocket Punch] indefinitely. After 2.5s of charging [Rocket Punch], become Unstoppable for the duration of that [Rocket Punch].
- 4,000
![]() Friendly Fissure - Legendary Hero Item
Friendly Fissure - Legendary Hero Item
- 25 Health
- 10% Ability Power
- [Meteor Strike] Area of affect grants all other allies Overhealth Equal to 20% of your Max Life for 5s.
- Cost: 9,000
![]() Chasm Crusher - Legendary Hero Item
Chasm Crusher - Legendary Hero Item
- 15% Ability Power
- 15% [Seismic Slam] Leap Distance
- Cost: 11,000
![]() Quickcharger - Legendary Hero Item
Quickcharger - Legendary Hero Item
- 15% Ability Power
- [Power Block] adds 10% progress for empowering [Rocket Punch]. [Power Block] no longer resets progress for empowering [Rocket Punch].
- Cost: 12,000
![]() Dual Layer Dampener - Legendary Hero Item
Dual Layer Dampener - Legendary Hero Item
- 25 Armor
- 10% Increased [Power Block] Damage Reduction
- [Power Block] now also reduces damage against Burn and other Damage Over Time effects.
- Cost: 4,000
![]() Zoomfist - Legendary Hero Item
Zoomfist - Legendary Hero Item
- 50 Armor
- Whenever you gain Overhealth from yourself, heal for 15% of Overhealth gained over 1s and gain 15% Move Speed for 3s.
- Cost: 9,500
![]() Power Matrix - Legendary Hero Item
Power Matrix - Legendary Hero Item
- 50 Armor
- [Power Block] absorbs projectiles for the first 1s, gaining Overhealth equal to 1% of your max Life for each projectile absorbed.
- Cost: 11,000
- Now speeds up the cooldown rate of his abilities by 100% while in the air
Developer Comment: The accelerated cooldown times will enable more fluidity with setting up Doomfist's combos when using the Meteor Strike ultimate.
General
- Shotgun patterns no longer apply random rotation. This will affect the following heroes:
- Ashe
- Doomfist
- D.Va
- Reaper
- Roadhog
- Torbjörn
- Can now hold down the Ability 2 button to use Seismic Slam as soon as able (and valid, if using the aerial version)
- When landing very close or on top of enemies, the enemy will be pushed in front/away from Doomfist slightly, instead of sometimes having then end up beside/behind Doomfist
- Aerial Seismic Slam no longer has a slight acceleration time, which should make it arrive at the destination more reliably
- Recovery time increased from 0.2 to 0.35 seconds
Developer Comment: Rising Uppercut followed immediately by his primary fire is a little too effective of a combo on its own, so we're increasing the time enemies have to react to it.
- Time to reach max charge increased from 1 to 1.4 seconds
- Shield health gained per hit reduced from 35 to 30
Developer Comment: We’re increasing Doomfist’s charge time for Rocket Punch to give players more warning when he is charging this powerful ability. We’re also reducing the shield health gain from his passive ability to weaken how much damage he can soak while dishing out his own.
Melee
- Quick melee no longer pauses ammo reload.
Developer Comment: This is a quality of life change which allows Doomfist to more freely use Quick Melee as part of his combos, without feeling punished for it.
- Cooldown reduced from 7 to 6 seconds
- Cooldown reduced from 7 to 6 seconds
Developer Comments: Reducing the downtime of Doomfist’s abilities will give him some power back and make his gameplay feel more fluid.
- Loss of air control duration lowered from 3 seconds to 0.6 seconds
- Maximum range reduced from 20 meters to 15 meters
- Targets no longer lose air control while being pulled in
- Inner ring damage radius increased from 1.5 meters to 2.0 meters
- Outer ring maximum damage decreased from 300 to 200
Developer Comments: Doomfist’s high mobility allows him to engage and disengage from extremely long range. Decreasing the range of the targeted aerial version of Seismic Slam requires him to get closer before engaging an enemy and makes it slightly harder for him to escape from combat. The loss of air control on Rising Uppercut was a frustrating mechanic for players, but it allowed Doomfist to set up combos. We’ve found a decent middle ground by limiting the amount of time Doomfist has to line up his next move. The Meteor Strike changes will make it harder to secure easy eliminations on heroes without mobility abilities, such as Zenyatta or Ana, while still preserving its maximum potential damage when aimed well or when combined with other abilities such as Graviton Surge or Sleep Dart.
- Damage falloff now starts at 15 meters
Developer Comments: Doomfist is all about getting up close and personal with his enemies, but his Hand Cannon's spread was tight enough to do surprising amounts of damage at longer ranges, especially against bigger targets. This change brings his weapon in line with other shotgun-style weapons by making its damage fall off beyond 15 meters.
- No longer impacts Symmetra’s teleporter
- Now destroys Symmetra’s sentry turrets without stopping his movement
Developer Comments: These changes are just quality of life improvements for how Doomfist interacts with Symmetra’s placed objects.
- Bonus movement speed increased from 150% to 200%
- Shield gain increased from 30 to 35 for normal abilities
Developer Comments: The increased movement speed on Meteor Strike gives Doomfist new options in how and where to deploy it. His passive is also being increased, allowing him to survive more often when diving into enemies.
- Ammo recovery rate increased from 0.8 seconds to 0.65 seconds per bullet
Developer Comments: This change will help Doomfist more consistently be able to use his weapon as part of his combos.
- Damage reduced from 11 to 6
- Number of bullets fired increased from 6 to 11
- Spread pattern made more consistent
Developer Comments: We have made a lot of progress with Doomfist’s movement in recent patches but we wanted to revisit his Hand Cannon. While the damage per bullet has been lowered, the number of bullets he fires per Hand Cannon shot has been increased which makes his overall damage output unchanged. Overall, these changes will help his Hand Cannon feel much more consistent.
New Hero: Doomfist(Offense)
References
- ↑ Overwatch: The Hero of Numbani
- ↑ 2.0 2.1 2017-07-18, New Hero Preview: Doomfist. YouTube, accessed on 2017-07-18
- ↑ [1] I was at the Doomfist BTS SDCC panel, here's the rundown of what was discussed. - Reddit
- ↑ [2] Doomfist test footage - Reddit
- ↑ https://x.com/GetQuakedOn/status/1998145924917514378
| Heroes in Overwatch
| ||||||||
|---|---|---|---|---|---|---|---|---|
Tank |
 Bruiser |
|||||||
Initiator |
 Doomfist |
|||||||
 Stalwart |
||||||||
Damage |
 Flanker |
|||||||
 Recon |
||||||||
 Sharpshooter |
||||||||
 Specialist |
||||||||
Support |
 Medic |
|||||||
 Survivor |
||||||||
 Tactician |
||||||||


