Ramattra is a Stalwart Tank hero in Overwatch. He was released in Season 2 on 6 December 2022, making him the 36th hero to be added to the game.
Overview
Ramattra Hero Selection
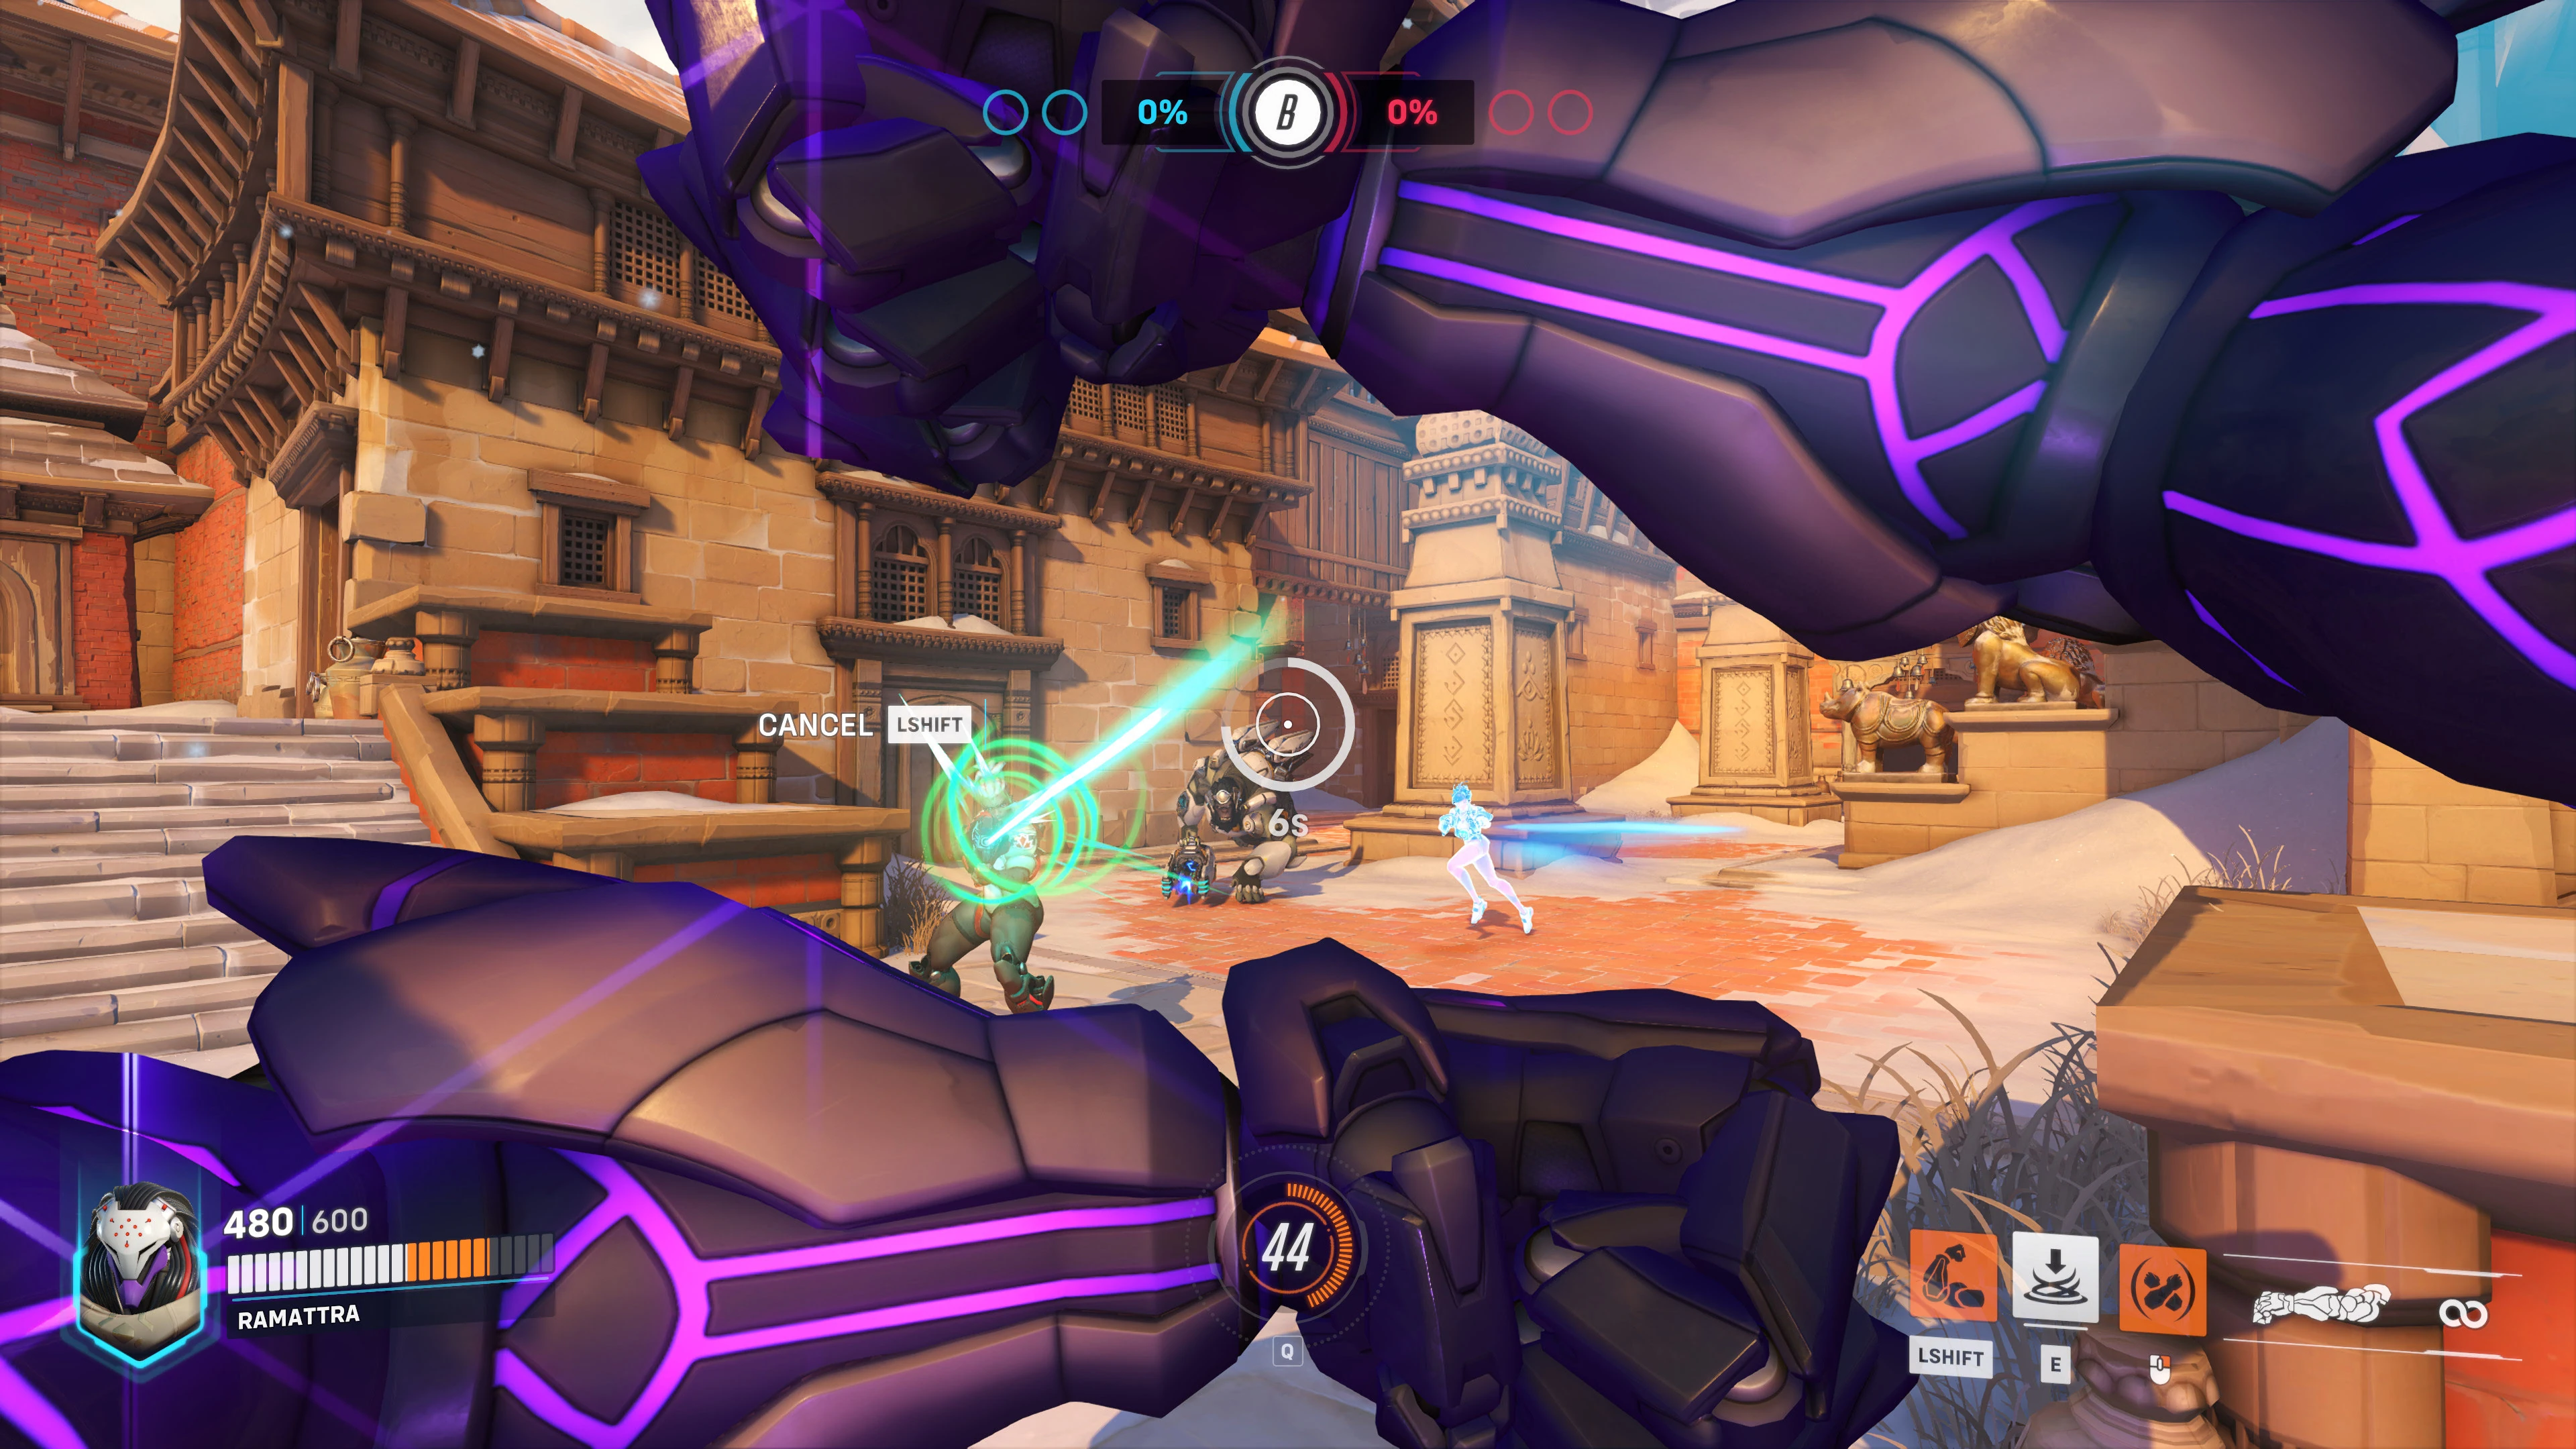
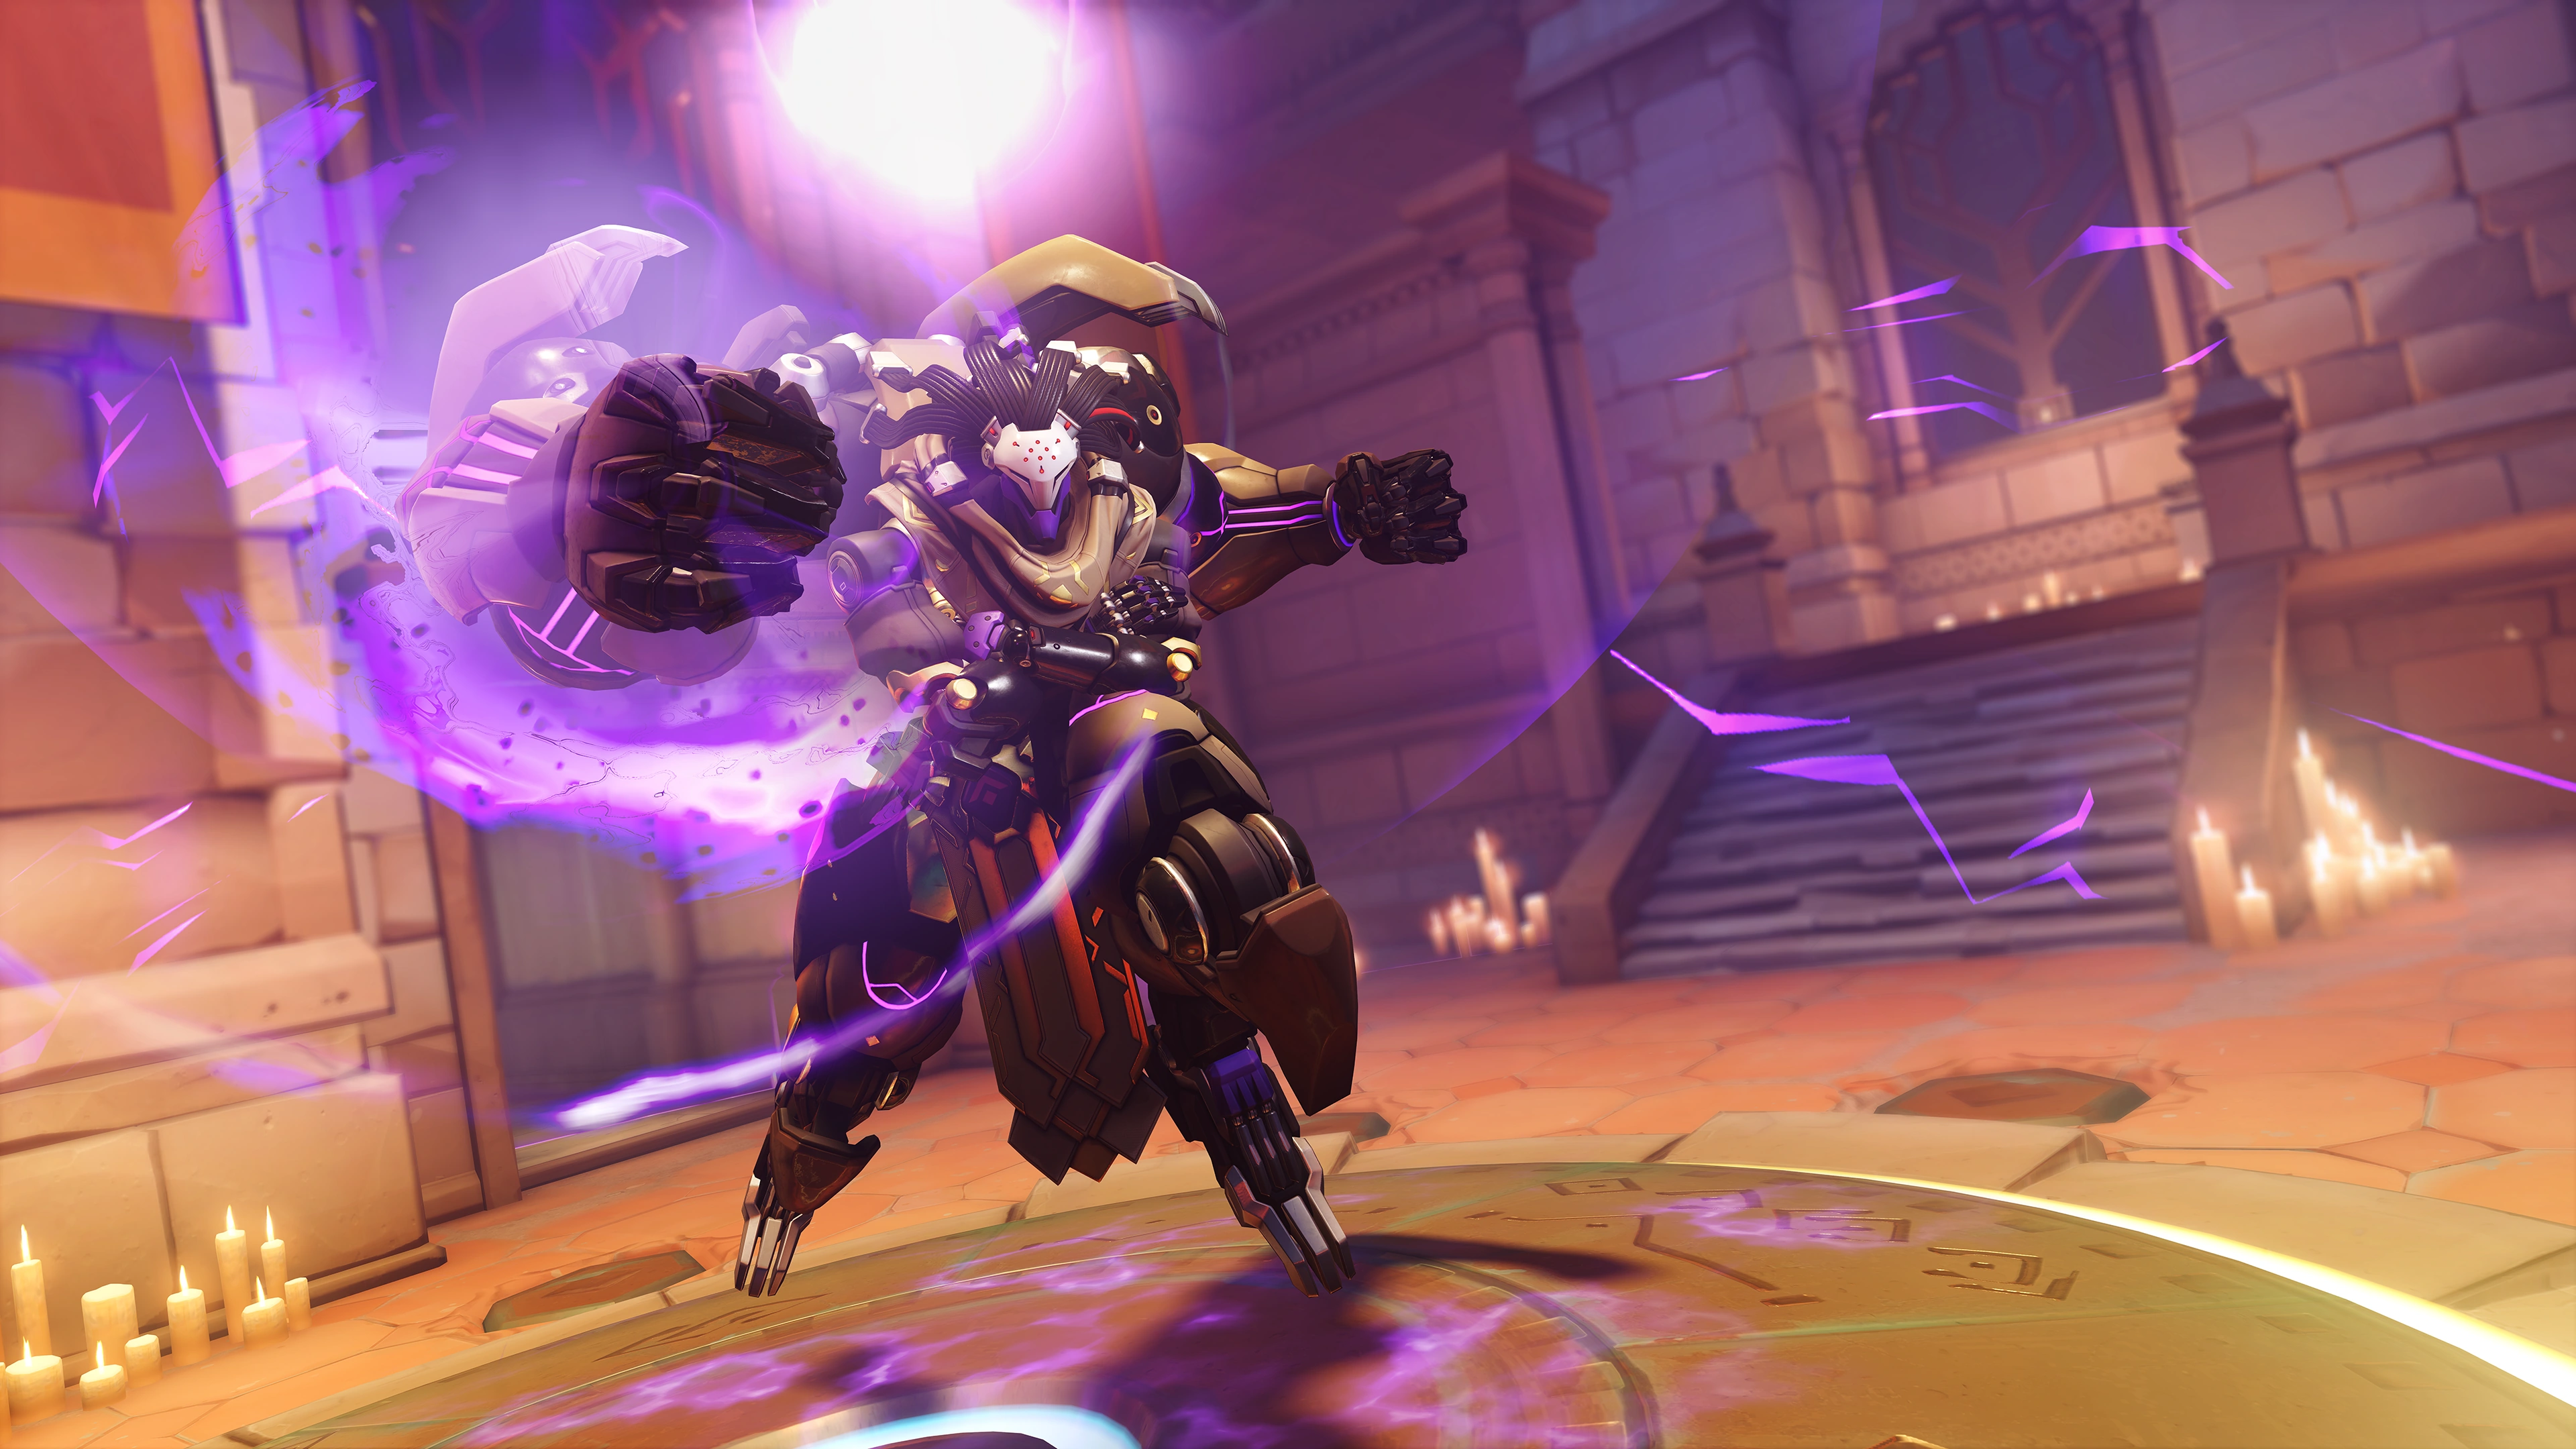
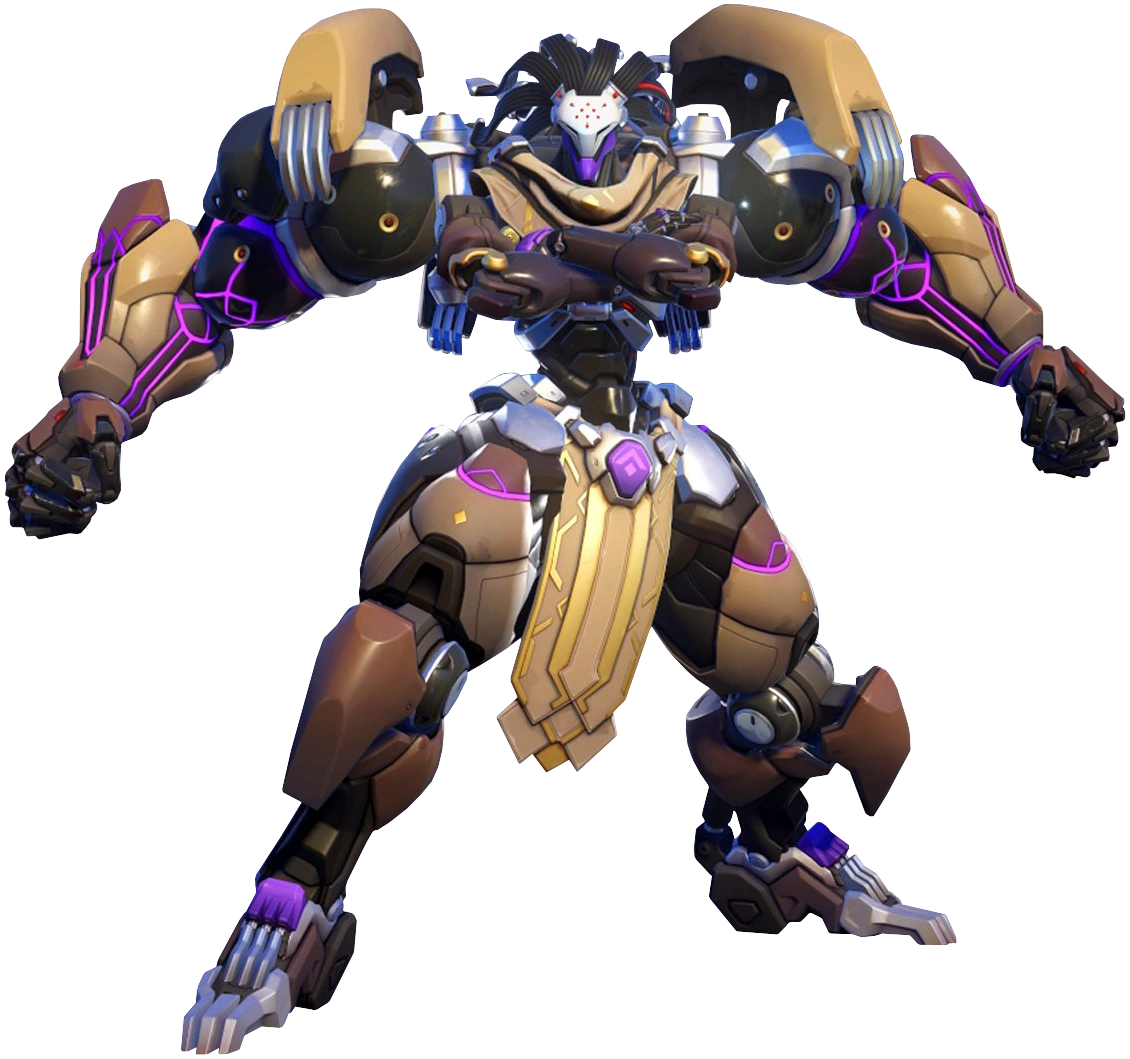
Ramattra is a dual-form hero. His Omnic form lets him deal long range poke damage using a staff as his weapon and deploy a stationary barrier to block fire from the enemy team. His Nemesis Form transforms him into a larger and more menacing close-range threat, allowing him to dish out damage with piercing punches while also granting him bonus armor and a block ability to withstand incoming damage. In either form, he can also deploy a slowing field that pulls down enemies in the air. During his ultimate ability, Ramattra unleashes his wrath, dealing continuous damage to all enemies in a large area around him and transforming into Nemesis form until no enemies remain.
-
 Main Menu
 -
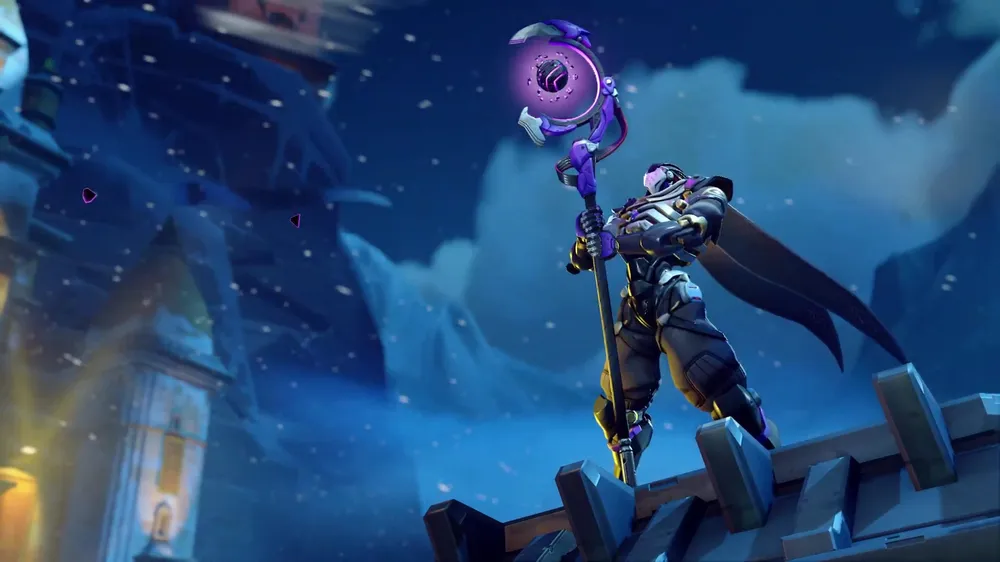
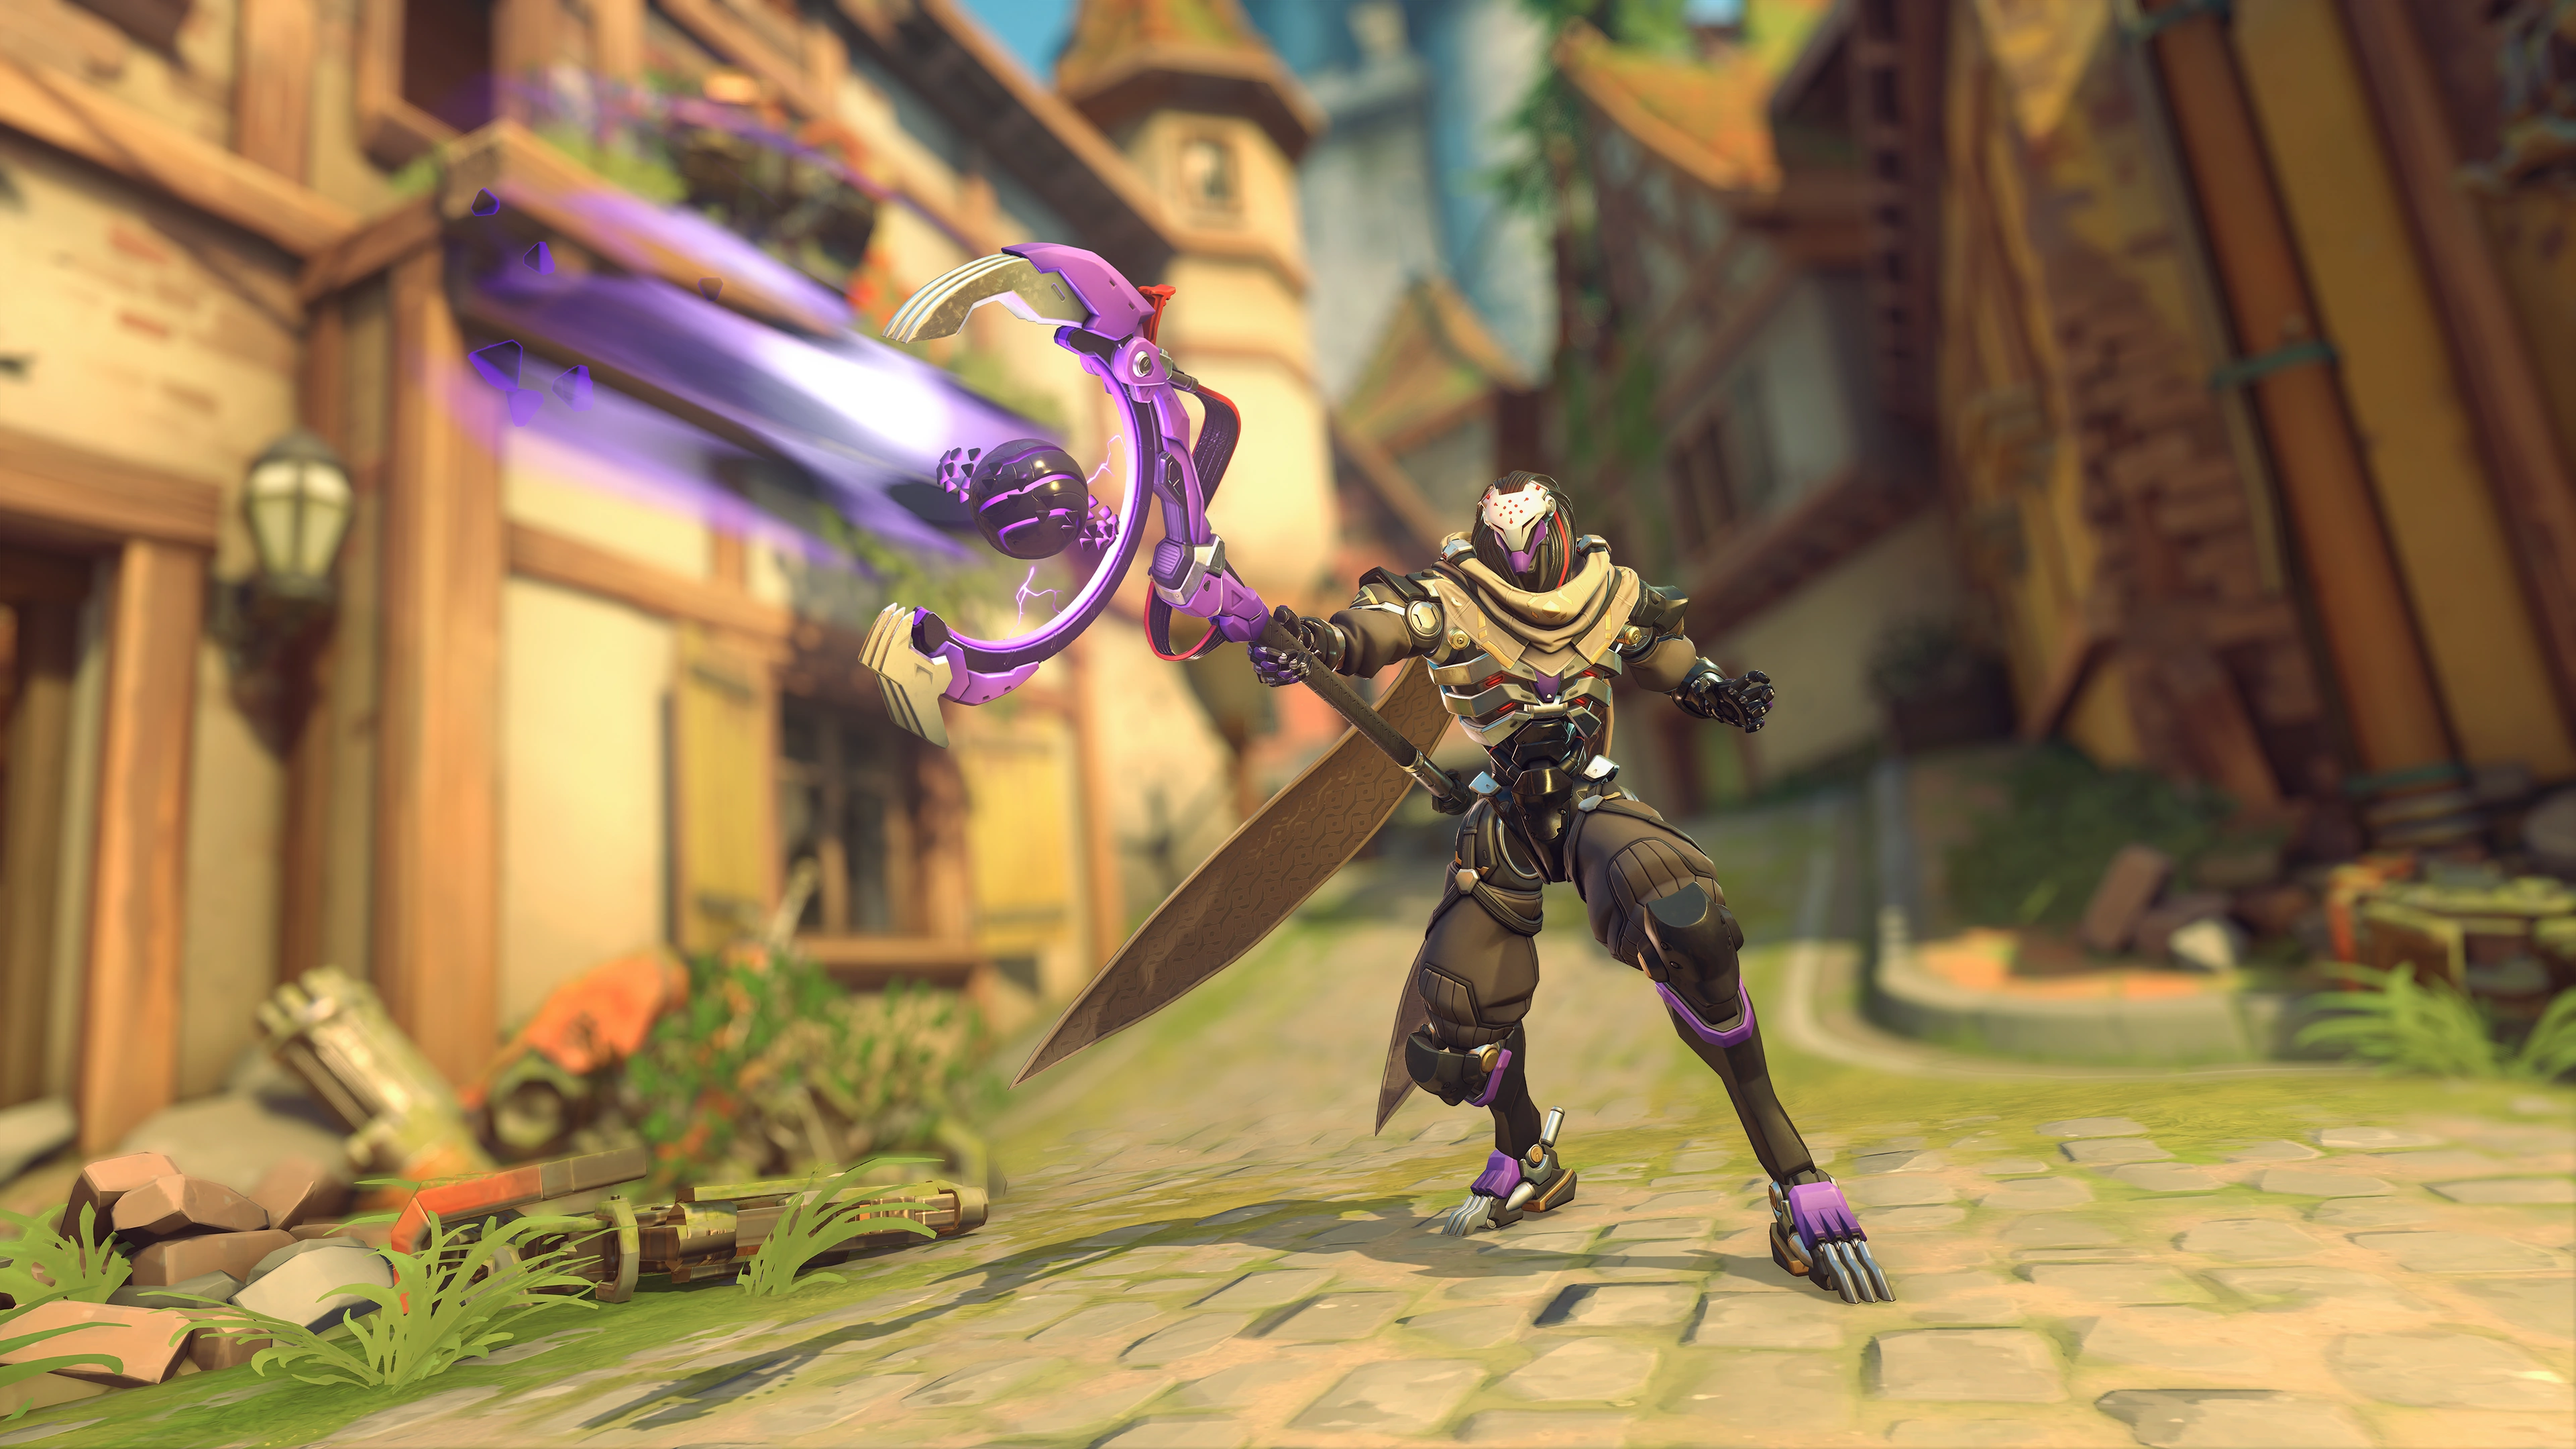
 Key Art
-
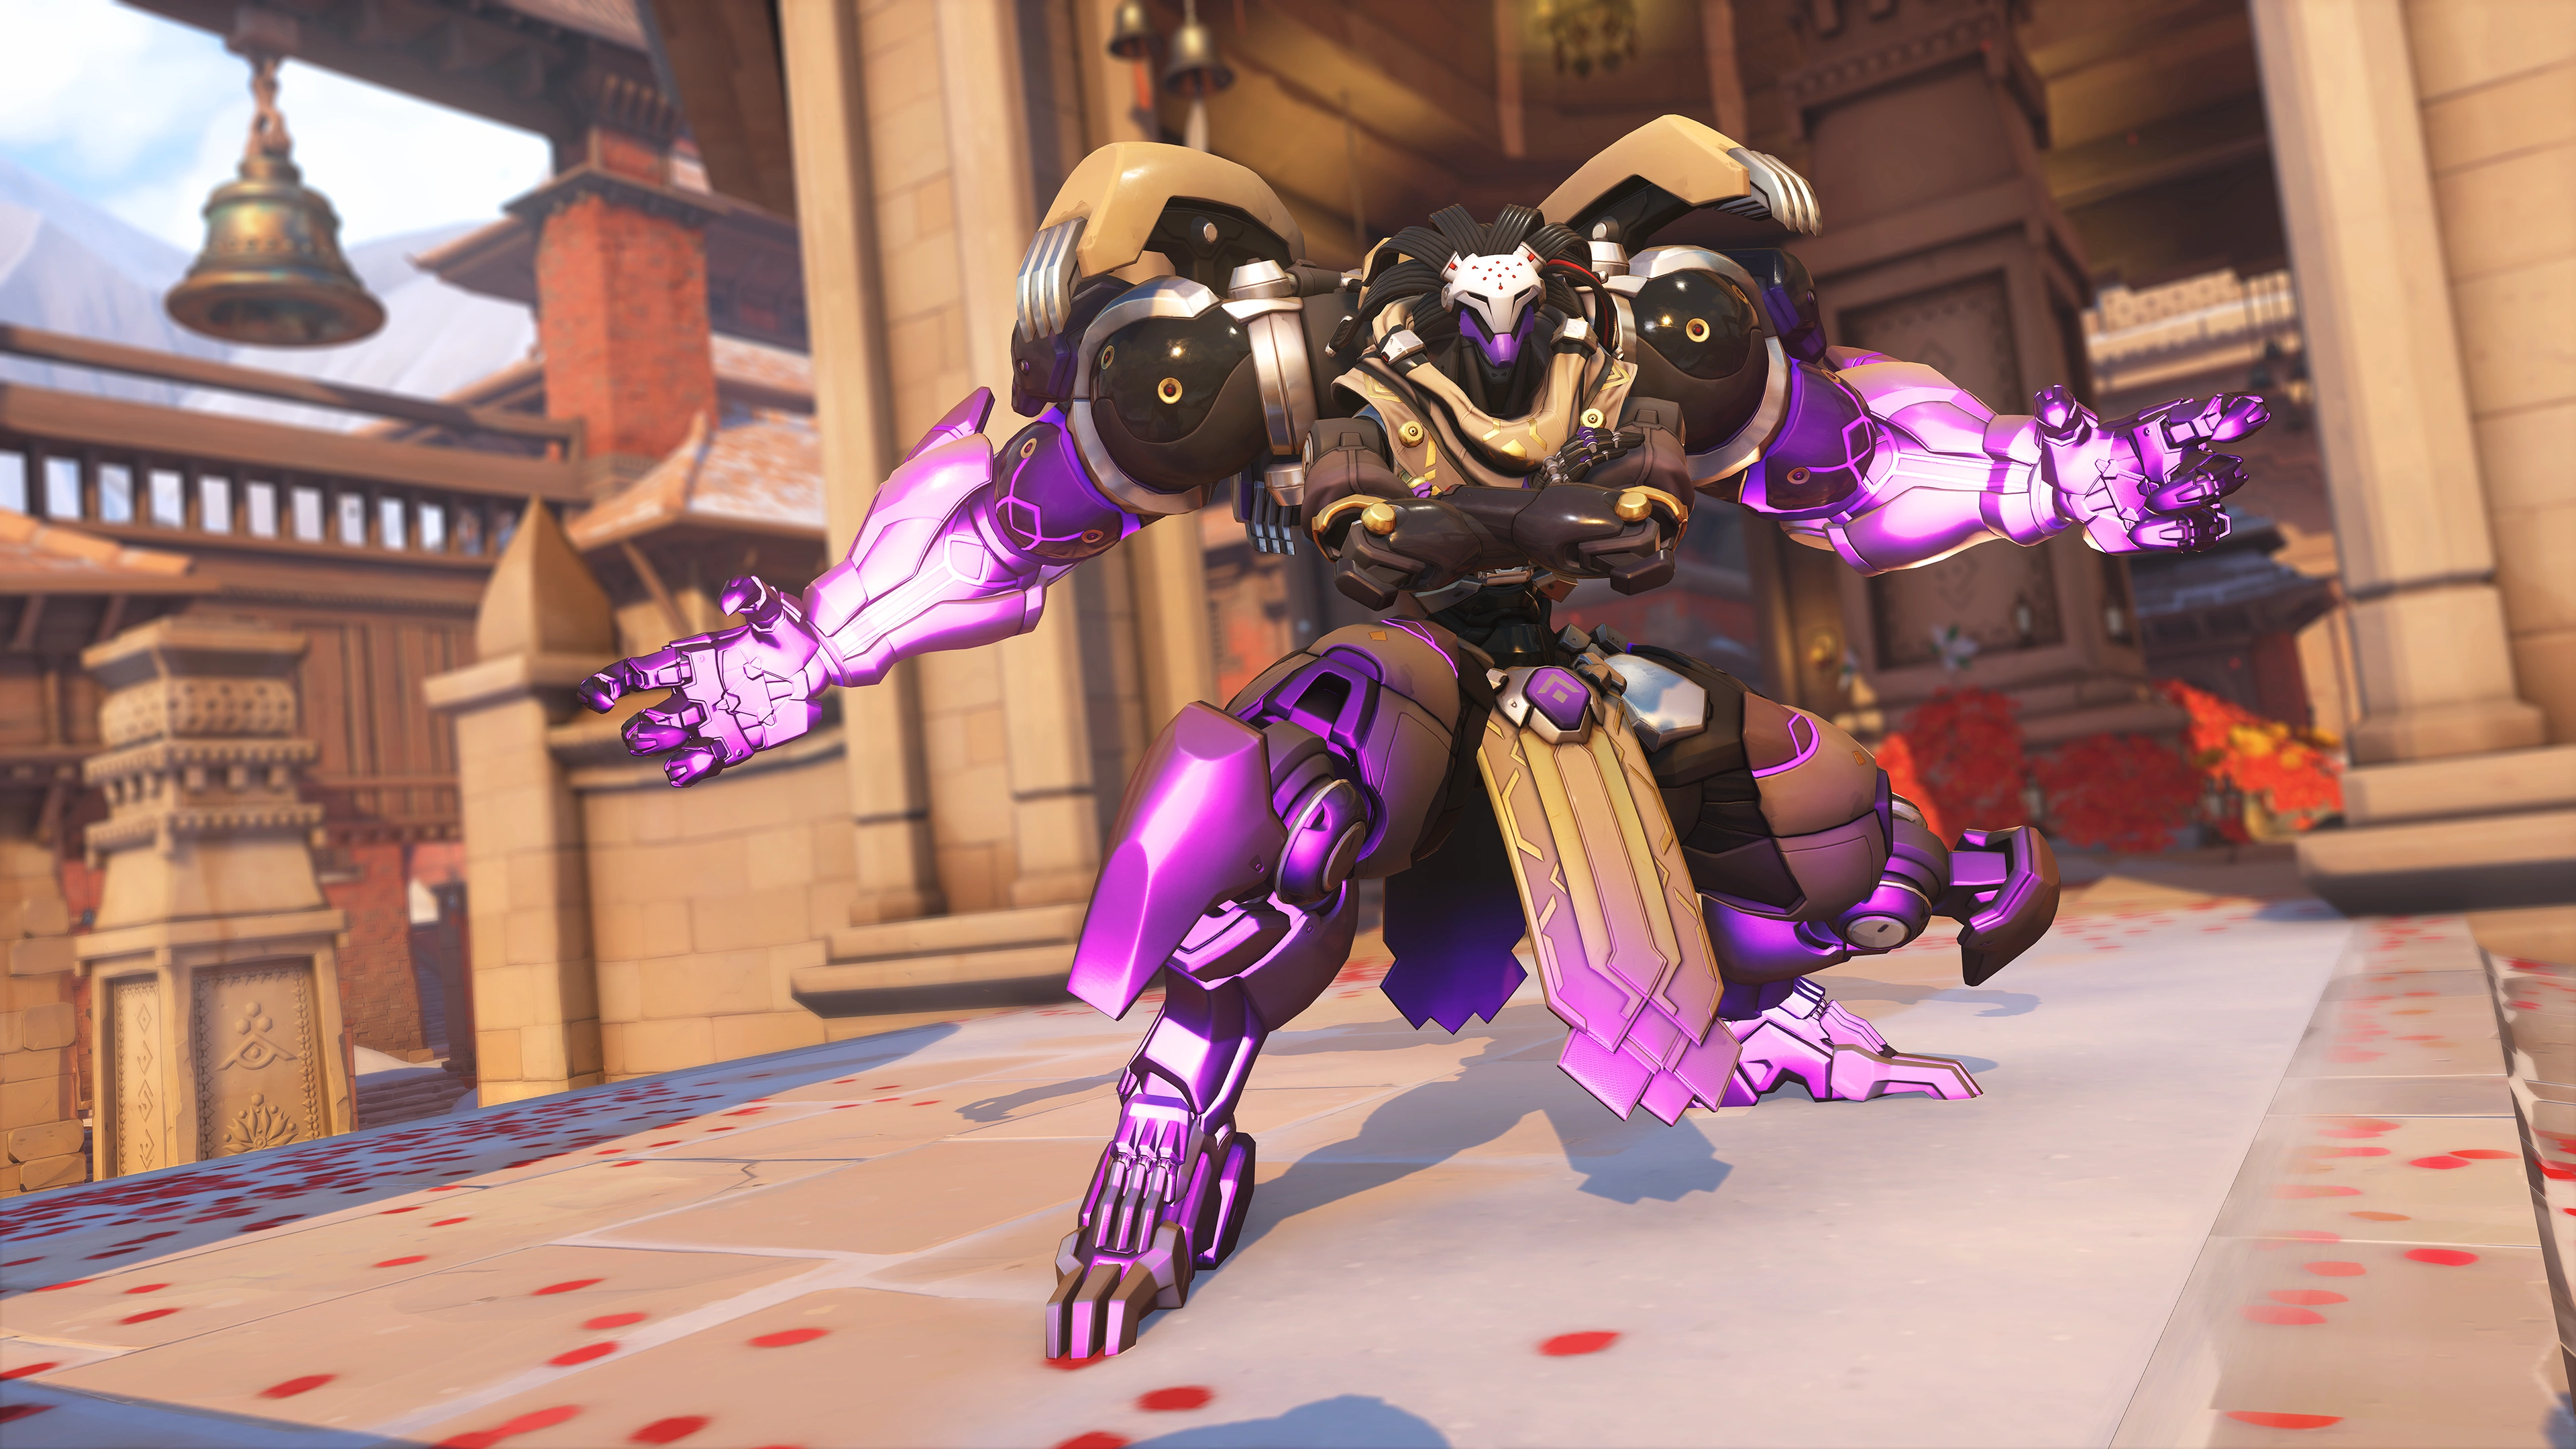
 3D Portrait
 -
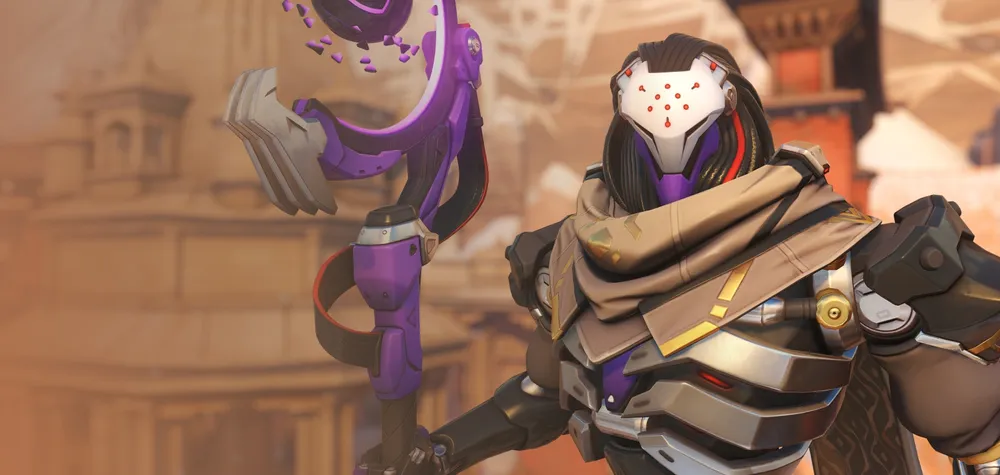
 2D Portrait

Abilities
Passive Abilities


- Ultimate charge and perk progress generation from damage and healing dealt to heroes with the Role: Tank passive is reduced by 40%.
- All tanks have 150 more health in Role Queue. The amount of armor and/or shields remains the same.
- No longer grants increased base health.
- Ultimate charge generation reduction reduced from 40% to 20%.

- Reduces the speed of knockback and the effectiveness of slowdown effects received by 40%.
Weapons


- Damage per second: 125 (100 overall w/ reload)
- Exclusive to Omnic form.
- No damage fall-off
Special Abilities
- Exclusive to Omnic form.
- Hold to target. While targeting, a line on the floor is generated that shows the player where the barrier will be drawn when the button is released.
- Targeting can be canceled by pressing Primary Fire or Escape.
- Only one barrier can be active at a time. Creating a new one replaces the previous.
- A new barrier cannot be created near the location of an active Void Barrier.
- Ability is stationed wherever it's placed. So, if placed on top of a temporary or moving surface, like
 Ice Wall or the Payload, it will remain in midair, even after the surface expires or moves.
 - Ability cooldown begins the moment the barrier is placed, similar to
 Barrier Projector.
- Cooldown increased from 12 to 16 seconds.
70 over time
- Available to both forms.
- The projectile must hit the ground to activate.
- The projectile is blocked by barriers, but the AoE is not.
- The projectile bounces off of objects and walls, but passes through heroes.
- The projectile can be negated by
 Defense Matrix,
  Javelin Spin,
  Kinetic Grasp,
  Power Matrix and
  Kekkai Sanctuary and reflected by
  Deflect before it lands.
 - Pulls down enemies lifted by Sigma's
 Gravitic Flux and Wrecking Ball during
  Piledriver, but does not prevent their effects.
 - Strangely, it appears that Doomfist's Rocket Punch is not affected by the speed reduction.
- Ravenous Vortex does not affect
 Petal Platform.
Nemesis Form
- Grants Ramattra armor and movement speed and replaces
 Void Accelerator and
  Void Barrier with
  Pummel and
  Block.
 - Cooldown starts when the transformation ends.
- Nemesis Form is not interrupted by crowd control.
- Ramattra can still use regular Quick Melee while in Nemesis Form.
- Nemesis Form's movement speed buff does not count towards global movement speed buff cap.
- Bonus armor reduced from 275 to 225.
Weapons
- Damage per second: 108.33
- Exclusive to Nemesis form.
- Punches pierce enemies and barriers.
- Also damages the barriers when passing through them.
- Damages enemies behind Zarya's
 Particle Barrier and
  Projected Barrier, but not the enemy affected by it.
- Pummel is not reflected when blocked by Deflect.
- Does not damage enemies through terrain or terrain-like objects, like Mei's Ice Wall or
 Tree of Life.
 - Quick Melee cancels the recovery animation of Pummel.
Special Abilities
- Exclusive to Nemesis form.
- Cooldown starts when blocking is stopped.
- No maximum duration; only limited by the duration of Nemesis Form.
- Block is a channeled ability; the ability is interrupted when Ramattra is affected by stunned, knocked down or hacked, including subsidiary effects.
- The impact damage from the instance that applied the effect will still be blocked.
- Damage is blocked if the horizontal angle between the direction Ramattra is facing and the direction from the impact location to its source is less than 53.15 degrees.
- Ramattra's vertical view angle does not affect blocking.
- Effectiveness extends to area abilities and splash damage from projectiles. Damage is generally blocked when facing the center of the AoE.
- Damage from
 Graviton Surge and
  Ravenous Vortex is blocked by facing the hero that used it instead of the AoE center.
 - Damage from
 Dragonstrike and
  Molten Core is blocked regardless of facing direction.
 - Does not reduce damage from Sombra's
 EMP or Sigma's Gravitic Flux (incl. both lift and slam).
- Damage from
- Block mitigates delayed or triggered detonation damage from stuck projectiles and debuffs, regardless of the direction Ramattra is facing.
- Following abilities are affected:
 A-36 Tactical Grenade,
  Sticky Bombs,
  Pulse Bomb and
  Captive Sun.
- Following abilities are affected:
- Does not affect damage over time effects from abilities.
- Hides head hitbox from the front.
- Block overrides the global 50% damage reduction buff cap.
Ultimate Ability
None (Nemesis form)
- Transforms into Nemesis form until the Ultimate ends.
- If Annihilation is activated from Nemesis Form, it has no recovery time and Ramattra regains the armor bonus from entering Nemesis Form.
- The cooldown of Nemesis Form is not affected by Annihilation. If Annihilation is activated from Nemesis Form, Nemesis Form's cooldown immediately begins as Annihilation is activated. Making it possible to chain Nemesis Form into Annihilation into another Nemesis Form if Annihilation lasts longer than the cooldown of Nemesis Form.
- Annihilation's tether damage by energy swarm is not interrupted by crowd control.
- Timer ticks down at 85% reduced rate when any enemy Heroes are affected by Annihilation, resulting in a maximum duration of 20 seconds.
- Enemies must be within line of sight to be affected by Annihilation.
- Does not affect enemies through barriers, including Zarya's Particle Barrier and Projected Barrier, or terrain-like objects, like Mei's Ice Wall.
- Does not affect invulnerable enemies, like Zenyatta during
 Transcendence.
  B.O.B. counts as a valid target. Constructs, such as Symmetra's
  Sentry Turrets and Torbjorn's
  Deploy Turret, do not take damage.
- Does not affect Sombra while she is invisible, unless Ramattra enters her detection radius.
- Can be canceled, by (re)activating Nemesis Form ability. This can be changed in settings.
Perks
Minor Perks
A Minor Perk can be chosen at level 2.


- Removed in Season 18, re-added in Reign of Ralon Season 2: Summit
Major perks
A Major Perk can be chosen at level 3.


30 (per burst)
- Damage per second: 175 (140 overall w/ reload)
- Activates every 15 shots.
- Increases damage from a full clip of ammo from 500 to 700. [2]
Hero-specific options
| Setting name | Options | Description |
|---|---|---|
| Void Barrier confirmation input | Secondary Fire release (default) | Void Barrier is activated when Secondary Fire is released. |
| Secondary Fire press | Void Barrier is activated when Secondary Fire is pressed again. | |
| Toggle Block | Off (default) | Block deactivates when player stops holding the button. |
| On | Block deactivates when player presses the button again. | |
| Void Barrier UI | On (default) | Void Barrier UI element is displayed above crosshair. |
| Off | Void Barrier UI element is hidden. | |
| Hide Nemesis Form cancel text | Off (default) | Cancel text UI element is displayed to the left of the crosshair. |
| On | Cancel text UI element is hidden. | |
| Relative aim sensitivity during Nemesis Form. | 0% ... 500% (default: 100%) | Multiplier to base aim sensitivity while Nemesis Form. |
| Annihilation cancel input | Ability 1 (default) | Annihilation is deactivated using Nemesis Form ability hotkey. |
| Ability 3 | Annihilation is deactivated using Annihilation ultimate ability hotkey. | |
| Off | Annihilation cannot be deactivated. |
Strategy
Ramattra's gameplay style differs in accordance with his form. In his omnic form, Ramattra is good at 'poking' the enemy, whereas his Nemesis form is designed for close combat. Players have to choose when it is best to use the Nemesis form, such as rushing the enemy. Also his shield is only up for 4 seconds so use it as a flash shield, to counter ultimates.[1] His greatest strength is chaining together attacks with his team, like Sigma's ultimate, Ravenous Vortex, and Nemesis form to quickly eliminate groups. He can also protect himself and his team from big, quick damage, with Void Barrier and Block.
Weapons and Abilities
- Good mid/long-range "poke damage" due to no damage fall-off.
- Most useful up close due to slow projectile speed, making it easier to land headshots.
- Good tool for baiting enemies to use key abilities early.
- While Void Accelerator does deal more single-target damage than Pummel, especially with headshots, it is generally better to fight in Nemesis Form when you can. The burstier damage and movement speed bonus are better for securing kills, and it is very easy to get blown up in Omnic Form without the additional armor health once Void Barrier expires.
- The barrier has lot of health, but its duration is short, it cannot be reoriented and has rather long cooldown, so think carefully when to use it.
- It can be deployed up to 35 meters away and can be used to block sniper spots or healing from supports.
- Nemesis Form instantly grants a chunk of armor on top of your current HP. In a pinch, it is completely fine to activate Nemesis Form and Block to keep yourself from dying.
- Nemesis Form's cooldown starts when the ability ends. If you are not in position to make use of Pummel and Block, you should deactivate it to get its cooldown back up slightly faster for the next engage.
- Quick Melee can still be used in Nemesis Form, canceling the recovery animation of Pummel. If in range, it can be used to immediately finish off 200 and 250 HP enemies that would otherwise be left with 20/10 HP after 3/4 hits.
- Has no cooldown or duration as long as Nemesis Form is active.
- Be careful to not get surrounded, as Block slows Ramattra's movement speed while active and only protects from the front.
- Use Ravenous Vortex to control your distance to your enemies. In Omnic Form you generally want to use it defensively to prevent the enemy from rushing you and in Nemesis Form you want to use it to prevent the enemy from running from you.
- While Ravenous Vortex can pull down aerial enemies, its vertical hitbox is rather low and it takes a bit to deploy, so it isn't very reliable at countering flying enemies and most of the time better used elsewhere.
- Annihilation resets the cooldown of Nemesis Form when it ends. One can spend long time in Nemesis Form by first casting it through the normal ability, then using Annihilation to enter Nemesis Form and lastly use Nemesis Form again right after the ultimate ends.
- Annihilation resets the bonus armor if activated directly from Nemesis form. It can be however useful to cancel Nemesis form before activating Annihilation to quickly put up your barrier from Omnic form for additional cover if it is available and you are not in immediate danger of dying.
Match-Ups and Team Synergy
Tank
| Hero | Match-Up | Team Synergy |
|---|---|---|
 D.Va |
D.VA's Fusion Cannons deal negligible damage at long range, unlike your Void Accelerator. However, Defense Matrix can destroy the nanites emitted from your staff. D.Va will have to charge at you with Boosters to deal greater. Now, you can turn the tables on her. Once she close, switch to Nemesis Form and D.Va has no defenses against your punches besides fleeing. If D.Va uses Self-Destruct, either your Void Barrier or Block (during Nemesis form) are viable defenses against it. | (To be added) |
 Doomfist |
If you see Doomfist approaching, use your Ravenous Vortex to slow him down (or pull him down early if engaging with Seismic Slam). Avoid pummeling him when he uses Power Block as three punches will empower his next Rocket Punch. Use Block to reduce the damage from Meteor Strike, or use Ravenous Vortex, to slow him down once his ultimate ends. | (To be added) |
 Hazard |
(To be added) | (To be added) |
 Junker Queen |
Try to use your staff to force Junker Queen to use Commanding Shout first. Once she does, engage her in Nemesis form as she'll most definitely be fighting you at close quarters. Use your Ravenous Vortex to slow her engagement a bit and then proceed to use Pummel. Carnage has a slow windup so use Block if you anticipate its use. | (To be added) |
 Mauga |
Mauga will be a pain in your side. Due to your hitbox, especially in |
(To be added) |
 Orisa |
Don't engage Orisa too early. Stay back and wait for Orisa to burn her cooldowns first before engaging. Javelin Spin blocks your Pummel, Energy Javelin can push you back, and you deal less damage while Fortify is active. When she uses Terra Surge, your Block greatly reduces the damage you receive. However, if you see Orisa charging with Javelin Spin, use your Void Barrier to block her. | (To be added) |
 Ramattra |
In a 1-on-1 scenario, you want to be the second person to use Nemesis Form. If the enemy Ramattra uses Annihilation first, use your Void Barrier to block the nanites and fall back. Use Ravenous Vortex to slow him down as he will certainly charge towards you. Remember, Annihilation ends after three seconds of no damage. | (To be added) |
 Reinhardt |
Never enter a battle against a Reinhardt when you're not in your Nemesis Form. All it takes for him to dispatch you out is one successful Charge and one strike of his Rocket Hammer, and just like that, you'll be waiting for a respawn after just a matter of seconds. If you are being charged by a Reinhardt, alert your team to pocket you to keep yourself safe and remain in the fight for longer, or if you can react quickly, enter your Nemesis Form to make use of your added armor.
|
(To be added) |
 Roadhog |
Void Barrier can block his Chain Hook and it can interrupt his hook combo by placing it between him and a hook ally. Do not use Nemesis Form (and by extension, Annihilation) against Whole Hog. Whole Hog can push you back, so far back that your nanites can't reach anyone or off the map. Wait for his ultimate to end or Roadhog's death before using either ability. | (To be added) |
 Sigma |
You have the upper hand against Sigma. Your weapon has no range limit. Plus, simply shield aggressively to close to distance and quickly switch to Nemesis Form. Neither Experimental Barrier nor Kinetic Grasp can block Pummel. All Sigma can do is use |
(To be added) |
 Wrecking Ball |
Wrecking Ball health pool means you probably can't deal meaningful damage to him. Your Void Barrier can block his Piledriver damage. Ravenous Vortex can be used to slow him down or pull down. Realistically, since Wrecking Ball will most definitely go after your backline, follow suit and go after his backline. | (To be added) |
 Winston |
If Winston dives your backline, place Void Barrier in front of his support so he can't be healed. Run in with Nemesis Form and Pummel him. After 3-4 punches, place Ravenous Vortex to close off his escape. | (To be added) |
 Zarya |
Force Zarya to use her barriers early as without them, she's relatively easier to eliminate. Your Void Barrier can block most of her damage. Once she's used both of her barriers, throw down a Ravenous Vortex and charge at her in Nemesis Form. | (To be added) |
Damage
| Hero | Match-Up | Team Synergy |
|---|---|---|
 Ashe |
Aside from poking with your Void Accelerator and occasionally throwing Ravenous Vortex at her from a distance, there is not much you can do against a properly positioned Ashe as her Dynamite can go over your Void Barrier and damage you and your team. At close range, try to keep damaging her until she uses her Coach Gun then chase her down with Ravenous Vortex or your Nemesis form. | (To be added) |
 Bastion |
Hide behind walls and use natural cover against a Bastion in Assault configuration. Your Void Barrier and Power Block are ineffective against Bastion as he can still melt you through it, and they should only be used to escort you to cover or as your last-resort defense. When Bastion is not in Assault, his relatively large hitbox is easy to damage with your Void Accelerator, so take advantage of it to kill him or bait out Assault. | (To be added) |
 Cassidy |
Cassidy is as good as dead if you catch him at close range with your Nemesis form - however still be cautious as he can fan fire you at close range and slow you down with his Flashbang which will make it harder for you to close the distance with him. Utilize your Void Barrier and Ravenous Vortex well to counteract this. | (To be added) |
 Echo |
You are not well-equipped to deal with flying heroes. Try to throw a Ravenous Vortex at an Echo that does not have Flight or is not looking at you, as she might avoid your abilities before she can be caught by them. If Echo duplicates you during her ultimate, use your Void Barrier to sever off any healing she might get and pummel her with Nemesis form before she can get her ultimate ready. | (To be added) |
 Genji |
If a Genji is harassing your team, pummel him with your Nemesis form or throw a Ravenous Vortex at him. This will either kill or scare him into using Swift Strike or Deflect, essentially ending his turn meaning that he will be unable to dive your team. Your ultimate is also a decent counter to his Dragonblade as your ultimate can pierce through his Deflect. | (To be added) |
 Hanzo |
A good Hanzo will often stay away from you as much as possible or stand on areas you cannot access easily. Hanzo has little mobility to get himself out - exploit this. Cut off his sightlines with Void Barrier, use Ravenous Vortex and pummel him with your Nemesis form to secure a kill whenever possible. With |
(To be added) |
 Junkrat |
It is extremely risky to fight a Junkrat at close range without your Nemesis form as he has higher burst damage than your Void Accelerator and can kill you if you're not careful. Junkrat can be slippery to fight as he can place a Steel Trap while running away or throw a Concussion Mine at you to create distance between you and him. Do note that a Junkrat stuck in your Ravenous Vortex is usually an easy kill as he is unable to escape while being stuck in the vortex. | (To be added) |
 Mei |
Try to save Void Barrier or Nemesis form in your ability reserve if you know Mei is alive. She can wall you off from your team, but either of the cooldowns mentioned before can greatly increase your chances of living until your team can break the wall behind you, whether you shield yourself or Power Block the damage. Pummel her with your Nemesis form to force her to use Cryo Freeze and she should easily be eliminated. | Mei has good synergy with Ramattra. |
 Pharah |
Pharah will rarely play within your range, so it is best to ignore her while she is in the air for your team to deal with. In the case that she is vulnerable, Ravenous Vortex can help your team secure a kill onto Pharah to prevent her from flying away. Keep track of her ultimate as her Barrage can kill you through your Power Block. Play near cover accordingly. | (To be added) |
 Reaper |
Void Barrier easily denies Reaper from doing any damage onto you and hence makes him easy to ignore while you are fighting. If you are directly confronting a Reaper, place down a Void Barrier first then enter Nemesis form to kill him or force him into using Wraith. | (To be added) |
 Soldier: 76 |
You have no vertical mobility so dealing with a Soldier on high ground or an off angle can be a nuisance and it is usually better to let your team deal with it. Use Void Barrier to minimize the damage you and your team will take from his poke damage. At close range, his Biotic Field makes him harder to kill with your Void Accelerator so don't hesitate to enter Nemesis form to secure the kill. | (To be added) |
 Sojourn |
Sojourn can be extremely slippery as her |
(To be added) |
 Sombra |
Most of the time, Sombra does not pose a threat to you as she will usually be focusing the rest of your team instead. However in situations where she may focus on you, she will usually Hack you in your Nemesis form to stop you from using Power Block. This will not matter most of the time as Hack lasts for a short time and your defensive abilities (aside from Power Block) cannot be cancelled by Hack. Try not to waste any abilities such as Ravenous Vortex or Nemesis against a Sombra as she will run away and your Void Accelerator usually suffices as enough damage to scare her into doing so. | (To be added) |
 Symmetra |
Barriers are fuel for Symmetra's primary fire, so it is better to enter Nemesis form straight away and start pummeling her. You will always outdamage a Symmetra at close range regardless of her charge with Nemesis form so focus her if she becomes aggressive immediately. | (To be added) |
 Torbjörn |
You are one of the best equipped Tanks to deal with a Torbjorn turret as you can destroy it simply by firing at it with your Void Accelerator and you can easily block it off with your Void Barrier. His hitbox also makes him an easy target to whittle his health down with your Void Accelerator or pummel in your Nemesis form. Be wary when he uses Overload to gain extra health as it does make him harder to kill, so save your cooldowns as much as possible when directly engaging with Torbjorn. | (To be added) |
 Tracer |
Hitting a Tracer is difficult with your Void Accelerator and she can easily escape your Ravenous Vortex with Blink. In this matchup, you want to get near Tracer to kill her instantly before she can react (with two Nemesis form punches and a quick melee on the second punch) or force her to Recall as soon as possible. Without Nemesis form, it's hard for you to secure a kill on a Tracer by yourself so coordinate with your team to deal with her. | (To be added) |
 Venture |
(To be added) | (To be added) |
 Widowmaker |
Widowmaker will usually be staying far away from the fight and on the high ground, which makes it difficult for you to deal with her. Use Void Barrier and natural cover whenever possible to minimize the damage she does onto you and your team. Keep in mind that she has Grappling Hook and try to save your abilities accordingly to chase her down. | (To be added) |
Support
| Hero | Match-Up | Team Synergy |
|---|---|---|
 Ana |
Ana's Biotic Grenade and Sleep Dart can pose a decent threat against you. She will typically throw her Biotic Grenade during fights to give her team the upper hand, so save Void Barrier or Nemesis form for this. Her Sleep Dart can also shut down your ultimate, so be cautious and wait for Ana to use her Sleep Dart first then use ultimate. | The combined power of a |
 Baptiste |
Baptiste's damage and Immortality Field can make some of your engagements more difficult, but otherwise his kit should not be a major problem to you. Catch him with a Ravenous Vortex so that he cannot use his Exo Boots to jump to a safe place. Baptiste's Amplification Matrix can kill you within less than a few seconds if you are not careful. Play behind cover when you hear Baptiste's cue for his ultimate, or directly contest him with your Nemesis form if you are close enough to him. | Since you're a ground hero, it's easier for Baptiste to sustain you in close-range brawls. His |
 Brigitte |
At long range, she can absorb your nanites with her shield to her benefit, giving her health. However, at close range her shield does little to protect her from pummel and quick melee. Be careful, as once her shield is down her attacks are strongest at close range. The good news is, outside of her shield bash, she has little in ways of movement- so once she is in range of your nemesis form or ultimate, it can be difficult for her to escape. | (To be added) |
 Illari |
First thing is almost always to take down her pylon, which can be incredibly fast and easy to do with your nanites. This will also prevent her from self healing. Her main attack ability is long range, so you have little to lose by pummeling her close range. She can use her jump ability do defend herself and escape her pummel, so it's ideal to wait until she's used her jump before pummeling her. | (To be added) |
 Juno |
Juno can be slippery for you. Her |
Hyper Ring can speed up Ramattra in Nemesis Form, making it easier to hunt down enemies trying to flee. |
 Kiriko |
Kiriko does very minimal damage against you as Ramattra, so her damage does not pose any threat against you, but her abilities and ultimate should always be dealt with first. When you directly confront a Kiriko, it is likely that she has her Swift Step or Protection Suzu ready so use as little cooldowns as possible to force her to use them first, then go after her or any of her other teammates after you have forced her to use either of her cooldowns. The key in this matchup is to use Ravenous Vortex after she has expended her abilities so that she has no way of escaping and can be secured as an easy kill. Do be careful of her Kitsune Rush as her team can run you down very easily with it even with your defensive abilities, and it is wise to kite it, then play near your team and wait it out before re-engaging. | (To be added) |
 Lifeweaver |
(to be added) | (To be added) |
 Lúcio |
Dealing with a Lucio is typically not your job, though if you meet him, you can simply throw a Ravenous Vortex to nullify his ability to climb walls and have you and your team secure a kill on him. Try not to chase a Lucio too hard if he is out of range, as it can become detrimental the longer you are distracted by him. | (To be added) |
 Mercy |
Dealing with Mercy is very similar to Pharah and Echo, do not focus her too hard as she will typically be playing in the backlines and in the sky, out of your effective range. As usual, use Ravenous Vortex when she is vulnerable, but specifically look for when she uses her Guardian Angel flight, throwing one at her as soon as she has performed her second "jump" in her flight. This ensures that you will not miss your vortex because she flew away. | (To be added) |
 Moira |
Ramattra's matchup with Moira is similar to Kiriko in the sense that you should use minimal, and if you can, no abilities to force her to use her own defensive abilities and then catch her or her teammates out when she's in a state of vulnerability. Moira's damage, even with her Biotic Orb and Coalescence is typically insignificant against you in your Nemesis form, but you should still pummel her to scare her away before she can do any more healing or damage with it. | (To be added) |
 Zenyatta |
Discord Orb can spell death for you if you are not careful. Always make sure you are playing near cover when you know there is a Zenyatta on the enemy team to get the Discord Orb off you, then try and isolate him from his team with your Nemesis form and Ravenous Vortex to dispatch him as quickly as possible. | (To be added) |
Map Strategies
Control
| Map | Strategy & Stage Tips |
|---|---|
 Overall Strategy |
TBA RATING | TBA FEATURE
Map strategy details for Overall Strategy are currently missing. You can help the Overwatch Wiki by adding them!
|
 Antarctic Peninsula |
TBA RATING | TBA FEATURE
Map strategy details for Antarctic Peninsula are currently missing. You can help the Overwatch Wiki by adding them! Labs
Strategy details missing.
Sublevel
Strategy details missing.
Icebreaker
Strategy details missing.
|

|
TBA RATING | TBA FEATURE
Map strategy details for Busan are currently missing. You can help the Overwatch Wiki by adding them! Downtown
Strategy details missing.
Sanctuary
Strategy details missing.
MEKA Base
Strategy details missing.
|

|
TBA RATING | TBA FEATURE
Map strategy details for Ilios are currently missing. You can help the Overwatch Wiki by adding them! Lighthouse
Strategy details missing.
Well
Strategy details missing.
Ruins
Strategy details missing.
|

|
TBA RATING | TBA FEATURE
Map strategy details for Lijiang Tower are currently missing. You can help the Overwatch Wiki by adding them! Control Center
Strategy details missing.
Garden
Strategy details missing.
Night Market
Strategy details missing.
|

|
TBA RATING | TBA FEATURE
Map strategy details for Nepal are currently missing. You can help the Overwatch Wiki by adding them! Village
Strategy details missing.
Shrine
Strategy details missing.
Sanctum
Strategy details missing.
|

|
TBA RATING | TBA FEATURE
Map strategy details for Oasis are currently missing. You can help the Overwatch Wiki by adding them! City Center
Strategy details missing.
Gardens
Strategy details missing.
University
Strategy details missing.
|

|
TBA RATING | TBA FEATURE
Map strategy details for Samoa are currently missing. You can help the Overwatch Wiki by adding them! Beach
Strategy details missing.
Downtown
Strategy details missing.
Volcano
Strategy details missing.
|
Escort
| Map | Strategy & Stage Tips |
|---|---|
 Overall Strategy |
TBA RATING | TBA FEATURE
Map strategy details for Overall Strategy are currently missing. You can help the Overwatch Wiki by adding them!
|

|
TBA RATING | TBA FEATURE
Map strategy details for Circuit Royal are currently missing. You can help the Overwatch Wiki by adding them! Attack
Strategy details missing.
Defense
Strategy details missing.
|

|
TBA RATING | TBA FEATURE
Map strategy details for Dorado are currently missing. You can help the Overwatch Wiki by adding them! Attack
Strategy details missing.
Defense
Strategy details missing.
|

|
TBA RATING | TBA FEATURE
Map strategy details for Havana are currently missing. You can help the Overwatch Wiki by adding them! Attack
Strategy details missing.
Defense
Strategy details missing.
|

|
TBA RATING | TBA FEATURE
Map strategy details for Junkertown are currently missing. You can help the Overwatch Wiki by adding them! Attack
Strategy details missing.
Defense
Strategy details missing.
|

|
TBA RATING | TBA FEATURE
Map strategy details for Rialto are currently missing. You can help the Overwatch Wiki by adding them! Attack
Strategy details missing.
Defense
Strategy details missing.
|

|
TBA RATING | TBA FEATURE
Map strategy details for Route 66 are currently missing. You can help the Overwatch Wiki by adding them! Attack
Strategy details missing.
Defense
Strategy details missing.
|

|
TBA RATING | TBA FEATURE
Map strategy details for Shambali Monastery are currently missing. You can help the Overwatch Wiki by adding them! Attack
Strategy details missing.
Defense
Strategy details missing.
|

|
TBA RATING | TBA FEATURE
Map strategy details for Watchpoint: Gibraltar are currently missing. You can help the Overwatch Wiki by adding them! Attack
Strategy details missing.
Defense
Strategy details missing.
|
Hybrid
| Map | Strategy & Stage Tips |
|---|---|
 Overall Strategy |
TBA RATING | TBA FEATURE
Map strategy details for Overall Strategy are currently missing. You can help the Overwatch Wiki by adding them!
|
 Blizzard World |
TBA RATING | TBA FEATURE
Map strategy details for Blizzard World are currently missing. You can help the Overwatch Wiki by adding them! Attack
Strategy details missing.
Defense
Strategy details missing.
|

|
TBA RATING | TBA FEATURE
Map strategy details for Eichenwalde are currently missing. You can help the Overwatch Wiki by adding them! Attack
Strategy details missing.
Defense
Strategy details missing.
|

|
TBA RATING | TBA FEATURE
Map strategy details for Hollywood are currently missing. You can help the Overwatch Wiki by adding them! Attack
Strategy details missing.
Defense
Strategy details missing.
|

|
TBA RATING | TBA FEATURE
Map strategy details for King's Row are currently missing. You can help the Overwatch Wiki by adding them! Attack
Strategy details missing.
Defense
Strategy details missing.
|

|
TBA RATING | TBA FEATURE
Map strategy details for Midtown are currently missing. You can help the Overwatch Wiki by adding them! Attack
Strategy details missing.
Defense
Strategy details missing.
|
 Numbani |
TBA RATING | TBA FEATURE
Map strategy details for Numbani are currently missing. You can help the Overwatch Wiki by adding them! Attack
Strategy details missing.
Defense
Strategy details missing.
|

|
TBA RATING | TBA FEATURE
Map strategy details for Paraíso are currently missing. You can help the Overwatch Wiki by adding them! Attack
Strategy details missing.
Defense
Strategy details missing.
|
Push
| Map | Strategy & Stage Tips |
|---|---|
 Overall Strategy |
TBA RATING | TBA FEATURE
Map strategy details for Overall Strategy are currently missing. You can help the Overwatch Wiki by adding them!
|

|
TBA RATING | TBA FEATURE
Map strategy details for Colosseo are currently missing. You can help the Overwatch Wiki by adding them! Pushing
Strategy details missing.
Defending
Strategy details missing.
|

|
TBA RATING | TBA FEATURE
Map strategy details for Esperança are currently missing. You can help the Overwatch Wiki by adding them! Pushing
Strategy details missing.
Defending
Strategy details missing.
|

|
TBA RATING | TBA FEATURE
Map strategy details for New Queen Street are currently missing. You can help the Overwatch Wiki by adding them! Pushing
Strategy details missing.
Defending
Strategy details missing.
|

|
TBA RATING | TBA FEATURE
Map strategy details for Runasapi are currently missing. You can help the Overwatch Wiki by adding them! Pushing
Strategy details missing.
Defending
Strategy details missing.
|
Flashpoint
| Map | Strategy & Stage Tips |
|---|---|
 Overall Strategy |
TBA RATING | TBA FEATURE
Map strategy details for Overall Strategy are currently missing. You can help the Overwatch Wiki by adding them!
|

|
TBA RATING | TBA FEATURE
Map strategy details for Aatlis are currently missing. You can help the Overwatch Wiki by adding them! Station
Strategy details missing.
Garden
Strategy details missing.
Town Center
Strategy details missing.
Bazaar
Strategy details missing.
Resort
Strategy details missing.
|

|
TBA RATING | TBA FEATURE
Map strategy details for New Junk City are currently missing. You can help the Overwatch Wiki by adding them! Arena
Strategy details missing.
The Ducts
Strategy details missing.
Refinery
Strategy details missing.
Junkyard
Strategy details missing.
Bomb Flats
Strategy details missing.
|

|
TBA RATING | TBA FEATURE
Map strategy details for Suravasa are currently missing. You can help the Overwatch Wiki by adding them! Market
Strategy details missing.
Garden
Strategy details missing.
Palace
Strategy details missing.
Temple
Strategy details missing.
Ruins
Strategy details missing.
|
Achievements
| Name | Icon | Description | Reward |
|---|---|---|---|
| Eliminate 3 enemies in a single use of Ramattra’s Annihilation in Quick or Competitive Play. |  | ||
| Block 300 or more damage and survive in a single use of Ramattra’s Nemesis Form in Quick or Competitive Play. |  |
Trivia
- Ramattra's skins apply to both of his forms. His voice effects change when using Nemesis form.[1]
- Ramattra is the primary antagonist of the Overwatch IP.[3]
Cultural References
- Ramattra's name may be derived from the Sanskrit rāmatra (रामत्र) which roughly translates to "dark defender." His name also seems to follow the same formatting as fellow Shambali monks Zenyatta and Mondatta.
- A number of players have likened the relationship between Zenyatta and Ramattra as akin to Charles Xavier and Magneto from X-Men.[4] It was stated that their relationship would be fleshed out in Overwatch 2's PvE missions.[5] However this did not come to fruition.
Misc. Character Information
- Ramattra's favorite animal is the ant. In his words, "they build marvelous structures and cooperate when threatened. I find them...inspirational."[6]
- Ramattra's origin as an R-7000 once troubled him, given the fear and hatred his model inspired in humanity. Now, this gives him "a warm little feeling inside."[6]
- Like many omnics, Ramattra wishes he could have met Aurora. If given the opportunity, he would ask her "the same thing I would ask her every day."[6]
Unlocking Ramattra
- Ramattra was released in Season 2, on December 6, 2022.[7] Players who purchased the battle pass gained instant access to him. Those on the free track had to reach level 45 to unlock him.[8]
- After season 2, Ramattra was unlockable only through completing set criteria in-game, namely:
- Win 35 games queued as All Roles or playing Tank heroes in Quick Play, Competitive, or No Limits
- Eliminate 3 bots with Void Accelerator in the Practice Range
- Use Ravenous Vortex during Omnic Form and Nemesis Form in the Practice Range
- Damage 2 bots simultaneously with Pummel during Nemesis Form in the Practice Range
- Absorb 30 damage with Void Barrier in the Practice Range
- Block 30 damage during Nemesis Form in the Practice Range
- Extend the duration of Annihilation for 6 seconds or more in the Practice Range
Development
| “ | We always knew Ramattra would be a tank because the story we were developing for him is that he’s a protector of his people, so it felt right that he would be a tank. But what you will find with his nemesis form, when he turns into this big hulking hero., making him this menacing character. That was part of the fantasy of Ramattra as we developed him. Some of the art designs that we chose, we really wanted the two different forms in his Omnic form and his Nemesis form to feel very different from each other. But you’ll still get the sense of it’s the same hero. | „ |
| ~ Dion Rogers |
Ramattra was a difficult hero to make.[9] His design is a case of story/art/character inspiring mechanics, and vice versa. The developers always knew that Ramattra would be a tank because of his backstory; the idea of him being a protector of his people.[1]
Ramattra was originally intended to be released in Season 8, and Mauga in Season 2. Their places were reversed, as Ramattra's design was completed while Mauga needed additional work.[10]
Early Design
| “ | We, on the Narrative Design Team like to write complicated heroes. We wanted to show you someone that felt exciting, felt understandable, dangerous, and someone you wanted to get to know better. | „ |
| ~ Gavin Jurgens Fyhrie |
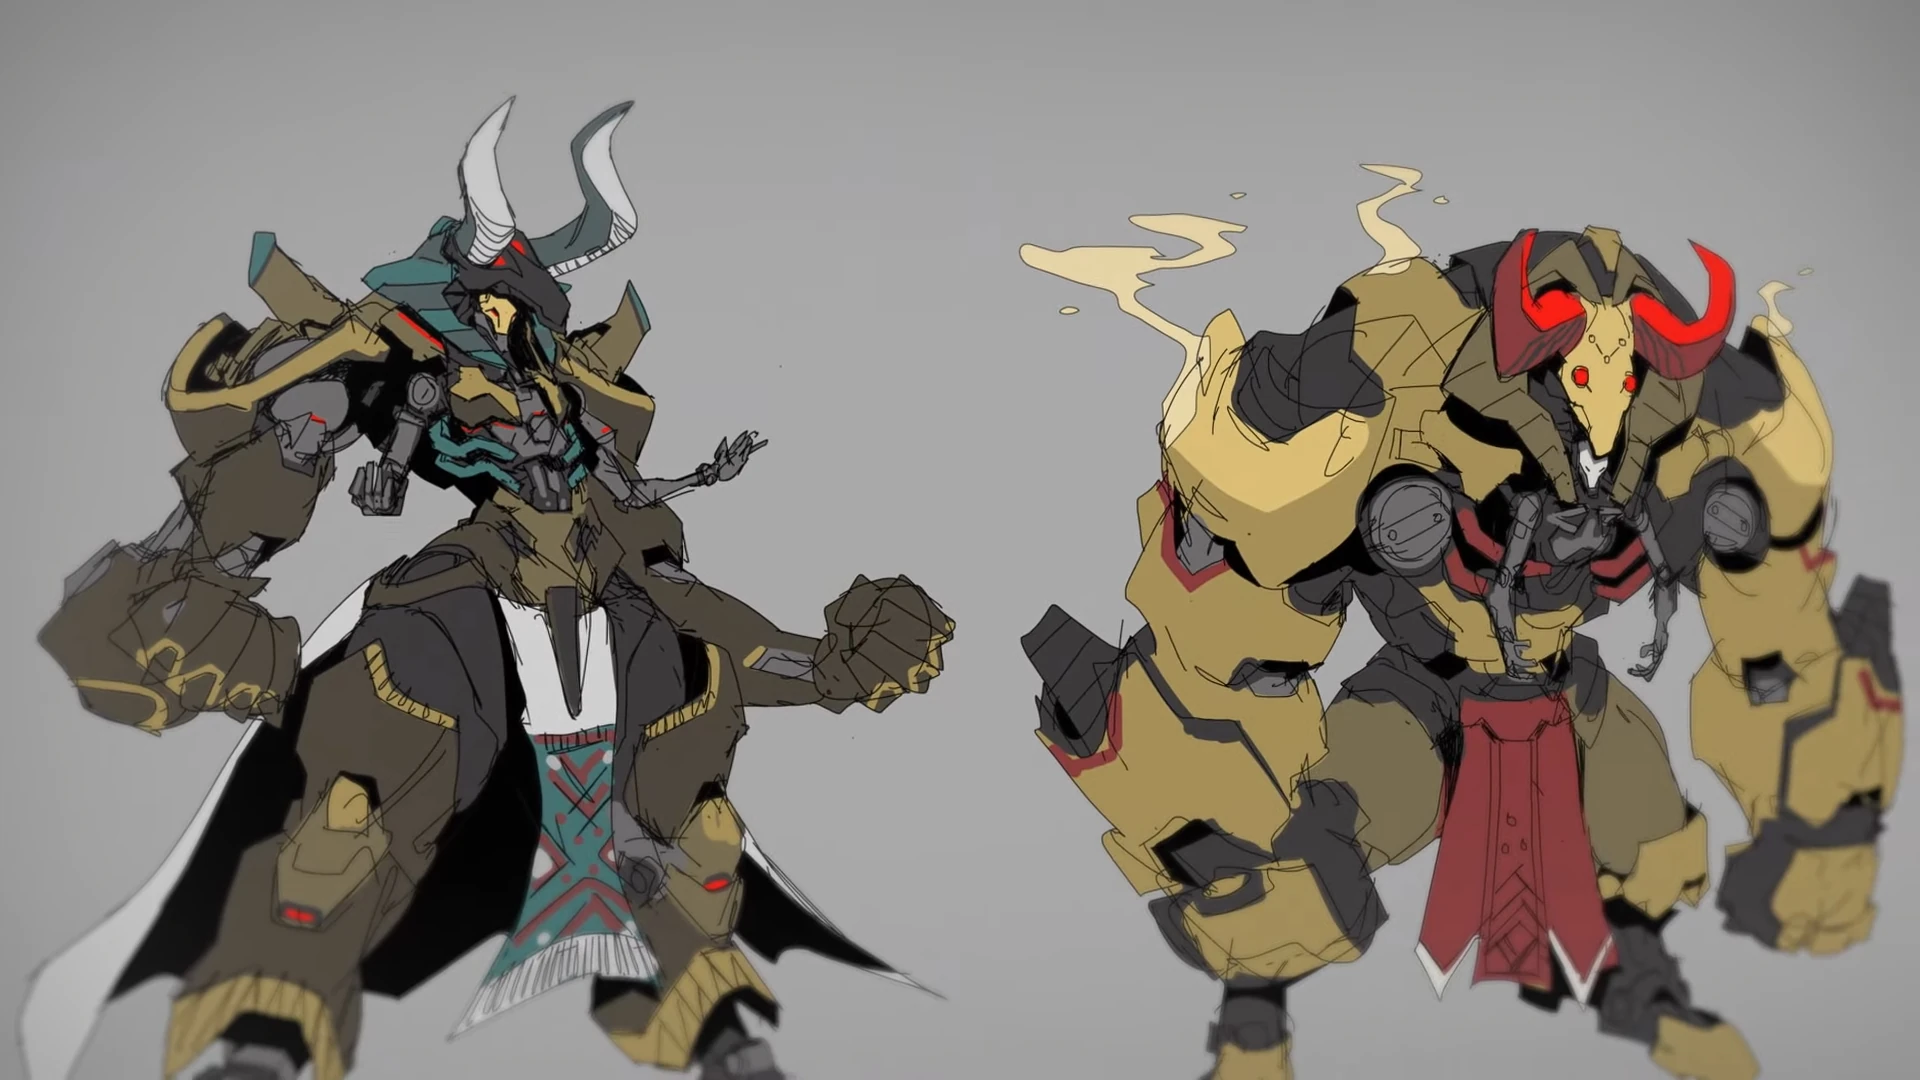
Ramattra was first conceived in 2017 when the team was designing Null Sector units. In this period, there was a Null Sector lieutenant unit that resembled a pharoh. The developers thought that the unit would make a good hero.[11]

An early shepherd concept for Ramattra
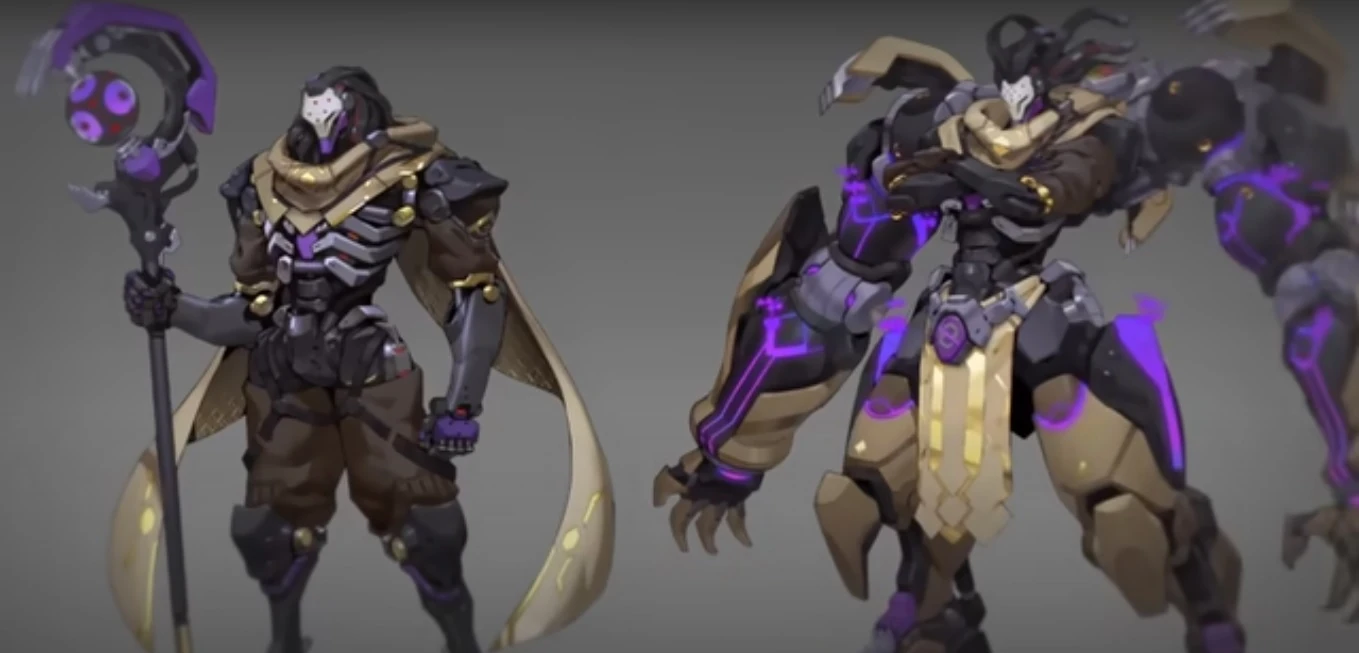
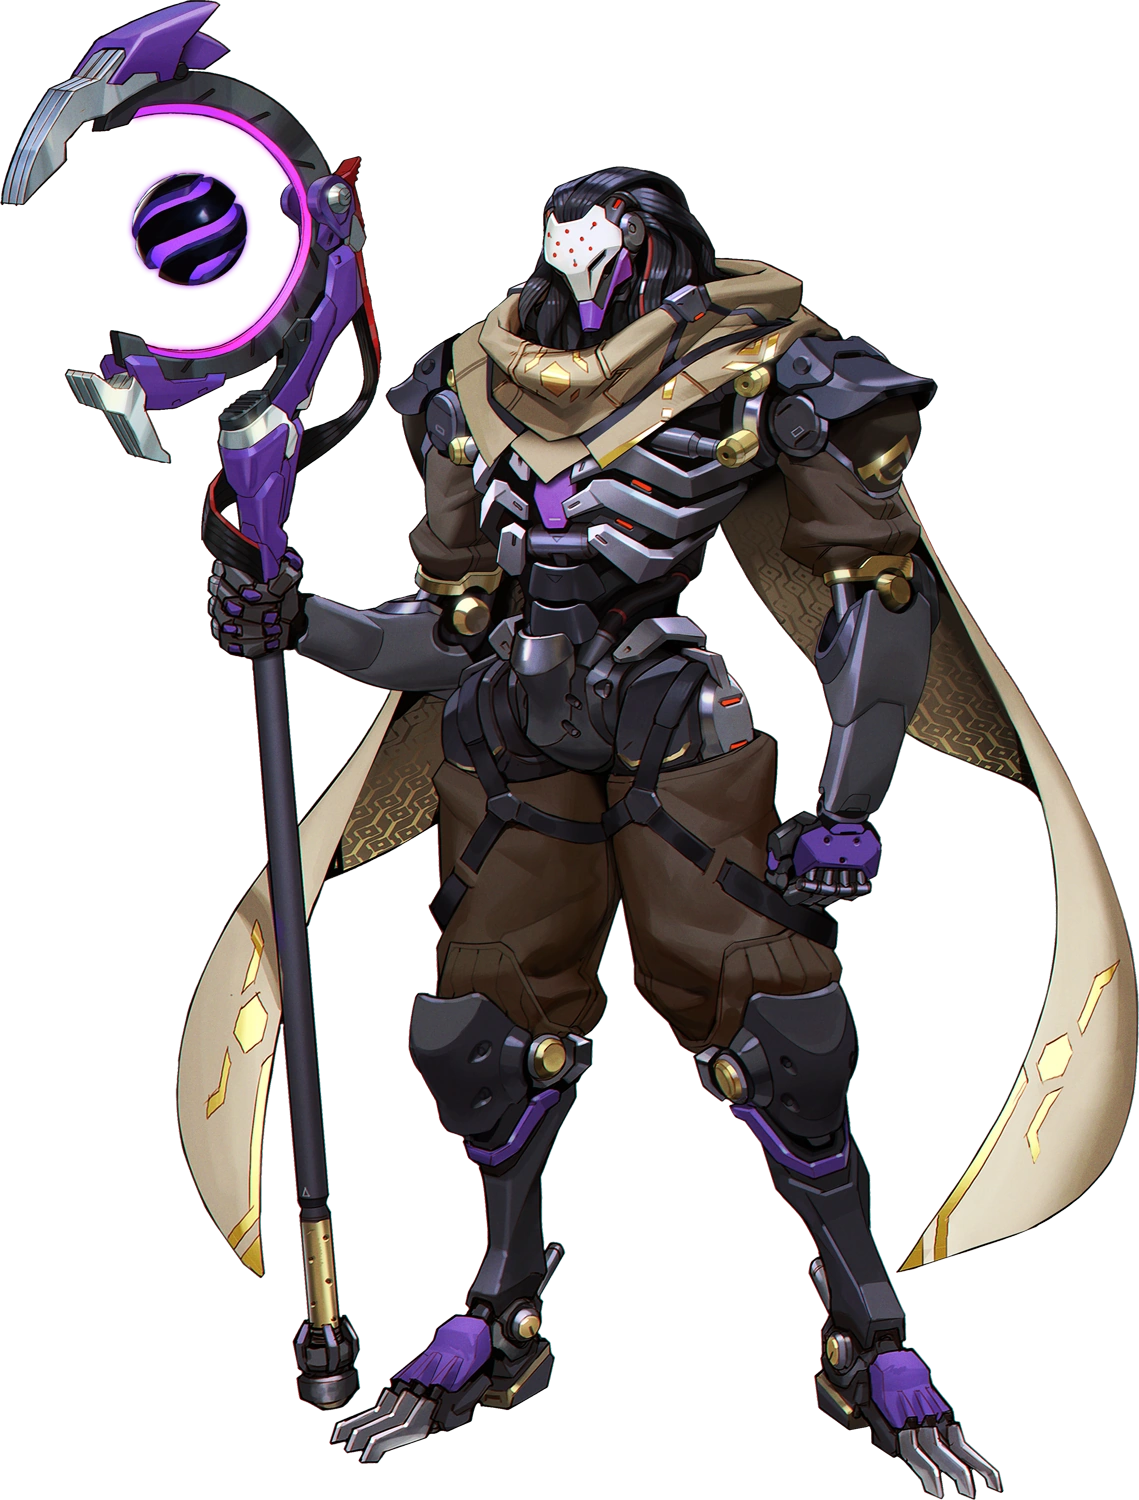
Rammatra's final design was modeled after a nomadic shepherd to help convey his status as a leader, with his staff being a particular point of focus. It also incorporates many triangular shapes to give him a menacing appearance, as well as the skeletal silhouette and primarily purple color scheme characteristic of Null Sector omnics, and in his Nemesis form he crosses his arm to help maintain his domineering atmosphere.[11] The Nemesis form itself came later during development. The two forms are intended to feel very different from each other, but still clearly be the same hero. Thematically, the two forms represent Ramattra as a character. His baseline form is reserved, equipped with a staff that doesn't appear that dangerous. The Nemesis form represents his suppressed fury, unleashed.[1]
Ramattra's Egyptian theme (Nemesis form)
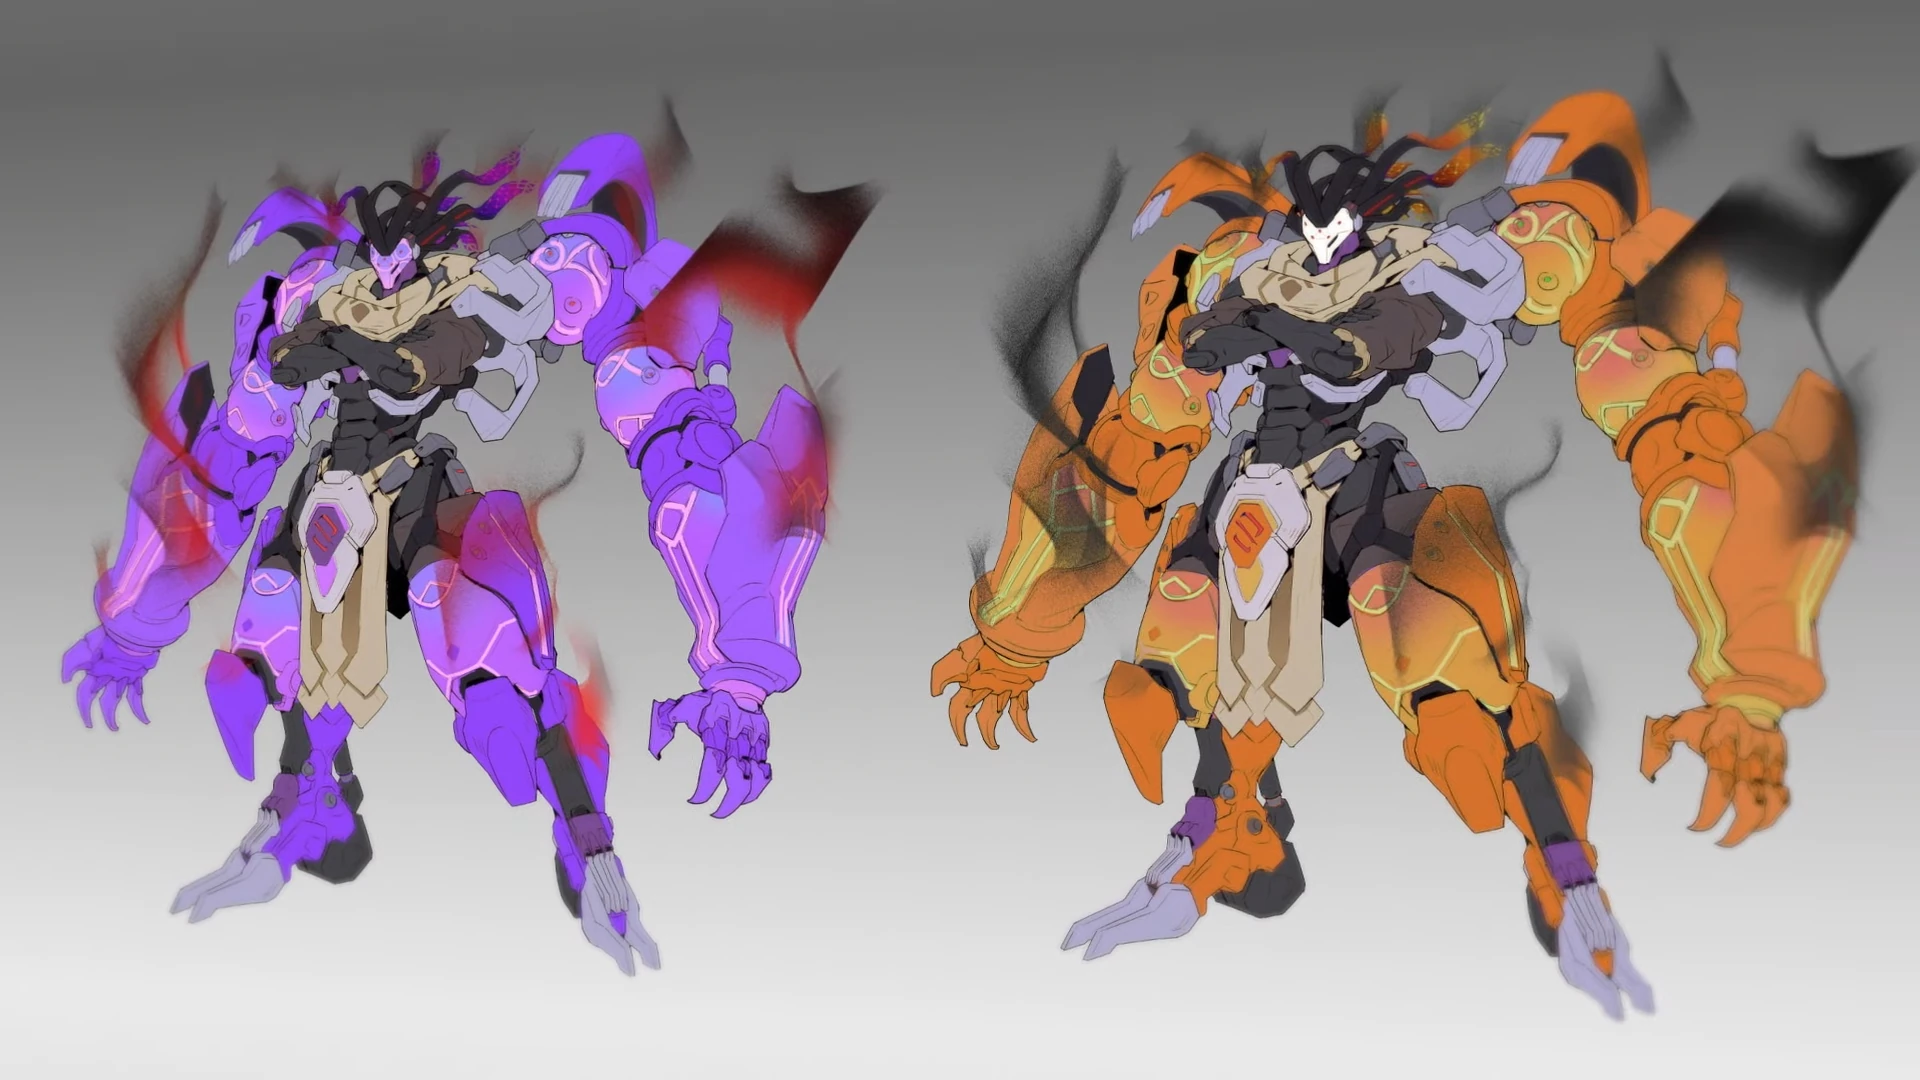
Ramattra's (Nemesis form) early concept art
Null Sector initially had a more overt Egyptian motif with nanite-based powers that resembled sand, and the nanites carried through to Ramattra's abilities. Early versions of his staff featured a hanging reservoir of nanites resembling particles of sand, almost like a lantern, which was simplified to an orb with a revolving band of nanites that he would wind up and shoot as his primary fire. His Nemesis form stemmed from the necessity to ensure he had the physical size and bulk to fulfill the Tank role, both visually and functionally. It drew inspiration from early Zenyatta designs that incorporated multiple-arms, archetypal of imagery in certain Eastern religions.[11]
Reveals
Ramattra's final design
Ramattra was first seen at the end of Overwatch Storm Rising in 2019, though was unnamed in the cinematic. Around the time, it was speculated that he was associated with Null Sector due to his similar color scheme and newspapers appearing on the Havana map that read "Quien es Null Sector?"
An early iteration of his design was described as far back as 2019, when Game Informer reported that Jeff Kaplan had shown them the silhouette of what appeared to be a male wizard or warlock hero with a crooked staff during a press tour for Overwatch 2.[12]
Well ahead of the game's release, it was decided that Ramattra would be released during Overwatch 2; season 2 ended up being his chosen position.[1]
He was formally revealed in the Overwatch League Grand Finals 2022 on YouTube.[13]
Subsequent Development
Ramattra’s initial release was met with a lot of positive feedback in terms of fun factor. There was a lot of conversation around his kit and overall design, though there was consensus that Ramattra wasn't viable in enough situations. The developers chose to increase his power while in Nemesis form by upping his armor and speed. The cooldown on Void barrier was also decreased in order to create more overall uptime with his abilities.[14]
In Season 3, Annihilation was given a timer, so that it would tick down slower if enemies are in it (previously, the timer paused entirely), and a cap of 20 seconds will be added. This was done to remove "unhealthy gameplay scenarios,"; the developers want Ramattra to feel imposing and intimidating, but not hopeless to fight against.[14]
Removed abilities
Removed Perks

- Integrated into base kit in Reign of Talon Season 2
- Once detonated, the projectile falls straight down and creates a vortex at the location where it landed.
- Automatically detonates upon hitting the ground if the projectile has travelled at least 4 meters.
Media
Images
- Concept Art
-
 Concept Art by Qiu Fang
 -
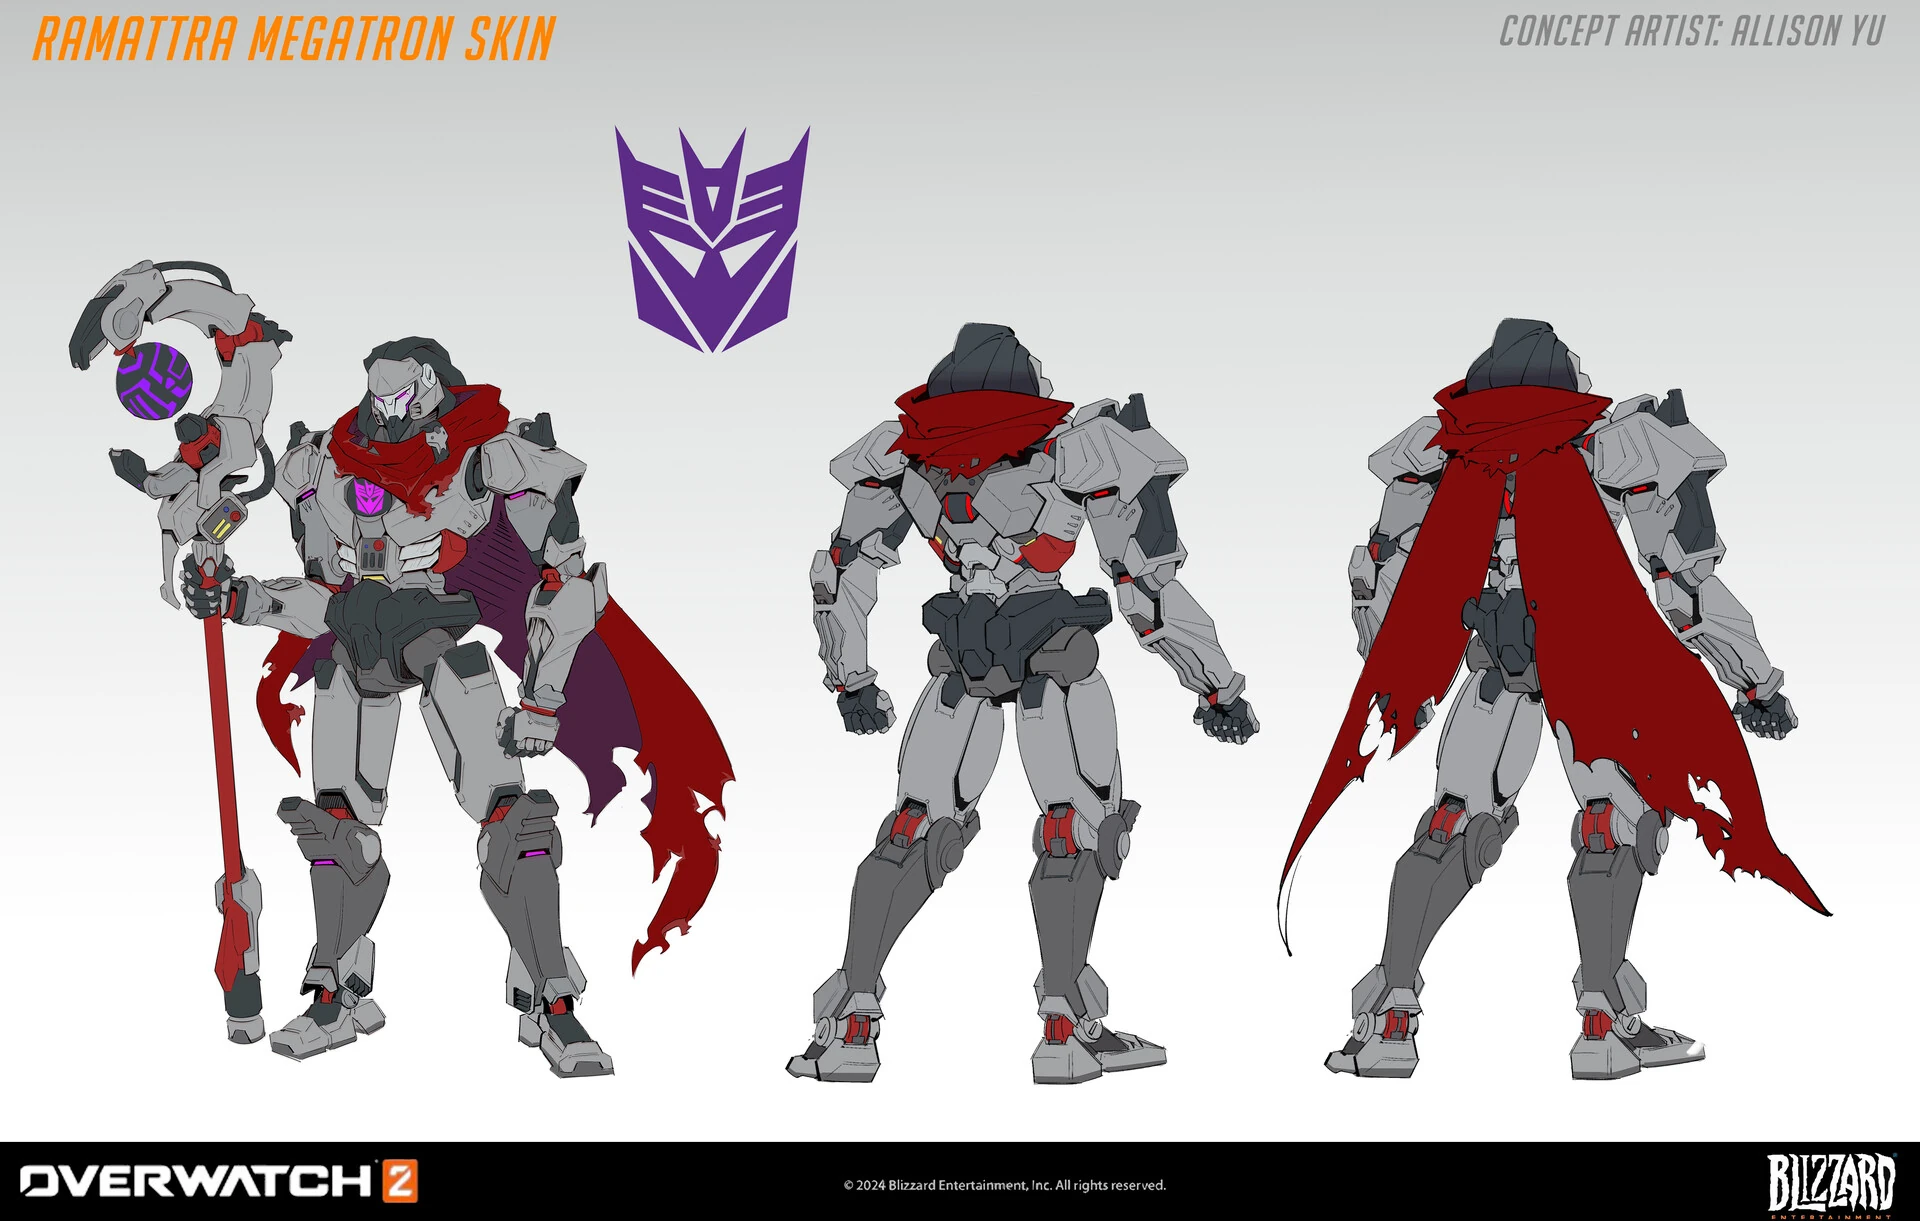
 Megatron Skin Concept Art by Allison Yu
 -
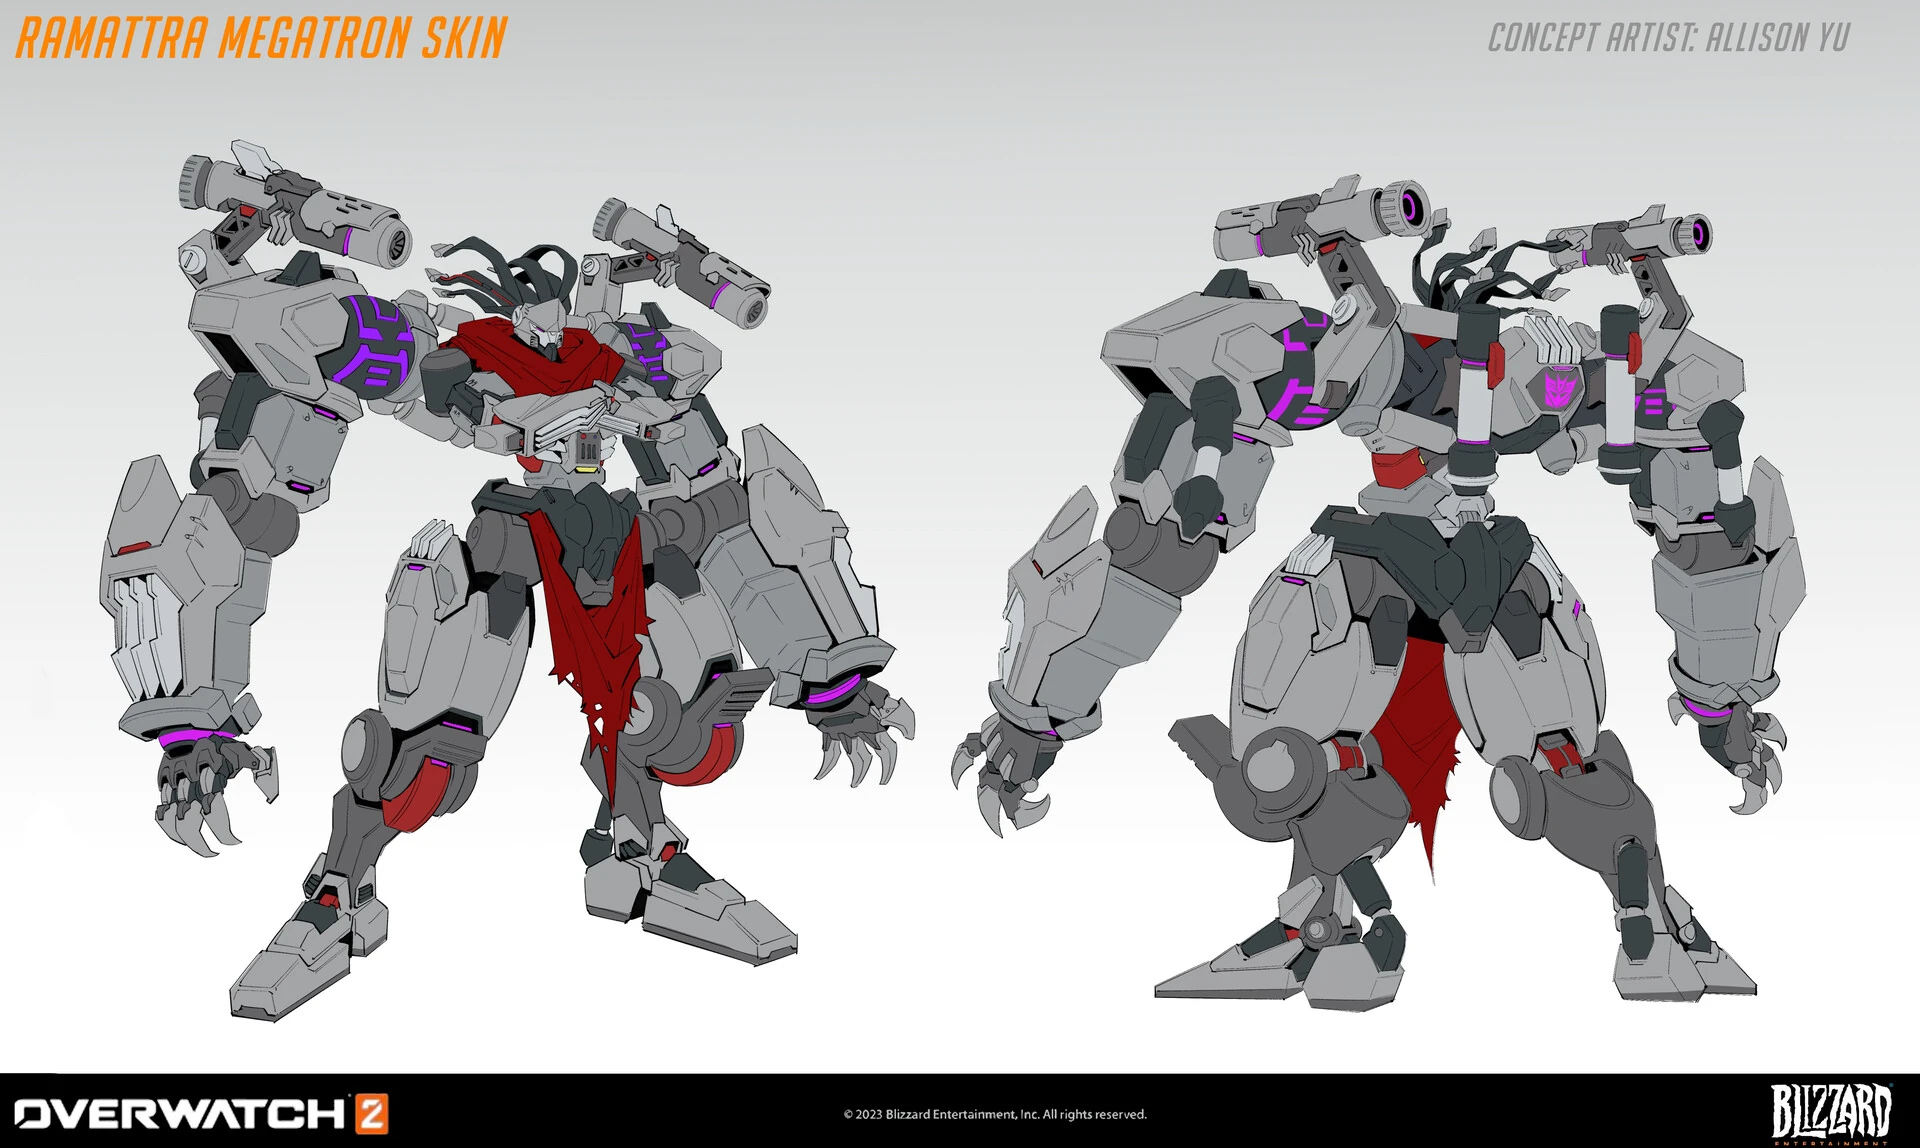
 Megatron Skin Nemesis Form Concept Art by Allison Yu
 -
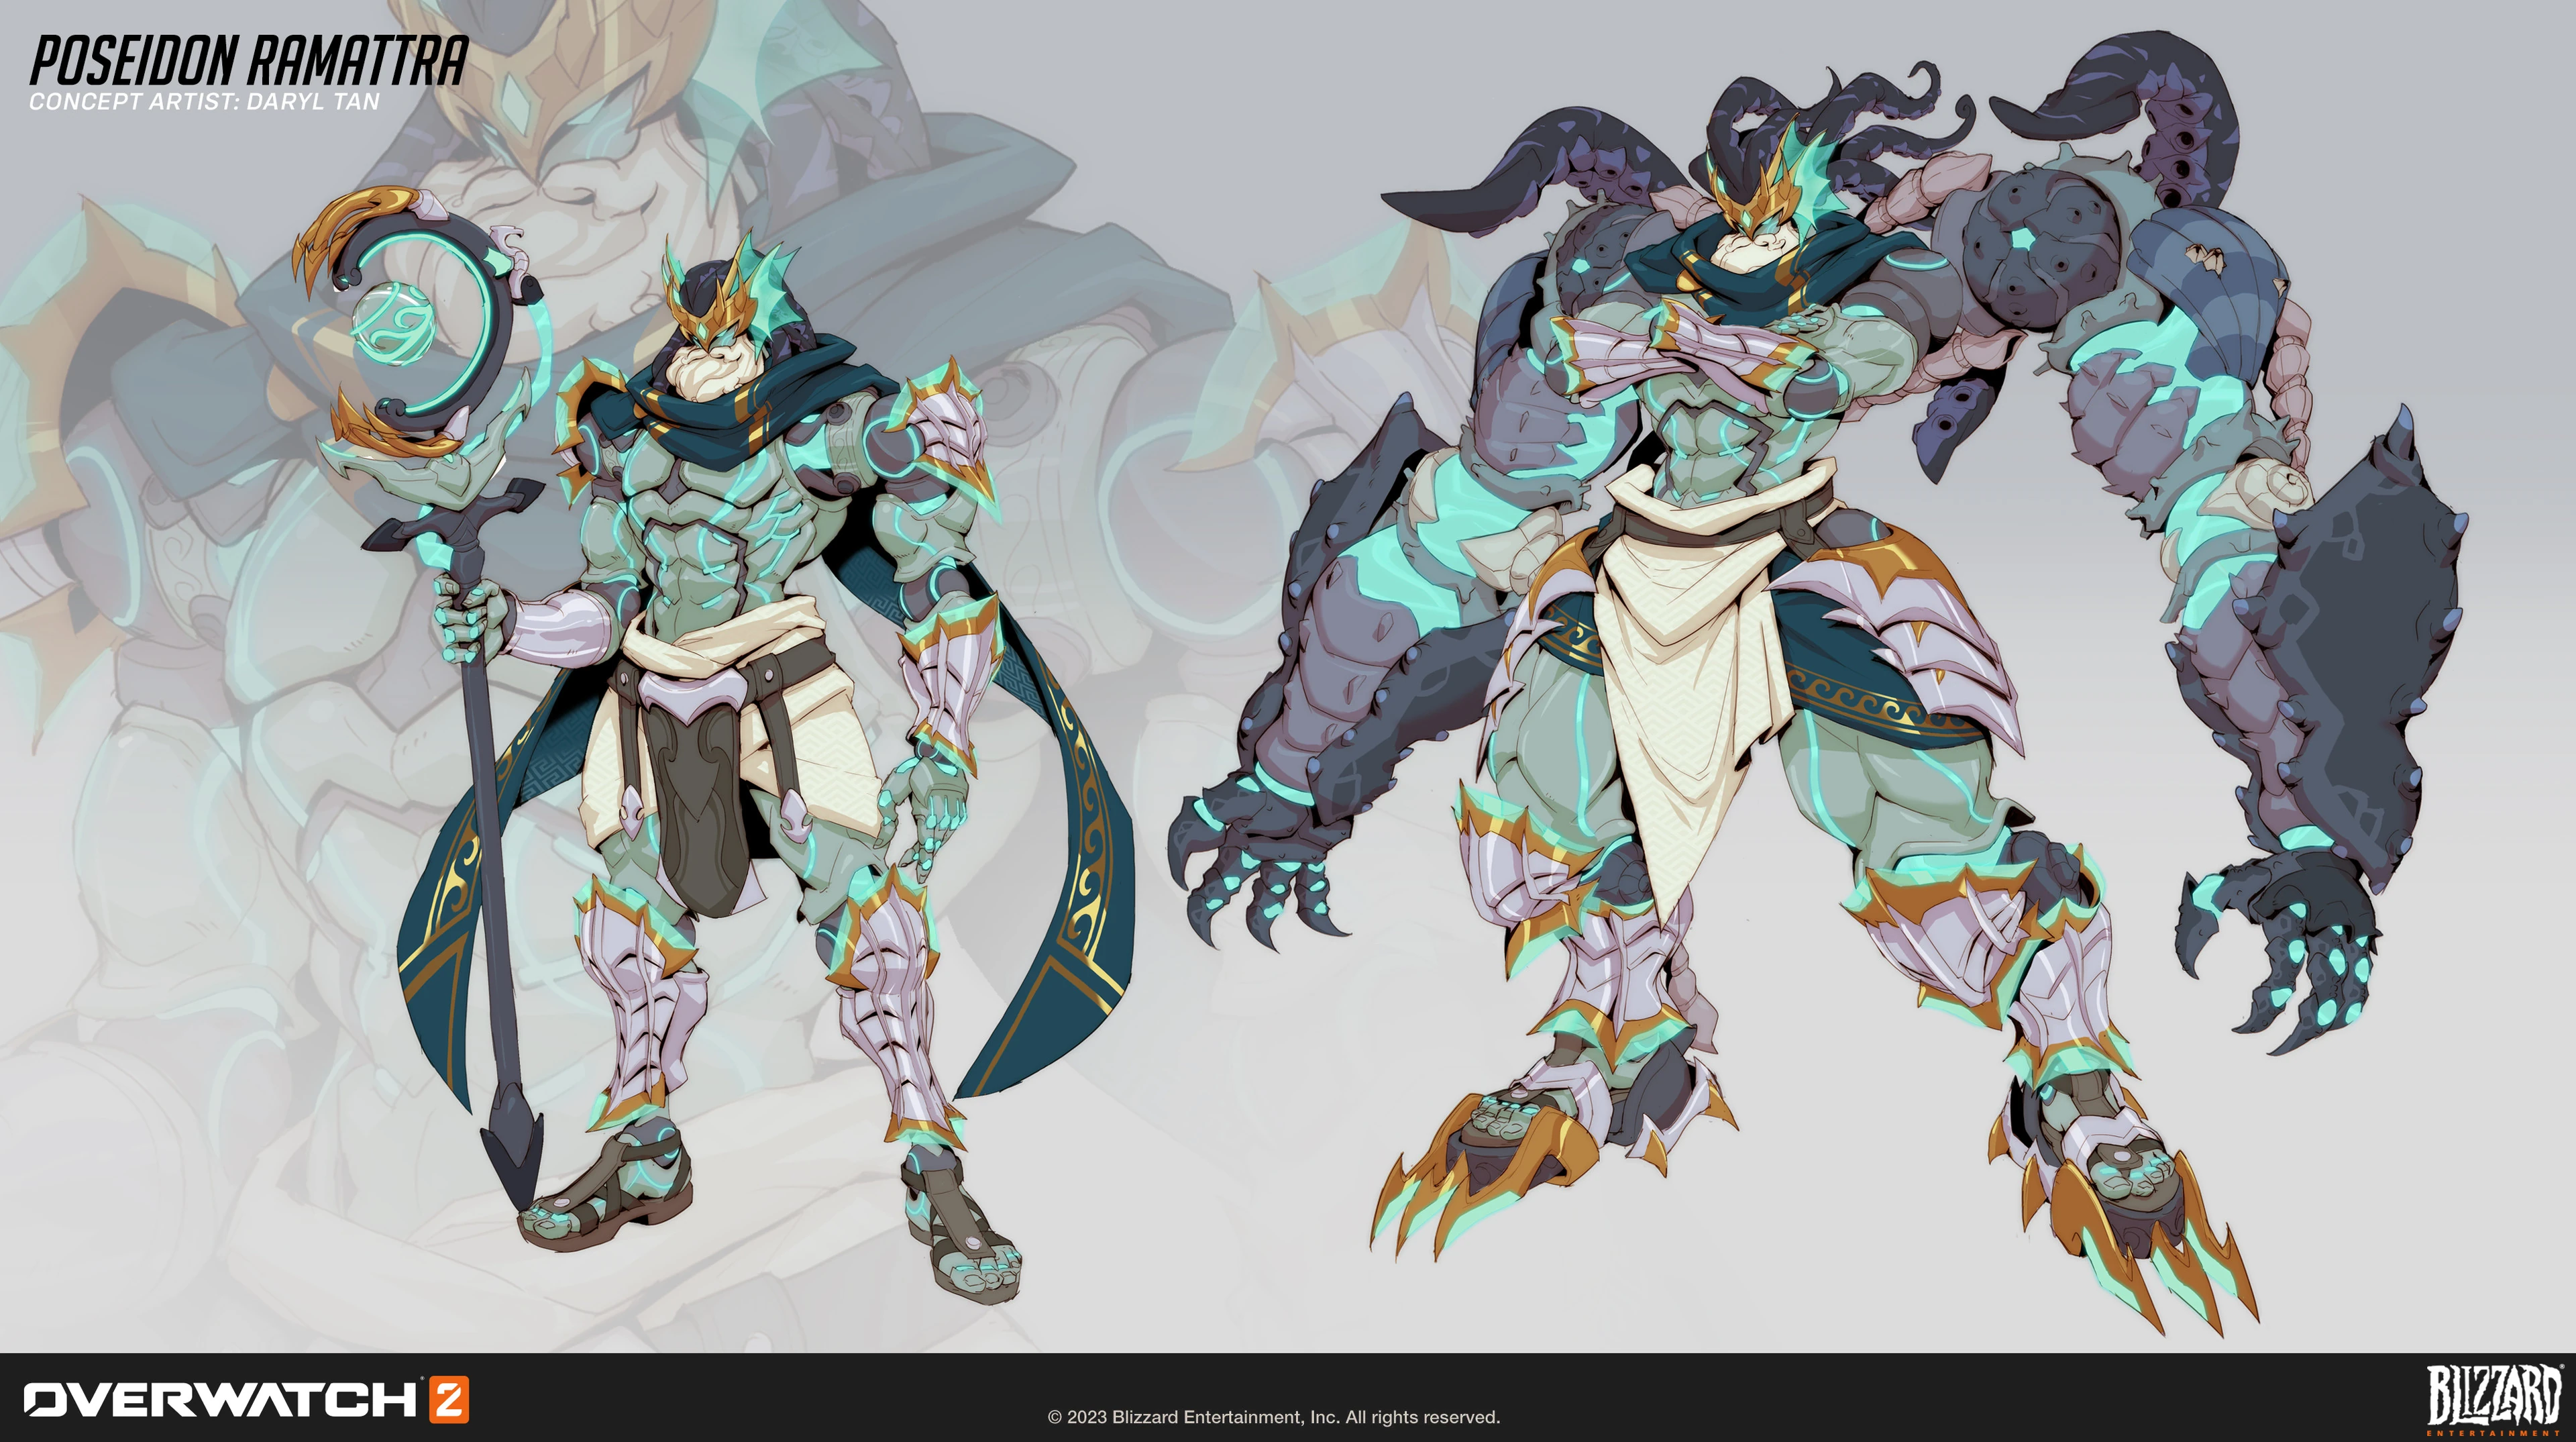
 Poseidon Skin Concept Art by Daryl Tan
 -
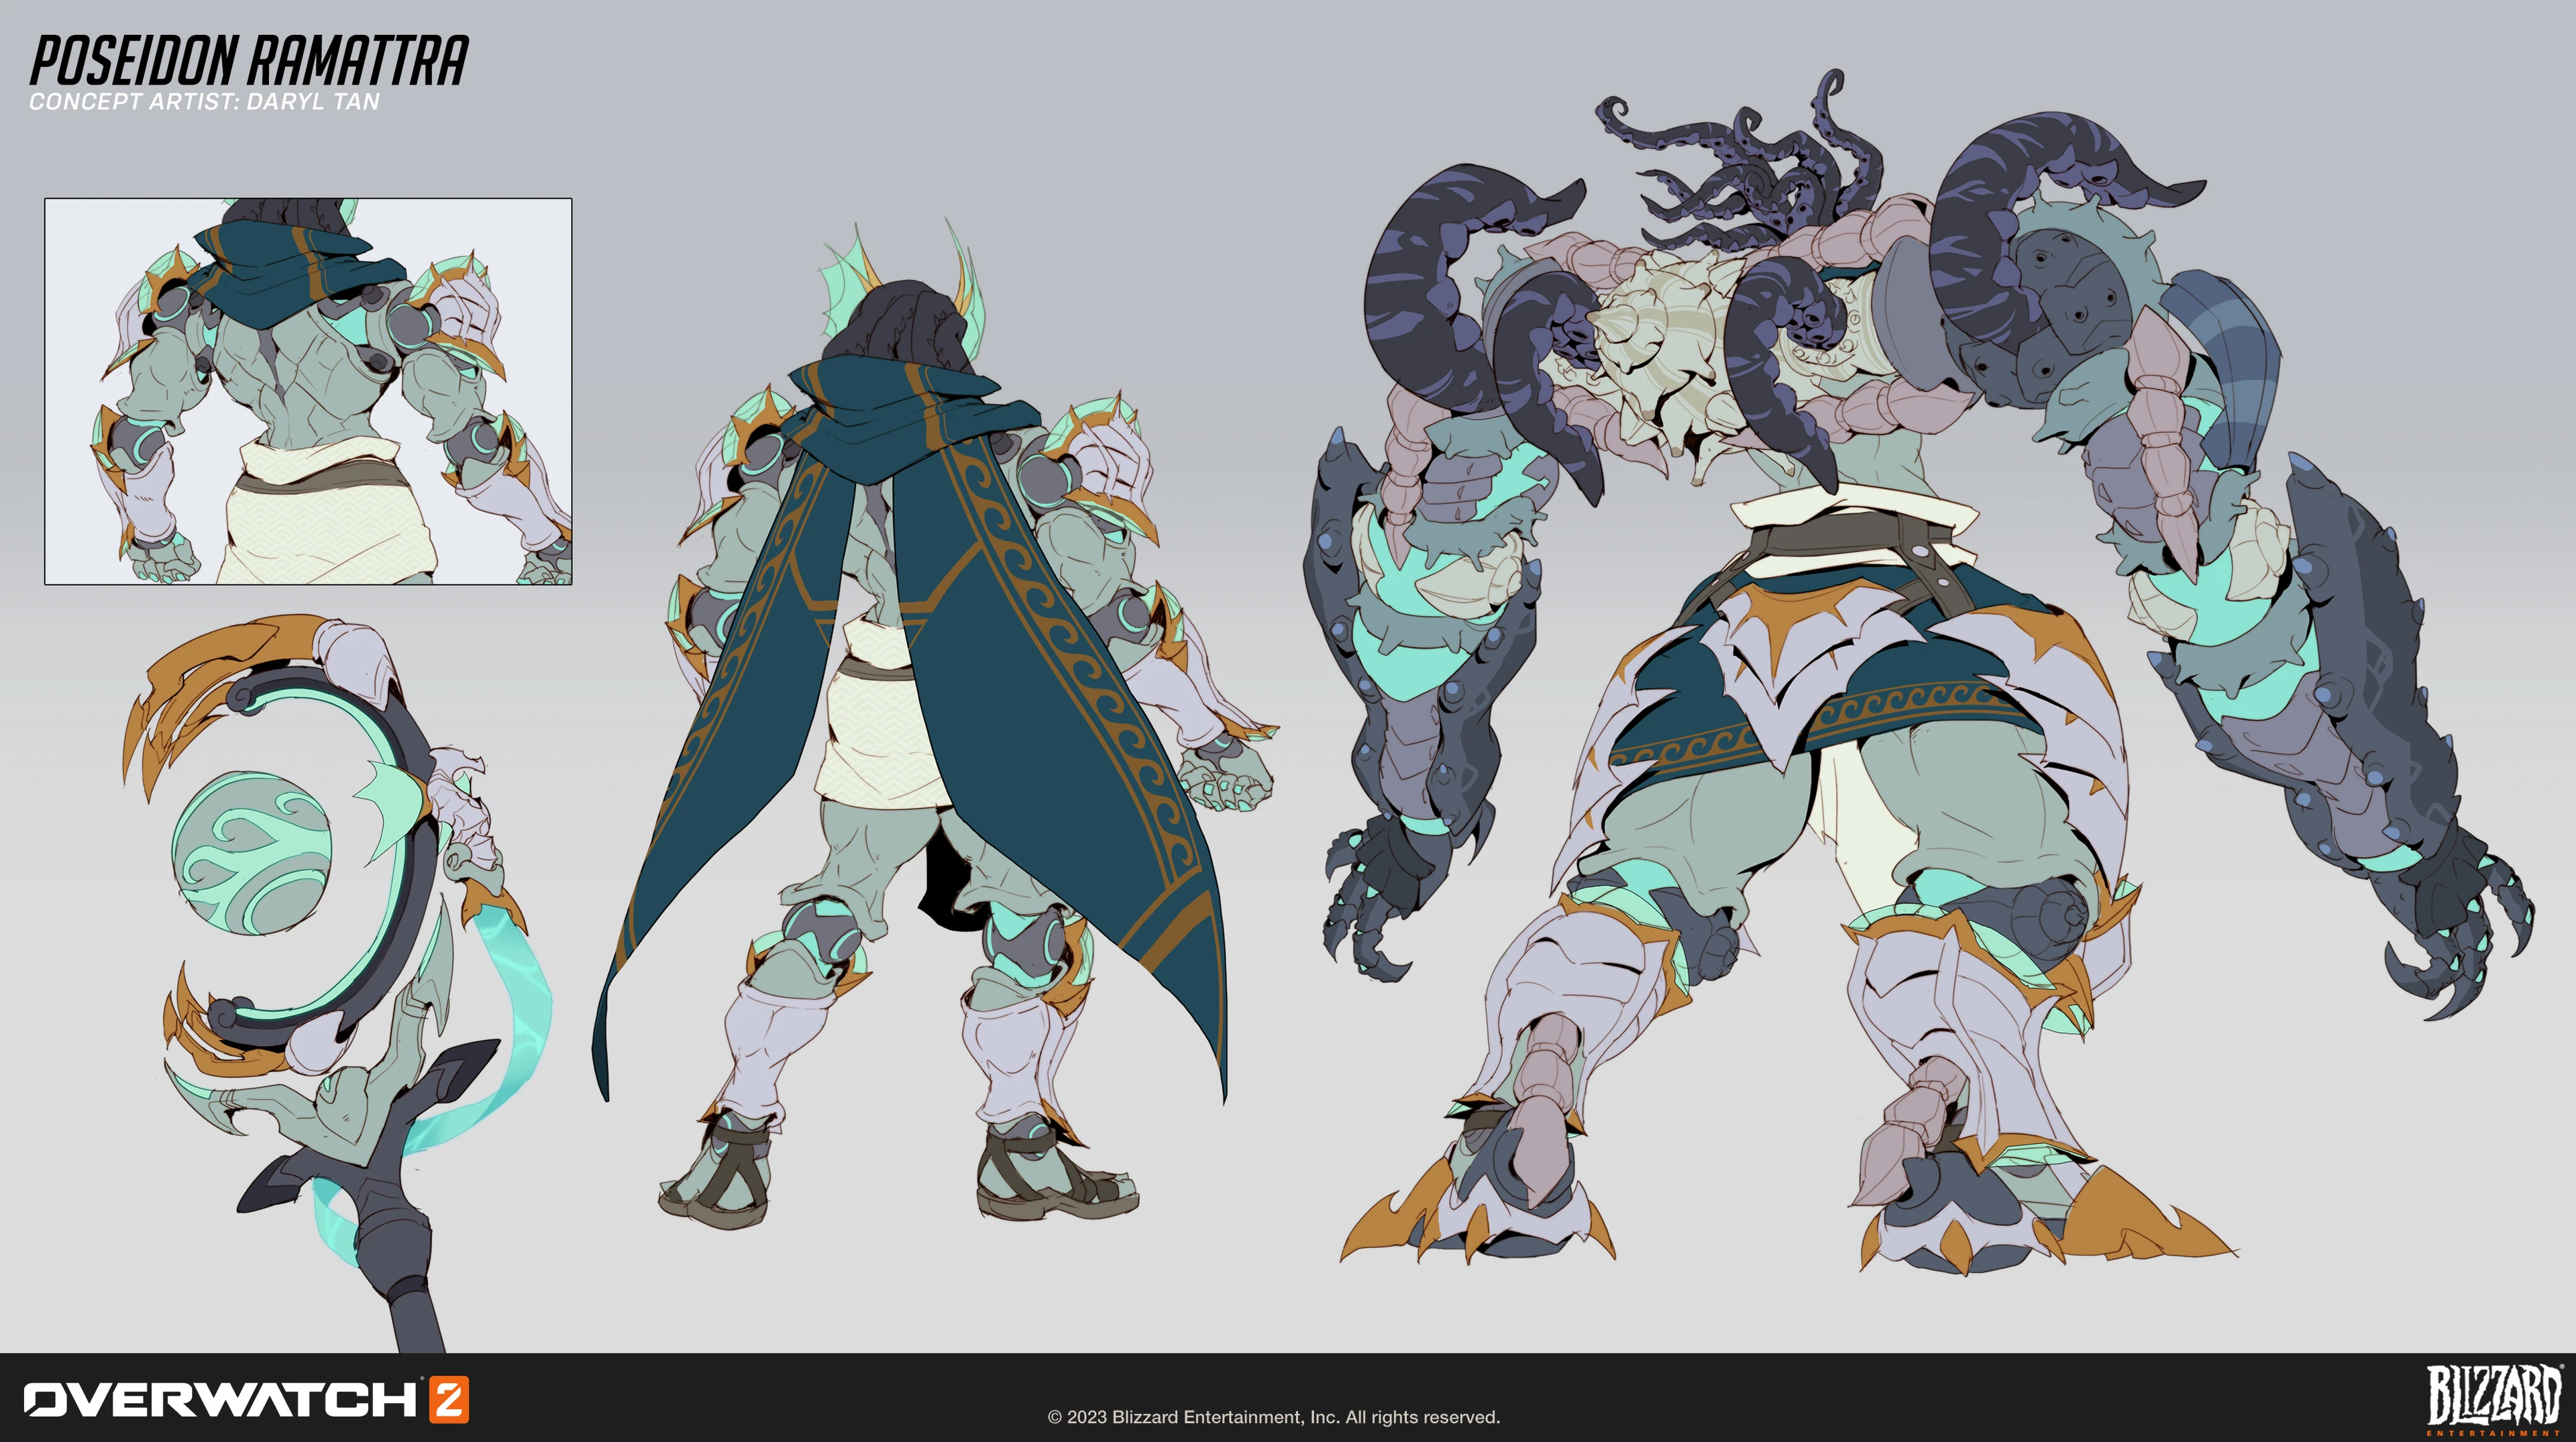
 Poseidon Skin Back Concept Art by Daryl Tan
- Hero Kit
-

-

-
 Omnic form.
 -
 Nemesis form.
 -
 Ravenous Vortex ability.
 -
 First person Ravenous Vortex ability.
 -
 First person Block ability.
 -
 Annihilation Ultimate.
 -

Videos
Balance Change Logs
- For more information, see Patch Notes.
- Vengeful Vortex moved from Perk to Baseline ability.
- Projectile now explodes on contact with the ground.
- Explosion can now be manually detonated while airborne.
- Explosion damage reduced from 50 to 15.
![]() Prolonged Barrier – Minor Perk
Prolonged Barrier – Minor Perk
- Added.
- Void Barrier duration and size increased by 25%.
![]() Vengeful Vortex – Major Perk
Vengeful Vortex – Major Perk
- Removed.
![]() Void Surge – Major Perk
Void Surge – Major Perk
- Moved from Minor to Major Perk.
- Delay between bursts reduced from 0.75 to 0.6 seconds.
- (5v5) Cooldown reduced from 13 to 12 seconds.
- Damage per second increased from 30 to 35.
- Base health increased from 250 to 275
- No longer has half effectiveness while in Annihilation
![]() Nemesis Form - Ability 1
Nemesis Form - Ability 1
- Bonus armor increased from 250 to 275.
![]() Ravenous Vortex - Ability 2
Ravenous Vortex - Ability 2
- No longer interrupts horizontal momentum when first affecting a target.
- Bonus armor reduced from 300 to 250.
![]() Block (Nemesis Form) - Secondary Ability
Block (Nemesis Form) - Secondary Ability
- Block ability now triggers a 1-second cooldown.
![]() Prolonged Barrier - Minor Perk
Prolonged Barrier - Minor Perk
- Removed.
![]() Relentless Form - Minor Perk
Relentless Form - Minor Perk
- New Minor Perk.
- While Nemesis Form is active, eliminations extend the duration by 1 second, half that during Annihilation.
![]() Nanite Repair - Major Perk
Nanite Repair - Major Perk
- Healing per second increased from 50 to 75.
- Now additionally increases the size of the Void Barrier by 25%.
- Hero Perks
- Void Accelerator periodically releases a burst of 6 additional projectiles during continuous fire.
- Void Barrier's duration is increased by 25%.
- Ramattra is healed for 50 health per second while within Ravenous Vortex.
- While Ravenous Vortex is airborne, use Secondary Fire again to detonate it, dealing 50 damage and pulling enemies downward.
- Base Armor increased from 75 to 100
- Now briefly interrupts horizontal momentum when first affecting a target.
- Slowing field now ignores barriers for line of sight.
- Reverted to pierce barriers again.
- No longer deals critical damage to barriers.
- No longer pierces barriers.
- Now deals 2.5x more damage to barriers.
- Cooldown increased from 7 to 8 seconds.
- Base armor reduced from 100 to 75.
- Base health reduced from 275 to 250.
- Bonus armor increased from 225 to 300.
- Pummel damage increased from 60 to 65.
- General updates
- Global projectile size modifier for travel time projectiles with a speed greater than 50 meters per second reduced from 0.1 to 0.075 meters.
- Hero updates
- Total damage increased from 45 to 70.
- Cooldown decreased from 12 to 11 seconds.
- General updates
Most damage-dealing projectile sizes have been increased by a new global modifier added to their base size.
- +0.05 meters for hitscan projectiles with a high rate of fire or spread (e.g., Tracer's Pulse Pistols or Reaper's Hellfire Shotguns).
- +0.08 meters for hitscan projectiles that are more precise (e.g., Cassidy's Peacekeeper or Soldier:76's Heavy Pulse Rifle).
- +0.05 meters for travel time projectiles that are shotguns or have a very high rate of fire (e.g., Roadhog's Scrap Gun or Ramattra's Void Accelerator).
- +0.10 meters for travel time projectile with a speed greater than 50 meters per second (e.g., Zenyatta's Destruction Orb).
- +0.15 meters for travel time projectile with a speed less than or equal to 50 meters per second (e.g., Pharah's Rocket Launcher).
- Very large projectiles with a base size greater than 0.5 meters have been excluded from these increases (e.g., Orisa's Energy Javelin or Reinhardt's Fire Strike).
Hero combined HP (base health/armor/shields) increased by 15-25%.
- 150-175 HP heroes increased by 25 HP.
- 200-300 HP heroes increased by 50 HP.
- 300+ HP (Tanks) increased by 75-100 HP.
- Each hero's precise health increases are listed in their patch notes below.
Ultimate Charge
- All Ultimate ability costs increased by 10%.
Regenerative Passive for All Heroes
- All heroes now regenerate 20 health per second after 5 seconds of not taking damage.
Quick Melee
- Damage increased from 30 to 40.
- Hero updates
- Health increased from 200 to 275.
- Base health reduced from 300 to 200.
- Base armor increased from 0 to 100.
- Projectile size increased from 0.075 to 0.1 meters.
- Damage increased from 4.5 to 5.
- Cooldown decreased from 8 to 7 seconds.
![]() Block (Nemesis Form)
Block (Nemesis Form)
- Block now reduces damage from stuck projectiles.
- Ultimate cost increased 12%.
- Block now reduces damage from stuck projectiles.
- The projectile now passes through enemy heroes but is still blocked by barriers.
- Using Annihilation while in Nemesis Form refreshes your bonus armor
- Base health in Role Queue modes remains the same at 450
- Base health in non-Role Queue modes reduced from 450 to 300
- Damaging enemies with the ultimate now slows the duration timer down instead of pausing it entirely. Lasts up to 20 seconds
- Ultimate cost increased 12%
- Movement speed increased by 20%
- Armor bonus increased from 150 to 225
![]() Void Barrier (Omnic Form)
Void Barrier (Omnic Form)
- Cooldown reduced from 15 to 13 seconds
- NEW HERO
- Ramattra has been added to the line-up
![]() Void Accelerator (Omnic Form)
Void Accelerator (Omnic Form)
- Primary: Fire a stream of projectiles in a fixed pattern
- Secondary: Create a barrier at the targeted location
- Transform into Nemesis Form, changing your attacks and gaining bonus armor
![]() Pummel (Nemesis Form)
Pummel (Nemesis Form)
- Primary: Punch forward, creating a wave of piercing energy with every swing
- Secondary: Significantly reduces damage taken from the front and reduces movement speed
- Fire a nano ball, which explodes when it hits the ground, spreading a damaging field. Affected enemies are slowed and pulled downward
- Enter Nemesis Form and create an energy swarm surrounding yourself. This swarm will lash out towards nearby enemies, dealing damage and pausing the duration when damage is dealt.
![]() Nemesis Form - Ability 1
Nemesis Form - Ability 1
- Bonus armor increased from 200 to 225. (undocumented) [verify]
- Base health reduced from 375 to 350. (undocumented)
- Base armor increased from 75 to 100. (undocumented)
- Base health increased from 250 to 375.
- Cooldown increased from 13 to 16 seconds.
- Bonus armor reduced from 300 to 200.
- Maximum damage increased to 150.
- [Annihilation] Duration bonus decreased from 2s to 1s.
- Healing decreased from 50% to 25% of damage mitigated.
- [Nemesis Form] Cooldown Reduction per enemy hit by [Ravenous Vortex] reduced from 1s to 0.5s.
- Void Blight damage increased from 20 to 30.
- Cost decreased from 12000 to 10000.
- Damage amplification increased from 10% to 15%.
- [Ravenous Vortex] cooldown reduction reduced from 100% to 75%.
- Final Form healing reduced from 80 to 50.
- Re-enabled.
- Added to the Stadium roster.
![]() Void Blight - Power
Void Blight - Power
- [Void Accelerator] infects enemies with nanites which explode for 20(WP) damage after dealing 100 damage.
![]() Void Surge - Power
Void Surge - Power
- [Void Accelerator] periodically releases a burst of 6 additional projectiles during continuous fire.
![]() Ramparts - Power
Ramparts - Power
- [Void Barrier] gains an additional charge.
![]() Recursion Relay - Power
Recursion Relay - Power
- +25% [Void Barrier] size. [Void Accelerator] projectile and [Pummel] that passes through the [Void Barrier] gain 10% increased damage.
![]() Final Form - Power
Final Form - Power
- While [Nemesis Form] is active, Ramattra is healed for 80 per second while within [Ravenous Vortex].
![]() Second Phase - Power
Second Phase - Power
- When [Nemesis Form] is activated, reduce the cooldown of [Ravenous Vortex] by 100%.
![]() Breakout - Power
Breakout - Power
- While blocking in [Nemesis Form], use [Pummel] to perform a dashing punch. (4s Cooldown)
![]() Conversion Protocol - Power
Conversion Protocol - Power
- [Block] heals Ramattra for 50% of damage mitigated over 3s.
![]() Retaliation - Power
Retaliation - Power
- Releasing [Block] deals damage equal to 100% of the amount mitigated, up to 100 to enemies within 6m.
![]() Insatiable Spiral - Power
Insatiable Spiral - Power
- +50% [Ravenous Vortex] Radius, +30% [Ravenous Vortex] Damage
![]() Ravaging Vortex - Power
Ravaging Vortex - Power
- When [Ravenous Vortex] is detonated, deal 50 damage and gain 2% Ultimate Charge per enemy hit.
![]() Dreadknight - Power
Dreadknight - Power
- +50% [Annihilation] Damage, +2s [Annihilation] Duration
![]() Fusion Core - Rare Weapon Hero Item
Fusion Core - Rare Weapon Hero Item
- 5% Attack Speed
- When [Block] mititgates damage, gain 15% Attack Speed for 3s.
- 4000 Cost
![]() Merged Munitions - Rare Weapon Hero Item
Merged Munitions - Rare Weapon Hero Item
- 10% Weapon Power
- 50% [Void Accelerator] projectile size
- 4500 Cost
![]() Omnium Augment - Rare Weapon Hero Item
Omnium Augment - Rare Weapon Hero Item
- 10% Weapon Power
- 25% [Pummel] Range
- 4500 Cost
![]() R-7000 Powercell - Epic Weapon Hero Item
R-7000 Powercell - Epic Weapon Hero Item
- 5% Weapon Power
- 50% [Void Accelerator] Projectile Speed
- While continuously shooting [Void Accelerator], gain up to 20% Weapon Power over 3s.
- 12500 Cost
![]() Anima of Anubis - Epic Weapon Hero Item
Anima of Anubis - Epic Weapon Hero Item
- 10% Ability Power
- 10% Attack Speed
- [Pummel] damage is also increased by Ability Power.
- 13000 Cost
![]() Voracious Maelstrom - Rare Ability Hero Item
Voracious Maelstrom - Rare Ability Hero Item
- 5% Cooldown Reduction
- For each enemy hit by [Ravenous Vortex], reduce [Nemesis Form]'s cooldown by 1s.
- 4000 Cost
![]() Null Vector - Rare Ability Hero Item
Null Vector - Rare Ability Hero Item
- 5% Cooldown Reduction
- 100% [Ravenous Vortex] Height
- 4000 Cost
![]() Abyssal Extender - Epic Ability Hero Item
Abyssal Extender - Epic Ability Hero Item
- 25 Shields
- 10% Cooldown Reduction
- 50% [Void Barrier] Duration
- 10000 Cost
![]() Swirling Ward - Epic Ability Hero Item
Swirling Ward - Epic Ability Hero Item
- 15% Ability Power
- 10% Cooldown Reduction
- All allies within [Ravenous Vortex] gain 300% increased jump height and 25% increased Movement Speed.
- 10000 Cost
![]() Ultimatum Axis - Epic Ability Hero Item
Ultimatum Axis - Epic Ability Hero Item
- 15% Starting Ultimate Charge
- 50% [Annihilation] Range
- Activating [Annihilation] pulls in enemies within 6m.
- 9000 Cost
![]() Shambali Shielding - Rare Survival Hero Item
Shambali Shielding - Rare Survival Hero Item
- 25 Shields
- Receive 5% more Healing while in [Block].
- [Block]'s movement speed penalty is removed.
- 4500 Cost
![]() Zenyatta's Aura - Rare Survival Hero Item
Zenyatta's Aura - Rare Survival Hero Item
- 25 Health
- Gain 100 Overhealth after coming out of [Nemesis Form].
- 4000 Cost
![]() Colossal Construct - Rare Survival Hero Item
Colossal Construct - Rare Survival Hero Item
- 25 Armor
- Gain 20% of [Annihilation] damage as Overhealth.
- 5000 Cost
![]() Nano-Mender - Epic Survival Hero Item
Nano-Mender - Epic Survival Hero Item
- 25 Shields
- 35% [Void Barrier] Health
- [Void Barrier] heals allies within 6m by 100 on spawn.
![]() Caustic Exo-Armor - Epic Survival Hero Item
Caustic Exo-Armor - Epic Survival Hero Item
- 50 Health
- 10% Weapon Lifesteal
- 10% Ability Lifesteal
- +15% Lifesteal while in [Nemesis Form]
- 9000 Cost
References
- ↑ 1.0 1.1 1.2 1.3 1.4 1.5 2022-11, Overwatch 2 Art Director Dion Rogers Talks About The Design Principles Behind The Dual Modes For Ramattra In Interview. Gamerbraves, accessed on 2022-11-15
- ↑ https://www.reddit.com/r/Competitiveoverwatch/comments/1itt4wj/assortment_of_damage_numbers_from_perks/
- ↑ 2024-07-11, Overwatch 2 Reveals Alternate Transformers Characters, Secrets of New Collab (Exclusive). Comicbook, accessed on 2024-07-14
- ↑ 2022-11-08, Overwatch 2 Reveals New Hero Ramattra, Locked Behind Battle Pass. Kotaku, accessed on 2022-11-10
- ↑ 2022-12-04, Overwatch 2: Ramattra and Zenyatta| Developer Update. YouTube, accessed on 2022-12-04
- ↑ 6.0 6.1 6.2 Overwatch 2, Ramattra Quotes
- ↑ Ramattra Reveal - Overwatch League Grand Finals. Overwatch News, accessed on 2022-11-04
- ↑ 2022-12-05, Blizzard Is Making Overwatch 2's Next Hero Easier To Unlock. GameSpot, accessed on 2022-12-06
- ↑ 2022-11-26, BUILDING A REVOLUTIONARY: AN INSIDE LOOK AT RAMATTRA WITH THE HERO DESIGN TEAM. Blizzard Entertainment, accessed on 2022-11-27
- ↑ 2024-01-31, Developing Overwatch 2's Samoan hero. Games Industry.biz, accessed on 2024-02-08
- ↑ 11.0 11.1 11.2 2022-11-28, Overwatch 2: Ramattra's Design Evolution | Dev Update Youtube, accessed on 2022-11-27
- ↑ 2019-11-5, Details On An Unannounced Overwatch 2 Hero. Game Informer, accessed on 2022-11-5
- ↑ 2022-10-27,Overwatch League Grand Finals 2022. Youtube, accessed on 2022-11-04
- ↑ 14.0 14.1 2023-01-31, SEASON 2 RETROSPECTIVE: A LOOK BACK AND THE ROAD FORWARD. PlayOverwatch, accessed on 2023-02-02
| Heroes in Overwatch
| ||||||||
|---|---|---|---|---|---|---|---|---|
Tank |
 Bruiser |
|||||||
 Initiator |
||||||||
Stalwart |
 Ramattra |
|||||||
Damage |
 Flanker |
|||||||
 Recon |
||||||||
 Sharpshooter |
||||||||
 Specialist |
||||||||
Support |
 Medic |
|||||||
 Survivor |
||||||||
 Tactician |
||||||||


