- For the cinematic of the same name, see Kiriko (animated short).
- For the similarly named character, see Kimiko.
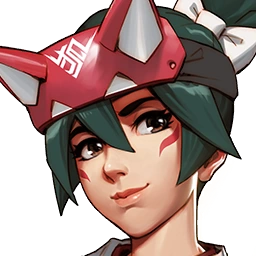
Kiriko is a Medic Support hero in Overwatch. Her release coincided with the release of Overwatch 2 on 4 October 2022, making her the 35th hero to be added to the game.
Overview
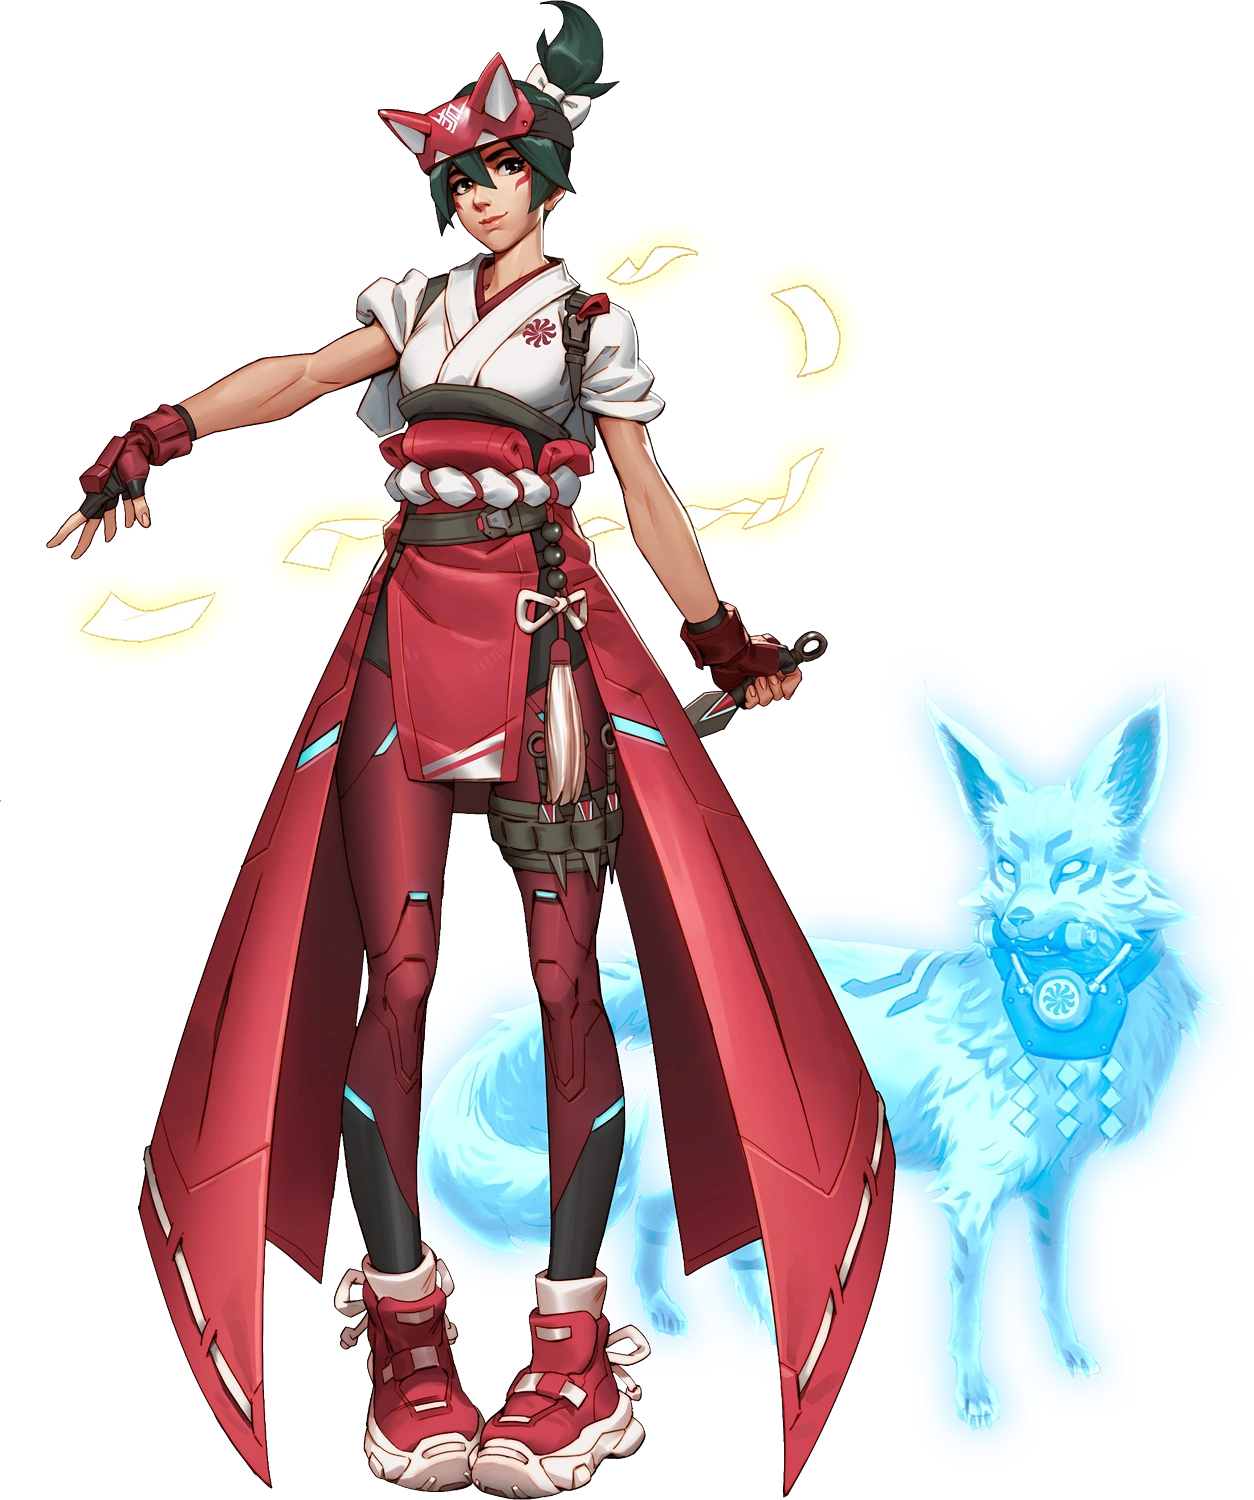
Kiriko is a kunoichi healer who is aided by her kitsune spirit. She can throw protection suzu to her allies or kunai against her enemies.[7]
She is a family friend of the Shimada Family. She also trained in the early days with Genji and Hanzo.
-
 3D portrait
 -
 2D portrait
Abilities
Passive Abilities


- Does not generate ultimate charge.
- Effect stacks when healing multiple allies.
- Affected by healing modifiers both on the target and the Medic.

- Wall Climb ends when the player stops holding the button, the wall ends or the duration is up. It cannot then be used again until the player has landed on a walkable surface.
- Kiriko will grab and mantle ledges if the input is held while facing a ledge of a walkable surface.
- This does not count as starting Wall Climb, and can be done even if Wall Climb was already used.
- Destroys fences and other breakables in the way when mantling a ledge.
- Can reach up to 10.3m height (11m with jump) due to momentum being kept after wall climb ends.
Weapons


26 (per burst)
1.42 seconds (full clip)
24 m/s (non-homing)
- Healing per second: 182 while firing (80.53 w/ reload)
- Default behavior is a toggle, meaning pressing the button will cause Kiriko to hold down the ability. If you don't want to use all 10 Healing Ofuda, you must press again to toggle off. This setting can be changed in the options.
- After being thrown, the talismans are either yellow or blue. The color indicates whether they are homing in on a target.
- Yellow means they are seeking the allied player.
- Blue means they don't have a target. Blue ofuda can still heal an ally if they walk into the missed ofuda's path.
- Healing Ofuda are destroyed upon impact with terrain (whether they were homing or not).
- Healing Ofuda automatically reload when they are not in use or the clip is emptied. All 10 Ofuda are restored, regardless of how many Ofuda were left in the clip.
- The max range for Healing Ofuda is the same as
 Swift Step, so you can use the indicator for that ability to determine if your Healing Ofuda is within range of homing in or not.
 - The maximum view angle for Healing Ofuda lock on is half that of Swift Step. If Swift Step sensitivity is set to 50%, then the presence of the Swift Step reticle will also indicate an adequate viewing angle for Healing Ofuda lock-on.
- Healing Ofuda will continue to home on targets even when they teleport or become untargetable by enemies, such as a
 Shadow Stepping Reaper or a Moira using
  Fade. They are still limited by their max homing range.
 - Despite
 Deflect switching ownership to Genji, yellow ofudas will still try to seek their original target. If Genji's allies stand in their path, they will be healed.
 - Can destroy fences and other breakables when colliding with them.
- Damage per second: 120 while firing (105.88 overall w/reload)
Special Abilities
- Swift Step can target allies through walls.
- Swift Step has a brief casting animation that can be interrupted.
- Objects that are attached to Kiriko are dropped at the cast location when she teleports.
- This includes
 Jagged Blade,
  Sonic Arrow,
  Pulse Bomb,
  Sticky Bombs,
  Take Aim and
  Tracking Shot.
- This includes
- Kiriko is briefly phased out after using Swift Step, making her immune to damage.
- Swift Step can be used on airborne allies, such as Pharah. Kiriko will appear at their side and begin to fall immediately.
- Swift Step cannot be used while Kiriko is under a movement lock effect such as
 Steel Trap,
  Gravitic Flux or
  Graviton Surge
- Protection Suzu makes allies phased out, making them immune to most negative effects and damage. They are not targetable by enemies and become non-physical. Abilities, such as
 Chain Hook, will pass through them.
 - Protection Suzu does not work on constructs like Torbjörn's
 Turret.
 - The projectile can be destroyed while in air by
 Defense Matrix,
  Kinetic Grasp,
  Javelin Spin,
  Power Matrix and
  Kekkai Sanctuary and reflected by Deflect, but the explosion is unaffected.
  Amplification Matrix affects all healing dealt, if the projectile passes through it. Area healing alone going through is not amplified.
- Protection Suzu does not collide with enemies.
- Protection Suzu, if thrown straight up, takes 7 seconds before it will impact the ground and trigger.
- Following effects are prevented and removed by Protection Suzu:
- Anti-heal, such as
 Biotic Grenade,
  Rampage and
  Healing reduction from damage
 - Damage over time effects, such as
 Dynamite,
  Venom Mine and Junker Queen's wounds
 - Stuns (incl. freeze), such as
 Energy Javelin and
  Blizzard
 - Ana's
 Sleep Dart
 - Sombra's
 Hack
Hack - Zenyatta's
 Orb of Discord
 - Illari's
 Captive Sun sunstruck debuff
 - Attached objects, such as Jagged Blade, Sonic Arrow, Pulse Bomb, Sticky Bombs, Take Aim and Tracking Shot.
- Movement slows, such as
 Endothermic Blaster and
  Meteor Strike
- Anti-heal, such as
- Following effects are prevented but not removed by Protection Suzu:
- Knockdowns, such as
 Earthshatter
 - Knockback's and knockups, such as
 Soundwave
 - Junkrat's Steel Trap
- Reinhardt's
 Charge
 - Roadhog's Chain Hook
- Knockdowns, such as
- Following effects are completely unaffected by Protection Suzu. Damage portions may still be prevented, but the effect will not end:
- Sigma's Gravitic Flux
- Zarya's Graviton Surge
- Mauga's
 Cage Fight
- Sigma's
- Protection Suzu can affect allies through walls and floors as long as their bodies are sticking through them.
- Destroys fences and other breakables in the area of effect.
Ultimate Ability
1 second (lingering buff)
- Grants +30% move speed, +50% reload and attack speed, and +100% cooldown recharge rate.
- The bonuses persist for 1 second after leaving the area.
- Kitsune Rush's deployment is completely stopped if the fox spirit collides with terrain under certain conditions. Whatever path was laid prior to collision with terrain remains in effect.
- If the fox hits a surface at a low angle, it will slide along it, maintaining its original direction, instead of stopping.
- The fox can jump walls roughly up to Kiriko's height, but it will not cover gaps. If Kitsune Rush goes down a ledge, it will deploy along the ground beneath regardless of height.
- Destroys fences and other breakables in its path.
- Kitsune Rush's deployment is not impacted by barriers and will pass through them.
- Terrain-like objects, such as Mei's
 Ice Wall and
  Cryo-Freeze and Lifeweaver's
  Tree of Life, can block the deployment of Kitsune's Rush, regardless of whether the ability is from an ally or an enemy.
- Terrain-like objects, such as Mei's
 B.O.B receives the benefits of Kitsune Rush.
- Other deployables, like Torbjorn's Turret and Junkrat's
 RIP-Tire do not receive any benefit.
- Other deployables, like Torbjorn's
- Functions with
 Beam-type weapons, such as
  Tesla Cannon, by increasing the tick rate.
 - Works on abilities which have a rate of fire, such as
 Storm Arrows and
  Whole Hog.
 - Speeds up the charge time of most weapons, such as
 Storm Bow and
  Healing Blossom.
 - Kitsune Rush cannot be cancelled mid-animation by stuns, but getting killed or hacked mid-animation does.
- Kitsune Rush's movement speed buff counts towards global movement speed buff cap.
Perks
Minor Perks
A Minor Perk can be chosen at level 2.

- Increases the speed by 50% of non-homing talismans' speed.

- Does not trigger when hitting barriers or other deployables, except B.O.B.
Major perks
A Major Perk can be chosen at level 3.

- Damage per second: 168 while firing (135.19 w/ reload)
- Healing per second: 254.8 while firing (135.39 w/ reload)

Hero-specific options
| Setting name | Options | Description |
|---|---|---|
| Healing Ofuda sensitivity | 10% ... 100% (default: 100%) | Adjusts the targeting sensitivity of Healing Ofuda. Setting this to a lower value reduces the maximum view angle for acquiring a target. |
| Toggle Healing Ofuda | On (default) | Healing Ofuda deactivates when player presses the button again. |
| Off | Healing Ofuda deactivates when player stops holding the button. | |
| Swift Step sensitivity | 10% ... 100% (default: 100%) | Adjusts the targeting sensitivity of Swift Step. Setting this to a lower value reduces the maximum view angle for acquiring a target. |
| Automatically climb walls | Off (default) | While facing a wall, hold Jump and Forward to wall climb. |
| On | While facing a wall, hold Forward while airborne to wall climb. | |
| Require a forward throttle to initiate wall climbing | Off (default) | You can only initiate a wallclimb by holding forward and jump |
| On | You can initiate a wallclimb by holding any direction and jump. | |
| Healing Ofuda cancels reload | On (default) | Activating Healing Ofuda interrupts reload |
| Off | Healing Ofuda cannot be used while reloading. | |
| Healing Ofuda UI | On (default) | Healing Ofuda ammo UI element is displayed below the crosshair. |
| On | Healing Ofuda ammo UI element is hidden. |
Stadium
Kiriko is a playable hero in Stadium game mode. See Kiriko/Stadium for a list of hero-specific Items and Powers.
Strategy
- Kiriko plays well when alongside flanking characters, such as Tracer and Genji.[8]
- Protection Suzu works a lot like Zarya's bubble or Baptiste's immortality field (though it lasts a mere 0.85 seconds). When timed right, it can save teammates (or yourself) from ultimates or burst damage.
- A combo of Swift Step + Protection Suzu allows you to save the lives of distant low health players and gives you a little time to start healing them.
- Swift Step provides a brief invulnerability upon arriving. With the right timing, you can dodge the effects of most abilities even if your only ally is also in range of that effect.
Match-Ups and Team Synergy
Tank
| Hero | Match-Up | Team Synergy |
|---|---|---|
 D.Va |
Up close, Defense Matrix is a great counter to Kiriko as it negates your kunai, your ofudas, and, most importantly of all, your Protection Suzu. If D.Va chooses to dive you, use your Swift Step to get away (preferably to an ally far from her). Your safest option is to poke D.Va from long range as your kunai have no falloff damage. Your Protection Suzu can protect you and allies from her Self-Destruct. Also, a well-timed Swift Step can save your being blown up by D.Va's ultimate ability. | Protection Suzu can ensure that D.Va isn't killed while using Call Mech. Your Kitsune Rush is a good pair with D.Va's abilities and increases her Boosters' uptime. |
 Doomfist |
If Doomfist dives you, use your Swift Step to escape. You can also Wall Climb or Protection Suzu to evade his Rocket Punch if you know it's coming towards you. Be careful about throwing your kunai at him while he's blocking. A single headshot will fully empower his gauntlet for a stronger Rocket Punch. Even if a teammate gets punched into a wall, he still needs a few more shots to finish them, which should allow you to throw Protection Suzu to save them. Protection Suzu can also protect you from Meteor Strike and cleanse its slowing after-effect. | As a highly mobile tank, your ofudas may have a hard time reaching him, especially when he goes around corners. You can use your Swift Step to reach him quickly. Protection Suzu could be a hindrance when he's using his Power Block because it could prevent him from fully charging his gauntlet. Despite this, the cooldown reduction from your ultimate grants Doomfist more opportunities to punch opponents into the walls. |
 Junker Queen |
Your Protection Suzu is a great countermeasure against her wounds and her Rampage's anti-healing effect. You can also use Swift Step to cleanse yourself of those negative effects. Swift Step also drops her Jagged Blade if it's stuck to you. | Your Protection Suzu can cleanse Junker Queen of negative effect, which is helpful to ensure she can sustain her self-heal. Your ultimate pairs nicely with her abilities as the speed boost can stack with her Commanding Shout, the cooldown reduction pairs greatly with Carnage and Rampage, |
 Orisa |
Up close, Javelin Spin is a great counter to Kiriko as it negates your kunai, your ofudas, and, most importantly of all, your Protection Suzu. Orisa can also use that ability to charge toward you, so use Swift Step when that happens. Fortify will ensure that you can't land any critical hits on her along with lowering the damage you can inflict. Watch out for her Energy Javelin as it stuns you and Orisa will most likely focus fire whoever get hit. If you get caught in Terra Surge, you can either use Swift Step to escape or use Protection Suzu around 2.5 seconds into her ultimate duration. | Protection Suzu can ensure that Orisa isn't killed or hacked while using Terra Surge. Your Kitsune Rush is a good pair with Orisa's abilities, especially since it brings back Fortify and Javelin Spin quicker. |
 Ramattra |
Just like you, Ramattra can poke you at long range. Do not confront him up close because if he uses Nemesis Form, he can pummel you to death. In that event, use either Protection Suzu to negate some of the damage or Swift Step to escape. His Void Barrier can block all of your projectile abilities. Ravenous Vortex can slow down your movement speed to go in tandem with Pummel. Annihilation can render your Kitsune Rush hazardous as his nanites attack anyone within it. | Kitsune Rush pairs nicely with his Nemesis Form and, in turn, Annihilation. He moves faster and punches quicker. You can use Protection Suzu to make him invulnerable and cleanse him of negative effects. Pepper in your kunai to help him mow down targets quicker. |
 Reinhardt |
As long as you play far back, Reinhardt can't do anything to you. Just throw kunai at him and dodge his Firestrikes. If Reinhardt charges at you, you can evade by climb up walls, teleporting out with Swift Step, or becoming invulnerable with Protecting Suzu. If you see Reinhardt is about to use Earthshatter, your Protection Suzu can reverse the knockdown effect on yourself and your allies. It can also prevent allies from taking pin damage. | Protection Suzu can ensure that Reinhardt isn't killed or interrupted if he has pinned a target. |
 Roadhog |
Roadhog is an easy target to farm ult charge for your Kitsune Rush. Roadhog's damage is negligible at long range. Protection Suzu can prevent Roadhog from one-shotting hooked allies. Protecting Suzu may not save anyone from Whole Hog because of the temporary duration. | Protection Suzu can remove any negative effects inflicted on Roadhog, allowing him to get up if he's been slept or knocked down and - most importantly - cleanses him of anti-heal effects. Protection Suzu ensures that Roadhog can use his Take a Breather without interruption, greatly increasing his survivability. Kitsune Rush pairs nicely with his abilities, especially Whole Hog as the higher rate of fire means he deals more damage. |
 Sigma |
Experimental Barrier and Kinetic Grasp blocks your kunai, healing ofudas, and Protection Suzu. He also gains overhealth from absorbing your kunai. Use Swift Step to escape Gravitic Flux's target zone. However, if you do get caught, use your Protection Suzu to prevent the damage by either hitting a wall, a neighboring ally, or (and this one is tricky) hitting the ground below slightly before you land. | Kitsune Rush can bring back online some key abilities sooner such as Accretion and Kinetic Grasp. |
 Wrecking Ball |
You might as well ignore Wrecking Ball because you can't inflict headshots while he's in Roll form. Leave him to another teammate with crowd control (preferably a stun). Your Protection Suzu can protect yourself and allies from taking damage from Piledriver. You can also dodge Piledriver with your Swift Step. Minefield can make your Kitsune Rush hazardous to stand in as the mines deal high damage when touched. | As a highly mobile tank, your ofudas may have a hard time reaching him, especially when he goes around corners. Frankly, you shouldn't really worry about Wrecking Ball as he should be able to get to health packs quickly. |
 Winston |
Throw a few kunai at Winston when he dives at you and then quickly escape with Swift Step. Realize that his Barrier Projector blocks your abilities (save Kitsune Rush) so communicate to allies to exit if they're inside. | Kitsune Rush can bring back online some key abilities sooner such as Jump Pack and Barrier Projector. |
 Zarya |
Stay out of range of the Particle Cannon's beam. Your kunais doesn't provide a lot of energy for her. If caught in Graviton Surge, do not use your Protection Suzu immediately. Try to wait a moment and then use it toward the end. | Kitsune Rush can re-enable her barriers sooner, increasing her shielding uptime and increasing the time she's at high energy. The tick rate of her beam is also increased, which makes a high energy Zarya a great threat. |
Damage
| Hero | Match-Up | Team Synergy |
|---|---|---|
 Ashe |
Your weapon has no damage falloff so you can use that to your advantage against Ashe. However, the Viper is a hitscan weapon so she could have some leverage. You can use Swift Step to cleanse yourself of Dynamite's burn effect. Protection Suzu does the same thing along with cleansing allies of the same effect. Landing headshots on B.O.B. can chip away large swathes of his health. | As a sniper, Ashe's mostly stationary, so it's easier to send her your ofudas. Kitsune Rush greatly helps Ashe as she suffers from having the longest reload time of the entire cast. It also helps her get back Coach Gun and Dynamite. B.O.B. is also benefited greatly as he moves faster as he's charges faster and his fire rate is increased, letting him deal more damage. Protection Suzu also greatly neutralize any status effect on B.O.B., especially Hack. |
 Bastion |
Bastion could be a problem to you. In Assault form, his critical hitbox - a blue box - is hidden behind his machine gun. Even if you reach it, you need to land 4 kunai to that spot. That will be hard, and Bastion can turn around quick enough before you can finish the job and then shred you apart. Your Protection Suzu doesn't last long enough to protect yourself from its onslaught of bullets. You can teleport away with Swift Step if you're close to dying. Your Protection Suzu can save yourself and allies from Configuration: Artillery. Though, keep in mind Bastion may space out the shots to bait you into using it early or cluster the shots so some of the splash can gravely wound you. | Kitsune Rush pairs extremely well with his Assault Form as he can output more damage quicker and nearly cancels out the speed penalty. Not only that, his Recon form's primary fire shoots faster and he moves quicker. Also, he can regain his grenade sooner. Protection Suzu can assure Bastion doesn't die while using Assault form and his ultimate. |
 Cassidy |
While your Kunai headshots are powerful, Cassidy can eliminate you with two headshots whereas you have to hit three. Cassidy has the advantage close-mid range, but at longer ranges his weapon's damage quickly falls off while your Kunais' doesn't, so try to mind your distance. At mid-long range, you can teleport away with Swift Step if you're low on health, but if you get too close to him he can lock you from using it with his |
Your Kitsune Rush decreases the speed penalty when he uses Deadeye (from -75% to -45%). Also, the increased fire rate makes Cassidy more lethal close to mid-range duels. |
 Echo |
As a flying character, Echo will be hard to hit while she's in the air. Her primary is just like yours - a projectile with no damage falloff. Her Tri-Shot, however, has a fire rate than yours. With Swift Step you can dodge her attacks. Plus, her Sticky Bombs fall off you. | In an open area, your healing ofudas should be able to home onto Echo. Protection Suzu, unfortunately, isn't a homing projectile and you can miss trying to hit her while she's flying. Kitsune Rush brings back her abilities sooner so she can maintain flight. |
 Genji |
You may experience difficulties trying to track a mobile hero like Genji. He can hop around you, evading your kunai, and damage your with either his shuriken or Swift Strike. Deflect can prevent your Protection Suzu from reaching allies and - in worse case scenarios - cleanse an ally of Genji. Do not try to fight Genji with Dragonblade as he only need to slash you twice to kill you.
|
You should be able to play well alongside a flanking character like Genji. Both of you can climb walls and you can teleport to Genji should use his dash. Use your ofudas to keep him alive so he can get eliminations. With Kitsune Rush, the rate of fire increase means Genji get more swings during Dragonblade. |
 Hanzo |
Hanzo will be difficult at long range. A singe fully charged headshot will kill you, whereas your need to land two kunai to his head. If you're bugged with a Sonic Arrow, either Swift Step or Protection Suzu will remove the effect. Protection Suzu can be effective against Dragonstrike as you or allies aren't rooted. | (To be added) |
 Junkrat |
Be aware of your surroundings as Junkrat could dive from high ground and instantly two-tap you (Frag Launcher grenade + Concussion Mine deals 220 damage). Getting caught in his Steel Trap chips away half of your health and disables your Swift Step, thus making Protection Suzu your only means of defense. Protection Suzu can protect you and your teammates from RIP-Tire. | (To be added) |
 Mei |
Stay out of her primary fire range. Her Endothermic Blaster's freeze ray deals a lot of damage over time. Use Swift Step to get out of range. Both of you have projectile alt fires that deal high headshot damage and has no falloff, so exercise caution in long range duels. Especially since it take three kunai headshots to kill Mei versus two icicles headshots. Mei can use her Cryo-Freeze to heal from your damage. This and her Ice Wall can block your healing and Protection Suzu. When dealing with Blizzard, try to teleport to an ally out of range using Swift Step. Otherwise, they to use your Protection Suzu about one second into its duration so you can avoid being frozen and hopefully escape. | (To be added) |
 Pharah |
As a flying character, Pharah will be hard to hit while she's in the air. Her primary is just like yours - a projectile with no damage falloff. Her rockets do more damage outright than your kunai. Even the splash from the explosion chips away much of your health. If Pharah does pursue you, try to use Swift Step to escape her. During Barrage, your Suzu can save allies, though Pharah could change her target mid-animation and take out someone else. | (To be added) |
 Reaper |
Your need three kunai headshots to eliminate Reaper, but that won't be easy. You do have the range advantage with your kunai and his shotguns are negligible at longer ranges. However, Reaper can close the distance between the two of you with Shadow Step and Wraith Form. Even he doesn't shoot you, he slowly self-heals while dealing damage to other allies. While he's using Wraith Form, you can't damage him at all. Reaper only needs one or two headshots at close range to finish you off. Unfortunately, your Protection Suzu won't say anyone caught by his Death Blossom due its briefduration. | (To be added) |
 Soldier: 76 |
While your kunai has no damage falloff, Soldier's Heavy Pulse Rifle has a high rate of fire and he has his Helix Rocket. Also, he can sprint to find cover and heal up with his Biotic Field. Your Protection Suzu could save you from Tactical Visor, but then he will target an un-cleanse ally. He also could just wait for that ability to wear off before resuming. | (To be added) |
 Sojourn |
(To be added) | (To be added) |
 Sombra |
Both Protection Suzu and Swift Step can remove the hack debuff from yourself. Your Suzu can cleanse allies that have been hacked as well. In a one-on-one, your slower rate of fire may hinder you from defeating Sombra but one good headshot chips away half of her health. Neither Hack nor EMP can cancel Kitsune Rush. | (To be added) |
 Symmetra |
(To be added) | (To be added) |
 Torbjörn |
(To be added) | (To be added) |
 Tracer |
(To be added) | (To be added) |
 Widowmaker |
(To be added) | (To be added) |
Support
| Hero | Match-Up | Team Synergy |
|---|---|---|
 Ana |
Protection Suzu counter nearly all of Ana's abilities; interrupts her rifle's slow overtime damage, awakens slept allies, and removes the anti-healing debuff. That being said, Ana can still be a threat at long range. Her scoped shots are hitscan, which makes three-tapping you easy. | With the Kitsune Rush combine to Nano Boost, this combo will your allies ultimate even more stronger. Such as Annihilation, Dragonblade, Tactical Visor or Overclock. |
 Baptiste |
(To be added) | (To be added) |
 Brigitte |
(To be added) | (To be added) |
 Kiriko |
(To be added) | (To be added) |
 Lúcio |
(To be added) | (To be added) |
 Mercy |
(To be added) | (To be added) |
 Moira |
(To be added) | (To be added) |
 Zenyatta |
Protect Suzu can remove discord effect, but unable to also prevent Zenyatta place the discord to target. In 1v1, Kiriko is favor into him, she can use Swift Step to get away if she's low health, as this abilities can cancel Discord effect too. Meanwhile, Kitsune Rush will easily get neutralize by Transcendence, as your team damage is not enough to out damage on this abilities unless your team is heavily poke comp. | (To be added) |
Map Strategies
Control
| Map | Strategy & Stage Tips |
|---|---|
 Overall Strategy |
TBA RATING | TBA FEATURE
Map strategy details for Overall Strategy are currently missing. You can help the Overwatch Wiki by adding them!
|
 Antarctic Peninsula |
TBA RATING | TBA FEATURE
Map strategy details for Antarctic Peninsula are currently missing. You can help the Overwatch Wiki by adding them! Labs
Strategy details missing.
Sublevel
Strategy details missing.
Icebreaker
Strategy details missing.
|

|
TBA RATING | TBA FEATURE
Map strategy details for Busan are currently missing. You can help the Overwatch Wiki by adding them! Downtown
Strategy details missing.
Sanctuary
Strategy details missing.
MEKA Base
Strategy details missing.
|

|
TBA RATING | TBA FEATURE
Map strategy details for Ilios are currently missing. You can help the Overwatch Wiki by adding them! Lighthouse
Strategy details missing.
Well
Strategy details missing.
Ruins
Strategy details missing.
|

|
TBA RATING | TBA FEATURE
Map strategy details for Lijiang Tower are currently missing. You can help the Overwatch Wiki by adding them! Control Center
Strategy details missing.
Garden
Strategy details missing.
Night Market
Strategy details missing.
|

|
TBA RATING | TBA FEATURE
Map strategy details for Nepal are currently missing. You can help the Overwatch Wiki by adding them! Village
Strategy details missing.
Shrine
Strategy details missing.
Sanctum
Strategy details missing.
|

|
TBA RATING | TBA FEATURE
Map strategy details for Oasis are currently missing. You can help the Overwatch Wiki by adding them! City Center
Strategy details missing.
Gardens
Strategy details missing.
University
Strategy details missing.
|

|
TBA RATING | TBA FEATURE
Map strategy details for Samoa are currently missing. You can help the Overwatch Wiki by adding them! Beach
Strategy details missing.
Downtown
Strategy details missing.
Volcano
Strategy details missing.
|
Escort
| Map | Strategy & Stage Tips |
|---|---|
 Overall Strategy |
TBA RATING | TBA FEATURE
Map strategy details for Overall Strategy are currently missing. You can help the Overwatch Wiki by adding them!
|

|
TBA RATING | TBA FEATURE
Map strategy details for Circuit Royal are currently missing. You can help the Overwatch Wiki by adding them! Attack
Strategy details missing.
Defense
Strategy details missing.
|

|
TBA RATING | TBA FEATURE
Map strategy details for Dorado are currently missing. You can help the Overwatch Wiki by adding them! Attack
Strategy details missing.
Defense
Strategy details missing.
|

|
TBA RATING | TBA FEATURE
Map strategy details for Havana are currently missing. You can help the Overwatch Wiki by adding them! Attack
Strategy details missing.
Defense
Strategy details missing.
|

|
TBA RATING | TBA FEATURE
Map strategy details for Junkertown are currently missing. You can help the Overwatch Wiki by adding them! Attack
Strategy details missing.
Defense
Strategy details missing.
|

|
TBA RATING | TBA FEATURE
Map strategy details for Rialto are currently missing. You can help the Overwatch Wiki by adding them! Attack
Strategy details missing.
Defense
Strategy details missing.
|

|
TBA RATING | TBA FEATURE
Map strategy details for Route 66 are currently missing. You can help the Overwatch Wiki by adding them! Attack
Strategy details missing.
Defense
Strategy details missing.
|

|
TBA RATING | TBA FEATURE
Map strategy details for Shambali Monastery are currently missing. You can help the Overwatch Wiki by adding them! Attack
Strategy details missing.
Defense
Strategy details missing.
|

|
TBA RATING | TBA FEATURE
Map strategy details for Watchpoint: Gibraltar are currently missing. You can help the Overwatch Wiki by adding them! Attack
Strategy details missing.
Defense
Strategy details missing.
|
Hybrid
| Map | Strategy & Stage Tips |
|---|---|
 Overall Strategy |
TBA RATING | TBA FEATURE
Map strategy details for Overall Strategy are currently missing. You can help the Overwatch Wiki by adding them!
|
 Blizzard World |
TBA RATING | TBA FEATURE
Map strategy details for Blizzard World are currently missing. You can help the Overwatch Wiki by adding them! Attack
Strategy details missing.
Defense
Strategy details missing.
|

|
TBA RATING | TBA FEATURE
Map strategy details for Eichenwalde are currently missing. You can help the Overwatch Wiki by adding them! Attack
Strategy details missing.
Defense
Strategy details missing.
|

|
TBA RATING | TBA FEATURE
Map strategy details for Hollywood are currently missing. You can help the Overwatch Wiki by adding them! Attack
Strategy details missing.
Defense
Strategy details missing.
|

|
TBA RATING | TBA FEATURE
Map strategy details for King's Row are currently missing. You can help the Overwatch Wiki by adding them! Attack
Strategy details missing.
Defense
Strategy details missing.
|

|
TBA RATING | TBA FEATURE
Map strategy details for Midtown are currently missing. You can help the Overwatch Wiki by adding them! Attack
Strategy details missing.
Defense
Strategy details missing.
|
 Numbani |
TBA RATING | TBA FEATURE
Map strategy details for Numbani are currently missing. You can help the Overwatch Wiki by adding them! Attack
Strategy details missing.
Defense
Strategy details missing.
|

|
TBA RATING | TBA FEATURE
Map strategy details for Paraíso are currently missing. You can help the Overwatch Wiki by adding them! Attack
Strategy details missing.
Defense
Strategy details missing.
|
Push
| Map | Strategy & Stage Tips |
|---|---|
 Overall Strategy |
TBA RATING | TBA FEATURE
Map strategy details for Overall Strategy are currently missing. You can help the Overwatch Wiki by adding them!
|

|
TBA RATING | TBA FEATURE
Map strategy details for Colosseo are currently missing. You can help the Overwatch Wiki by adding them! Pushing
Strategy details missing.
Defending
Strategy details missing.
|

|
TBA RATING | TBA FEATURE
Map strategy details for Esperança are currently missing. You can help the Overwatch Wiki by adding them! Pushing
Strategy details missing.
Defending
Strategy details missing.
|

|
TBA RATING | TBA FEATURE
Map strategy details for New Queen Street are currently missing. You can help the Overwatch Wiki by adding them! Pushing
Strategy details missing.
Defending
Strategy details missing.
|

|
TBA RATING | TBA FEATURE
Map strategy details for Runasapi are currently missing. You can help the Overwatch Wiki by adding them! Pushing
Strategy details missing.
Defending
Strategy details missing.
|
Flashpoint
| Map | Strategy & Stage Tips |
|---|---|
 Overall Strategy |
TBA RATING | TBA FEATURE
Map strategy details for Overall Strategy are currently missing. You can help the Overwatch Wiki by adding them!
|

|
TBA RATING | TBA FEATURE
Map strategy details for Aatlis are currently missing. You can help the Overwatch Wiki by adding them! Station
Strategy details missing.
Garden
Strategy details missing.
Town Center
Strategy details missing.
Bazaar
Strategy details missing.
Resort
Strategy details missing.
|

|
TBA RATING | TBA FEATURE
Map strategy details for New Junk City are currently missing. You can help the Overwatch Wiki by adding them! Arena
Strategy details missing.
The Ducts
Strategy details missing.
Refinery
Strategy details missing.
Junkyard
Strategy details missing.
Bomb Flats
Strategy details missing.
|

|
TBA RATING | TBA FEATURE
Map strategy details for Suravasa are currently missing. You can help the Overwatch Wiki by adding them! Market
Strategy details missing.
Garden
Strategy details missing.
Palace
Strategy details missing.
Temple
Strategy details missing.
Ruins
Strategy details missing.
|
Achievements
| Name | Icon | Description | Reward |
|---|---|---|---|
| Cleanse 5 negative effects with one use of Kiriko's Protection Suzu in Quick or Competitive Play. |  | ||
| Restore 1500 health and land 5 critical hits without dying as Kiriko in Quick or Competitive Play. |  |
Trivia
- Kiriko became playable in Overwatch 2. Players who owned Overwatch gained access to her immediately. Those who don't had to unlock her through the season 1 battle pass, or purchase through the store.[9] Later it became a hero challenge by winning 10 games as a support hero.
- Kiri (霧) means "mist" and -ko (子) is a common female name suffix that means "child."
- The Kiriko main menu screen that was used during the first season of Overwatch 2 features the song "BOW" by Japanese rapper MFS, which is also used in her animated short.
- Kiriko's Protection Suzu used to deal a small amount of knockback to enemies, making it possible to eliminate them with the suzu. The Protection Suzu had its own icon in the kill feed.
- Kiriko's relationship with the Fox Spirit mimics that of Genji and Hanzo with the Shimada dragons.[1]
- While Tracer is considered the mascot character of the Overwatch IP,[10] some have posited that Kiriko has taken her place as the IP's "poster girl."[11]
- Kiriko is the second hero in the Overwatch franchise to be trilingual (after Baptiste and before Illari, Vendetta, Domina and Emre), speaking English, Japanese and Japanese Sign Language.
- Kiriko's fox plush from the animated short "Kiriko" is present in the majority of the arcade machines inside of Hanaoka.
Contradictions
- Kiriko's backstory differs between her origin story trailer and hero page. In the former, it is established that her grandmother and mother taught her her respective skills in her childhood, while the latter states that her grandmother taught her healing after moving in with her. Furthermore, the same site states that Kiriko moved in after the Hashimoto took over, while the Kanezaka lore drop established that Kiriko lived with her mother for close to a decade under Hashimoto rule.
Age
- There has been much debate on Kiriko's age within the community, many believing available information regarding it conflicts with her own lore, as well as that of Genji and Hanzo. Her origin summary states that Kiriko joined the Yokai when she was 20, implying she's at least that old,[12] yet the same short seems to conflict with this at first by also stating that Kiriko was 7 when Sojiro Shimada was assassinated (this is also contradicted by her hero page, which states that she was 12 when this happened). As the Yokai story states, "The Shimada were some ten years gone now", would instead logically make Kiriko 17.[13] However, in a letter between Kiriko's parents, it was mentioned that some twelve years had passed since the Hashimoto Clan took over, which would instead indicate Kiriko is 19,[14] still seemingly not lining up with her origin summary. An important detail to consider though is that this message was released as part of the original Overwatch title, but Kiriko only made her debut in Overwatch 2, which is set one year after Recall,[15] adding a likely additional year and bringing Kiriko up to 20, fitting with what was originally stated. It is also possible more than thirteen years has passed, as both mentions of how long had passed since the assassination both state "some ten / twelve years".
- While this explains how Kiriko's age is largely consistent with what was stated, there is one aspect of her lore that conflicts with all this. In both Kiriko's Origin Story, as well as Protector, she's shown alongside Hanzo and Genji, with both appearing to be in their mid to late teens, which is strange, as based on the two's originally mentioned ages, 13 years ago should've shown the two as being around 25 and 23 respectively. This would seem to suggest that instead of around 10 years, it has instead been around 20 years since their father was assassinated. However, this doesn't make much sense, as that would mean Kiriko is really in her mid-twenties to early thirties, the Yokai has accomplished little to nothing of note against the Hashimoto Clan despite being active for around a decade, and conflict with the previously mentioned information of it being closer to 10 years since the assassination.
- The short story, The Fall of a Sparrow, properly corrects Genji and Hanzo’s ages by portraying them as young adults in Genji’s memories while Kiriko remains as a child. The retcon fixes the characters’ timelines and leans into the portrayal of Genji and Hanzo being adult figures to Kiriko.
Design
- Kiriko's clothing is based on the attire worn by Shinto shrine maidens and her overall design incorporates allusions to Inari Ōkami, the patron deity of foxes.
- While her kunai are ninja tools, her other abilities mainly stem from objects associated with Shintoism: ofuda are paper talismans, suzu are sacred bells used to ward off evil, kitsune are fox spirits, and torii are traditional gates that mark the entrances to sacred sites.
- The symbol on Kiriko's headband is the kanji kitsune (狐) or "fox," which has been highly stylized and rotated 45° counter-clockwise.[16]
- Kiriko's final design strongly resembles the original Omniblade concept that became Sombra and influenced the designs of Genji, Hanzo, and Moira, though developers have not credited it as a specific source of inspiration.
Development
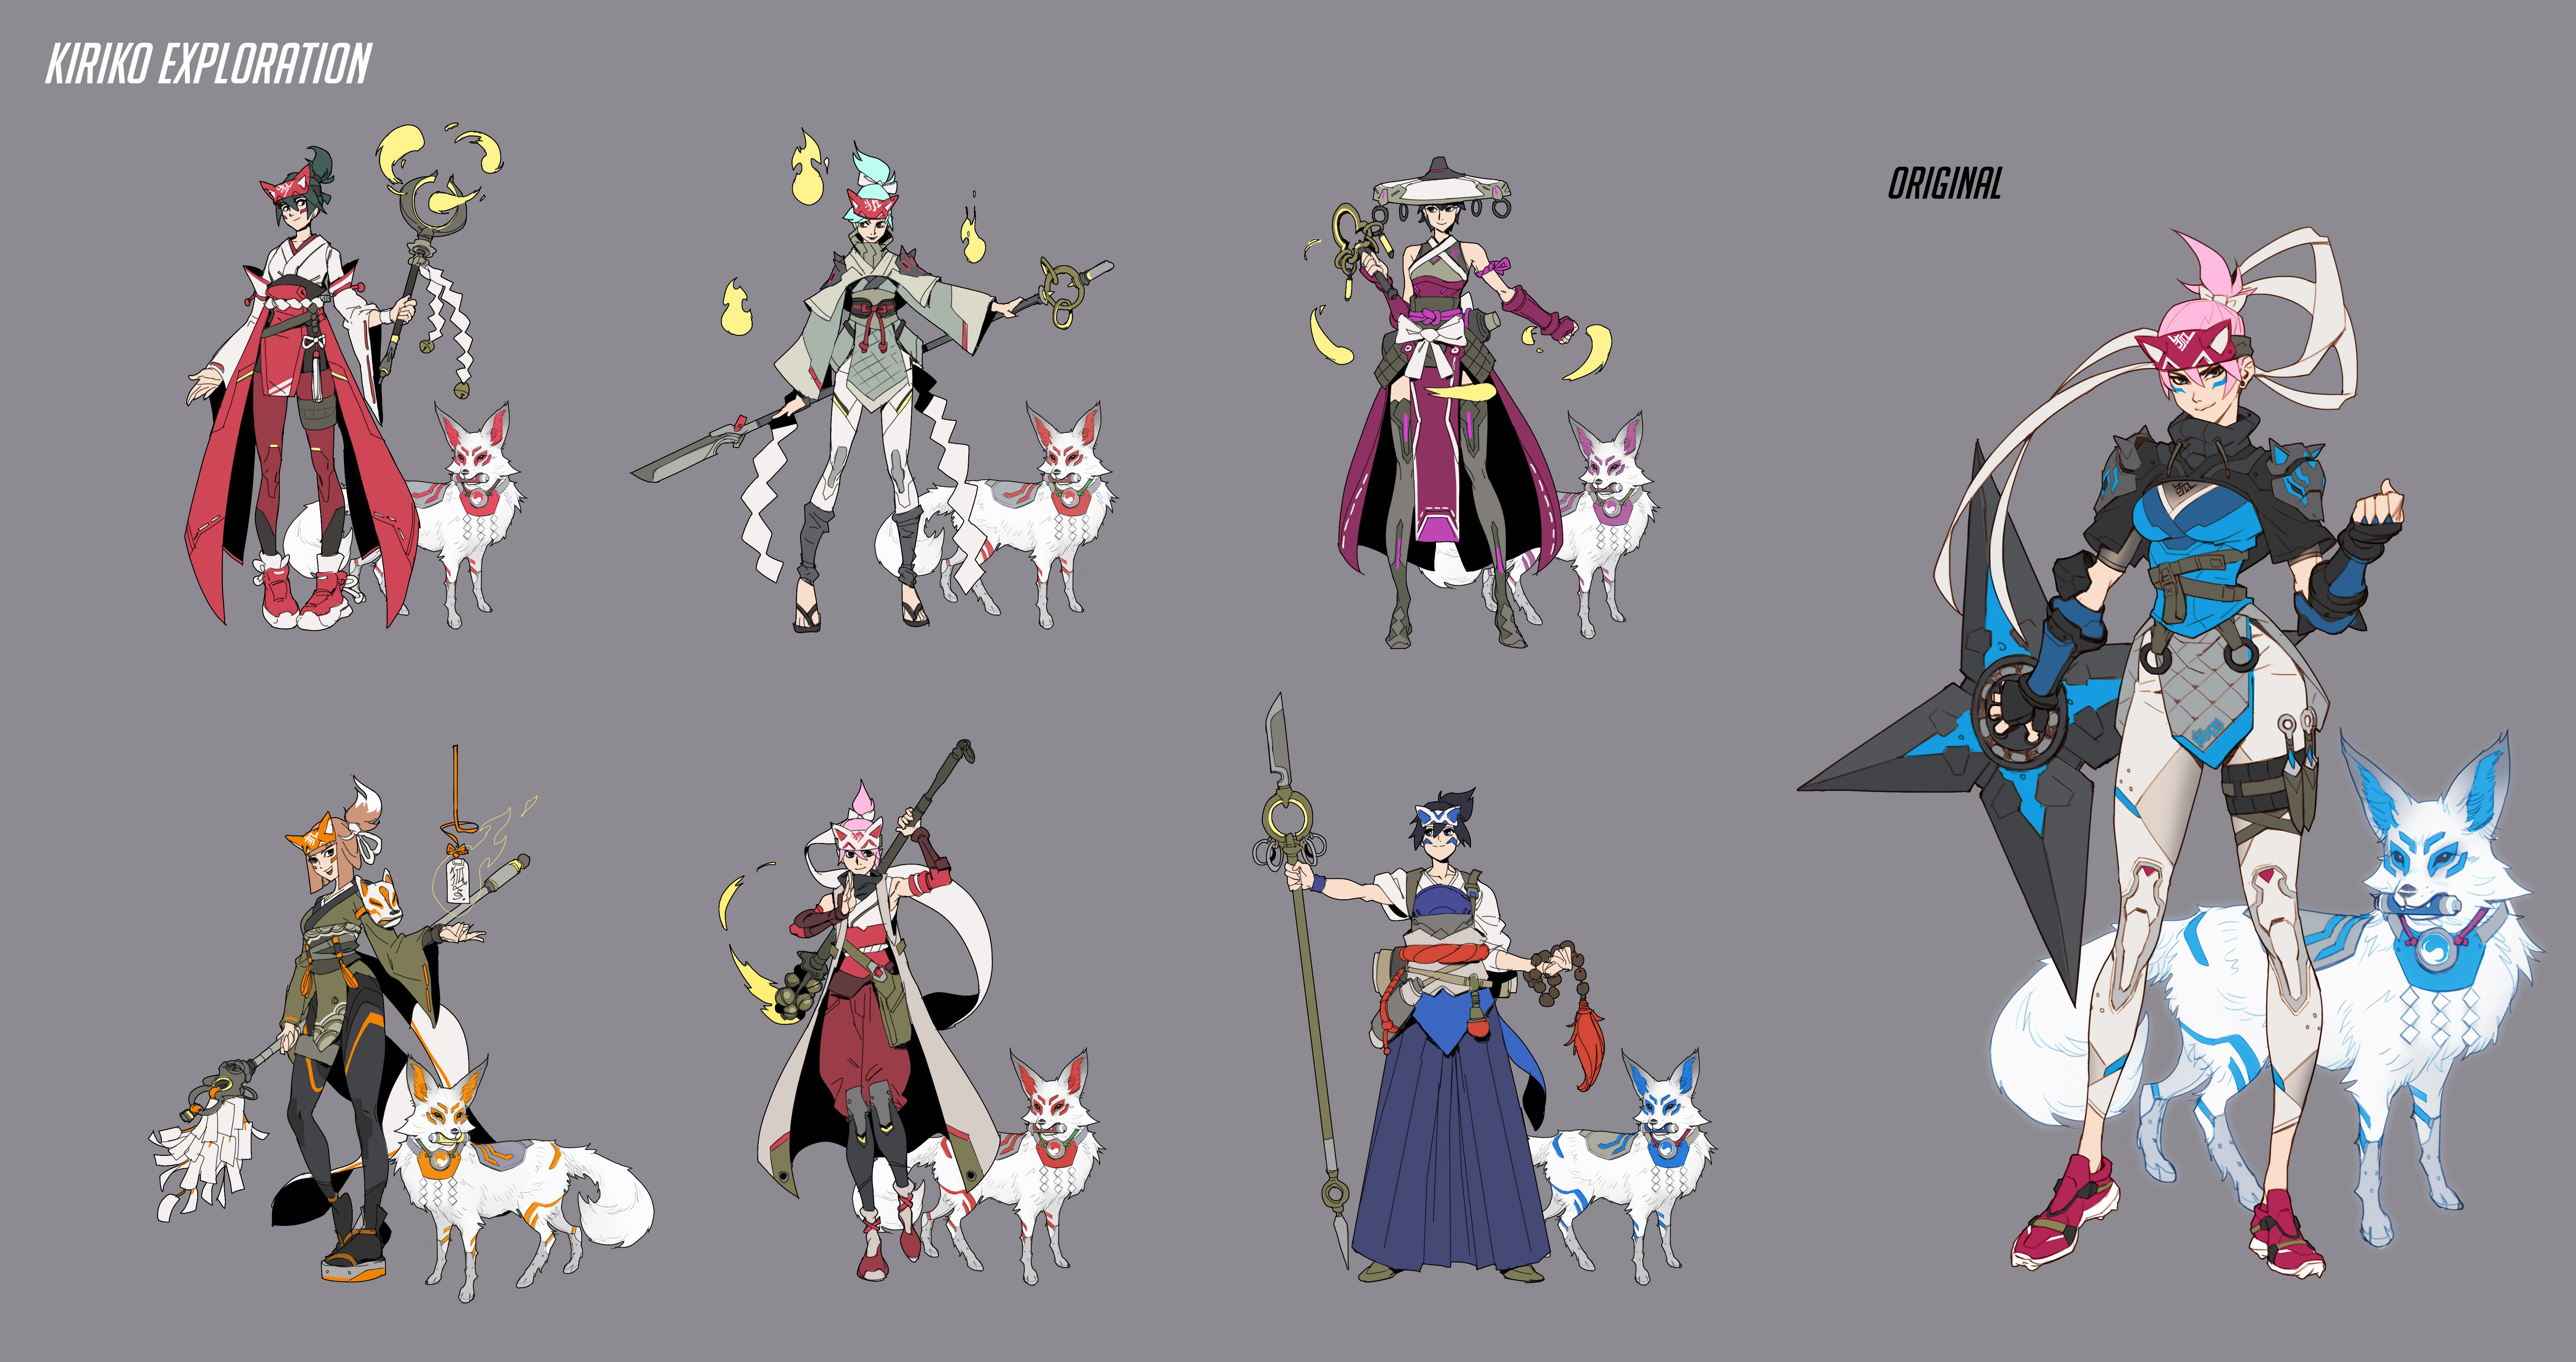
Concept arts of Kiriko
Kiriko was developed with Overwatch 2's new 5v5 team compositions in mind. Her design was heavily inspired by Genji; one of the starting points was creating a support hero that DPS players (i.e. Genji) would enjoy playing. Her design stems from a boss character that Blizzard created for the ninja ecology in Overwatch 2's PvE content. She was originally armed with a massive, fidget spinner-inspired throwing star, and had a somewhat more traditional ninja-like appearance.[8] The fox spirit concept was present in her design from the outset. The headband and bandanna come from classic depictions of ninjas in pop culture.[17]
In order to better suit her Support role, Blizzard eventually merged that concept with the traditional dress of a miko, a Shinto shrine maiden, and modern streetwear aesthetics.[8] The developers tried to retain her throwing star, but ended up retooling her to look the part of a Support. An idea was to split her abilities thematically, representing her nature as a Damage/Healer hybrid. This is reflected by her kunai and ofuda respectively. Of note, the kunai were used by Genji in his first iteration.[17]
The visual and sound effects from the ofuda draw on themes from nature. This corresponds with Kiriko's lines when using her primary, such as "the breeze brings relief" and "like a gentle rain."[1]
The protection suzu was chosen to be an active ability, so that Kiriko would engage with her teammates. The first idea for this ability was a smoke bomb inspired by her ninja training. A version of this ability blocked enemies' sight, but the game ended up becoming "one giant smoke cloud" when there was a Kiriko on both teams. Furthermore, instead of using the smoke bomb as a tool to disengage, teams would throw it ahead of them and use the visual cover to pop up in front of the enemy team. Ultimately, the final version of protection suzu was designed to fit with Kiriko's narrative, while also serving a function not otherwise present in the game via temporary invincibility.[1]
The decision to give Kiriko the wall climb passive stems from her backstory of training with Genji and Hanzo. The kitsune rush ultimate was originally just a fox, but playtesting demonstrated that it was hard for players to track the fox. As such, the ability was changed to incorporate Torii gates[17]
Kiriko was officially revealed at the 2022 Tokyo Game Show.[2]
Leaks
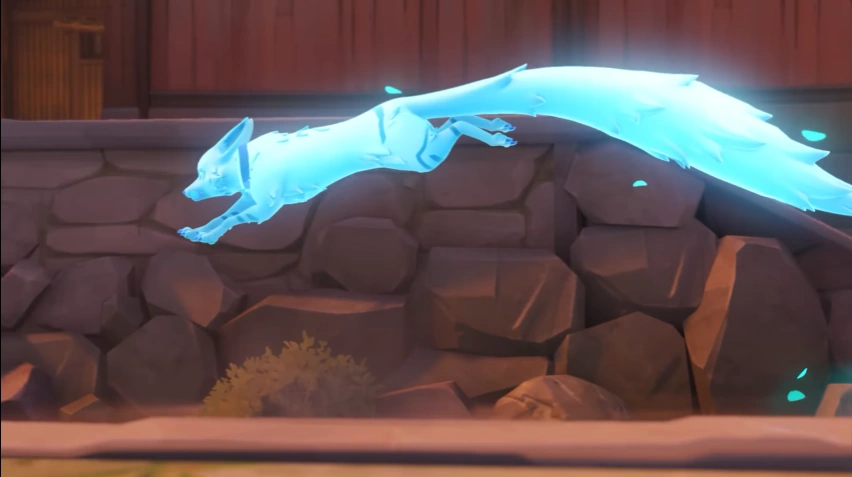
Kiriko's fox spirit, as seen in the June 2022 trailer
Over the years, a number of rumors and leaks pointed to Kiriko. Among the community, the term "Kanezaka Fox Girl" became regularly used when discussing the hero.
- The existence of a fox-like hero was rumored as far back as 2019, when Game Informer reported that Jeff Kaplan had shown them the silhouette of what appeared to be a female ninja character with a giant shuriken and fox companion during a press tour for Overwatch 2, later revealed to be an early iteration of her design.[18]
- In January 2021, the Kanezaka map and its related promotional material contained a number of small hints to the hero's identity and background with the storyline for Asa and Toshiro Yamagami, which mentioned Asa's daughter and a fox spirit that she would pray to.
- In June 2022, in the free-to-play announcement trailer for Overwatch 2, a glowing fox spirit was seen moving through the Kanezaka map, tying back into the lore released for the map in 2021.[18]
- In September 2022, Overwatch streamer John “Wanted” Lin accidentally mentioned Kiriko's name on a stream after getting details from Team 4.[18]
- A few days later, Kiriko was leaked via an advertisement for the Overwatch 2 battle pass.[19] The validity of the leak was later confirmed (albeit indirectly) by Blizzard.[20]
- Less than 24 hours later an incomplete workprint of an animated short for Kiriko with Spanish dubbing and temp music was leaked to YouTube, which was reported on by various outlets.[21][22]
Removed abilities

- Removed in Season 18.
Media
Concept Art
-
 Concept Art by Arnold Tsang
 -
 Antifragile Kira-Kira Concept Art
 -
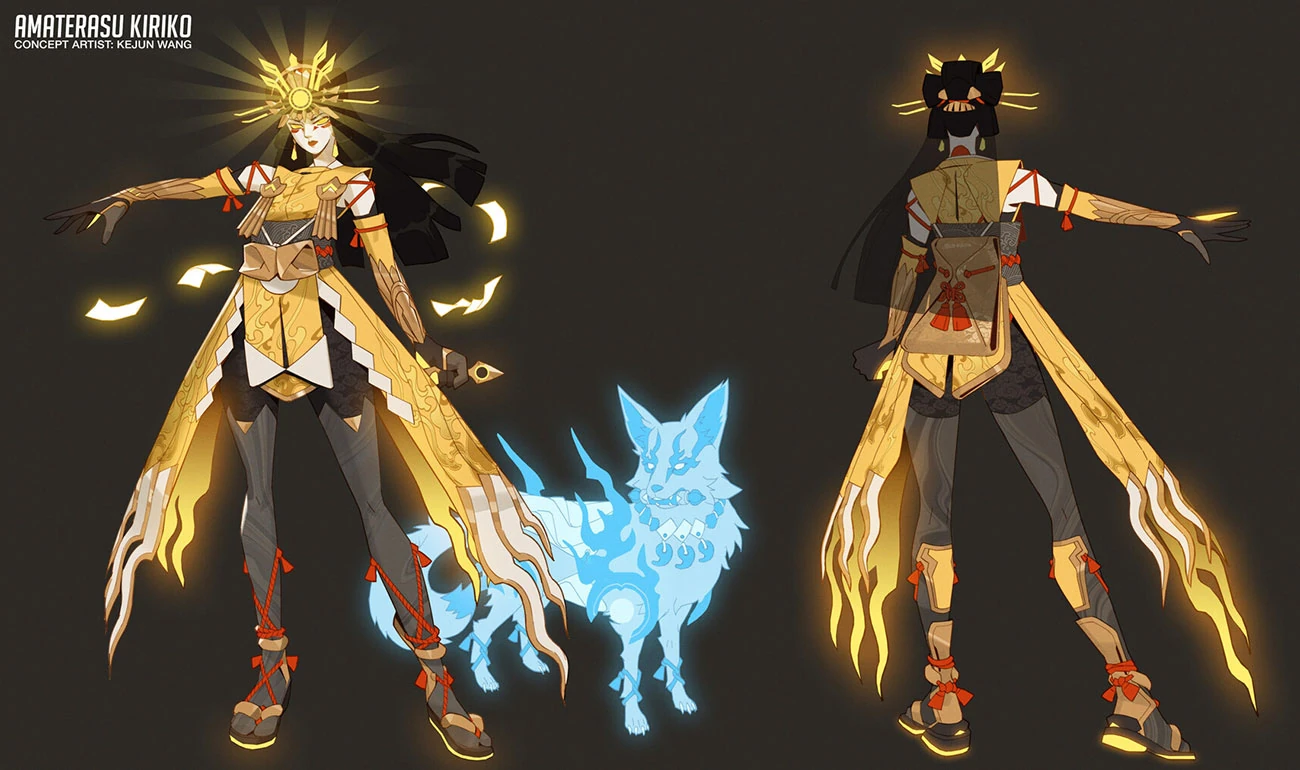
 Amaterasu Concept Art by Kejun Wang
 -
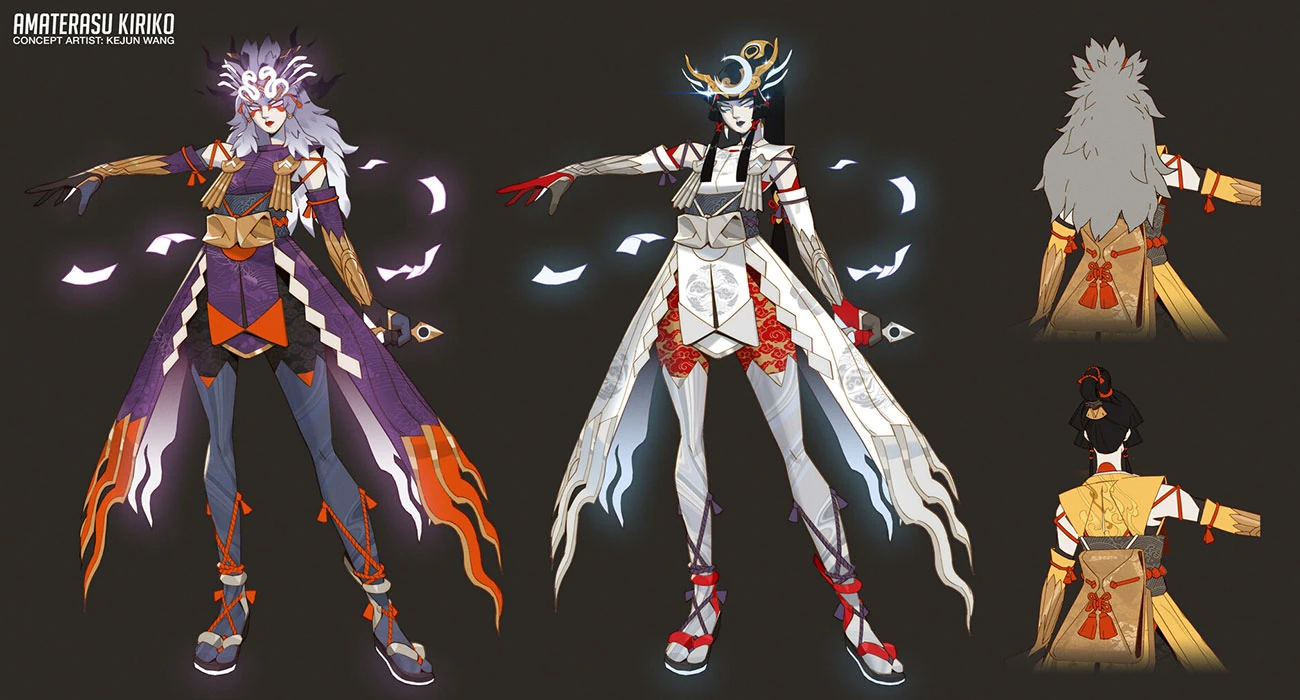
 Amaterasu Concept Art by Kejun Wang
 -
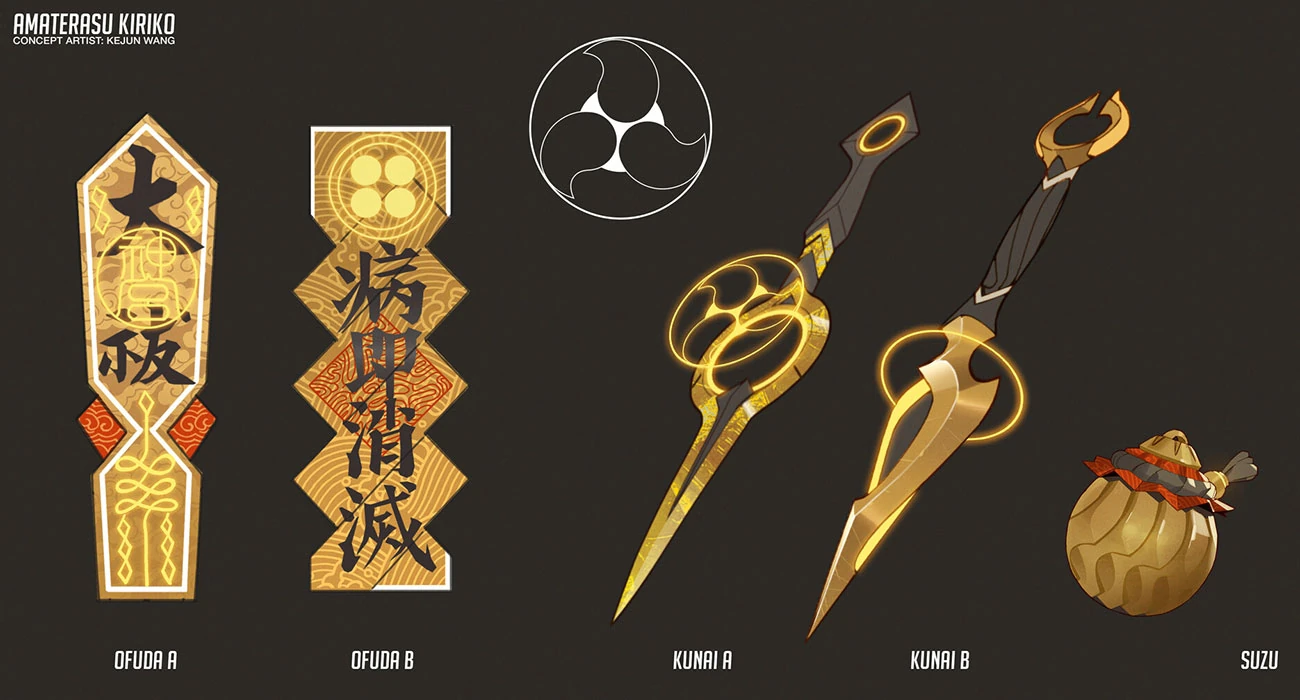
 Amaterasu Weapon Concept Art by Kejun Wang
 -
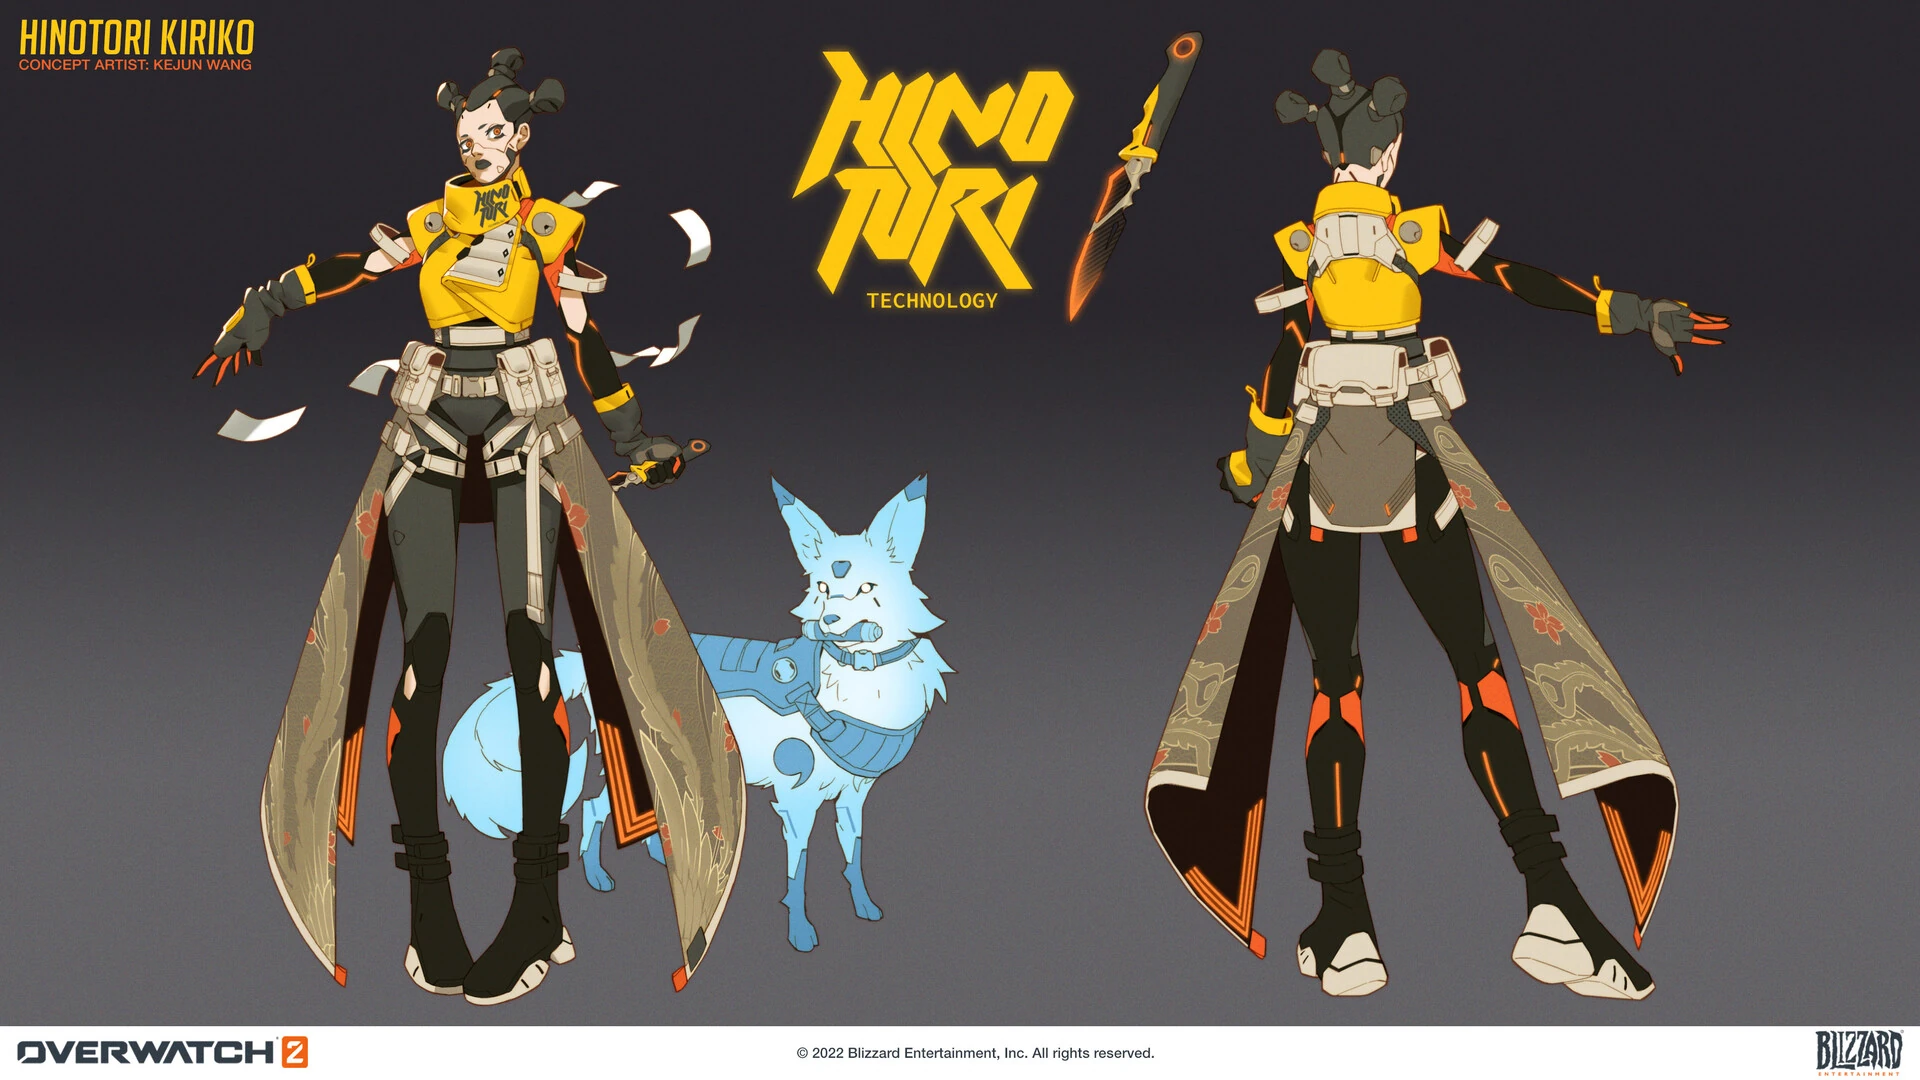
 Hinotori Skin Concept Art by Kejun Wang
 -
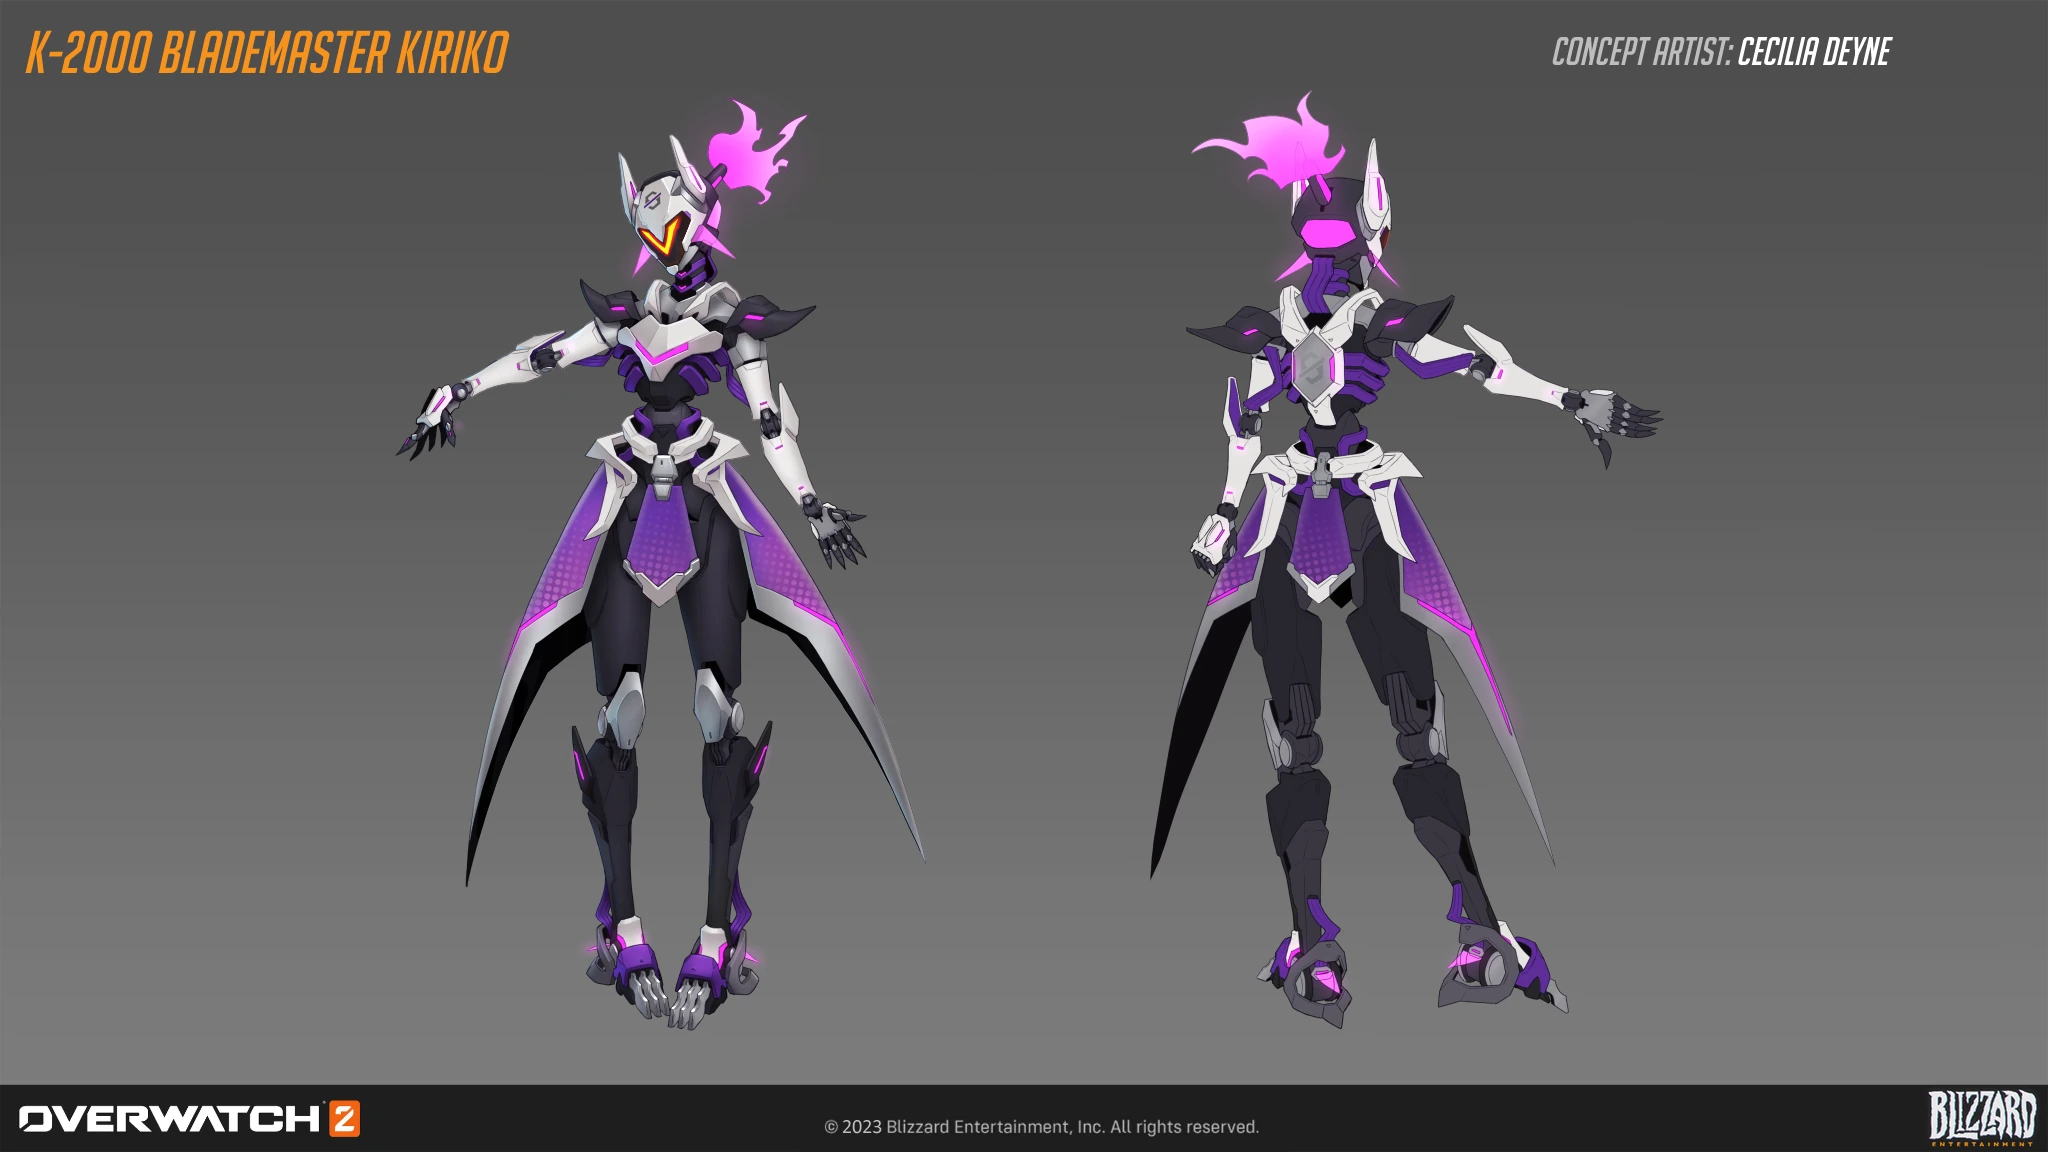
 K-2000 Blademaster Concept Art by Cecilia Deyne
 -
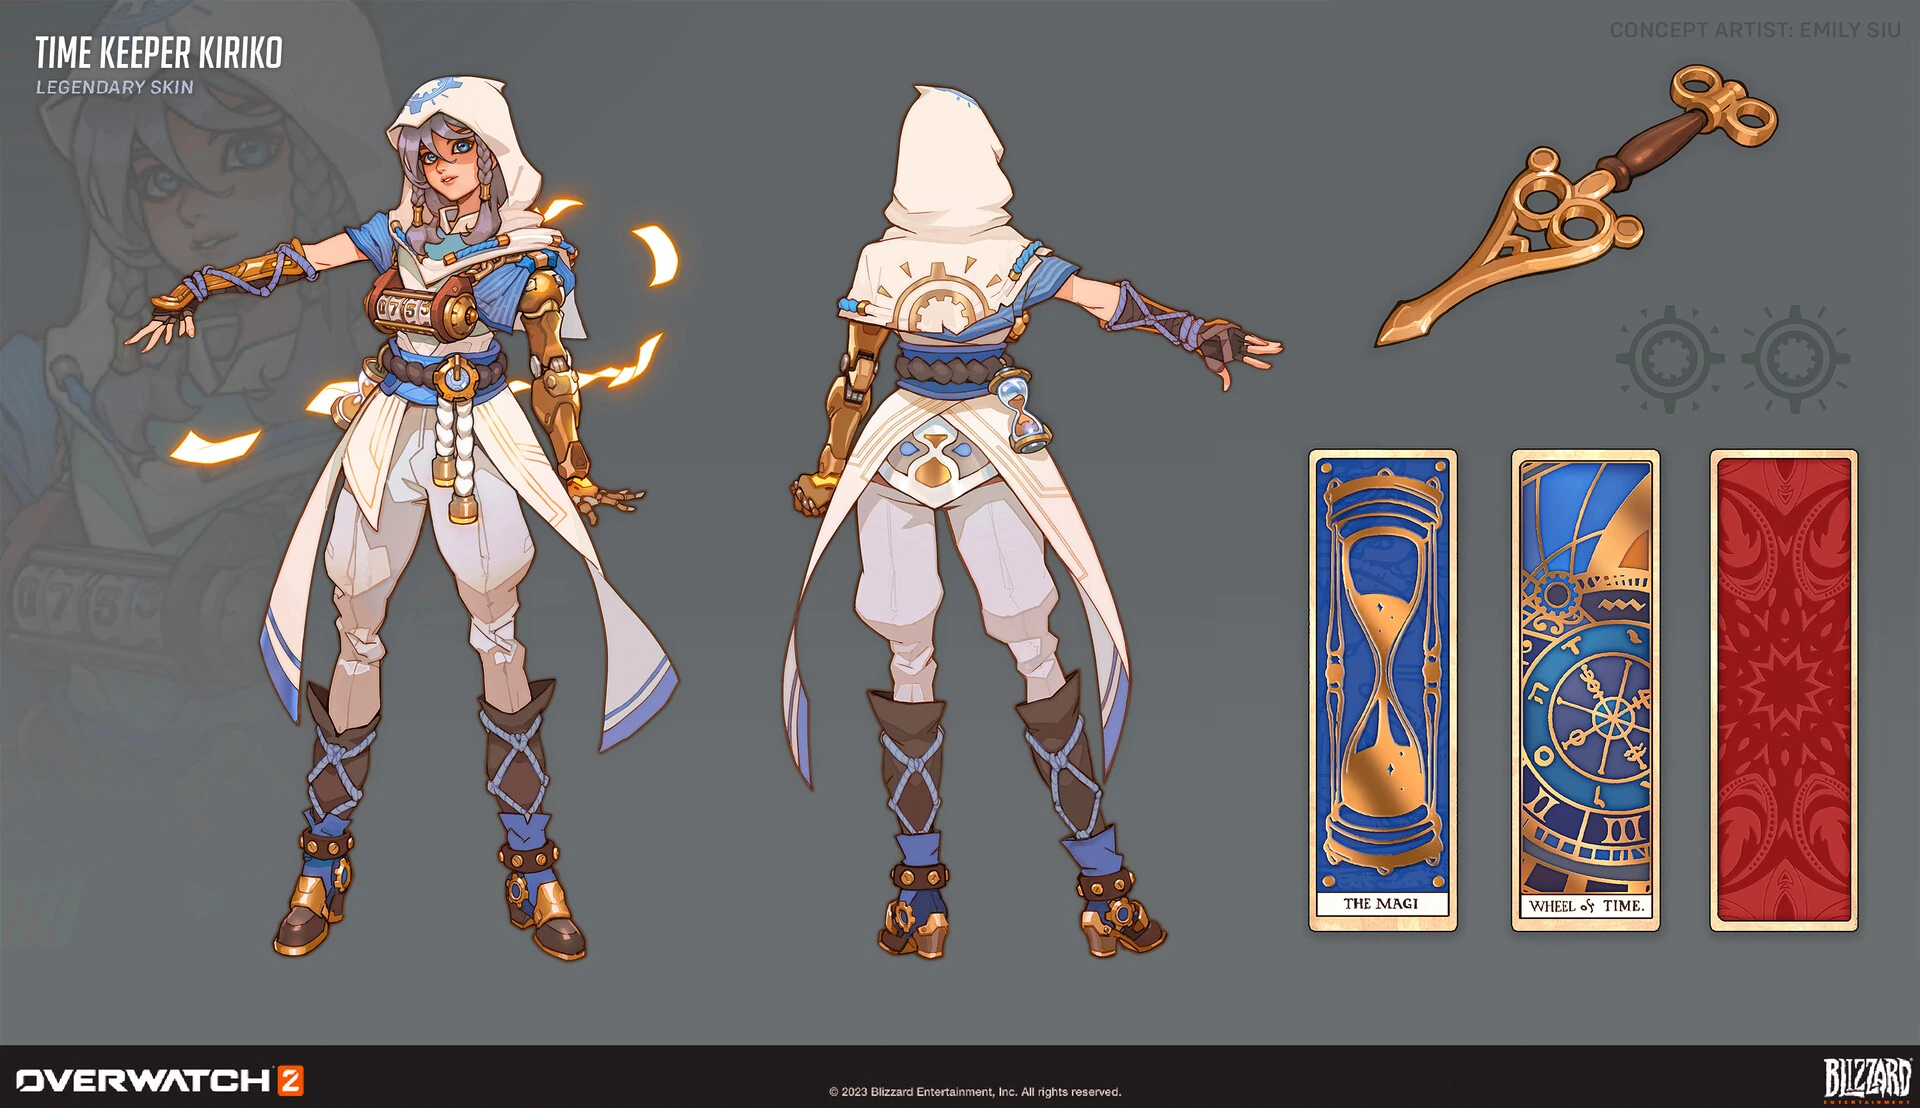
 Time Keeper Concept Art by Emily Siu
 -
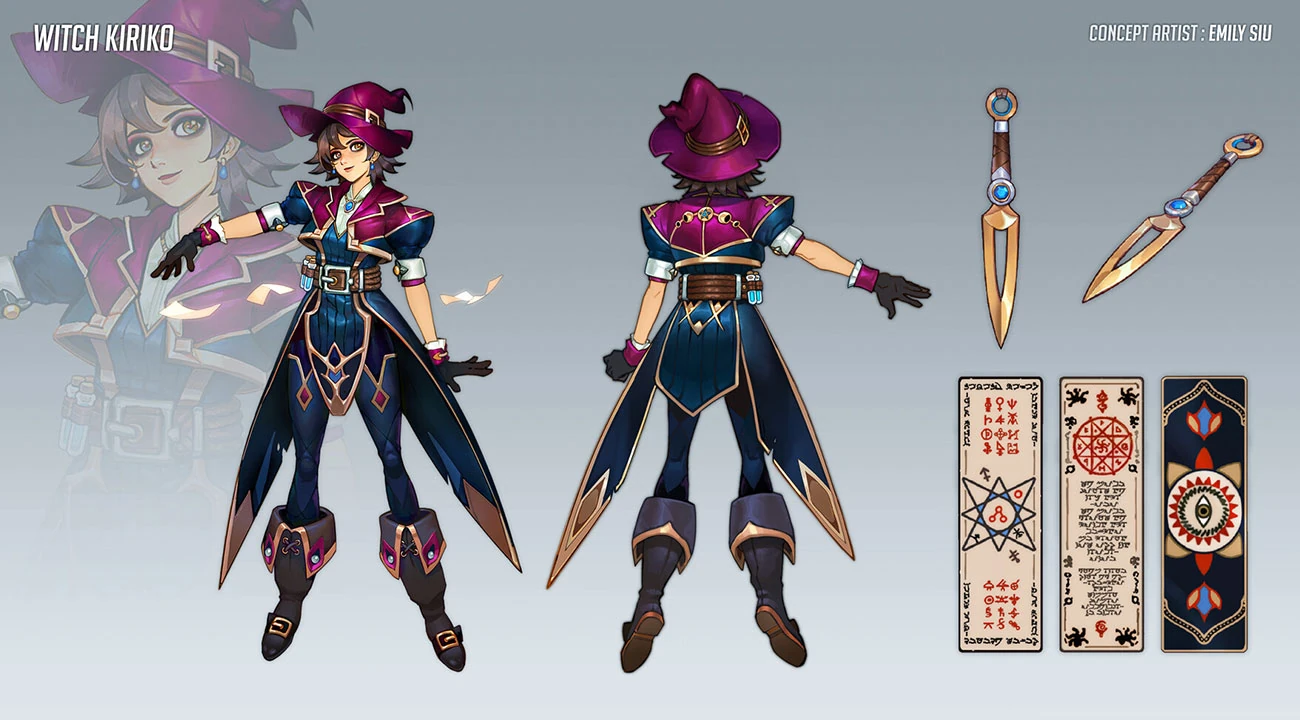
 Witch Concept Art by Emily Siu
 -
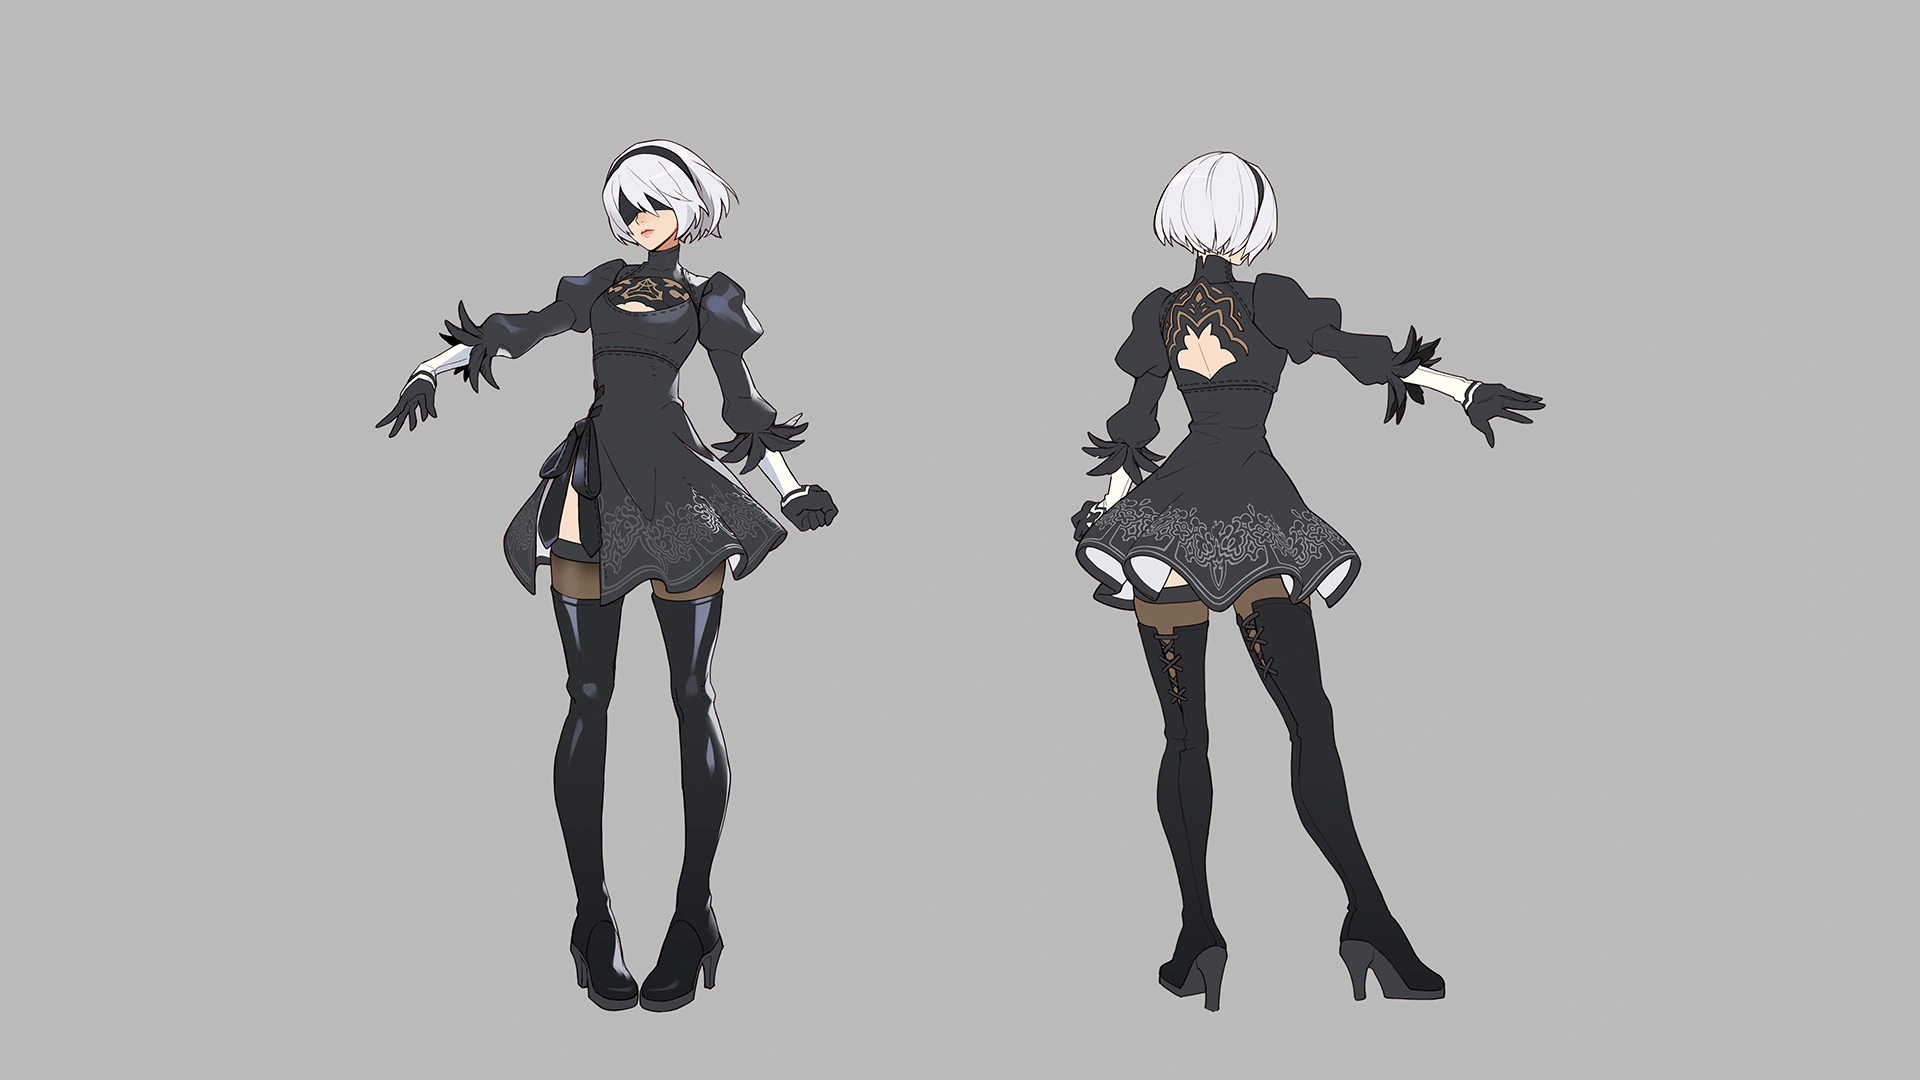
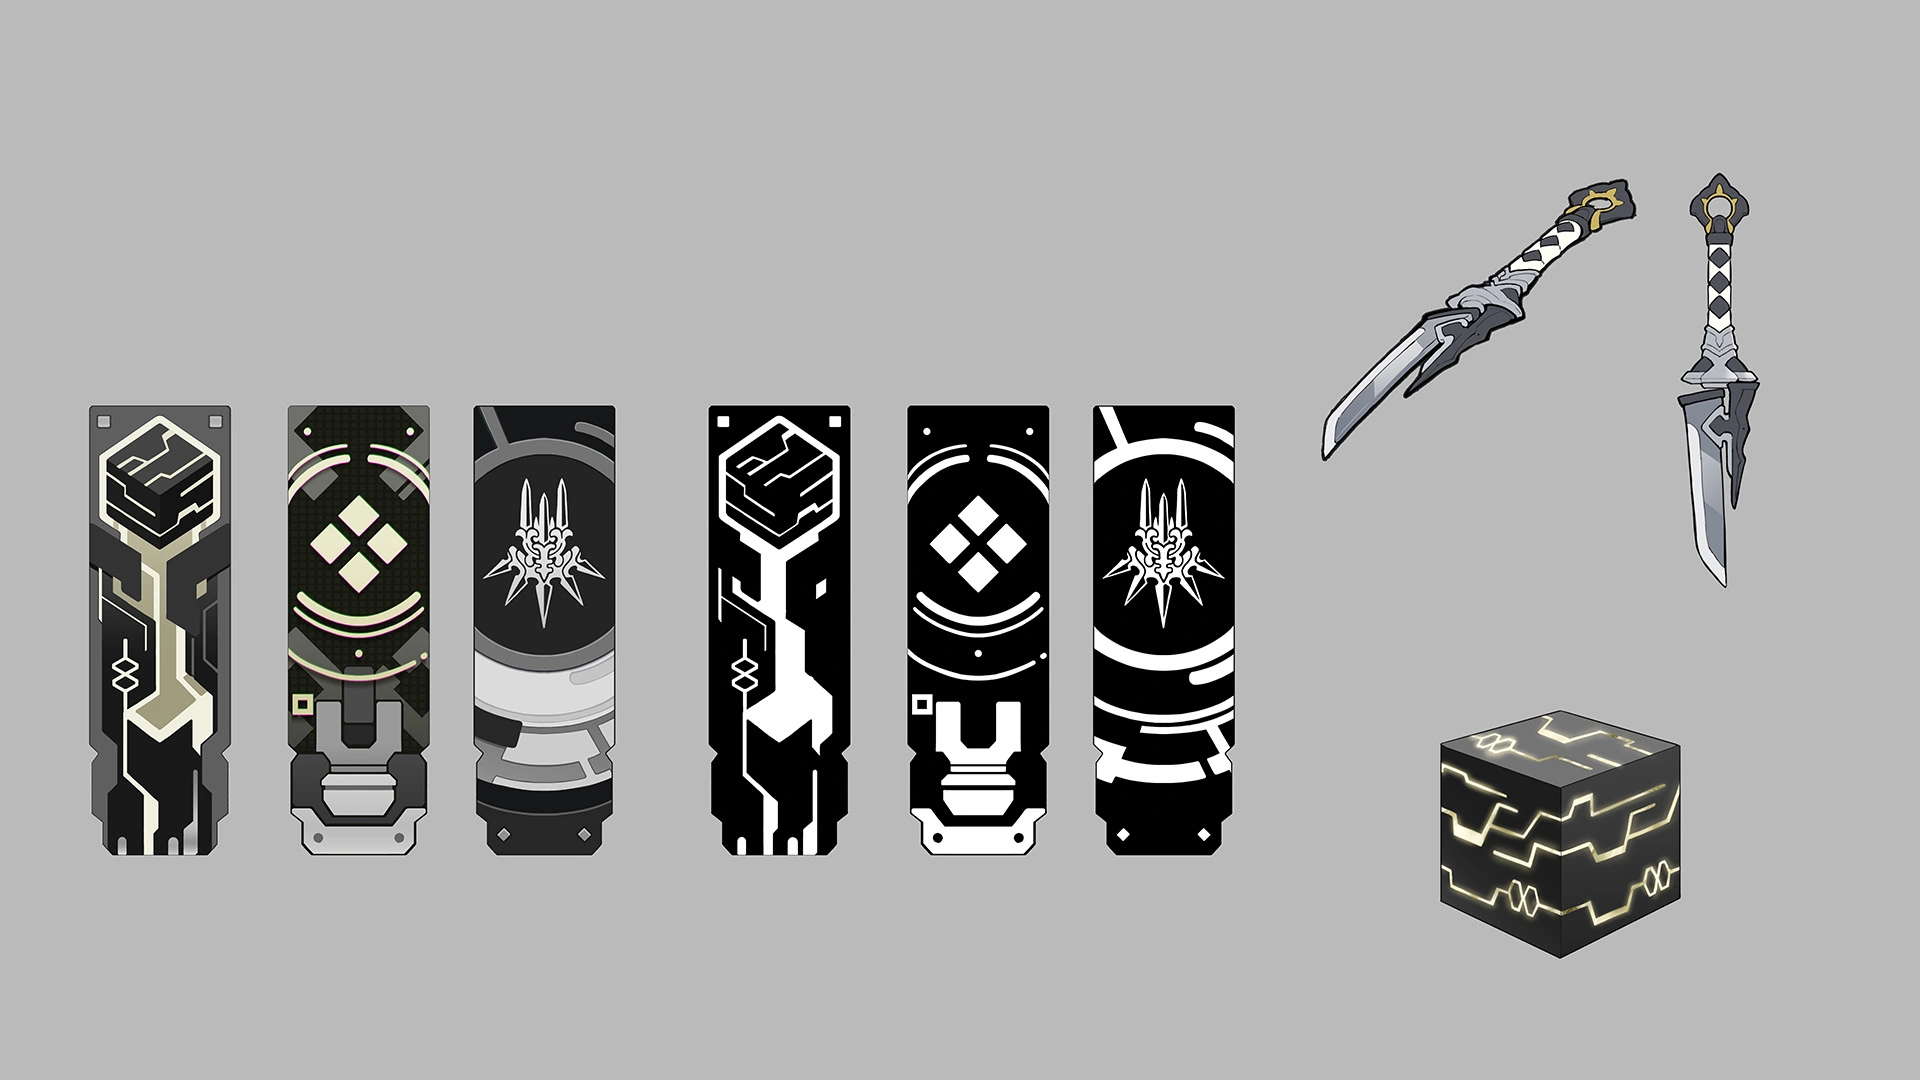
 Kiriko 2B Skin Concept Art
 -
 Kiriko 2B Skin Weapon Concept Art
Videos
Balance Change Logs
- For more information, see Patch Notes.
- Additional healing after negative status cleanse removed (was 30).
- Teleport range reduced from 35 to 30 meters.
- Fire rate increased from 5 to 7 per second.
- Projectile speed increased from 18 to 24.
- No longer cleanses on use.
![]() Foxtrot – Major Perk
Foxtrot – Major Perk
- Removed increased cooldown recovery buff
- Movement speed buff duration increased from 2 to 4 seconds
- Base projectile size reduced from 0.15 to 0.12.
- Ultimate cost increased by 8%
![]() Foxtrot – Major Perk
Foxtrot – Major Perk
- Duration reduced from 3 seconds to 2 seconds.
![]() Ready Step – Major Perk
Ready Step – Major Perk
- Duration increased from 2 to 3 seconds.
![]() Shuffling - Major Perk
Shuffling - Major Perk
- Removed.
![]() Ready Step - Major Perk
Ready Step - Major Perk
- New Major Perk.
- Swift Step grants Kiriko 40% increased attack and reload speed for 2 seconds.
![]() Foxtrot - Major Perk
Foxtrot - Major Perk
- Projection Suzu now only grants 30% increased movement speed for allies (down from 40%) but now grants 100% increased cooldown recovery.
- Hero Perks
- Healing Ofuda projectile speed is increased by 50% when seeking critical health allies.
- Kunai hits launch 2 Healing Ofuda to an ally in front of you.
- Swift Step can be used again within 4 seconds of its initial cast.
- Protection Suzu grants 40% movement speed to allies for 2 seconds.
- Recovery time decreased from 0.55 to 0.5 seconds.
- Cooldown reduced from 8 to 7 seconds.
- Cooldown reduced from 15 to 14 seconds.
- Base health reduced from 250 to 225.
- Critical multiplier reduced from 2.5 to 2x.
- Damage increased from 45 to 60.
- Recovery time increased from 0.5 to 0.55 seconds.
- Cooldown increased from 7 to 8 seconds.
- No longer cleanses hard knockdown stuns.
- General updates
- Global projectile size modifier for travel time projectiles with a speed greater than 50 meters per second reduced from 0.1 to 0.075 meters.
- General updates
Most damage-dealing projectile sizes have been increased by a new global modifier added to their base size.
- +0.05 meters for hitscan projectiles with a high rate of fire or spread (e.g., Tracer's Pulse Pistols or Reaper's Hellfire Shotguns).
- +0.08 meters for hitscan projectiles that are more precise (e.g., Cassidy's Peacekeeper or Soldier:76's Heavy Pulse Rifle).
- +0.05 meters for travel time projectiles that are shotguns or have a very high rate of fire (e.g., Roadhog's Scrap Gun or Ramattra's Void Accelerator).
- +0.10 meters for travel time projectile with a speed greater than 50 meters per second (e.g., Zenyatta's Destruction Orb).
- +0.15 meters for travel time projectile with a speed less than or equal to 50 meters per second (e.g., Pharah's Rocket Launcher).
- Very large projectiles with a base size greater than 0.5 meters have been excluded from these increases (e.g., Orisa's Energy Javelin or Reinhardt's Fire Strike).
Hero combined HP (base health/armor/shields) increased by 15-25%.
- 150-175 HP heroes increased by 25 HP.
- 200-300 HP heroes increased by 50 HP.
- 300+ HP (Tanks) increased by 75-100 HP.
- Each hero's precise health increases are listed in their patch notes below.
Ultimate Charge
- All Ultimate ability costs increased by 10%.
Regenerative Passive for All Heroes
- All heroes now regenerate 20 health per second after 5 seconds of not taking damage.
Support Role Passive
- Now reduces the delay before regeneration begins by half (2.5 seconds).
Quick Melee
- Damage increased from 30 to 40.
- Hero updates
- Health increased from 200 to 250.
- Base projectile size reduced from 0.18 to 0.15 meters.
- Projectile speed increased from 14 to 18 meters per second.
- Invulnerability duration reduced from 0.85 to 0.65 seconds.
- Healing explosion increased from 40 to 80 health.
- Cooldown increased from 14 to 15 seconds.
- Now passes through enemy heroes.
- Knockback removed.
- Healing reduced from 50 to 40.
- Now heals for an additional 30 health when cleansing a negative effect.
- Damage increased from 40 to 45.
- Recovery time reduced from 0.55 to 0.5 seconds.
- Critical damage multiplier reduced from 3 to 2.5x.
- Recovery reduced from 1 to 0.9 seconds
- Kunai reloads after 65% percent of the animation has completed (formerly 75%)
- New Hero option: "Healing Ofuda Cancels Reload"
- Recovery time increased from 0.85 to 1 second
- Invulnerability duration reduced from 1 to 0.85 seconds
- General
- Arm hit volumes width reduced 15%
- Added an auto-wall climb hero option
- Cast time reduced from 0.15 to 0.1 second
- Ammo increased from 12 to 15
- Ability input can now be held to activate
- Ultimate cost increased by 10%
- Movement speed bonus reduced from 50 to 30%
- Cooldown rate reduced from 3 to 2 times faster
- Invulnerability duration reduced from .4 to .25 seconds
- NEW HERO
- Kiriko (Support)
![]() Donut Delivery - Epic Ability Hero Item
Donut Delivery - Epic Ability Hero Item
- Cooldown Reduction decreased to 5% (Down from 10%).
- Healing decreased to 80 (Down from 120).
![]() Talisman of Life - Epic Survival Hero Item
Talisman of Life - Epic Survival Hero Item
- Ability Power decreased to 15% (Down from 20%).
- Overhealth decreased to 80 (Down from 100).
![]() Clone Conjuration - Power
Clone Conjuration - Power
- Now the Clone's heal and damage contributes to earning Stadium Cash.
- Now there is a short delay before the Clone starts healing or dealing damage after being spawned.
- Clone's health has been reduced and can be increased by Ability Power.
![]() Fleet Foot - Power
Fleet Foot - Power
- Swift Step cooldown is increased by 30% when used without a target.
![]() Foxy Fireworks - Power
Foxy Fireworks - Power
- Projectile speed is now the same as regular kunai.
![]() Clone Conjuration - Power
Clone Conjuration - Power
- Clone now deals 65% less healing and damage.
- Increased duration to 4s (Up from 2.5s.)
- Decreased duration to 2.5s (Down from 5s).
![]() Soothing Step - Power
Soothing Step - Power
- Increased Healing to 120 (Up from 80).
- Replaced stat: From 10% Ability power to 10% Cooldown reduction.
![]() Triple Threat - Power
Triple Threat - Power
- Spread reduced by 50%.
- Redesigned to: When you use Healing Ofuda, each Ofuda thrown heals you for 3% of max life.
![]() Self-Care - Power
Self-Care - Power
- Increased heal to 15% (Up from 5%).
- Reduced the amount of Stadium Cash gained from damage and healing by 16.67%.
- Introducing Stadium
- Tank Heroes: D.Va, Junker Queen, Orisa, Reinhardt, and Zarya.
- Damage Heroes: Ashe, Cassidy, Genji Mei, Reaper, and Soldier: 76.
- Support Heroes: Ana, Juno, Kiriko, Lucio, Mercy, and Moira.
References
- ↑ 1.0 1.1 1.2 1.3 Cite error: Invalid
<ref>tag; no text was provided for refs namedLetKitsune - ↑ 2.0 2.1 2.2 2022-09-15, Overwatch 2 Reveals New Hero Kiriko, A Ninja Support Hero And The Protector Of Kanezaka. GameSpot, accessed on 2022-09-15
- ↑ 3.0 3.1 Cite error: Invalid
<ref>tag; no text was provided for refs namedKiriko - ↑ 2022-09-16, Sally Amaki official Twitter statement. Twitter @sally_amaki, accessed on 2022-09-16
- ↑ 2022-09-15, Overwatch Japan official Twitter account. Twitter @jpPlayOverwatch, accessed on 2022-09-15
- ↑ 2022-10-04, [1]. Twitter @amialello, accessed on 2022-10-04
- ↑ 2022-09-15, Overwatch 2's Next Support Hero Is Kiriko, a Healing Ninja. IGN, accessed on 2022-09-15
- ↑ 8.0 8.1 8.2 Cite error: Invalid
<ref>tag; no text was provided for refs namedNewKiriko - ↑ 2022-09-15, OVERWATCH 2 EXPLAINED: BATTLE PASS, SHOP, HERO UNLOCKS, AND MORE. Blizzard Entertainment, accessed on 2022-09-15
- ↑ 2015-03-13, PAX East 2015 Overwatch Hands-On Preview. Blizzplanet, accessed on 2015-03-2015
- ↑ 2023-12-30, Overwatch 2 community thinks “poster child” Tracer has been replaced by this hero. Dexerto, accessed on 2023-12-31
- ↑ Cite error: Invalid
<ref>tag; no text was provided for refs namedKirikoOriginSummary - ↑ Cite error: Invalid
<ref>tag; no text was provided for refs namedYokai - ↑ Cite error: Invalid
<ref>tag; no text was provided for refs namedCorrespondence - ↑ https://youtu.be/Zwq1FtM_WVE?t=48
- ↑ 2022-09-15, Overwatch 2: Kiriko Abilities, Backstory And Gameplay Trailer. Forbes, accessed on 2022-09-17
- ↑ 17.0 17.1 17.2 Cite error: Invalid
<ref>tag; no text was provided for refs namedKirikoDeveloperUpdate - ↑ 18.0 18.1 18.2 2019-11-5, Details On An Unannounced Overwatch 2 Hero. Game Informer, accessed on 2022-11-5
- ↑ 2022-09-08, Naeri X 나에리. Twitter, accessed on 2022-09-09
- ↑ 2022-09-08, Jon Spector. Twitter, accessed on 2022-09-09
- ↑ 2022-09-09, Leaked Overwatch 2 short seemingly reveals fox hero Kiriko. Games Radar, accessed on 2022-09-09
- ↑ 2022-09-09, Overwatch 2 new hero cinematic leaks: Meet Kiriko. PC Gamer, accessed on 2022-09-09
| Heroes in Overwatch
| ||||||||
|---|---|---|---|---|---|---|---|---|
Tank |
 Bruiser |
|||||||
 Initiator |
||||||||
 Stalwart |
||||||||
Damage |
 Flanker |
|||||||
 Recon |
||||||||
 Sharpshooter |
||||||||
 Specialist |
||||||||
Support |
Medic |
 Kiriko |
||||||
 Survivor |
||||||||
 Tactician |
||||||||


